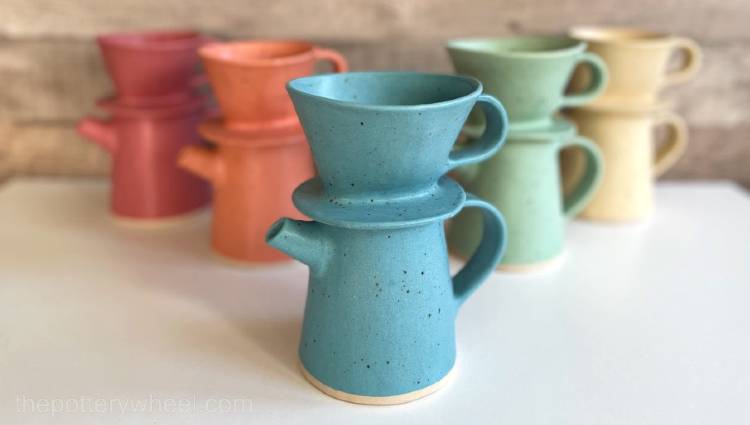
If you are starting your pottery journey, you may be wondering just how to glaze pottery at home. Is it possible? What are your options? You will be pleased to know that it is completely possible to glaze pottery at home. This article is all about the different ways to glaze pottery both with and without a pottery kiln.
There are three different ways to glaze pottery at home. The first one is to decorate your pottery with a glaze-like alternative to ceramic glaze. The second option is to use a small domestic pottery kiln intended for use by hobby potters. And the third option is to use an alternative method of firing that doesn’t involve using a standard pottery kiln.
You may already know which of these methods you want to try out. In this case, you can use one of the links below to take you directly to that section. Or if you are still deciding, you can check out each of the following options and decide which one appeals.
- Glazing Pottery without a Kiln – Alternatives to Ceramic Glaze
- Using a Pottery Kiln
- Using a DIY Kilns
Whether you have decided which approach you want to try or not, it’s completely possible to glaze pottery at home. What’s more, it’s a really exciting and satisfying thing to do. So, read on…
How to Glaze Pottery at Home without a Kiln
Ceramic glazes need to be fired at high temperatures. Different types of glazes are fired at different temperatures. However, most ceramic glazes need to be fired to at least 1832F (1000C). And glazes that are fired to 1832F are at the lower end of the temperature range required.
The reason ceramic glazes need to be fired at these hot temperatures is that they are designed to melt. The ingredients in glazes melt when the kiln is hot, and then harden in when the kiln cools. This forms a glassy cover over the surface of the glazed pottery.
Ceramic glazes can look lovely. But they are not the only way of decorating your pottery to make it look great.
There are alternative ways to glaze pottery at home, without relying on a ceramic glaze that needs such high temperatures.
Pottery finishes that are not fired are called ‘cold finishes’, for the obvious reason that they don’t rely on heat. Here are some suggested ways to cold finish your pots:
Alternatives to Ceramic Pottery Glazes
These alternatives to ceramic pottery glaze are ordered alphabetically, rather than for any other reason…
Acrylic Paint
Acrylic paint comes in a wide range of bright colors that can be mixed in whatever combination you like.
The good thing about acrylic is that it is reasonably tough. It has a somewhat plastic quality which makes it tough.
And it is a little water-resistant, so if it gets damp it won’t run immediately.
Nevertheless, it is not waterproof. Applying a sealer will help protect the finish and lock the paint in place. Some suggested sealants for acrylic paint are matte or gloss varnish, mod podge, or a spray-on acrylic sealer.
A sealer will protect the acrylic paint and make it more water-resistant. But it won’t make it 100% waterproof. Even with a sealant, decoration on ceramics with acrylic paint won’t be as durable as glazed pottery.
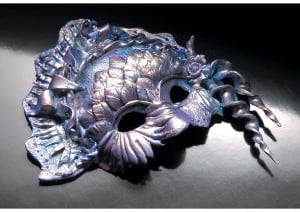
Boot Polish and Bronze Powder
One way to give your pot a metallic look is to use a metal powder. First, paint your ceramics with a black finish like Indian Ink. Then rub a thin layer of clear boot polish over the black surface.
Once the boot polish has hardened a little but is still tacky, lightly dust bronze metallic powder over the surface.
It’s easy to overdo the bronze powder. But if you just catch the raised edges, it can look like authentic bronze.
This finish is quite fragile and is best for sculptures or pieces of pottery that won’t be handled too much.
Car Repair Enamel Paint
By contrast, car repair enamel paint is quite tough and won’t be damaged by being handled. It also comes in some good metallic finishes, that can give your pottery a bronze, copper, silver, or gold finish.
Colored Pencils
Perhaps painting is not your thing. If so, then colored pencils can give you allow you to make subtle detailed designs on your pottery.
If you want a gloss finish to your pottery, you can apply clear varnish or a gloss art sealant.
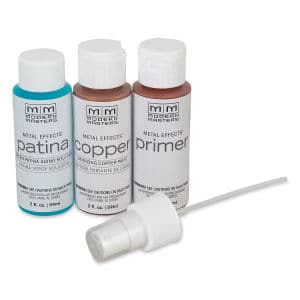
Metal Effects Paint / Patina Paint
You can buy painting kits that are designed to create a patinated metal effect. This will give your pottery an antique metallic look.
For example, this kit is made of water based acrylic paint and contains real metal particles.
Once applied to your pottery, the metal particles oxidize, giving your work a metallic patina effect.
You can use a green or blue patina. Or you can choose a rust finish if you want an iron look. They do look amazingly convincing.
Oxides Washes
Potters will often use oxide washes and stains prior to glaze firing. However, metal oxides mixed in with water don’t have to be glaze fired. They can be used as a wash on their own. Oxide washes can create a nice effect with textured ceramic surfaces.
You can paint on the wash or dip your piece into an oxide wash. Then use a sponge to wipe over the ceramic surface. This cleans the oxide off the high points and leaves the oxide color in the textured areas.
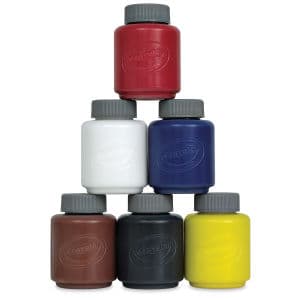
Tempera Paint – also Called Poster Paint
Tempera (or poster) paint is a water-soluble inexpensive way to decorate pottery without glazing it.
Like acrylics, poster paints colors can be mixed together to create an endless range of colors.
Once it’s applied it’s a good idea to seal it with a paint sealer. A glossy sealer can give you a nice glazed look.
Spray and Canned Enamels
Spraying a finish onto your pottery can give a fine even coating. And using a metallic spray can create a convincing metal finish. Hammerite is a good option to create a metallic effect.
It’s a good idea to use an undercoat with a metallic spray. One reason for this is that it can be harder to get sprays into nooks and crannies on your piece. If you use an undercoat, you don’t have to worry if the spray doesn’t reach small areas.
Another reason is that you can choose an undercoat that compliments the enamel spray. For example, an iron oxide wash with a top coat of bronze Hammerite spray will create a lustrous metallic effect.
Varnish
If you have used an attractive clay to build your pieces, a simple coat of clear varnish can look great. Some clays look beautiful unglazed. They can be lovely reds or pure white. Or you might have a speckled textured clay. These colors and textures are attractive enough without glazing.
You might want to leave them unfished, or ‘raw’. Or you might want to use a coat of clear varnish to add a clear shine to their raw beauty.
Watercolors
Watercolors can be used to create a wash over your piece. Or they can be used in a painterly way like underglaze to create attractive designs on your pots.
Wax
Wax is a nice way of getting a soft sheen on your pots. This can look like burnished clay. A wide range of waxes are suitable for decorating pottery as an alternative to glazing.
For example, you can apply paste wax to your pot. Then heat the pot up with a hairdryer or heat gun. Once the wax is warm, you can buff it up with a cloth and then apply another coat. As you build up the layers, you will develop a deep, rich, warm sheen on your piece.
Wood Stain
Wood stain can be applied to unglazed pottery either on its own. Or it can be varnished after application. It can look a little like an oxide wash.
You can also use spray stains that are designed for craft purposes, and for porous surfaces. A good example is this range of distress spray stains by Tim Holtz. They come in metallic and non-metallic colors and can look amazing when applied to pottery.
Tips on Using a Non-Ceramic Glaze Finish
If you want to glaze pottery at home using a non-ceramic glaze alternative, there are some important things to remember:
Tip 1:
Even if you don’t want to glaze your pots, it’s best to decorate bisque ware. Pottery is usually fired twice. The first firing is the bisque fire, which turns clay into hard ceramic matter. Pottery that has been bisque fired, is called bisque ware. The second fire is the glaze fire.
Clay that has not been bisque fired is very fragile and will dissolve in water. Bisque ware on the other hand, though porous, is hard and quite durable, and non-soluble.
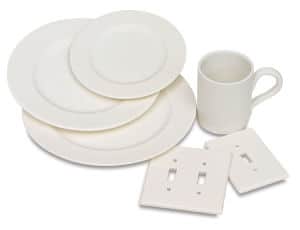
If you don’t have a kiln to bisque fire your pots, don’t worry. You can buy bisque ware that is ready for decoration.
For example, you can buy earthenware bisque pottery at Blick Art Materials. This is has been bisque fired already and can be decorated either with glaze or a glaze alternative.
Tip 2:
Bisque ware is porous and very absorbent. As such, it draws water out of paint and other liquids very quickly. If you try to put paint directly onto bisque, it will dry the paint out and make it hard to blend.
If you want to make the bisque less absorbent, you can apply a sealer before you paint it.
This is a bit like sealing a plaster wall before you apply house paint.
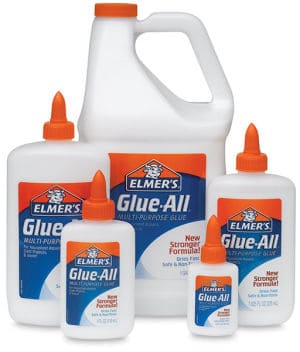
You can make a simple sealant by mixing PVA glue in with water and then painting this on your bisque. PVA glue is also known as wood glue, school glue, or Elmer’s glue.
Tip 3:
Pottery that is finished using these alternatives to glazing is not food safe. What this means is that you can’t use it as dinnerware, or to drink out of.
The reason for this is that the surface of these alternatives to glaze are porous. They will either absorb liquid or leach ingredients into your food and drink.
Because they are porous they are also not suitable to be used as water holding vessels like vases.
If you want to use an unglazed pot as a vase, you can put a plastic container inside the pot. The plastic container acts as a liner.
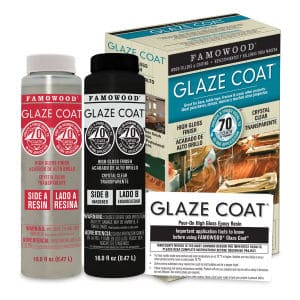
Another option is to apply a two part epoxy resin to the inside surface of your vessel. Epoxy resins are designed to create a watertight surface.
This pour-on epoxy coating by Famowood can be used on rough non-waxy surfaces like bisque ware.
Nevertheless, even if you use an epoxy resin, I’d recommend testing this out before using your pottery as a vase.
You can do this by filling the sealed vase with water. Then place the filled vase on a piece of paper. Leave it for a few hours, ideally overnight.
Is the paper is damp and wrinkled underneath the pot when you lift it? If it is, then you know that the vase is seeping water and not fully waterproof. It’s worth checking this before you place your vase on your favorite antique table!
How to Glaze Pottery at Home With a Kiln
There are nice-looking alternatives to glazing. However, if you want to use your pottery for food and drink you need to use a ceramic glaze. And it needs to be fired in a kiln.
So how do you go about getting access to a kiln? Luckily you have options. Here are a few of them:
Option 1) Using a Pottery Firing Service
With a bit of investigation, you will likely find that there are a few people nearby that have a kiln. These people might be schools, pottery cafes, or local potters to name but a few. A lot of people who own kilns will fire your pottery for a very reasonable fee.
You would simply apply the glaze at home and take it along to the person with the kiln. They fire it, and then a few days later you can pick it up.
This is a great solution when you are starting out and you’re not sure how to glaze pottery at home. Check out this article if you’d like some more ideas about where you could find a pottery firing service nearby.
Asking someone else to fire your pottery has a lot of advantages. They are:
- You don’t have the initial expense of buying a kiln
- No need to find space for a kiln at home
- You are using the expertise of an experienced potter (hopefully!) to fire your pots well
- You can experiment with your pottery hobby and see if it’s really for you before committing to buying a kiln
Do remember that if you don’t have a kiln, you will either have to buy your bisque ware to glaze. Or you will also need to ask the kiln firing service to bisque fire your pottery first.
As explained above, and here in this article, most pottery does need to be bisque fired before it’s glazed. There are some experienced potters that move on to single firing pottery. This approach skips the bisque firing stage.
However, single firing also referred to as glazing greenware has its challenges. And if you are learning how to glaze pottery at home, I’d recommend glazing bisque ware.
Bisqueware
It’s easy and relatively inexpensive to buy bisque ware. I made some suggestions here above about where you can purchase it.
Buying bisque ware can be a sensible choice if your main interest is decorating pottery. However, if you want to learn about how to make your pots and fire them, then this is entirely possible too.
Simply make your pots at home, and allow them to dry out until they are bone dry. Then take them along to the local kiln firing service and explain that you want them ‘bisque fired’.
They will know exactly what to do. Once they have been bisque fired, you can collect them, glaze them, and take them back for glaze firing.
Tip 1:
Unfired ‘bone dry’ pottery, also known as ‘greenware’ is very fragile and can break easily. This article gives you lots of handy tips about how to transport greenware safely without it getting damaged in transit.
Option 2) Buying a Used Kiln
There are normally a lot of second-hand kilns for sale on sites like eBay or Craigslist. And you can often pick up a kiln in decent condition for about half its original price or less.
But before you go bidding on eBay for a kiln, here are a few things it is helpful to understand:
Things to Consider When Buying a Used Kiln
- Some kilns plug directly into a domestic socket. These kilns are smaller in size. Other kilns require more power than is supplied by a standard domestic socket. These kilns need to be wired in by an electrician. It’s not always obvious when second-hand kilns are listed whether the kiln can use a domestic power supply. If it’s not clear from the listing, you should ask before you buy.
- Kilns fire to different temperature ranges. Some kilns are designed to fire at lower earthenware temperatures. Other kilns can fire up to higher stoneware temperatures. If you want to understand the difference between earthenware and stoneware clay, check out this article. Remember to check the firing range of the second-hand kiln.
- What size is the kiln? Kilns have a lot of insulation and the outside dimensions are a lot bigger than the internal chambers. Make sure to find out how big the internal chamber is. It’s even helpful to do a mock-up out of cardboard that matches the internal dimensions. What sounds like quite a bit of space can look small once you see it in 3-D.
If you are wondering what size kiln to buy, you could check out this article. It will give you some handy tips on how to decide what size kiln you need.
Buying anything secondhand comes with the risk that it might break down. Used goods often don’t have a guarantee. In spite of this, if you choose your kiln carefully, you can pick up some great bargains. I bought my first kiln on eBay, and it’s still going strong.
Option 3) Buying a New Kiln
If you’d rather not take the risk of a second-hand kiln, you can of course buy a new one. There are lots of advantages to buying a new kiln. They are:
- You can get a lot of support from the supplier in how to set it up when it arrives
- Often suppliers are happy to give you advice about how to use and fire your kiln
- The components of the kiln are brand new
- Your new kiln will be working efficiently and will reach the required temperature easily
These are very solid reasons for buying a new kiln. So, if you are able to stretch to a new one, then it will be a good investment. And it will make your learning curve on how to fire your pottery, a bit easier.
The main factors to consider when buying a new kiln are similar to those outlined when buying a used kiln. These factors are the kiln’s power requirements, its temperature firing range, and the internal and external dimensions of the kiln.
There are some great hobby kilns on the market. And one of the most popular is produced by Skutt.
The Skutt KMT 614 is a good option because it has a good-sized internal chamber which is 11 by 13 inches. And its external dimensions aren’t too bulky either.
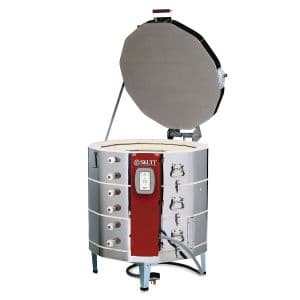
One of the good things about a new modern kiln is that they are often linked up to a smartphone app.
This means you can check on your kiln any time of day.
Practical Considerations
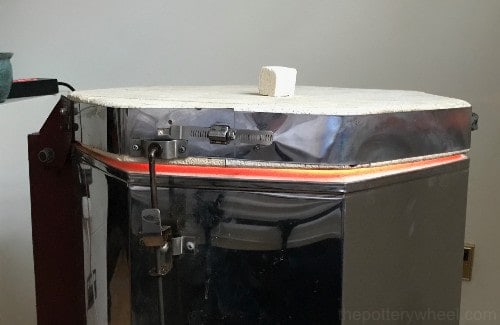
There are a number of practical and safety factors to consider when using a kiln at home. For example, do you have enough space?
It’s generally recommended that a kiln has 18 inches of clearance around each side to be safe. The outside surface of a kiln gets hot, and when it’s firing it will pump out a lot of heat. You need to make sure there is nothing combustible within 18 inches of any surface area on the kiln.
Also, whilst the kiln is firing pottery it will be emitting moisture and fumes from the clay and glaze. Ventilation is an important consideration if you want to glaze pottery at home. If you want to know more about these factors check out this article.
Learning to Glaze Pottery at Home
You can glaze pottery at home in a few ways. The 4 main ways that glaze is normally applied to pottery are as follows:
Dipping Glaze
This involves holding your glaze with tongs and dipping it for a matter of seconds in a bucket of glaze. If you’re dipping your pottery, you need to paint wax resist on the foot of the pot before you dip. The waxy coat stops the glaze from sticking to the bottom of the pot.
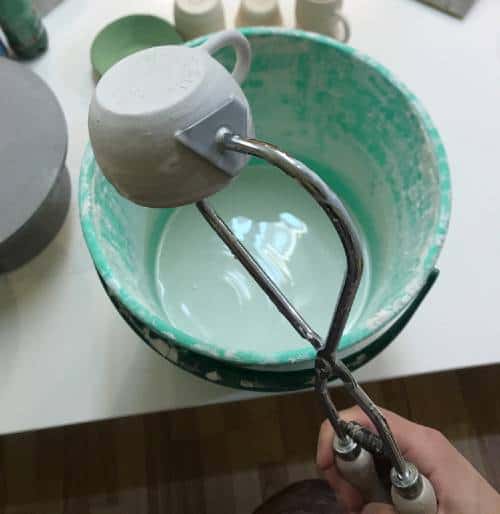
This is important because the glaze contains glass-forming ingredients that melt when the glaze is fired. The glass-forming ingredients play a key role in making the sealed glazed surface.
However, if you glaze the underside of your pot, the glaze will stick to your kiln shelf as it melts. So, you either need to wipe the glaze off the base or use wax resist on the bottom.
The advantage of dipping your pottery in glaze is that it’s quick and easy. And you get an even coat of glaze that doesn’t have brush marks.
However, one of the disadvantages of dipping glaze is that larger buckets of glaze take up space. If you have a garage to glaze pottery at home, then storing buckets of glaze might not be an issue. However, if like lots of hobby potters, you’re working from your kitchen table, you might not have lots of space.
If that’s the case, then brushing glaze might suit you better.
Brushing Glaze
Brushing glaze is just as the name suggests, it is a pottery glaze that is applied to with a brush. They are generally thicker in consistency than dipping glazes. And they contain a gum that stops them from sliding off the pot once applied.
Brushing glazes vary in how thickly they need to be applied. However, normally brushing glazes require an application of 2-3 coats.
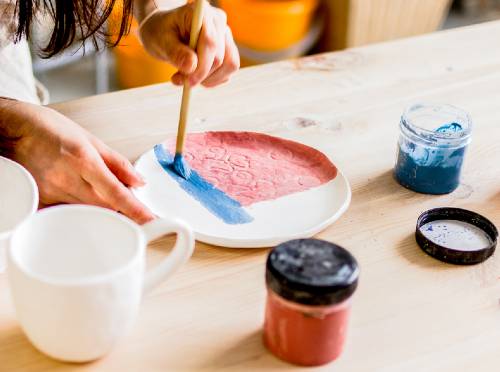
Applying pottery glaze with a brush is not like painting a picture or painting details with underglaze. When you apply a brushing glaze, you are trying to coat the pot. So ideally you should apply the glaze with a larger brush that will hold quite a bit of glaze.
Mop brushes are good for glazing because they have soft bristles that don’t leave brush streaks in the glaze. And they hold quite a bit of glaze once you have dipped them in the glaze pot.
I’ve heard some potters talking about floating or gliding the glaze onto the pot with the brush. Rather than dabbing away with the brush like an oil painting, you are gliding the glaze onto the surface.
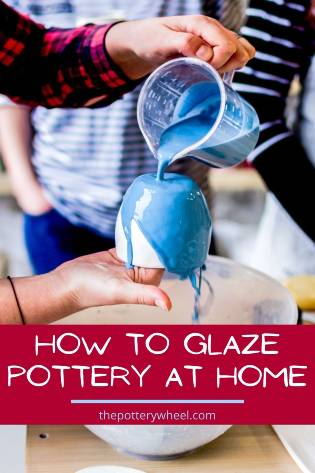
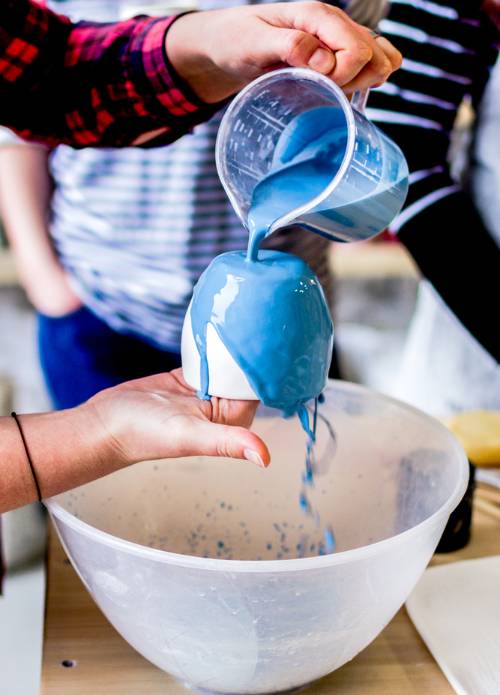
Pouring Glaze
Another way to get an even coat of glaze is to pour the glaze over the pottery surface. This is a good alternative to dipping. If you don’t have large buckets of glaze, you can pour it over the pot. This is a handy way of getting a good coat of glaze onto the inside of vases, especially if they have narrow necks.
Airbrushing Glaze
Airbrushing glaze involves spraying a thin mist of glaze onto the pottery. This is a great way to apply an even coat of glaze. It is also good if you want to create a gradient between two glaze colors.
Airbrushing glaze requires more pieces of equipment than other ways to glaze pottery at home. If you want to try airbrushing, you will need an airbrush gun and a spraying booth. Spraying booths are cubicles that prevent the mist of glaze from going all over your home. And they have built-in vents to draw out the excess glaze particles, so you don’t inhale them.
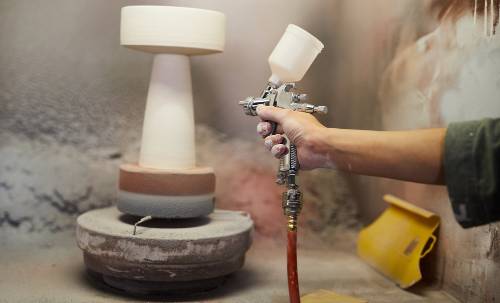
Even though the spray booth will extract most of the glaze mix, you do need to wear a respirator too. This will help you avoid inhaling the remaining airborne glaze particles.
Starting Again
Regardless of which way you use to apply your glaze, if you aren’t happy with the way it looks before it’s been fired, all is not lost. Prior to being fired, the glaze is still powdery and soluble.
So if it looks like you have applied it too thickly, or if you just aren’t happy with the pattern, you can always wash it off and start again.
If you want to know more about the best way to wash unfired glaze off a pot, check out this article that I wrote here.
What Type of Pottery Glaze to Use?
You also need to choose what kind of glaze to use. Most beginners who want to glaze pottery at home will opt for brushing their glaze on pottery.
There is a wide range of commercially made brushing glazes. These glazes differ in color, texture, and glazed appearance. You also need to buy a glaze that is fired at the right temperature for the clay you have.
Low Fire versus Mid High Fire Glazes
When a pottery glaze melts in the kiln and forms that nice glasslike surface, it is said to have ‘matured’. Some glazes melt and mature at lower “earthenware” temperatures. Earthenware temperatures are around 1832F 1000C).
Other glazes are designed to mature at “stoneware” temperatures. Stoneware temperatures are either in the mid-range at around 2228F (1220C). Or they are at the higher range. High fire stoneware glazes mature around 2372F (1300C).
Most stoneware glazes that are available to buy as ready-made brush-on glazes are mid-range glazes. These are also called cone 5/6 glazes.
As a rule, it’s best to use a glaze that matures at around the same temperature that your clay matures. Like glazes, clay also matures when it’s fired. When clay has matured, it has reached its optimal strength and density. Earthenware clays like terracotta mature at a lower temperature than stoneware clays.
If you are using earthenware clay, it’s best to use a glaze that is designed for earthenware temperatures. Similarly, glazes that mature at stoneware temperatures are best for stoneware clay.
There are exceptions to this rule. For example, you can glaze stoneware clay with a low fire glaze. Some low fire glazes like the Foundations series by Mayco will tolerate being fired at higher temperatures. Though they might lose a bit of color.
However, there is something called glaze/clay fit. This refers to how suited a glaze is to a particular type of clay. If a glaze doesn’t particularly suit a clay body, you can get problems with your glaze, like crazing and blistering. Basically, the glaze and clay don’t fit one another when they are fired. As a result, the glaze will be under a lot of tension and can crack or craze.
Choosing a Pottery Glaze
You also have more artistic decisions to make about what you want your glaze to look like. There is an incredible range of glazes to choose from. They vary in color, texture, and how much they move and flow when they are fired. Glazes also vary in transparency and opacity.
Glazes always look very different when they have been fired, to how they look when they are applied. Manufacturers will provide small sample tiles and images of the fired results. But these can sometimes look quite different from what your pottery will look like once glazed. And it’s best to use these images as a guide rather than a guarantee of how your work will look.
Usually, you will only get a true idea of what a glaze looks like by testing it out. So, it can be helpful to do a test fire on a piece of pottery that isn’t too important to you. If you like the results, then you can use the glaze on your favorite clay creations.
If you want to know more about choosing the right glaze for your pottery, check out this article.
How to Glaze Pottery at Home with a DIY kiln
If for whatever reason, you don’t want to buy a pottery kiln, you can make your own DIY kiln.
There are a number of ways to make a pottery kiln to glaze pottery at home. Most of these involve building a kiln in your backyard. So, if you have some outside space, you can give these a try. Here are just a few of them:
Raku Firing Pottery
Historically raku firing extends from a long tradition of firing pottery that originated in Japan. However, the approach has been adapted over the years. Lots of potters make raku pottery in kilns made from metal containers that range from trash cans to shopping trolleys.
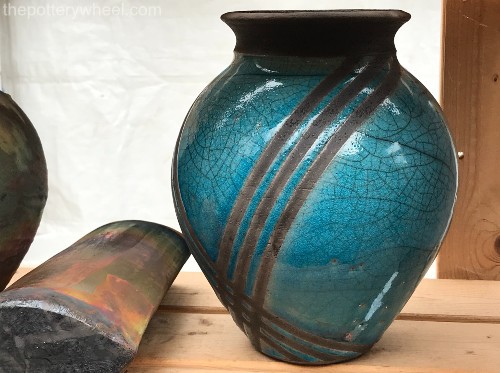
Today, raku firing often refers to a fast way of firing pottery to low temperatures. It can take around 12 hours to glaze fire a piece of pottery in a pottery kiln. By contrast, a raku kiln can reach its target temperature in 30 minutes to an hour.
Usually, raku kilns are fired up to around 1832F (1000C), give or take a few degrees.
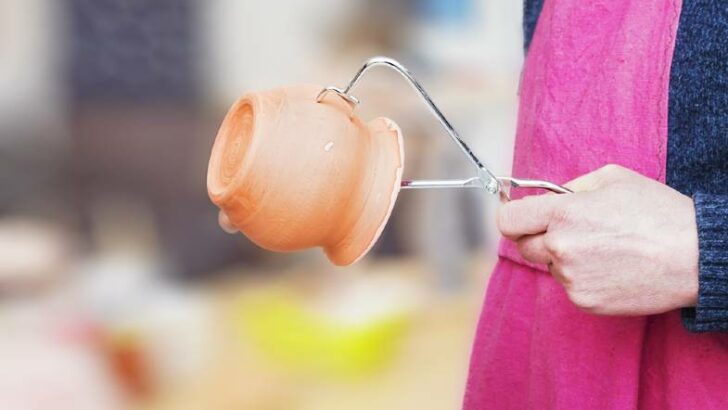
The raku approach involves glazing bisque ware and then heating it quickly in a raku kiln. Once the kiln has reached around 1832F the pottery is lifted from the kiln whilst it is very hot. Because the pottery is hot, it needs to be lifted using long metal tongs called raku tongs.
The hot pottery is then placed on a bed of combustible material and covered over with a metal container. Combustible material might be straw, paper, sawdust, or something similar.
Because the combustible material is burning inside a sealed metal container, the oxygen around the pottery is reduced. This creates a ‘reduction’ atmosphere. The raku glaze will respond to the reduction atmosphere and produce a distinctive raku glaze effect. And the unglaze parts of the pottery will become a nice rich black color through a process of carbonization.
Raku Firing and Bisqueware
It is possible to bisque fire pottery in a raku kiln. However, bisque firing takes about 10 hours and that’s a long time to be firing pottery in your backyard.
If you don’t have a pottery kiln, I’d recommend finding someone local who can bisque fire for you. After your pots have been bisqued, you can glaze them and fire them in your DIY raku kiln.
Making a Raku Kiln
There are lots of ways to make a raku kiln. One of the most straightforward ways is to line a galvanized steel trash can with insulating ceramic fiber. Check out my full step-by-step guide on how to make a DIY raku kiln. Once you have built the kiln, you use a propane burner torch as a heat source.
Raku Glazes
There are some very beautiful raku glazes available to purchase. It’s a great way to glaze pottery at home.
What’s nice about raku glazes is that the same glaze will look different each time you fire it.
And if you have an experimental streak, raku firing might be for you.
Pit Firing
Another way of firing pottery in your backyard is pit firing. This is probably the oldest, earliest way that humans fired pottery.
Pit firing involves digging a hole in the ground and lining it with combustible material. This material can be wood, sawdust, leaves, and even dung. The pottery is then placed on the bed and covered over with more combustibles.
The burnable material is set alight. Once the fire is established, the burning pit can be covered over to keep the heat in. It can be covered with a piece of metal or some earth.
As a rule, potters do not use ceramic glaze when pit firing pottery. This is partly because the pots are nestled down in the fire. Wood, ash, and dirt would stick to the glaze and damage it.
Sometimes potters will place pots into a pit with no finish on them at all. These pots will have a blackened look when they have been fired. If the pottery is burnished to a sheen before it’s pit-fired, the blackened surface can look silky and beautiful.
Alternatively, a potter might put their pots into a saggar. Saggars are containers that are used to protect the pottery. Sometimes saggars are made out of clay. However, you can also make a saggar by wrapping your pottery in aluminum foil.
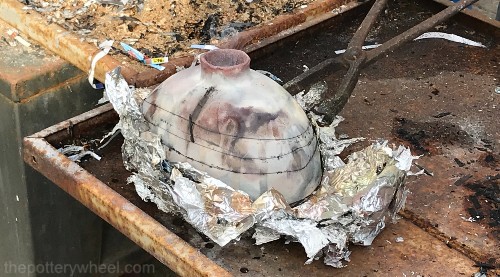
Saggars are also used to hold certain materials against the surface of the pots as they fire. Different materials such as copper wire, salt, and banana skin can create interesting patterns on the pottery surface.
For a great overview on pit firing, check out this blog site by Up In Smoke Pottery.
Barrel Firing
Barrel firing works on the same principle as pit firing. However, rather than digging a hole in the ground, you are using a metal barrel to contain the burning material.
The advantage of barrel firing is that you can cover the barrel with a fitted metal lid to contain the heat. Also, you can put holes along the bottom of the barrel and have a flue on top of the lid.
This creates an updraft ventilation system. The updraft system gives you a bit of control over the temperature of the kiln. It also enables you to control the amount of oxygen in the barrel during firing.
Using Saggars When Barrel Firing
Often potters will use saggars when they are barrel firing. Rather than using ceramic glaze, you can use a variety of oxides, powders, and organic materials to decorate your pots.
For example, one approach is to burnish your pots and then bisque fire them. This gives you a lovely velvety smooth pottery surface.
Ferric chloride can then be painted carefully onto parts of the pottery. Ferric chloride is very corrosive and needs to be handled with extreme care.
The pot is then placed on a sheet of aluminum and other materials are wrapped around it. These might include organic materials like seaweed, corn leaves, or banana skins. Powders and granules like copper carbonate powder and salt can be sprinkled around the pot as well. This will add to the colors and patterns on the pottery surface.
Another technique is to wrap some copper wire from a kitchen scourer around the pot. This can make nice red random-shaped lines across the pot surface.
Once fired, the aluminum saggar is removed to reveal a lovely array of colors and patterns.
Further Tips on DIY kilns:
These are just 3 ways of making your own kiln to glaze pottery at home. If you want to know more about other DIY kilns, check out this article.
If you are using a low firing technique like raku to glaze pottery at home, your pots will be decorative rather than functional. This means that they can’t be used for holding food and drink, or as vases. This is because the surface is still porous and often has tiny cracks in it that can harbor bacteria.
Final Thoughts
Learning how to glaze pottery at home is very exciting. As you will have seen there are lots of options. And whether you choose to glaze pottery at home with a ceramic kiln or a DIY kiln, you can produce some lovely glaze finishes. Using a kiln whether it’s a ceramic kiln or a DIY kiln is a bit of a learning curve. But of course, why else do we learn things if not to stretch ourselves?