
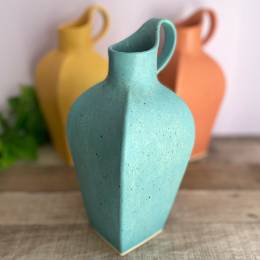
This guide walks you through making a four-sided, petal-shaped vase using the printable, including two neck design options.
If you would like to get a copy of the template, you can grab a copy here in my Etsy store.
Get The Template Here
You can get a copy of the template (and my other slab pottery templates) from my online store here…
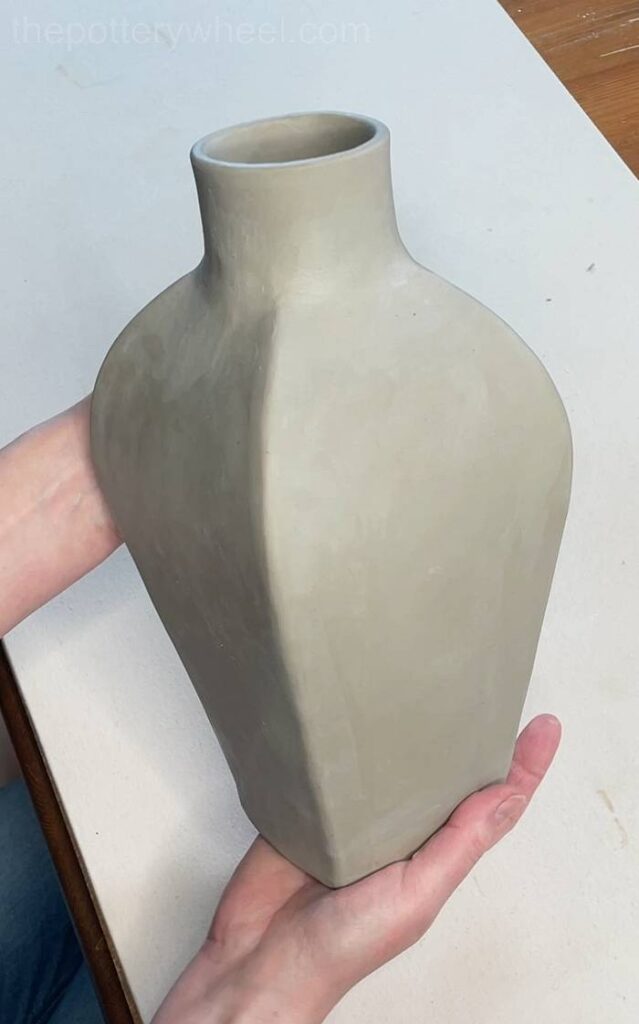
The Petal-Shaped Vase
This is a list of materials and tools. Some of the items are essential, others are nice to have, but you can often improvise with other implements that you have around your home or studio.
You Will Need:
- Clay
- Rolling pin
- Clay roller guides
- Clay knife
- Rubber pottery rib
- Platter tool
- Canvas for rolling on
- Clay scoring tool
- Serrated rib
- Wooden modelling tools
- Chamois leather
- Banding wheel
- Wooden drying board
Step 1: Roll a Slab
Roll a slab using 5mm guides.
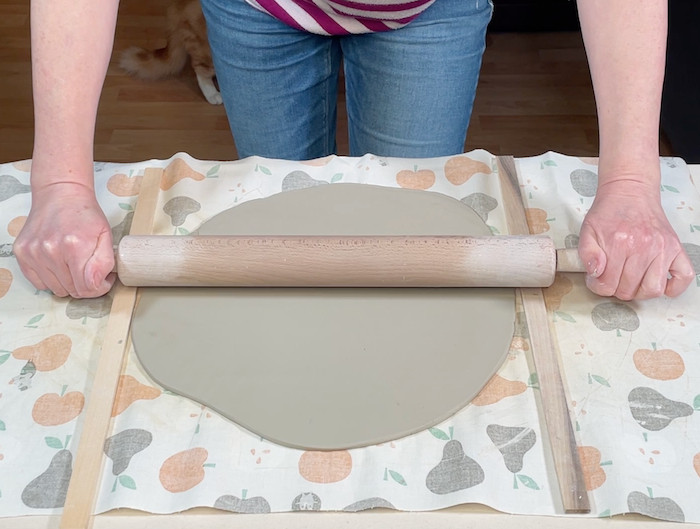
Smooth both sides with a rib or platter tool to remove texture and compress the clay.
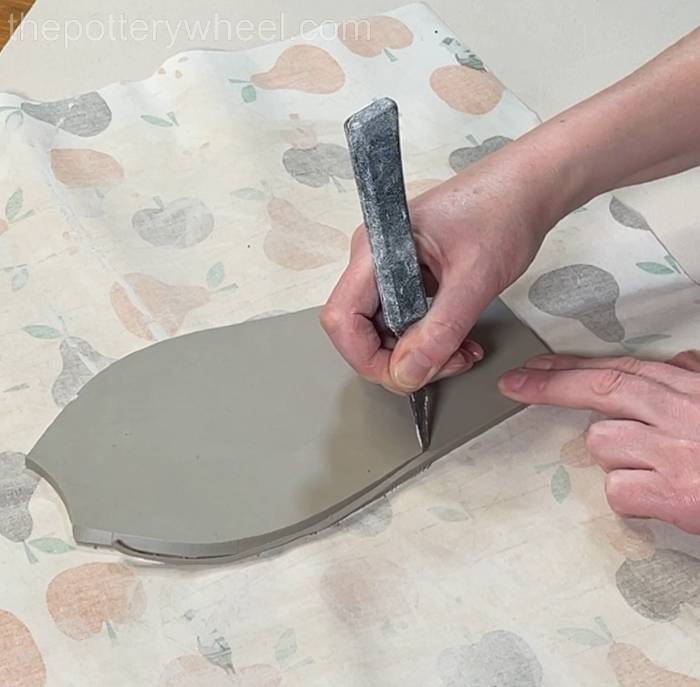
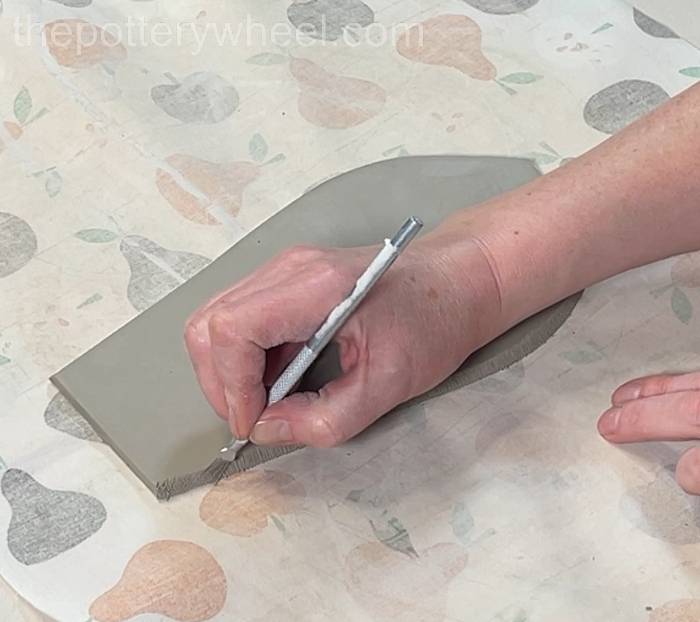
Step 2: Cut Out the Sides of the Petal-Shaped Vase
Once templates A and B have been joined together, use them to cut out four identical slabs for each side of the vase.
Put the slabs on a wooden drying board and let them firm up to soft leather hard. You can move them on a piece of paper or fabric to avoid stretching them when soft.
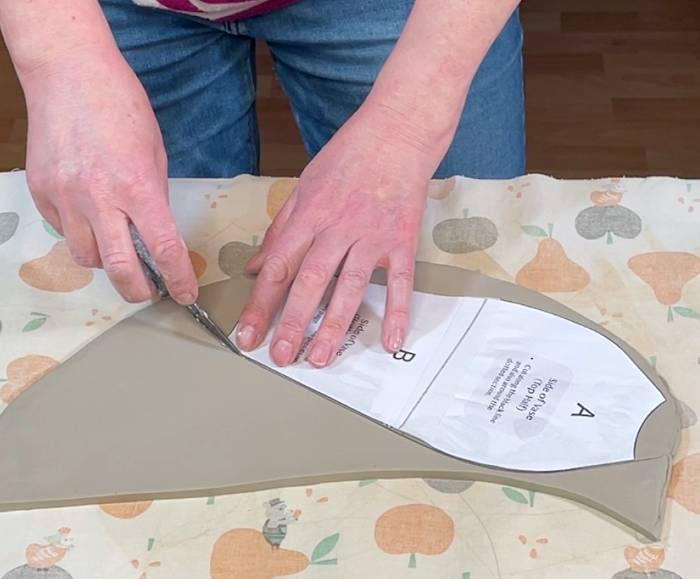
Step 3: Cut Base and Neck Pieces
Cut out the vase base using template E.
Cut the neck. There are two neck designs. Templates C & D when joined form the neck with the curved handle detail.
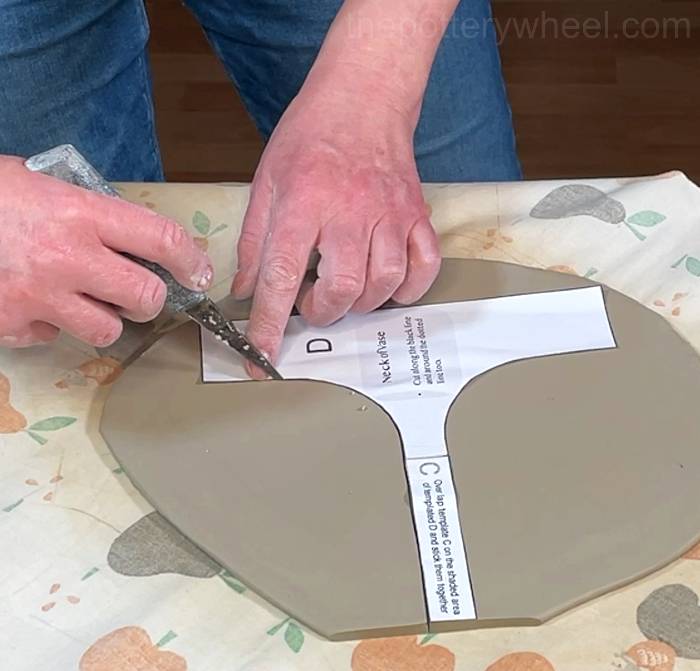
Template F forms the simple cylinder neck. You can choose either.
Keep neck pieces and the base on plastic to stay soft and flexible.
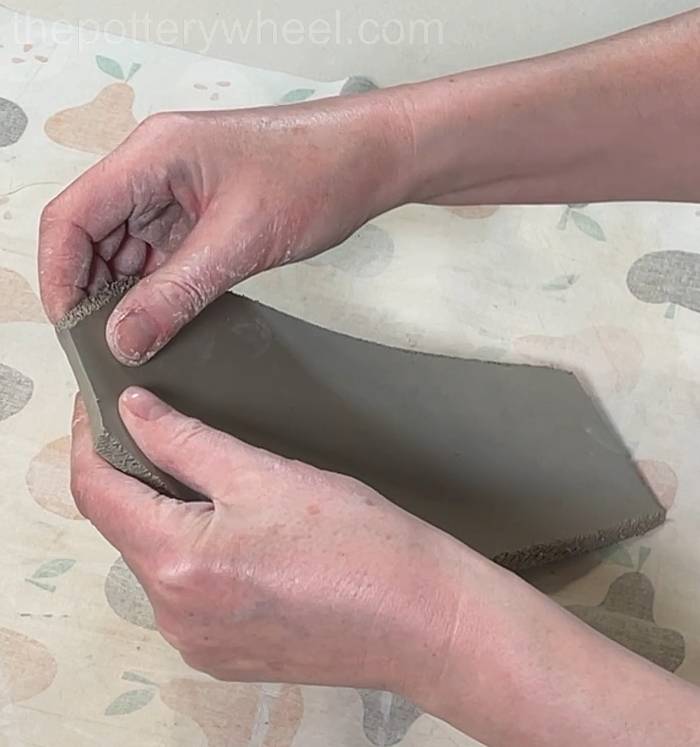
Step 4: Prepare the Side Panels
Once sides are soft leather-hard bevel both long edges at a 45° angle.
Don’t flip the slab over before you bevel the other side. The bevelled edges should look like this:
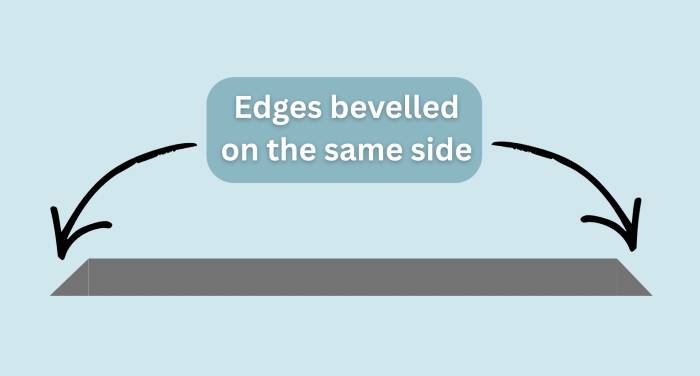
Score both bevelled edges (cross-hatch).
Lightly curve each slab to give a gentle convex shape.
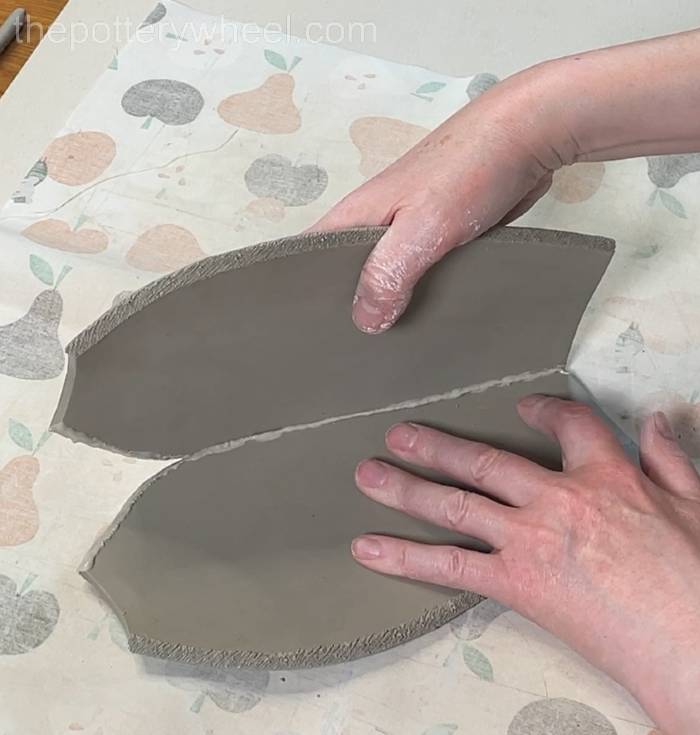
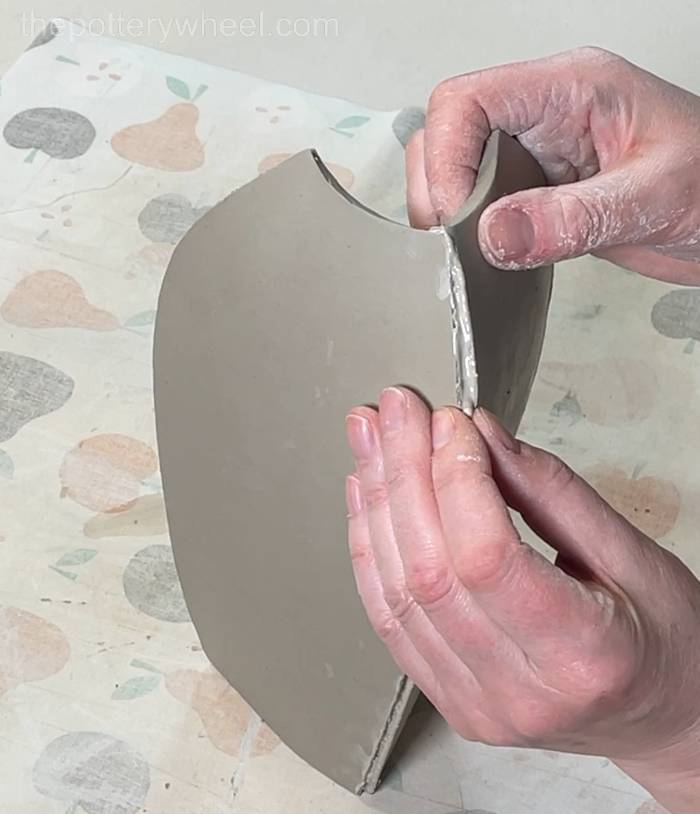
Step 5: Join the First Two Sides of the Vase
Apply slip to two matching edges.
Press slabs together. To do this, lay one slab flat on the table. Line the other slab up against the one on the table and press the join together.
When the bottom half of the two slabs has been pressed together, lift the two slabs so that they are resting on their bottom edge. Curve the top edges of the slab round to form a bond.
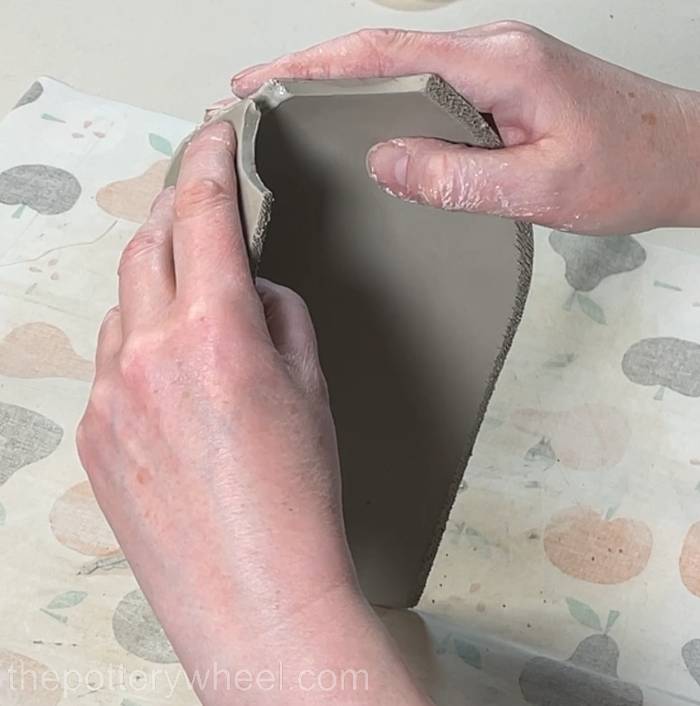
Pinch the join together to make the bond firm.
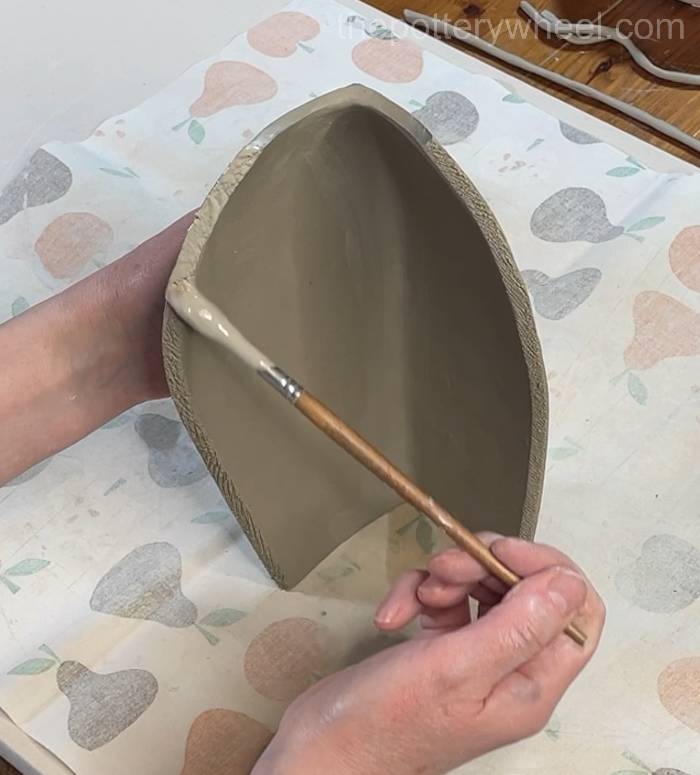
Reinforce the inside of the join. Add a thin clay coil along the join. Blend with a wooden tool.
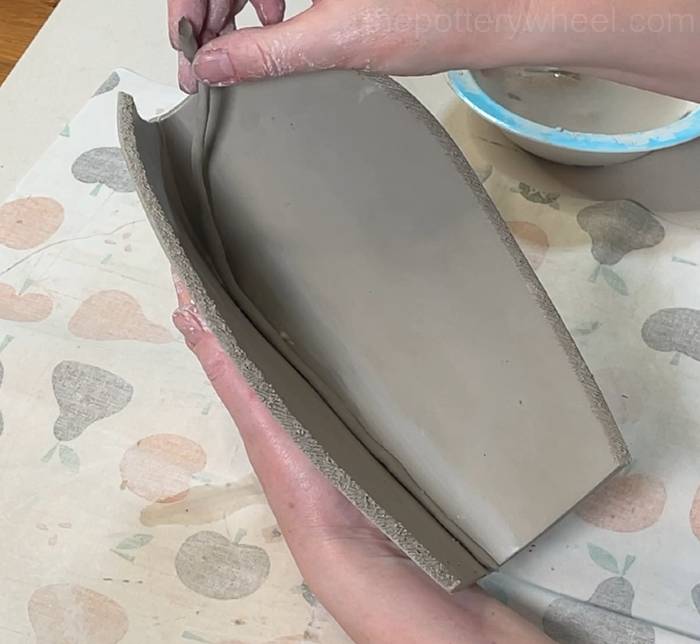
Blend with a wooden tool.
Smooth inside with chamois leather.
Check the seam on the outside hasn’t opened up and tidy it up.
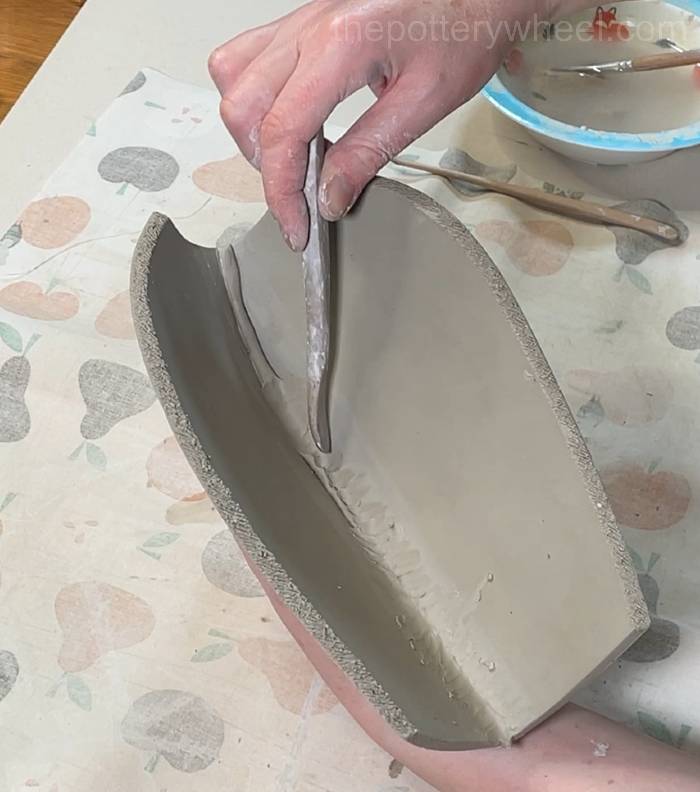
Step 6: Add the Third Side
Prepare the slab in the same way as before. Namely, bevel and score both edges. And curve the third slab slightly to give the slab a slightly convex shape.
Apply slip to one scored edge on the third slab.

Apply slip to one of the edges of the two sides that have been joined already. Make sure that you are applying slip to the edge that will join with the third slab.
Attach starting from the top edge, then work downward.
Pinch the joint to secure the bond.
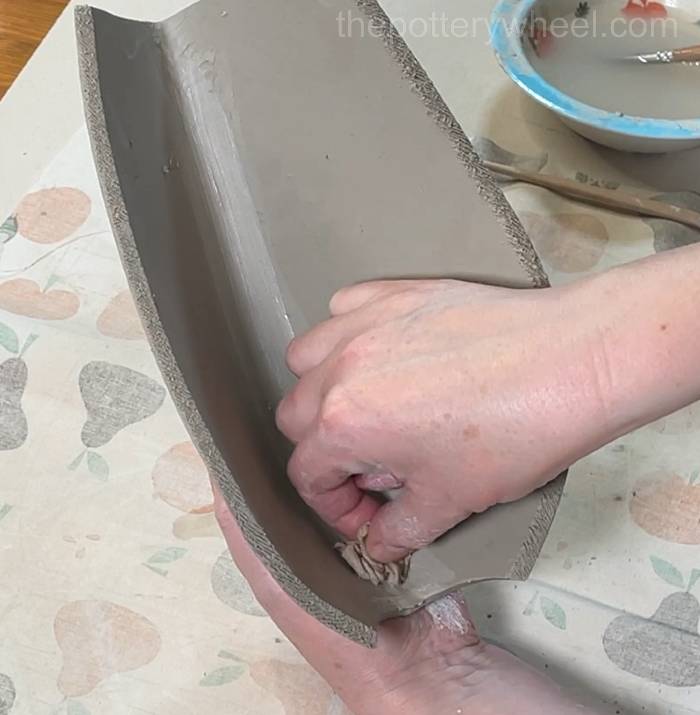
When the joint is secure, you can open the gap a little and add a coil inside. After adding the coil, blend it and smooth it as before.
Support the structure with your free hand so that the vase doesn’t topple over as you add the coil (it will be unstable at this stage).
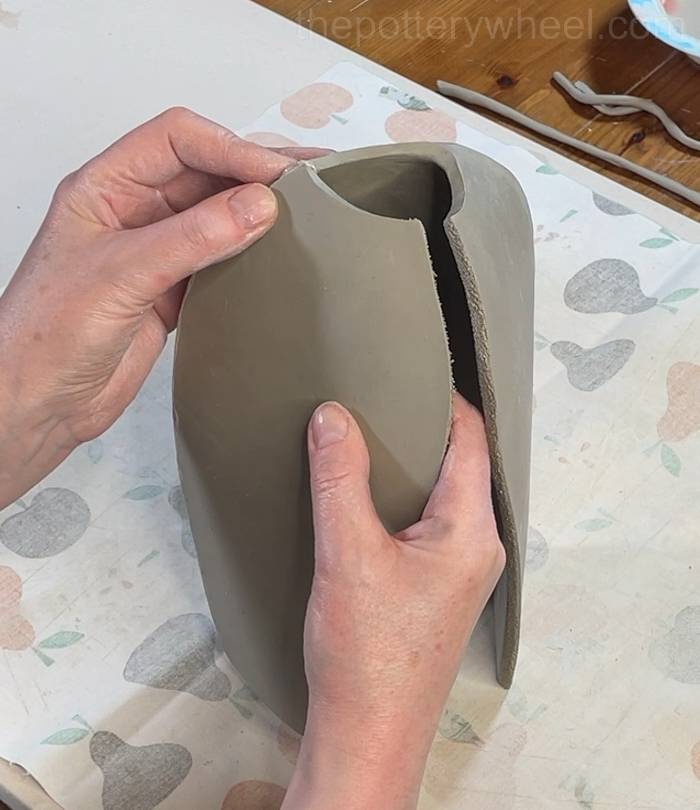
Step 7: Attach the Fourth Side of the Petal-Shaped Vase
Apply slip to one scored edge of the fourth slab. Then apply slip to the side of the vase that your fourth slab will be joined together with.
Begin to attach the fourth slab. First, align the top edges of the slabs.

Work your way down the slabs pressing the slipped edges together. When the two edges are aligned and in the right position, press and pinch the seam all the way from the top to the bottom of the vase.
Add a coil to the inside join where the third and fourth slabs meet.
Blend the coil in and smooth it off with your chamois leather.

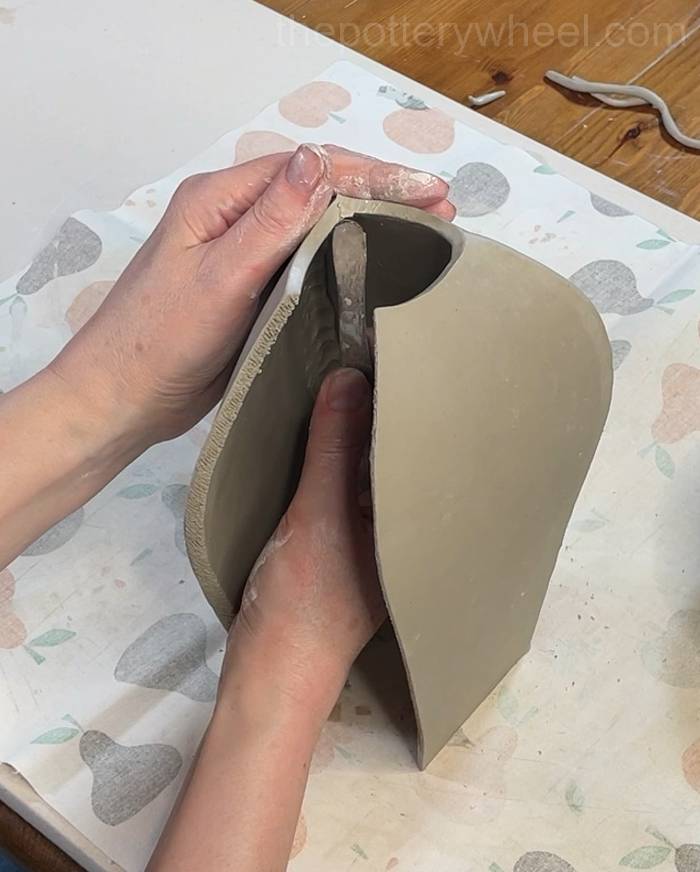
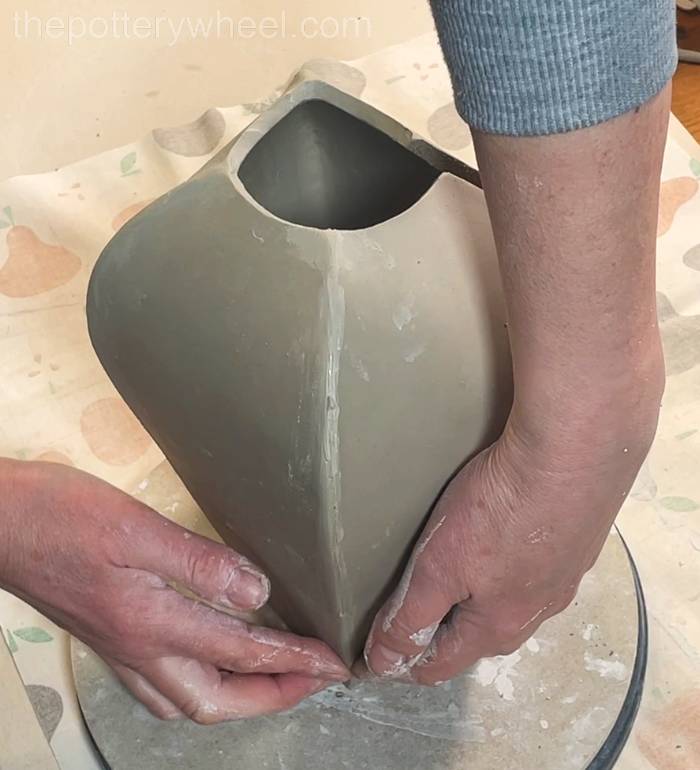
Step 8: Joining the Final Seam of the Petal-Shaped Vase
At this point you have one seam on the walls of the vase that hasn’t been attached yet.
Apply slip to the two remaining edges. Line the slipped edges up. When they are aligned, press them together to form a good bond.
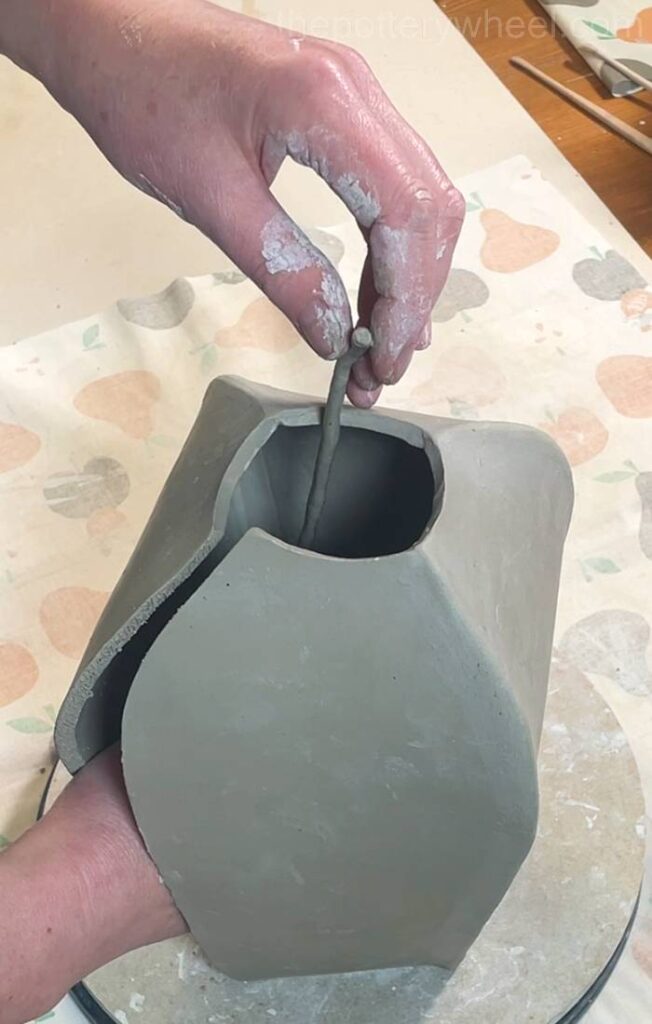
Add a small coil at the top edge first. This will give the final join a bit of extra strength.
Using an old flat pillow or a piece of soft foam, lay the vase on its side.
Drape a coil along the inside surface of the vase where the two final edges are aligned.
Blend the coil in with your wooden tool as much as you can.
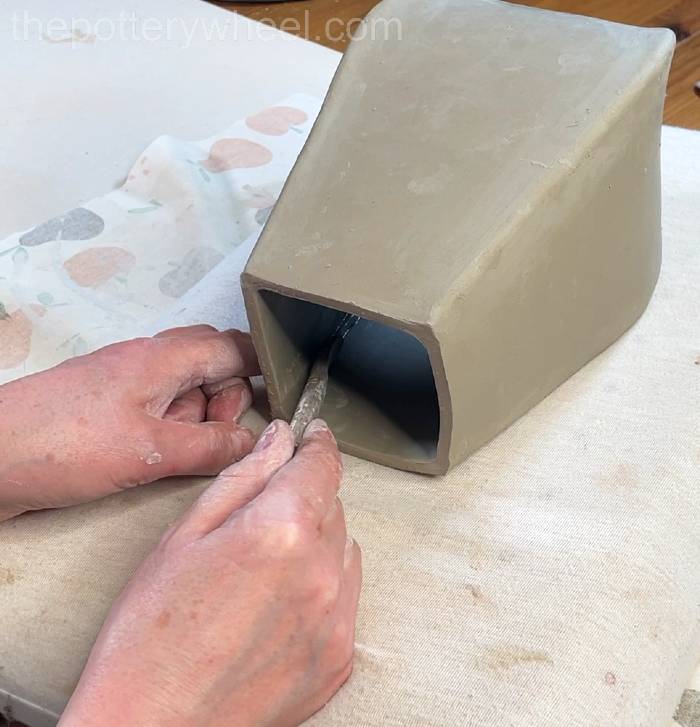
You may need to blend some of it with a damp fingertip if you can’t get your wooden tool all the way into the bottom of the vase.
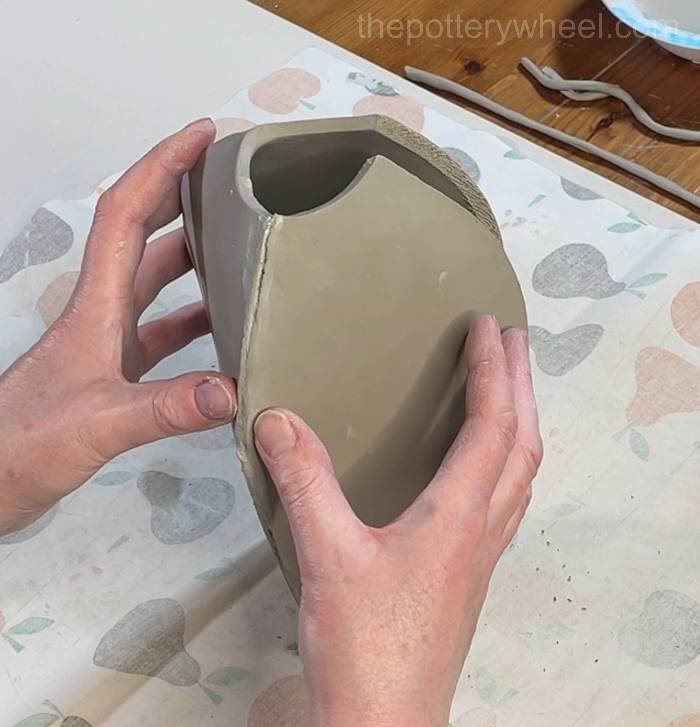
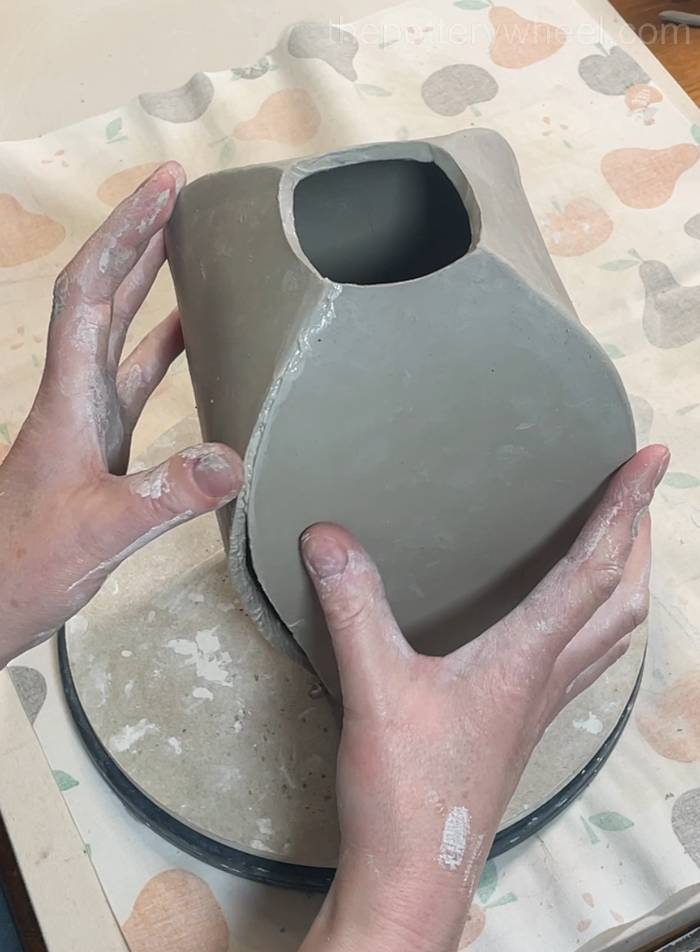
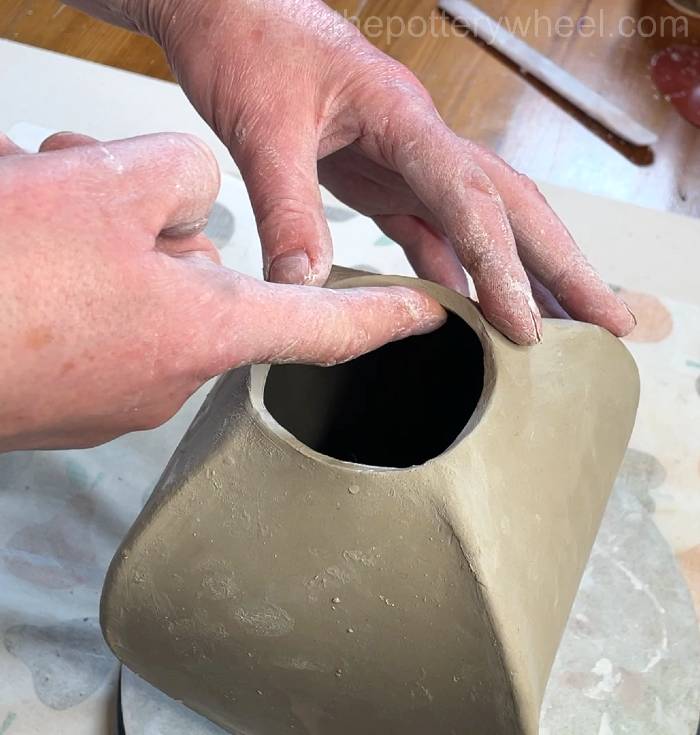
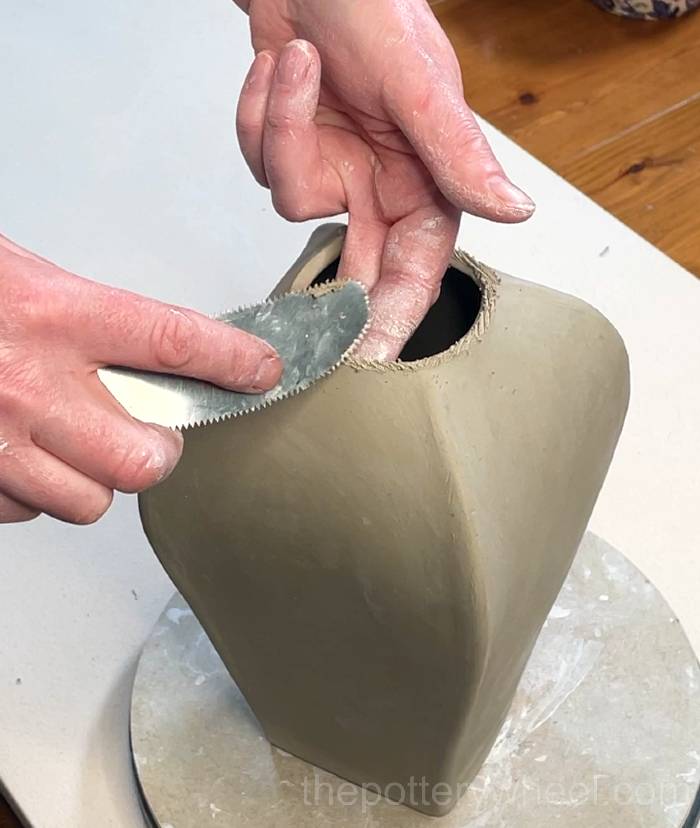
Step 9: Shape the Rim
Lightly spray the vase with water if the clay is stiff. Pinch and smooth the top edge into a rounded shape.
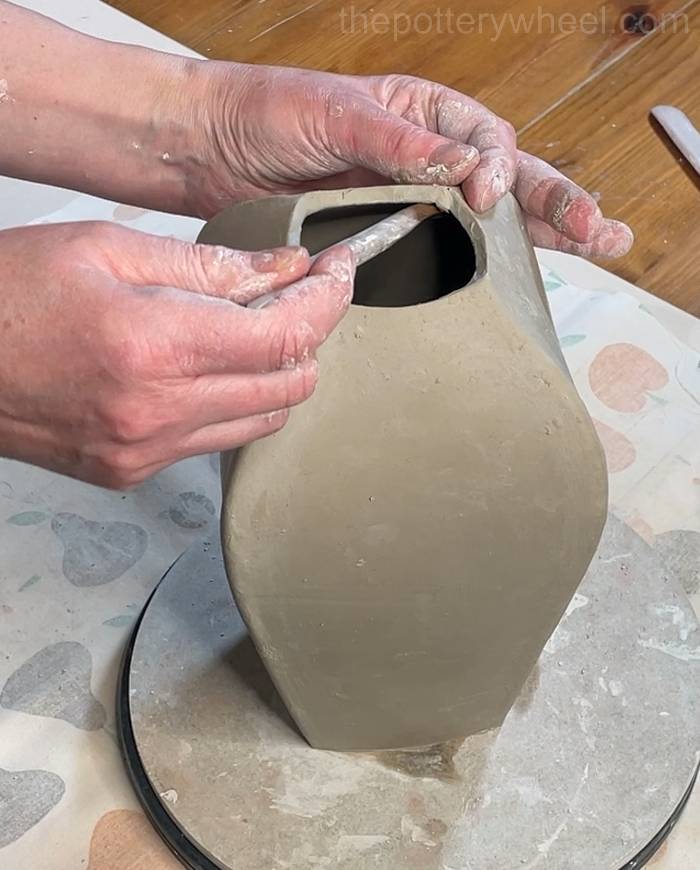
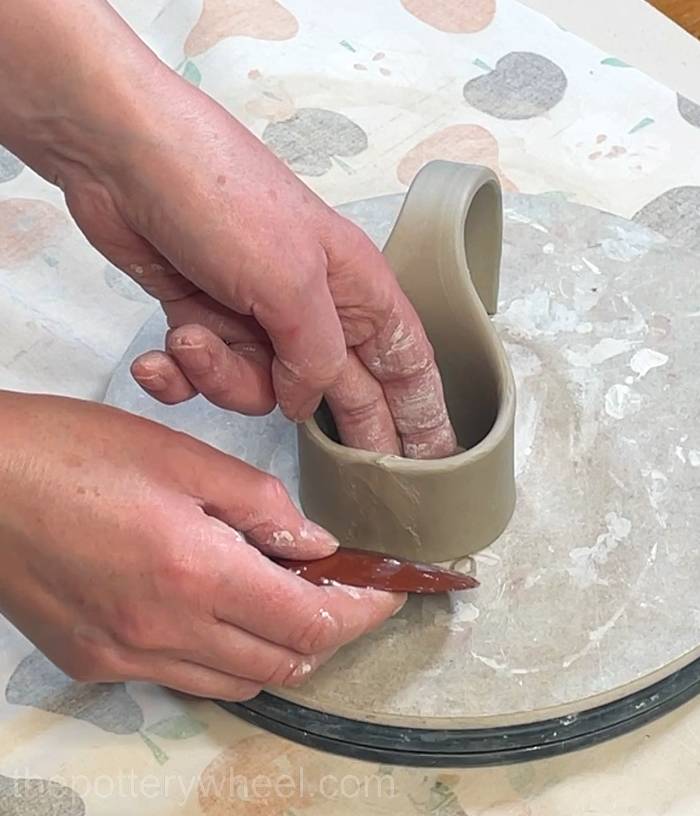
Step 10: Attach the Base
Score along the bottom edge of the vase and around the edge of the base.
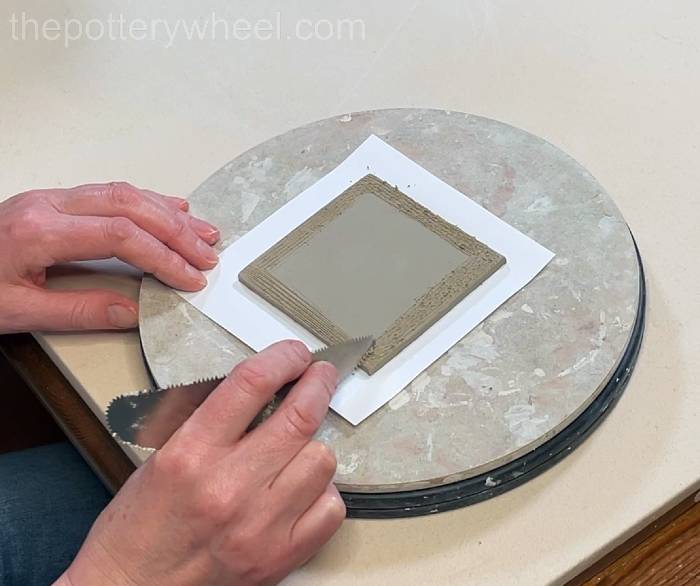
Apply slip to both surfaces. Lower the vase onto the base.
Trim excess clay off the base, leaving about 1–2mm overhang.
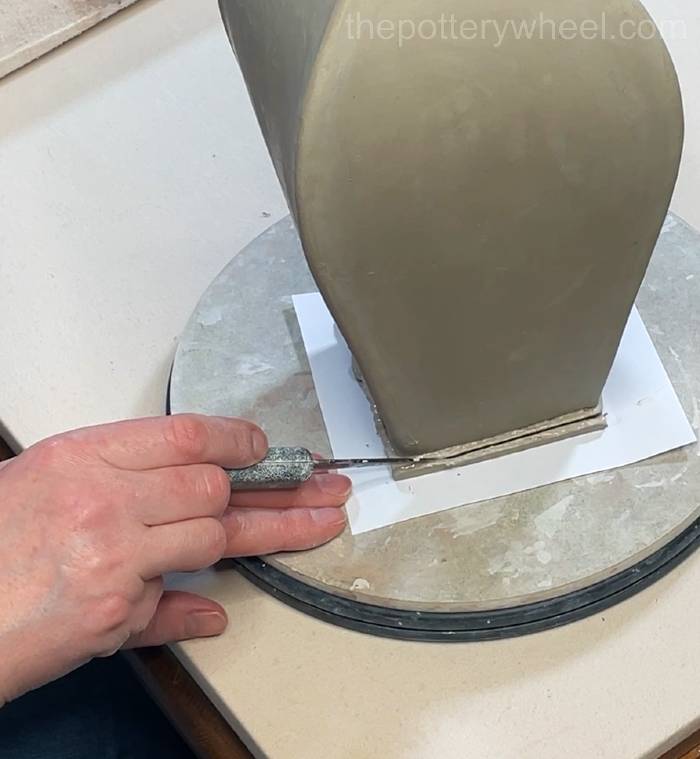
Blend this overhang into the vase base. Smooth and soften edges (avoid sharp corners).
Step 11: Making Neck Design 1 (From Template C&D)
Preparing the Neck
Bevel and score both short edges.

Important: flip slab over before bevelling second edge
Smooth curved edges while flat.
Lift the slab onto its bottom edge and allow the long thin strip to drape over in a curved shape.
Gently bend the neck into a cylinder shape.
Add slip to the short scored edges and join them together.
Smooth the outside of the join with a rubber pottery rib. Blend inside with a modelling tool.
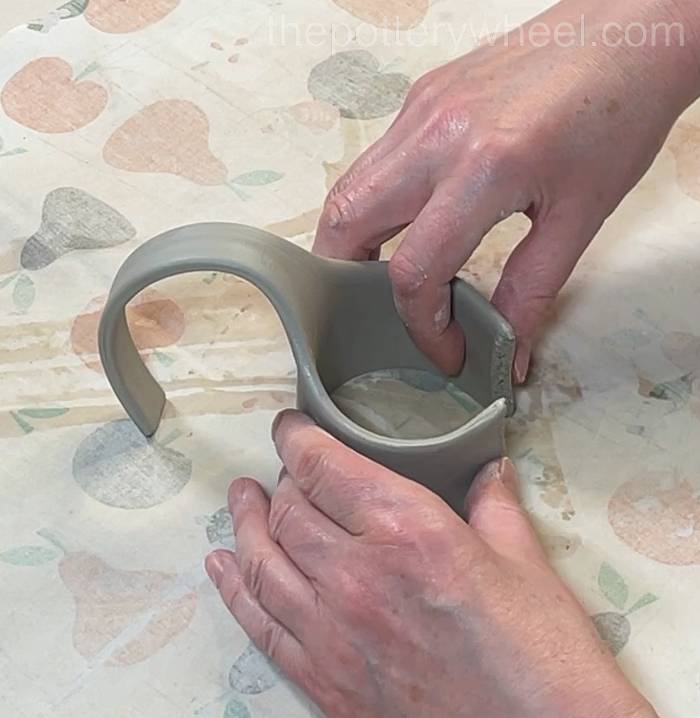
Attaching the Neck
Score the top edge of the vase and the underside of the neck.
Apply slip to both scored surfaces and lower the neck onto the rim of the vase.
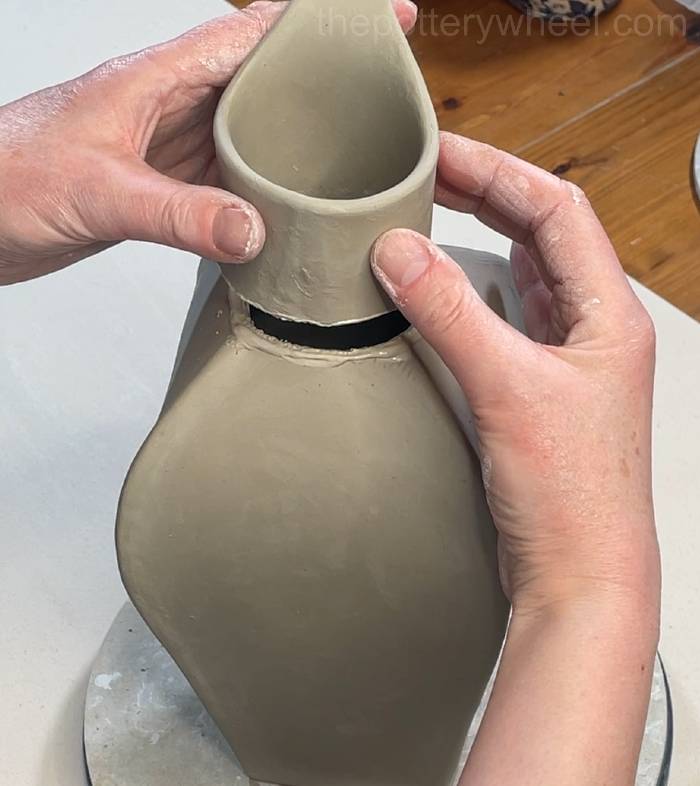
Press gently into place. Blend join on the outside with a wooden tool.
Blend the join on the inside with a wooden tool.
Add a thin coil of clay around the outside of the join. Blend the clay coil onto the vase and the neck.
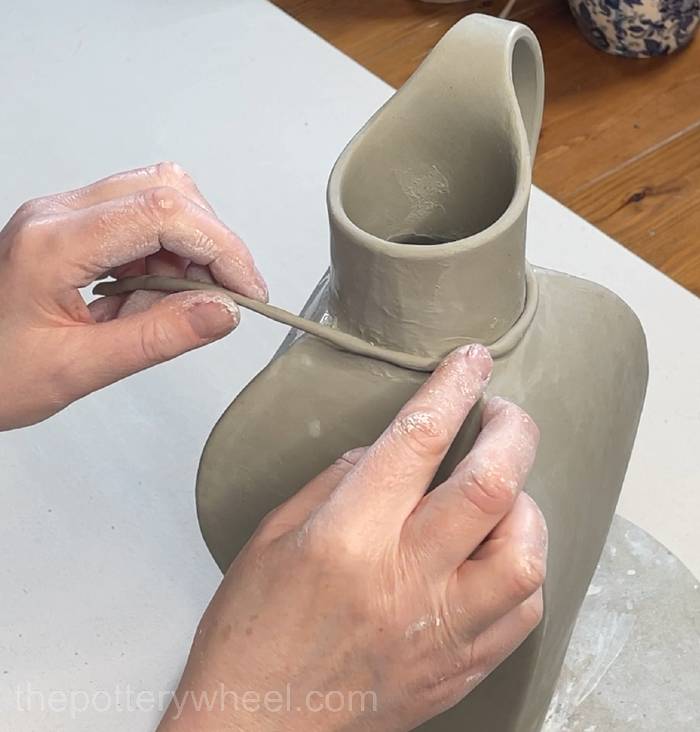
Wipe the join down with a chamois leather to smooth away any texture.
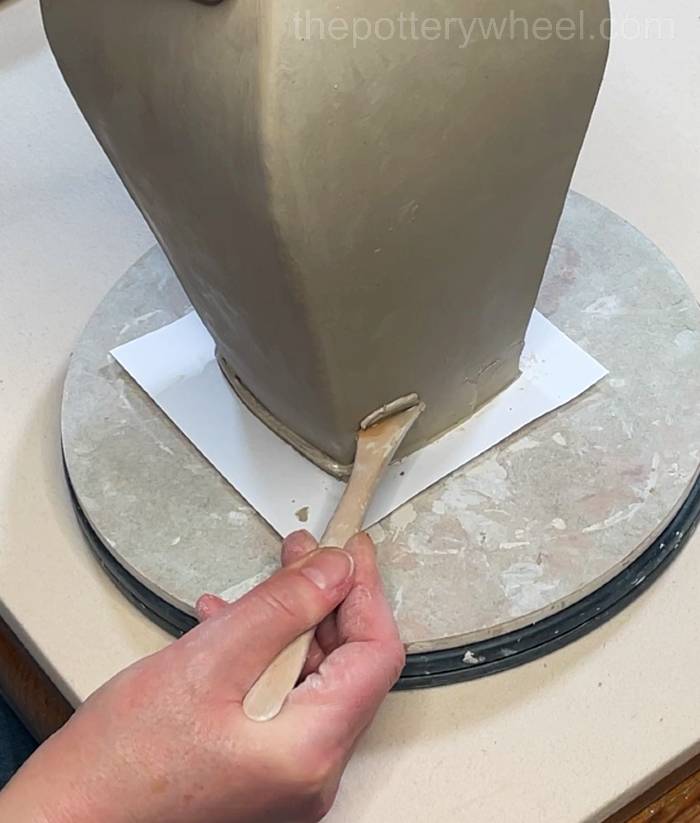
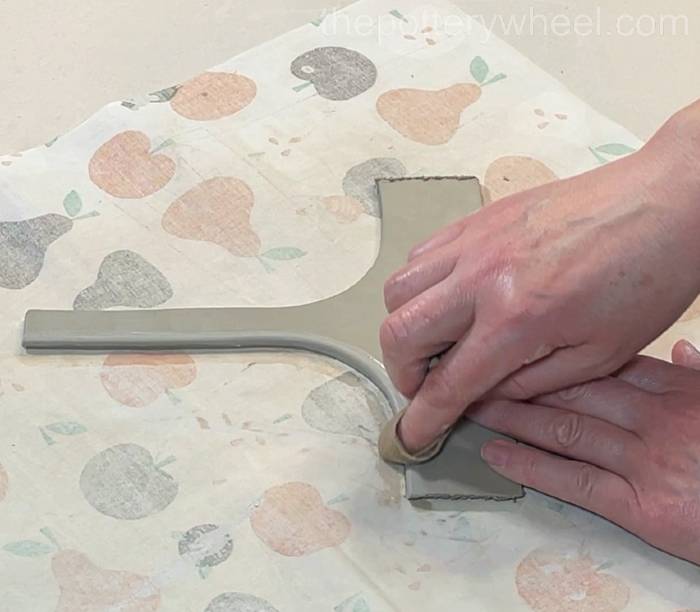
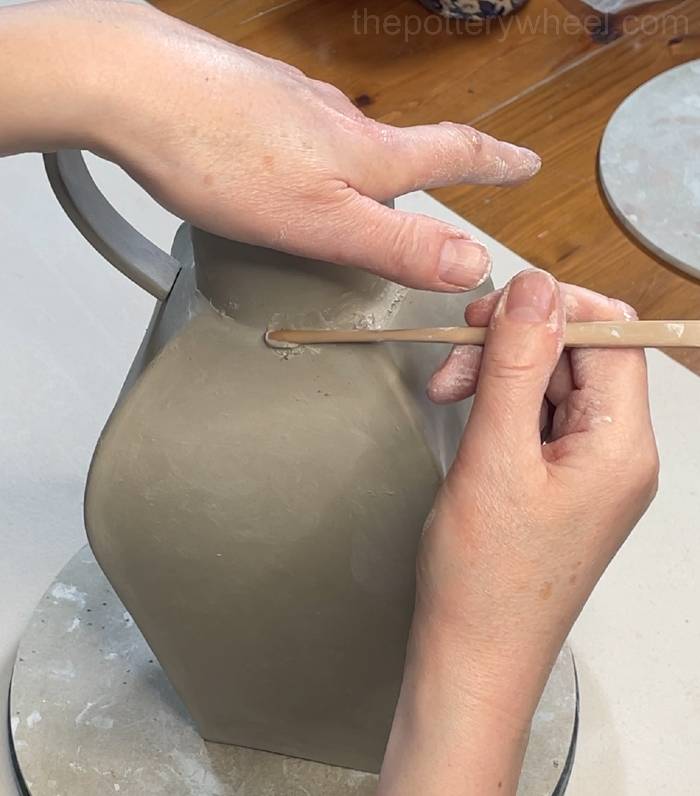
Step 12: Attaching The Handle
Bend the handle and position the end of the handle on the neck where you want it to be attached.
Mark on the clay where you plan to attach the handle. Score both surfaces. Apply slip and press the end of the handle onto the neck.
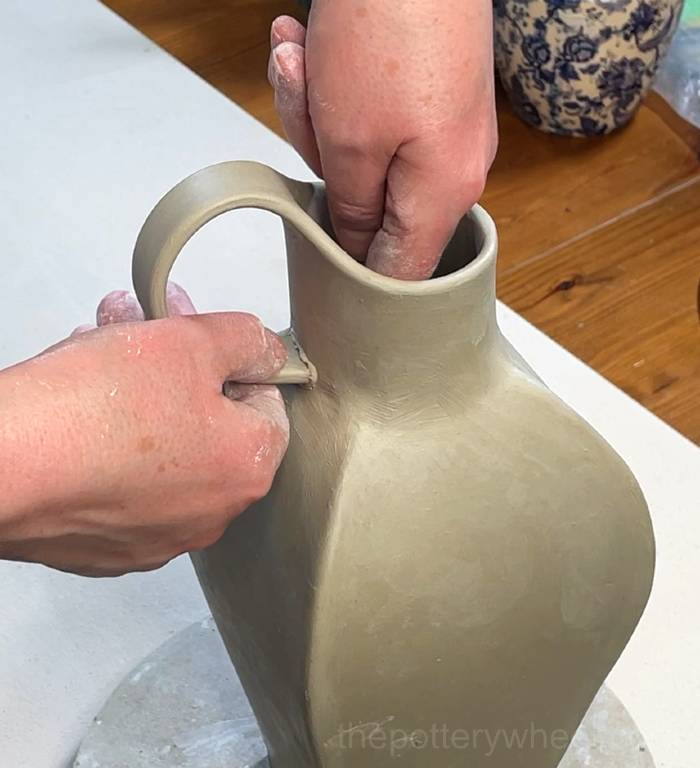
Reinforce with a small coil. Wrap the coil around where the handle joins the neck. Blend the coil into the surface.
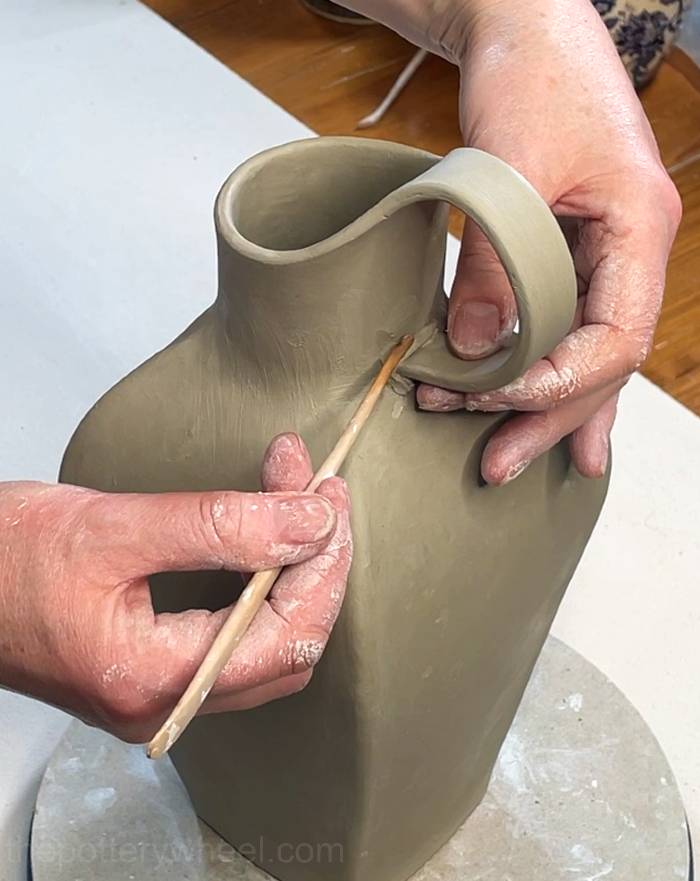
Smooth finish with a chamois leather.
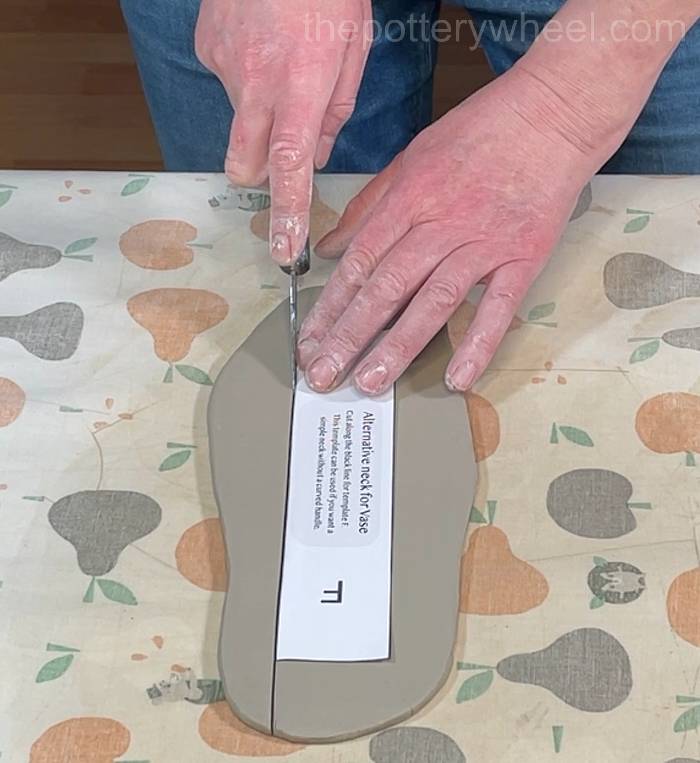
Alternative: Making Neck Design 2 From Template F
- Bevel both short ends of the neck.
- Smooth one of the long ends of the neck on both sides.
- Bend the clay into a circular shape and add slip to both scored edges.
- Blend the two scored edges together.
Attach the neck to the vase in the same way outlined above. The only difference is that you don’t need to attach a handle to the neck once the neck has been joined to the vase.
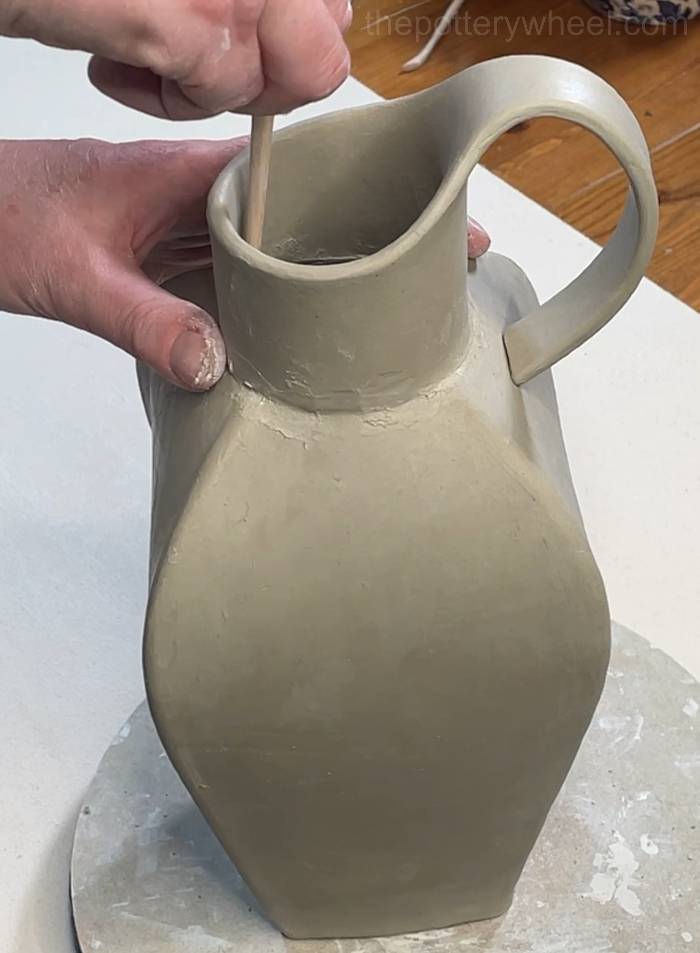
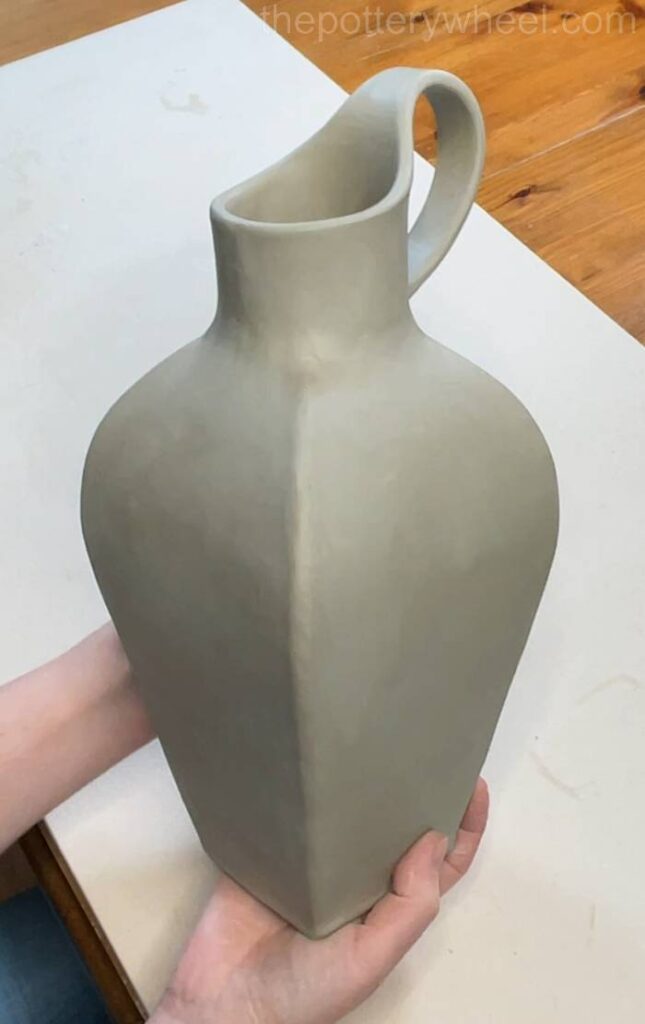
Step 13: Final Checks
Check that you are happy with the overall finish of the vase and the shape of the neck.
Cover loosely and allow to dry slowly before bisque and glaze firing.
Get The Template Here
You can get a copy of the template (and my other slab pottery templates) from my online store here…
Extra Tips on Making The Petal-Shaped Vase
- Preparation is key—have slabs ready before assembling.
- Construct the body of the vase when the side slabs are soft leather-hard stage for best results.
- Support the structure as you build. If it topples over before all the sides are attached, it can lose its shape and seams can open up.
- Adding thin coils where you can helps make stronger joins.
- Use fingertips when tools can’t reach.
- Take your time—this build is more complex than a mug.


Leave a Reply