Burnishing pottery involves rubbing it before it’s been fired so that the surface is smooth and shiny. There are lots of ways to burnish, and one of the easiest ways is burnishing pottery with a plastic bag. This might sound strange, but it does work.
What is Burnishing Pottery?
Burnishing clay is a way of getting a smooth, glossy finish on your pottery without glazing it. There are different ways of burnishing. One way is to rub the pottery with a smooth hard object like a burnishing stone. This compresses the clay particles and creates a smooth reflective surface on the pottery.
The other way is to apply terra sigillata to your pottery and then polish that. Terra sigillata is a special kind of clay slip made of refined clay particles, which creates a smooth finish on your clay surface.
You can use a plastic bag to enhance both of these ways of burnishing clay. Let’s take a closer look at both approaches, so you can choose which one you like the sound of most.
Using a Burnishing Tool
If you want to burnish your pottery with a tool, you can do it at different greenware stages.
For example, you can burnish pottery straight after you have trimmed it. Whilst your pot is still on the trimming wheel, you can run a smooth object over the surface of the clay as it turns.
Some potters run the back of a spoon over the surface of their freshly trimmed pots. Alternatively, you can run the edge and side of a metal rib over the clay to remove any marks made by your trimming tools. I sometimes run a rubber rib over my pottery to compress the clay after trimming.
However, mostly, burnishing is done after the pottery has been trimmed and it is leather-hard.
Burnishing Leather Hard Pottery
You can buy specially designed burnishing tools. They come in different shapes and sizes, but one example is a pencil-shaped tool with a smooth, hard agate tip.
However, you can burnish your pottery with any hard object, provided the object is smooth and easy to hold. For example, you can use a smooth stone, the back of a spoon, or something similar. Some potters even burnish with a small lightbulb.
The main thing is that the object is smooth. Any tiny lumps, bumps, or sharp bits on the object will scratch your pottery.
There are different techniques for using a burnishing tool. However, a popular method is to rub back and forth, switching directions often. If you keep rubbing in the same direction, you can get lines on the pottery.
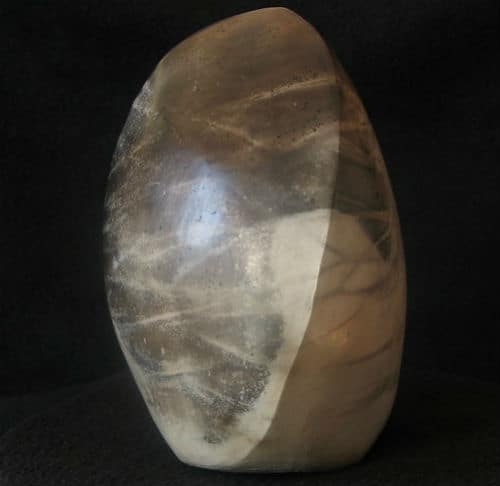
The principle behind burnishing is that the clay platelets are flattened and aligned to form a smooth reflective surface. As you rub, the clay particles become compacted and the remaining moisture in the clay is drawn to the surface. Therefore, the clay becomes darker as you work.
You can moisten the clay with a small amount of water as you work over the surface area. Alternatively, you can add a little oil, to lubricate the surface and create a sheen. Most types of oil will be suitable. For example, you can use olive oil, baby oil, or even lard.
Methods of Burnishing with a Plastic Bag
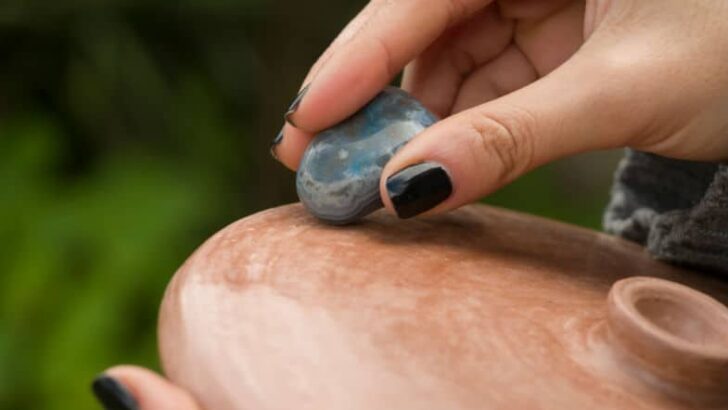
Once you have finished burnishing the area you want to cover, you can polish the burnished surface with a plastic bag. There are a few ways you can do this. Here are some options:
- Hold the bag in your hand and rub the pottery as if you are using a cloth or duster
- Wrap the plastic bag around the tip of your finger and polish using your fingertip
- Wrap a piece of plastic around a small sponge and use this to rub the pottery surface
Each of these methods works well. I like to use a combination of the first two. I use the plastic bag like a polishing rag on larger areas. Then, I wrap a bit of plastic around my fingertip to get into smaller nooks and crannies on the pot.
Tips on Burnishing with a Plastic Bag
- Use the crinkly kind of bag you get from a grocery store, rather than the thicker viscous kind
- Apply enough pressure to polish the clay, but be careful not to crush your pots. Remember greenware is fragile.
Different Options for Burnishing Clay
The benefit of burnishing leather hard clay is that the remaining moisture in the clay makes the burnishing process a bit easier. Slightly damp clay will compress rather than crumble.
However, not everyone burnishes pottery when it’s leather hard. One of the disadvantages of burnishing when clay still contains moisture, is that the clay still needs to dry before it is fired.
As the leather hard clay dries out completely, it still needs to shrink. Even if it shrinks just a tiny bit, this can disrupt the burnished surface, and you can lose some of the shine that you worked hard to achieve.
Because of this, some potters prefer to burnish clay when it’s bone dry. You can read more about the different ways of burnishing clay in my guide to burnishing here.
Whether you burnish clay when it’s leather hard or bone dry, burnishing clay takes a long time. Even a small pot can take hours to burnish. You may enjoy the quiet calm meditative experience of burnishing. However, if you want to save yourself some time, you could try an alternative way of burnishing which is less time-consuming.
Using Terra Sigillata for Burnishing
Terra sigillata is a liquid that you can paint onto your greenware pottery. Like slip it’s made from clay and water. The difference between terra sigillata and normal clay slip is that it contains only the finest particles of clay.
To make terra sigilatta, you add bone-dry clay to water. Once the clay has dissolved into the water, you add a small amount of a deflocculant such as a mixture of sodium silicate and soda ash, or a product like Darvan 7.
The deflocculant causes the clay particles to repel one another. The heavier, grittier particles in the clay sink to the bottom of the container. You can then siphon off the water mixed with the finer particles of clay, and this will form the base of the terra sigillata.
It’s easy to make terra sigillata and if you’d like to give it a go, you can check out my step by step guide to making it here. You can also buy readymade terra sigillata from a limited number of places.
Applying Terra Sigillata
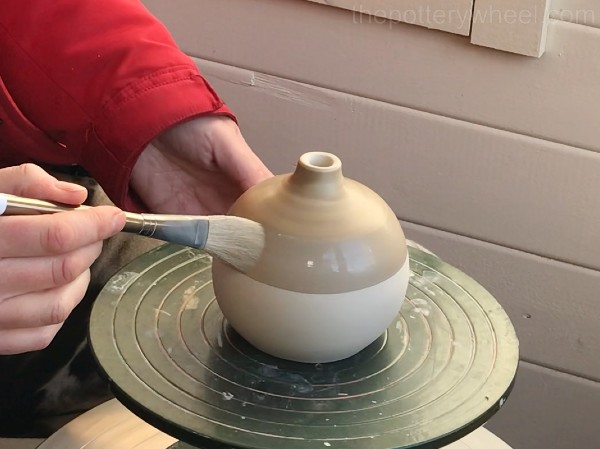
The best way to apply terra sigilatta (often called terra sig for short), is to paint it onto your pottery. I find the easiest way to apply an even coat is to put your pot on a banding wheel and turn the wheel as you apply a coat. You can read more about how to apply terra sig here.
Some potters prefer to use it on leather hard clay. Others prefer to use it on bone-dry clay that has been sanded smooth.
One reason for using it on bone-dry clay is that as mentioned above, leather hard clay does shrink a little. The result can be that the sheen on the terra sigilatta becomes dull. This is because when the clay shrinks, it causes the terra sig to crinkle a little at a microscopic level.
Burnishing Terra Sigilatta Pottery with a Plastic Bag
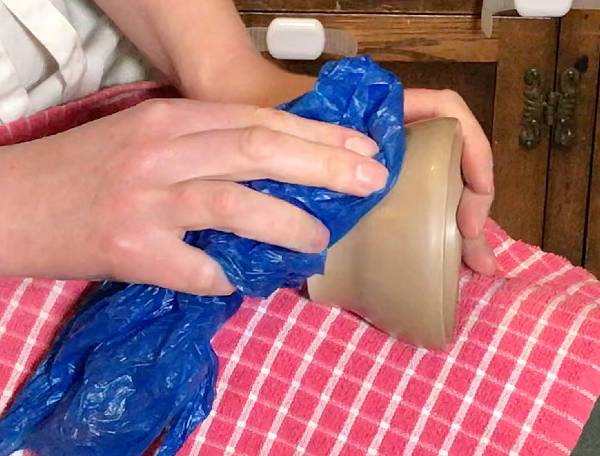
After you have applied a few coats of terra sigillata to your pot and allowed them to dry, you can polish the surface to create a high sheen. You can polish with a lint free cloth, but I’ve found that burnishing with a crinkly plastic bag is the best way of polishing pottery coated with terra sig.
There are a few ways of doing this. I’ve found that the easiest options are to either…
- Hold the pot in your lap or hands and polish the pot whilst it’s resting on you. Here is my step-by-step video of this method for this technique.
- Position the pottery on the potter’s wheel, or a banding wheel, and hold the bag to the surface of the pot. As the wheel turns, the bag slips over the surface of the pot and creates a high sheen.
If you have a giffin grip, you can hold the pot in place using that. However, there are some handy trimming tools that you can hold on the top of your pot manually with one hand. Then you can use your other free hand to burnish the pot.
Final Thoughts
Technically, using a plastic bag to create a shine on your pottery is polishing rather than burnishing. Burnishing in the true sense of the word involves using a hard, smooth object on the clay surface to create a shine.
A plastic bag is soft, so strictly speaking you are polishing with the bag. But it’s often referenced as being part of the burnishing process because it works so well.
Besides, burnishing pottery is, to my mind, one of the most beautiful finishes you can achieve. Not bad results from the back of a spoon and a plastic bag!


