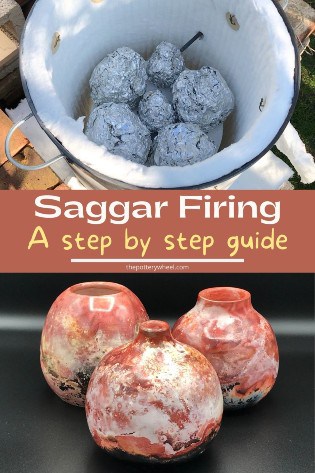
Saggar Firing
In the past, the term ‘saggar’ referred to a container that pottery was fired in. These containers were made of heat-resistant, refractory material. They were designed to protect the pots from the fumes, flames, and debris in the atmosphere of the kiln.
Today saggars are often used for the opposite purpose. These days the term saggar often refers to a container that is designed to keep a selection of materials close to the surface of the pot as it fires. The idea is that as the saggar is fired, the fumes and smoke from the materials create lovely effects on the pot’s surface.
So, originally the saggar was designed to protect the atmosphere around the pot and keep it ‘clean’. Whereas now, saggars are often used to create a rich atmosphere immediately next to the pot surface.
Why not save this article for later too?
Different Ways to Make Saggars
Saggars can be made in many different ways. Sometimes pots are fired inside an old tin can that contains a selection of materials. Or a saggar might be made by wrapping paper clay around a pot. Another technique is to dip strips of paper in clay slip and make something like a paper mache cocoon around the pot.
One of the simplest and most effective ways to make a saggar is to use aluminum foil. This is the approach that I use for saggar firing in my propane-fired raku kiln. If you would like to know how I build this kiln you can check out my step-by-step guide here.
However, it’s worth saying that aluminum foil saggars can be fired in barrel kilns, and pit fires too.
Saggar Firing with Aluminum Foil
If you’d like to try saggar firing using aluminum foil this is the equipment that you will need:
- A plastic table, or plastic sheeting to cover the table
- Rubber gloves
- Safety goggles
- A plastic bowl
- Ferric Chloride Solution
- A respirator that filters vapors
- Some salt shakers (optional)
- Aluminum foil
- Some old rags or paper toweling
- A plastic garbage bag
These are some of the materials that can be used when saggar firing:
- Copper sulfate
- Iron sulfate
- Granulated sugar
- Miracle-Gro
- Horsehair
- String soaked in salt solution
- Sawdust
- Straw
- Seaweed
This isn’t an exhaustive list. You can try all sorts of materials to see what effects they create when you are saggar firing. Some other materials that you might like to try are Epsom salts, manganese sulfate, coffee grounds, corn husks, dried banana peel, copper wire, and steel wool.
Here are the steps that I take when saggar firing using aluminum foil saggars.
Step 1 – Making Your Pots
I make a selection of pots, either on the wheel or hand-building. I make sure that the surface of the pot is nice and smooth. For example, when I trim my thrown pots, I will run a rubber rib over the surface of the trimmed pot. This compresses the clay and gets rid of any trimming marks.
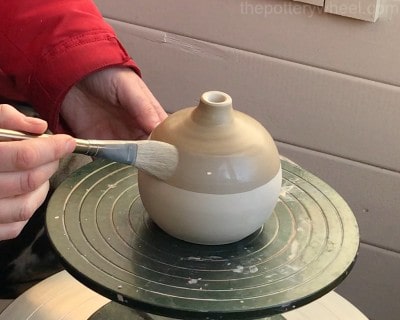
I then allow the pots to become bone dry before applying about 3 layers of terra sigillata. I find the easiest way to put on even layers of terra sigillata is by placing the pot on a banding wheel. Then I rotate the pot slowly and apply the terra sig with a soft mop brush.
Once the terra sig has been applied, I buff it up to a shine using a soft lint-free cloth.

The terra sigillata pots are then bisque fired to cone 06 which is 1823F (995C). If you want to know more about your options when bisque firing terra sigillata, check out my article here. It may help you choose what temperature to fire at when bisque firing terra sig.

Step 2 – Preparing the Materials
When the time is right, you will be sprinkling your granules, materials, and chemicals onto your pots quite swiftly. So, it’s good to get them lined up and ready to go.
You can experiment with the containers that work best for you. For example, I tend to have a little dish of sugar lined up. Whereas I put the copper sulfate, iron sulfate, and Miracle-Gro into salt shakers.

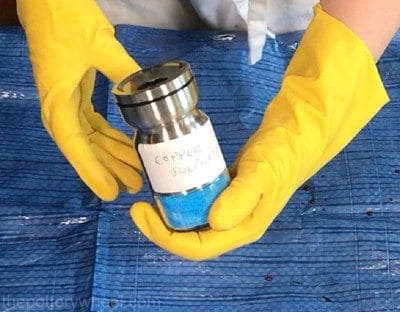
The salt shakers help you get a nice even sprinkling. And also, they help you avoid putting your damp gloved fingers into the granules and making a mess as you work.
Use salt shakers with a reasonably big hole in the top, otherwise, they can get clogged up with particles of copper or iron. You can buy shakers with holes that are adjustable in size. These are a good choice for the job.
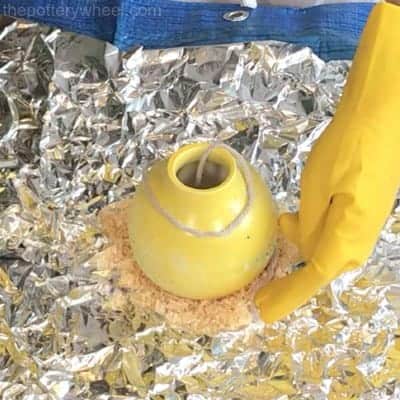
You can also use string or twine that has been soaked in salt solution and allowed to dry out when saggar firing.
Step 3 – Preparing the Pots
Ferric chloride solution is corrosive and dissolves metal. It’s used as an etching solution for metals. However, it does not damage plastic. For that reason, it’s best to cover your working surface or table with a plastic sheet.
It’s also a skin irritant, so wear rubber gloves when you are handling it.
When making my saggars, the first thing I do is apply a couple of layers of ferric chloride to the outside surface of the bisque-fired pots.
You can apply ferric chloride in several ways. It can be painted, sprayed, or poured. I tend to pour it on as it’s quick and easy and gives a nice even coating.
Pouring the Ferric Chloride
I transfer some ferric chloride from the bottle to a plastic measuring jug. It’s easier to pour from a plastic pitcher with a handle, than straight from the chemical bottle.
Depending on the shape of the pot, I will usually hold it using one or two fingers inside the neck of the pot. However, if it’s a narrow necked pot, you can hold the outside of the pot and turn it in your hand to make sure it all gets coated.
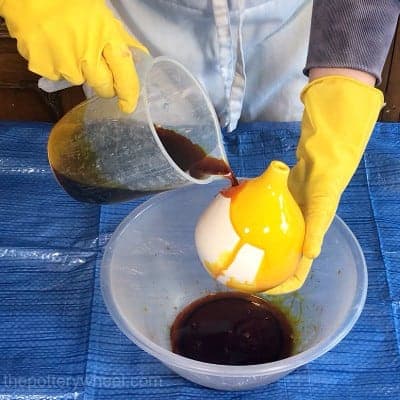
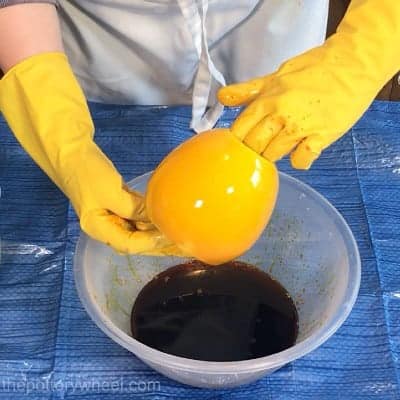
Hold the pot over a large plastic bowl and then pour the ferric chloride over the outside of the whole pot.
I try not to get the solution on the inside of the pot, but if some does run inside, I just pour it back out again.
Set the pot to one side, and let it dry as you pour the solution over your other pots.
The first layer of ferric chloride will dry quite quickly, as you are pouring it on bisqueware which is very absorbent.
Applying Materials to the Pot
Once I’ve poured one layer of ferric chloride on all the pots, I collect together the materials I have transferred into my salt shakers and have them at the ready.
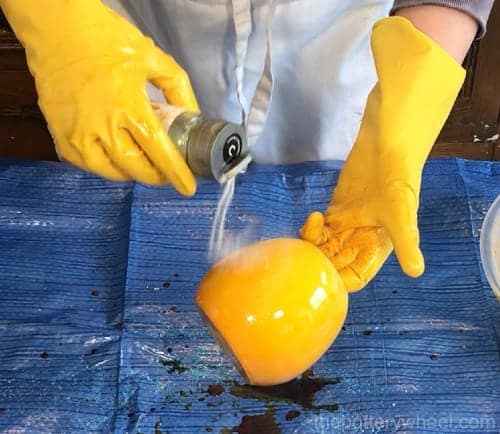
I then pour a second layer of ferric chloride onto the outside of the pot using the same technique.
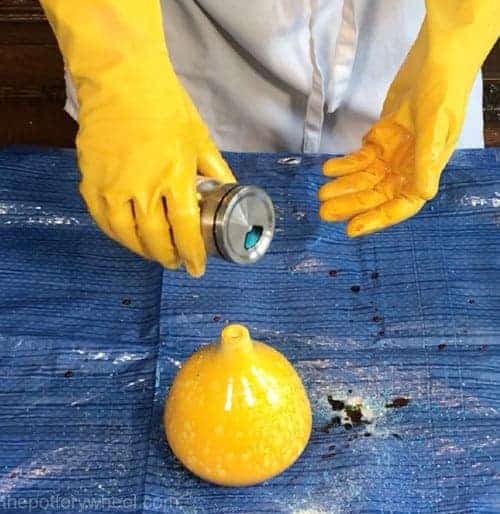
However, this time, before I let the solution dry, I shake some of the materials in the salt shakers onto the wet surface of the pot. Or use my fingers to sprinkle them on. Because the pot is still wet, the granules stick to it well.
Each of the granules and chemicals that you apply will create a different effect during the saggar firing. It’s best to experiment with different combinations and quantities to see which effect you like most
The ferric chloride solution will create a light orange color on the surface of the pot and the copper sulfate will add rich orange highlights. By contrast, iron sulfate will create light green highlights.
Granulated sugar will create black patches and spots on the pot, so it’s best to use this sparingly. If you use a lot of sugar the entire pot might be blackened and you lose the oranges and yellows from the other chemicals.
Miracle-Gro, which contains iron, copper, and salts and will create a range of subtle colors.
Once you have applied your chemicals and granules to each of the pots, allow the ferric chloride to dry thoroughly.
It’s important that the ferric chloride solution has dried because the next step is to wrap the pots in aluminum. As stated earlier, ferric chloride corrodes metal when it’s wet. So, your pots need to be dry otherwise the solution will eat through the aluminum saggar.
Step 4 – Making the Saggars
As the pots are drying, I tidy up the work surface and clear away any splashes or drips of ferric chloride that might be on the tabletop.
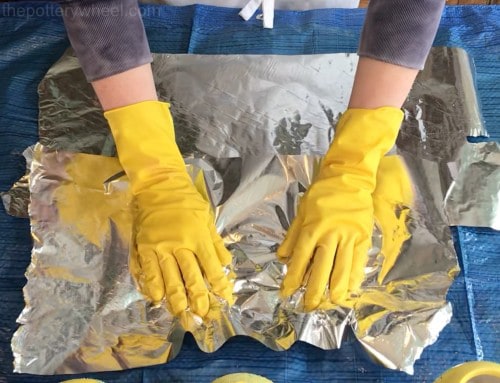
Pull off a large sheet of aluminum foil. This needs to be big enough to wrap around a piece of the pottery you have prepared earlier. If the sheet isn’t wide enough, you might need to put two pieces side by side and have them overlap a little.
Gently scrunch the aluminum foil up to give it a crinkled, textured surface. This will help to create interesting variations in color on the surface of your pot.
I then add whatever other materials that I want to include in the saggar firing. You can mix this up in whatever way you want to experiment with effects.
For example, I quite like to put a small amount of sawdust on the aluminum foil, and then put the pot on top of the sawdust.
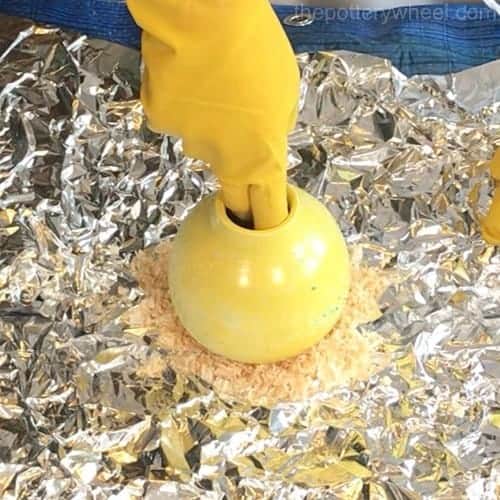
When you wrap the foil around the pot the sawdust is held close to the base of the pot. As it fires, the sawdust will create carbon which gives the base of the pot a nice dark black color.
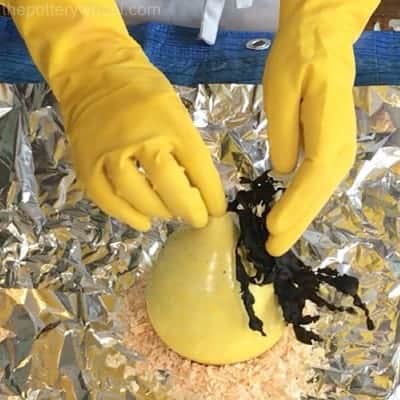
Equally, you can drape horsehair, salt-infused string, twine, or seaweed over your pots. Just remember that combustible material can create black carbonized patches on your pot, so use sparingly and experiment with the effect you want to create.
Once you have finished adding your additional materials to the pot, wrap the aluminum foil around the whole piece. Press the foil around the piece so that it fits closely to the pot.
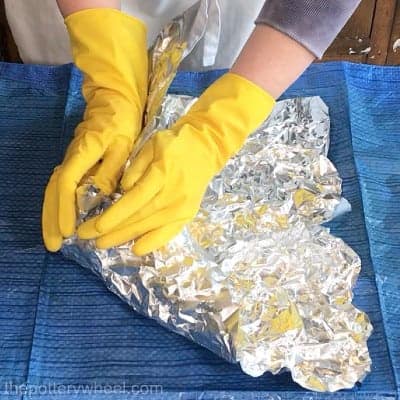
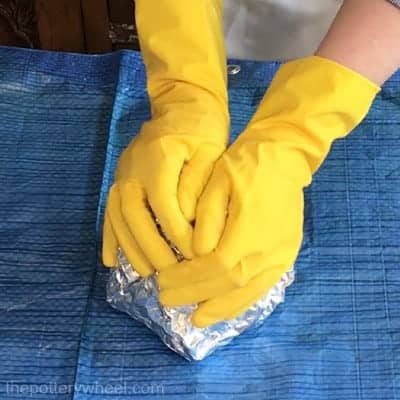
However, be careful not to press too firmly or you might rub the chemicals and granules off the surface of the pot.
I tend to wrap the pot in two layers of aluminum foil. Aluminum breaks down and melts at 1220F (660C) (source). I fire the raku kiln up to 1382F (750C). Two layers of aluminum foil will help the saggar stay in place until the end of the firing.
Tip!
It helps to use thicker heavier-grade aluminum foil rather than budget price very thin aluminum.
The heavier-grade aluminum survives better in the raku kiln. Also, your materials are less likely to poke holes in thicker aluminum foil. The thinner foil tends to tear and break easily when making the saggars.
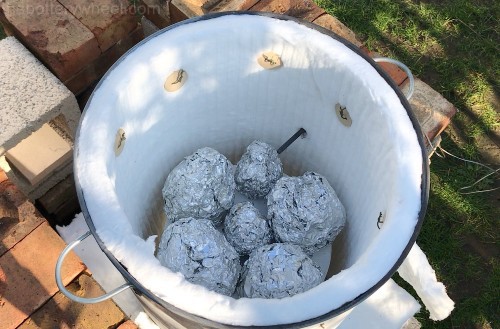
Step 5 – Firing the Saggars
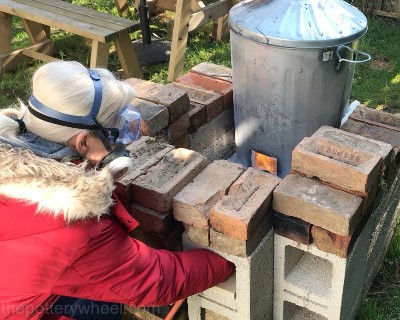
I then load my raku kiln with the foil saggars. If I’ve made small pieces, I will load the kiln with a few at a time. However, if they are large pieces I will do the saggar firing individually.
This is partly because my raku kiln is quite small. But also, the combination of fumes created when saggar firing in this way is quite potent. And firing one piece at a time helps avoid a heavy build-up of fumes.
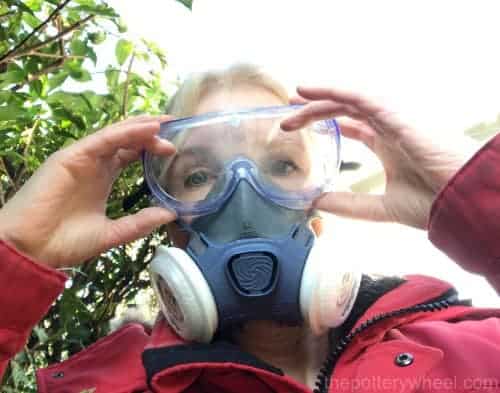
That being said, I always wear a vapor filtering respirator when saggar firing in this way. And I always fire the kiln outside so that there is plenty of ventilation.
In addition to wearing a respirator, I also wear safety goggles. This is because throughout the firing process I’m getting very close to the kiln to adjust and hold the temperature. I want to make sure that my eyes are protected in case of any unexpected events with the bricks, kiln or pot.
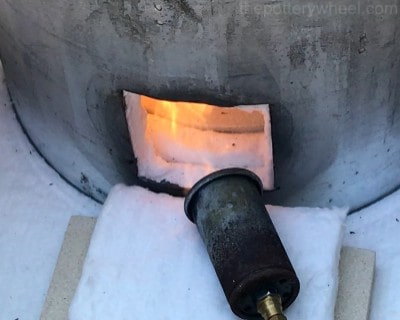
Once the kiln is loaded, I light the propane burner and allow the temperature to rise slowly to around 480F (250C). I then hold the temperature there for about 15 minutes.
After that, I increase the temperature gradually until 1112F (600C). I always fire slowly up to 1112F (600C) when I’m using a raku kiln. This is to help the pots go through the quartz inversion at around 1063F (573C) without cracking.
However, once the kiln is past 1112F (600C), then I generally increase the speed at which the temperature increases.
Once the kiln reaches 1382F (750C), I turn it off and allow the kiln to cool to around 572F (300C).
The Saggar Firing Schedule
Here is an example of a typical saggar firing schedule. This is a guideline and for me, it tends to vary a little each time I fire the kiln, depending on a few factors.
For example, I fire my propane kiln outside. It’s hard to hold the kiln at 480F (250C) when there is even a moderate breeze.
If it’s a little windy I tend to go to 660F (350C) and hold for 15 minutes. This is because when the flame is stronger it bounces less and is less likely to blow out in a breeze. But it does mean that the kiln heats up faster.
| Time | Target Temp | Hold Time |
| 5 mins | 480F (250C) | 15 mins |
| 20 mins | 1112F (600C) | no hold |
| 10 mins | 1382F (750C) | no hold |
When the kiln has cooled to 1382F (300C), I carefully remove the pots from the kiln using long raku tongs.

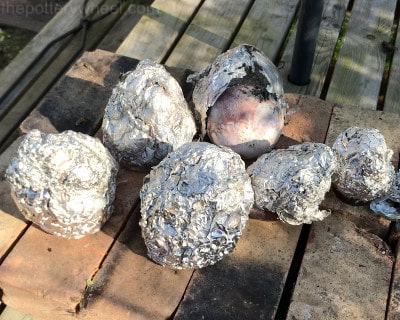
At this point, the aluminum foil will be crumbling and fragile, and easy to remove from the pots. Some of the aluminum will just fall away, and other bits of foil will be peeled away easily. If the pots are still hot, it’s important to wear heat-resistant kiln gloves.
When you first remove the pots and unwrap them, you might find that the colors are a bit muted.
However, as the pots cool and are exposed to oxygen the colors on the surface will continue to get richer and deeper.
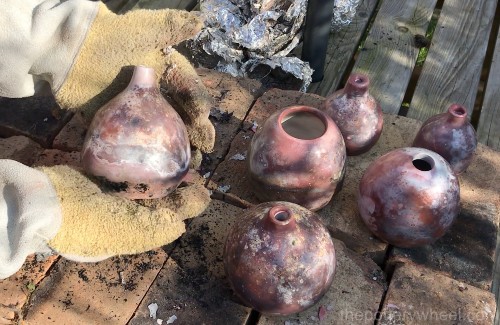
Step 6 – Finishing the Saggar Fired Pots
Once the pots have cooled, I give them a dust off with a soft lint-free cloth. Dusting them down might be enough to get rid of any soot or debris that is sitting on the surface.
If not I give them a brief rinse under the tap with warm water and wipe them down with a sponge.
When they are completely dry, I apply wax to the surface to give the pots a high shine. I like to use Briwax because it goes on easily and shines up well. But you can use other sealants like beeswax and I’ve read of others using floor tile sealer.

Alternatively, if you don’t like polishing, you can give them a coat of a non-yellowing acrylic gloss sealer like Mod Podge. The benefit of using a spray is that it’s extremely quick to apply and provides a harder protective layer to the pot as well.
I prefer to wax mine as I find it gives a nice rich, velvety finish. But the spray can give a nice glossy look too.
Here is the full video of this entire process for you to watch.

Final Thoughts
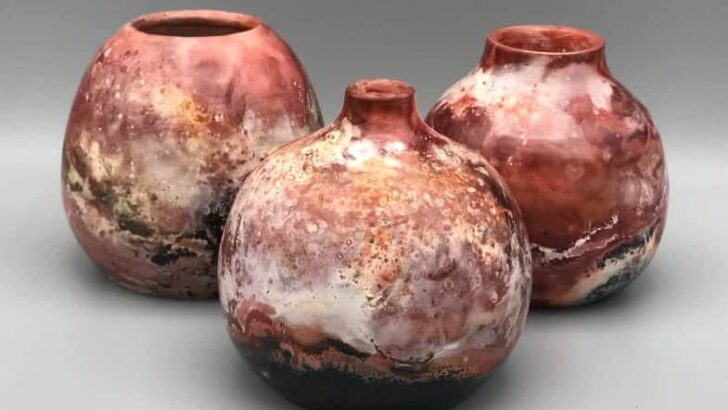
When I first saw some saggar fired pottery, I was amazed by how lovely it was. I love the organic colors and random patterns. It looked like a picture of the solar system to me. I was hooked.
Saggar firing is one of my favorite low fire techniques, and I continue to experiment with it. I hope you have found this guide helpful and that you find this way of firing inspiring.


