Your cart is currently empty!
Underglaze Techniques – 16 Exciting Ways to Use Underglaze
Published:
Last Updated:
Affiliate Disclaimer
As an affiliate, we may earn a commission from qualifying purchases. We get commissions for purchases made through links on this website from Amazon and other third parties.
Underglaze is an incredibly versatile way of decorating clay. So, I thought I’d put together an overview of some of the best underglaze techniques for inspiration.
Different Underglaze Techniques
If you don’t have time to browse through all these underglaze ideas, you can use the links below to jump to the section that catches your eye…
- Dipping
- Spraying / airbrushing
- Silk Screening / Screen Printing
- Painting
- Drawing
- Burnishing
- Mishima
- Watercolor Effect
- Marbling
- Bubble Underglazing
- Sponging
- Transfers / Decals
- Stencils
- Slip Trailing
- Sgraffito
- Lino Cut Printing
When to Apply Underglaze
Before we get into the different underglaze techniques, here’s a quick word about when to use it. As the name suggests, underglaze is applied to pottery before it is glazed.
Most underglaze can used on clay at any greenware stage. It can also be applied to bisque-fired ceramics before glazing.
16 Underglaze Techniques – Why Not Experiment?
Here are 16 of the best ways of using underglaze on your pottery.
1) Dipping – One of the Simplest Underglaze Techniques
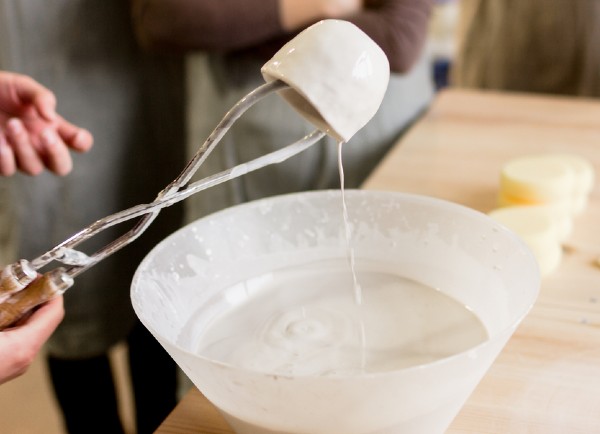
Although dipping is often used for glazing pottery, it can be used to underglaze ceramics too. Using the tips of your fingers or dipping tongs you can submerge your ware into the underglaze.
The advantage of dipping is that it is a quick way to get an even coat all over your pottery.
Put your underglaze into a container that is large enough for you to dip your pottery into. Bear in mind that you will need your fingers or dipping tongs to fit in there too.
When dipping into underglaze, it’s a good idea to water it down a little. It needs to be a little more fluid than underglaze that is being used for painting.
Make sure you have stirred or shaken the underglaze up so it is of an even consistency. Check that any air bubbles dragged into the underglaze when mixing have been released.
You can do this by tapping the side of the container and giving it a gentle shimmy. Let the underglaze sit for a moment so that any bubbles can rise to the surface.
Which Way Up Do You Dip Cups, Bowls, and Vessels?
Underglaze can be dipped so that it is only applied to the outside of a vessel. If you only want the color to go partway up the outside, you can dip it in base down.
However, you may want the color to go all the way up to the lip. The best way to do this is to dip the vessel upside down.
Hold the vessel upside down with the lip level and horizontal. Keep the lip level as you dip it into the underglaze upside down. The air in the vessel will stop the underglaze from going onto the inside surface.
Usually, underglaze doesn’t stick to the kiln shelf like pottery glaze. However, some underglaze can melt a little when it’s fired.
This can cause it to bond to other pieces of pottery or the shelf it’s resting on. You can read my guide on whether your underglaze will stick to other objects when it’s fired here.
2) Spraying / Air Brush – Two Similar Underglaze Techniques
One of the more contemporary underglaze techniques is airbrushing. Some potters use electric airbrushes, others use simple sprayers that you blow through.
Electric airbrushes generally have a range of nozzle sizes. These allow anything from fine detail work to a broad overall spray.
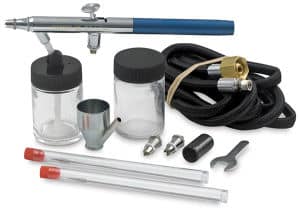
Also, you can vary the width of the mark by changing how close you are to your work.
A handy thing about electric airbrushes is that you can buy spare bottles. You can fill each bottle with a different color underglaze.
And as you are working, you can switch bottles quickly and blend colors easily.
Airbrushes are great for creating color gradients. If you are working on bisque or bone dry clay the sprayed underglaze will dry very quickly. Because the mist is fine, you will need to apply layers to your work to get a deep color.
Another tip is to combine using an airbrush with a stencil. Spraying the underglaze on through a stencil can create interesting patterns and effects.
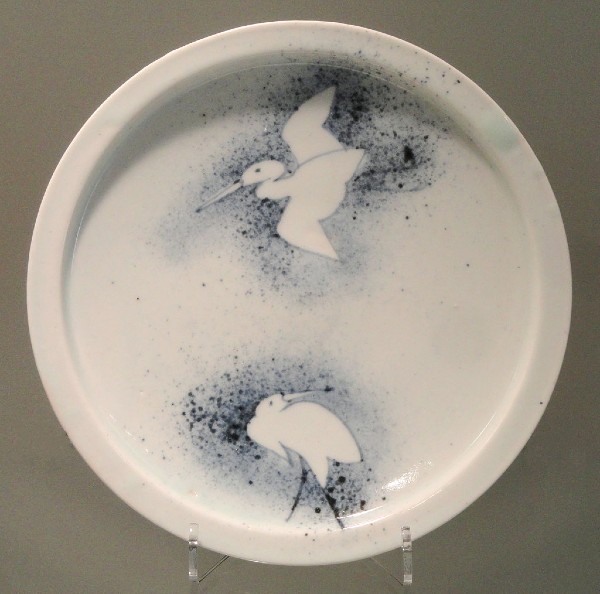
The alternative to an electric airbrush is an atomizer that you use by blowing through. This is a simple piece of equipment that looks a little like a tobacco pipe. The underglaze is put in a little bowl on top of the pipe. You then blow through the pipe and it sprays the underglaze onto your pottery.
Because this involves some huffing and puffing, it is not ideal for large pieces. However, it is a simple way of adding details to small areas. The spray that it creates is less fine than an electric airbrush and can have a splatter effect too.
3) Screen Printing as an Underglaze Technique
Silk screening and screen printing refer to the same process. Silk screening is just an older name for the same thing.
The principle behind screen printing is that an image or text is ‘burned’ onto a piece of fabric. It is burned on by exposing the light-sensitive emulsion to UV rays.
When underglaze is put onto the fabric, it passes through the burned areas and transfers onto the clay. By contrast, the unburned areas block the underglaze. As a result, the image is printed onto the pottery.
There are several different ways you can use a silkscreen to apply underglaze.
You can either make or buy your silkscreen. They are manufactured commercially and you can buy nice designs that you can transfer onto your pottery. There are quite a few potters and artists who sell interesting designs on Etsy.
If you are screen printing onto flat clay, you can use a silkscreen stretched tightly across a frame. This is a good way to get quite a precise result.
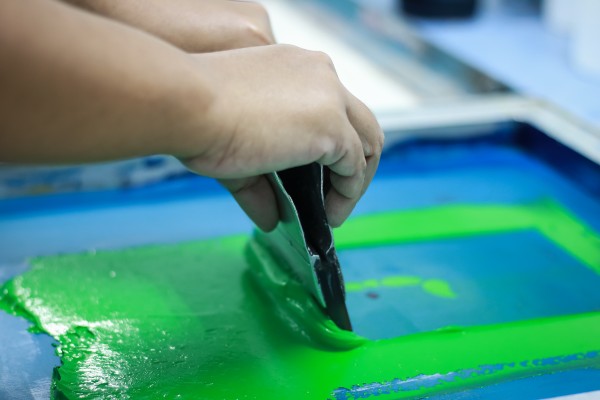
Some ceramicists screenprint underglaze onto slabs of wet clay. They then let the underglaze go touch dry. Then they mold the slab of clay around a shape that they want to recreate. For example, molding the slab around a bowl.
Alternatively, you can use a silkscreen without a frame. These can be wrapped around and held fast against clay that is leather hard or drier. You can use moist clay, but it’s harder to hold the screen fast as the clay is soft.
The underglaze is then painted or dabbed onto the screen, a bit like using a stencil. The silkscreen is then peeled away carefully once the image has been transferred onto the pottery.
4) Underglaze Painting
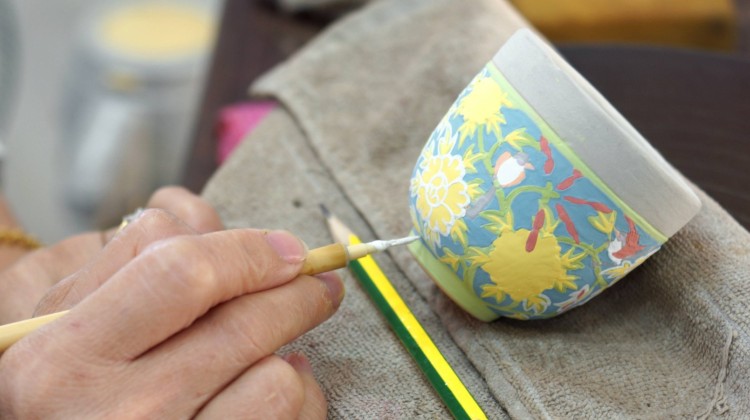
There are a variety of ways to paint ceramics and painting with underglaze can look spectacular. The number of different underglaze painting techniques that you can use is limited only by your imagination.
Wider flatter brushes can be used to create gradients, blending colors into one another. Or smaller brushes can be used to paint patterns.
How many layers of underglaze to apply?
To get a vibrant rich color when painting on underglaze it’s important to apply at least 2 layers. Apply 3 or more layers if you want opacity. If you only apply one layer, the color will look translucent when fired. Also, you will see brush strokes if you have only one coat of underglaze.
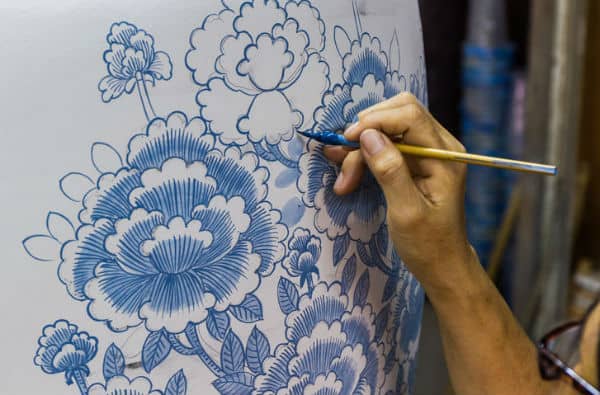
This is fine if you are trying to achieve a watercolor effect. But if you want your colors to be more solid, you need to apply at least 2 layers.
Layering applies to block base colors and finer painted details too. Doubling up on the finer details may feel fiddly. However, it is worth it to make sure the details pop. Let the layers dry between painting.
Don’t worry too much if a bristle from your brush comes off as you are painting your pottery. Any bristles that get stuck in the underglaze will come off when the clay is fired.
When painting on underglaze it’s a good idea to be generous with the amount you apply. This will ensure that you cover the areas that you want to cover and that the color is even. However, be careful not to load your brush so much that it drips once it has been applied.
If you are working with multiple colors, make sure that your brush is clean when switching between colors. And dry your brush between different coats too. If you dip a very wet brush into your underglaze you will be diluting the mixture as you go along.
5) Drawing Underglaze Techniques
You can draw on pottery with underglaze using pencils, crayons, and pens. Let’s take a look at each of these in turn…
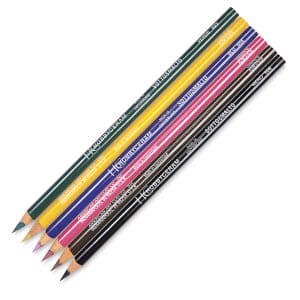
Underglaze Pencils
The marks made on pottery with a normal graphite pencil burn off during firing. However, underglaze pencils are made with materials, including clay and color that don’t erase in the kiln.
They are a great way to add fine detail to your design if you enjoy drawing. Underglaze pencil patterns will show up through painted underglaze and glazes applied to your pottery. So, you can use a combination of drawing and painting to create a detailed effect.
How to Use Underglaze Pencils
Underglaze pencils can be used in the same way as ordinary pencils. For example, they can be used for outlines, details, and shading.
You have to use a bit of pressure for the underglaze pencil to leave its mark, so it’s best to use them on bisque fired pottery.
The hardness of an underglaze pencil is similar to a graphite HB pencil. So, you don’t have to press excessively hard. However, drawing with an underglaze pencil on unfired clay would likely gouge into the surface of your ware.
Drawing on bisque pottery can be a bit tricky at first, as the hard ceramic surface feels very different from paper. But with practice you will get the hang of it and develop your own style.
Underglaze Crayons
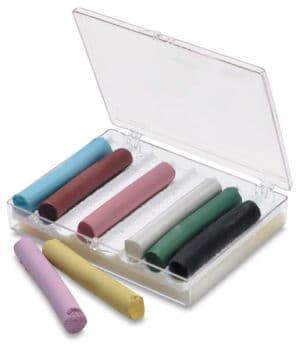
You can buy either wax or chalk underglaze crayons. Unlike underglaze pencils they allow you to blend your colors in more. So, you can apply the crayon and then blend or smudge in with your finger or a tool. It’s a little like drawing with pastels.
One suggested way of using underglaze crayons is to apply a glaze to your piece first.
If you apply a matt white glaze it can look like a drawing on paper. But of course, you can apply whatever color glaze you prefer.
You can also apply a gum solution over the glaze. This will seal the glaze so that it doesn’t crumble off when you are drawing.
View on Blick
Underglaze Pens
Underglaze pens are good for fine detail work. You can buy underglaze pens, that look and feel like regular pens. They work by dispensing underglaze onto your ceramics when you press down on the nib. The pressure you put on the pen tip opens a valve that transfers the underglaze onto your work.
Other types of underglaze pens work a little bit like a slip-trailing bulb. The underglaze is stored in a small plastic bottle with a fine nozzle on it. When you invert the bottle and squeeze it gently, the underglaze comes out of the end of the nozzle.
You can either buy empty bottles that you can fill with the underglaze of your choice. Here are some good underglaze bottles. Or you can use a product like Mayco Designer Liner which is an underglaze-like pigment that comes in its own bottle and can be applied directly to your pottery.
Underglaze pens, pencils, and crayons allow you to draw precise lines on your pottery. Because the lines are relatively sharp, any smudging or bleeding when clear glaze is applied on top is magnified. There are some simple steps you can take to prevent this from happening. Take a look here for some tips on preventing underglaze smudging and bleeding.
6) Burnishing (One of My Favorite Underglaze Techniques)
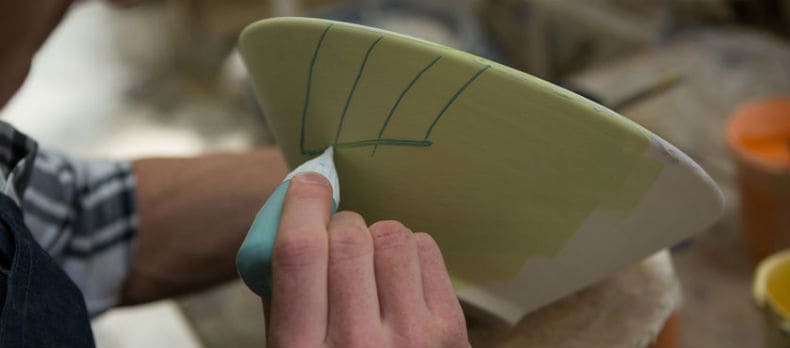
Before glazes existed, potters would decorate their ware by burnishing it. This technique involved rubbing the clay with a stone to create a smooth sheen. Liquified clay (slip) was colored and painted on the pottery before burnishing to create decorative patterns.
The same technique can be used by modern-day potters, using underglaze. Most underglaze is made with a clay base. Because underglaze has a high clay content, it can be burnished to a high smooth polish.
Because burnished pottery is not glazed, it is also generally porous. It is, therefore, suitable for decorative rather than functional purposes. Nonetheless, a glaze can be applied to the inside to make it more usable.
How to Burnish Underglaze – an Overview
You can burnish underglaze with a smooth stone or the back of a spoon. It is quite time-consuming. However, of all the underglaze techniques described here, burnishing, in my opinion, produces some of the most beautiful results.
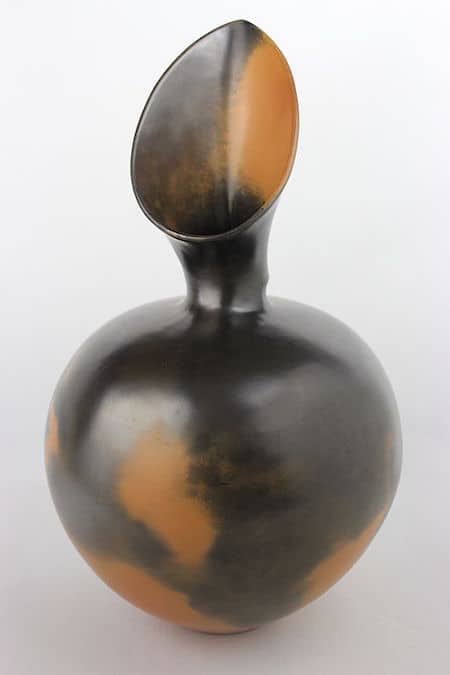
Clay needs to be damp when it is being burnished. For this reason, most potters will burnish clay when it is leather-hard. When burnishing dry greenware, you need to wet it with a sponge before you start.
The underglaze is applied in layers after the clay has been dampened with a sponge. Once the last layer of underglaze is touch dry, rub it with a soft cloth. You need to rub the whole piece of pottery until it is a bit darker and has a soft sheen.
If it dries out whilst you are working, you can mist it with water to keep it damp. Or sponge it a little. It needs to be touch dry rather than shiny wet before you start burnishing again.
Next, you rub the underglaze with your stone or spoon, until the surface takes on a high sheen. Continue to keep your pottery damp during this process. The longer you burnish and the more verve you use, the higher the sheen will be.
Some potters will layer vegetable oil or lard over the underglaze whilst burnishing to create a very high shine. The burnished underglaze can be fired as it is. Or the potter may choose to draw or paint a further underglaze design on top of the burnished surface.
7) Mishima – One of the Oldest Underglazing Techniques
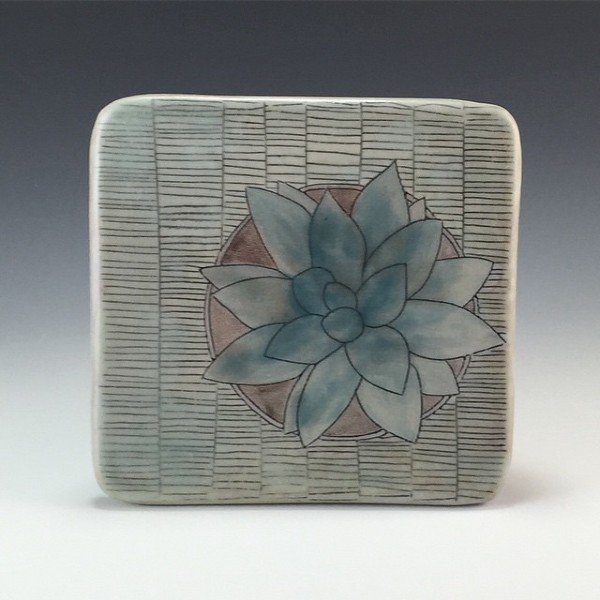
The Mishima technique involves scoring into greenware using a sharp tool. The carved lines are also called incised lines. Underglaze or colored slip is then painted into the scored areas. Potters refer to this as inlaying the underglaze or slip. When the clay is bone dry it is bisque fired.
Two Approaches to Mishima
There are however a couple of approaches to the Mishima technique. Some potters will use a sharp tool to carve into leather hard clay. After they have painted in the underglaze or slip, they wait for it to dry. The clay is also left to dry out further.
Then, using a sharp tool like a metal rib, they will scrape off the excess underglaze from the unscored areas. The scraping is also a way to get rid of pieces of clay that are removed during the incising process.
(CC BY-NC-ND 2.0)
However, some potters claim that the scraping process can blur the scored edges. Even when very sharp tools are used to scrape excess you can lose some detail in the design. And the edges of the incised lines can lose their definition.
An alternative approach is to paint the pottery with wax resist and then cut through the wax resist. Underglaze or colored slip can be painted into the incised lines.
Once the paint has dried the excess can simply be wiped off the wax resist surface. When the pottery is fired the wax resist is burnt off leaving a clean surface.
I am also aware of potters that score the greenware and then fire it. After the clay is bisque fired they inlay underglaze into the carved lines. Once the underglaze is dry they sand down the unscored areas to remove excess underglaze and clay debris.
The approach taken is a personal choice. As are the tools that potters use to incise the clay. The tools used are many and varied ranging from scalpels, pencils, needlepoints, and small loop tools.
8) Watercolor Underglaze Techniques
You can buy a palette of watercolor underglaze. This underglaze comes in solid blocks that you wet and then apply with a brush.
Alternatively, you can use a pot of underglaze and water it down. Adding water to any underglaze will make it watery on application. Hence the watercolor look.
Like other decorating techniques, it can be a good idea to apply white underglaze before you paint your design. Applying three layers of white underglaze will give you an opaque ‘canvas’ to paint on.
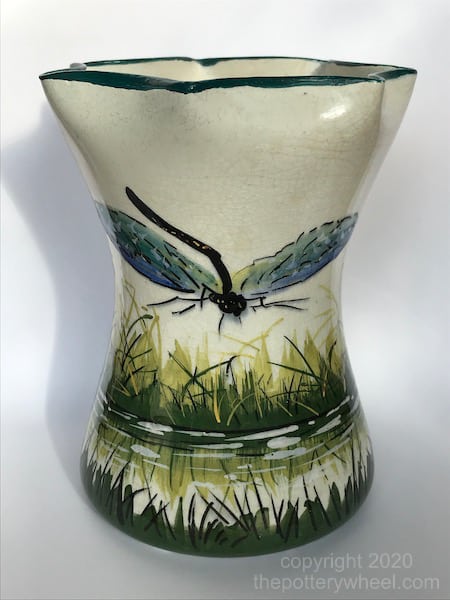
It is important to let the layers dry between coats. If you don’t let them dry then when you apply the next coat you will lift off the first. As a result, the underglaze does not layer up.
Like watercolor painting on canvas, you can create a subtle wash effect with underglaze.
If you want to build up color, you will need to apply several layers. However, one tip is to make the first watercolor layer more watery than the later layers. This will result in some areas being more translucent than others and will add to the watercolor effect.
When working on lighter areas of your painting, use fewer layers. In the areas where you are creating shade and tone, make the underglaze thicker. And apply 3 or 4 layers rather than just a couple.
9) Marbling Underglaze Techniques
This is a novel but very simple way of creating a wonderful marbling effect with underglaze. The main material you will use is shaving foam!
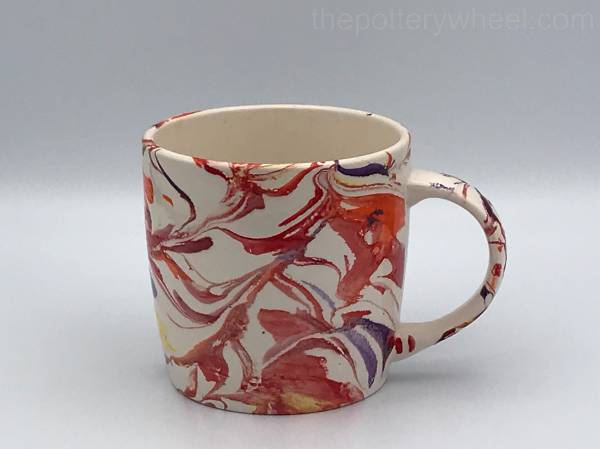
Very simply, spray your shaving foam onto a smooth surface. Either a table or if you want to keep things tidy, you can spray it into a tray.
Smooth the shaving foam out with a flat edge like a spatula or a ruler. Create a layer about 1 inch thick. Then drip your underglaze onto the shaving foam.
You can use as much or as little underglaze as you like. And you can drip it or trail it in whatever pattern you want. If you drip it, it will look like Smarties on a cake. You can create patterns in the foam by dragging a pencil through the blobs and creating swirls.
Then, roll your bisque fired ceramics through the surface of the shaving foam.
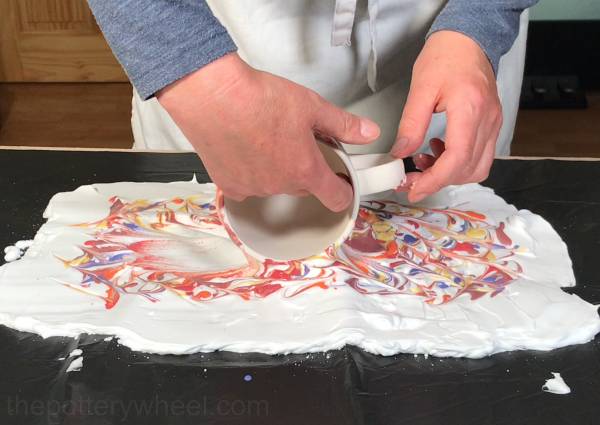
Once you have covered the area you want marble with foam and underglaze carry it to the sink. Carefully rinse the foam and underglaze mixture off under the tap. Here is a complete step-by-step video of the process.
You will find that an amazing marbled underglaze effect has adhered to the bisque pottery. Once the bisque ware has dried again, a clear glaze can be applied and the pottery can be fired again.
10) Bubble Effect Underglaze Techniques
Make sure your underglaze is mixed. Put a small amount of water into a cup, around 3 tablespoons is sufficient. Then add 3 teaspoons of washing up soap into the water. Add a tablespoon of underglaze to the mixture. So, the ratio of underglaze to water is 3 to 1.
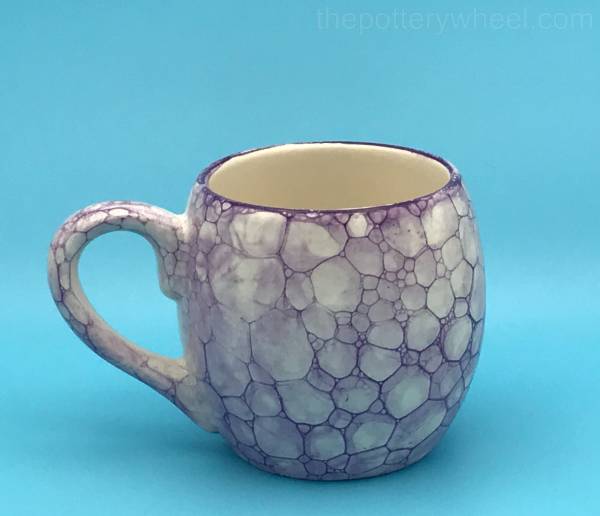
Stir the mixture, then using a drinking straw, blow air into the mixture. This will cause the soapy underglaze mixture to bubble up in the cup.
Put your bisqueware in a container like a tray or a shallow bucket. Blow the underglaze and soap mixture so that the bubbles flow over the top of the cup. Allow the bubbles to drape over your bisqueware. Keep blowing until the bisque is covered with the bubble mix.
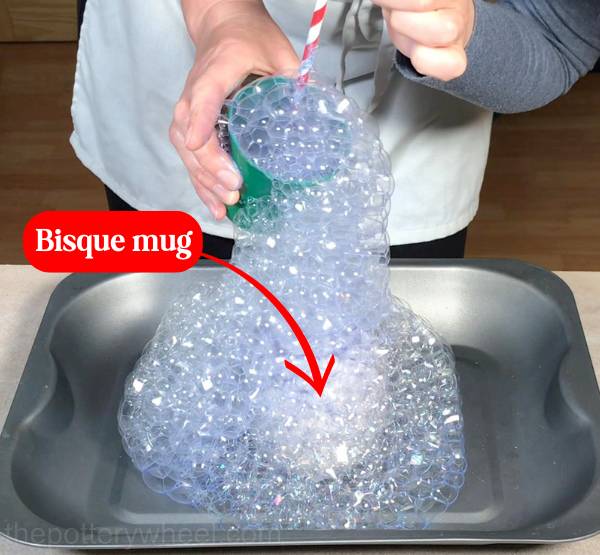
Once the pottery is covered with bubbles, gently blow on the bubble mixture on the pottery. This will burst the bubbles in the bucket that are sitting against the bisque ware.
When the underglaze soap bubbles have gone, the bubble effect on the bisqueware will be revealed. Why not check out my step-by-step video on the underglaze bubble technique.
11) Sponges – A Simple Underglaze Technique
Sponges are one of the most simple ways to use underglaze on greenware or bisque pottery. One idea is to soak up the underglaze in the sponge and dab it onto the pottery.
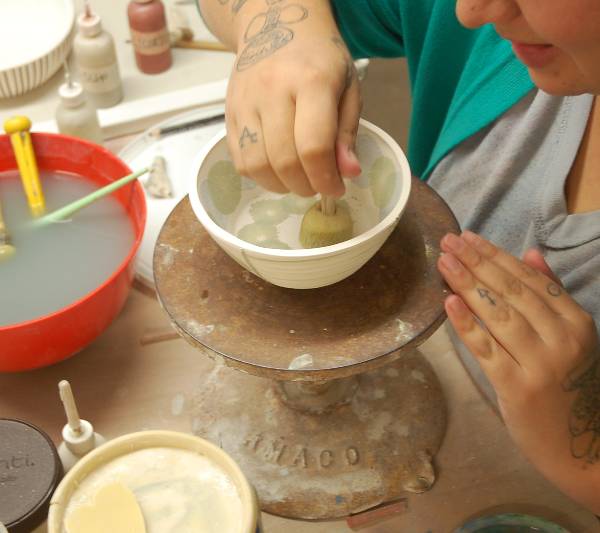
You can do this with any shaped sponge you like. Or you can cut your sponge into a particular shape that you want to recreate on the pottery.
Buy a slab of foam sponge. A good idea is to buy a slab of sponge that might be used to line a chair. Then using a sharp knife or scalpel, you can cut and sculpt your foam into whatever shape you like.
If you use a sharp pair of scissors, this will give you even more control over the shapes you create.
You can also buy sponges that are pre-cut into a range of shapes. Anything from baby bath sponges to sponges supplied in a craft shop will do.
Dip the sponge into your underglaze and press it gently against the surface of your pottery. Peel the sponge away carefully to reveal the pattern underneath. You can experiment with the look of the pattern by watering the underglaze down.
12) Underglaze Transfers and Decals
A decal is a way of transferring pre-printed images onto ceramics. Transfer and decal basically mean the same thing.
An underglaze decal is an image that has been printed onto backing paper. In commercially made decals the backing paper is often tissue-like and translucent. It is a way of carrying the underglaze design. It can then be transferred onto your ceramic work in a few different ways.
You can either buy commercially produced underglaze decals or you can make your own. Most underglaze transfers can be applied to greenware or bisqueware. Here is a step-by-step video on how to use underglaze transfers.
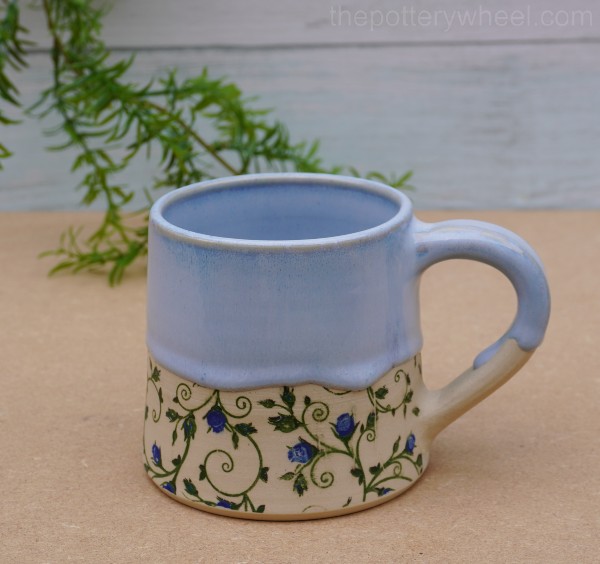
Making your own underglaze transfers – so simple!
It is very simple to make your own transfers. Simply design your image and then run it through a photocopier on ordinary white printing paper.
You can then apply your underglaze to the image. The black areas of the photocopied image will resist the underglaze. So, your underglaze will sit neatly between the lines of your design.
Once the underglaze has dried on the photocopied image, it is ready to be transferred to your pottery.
Applying the underglaze decal involves wrapping it around your pottery and wetting the transfer paper. When the paper is wet, the underglaze separates off from the paper and adheres to your clay.
There are a few differences in exactly how to apply different types of decals. However, essentially each of these processes involves using water to release the underglaze from the paper. Once the underglaze has been transferred, carefully peel the paper off the pottery.
13) Underglaze Techniques with Pottery Stencils
It is easy to make and use paper stencils to apply underglaze. One way to do this is to cut your shape out of some paper. Then hold the paper up to your pottery. The good thing about paper is that it curves easily around shapes.
Then using a sponge (or a brush if you prefer), dab underglaze onto the cut-out shape. This will of course leave an underglaze impression on your pottery of your shape.
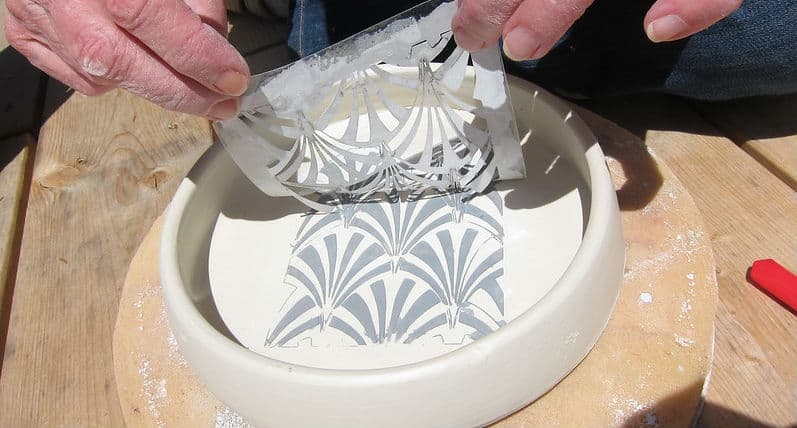
You can build on this technique as follows. Imagine you have created leaf-shaped underglaze stencils out of paper.
First, coat your pottery with a layer of underglaze. Then put the leaf stencil on top of the underglaze. Make the paper stencil damp so it sticks to the underglaze.
Then sponge off the excess underglaze from the surrounding clay. The paper remains on the underglaze, for now, keeping it in place on the clay. Then using a brush or sponge, apply another color of glaze to the clay surrounding the stencil.
Remove the stencil with a needle tool. This will reveal the underglaze that was covered by the paper. It sits neatly next to a glaze with a different color. This is a simple way to get two or more different colors aligned quite precisely around the shape of your choice.
14) Slip Trailing as an Underglaze Technique
As the name suggests, slip trailing involves trailing slip (liquid clay) across your pottery. This is done with a slip trailing bulb. The bulb is made of rubber and is the right size to be held by hand. It has a nozzle or nib attached. When the bulb is squeezed the slip comes out in a trail.
Because slip can be relatively thick, it creates raised lines on the ware. The result is that when it dries it creates interesting textures on pottery.
Generally, it is said that underglaze is not suitable for slip trailing. The reason for this is that it is thinner in consistency than slip. Therefore, it tends to flatten out on surfaces that it’s applied to. And it’s difficult to create the raised line appearance typical of slip trailing.
However! There are potters who apply underglaze with a slip trailer. The trick is to use a very fine nozzle in the bulb. It’s possible to buy very fine metal nozzles for a slip trailer. Using one of these will dispense the underglaze finely enough to create an attractive design.
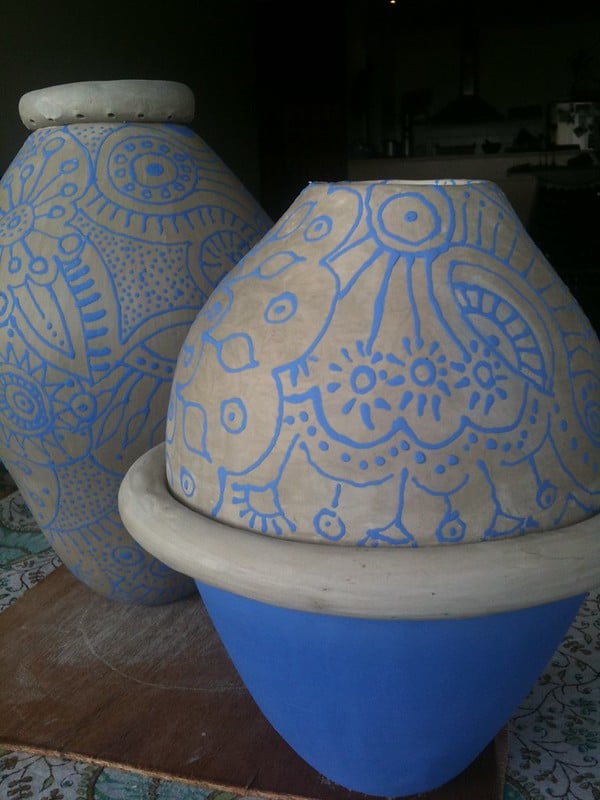
Another way of combining slip trailing with underglaze is to decorate your pottery with slip from a slip trailer. This will create a textured pattern for your design. Then, once the slip has dried, you can paint a layer of underglaze on top.
When the underglaze has dried, you can sand the underglaze down. The underglaze will rub down on the raised parts of the slip-trailed pattern.
If the slip is a different color from the underglaze, the color of the slip will pop through the underglaze. The pattern of the slip will also show through the sanded underglaze.
15) Sgraffito Underglaze Techniques
The sgraffito technique involves painting multiple layers of slip or underglaze onto leather hard clay. When the underglaze is touch dry, the potter uses a sharp tool to carve through the painted layers. The idea is that the underlying clay is exposed by the lines made on the surface.
Sgraffito is often used for quite intricate designs. So, it’s best to use fine clay. Clay with grog in it will be harder to score and the lines will be less defined.
Also, although sgraffito can be done on soft clay, it is better to wait until it is leather-hard. The reason for this is that soft clay tends to distort when you are carving through the underglaze. Leather hard clay offers more resistance and will provide a cleaner finish.
Sgraffito – an Overview
First, the underglaze is painted directly onto the clay. Usually, several layers are used to make the color opaque enough. 5 layers of underglaze are common.
The layers can be the same color or you can mix the colors up. Having multiple colored layers affects the overall color of the piece. And some of the different colors will be visible at the edges of the incised lines.
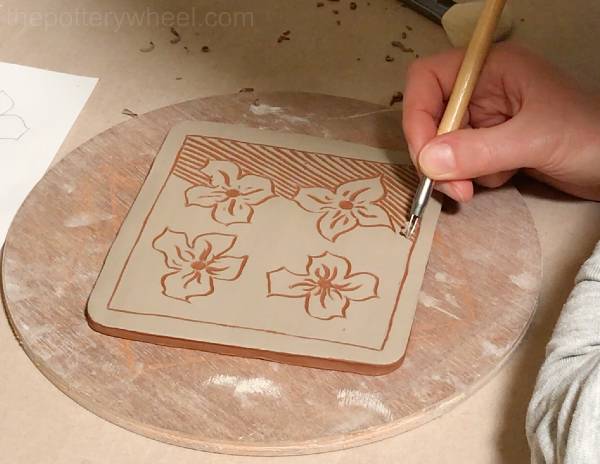
Potters will often draw or trace their design onto the surface of the underglaze. Once the design has been marked on the clay, they can start to carve it out. The type of tool you choose is a matter of personal choice. However, it does need to be sharp. You can use a soft brush to remove the shreds of clay that come up as the lines are carved.
When you have finished your design, the ware can be fired when it is bone dry. A clear glaze can be applied after the bisque fire.
There is a particular sgraffito style of pattern, which often looks Aztec to me. However, the design you choose is limited only by imagination. And there is great scope for creativity.
16) Lino Cut Underglaze Techniques
Line cutting is a very simple way to add graphic-looking images and textures to your pottery. It is a versatile material and can be used in numerous ways. However, here is one way to use lino as a method of applying underglaze.
Cut out a piece of lino the right size for your design. You can buy soft rubber-like slabs for this purpose that are easy to cut. One example is the Soft-Kut Printing Block.
You will be using a lino cutter to carve your design into the printing block. Lino cutters come with various-sized blades. Basically, you push the lino cutter along the surface of the lino block. As you push, it will scoop outlines in the rubber. It’s a little like pushing an ice cream scoop through ice cream.
Before carving, it is a good idea to draw your design on the block first and follow the lines. This can be drawn freehand or traced.
You can cut away the background around your design. This will leave you with a design that stands out as a positive image from your lino. Or you can cut away the lines of the design so that your image is a negative on your block.
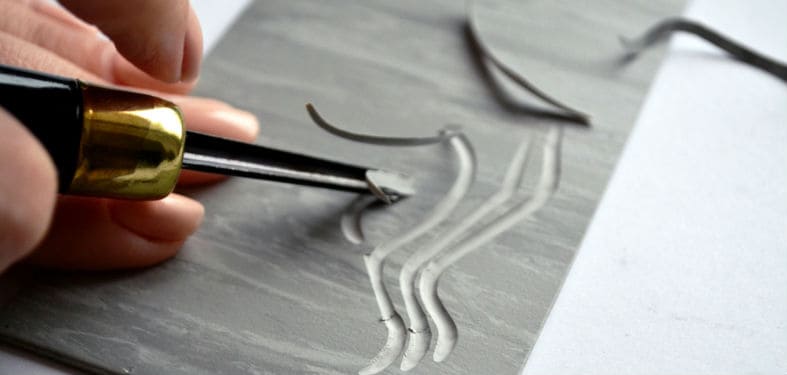
Cutting the background away
If you have cut the background away, the design will stand proud of the lino block. As such, you can roller underglaze onto the design. Then you can press the lino onto your pottery surface to transfer the underglaze.
Cutting the design away
If you have scooped the line of the design away, your image will be indented into the lino. Place your lino up against your pottery. Then using a roller or your thumb press the lino onto the clay surface.
When you peel the lino away, you will have a raised, positive impression of your design on the clay. Then use underglaze on a roller to pick up on the details of the raised design.
If you use a roller, it’s likely that you will get specks and blobs of underglaze elsewhere. This is fine if you want to incorporate this detail into your design.
If you want a more precise result, you can simply paint underglaze onto the raised design with a fine brush. Remember that you will need to apply at least three coats for opacity.
Some General Tips About Underglaze Techniques:
- Unlike glaze, the color of underglaze in its container is more or less the color it will be when fired. Some will brighten up and get a bit darker when they have been fired. Adding a clear glaze on top will make the colors more vibrant.
- If your pottery is dry or bisque-fired, it’s a good idea to dampen it down a little. Using a moist sponge before you apply the underglaze will help the underglaze to adhere.
- Bone dry clay is extremely absorbent. It will draw the liquid out of the underglaze very quickly. It can be helpful to thin some underglaze down with water and apply this first to act as a primer. Then the underglaze that you apply for decoration is less likely to flake off.
- Often the hotter the temperature that you are firing at the more vibrant the underglaze color will be. A good firing temperature for underglazes is often around cone 03 – 04.
- One tool that is helpful for applying underglaze is to use a banding wheel. A banding wheel is basically a flat surface on a turntable. If you place your pottery on the banding wheel, you can turn it easily. This gives you access to all sides without touching the surface of your ware.
- Depending on the underglaze technique you are using, it’s generally recommended that you apply at least 3 layers for opacity. For finer design detail you may need fewer layers, depending on the effect you are going for.
- It can be easier to decorate pottery if the surface is smooth. However, if you are sanding down bone dry clay or bisque ware, always wear a respirator to avoid dust inhalation. Also, you can use wet/dry sandpaper on bisque ware to reduce the amount of dust produced.
Clear Glaze
- Normally a clear glaze is applied on top of the underglaze. You may be applying the clear glaze directly on top of the underglaze in its raw unfired state.
- Some underglazes can be co-fired with a clear glaze on top in a single firing. Or you may have applied underglaze to bisque ware and then put the clear glaze over.
- Either way, if the underglaze is not fired, you need to apply the clear glaze carefully. Clear glaze can cause underglaze to streak and bleed.
- One suggestion is to apply the first layer of clear glaze very lightly, with a feathered brush. Make this layer quite thin to reduce the chance of the underglaze feathering. Once this layer of glaze has gone off, you can apply your second layer more liberally.
Final Thoughts
This is not an exhaustive list of underglaze techniques. There are as many ways to use underglaze as your imagination will allow for.
Also, whilst I have covered these underglaze techniques individually, they can be combined. In addition to this, the way you fire something will affect how your pottery turns out. With underglaze, the world really is your creative oyster.

