This pour-over coffee dripper set is made up of two pieces. A coffee jug (or carafe) that collects the coffee and the coffee dripper itself.
If you would like to get a copy of the template, you can get hold of one in my Etsy store here:
Get The Template Here
You can get a copy of this template (and my other slab pottery templates) from my online shop here…
First, let’s look at how to make the coffee carafe.
You Will Need:
- Wide rolling pin
- Roller thickness guides for clay
- Platter tool
- Rubber rib tool
- Clay knife
- Flexible chopping board
- Clay scoring tool
- Banding wheel
- Wooden bat
- Wooden modelling tools
- Chamois leather
- Serrated rib tool
- Clay shredding tool
Making The Carafe For The Coffee Dripper
The first step is to roll a slab of clay.
Step 1 – Rolling a Slab of Clay
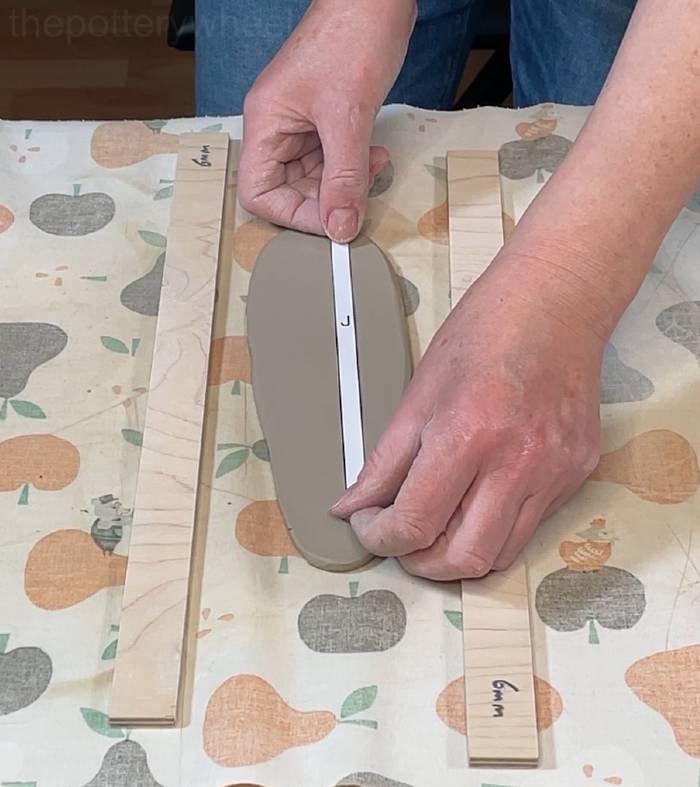
It’s a good idea to use roller guides when you are rolling your slab. These are the two wooden sticks on either side of the clay. They help you roll the clay evenly.
I like to use 3mm roller guides, as it makes nice thin slabs. Thinner slabs make your pottery lighter. However, you can use thicker roller guides. 5 mm or even 6 mm would be fine if you find it easier to work with thicker slabs.
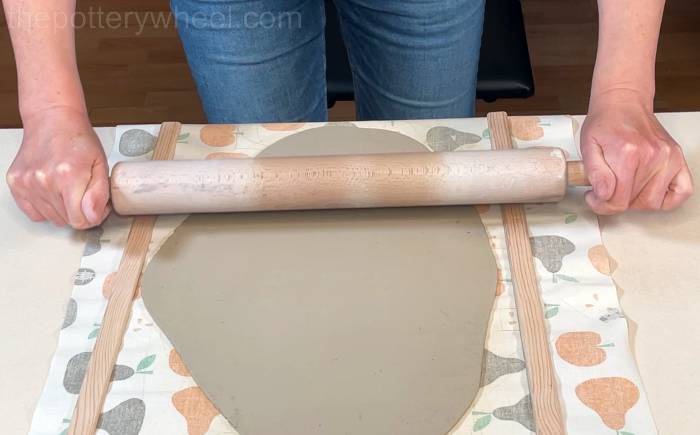
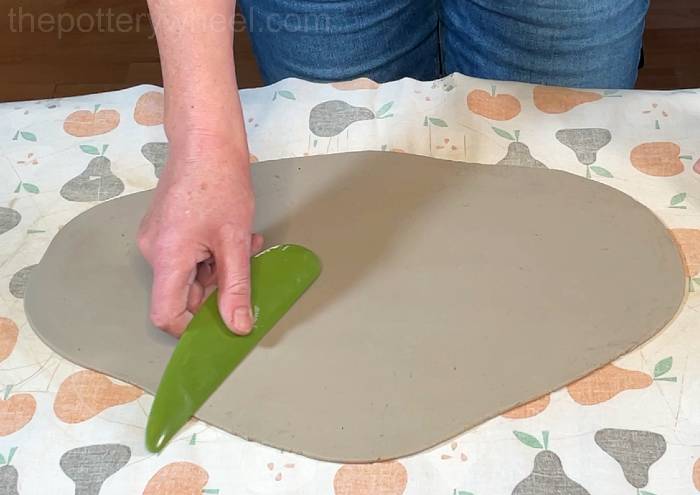
It’s a good idea to run a pottery rib over each side of the slab once you have rolled it. This gets rid of any texture from the rolling fabric on the surface of the slab. It also compresses the clay a little, which makes it less likely to crack when it’s drying.
If you’re new to slab pottery, you can get some more tips about rolling an even slab of clay here.
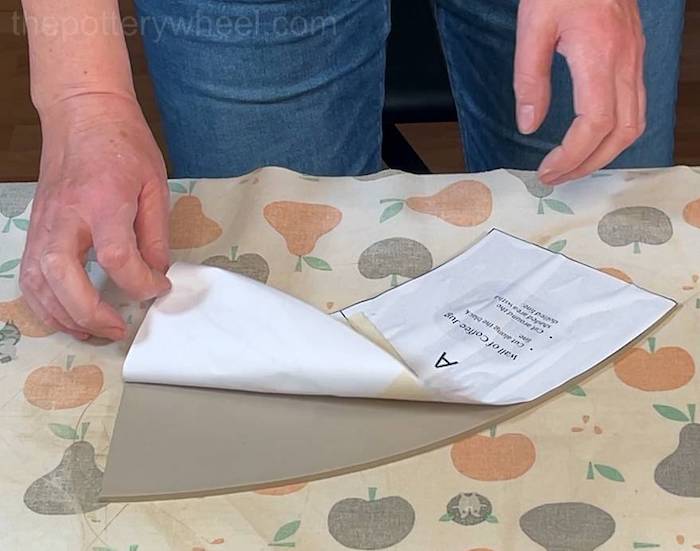
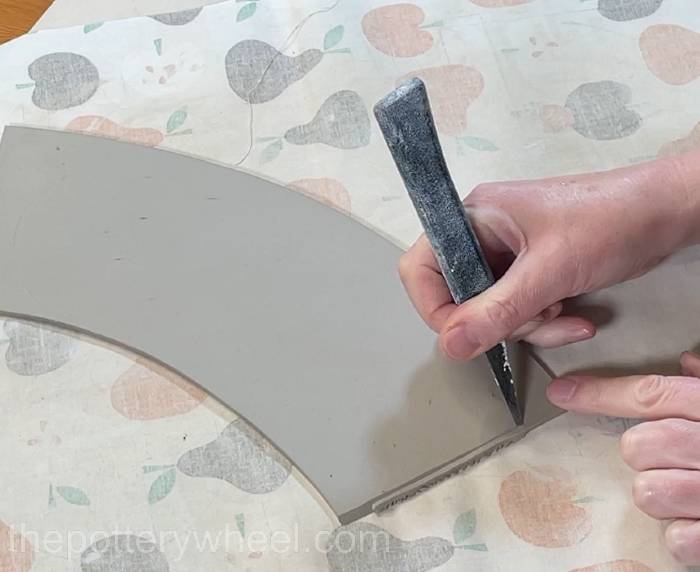
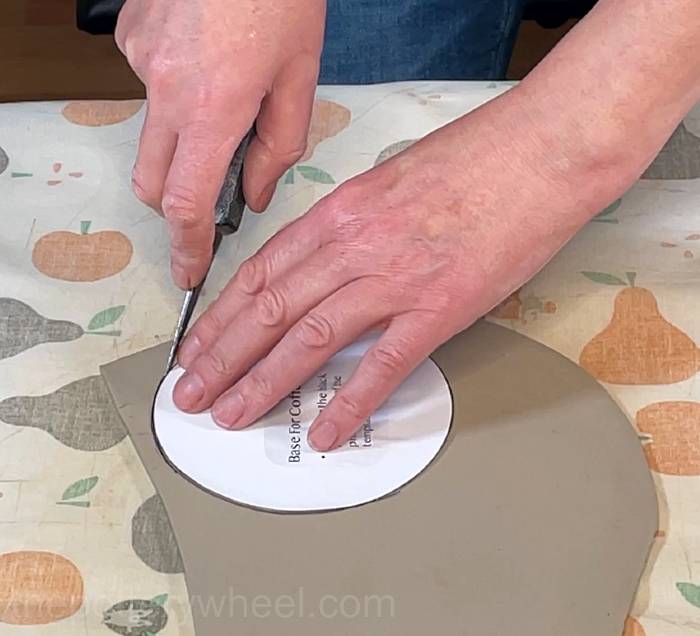
Step 2 – Cutting Around the Pour-Over Coffee Dripper Template
Place the template on the slab and use a clay knife to cut around the shape.
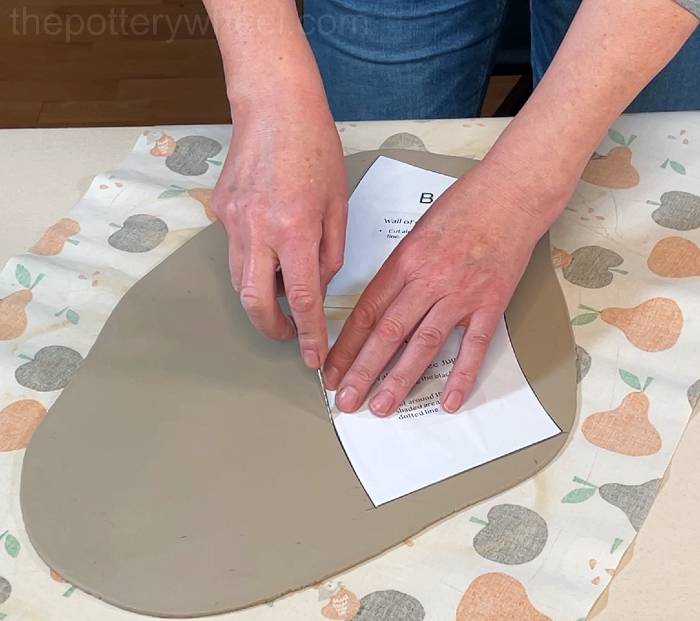
Peel away the paper template.
The paper templates absorb water. You can generally use them 2 or 3 times before they start to tear a little. If you want to use them more than 3 times, I’d suggest making the templates using craft foam.
Craft foam is a rubber material that doesn’t absorb water. As such, your templates will last indefinitely. You can make them out of craft foam by simply drawing around the paper template and cutting them out of the craft foam.
At this point, the clay will be very soft and fresh, so you will need to put it to one side to let it firm up a little. I transfer the slabs onto a wooden drying board.
Keep checking them so that they don’t dry out too much and become too stiff. Leave the slabs to firm up on wooden drying boards. They need to be firm enough to lift without losing their shape, but soft enough to bend.
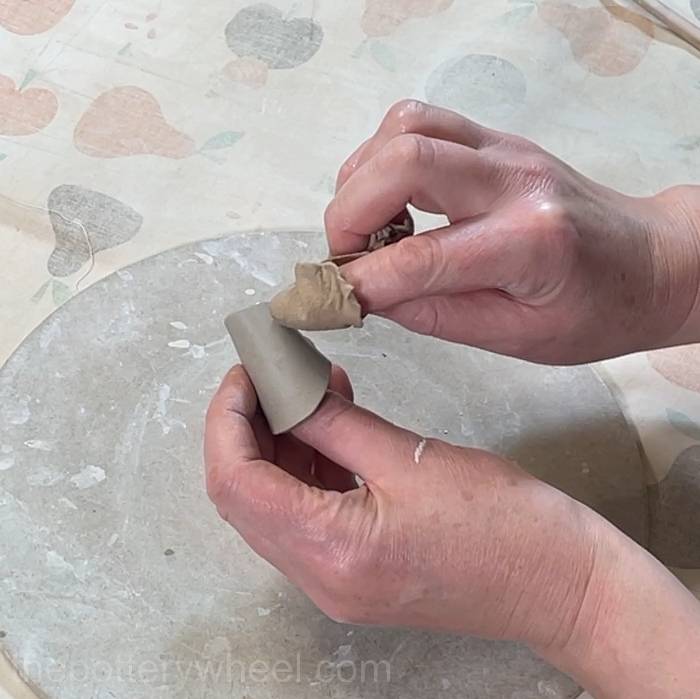
Step 3 – Preparing the Spout for the Pour Over Coffee Jug
Make the spout first. When you make the spout first, you can put it to one side and let it firm up until you need it later.
The spout is made from the small slab of clay cut out using template D.
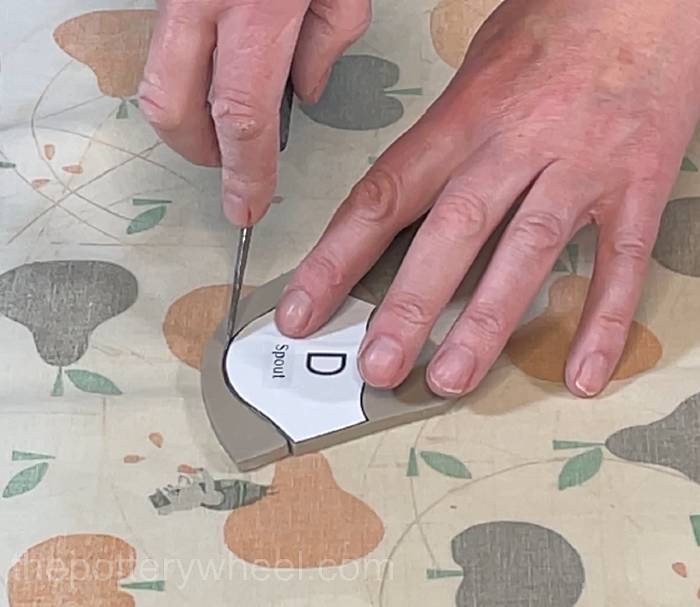
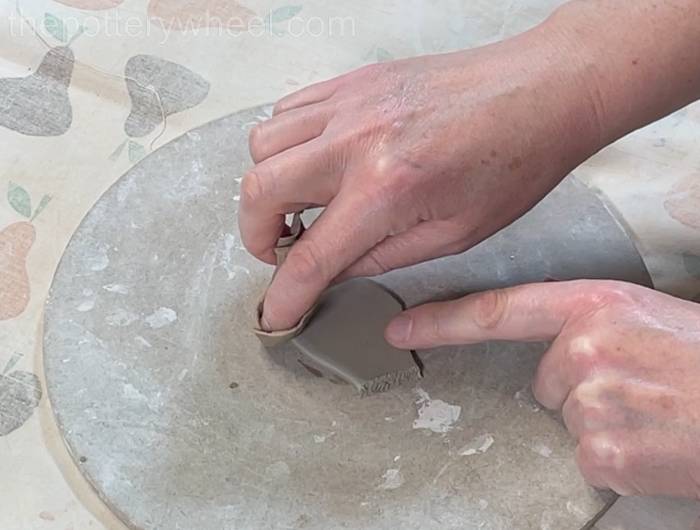
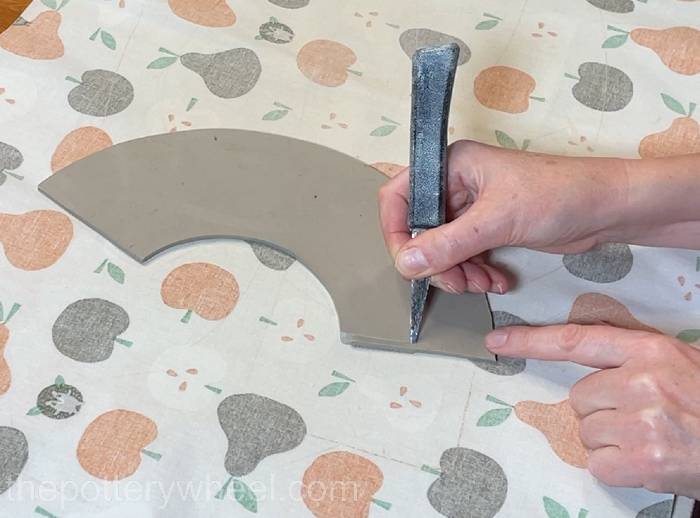
Start by beveling the straight edge of the spout. Bevelling means cutting at an angle, and it enables you to overlap two edges when you are joining them together.
The simplest way to bevel a clay edge is to hold your clay knife at a 45-degree angle and draw it down the edge of the clay.
You need to bevel both straight edges. It’s important to turn the slab over before you bevel the second straight edge. If you don’t turn the slab over, the two beveled edges won’t overlap when you try to join them later.
Once you’ve beveled the edges, score into both of them using a clay scoring tool.

Then use a damp piece of chamois leather to smooth the shorter of the two curved edges. This is going to be the rim of the spout. It’s easier to smooth the rim when the clay slab is flat.
Step 4 – Shaping the Spout
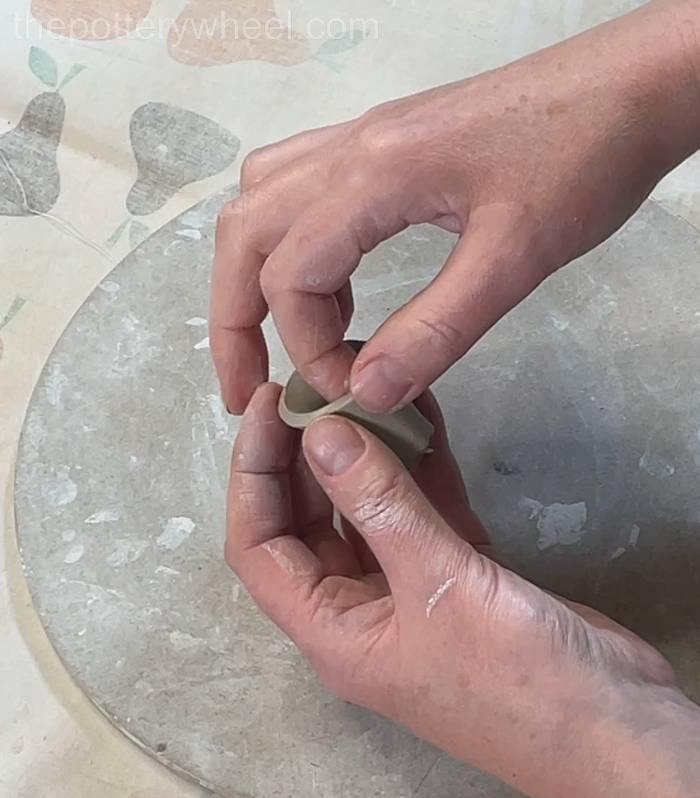
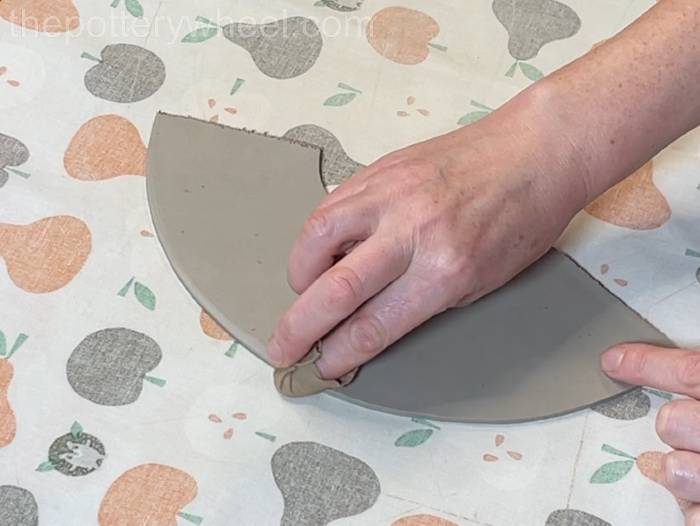
Gently curve the spout slab around until the two straight edges are lined up with one another.

Apply some clay slip to both of the straight edges.
Press the two edges together and blend the seam using a mixture of your fingers and a rubber rib.
You can blend the inside seam with a fine wooden modeling tool.
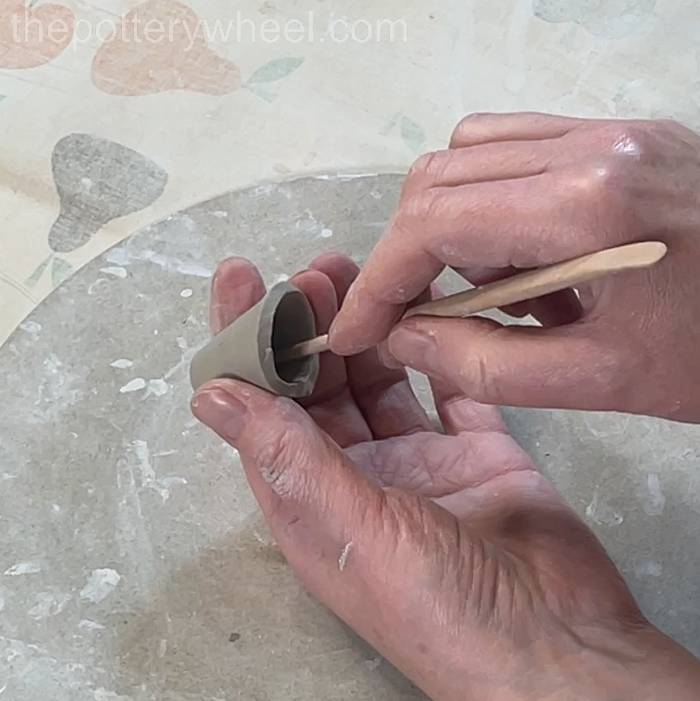
You might find that small cracks appear in the surface of the clay when you bend the clay around. It’s important to get rid of these before the clay dries. Wipe over these with a damp finger tip or a piece of chamois leather to smooth the surface.
Wrap the spout in some plastic and put it to one side for later.
Step 5 – Making the Main Body of the Pour-Over Coffee Jug
Check the slab that is made using templates A and B which have been joined together. This slab will make the main wall of the pour-over coffee dripper.
The slab needs to be soft enough to bend without cracking but firm enough to handle without flopping about.
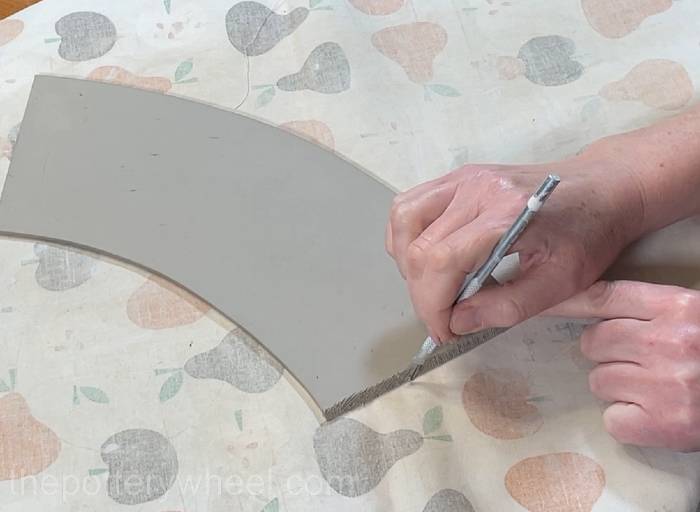
Bevel both straight edges of this slab.
Important
Remember to flip your slab over before you bevel the second side
After beveling the edges, score into both edges using a clay scoring tool.
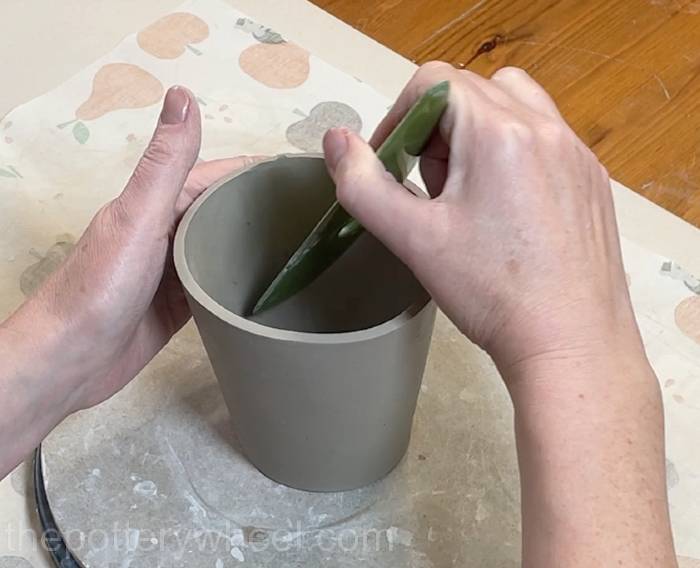
Step 6 – Smoothing The Rim
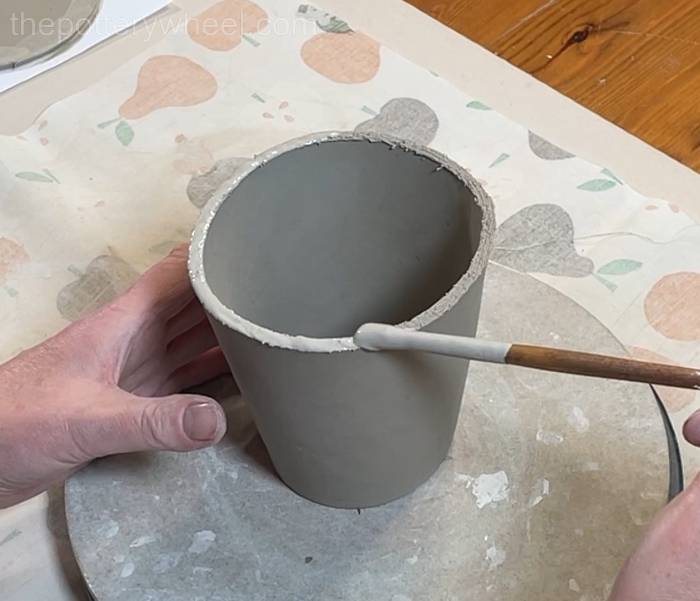
Wipe a damp piece of chamois leather over the short, curved edge. This is going to be the rim of the pour-over coffee dripper carafe. Turn the slab over and smooth both sides to make a soft edge on the rim.

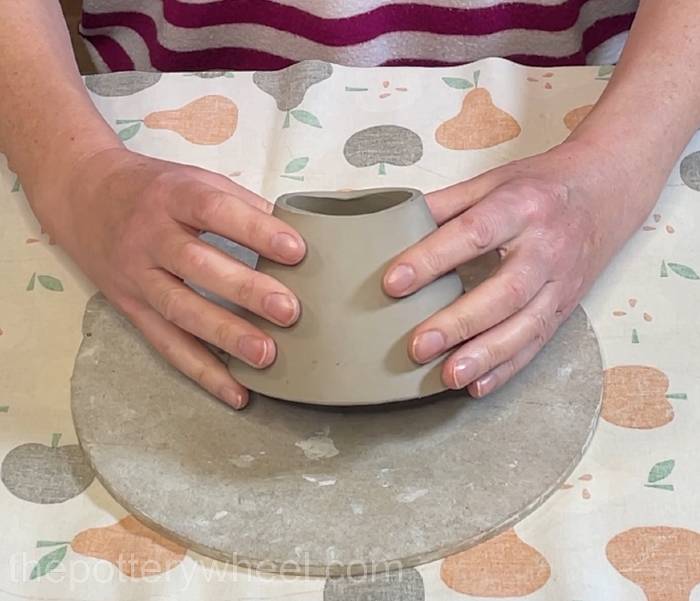
Step 7 – Shaping The Slab
Pick the slab up and curve it around so that it’s resting on the longer curved edge. Line the two scored edges up with one another.
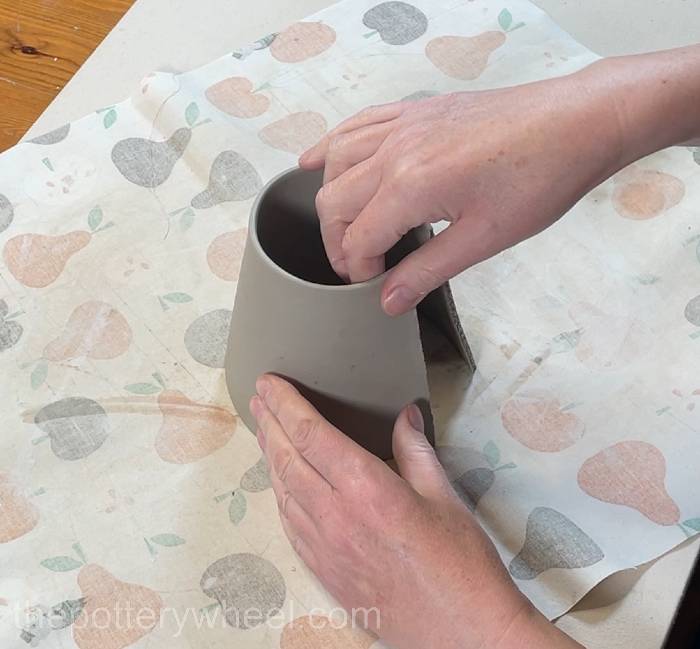
Apply clay slip to the scored edges.
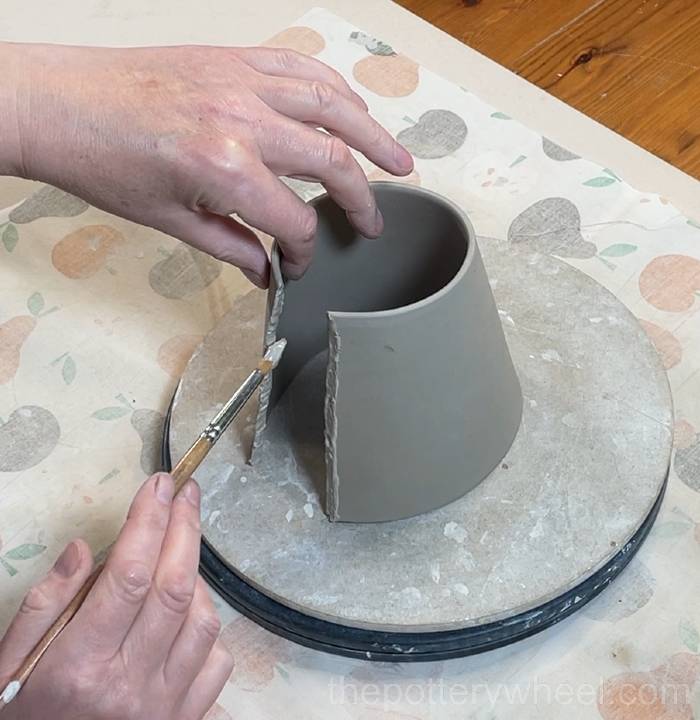
Press the edges together with your fingertips.
Use a rubber rib to smooth the join. It helps to put a long wooden tool on the inside surface to support the join on the inside while you are joining the seam.
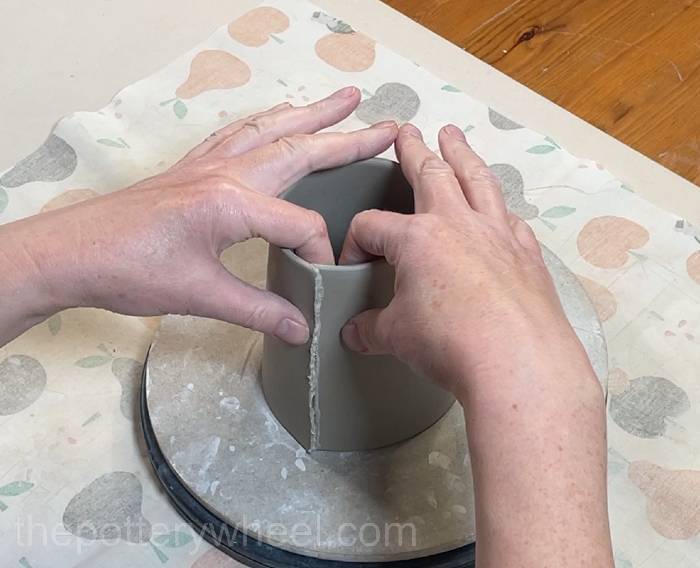
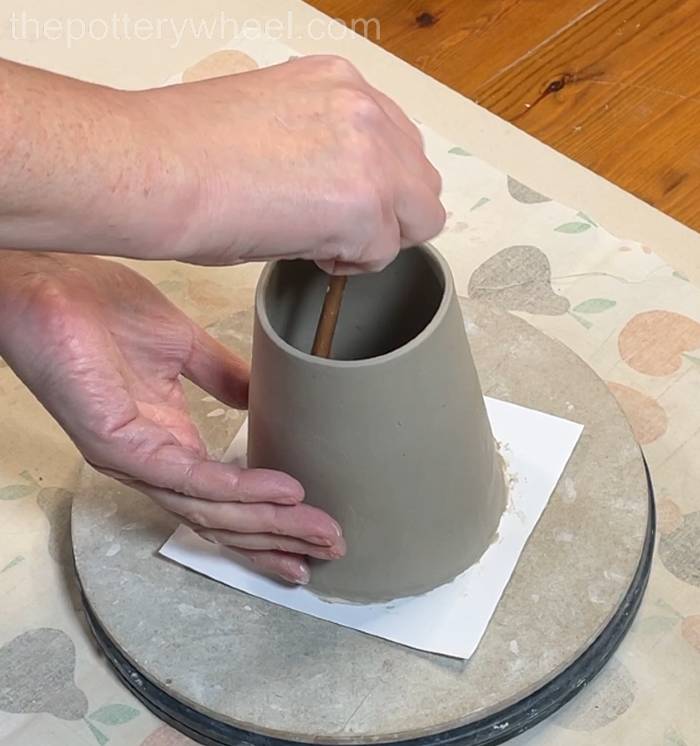
Now you have a clay cone. Use a wooden modeling tool to blend the seam on the inside too.
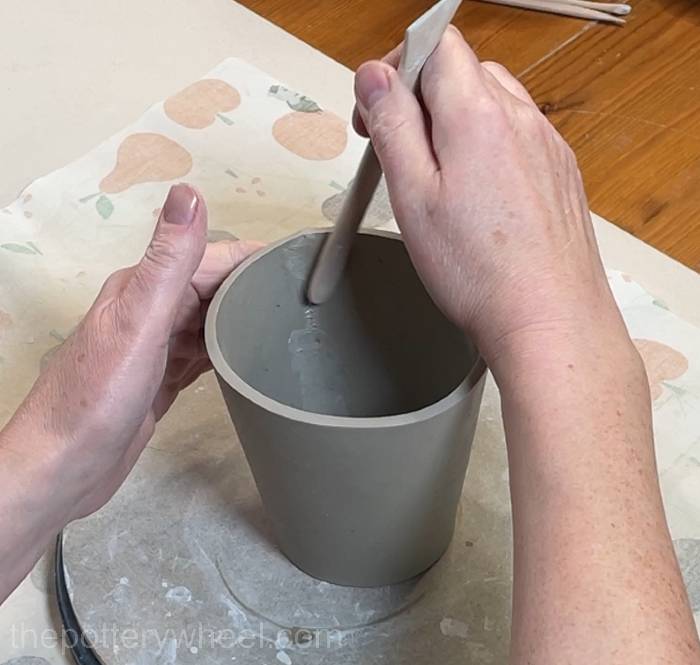
Turn the cone the other way up so that it’s resting on the narrow end. Use the modeling tool to blend the seam at the wide end. Once you’ve blended with the modelling tool, you can use a rubber rib or a platter tool to make the seam smooth.
Then use a rubber rib, or a platter tool to smooth away any texture left behind by the modelling tool.
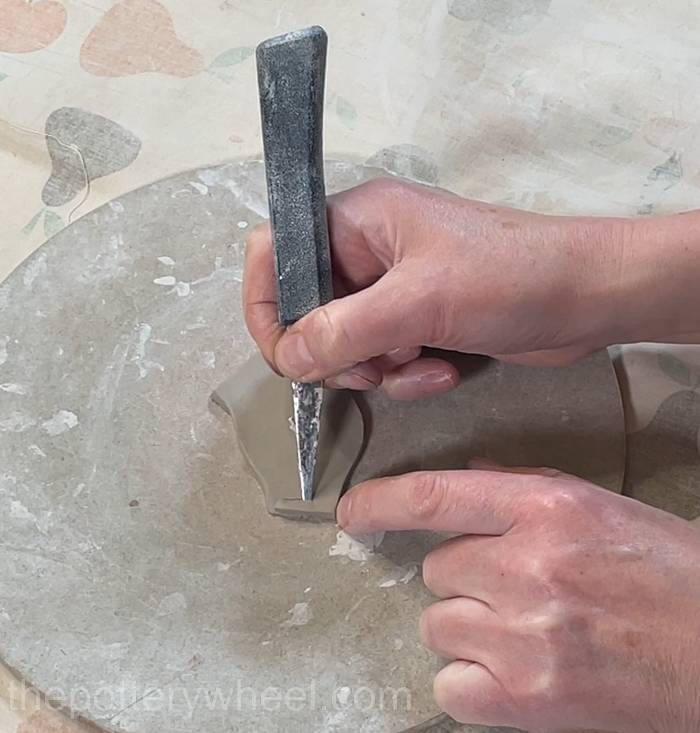
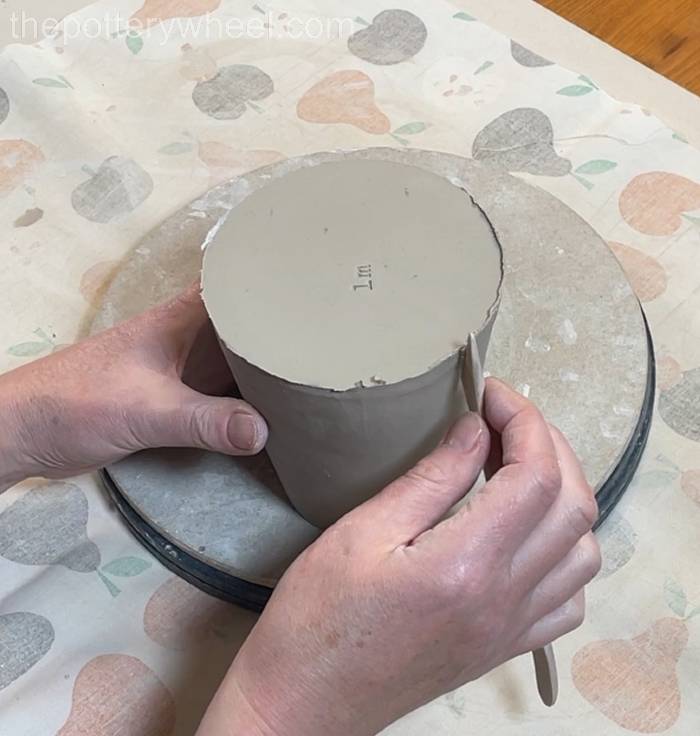
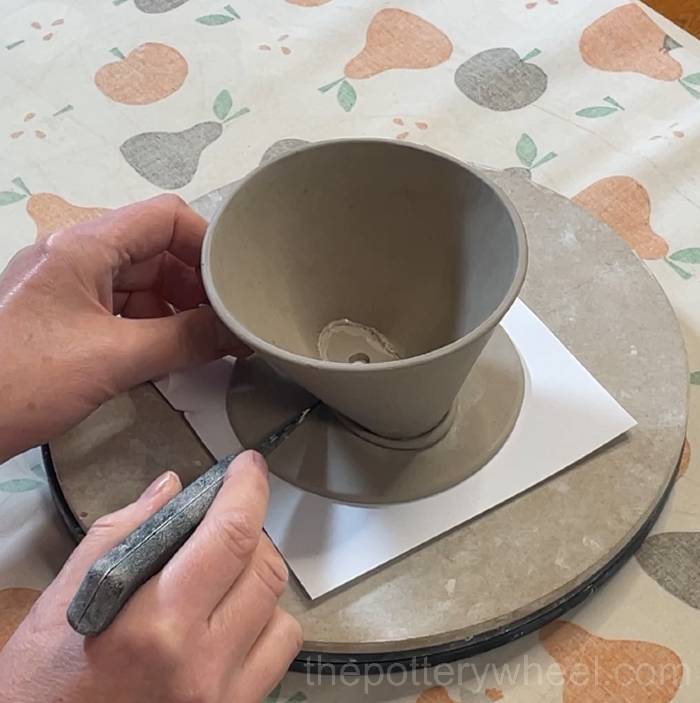
Step 8 – Attaching The Base To The Pour-Over Coffee Jug
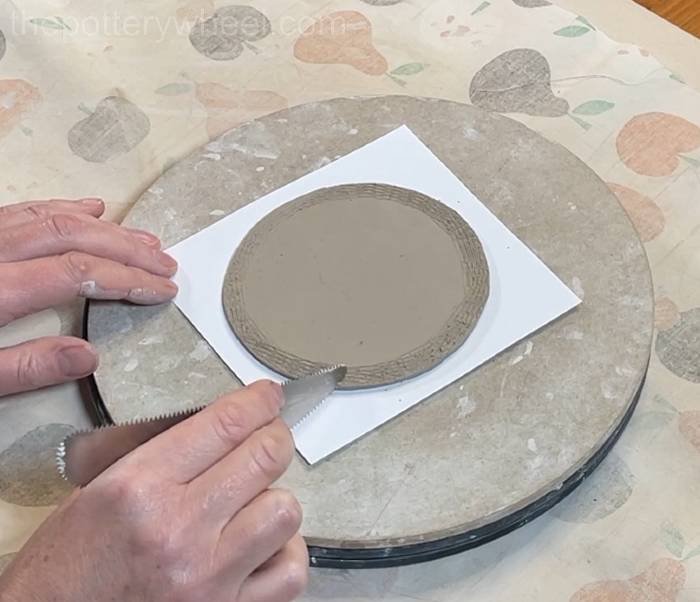
The base of the coffee jug is formed by the slab made using template C. Roll a slab and cut around template C to form the base. Allow the base to firm up until it’s soft leather hard.
Score around the edge of this slab using a serrated rib tool or a clay scoring.
Score around the wide edge of the clay cone.
Apply clay slip to both scored edges.
Lower the clay cone onto the base. You have a minute or so to wiggle the cone around on the base so that it’s lined up centrally.

The base of the jug is designed to be a couple of millimeters wider than the bottom edge of the clay cone. This gives you a bit of extra clay so that you can blend the base onto the cone.
Use a modelling tool to blend the extra clay onto the bottom edge of the clay cone.
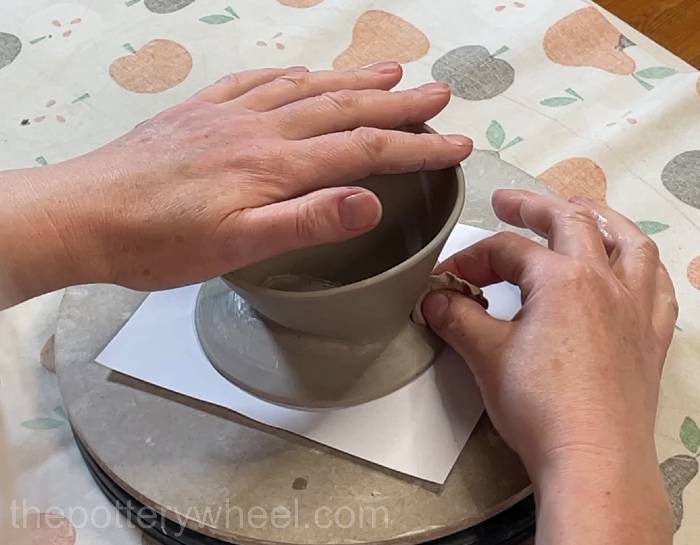
When you have blended the base onto the cone, you can start to tidy up the surface of the clay with a rubber rib.
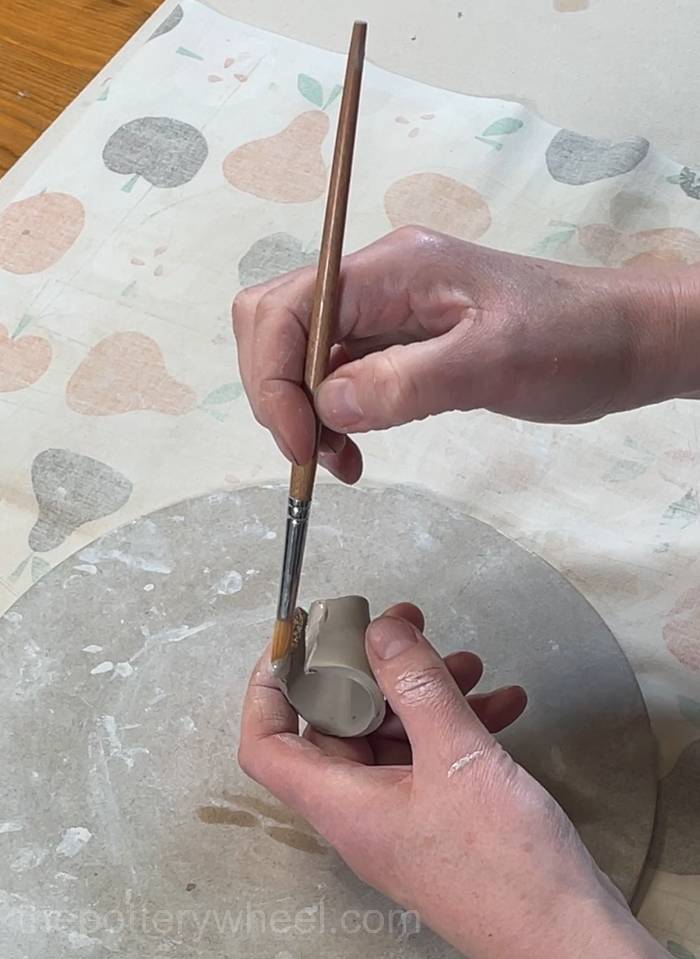
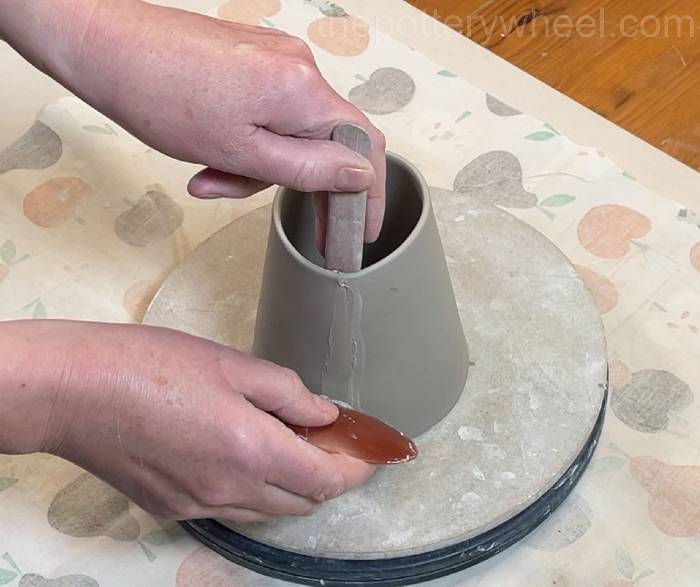
After blending the base on the outside, it’s important to smooth the join on the inside. Because the neck of the jug is quite narrow, it would be hard to add a coil of clay to the inside join.
Another way to smooth and reinforce the join is to load a soft brush with clay slip. Then rub the join on the inside with the clay slip until the join becomes a smooth surface.
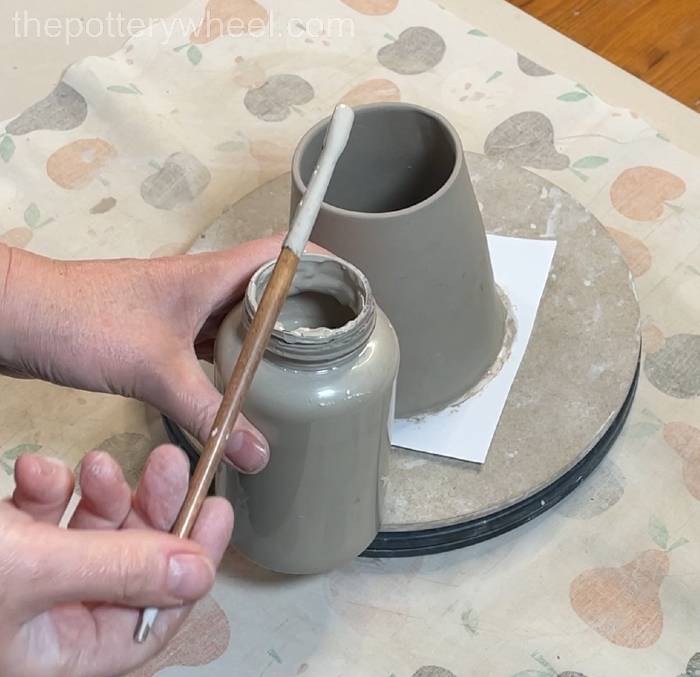
Be sure to keep running the brush over the inside join until the surface is smooth. This will help to prevent cracks when the clay dries and is fired.
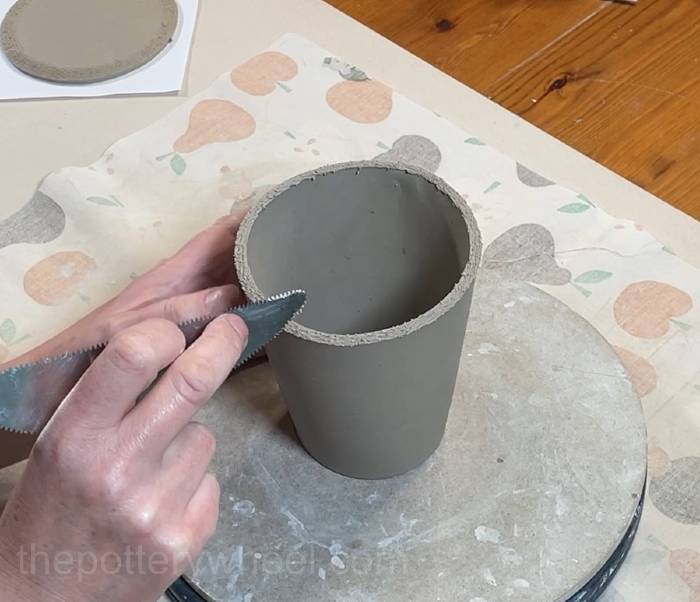
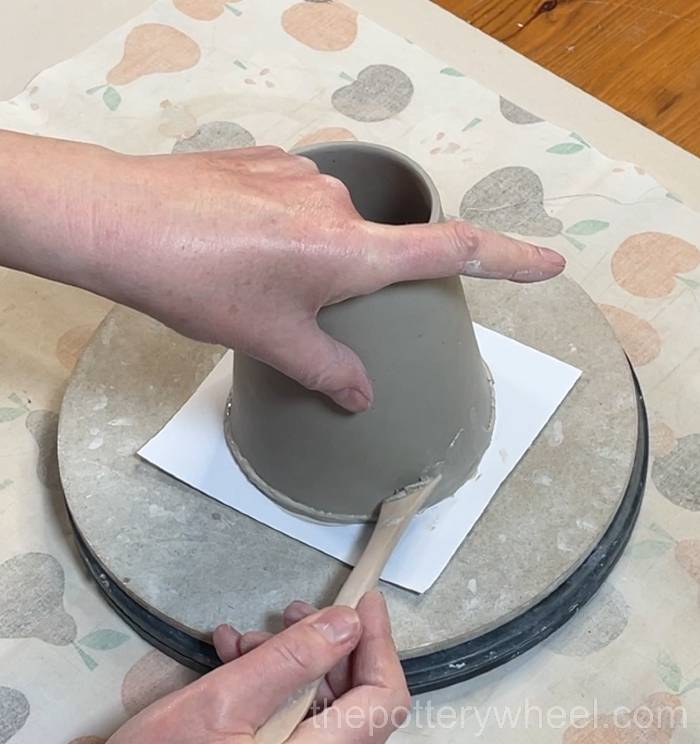
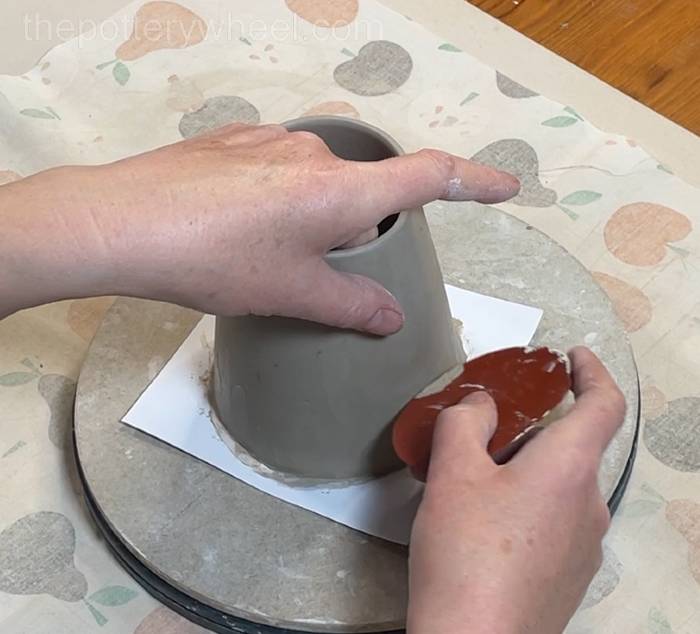
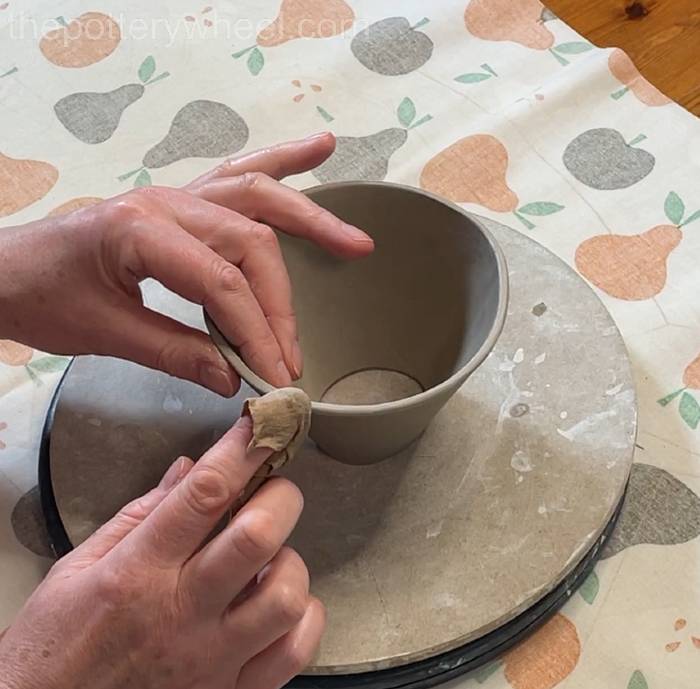
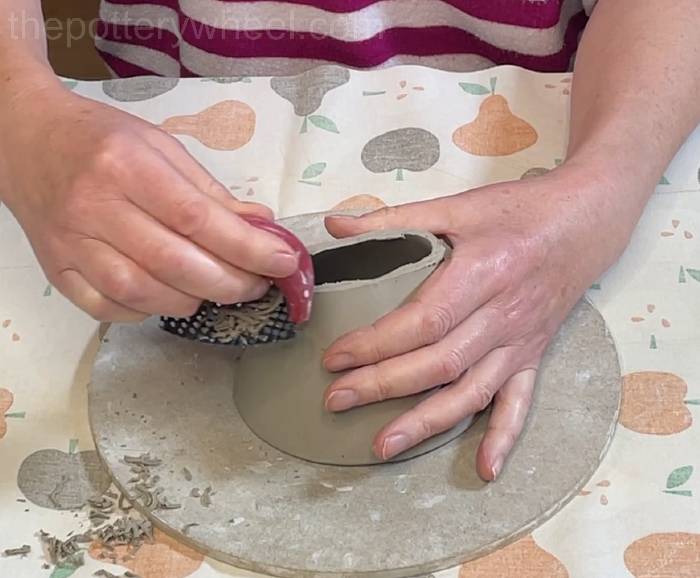
Step 9 – Tidying Up the Bottom Edge of the Coffee Dripper Jug
Turn the coffee jug over so that it’s resting on the narrow rim. Use a wooden modelling tool to scrape away any excess clay and tidy up the surface.
Use a clay knife to shave away excess clay if a bead has formed around the bottom edge.
Then use a damp chamois leather to wipe away any remaining texture and to create a soft, rounded edge.

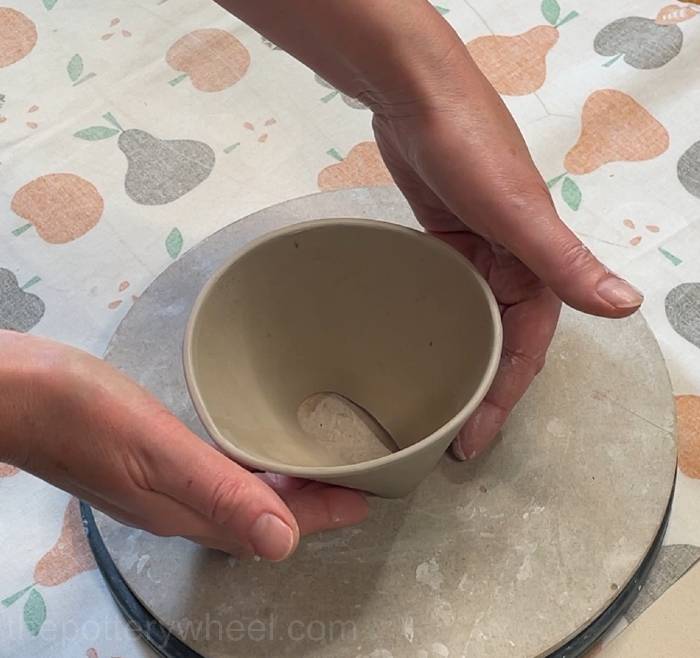
Leave the jug to firm up a little. Put a round plastic beaker or container in the rim to keep it round as the clay firms up.
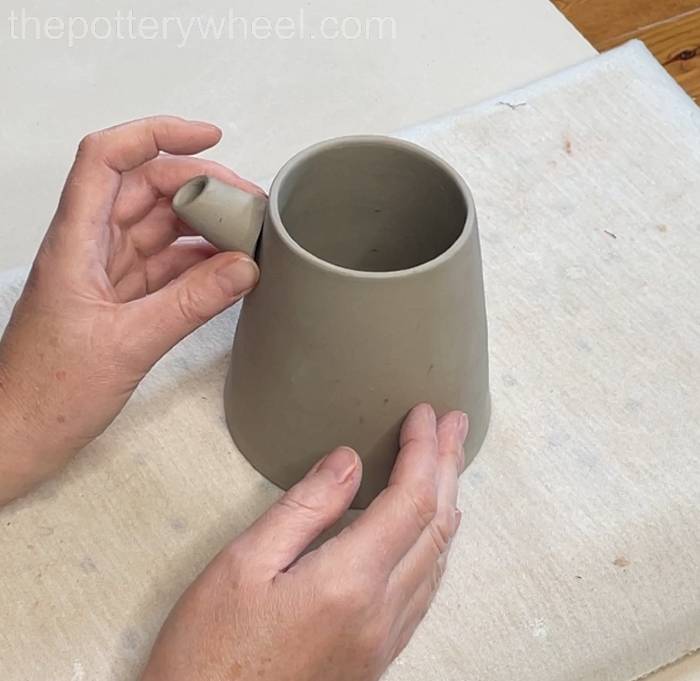
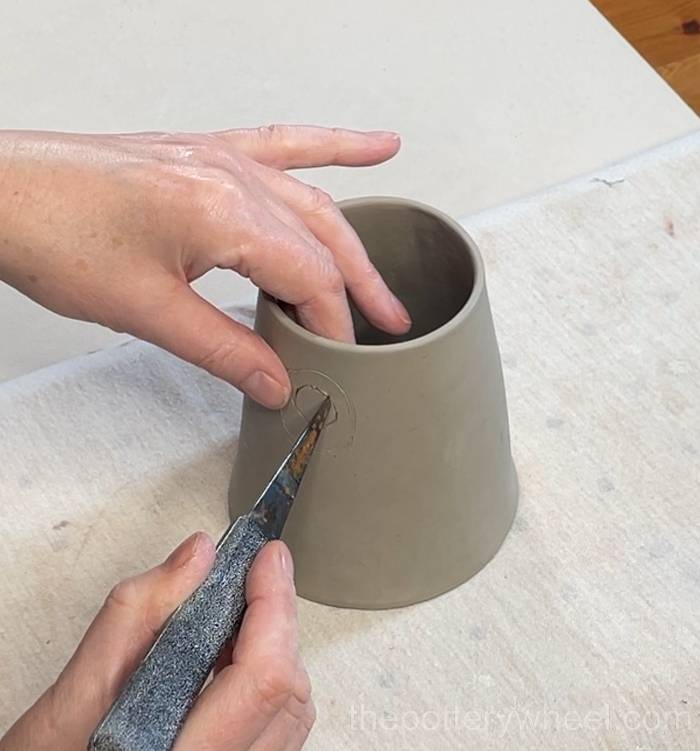
Step 10 – Getting Ready to Attach the Spout to the Over-Pour Coffee Dripper Jug
Hold the spout up against the side of the jug. Line it up so that it’s in the position that you want to attach it.
Remember that the spout needs to be quite high on the jug. If you attach it too low, then the coffee will leak out of the spout when the jug fills up.
I like to line the tip of the spout with the rim of the jug. Like this:
Use a clay knife to draw a feint line around the spout.
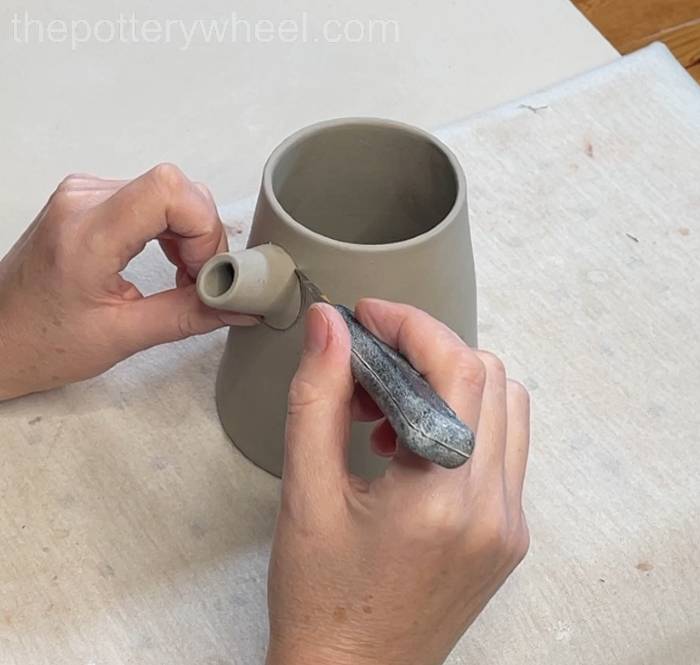
Then, use a clay knife to cut a hole in the middle of the line you have drawn on the side.
Important Note
You aren’t cutting around the line that you made. If you cut right up to the line, then you won’t be able to attach the spout. Instead, cut a hole (about the size of a penny, or 1cm wide) in the centre of where the spout will be attached.
Use a damp chamois leather to smooth and tidy up the hole you have cut into the side of the pour-over coffee dripper jug.
Using the line you drew around the spout as a guide, score into the surface of the jug.
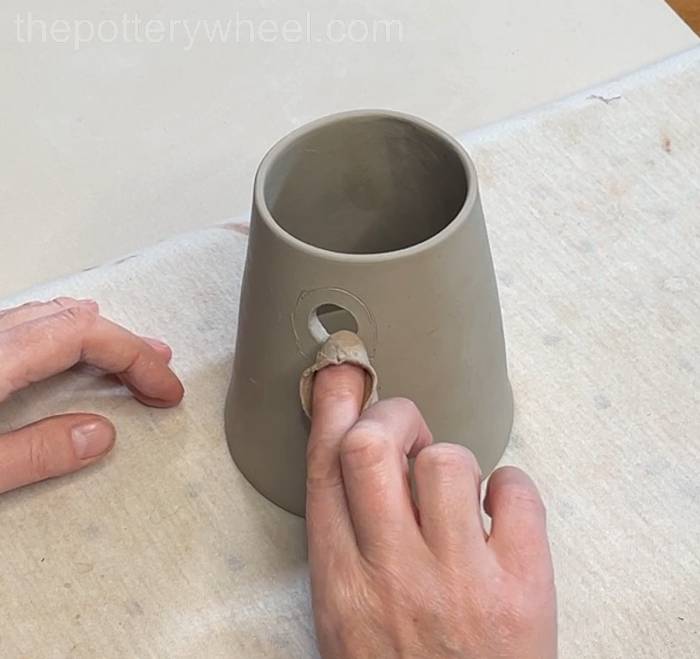
Also, score around the wide end of the spout with a serrated rib tool.
Apply slip to both scored surfaces.
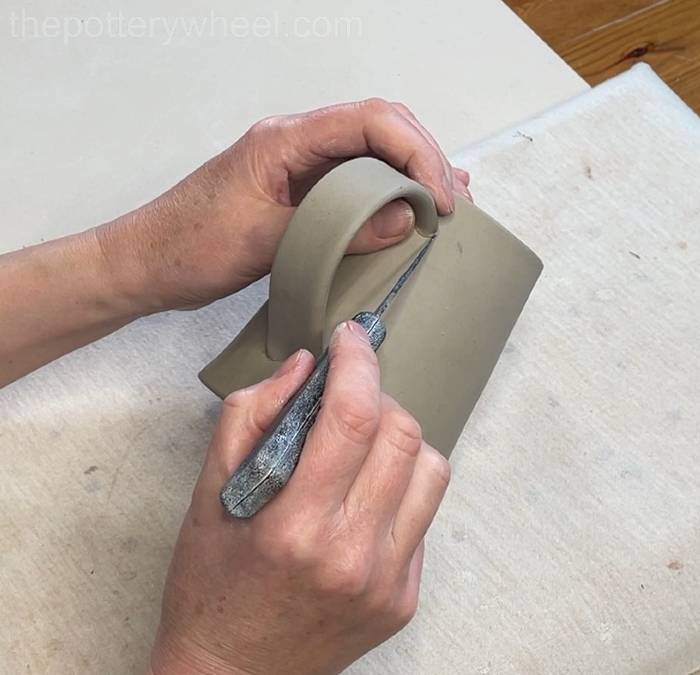
Step 11 – Attaching the Spout to the Pour-Over Coffee Dripper Jug
Press the spout onto the side of the jug. Use one hand to support the inside of the jug and press it into position, being careful not to crush the spout.
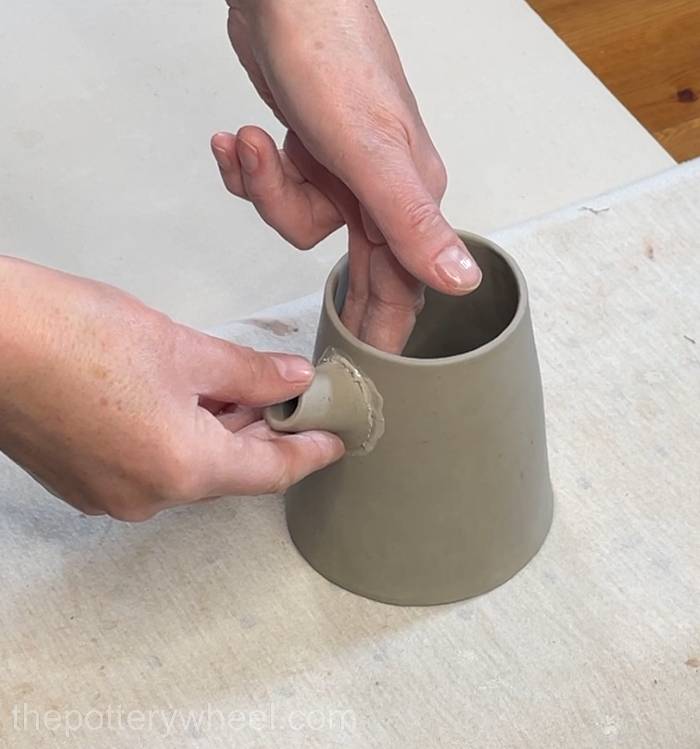
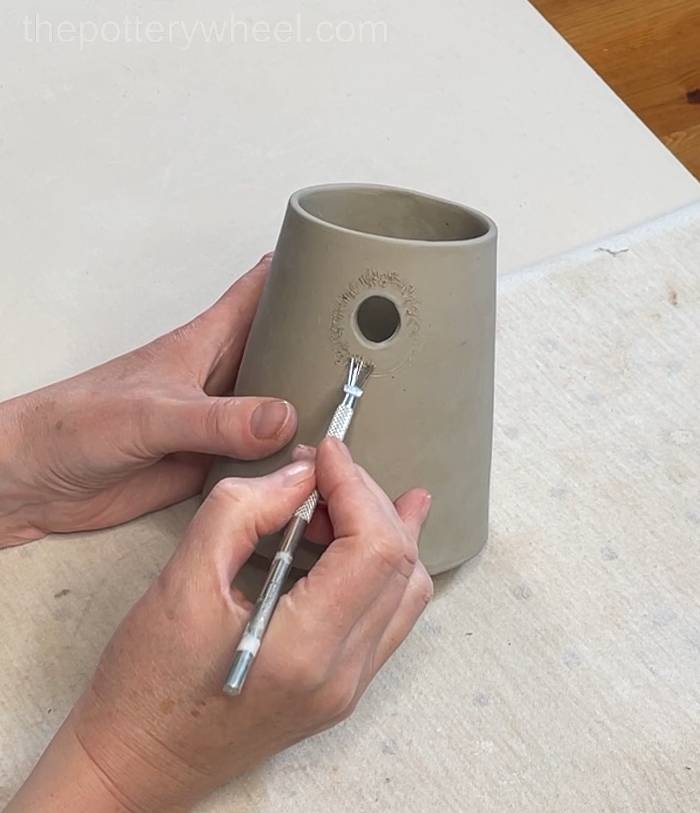
Blend the bottom edge of the spout onto the jug using a wooden tool.
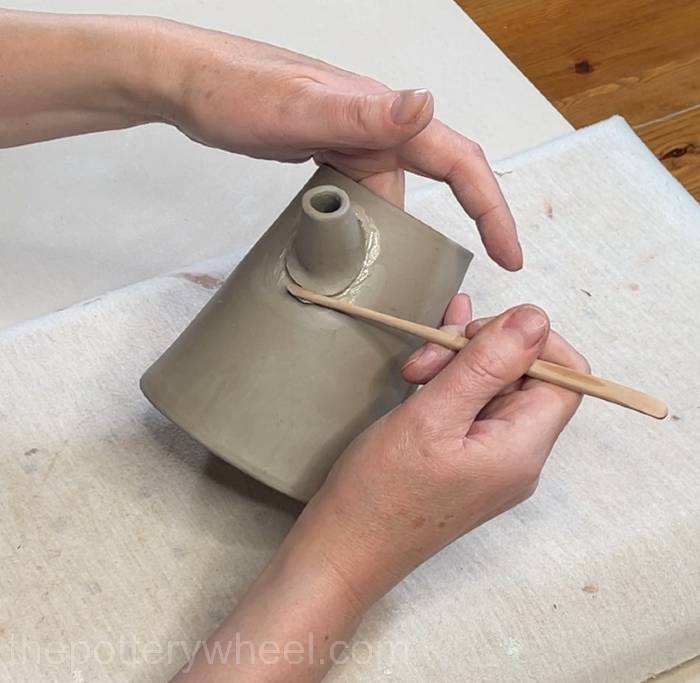
Roll a small thin coil of clay. You can check out some tips on rolling coils of clay here.
Wrap a short length of clay coil around the top of the spout where it joins the jug.

Use a modelling tool to blend the coil onto the spout and the jug.
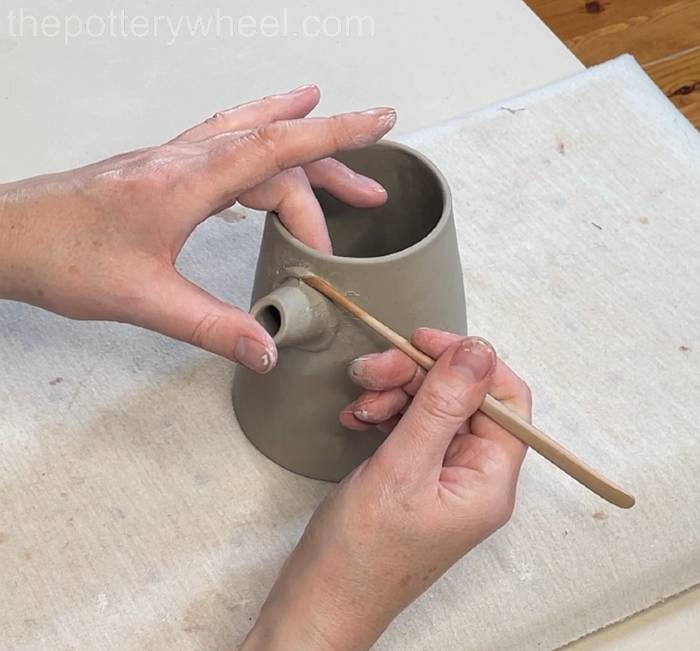
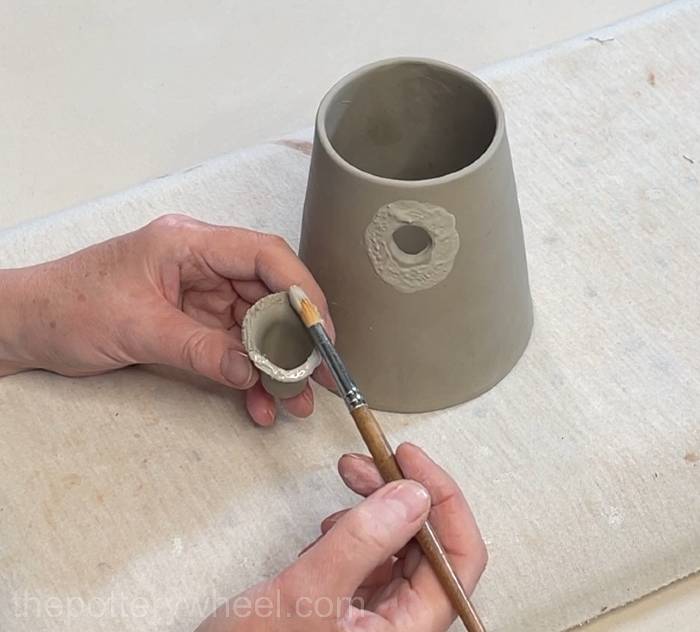
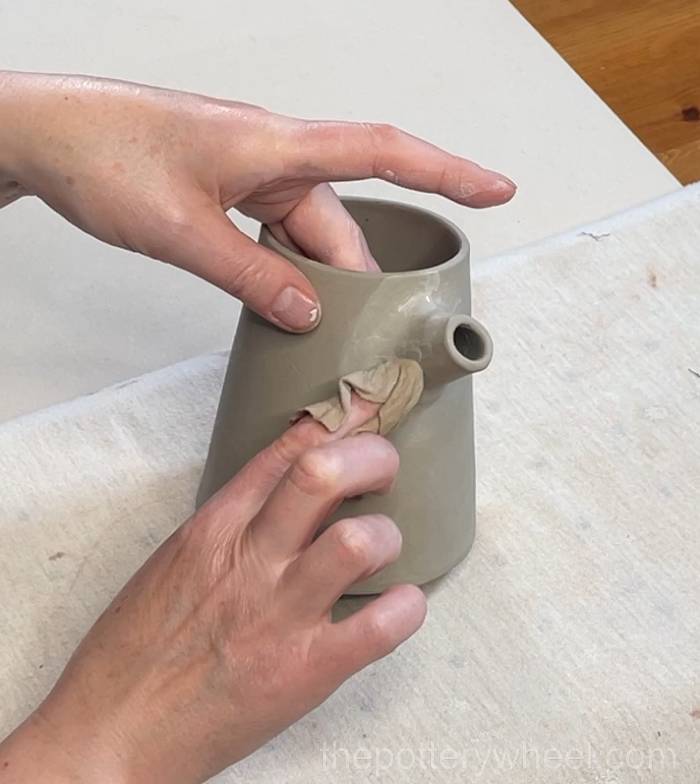
Wipe down the joint with a damp chamois leather to get rid of any marks in the clay and to create a smooth surface.
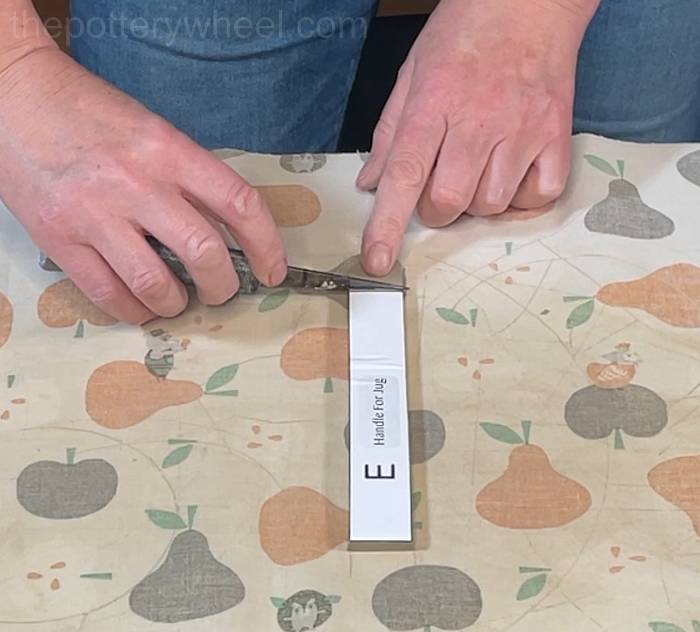
Step 12 – Making The Handle
Roll a strip of clay for the handle. Usually, I use 5 or 6 mm roller guides for the handle, as a slightly thicker handle can feel more comfortable to hold.
Remember to run a rib over both sides of the slab after you have rolled it out.
Use template E to cut out the handle.
Smooth each edge of the handle with a damp sponge or piece of chamois leather.
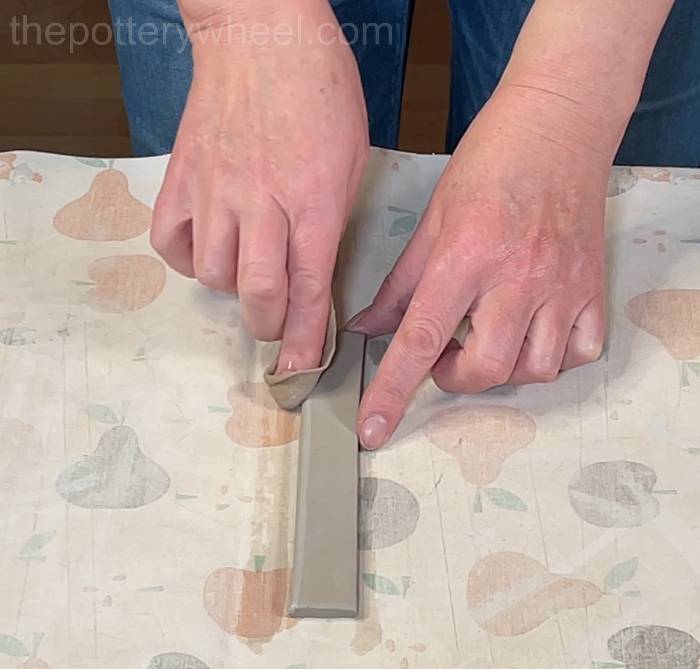
Curve the slab of clay into a handle shape and leave it to firm up until it’s leather hard.
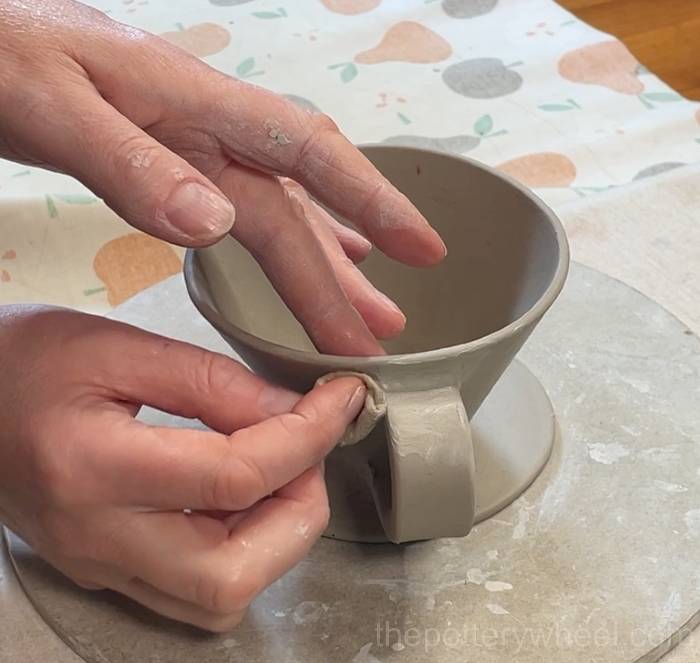
Step 13 – Attaching The Handle
The template for the handle is on the long side. It’s designed long so that you can trim it to a length that you prefer.
Trim the handle to length. Then use your clay knife to cut a concave curve on both ends of the handle. This will help it sit flat against the curved edge of the jug.
Hold the handle against the coffee dripper jug and position it where you want to attach it. Make small marks around the handle to mark where you are going to attach the handle.
Score both trimmed ends of the handle, and also the two points on the jug where the handle will be attached.
Apply slip to each of the scored surfaces. Then press the handle into position. Put one hand on the inside of the jug to help keep its shape.
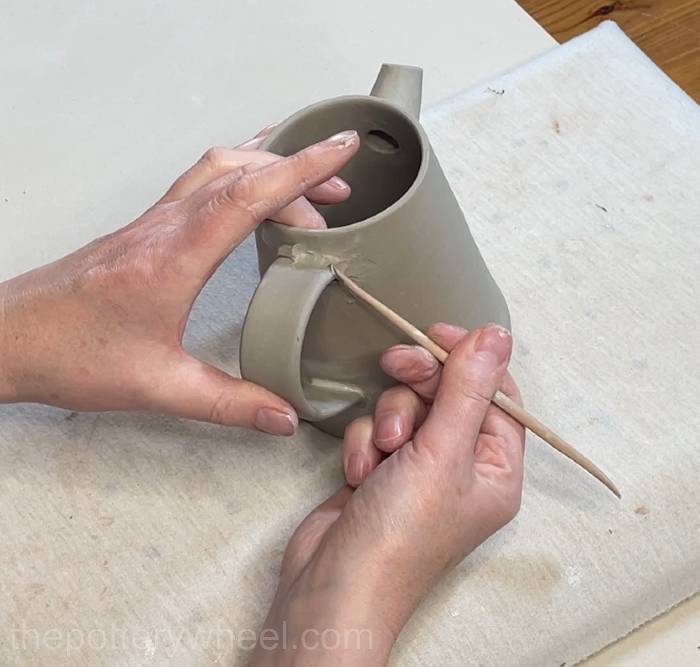
To make sure that the handle stays on the jug, you can wrap a small clay coil around where the handle meets the jug.
Blend the clay coil onto the handle and the jug using a wooden modelling tool.
Use a damp chamois leather to wipe away any marks left by the modelling tool on the clay surface.
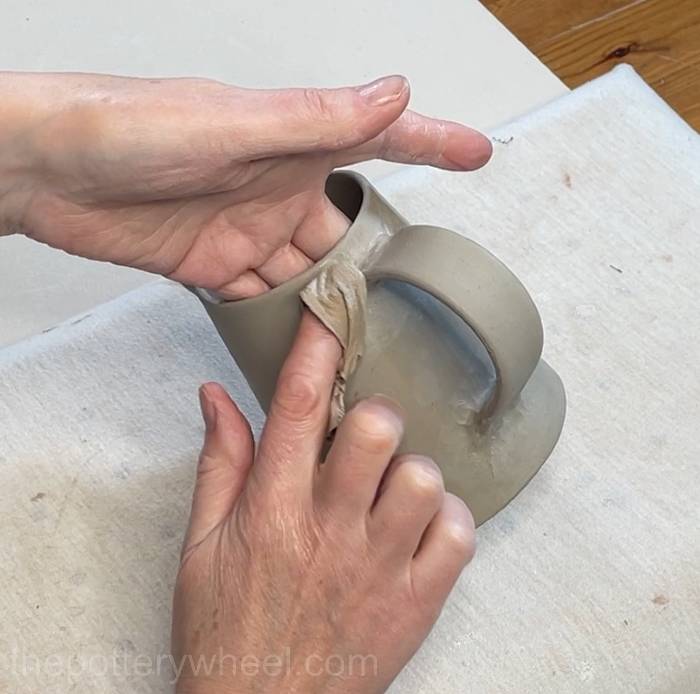
Repeat this process with both ends of the handle.
The jug is now ready to be put to one side to firm up while you make the coffee dripper.
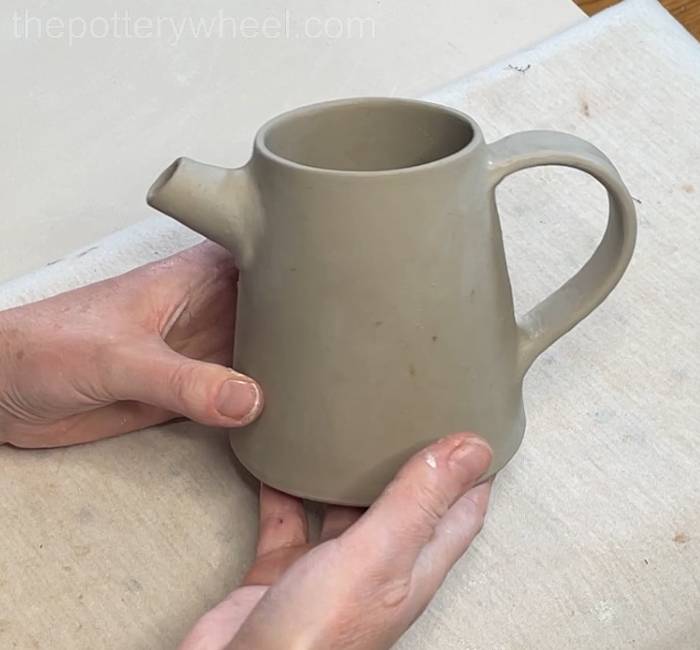
You can help to keep the top rim of the jug round by putting a plastic cup or beaker in the rim while it firms up.
Making The Pour-Over Coffee Dripper
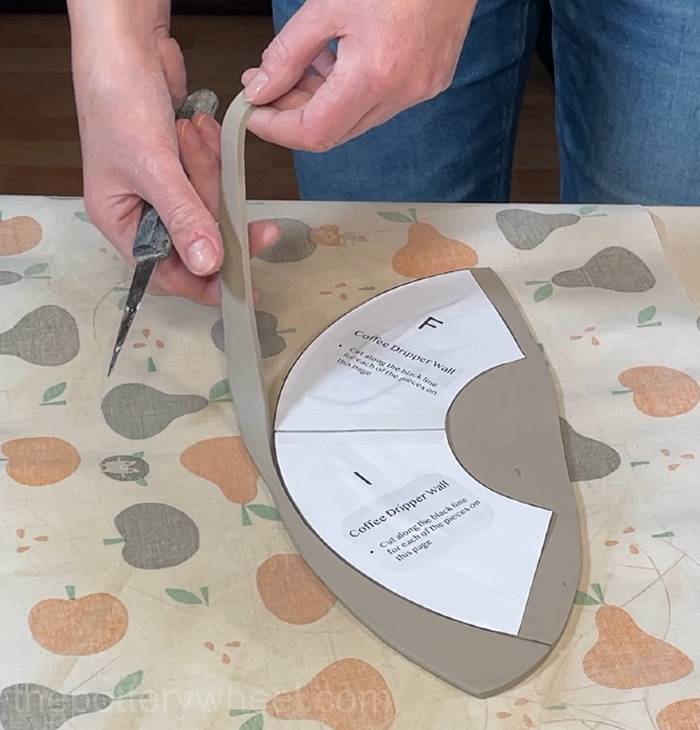
Roll another slab and use the printable template to cut out each piece of the pour-over coffee dripper.
Step 1 – Making the Wall of the Pour-Over Coffee Dripper
The wall of the coffee dripper is made from templates F and I, which have been joined together. Cut out the wall of the coffee dripper first using these two templates.
Put this slab to one side and allow it to firm up. It needs to be soft enough to bend but firm enough to handle without losing its shape.
Once the slab has firmed up sufficiently, bevel both of the straight edges on the slab. Cut each edge at a 45-degree angle.
Remember – Turn the slab over after you have bevelled on edge and before you bevel the second straight edge.
After bevelling the edges, use your damp chamois leather to smooth both sides of the large curve on the clay arc. This large curve is the rim of the pour-over coffee dripper.
The process of making the clay cone for the coffee dripper is the same as for making the jug. So, I won’t repeat it word for word.
In short, you need to:
Recap
- Score the bevelled
- Shape the slab into a clay cone
- Apply some slip to both scored edges
- Press the slipped and scored edges together
- Blend the join using your fingers and a rubber rib on the outside
- Blend the join on the inside using a modelling tool
- Smooth away the marks left behind by the modelling tool
You will then have a clay cone that looks like this:
Step 2 – Shaping the Wall of the Pour-Over Coffee Dripper
At the moment, the wall pour-over coffee dripper is circular. You need to shape the narrow end of the cone so that it’s an oval.
Put the clay cone on your work surface, resting on the narrow end of the cone. Use your fingers to press the narrow end of the cone into an oval shape.
When you have done this, the narrow end of the cone will look something like this from above.

Leave the clay cone to firm up and become leather hard.
Step 3 – Preparing the Wall of the Pour-Over Coffee Dripper
When the wall is leather hard, turn it over so that it’s resting on the wide end of the clay cone.
You will notice that the short edge of the clay cone has a concave shape. This concave shape is formed when you squeeze the clay cone into an oval on the base.
The base needs to be flat, rather than concave, if it’s going to attach to the base of the coffee dripper.
An easy way to flatten the base is to shave away some of the excess clay using a clay-shredding tool.
Put the clay cone on its wide end, and use the clay shredder to flatten the base.
Step 4 – Attaching the Pour-Over Wall to the Base
The supportive base of the coffee dripper is the circular slab made using template H.
Use your damp chamois leather on each side of the circular slab to smooth down the edge.
Place the wall of the coffee dripper in the centre of the circular base. Adjust it carefully so it’s right in the middle.
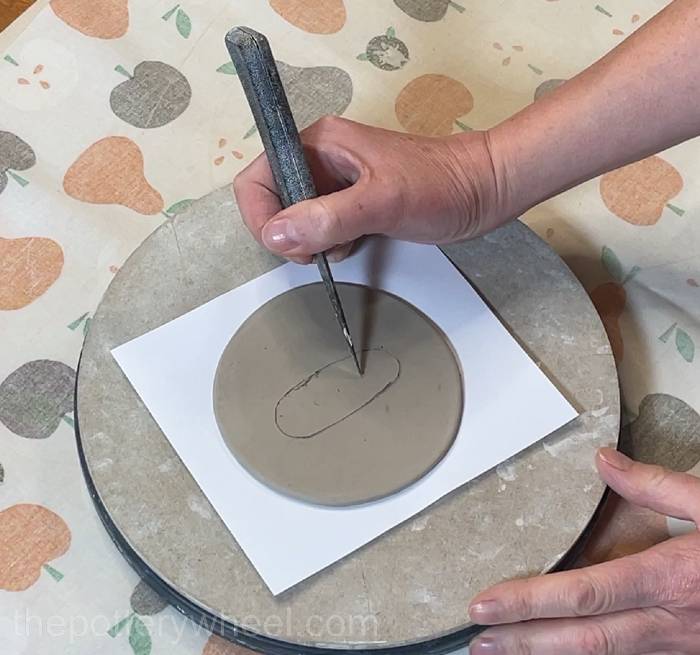
Using your clay knife, make a light mark in the base to show you where the coffee dripper wall is going to be attached.
Important! You aren’t cutting through the clay at this point, you are just marking it lightly so that you know where to attach the dripper wall.
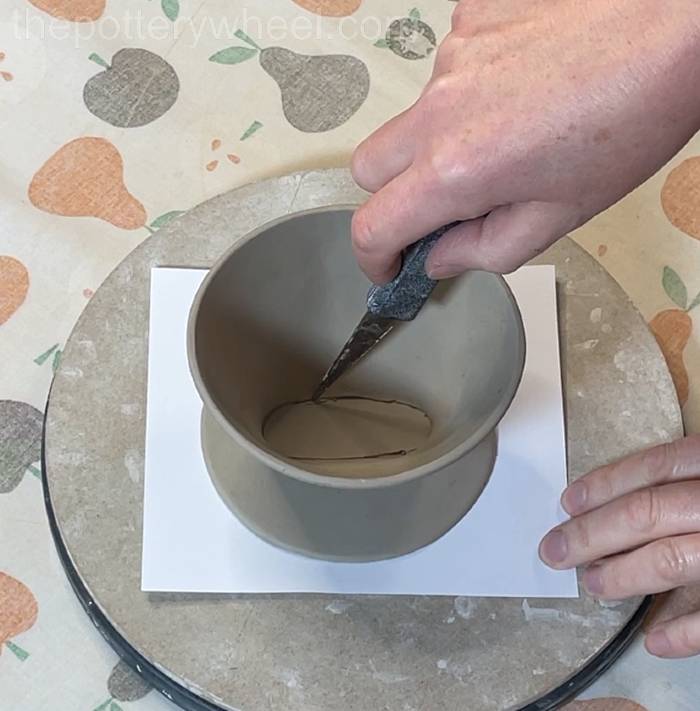
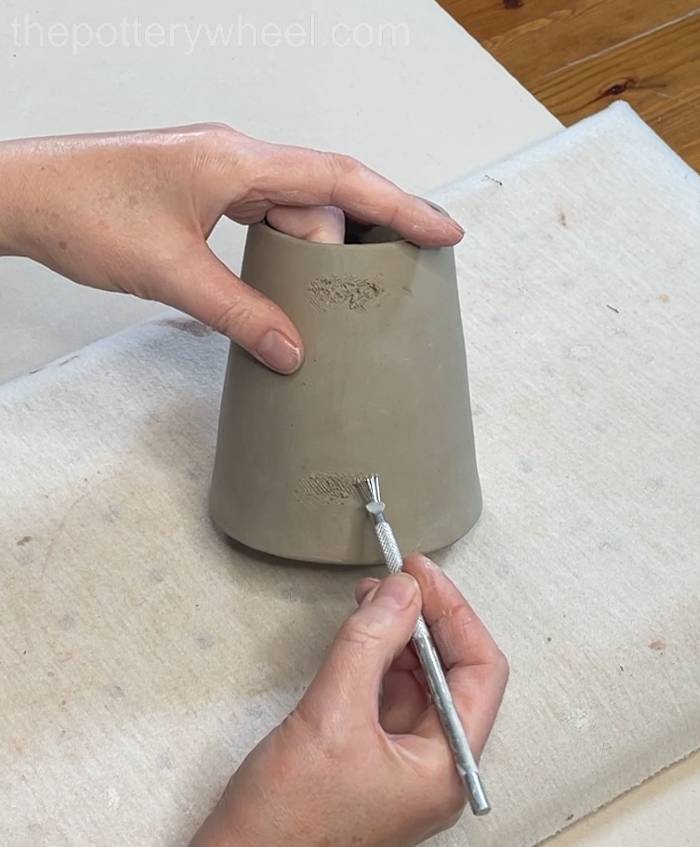
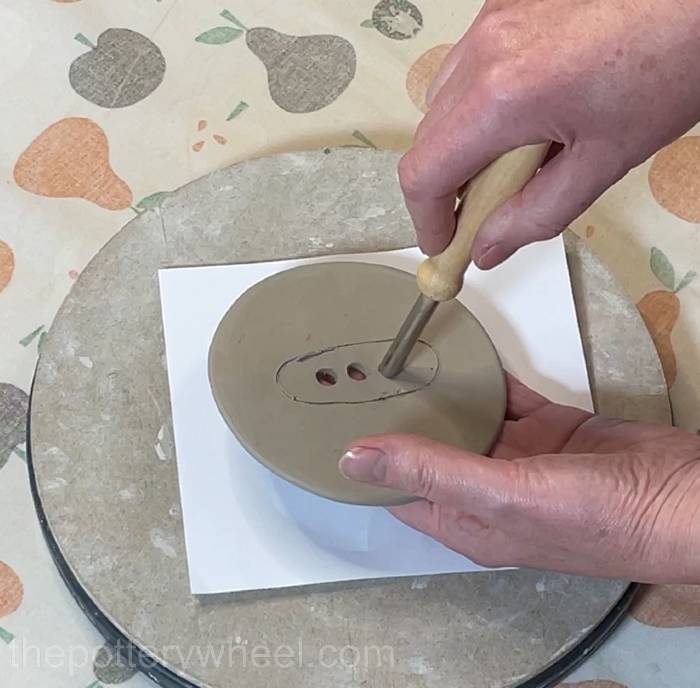
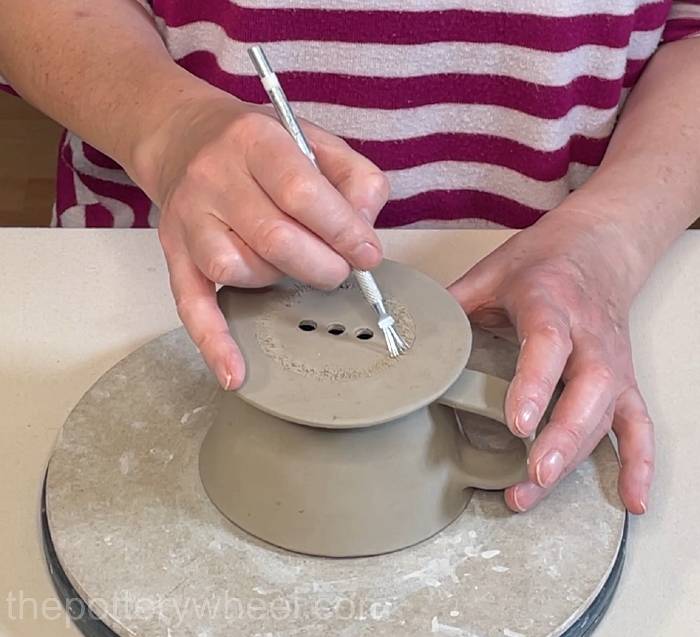
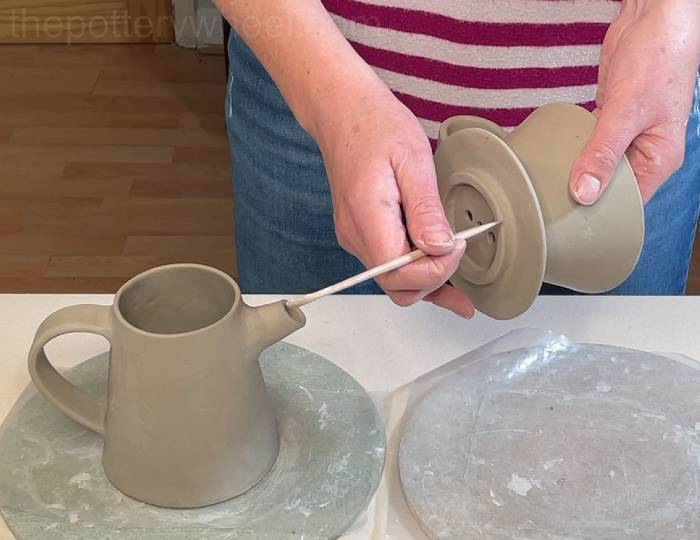
Use your clay knife or a needle tool to mark three points on the base where you are going to make some holes. I mark these points by eye, so that they are spread out equally.
The easiest way to make 3 neat holes is to use a clay hole cutter.
Score into the clay around the feint line you made earlier on. This is where you are going to attach the wall of the pour-over coffee dripper.
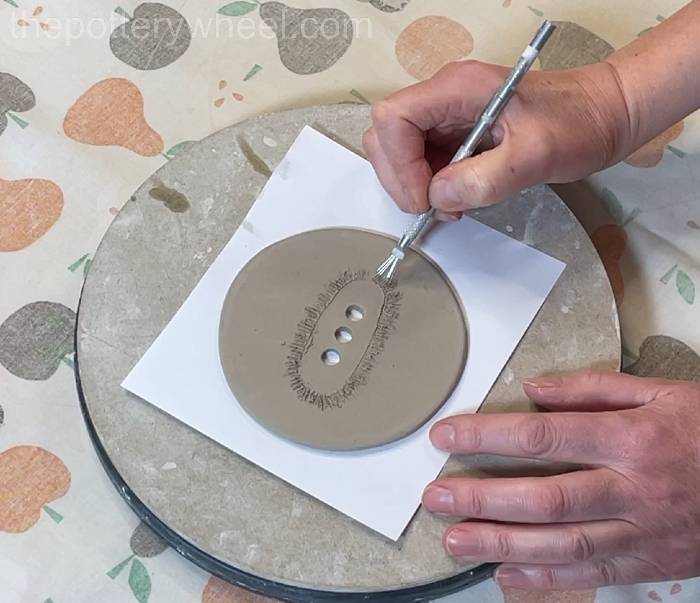
Also score into the underside of the coffee dripper wall.
Apply slip to both scored surfaces and then lower the coffee dripper wall onto the base.
While the clay slip is still wet, you can wiggle it about a bit to get it into the right position.
When you are happy that it’s in the right place, press gently down on the coffee dripper wall so that it bonds to the base.
Adding a Clay Coil
Roll a thin clay coil and then drape the clay coil at the point where the dripper wall meets the base. Cut the coil to length when it’s in position.
Press the clay coil into the join and then blend the clay coil onto the coffee dripper wall and the base.

Once the clay coil is blended on, wipe down the surface to get rid of any marks left behind by the modelling tool.
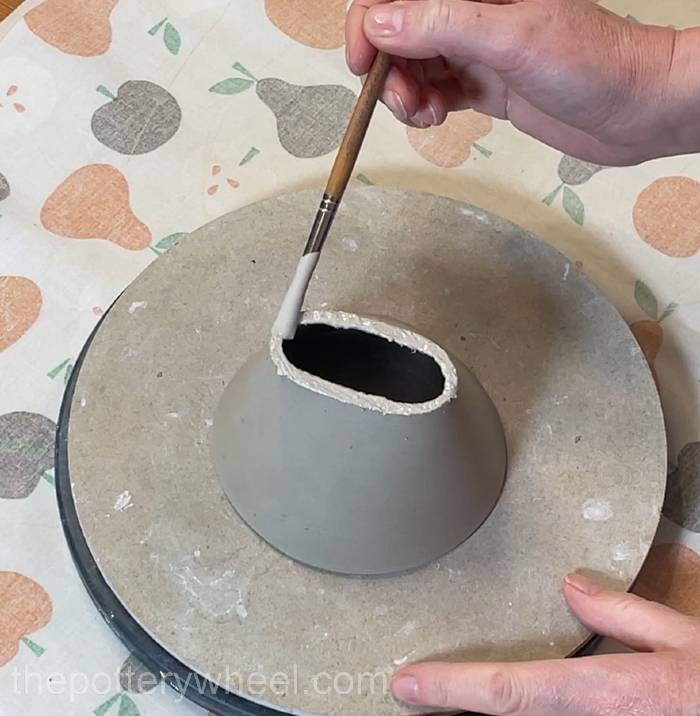
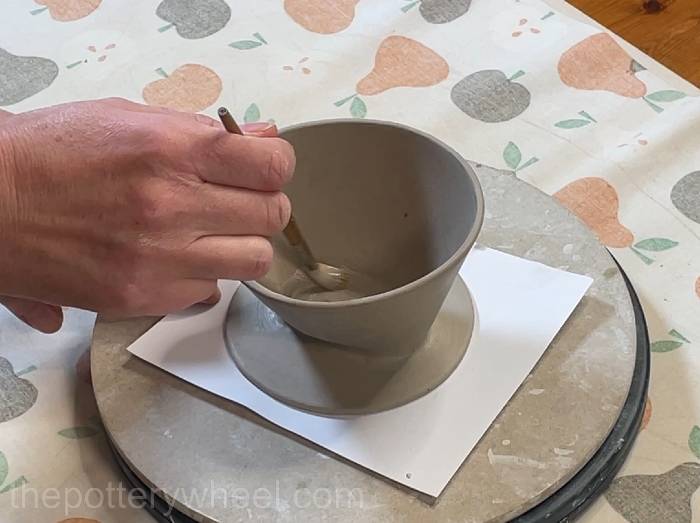
Dip a soft paintbrush in clay slip. Run this around the join on the inside of the coffee dripper to blend the join and create a smooth finish on the inside.
Step 7 – Adding the Handle to the Pour-Over Coffee Dripper.
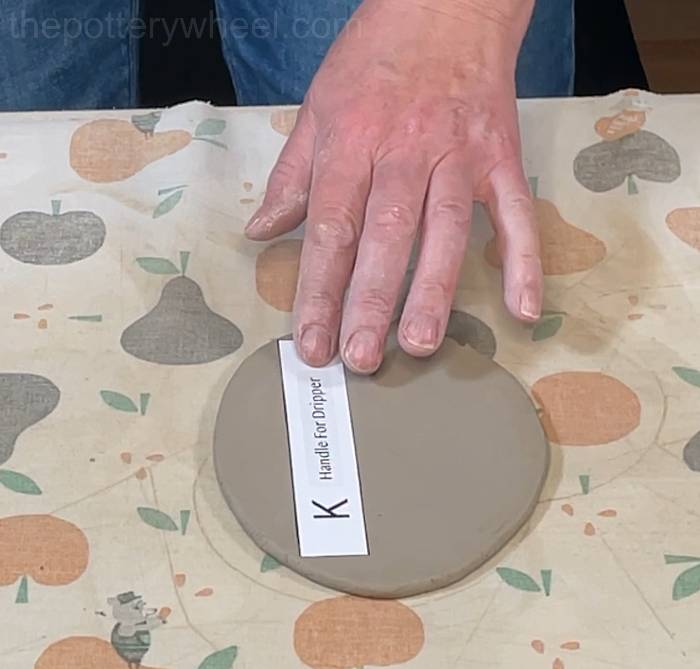
The handle for the coffee dripper is made from template K.
The process for adding the handle to the coffee dripper is the same as the one outlined above, from step 12. You can jump back to that section now, if you want to review it.
In short, to add the handle to the coffee dripper, you need to:
Recap
- Cut out the handle using template K
- Smooth the edges of the handle
- Curve the handle into shape and leave it to become soft leather hard
- Trim the handle to a length that feels comfortable to you
- Give each end of the handle a concave shape so that it sits well against the side of the coffee dripper
- Hold the handle against the side of the dripper and mark where you want to attach it with your clay knife
- Score each of the surfaces
- Apply slip to each scored surface
- Press the handle into place
- Add a thin clay coil to each end of the handle where it joins the coffee dripper
Smooth down the handle after it has been attached.
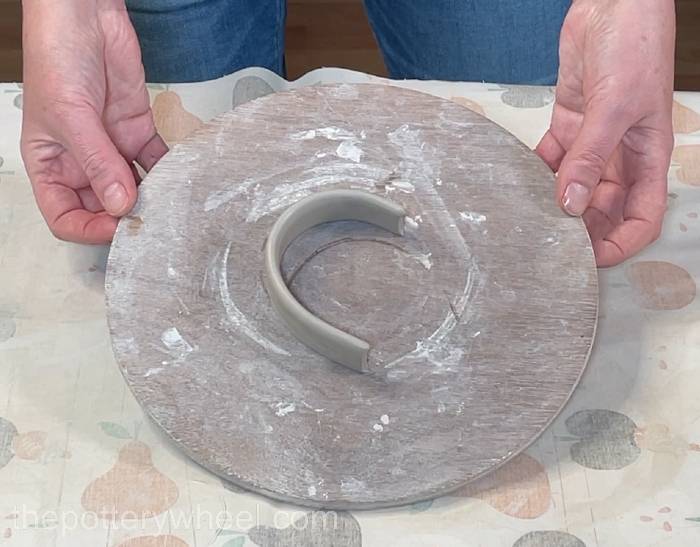
Step 5 – Preparing to Add the Flange to the Underside of the Coffee Dripper
The flange is the strip of clay that sits on the underside of the coffee dripper lid. It sits inside the rim of the coffee jug and stops the coffee dripper from sliding off.
The flange is made using template J. This is a long, thin strip that needs to be cut out of clay using roller guides that are 6mm wide or thicker.
Once you have cut out the flange, put it to one side briefly.
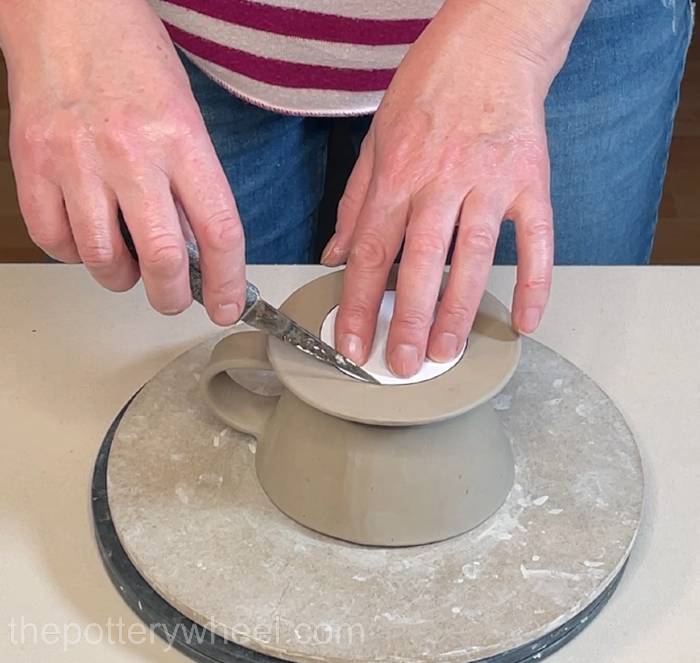
Place template G on the underside of the coffee dripper. Template G is a guide shape. Position it in the middle of the underside over the three holes.
Use a clay knife to draw lightly around template G. Remember, you are not cutting through the clay, you are just making a light mark.
Template G helps you make the flange the right size so that it fits in the rim of the coffee jug.
The flange needs to sit inside the line you drew using template G. Place the strip of clay you cut using template J, and curve it around the inside of the circle you drew on the base.
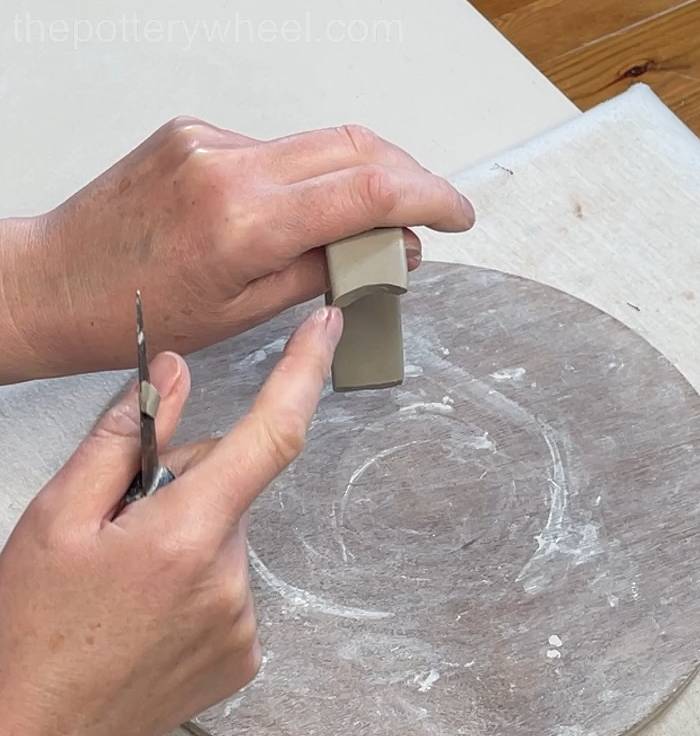
The strip is about half a centimetre longer than it needs to be. This is so that you can bevel the two short ends. Bevel the two short ends at an angle using your clay knife.
Score both bevelled ends, apply some slip, and then blend them together to create an enclosed clay ring.
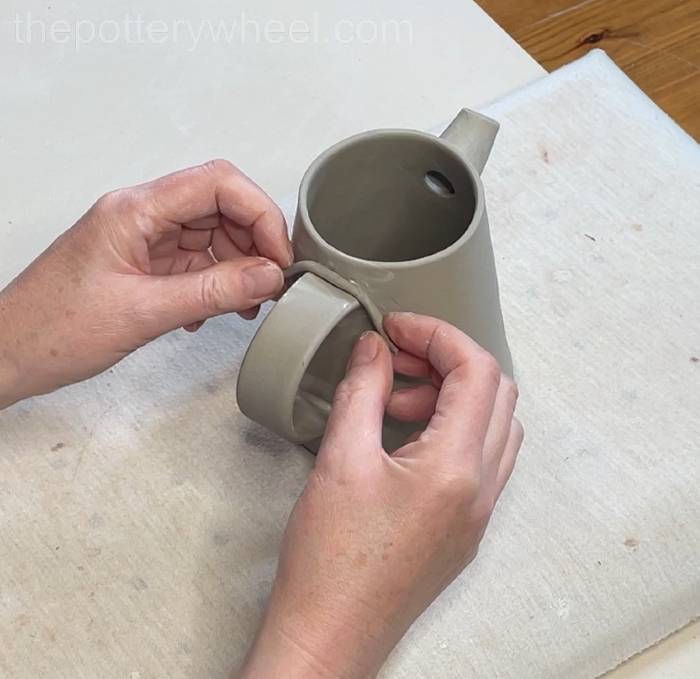
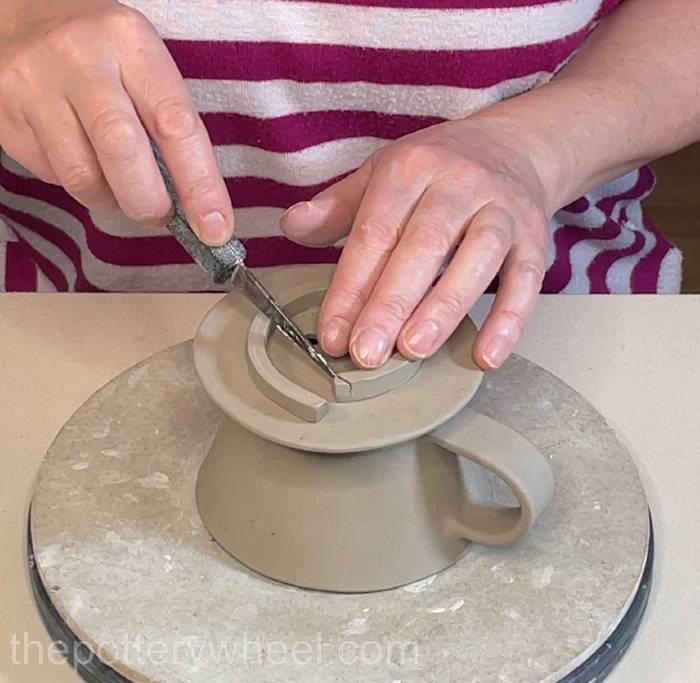
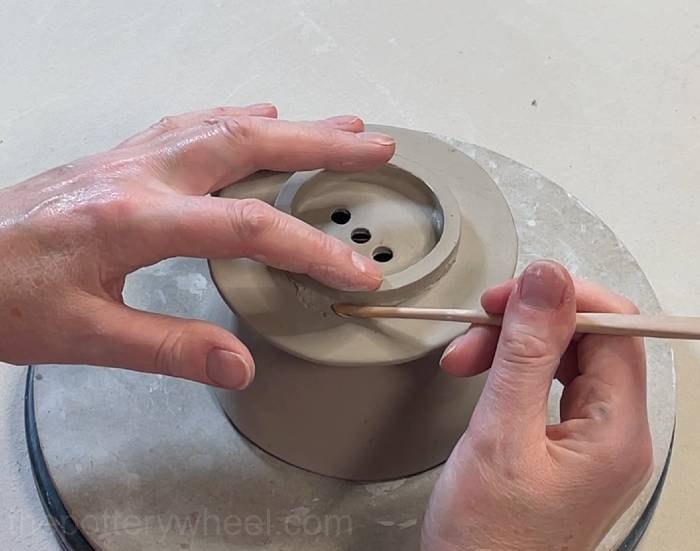
Step 6 – Adding the Flange to the Pour-Over Coffee Dripper
Score around the guideline on the underside of the coffee dripper. Remember that you are scoring on the inside of the guideline as the flange sits on the inside.
Also score one side of the clay flange. Apply slip to both scored surfaces.
Place the flange in position on the underside, and gently press it in place so that the clay surfaces bond together.
Using a wooden modelling tool, blend the flange onto the underside of the coffee dripper. Blend it on the inside and the outside of the flange.
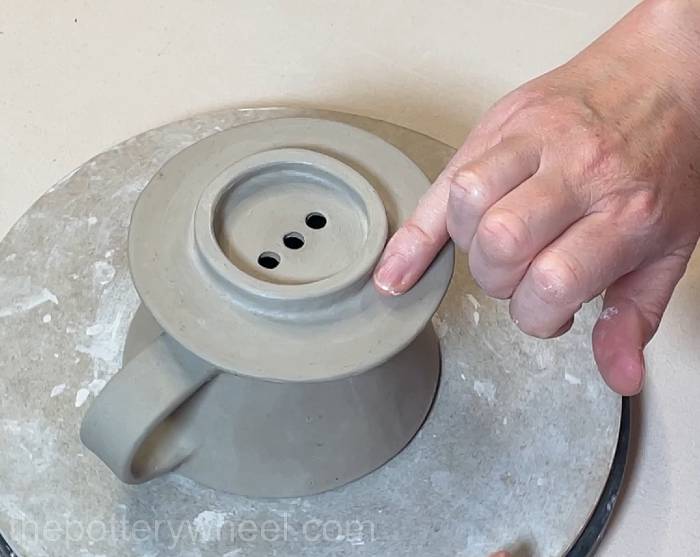
Wipe the flange down to remove the marks made by the modelling tool.
Smooth the flange down so that the edges are round and soft rather than sharp.
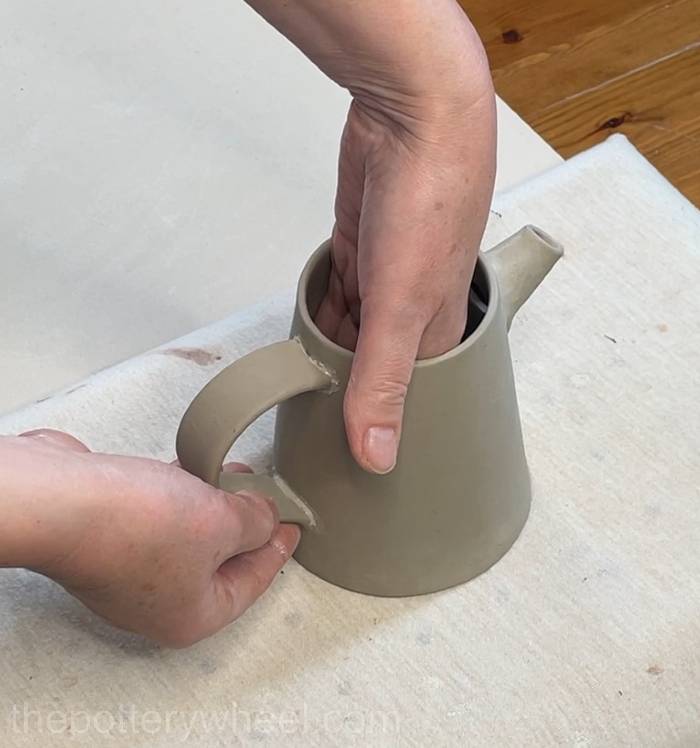
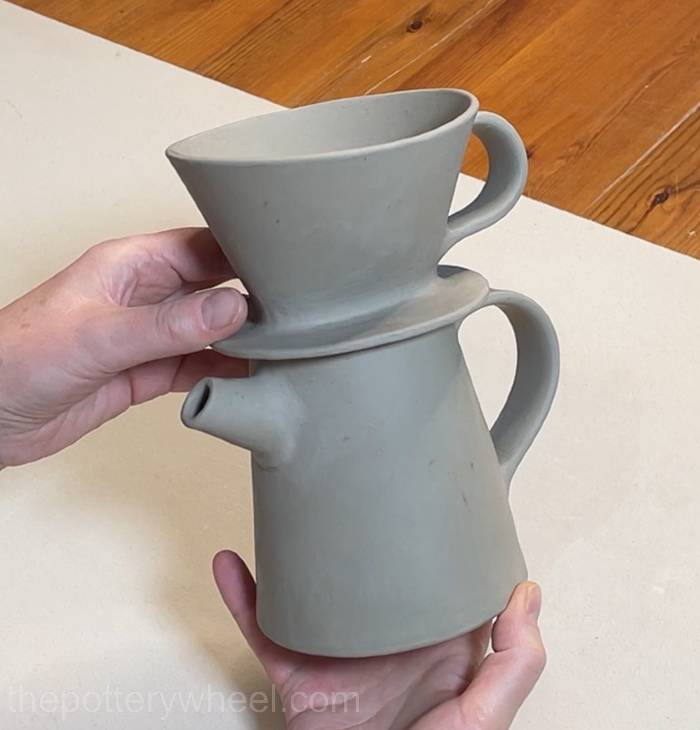
Step 8 – Fitting the Pour-Over Coffee Dripper With The Coffee Jug
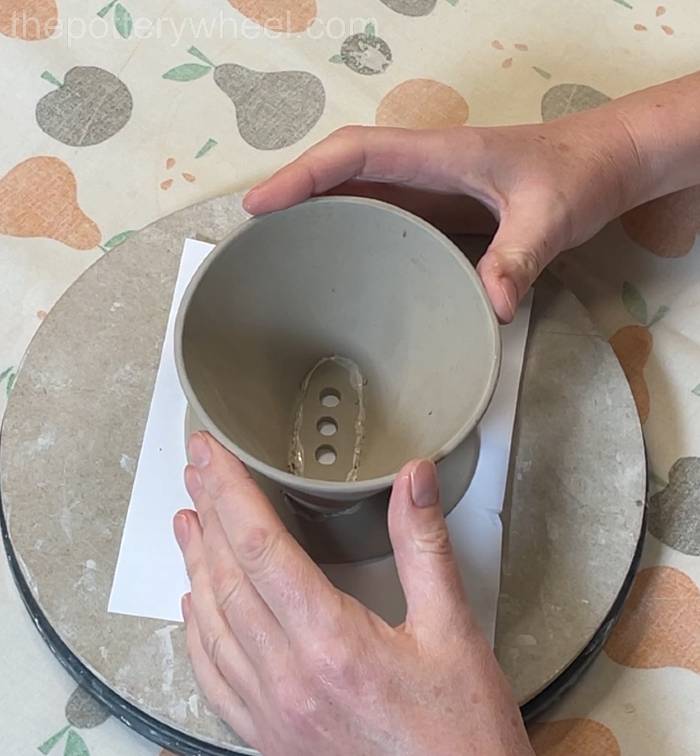
After you have made the coffee dripper, it’s a good idea to check that the flange is a good fit with the coffee jug.
Put some cellophane in the neck of the coffee jug. This stops the flange from getting stuck in the neck of the jug if it’s a bit tight.
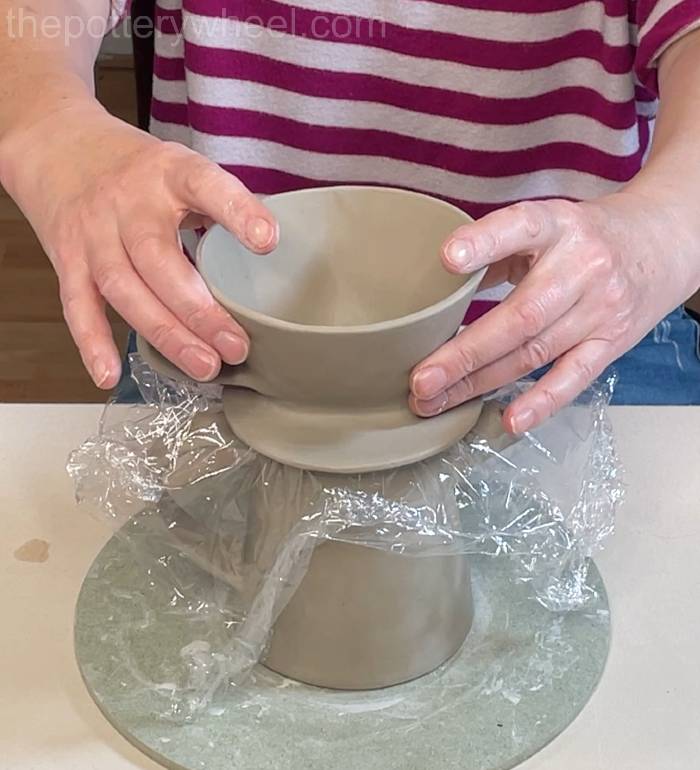
Fit the coffee dripper onto the jug. If the flange is a bit tight, remove it from the jug and use a wooden tool or your clay knife to pare a bit of the excess clay off the flange. Keep doing that until the flange fits the neck of the jug comfortably.
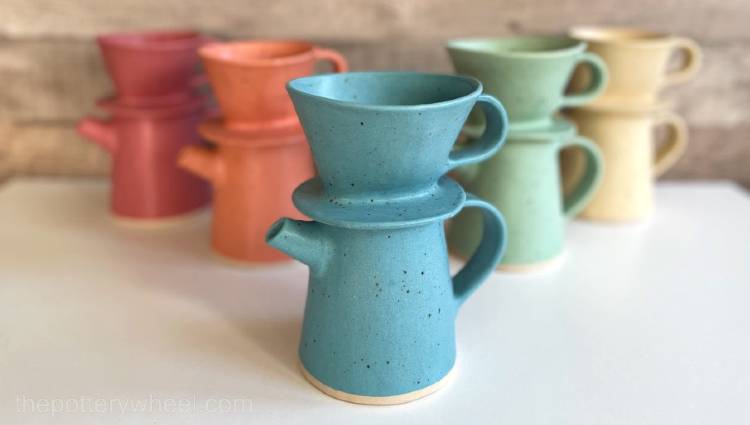
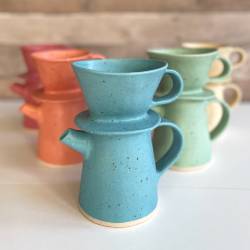
The Pour-Over Coffee Dripper Set
Here is the finished set before it has been dried and fired:
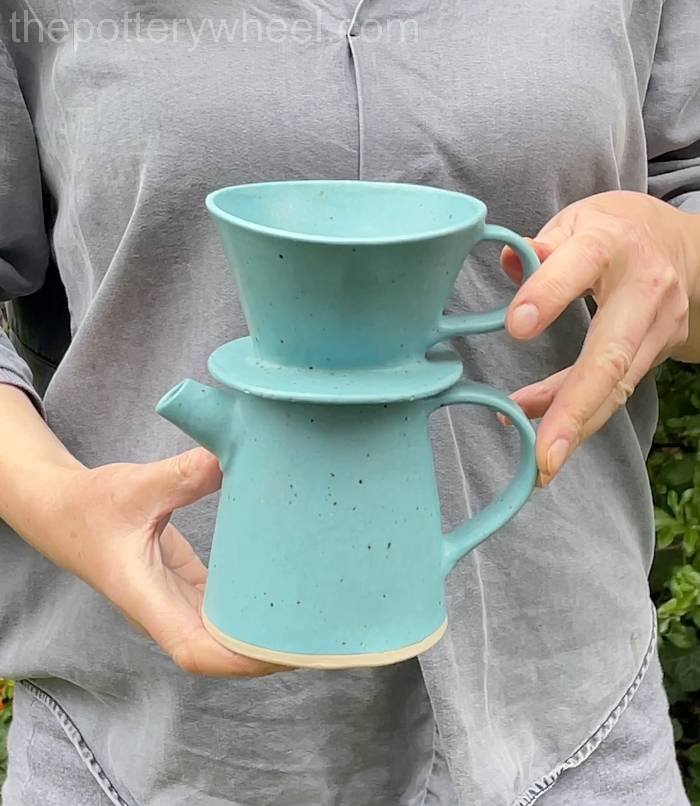
And here is the glazed set:
If you would like to get the template, you can grab a copy here.
Get The Template Here
You can get a copy of this template (and my other slab pottery templates) from my online shop here…


Leave a Reply