I really like the look of flowing glazes, so when I first saw the Potter’s Choice range, I loved them. When I began to use them, I had a few difficulties and I wasn’t getting the results I wanted. With a bit of research, and with trial and error, I have worked through these. Here are some of the Potter’s Choice glaze problems I encountered. And what I did to fix them.
Before I go on, I wanted to say that I love this range. And I’m glad I’ve taken the time to work through some of the Potter’s Choice glaze problems I encountered.
Really the problems have been technical problems on my behalf, rather than problems with the glaze itself. But in the process of finding solutions to the issues, I found other potters talking about similar difficulties.
So, I thought it would be helpful to write about the changes I made to make the glaze work for me
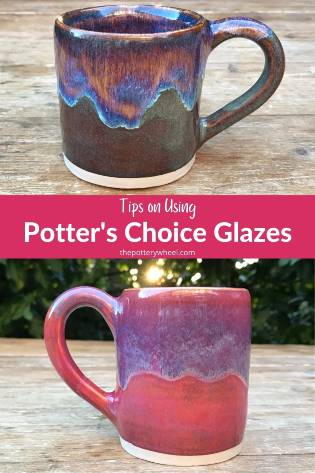
4 Potter’s Choice Glaze Problems
So, here are the main difficulties that arose for me when I started using these glazes. And what I did to address them.
1) Potter’s Choice Glaze Colors Not as I Expected
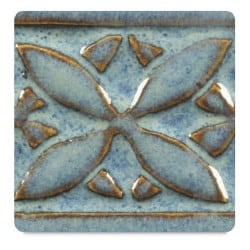
Amaco has a helpful set of illustrations on their website about what the different potter’s choice combinations can look like.
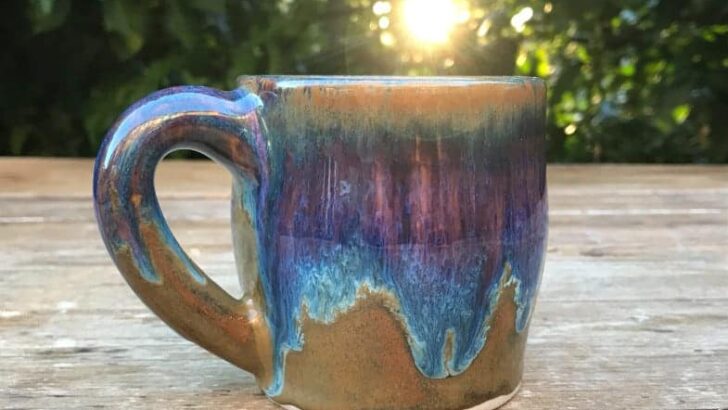
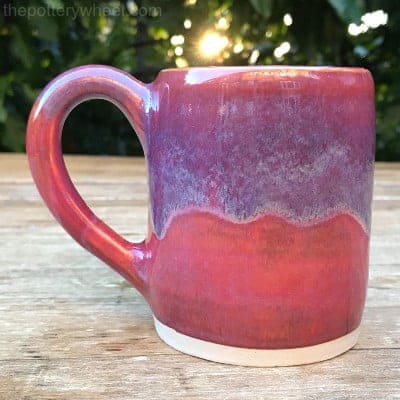
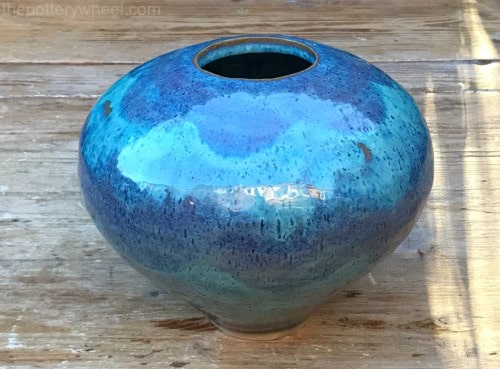
I love reds and purples and these were the combinations that appealed to me most. The first one that I tried was Oatmeal over Iron Lustre. I’d seen pictures of pieces glazed with this combination. I loved the blue-purple highlights that you get when the Oatmeal flows into the Iron Lustre.
However, the first few times I tried this combination I lost all the purples. The Iron Lustre was brown/tan and not unpleasant. And the Oatmeal was a mixture of blue and cream. It looked fine, but it lacked the lovely purples that really appealed to me.
Why Was I Losing Purples and Red?
This first piece had been fired for me by someone else. My own kiln was on the fritz, and a friend had offered to fire a batch of pieces for me. She did a couple of firings for me, and I had the same problem with both loads. Namely, that the purples and reds in the potter’s choice glazes seemed to get burned out.
I asked her about her firing schedule. She said that her target temperature was 2266F (1241C) with a 20-minute hold. She didn’t use cones, so I can’t say for sure how much heatwork was going on. But, my hunch was that with the hold, she was getting to cone 7.
Experimenting with the Temperature
When my kiln was working again, I experimented with the temperature myself. All kilns are different, and I can’t say that what worked with my kiln will work for yours.
My kiln is an old Cromartie kiln and it takes quite a long time to get to stoneware temperatures. By the time it has finally gotten up to cone 6, I really don’t need to do a soak. The glazes have already been sitting in stoneware temperatures for a long time already!
I have found that firing to 2201F (1205C) with no soak is the sweet spot for me with Potter’s Choice glazes. 2201F is cone 5 according to the Orton Cone Chart. However, because my kiln is a bit slow, by the time it gets to 2201F the pots have reached cone 6.
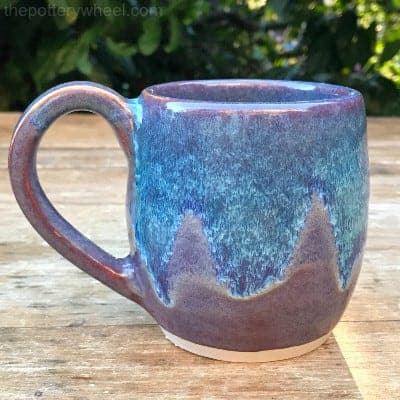
These glazes are designed to be fired at cone 5 or 6. I have found that they work best if fired to cone 6. Even though I have a digital controller, I use cones in every firing. If the cone indicates a perfect cone 6, then I find the colors in the glaze are at their best.
At cone 6 the reds and purples are vibrant and lush. At cone 7, I have found that they become burned out.

However, losing reds at higher temperatures is only one of the common potter’s choice glaze problems relating to color. I found that another issue was that these glazes can sometimes come out an unexpected muddy brown color.
This sometimes has to do with how thickly the glaze has been applied. So, let’s take a look now at the difference that the thickness of application can have…
2) How Thick to Apply Potter’s Choice Glazes
Potter’s Choice glazes can be bought for brushing or dipping. I brush on my glaze, so what I’m saying here is related to brushing glaze rather than dipping. Nevertheless, I think that some of the general points apply whether you are brushing or dipping.
On the Amaco website, it states in their illustrations of glaze combinations they use 2 coats of both glazes. So, if each coat is applied to the whole piece, all areas of the pot will have 4 coats in total.
If you are interested in what a particular potter’s choice glaze combination looks like, you find plenty of examples online. Simply search for the combination you like and you will find lots of images uploaded by potters. Often, potters will specify how many layers they used and what cone they fired at.
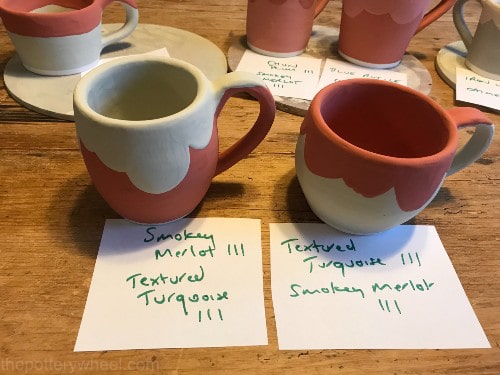
Often when I’m trying a new combination, I take a photo and a note of the number of layers like the one above. That way, if the combination works, I can remember how to recreate it. Sometimes it’s hard to tell once the pot has been fired.
The exact number of layers that works best seems to vary depending on the particular glaze and the glaze combination. However, what seems to be true across the board with these glazes is that they need to be applied thick.
I have found that if I apply just 2 layers, the glazes can look brown and muddy. 3 layers will start to look better. But even with three layers, the glaze can look a bit uneven if I haven’t brushed it on generously enough.
My experience has been that 4 layers are a good thickness. The glaze will melt evenly and flow nicely. And there is enough glaze on the piece to bring the colors out well.
Layering Potter’s Choice Combinations
In fact, when I’m layering Potter’s Choice glazes, I usually put 3 coats on the base layer. Then I add another 3 coats of the combination layer, on top of the base layer. So, the layered section will often have 6 layers.
This sounds like a lot of glaze. Ordinarily, 6 layers of glaze could look dreadful once fired. But I’ve found with Potter’s choice, a really thick application can look beautiful once fired.
Because these glazes are best applied thickly, it’s wise to take some precautions to avoid damage from drips. These are some of the things that I do to protect my kiln and shelves from overflowing glaze.
Tips on Drips!
Here are a few tips for avoiding damage to your kiln shelves if you do get drips…
- I always fire Potter’s Choice glazed pieces on kiln cookies. These are thin patties of clay that sit under the pot in the kiln and catch any drips that might run.
- Be sure to use kiln wash on your shelves and kiln cookies. Kiln wash will make it much easier for you to remove your pots from the surface it’s dripped onto.
- Whilst you’re getting to know a combination of glazes, keep the thicker layers on the top part of the pot. If you are applying 5 or 6 layers of glaze, paint these on the top 1/3 of your piece. See how much that flows when you fire it. If it doesn’t move too much, you can paint it nearer the foot the next time.
- I tend to give pieces fired with Potter’s Choice glazes a generous dry foot. Giving your piece a nice clear band at the bottom of the piece, or around lids will help if you do encounter drips.
- Be careful with handles on mugs. When applying glaze to pots, the glaze will tend to build up around handles and details.
I’m generally a bit more careful in the way I apply the glaze around a handle for that reason. It’s generally recommended that you load your glaze brush up generously when applying Potter’s Choice glazes.
I do tend to load my brush when I’m applying to bigger surface areas. But around details like handles, I apply it a little less thick, to avoid build-up. - Make test tiles to try out glaze combinations and to figure out the ideal number of layers for that combination.
3) Potter’s Choice Glazes Not Flowing
One of the things that initially appealed to me about Potter’s Choice glazes is how fluid they are. It took me a while to figure out how to get the flowing look that I liked.
During some of my experiments with these glazes, I have tried firing to cone 5. Mainly this was whilst I was figuring out how to make the colors as vivid as I could. What I’ve found is that if I fire at cone 5, they don’t flow quite as much as I want them to.
These glazes are designed to be cone 5 or 6 glazes and some potters might prefer the look they get at cone 5. This is a personal choice. But I really like the fluid melty look, so cone 6 works best for me.
For example, this vase was fired at cone 5. Though I like the colors, I would have liked the layers to blend more with each other.
4) Pinholes and Blisters with Potter’s Choice Glazes
The last item on my list of potter’s choice glaze problems is an issue with pinholes and blisters.
One of the first pieces I glazed with Potter’s Choice was quite a large vase. I know, I should have done a test tile first. But I was impatient to see how it would look.
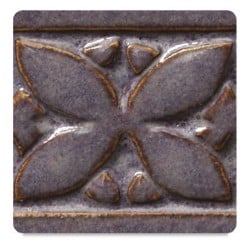
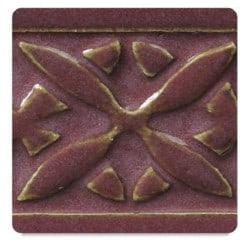
So, I applied 3 layers of Chun Plum and 2 layers of Smokey Merlot on the top half. I was excited to see how my lovely vase would look. However, even as the kiln was cooling down, I could hear a lot of ‘pinging’ going on in the kiln.
The pinging continued once the pot was removed from the kiln. I noticed that gradually over time, small pinholes and blisters were appearing over the glaze surface. Some were there when the vase came out of the kiln. But some definitely appeared in the days to come.
Solution 1 – Bisque Firing at cone 04
I researched what might be causing this, and wondered if I should bisque fire my pots at a higher temperature. I had previously bisque fired my ware at cone 06.
However, some say that if you bisque fire at cone 06, carbonaceous material can be left in your bisqueware. This then burns out during the glaze fire and can cause defects in your glaze. The gases try to escape the clay in the glaze fire. If they are not fully expelled they get trapped in the glaze layer and this can cause pinholes and blisters.
So, I started to bisque fire at 04 to see if this would make a difference.
Solution 2 – Finding a Good Glaze Clay Fit
If your pots ping when they cool down, it’s often to do with a poor glaze clay fit. If the glaze and clay don’t fit, the glaze is under pressure and can crack and craze when it cools.
When the crazing is microscopic you most likely won’t be able to see the cracks. However, if you hear the pinging, it’s because the glaze is cracking whether you see it or not.
This is not good for items like vases that are supposed to be watertight. Or for functional ware like mugs. Small cracks can harbor bacteria and make functional items unhygienic. Plus, with time a tiny crack can open up and the glaze can break off.
Trying a Different Clay Body
As well as raising my bisque firing temperature wondered if I should try another clay body.
The vase that had problems with pinging and blistering was made from slightly gritty stoneware clay. I like to use grogged clay when I’m hand-building, and I had hand-built this vase.
The clay that I switched to, was another clay body I like to use. It is a buff school stoneware clay with a bit of added sand. It’s one of my favorite clays because it is good to hand build with and throw on the wheel.
However, I encountered the same issue. The glaze was being fired to cone 6, but I was still getting the pinging and blistering. This suggested to me that the pinging problem was not related to the bisque temperature.
Instead, I wondered if the pinholes might have been to do with the grog and sand in the clay.
So, I decided to try an extra smooth clay body. And since switching to a smooth clay body, I’ve found that the pinging has ceased.
In fact, on the smooth white stoneware clay body, I’ve found that these glazes look wonderful.
Amaco has illustrations of Potter’s Choice glazes on different colored clay bodies on their website. I’m sure that these glazes can work on buff or darker clays. But my experience is that they work best on a smooth clay body.
Final Thoughts
It has taken me a bit of experimentation to work through the Potter’s Choice glaze problems I was having. However, it has been worth the time effort, and heartache. I love this range of glazes. And the nice thing about them is that you can try out any number of new combinations. I’m glad I stuck with it and figured out what worked for me. In the end, ironing out the problems involved fine-tuning the firing temperature, glaze thickness, and clay glaze fit.


