When I first got my kiln, I had no idea how to use it. The first hurdle was to learn about firing greenware to bisque. It was a bit of a learning curve for me and some of it I learned through trial and error. So, I thought it would be helpful to put together a guide on bisque firing and share what I’ve learned.
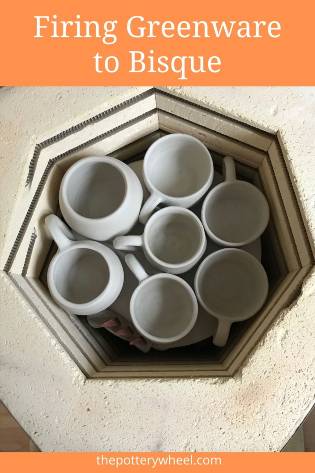
Firing Greenware to Bisque
These are my top 11 tips on how to bisque fire pottery…
1) Make Sure Your Pottery is Bone Dry
Bone dry clay is clay that is as dry as it can possibly be before it’s fired. All unfired clay contains two kinds of water. The first is called mechanical water. These are water molecules that sit freely between the clay particles (or platelets).
This water can evaporate quite easily over the course of a few days. The second kind of water is chemically bonded water. This is water that is bound to the clay particles at a molecular level. Chemically bonded water is only driven out when the clay is being fired in the kiln.
Prior to bisque firing your clay, you won’t be able to get rid of the chemically bonded water. This will only happen during the bisque fire. But, it’s important that you get rid of as much of the mechanical water as you can.
Once the mechanical water that sits between the clay platelets has evaporated, then your clay is bone dry. If your clay is not bone, it can explode or break when firing greenware to bisque. The reason pottery explodes in the kiln is that at 212F (100C) residual water in the clay turns to steam.
When water turns to steam it expands rapidly. As it expands, the steam travels into small air bubbles in the piece of clay. These gaps in the clay are put under a lot of pressure by the expanding steam. If there is enough pressure it can cause the pot to break or explode.
So, making sure that your pottery is as dry as it can be is important. It can take around a week for clay to dry out fully. This does depend upon how dry your climate is. If you live somewhere with a damp atmosphere it can take longer for clay to dry.
How to Make Sure Your Pottery is Dry
When pottery clay is dry it turns to a lighter color. The color it is when it’s dry depends upon what type of clay you are using. But, regardless of this, once it’s bone dry it will become a much lighter version of its original color. It will also have a matte slightly dusty looking surface.
Another way that some potters check if their clay is dry is to hold it to their cheek. The idea is that if it feels cold then it still contains moisture, and needs to dry for longer. However, I think the ‘cheek test’ is probably only useful if you live in a warm climate. If you live in a cold place, then your clay will probably feel cold even when it’s dry.
Generally, I gauge if clay is dry by how it looks, and how long it has been set aside to dry.
2) Pre-heating Your Kiln
Another way to make sure your clay is completely dry is to pre-heat your kiln. Pre-heating your kiln is also called ‘candling’ your kiln. Candling involves putting your kiln on a low heat for a few hours before you firing your pots.
But what does a low heat mean? Well, in terms of pre-heating your kiln, any temperature that is below the boiling point of water is low. Provided your kiln stays below 212F (100C), then the residual moisture will dry out slowly and leave the clay.
I live in a damp climate and I always pre-heat my kiln for two hours before firing greenware to bisque. To be precise, I pre-heat at 176F (80C) per hour for two hours. Doing this I have not had any problems with pottery exploding.
If your pieces of pottery are thick or you’re firing a larger sculpture, you may want to candle for longer.
3) Drying Your Pots on Your Kiln
I also place greenware on top of the kiln lid when the kiln is firing. The kiln lid gets hot. So, if I have a second load of pottery waiting to be fired, I dry it out on the lid. This is only really a good idea if your pottery is already quite dry. It’s not a good idea to speed up the drying process if your clay is still leather hard. Doing this can cause your pottery to dry unevenly and crack.
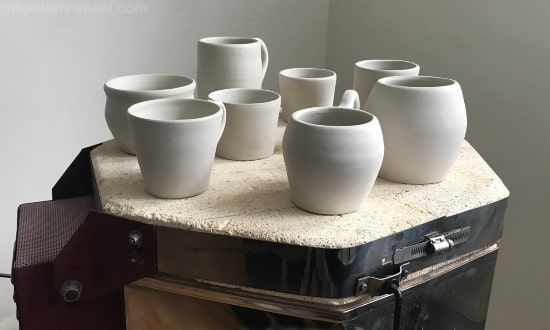
I would say that I generally do this when the kiln is hot but in the process of cooling down. When a kiln is operating at high temperatures the sides and lid get very hot. I wouldn’t put anything on it whilst it is really hot. But when it’s warm and on the cooling ramp, I sometimes use the lid to finish drying greenware.
4) Check Your Pots Before Firing Greenware to Bisque
Before I load my kiln, I give my greenware a final quick check. I’m looking for dents, bumps, and burrs on the pottery. Once pottery has been fired to bisque, it becomes hard and is more difficult to sand. So, it’s best to remove any imperfections from your pots before you bisque fire.
When clay is in its bone dry state it is still very soft and delicate. If I notice any bumps, lumps, or burrs I take a moment to sand them off. You have to be careful when sanding greenware. It’s very soft and if you sand with gritty sandpaper, it can be scratched very easily.
When I ‘sand’ bone dry clay, I rub it very gently with a piece of old green scrubby. Old scrubby is soft and floppy, but still a bit abrasive. This is rough enough to remove any little burrs on the greenware.
5) Loading your Kiln
The bricks on the floor and walls of your kiln are very soft and can be damaged easily. So, it’s important when you are loading and unloading your kiln not to bump the kiln walls.
It’s really easy when you’re lifting kiln shelves in and out to knock the walls and elements of the kiln. So, it’s best to load your kiln when you have time to do it slowly and carefully.
Here are some tips on loading your kiln when firing greenware to bisque:
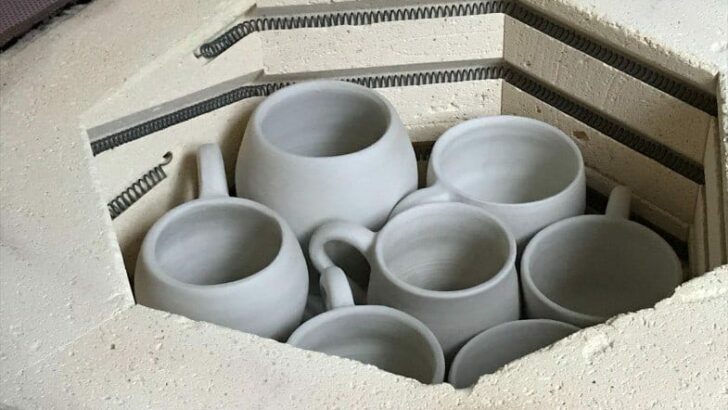
- Don’t put greenware directly on the floor of your kiln. Instead, put a kiln shelf at the bottom of the kiln, and place the shelf on very short props. This will allow air and heat to circulate under the bottom shelf. And it will protect the delicate bricks on the floor from your pottery.
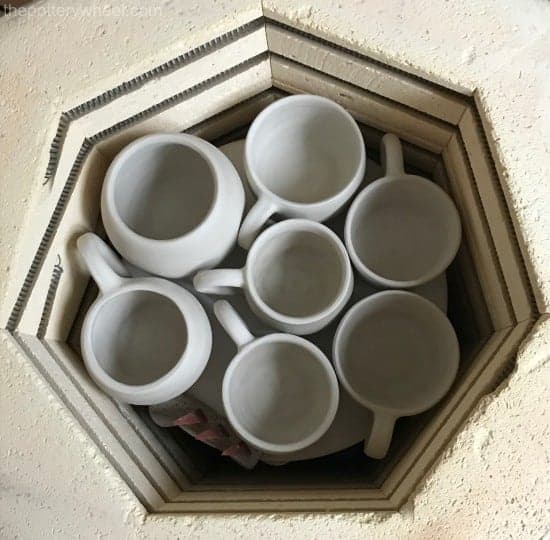
- It’s ok for pieces of greenware to touch one another in a bisque fire. In fact, you can stack greenware in a bisque fire. This is a good way of fitting more pottery into your kiln as you bisque fire. If you do stack greenware, remember to put the heavier items on the bottom.
- A good way of doing this is nesting smaller items inside larger ones. Make sure that the weight of the smaller items is sitting on the base of the lower item. This avoids undue pressure being applied to the rim of the item below.
- Some potters allow greenware pottery to touch the walls of the kiln. Personally, I avoid doing this, as I like to protect the walls as much as I can.
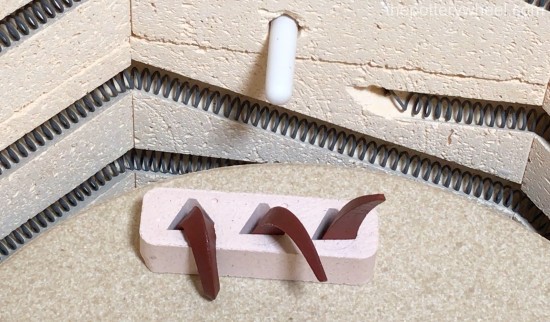
- It’s important however to avoid pottery resting on or touching the elements. This can damage the elements, and then your kiln won’t fire properly.
6) Tips About Kiln Furniture
To make sure your kiln shelves are steady, position the shelf on 3 props rather than 4. Ideally, you should use 3 kiln props positioned in a triangle shape with equal length sides.
It’s good to have a selection of kiln props of different lengths. Then you can fit the maximum amount of pottery in your kiln when you’re firing greenware to bisque.
Position the kiln props above one another between shelves. In other words, when you put a prop on a kiln shelf, it should be positioned above the prop underneath. This prevents unnecessary pressure from being applied to the kiln shelf as it’s fired.
7) Using Pyrometric Cones
Even if you have a kiln with a digital controller, it’s a very good idea to use pyrometric cones. If you are new to firing pottery, you might not know about cones. Here is a brief description of what cones are and how they work.
Cones are small pieces of ceramic material that are made in the shape of a narrow triangle. These thin triangular rods of ceramic material are designed to bend at particular temperatures. They are used in kilns to measure heatwork. Heatwork is a combination of the temperature a kiln reaches, and the amount of time it spent at that temperature.
There is a range of cones designed to bend at different temperatures. For example, some cones will bend at bisque temperatures. Other cones will bend at higher stoneware temperatures. Cones that bend in different temperature ranges are given different rating numbers.
Cones range from cone 022 to 14. Lower temperature cones have a leading 0. So, for example, cone 06 will bend at a lower temperature than cone 6.
Why Use Cones?
A digital controller on a kiln will tell you the temperature the kiln reached. But it won’t tell you exactly how much heatwork your pottery has had. If you are using a brand new kiln it will probably be working very efficiently. If it works efficiently, the kiln will probably reach temperature quite quickly and easily.
By contrast, a used kiln might be slower and less efficient. If you are firing in an older kiln, the pots might be getting more heatwork because it takes the kiln longer to reach temperature. Using cones will give you that information and you can adjust your firing schedule accordingly on the next firing.
You can either use self-supporting cones or smaller cones that need to be propped up in a cone pack. Self-supporting cones have a fatter base that you can simply position on your kiln shelf.
Smaller cones that need to be propped up in a cone pack, are, rather confusingly called ‘large cones’. They are called large cones to help distinguish them from ‘small cones’. Small cones are bar-shaped cones used in kiln sitter kilns.
Using cones will also tell you if your elements are working well. Even small kilns will have a few sets of elements that run around the walls of the kiln. If one of those sets of elements stops working, then you will get cold spots in the kiln.
Using cones will let you know if some parts of your kiln are colder than others. Pottery that is fired in a cold spot in your kiln might be underfired. Underfired pottery is clay that has not had enough heat work. If pottery is underfired, it may not have gone through the changes it needs to become fully ceramic.
Where to Put Your Pyrometric Cones?
Because cones will tell you if you have a cold spot in your kiln, it’s helpful to put them on each shelf. This may seem like overkill in a bisque fire. However, it can give you very useful information about how your kiln is working.
Ideally, you should place a cone pack near a peephole so you can see them as your kiln fires. If you can see the cones as your kiln fires, you will see when the cones have bent over. When cones are bent over it means that the pottery has had enough heatwork.
8) What Temperature to Use when Firing Greenware to Bisque
Usually, potters will bisque fire their pottery either to a target temperature of 1828F (998C) or 1945F (1063C). On the Orton Cone Chart, these temperatures are the same as cone 06 and 04.
To put it another way, if you are firing your pottery at cone 06, your target temperature is around 1828F. And if you are bisque firing your pottery at cone 04, then the target temperature is around 1945F.
Using the cone system can take a little while to get the hang of. Although 04 is a smaller number than 06, cone 04 is actually hotter than cone 06. This is because the cones start at the lowest temperature of cone 022. The scale then moves up in temperature towards cone 01. So, cone 06 is positioned on the chart at an earlier point and lower temperature than cone 04.
After cone 01 on the chart, then the leading 0 is dropped and the numbers go from 1 – 14. Either way, the cone number system is a little confusing at first. So, it’s always best to double-check your temperatures before you switch your kiln on.
The Advantages of Bisque Firing to Cone 06
As the temperature in your kiln gets higher, your ceramic material will become denser. When pottery becomes denser it becomes less porous.
If you bisque fire your pottery at the lower temperature of cone 06, then your bisqueware will be more porous. This can make it easier to get glaze to adhere to your pots when you glaze them. Glaze sticks to bisque when it’s applied because the porous bisque draws out the water. As the water is drawn out, the glaze materials adhere to the bisque surface.
If your bisque pottery is too dense, then it absorbs less water. The result of this is that it can take the glaze longer to dry on the bisque surface. Or less of the glaze material actually adheres, meaning you get a thinner layer of glaze. So, having porous bisque is, on the whole, a good thing.
However, during a bisque fire organic and carbonaceous material is burnt out of the clay as it turns to ceramic. It takes a while during the bisque fire for all this material to be burnt off. Sometimes if you bisque fire to a lower temperature like cone 06, not all of this material will have been burned out.
Organics and carbons left in the clay after the bisque fire can create gases that escape during the glaze fire. Gases that try to escape the ceramic ware during a glaze fire can cause blisters and pinholes in your glaze.
The Advantages of Bisque Firing to Cone 04
Cone 04 is a hotter bisque firing temperature than cone 06. The two main advantages of bisque firing to cone 04 are:
Organic and carbonaceous materials will have had more time to be burned out during the bisque fire. This means you are less likely to have problems during your glaze fire with pinholes and blisters.
Because pottery gets denser as the kiln gets hotter, your bisque ware will be stronger and less fragile.
However, bisque firing to a hotter temperature is a bit of a trade-off. The stronger and denser your bisqueware is, the less porous it becomes. As stated above, if your bisqueware is less porous it takes longer for glaze to dry on your pots. And it can be harder to get a thick enough layer of glaze to adhere.
Should I Bisque Fire to Cone 04 or 06?
This is something that you probably need to experiment with a little. It depends a lot on what kind of clay you are using. Clay with a lot of organic material and carbons may well be better off being bisque fired at cone 04. Whereas, if you are using a smoother cleaner clay, then cone 06 may be sufficient.
When you are using a new material, it’s good practice to make some test tiles. This is true whether you are using a new clay or a new glaze. Or if you are trying out a new combination of clay and glaze. It’s good to see how they interact. And you can see whether they bisque fire best at cone 04 or 06.
9) What Bisque Firing Schedule to Use?
Bisque firing pottery normally takes about 8-10 hours, depending on the kiln you are using. During that time, the rate at which the temperature of the kiln increases needs to vary. The firing schedule is divided into different segments or ramps. Each segment has a different rate of temperature increase.
When I first started firing greenware to bisque, the most daunting thing was deciding what firing schedule to use. I did a lot of research and spoke to a lot of people. But, everyone I spoke to seemed to have a different suggestion about the best firing schedules to use.
If you buy a brand new kiln, the ceramic supplier will probably provide instructions about what firing schedule to use. But if you buy a used kiln, then you may not have the manufacturer’s instructions about which schedule to use.
I have found that some potters have quite complicated firing schedules. Complex schedules have lots of different segments and hold times. My experience has been that it’s okay to bisque fire pottery with a relatively simple firing schedule.
Example of a Bisque Firing Schedule
This is the schedule I use to fire my bisqueware in Celsius:
| Segment | Rate | Target |
| 1 | 80C p/hr | 600C |
| 2 | 150C p/hr | 1063C |
This is the same schedule in Fahrenheit:
| Segment | Rate | Target |
| 1 | 175F p/hr | 1112F |
| 2 | 300F p/hr | 1945F |
It’s advisable to keep the temperature increase at a slow rate up until 1112F (600C). This is because the clay is undergoing a lot of dramatic changes below 1112F. Some of these changes involve the evaporation of residual mechanical water, and the driving off of chemically bonded water. Organic and carbonaceous material is being burned off.
Also, at 1063F (573C) the clay goes through a small but rapid expansion in size called the quartz inversion. It’s best if the rate of temperature rise during this window is slower. This helps the pottery survive the quartz inversion without cracking. Incidentally, pottery goes through the quartz inversion during the same window as the temperature drops too.
I’ve found that once the kiln has passed 1112F, it’s safe to increase the rate at which the temperature climbs. Nevertheless, this is just my experience. The firing schedule that works for you will depend on how old and large your kiln is.
When you start using your kiln, it can take a few tries to understand the best schedule to use. My recommendation would be to use pyrometric cones when you are firing. Even if you have a digital controller. The cones will tell you exactly how much heatwork is going on in your kiln. And you can adjust your firing schedule accordingly.
10) When to Open Your Kiln?
It is best to wait until your kiln is at room temperature again before you open it. During a bisque fire, your pottery has gone through a lot of changes. If you open the kiln when the pottery is still hot, then you risk the pottery experiencing thermal shock.
This is when the temperature of the pots drops very rapidly on contact with the cool air outside the kiln. The sudden drop causes the bisqueware to contract rapidly. Thermal shock puts bisqueware under a lot of stress and can cause your pottery to crack.
If you wait until the kiln is sufficiently cool, then you reduce the risk of damaging your pots.
It takes kilns a long time to cool down. Usually, it takes a kiln as long to cool down, as it did to get to the target temperature. So, if it takes 8 hours to bisque fire your pottery. Then it will probably be another 8 hours before you can open your kiln. If your kiln is very packed full, then it will take longer to cool down than if it is half empty.
Some potters will open the peepholes on their kiln to speed up the cooling down process. Or they may even crack the lid of the kiln. I tend to err on the safe side and leave mine closed up until it’s reached room temperature. It can be hard to resist peeking, but taking an early look doesn’t seem worth the risk to me.
11) Is your Bisqueware OK?
Once your kiln has cooled down, you can unload the kiln and check your pots. Clay that has been fired to ceramic bisque will make a ringing sound if you flick it gently. You will also notice that if you hold a damp finger to your bisqueware, it will absorb the moisture quickly.
You can check your pots for any fine lines or cracks that might have opened up in the bisque fire.
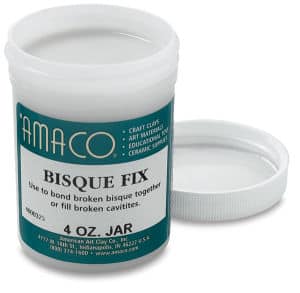
If a piece has cracked then all is not lost. You can mend bisqueware using bisque fix before you apply your glaze.
However, you may find that a piece of bisque has shattered or exploded in the bisque fire.
If this has happened, all you can do is clean up your kiln and chalk it up to experience. The best way to clean your kiln after an explosion is to lift out the larger pieces. Then use the soft brush on a vacuum and carefully vacuum out the small bits of bisque and dust. It’s important when you do this to avoid bumping the kiln walls and elements with the vacuum cleaner head.
Final Thoughts
Learning the process of firing greenware to bisque is very exciting. It’s the start of a new chapter in your pottery journey. Once you start firing your own pottery you can start to experiment more with your glazes. And this way you can carry on finding your own style and unique look. I found that when I first start firing greenware to bisque, it was a learning curve. A lot of it was learned by trial and error. But once I had the hang of it, my confidence really grew and the process of firing became less mysterious.


