Your cart is currently empty!
How to Make Pottery at Home – A Beginners Guide
Published:
Last Updated:
Affiliate Disclaimer
As an affiliate, we may earn a commission from qualifying purchases. We get commissions for purchases made through links on this website from Amazon and other third parties.
When I started to make pottery from home, I really just made it up as I went along. En route, I encountered a few practical issues that I had not anticipated. So, I thought it would be helpful to write a simple guide on how to make pottery at home. To help you avoid some of the pitfalls I encountered.
There are three main ways to make pottery at home. These include hand-building, wheel throwing, and slip casting. You can use air-dry clay, or ceramic pottery clay that requires firing. You don’t have to own a kiln, instead, you can find a local kiln firing service.
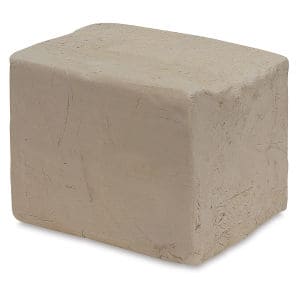
If you want to make pottery from home the first thing you are going to need is some clay. We will look at the different types of clay you can use for different techniques in this article. But before we do that, it is a good idea to think about the following 3 things:
Table of Contents
show
1) Where Are You Going to Make Pottery at Home?
Find some space in your home that you can use as a work table. The best place to make pottery is somewhere with a good source of natural light. A table by a window is a good option.
It sounds simple, but you need to be able to see what you are making well. I used to live on a boat, and it was dark.
Sometimes, I’d make something in the boat and be quite happy with it. Then I’d take it outside, into the harsh light of day, and I’d be disappointed in the detail. So, find somewhere, where you can see what you are doing.
I now work on a table by a long full-length window, that lets in plenty of light. So, if I’m making pottery that isn’t quite right, I know about it straight away.
2) Have a Dedicated Space to Make Pottery at Home
You will need to buy yourself a few tools and have some space for the things you make. So, having a space that is dedicated to making pottery will help.
You may be lucky and have a home with lots of extra space. Perhaps you have a shed or a garage that you can turn into your workspace. If so, that’s great. But don’t worry if you don’t. A simple corner in your living space will suffice. Just start to think of it as being where you keep your ‘pottery stuff’, and make it your work area.
3) Clear Some Shelves
Shelving is essential if you want to make pottery at home. Although you don’t need a lot of complicated equipment, you will need a little space to store some items.
Also, every time you make something, you are going to store it between pottery sessions. And also, you will need space to let your pottery dry out once it is done. It’s best to have some shelving where your pottery will be out of the way. That way you can avoid your work getting bumped and knocked in your home.
Once you have your space sorted out, you want to consider how you are going to make your pottery.
How to Make Pottery at Home
There are basically 3 ways of making pottery. I will give you an outline of each, so you can decide which one appeals to you the most.
I will look at each of these techniques in turn. If you know which one you want to know about, use the links below to jump straight to that section.
The three main ways to make pottery at home are:
Many potters use a combination of each of these skills. So, just because you start off using one technique, doesn’t mean you can’t try the others too. But it helps to know the difference when you are starting out, so you can choose a starting point.
Let’s look at using a pottery wheel first…
How to Make Pottery at Home – Using a Potter’s Wheel
Making pottery with a potter’s wheel is called wheel throwing, or throwing on the wheel. Here is a simple outline of what throwing pottery on the wheel involves.
It is a whistle-stop tour of wheel throwing. This brief outline will give you an idea of what is involved. So, you can decide if it appeals to you as a way of making pottery…
Throwing on the Wheel
Firstly, you take a piece of clay and place it on the wheel head. The wheel head is the metal plate on the pottery wheel that spins.
Most potter’s wheels are controlled using a foot pedal. You wet the clay so that it slips beneath your hands, and then press the foot pedal so that wheel spins.
The next thing you need to do is to center your clay. This basically means that you are positioning your clay in the center of the wheel head.
Once the clay is centered, you can start to shape your clay into whatever item you want to make. This can be a bowl, cup, mug, plate, or vase. There are a number of different techniques that you can learn to center and shape your clay.
It looks easy when you see experienced potters throwing pottery. However, there is a real knack to making pottery on the wheel and it does take practice. Don’t be disheartened if your first efforts do not look great. It’s a motor skill and it will take a while before you get good.
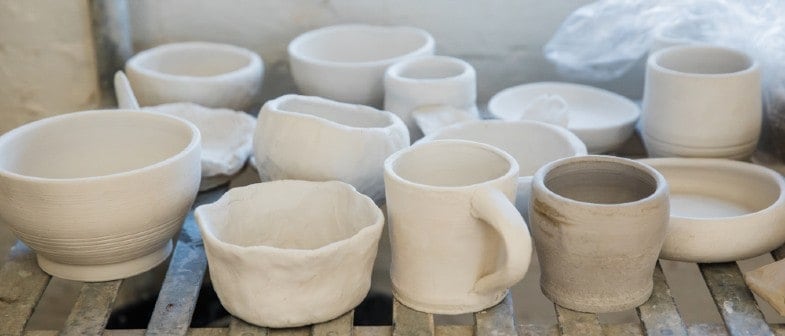
Once you’ve made your pottery, you need to remove it from the wheel head and put it to one side. This is when your shelving comes in handy.
Removing Your Pot from the Wheel
How you remove your pot from the wheel will depend on what kind of wheel you have. Some potter’s wheels have something called bat pin holes. These are holes in the wheel head that allow you to attach a wooden wheel bat to the wheel head.
If you have bat pins and a wheel bat, you can simply lift the bat off the wheel. If you don’t have bat pins, you will need to slice the pot off the wheel. The pot is then transferred to a wooden bat to dry.
The clay needs to dry out a little and become ‘leather hard’. Clay is leather hard when it’s dried and hardened a little. It isn’t completely dry and can still be carved and trimmed easily. But it is not so soft that it changes its shape when it’s handled.
Trimming Your Pottery
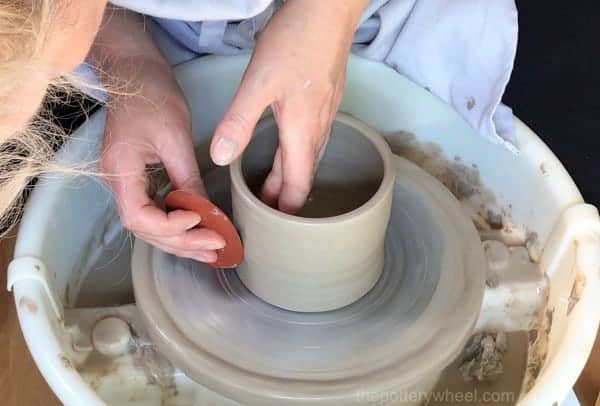
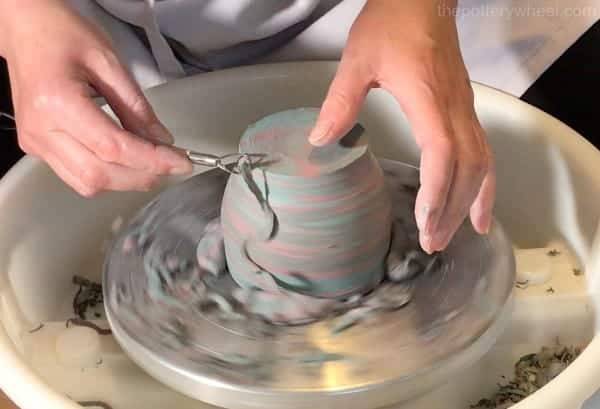
Once the pot is leather hard, you will tidy it up using a ‘trimming tool’. Trimming your pottery involves placing it back on the wheel head. You can fix your pottery to the wheel head again by using a few blobs of soft clay.
A trimming tool is then held up against the pottery as it spins. This will remove excess clay from your pottery, and tidy up the shape.
Once your pottery has been trimmed you can smooth down any ridges made by the trimming tool. I find the easiest way to do this is by using a rib tool.
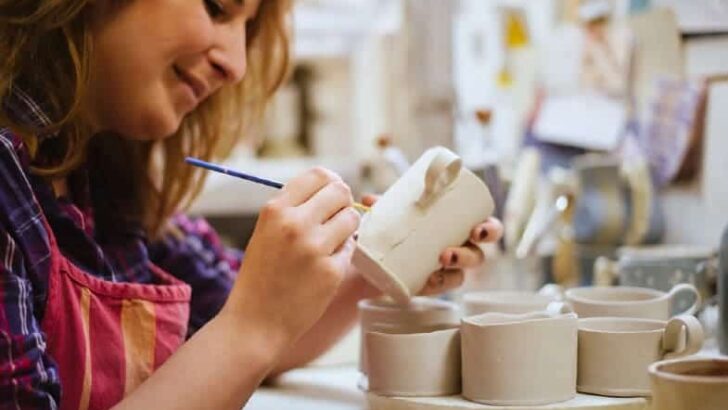
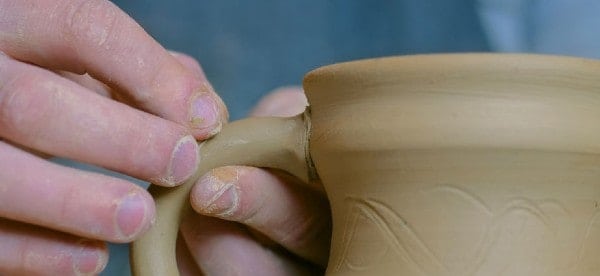
Attaching Handles
If you are making a cup, mug, or jug, your pottery is now ready to attach a handle. It’s possible to buy a handle extruder.
You can push clay through a handle extruder and make nice evenly proportioned handles for your work. However, extruders are quite expensive, and it’s easy enough to make your own handles. This is called ‘pulling a handle’.
Once you have shaped your handle, you set it to one side (again on your shelf!). The handle is left until it is also leather hard. When the mug and the handle can both be handled without losing their shape, you can attach the handle.
This is done by using a method called slip and score. With score and slip, you scratch into the clay with a ‘needle tool’ to make the surface rough. You then apply a little clay slip to each surface, to make the scored area soft and wet. The two surfaces, (the handle and the cup) can then be pressed together and will make a firm join.
Your pottery is now ready to be left to dry out so that you can decorate it or fire it. I will discuss firing your pottery later in this article. If you’d like to read about this now, you can jump to that section here.
In the meantime, it would be helpful to look at the equipment you would need to start wheel throwing…
Equipment for Wheel Throwing
So, bearing in mind the steps described above here is some of the equipment that you need for wheel throwing.
- A potter’s wheel
- Clay
- Wheel bats
- Clay wire
- Wooden tools
- Metal rib tools
- Rubber rib tool
- Needle tools
- Trimming tools
A Word About Buying a Potter’s Wheel
Pottery wheels take up quite a bit of space. If you have a large place and space isn’t an issue, then a larger wheel is fine. But if space is at a premium, it’s helpful to get a wheel that you can store in a corner.
There are a variety of pottery wheels available on the market. These range from $200 to $2000.
How much you want to spend on a wheel is a matter of personal choice. However, when you’re new to a hobby it can be sensible to start in the lower price bracket.
You can have a look at my article about buying a potter’s wheel. This will give you an idea of the range of wheels on the market. However, as a starter wheel, my feeling is that a simple, cheap, and cheerful unbranded wheel is fine.
One of the main advantages of buying a more expensive wheel is that they have more horsepower and torque. This enables them to handle larger quantities of clay. So, more experienced potters are able to throw very large pieces on the wheel.
However, if you are new to pottery, it’s likely that you will be making smaller pieces. And a wheel like this is able to easily manage pieces like mugs, cups, plates, and bowls.
I started off with a pottery wheel like this from Vevor a long time and it served me well.
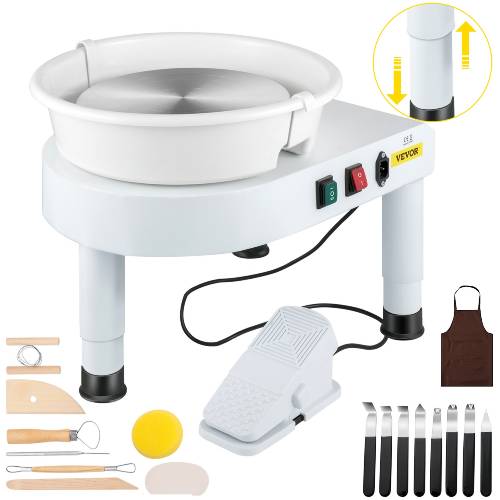
Pottery Wheel for Beginners – View on Vevor
If you decide that wheel throwing is your passion and you want to upgrade in the future, that is fine. But when you are starting out, a wheel like this will do just fine.
It is compact, easy to clean, works well, and won’t break the bank.
Best Clay for Wheel Throwing Pottery at Home
You will also need to buy yourself some clay too. There is also a wide range of clays available that are suitable for wheel throwing. If you’d like to know more about different types of clay for pottery, check out this article. For the pros and cons of using different clays, I have also written about the best clay for beginners too.
In a nutshell, though, it would be best to buy some clay that is easy to use. That might sound like a strange thing to say, clay is clay, right? Well not really. Different clay bodies feel quite different to use.
The main types of clay are earthenware, stoneware, and porcelain.
If you are new to using a pottery wheel, my recommendation would be to use stoneware clay.
Porcelain is lovely to use once you have the hang of it. However, it can be hard to manage when you are starting out.
Stoneware is more straightforward to use and generally does what you want it to do on the wheel. Unlike porcelain, which can have a mind of its own.
Choose Clay with a Fine Grog
One of the things that is added to clay to make it easier to use is grog. Grog is basically clay that has been fired and ground up into granules of varying sizes. Some grog is fine, other grog is coarse.
When grog is added to clay, it makes it easier to use because it gives the clay extra strength. It’s like a kind of internal scaffolding, which stops the clay from slumping when you are making things from it.
Clay that contains a fine grog will be easier to use on the pottery wheel. Avoid buying clay that contains coarse grog or sand, as this will feel rough on your hands. But a stoneware that contains fine grog will probably suit you if you are new to the wheel.
Before you buy a potter’s wheel, you might like to know about another way to make pottery at home. So, let’s have a look at hand-building pottery….
How to Make Pottery at Home – Hand Building Pottery
Hand-building pottery is exactly as it sounds. You are using your hands to build the clay into pottery vessels. There are 4 main ways of hand building, and I will give you an overview of these now. Nevertheless, what each method has in common is that your hands are your main tools.
My background is in sculpture. And, one of the things that I love about hand building is that it can feel quite sculptural. You are building and modeling the clay into pottery.
Hand building is the perfect way to make pottery at home because it requires little space-consuming equipment.
Here are the main ways of hand-building pottery…
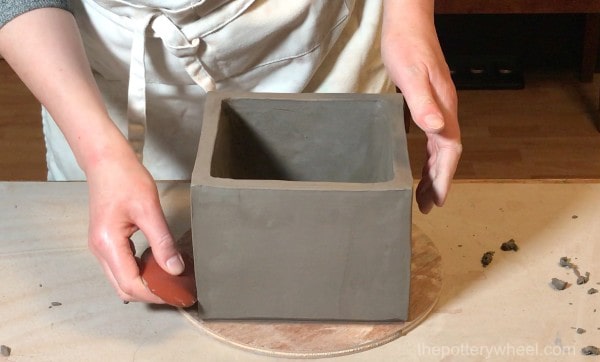
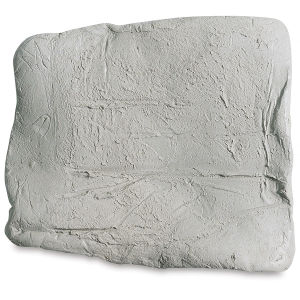
Slab Pottery
With slab pottery, you are building your vessels out of slabs of clay. The main technique involved is to roll out slabs of clay and join them together into the desired shape.
Slab pottery is versatile, and it can be used to make mugs, vases, bowls, and boxes.
Whatever you are making, generally the same technique applies. This involves rolling out your slab of clay and then cutting the slab into the required sizes. Then join the slabs together in the desired shape using the slip and score method I mentioned above.
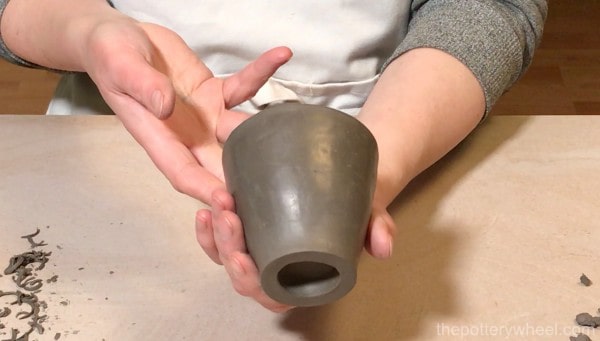
Pinch Pottery
The pinch pottery technique involves using your fingers and thumb to pinch your clay into the desired shape.
This sounds very simple, and in some ways it is. Pinch pottery is a great way for children to start making pottery. However, the pinching technique can be used to make fine pottery too.
There are various different techniques that you can use to finesse a pinch pot, so can look really quite lovely.
Pinch pots can be very simple constructions. And with a few extra steps, they can be made to look quite refined.
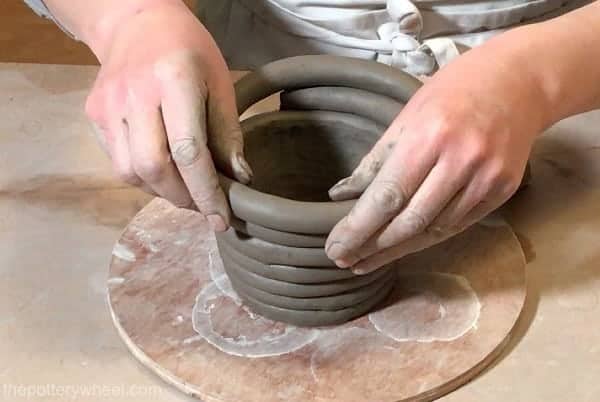
Coil Pots
Making coil pottery is an ancient art form dating back thousands of years. It involves rolling clay out into long coils of clay and then shaping these together to form a vessel.
A simple coil point involves putting one coil on top of another to build up the sides of the pottery. Each coil needs to be fixed securely to the next to ensure the pot holds together. Sometimes this is done using slip and score.
At other times the coils are secured by blending the clay together to make the surface smooth. Often the inner surface is blended so that the inside of the pot is smooth. This leaves the distinctive coil pattern visible on the outside.
There are many different ways of making coil pottery. It can be a lot of fun and the resulting pottery can look really quite striking.
Using Molds for Hand Building Pottery
Another way of hand-building pottery is to use a mold. Broadly speaking pottery molds can be divided into hump molds and slump molds.
Hump Molds:
A hump mold is basically a hump over which a slab of clay can be draped and shaped. Humps can be made out of different materials. They can be made out of bisque pottery, wood, plaster, or even plastic.
I have found that plaster hump molds work best because they absorb water from the clay. Because plaster molds are absorbent, it’s easy to remove the clay pot from the mold once it’s leather hard. You can buy plaster molds, however, they are extremely simple to make. Check out my video on how to make a plaster hump mold:
Making a Plaster Hump Mold for Pottery

When using a hump mold, you simply roll out a slab of clay and drape the slab over the mold. You can then press the slab firmly against the mold so the bowl is flush against the mold surface. Or you can drape the clay loosely to create a fluted shape.
Whilst the clay is moist, you can trim the edge of the pot with a knife or needle tool
Once the clay slab has dried to the point of being leather hard, it can be lifted off the mold. You can then tidy up the clay surface with a rib tool. The smooth surface can then be decorated as you choose.
Slump Molds:
Slump molds are basically shapes that you can drape a slab of pottery into rather than over.
As with hump molds, you can buy slump molds that are specifically made for draping clay. However, there are lots of different containers around your home that you can use as a slump mold.
A good example would be a plastic storage container, like this:
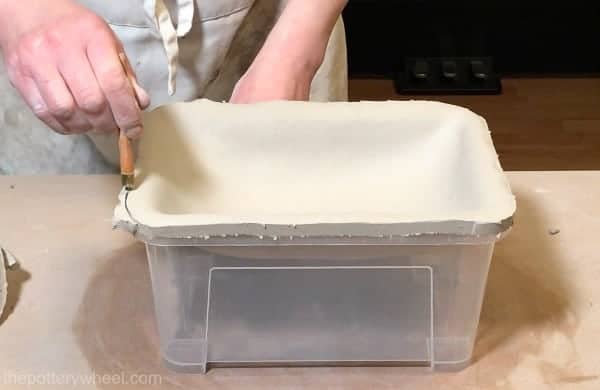
As with making hump mold pottery, you start by making a slab of clay. Then you drape the slab of clay over the edges of the drape mold. You can trim excess clay off the side of the slump mold, and allow the clay to go leather hard.
Once it’s leather hard, you can lift the pot off the mold and tidy it up with your pottery tools.
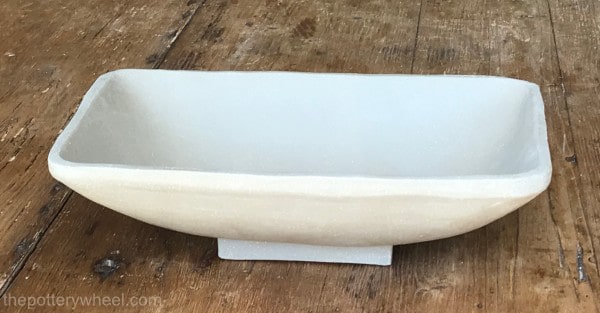
You can then finish it in whatever way you like. You may for example like to put a foot ring on the pot. Here is the above pot made in a slump mold, with a foot ring attached.
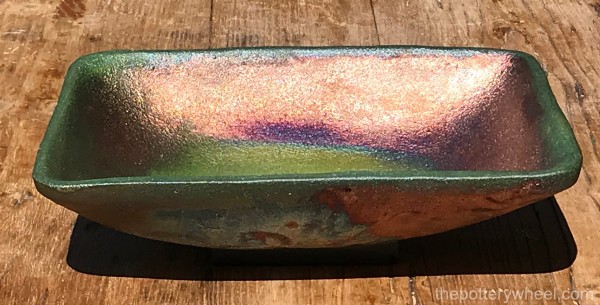
This is the same pot, once again after it has been glazed and fired. Clay undergoes quite a transformation in its pottery journey. And a humble plastic container that you have in your home, can help you make lovely pottery.
Best Clay for Hand Building Pottery at Home
When hand building you can use a clay body with a higher grog content than is ideal for wheel throwing. As stated above, grog is added to clay to strengthen the clay and make it easier to shape. This is useful for hand building, as the clay will keep its shape more readily.
A highly grogged clay can feel uncomfortable when wheel-throwing. This is because the grog granules can feel like sandpaper under your hands on the wheel. However, this is not a problem with hand-building and added grog won’t cause any discomfort.
If you want to make very delicate refined hand-built work, then porcelain that contains fine grog might be good.
Some things to remember about porcelain are that it shrinks quite a lot when it dries. Also, it does dehydrate quite quickly, so you need to work fast. Also, even grogged porcelain can feel a bit floppy to work with.
My recommendation for anyone starting out in pottery is to use stoneware clay.
Stoneware is strong and easy to manage. However, if it is finished well, it can look very smooth and refined.
Although a lot of stoneware clay is grey or buff when it is wet, it does dry a lighter color. And if you are firing your pieces too, it will often fire to an off-white color.
Tools for Hand Building Pottery
As well as purchasing clay, there are some tools that are useful to buy when hand-building pottery.
Here are some tools that you will likely find helpful if you are thinking of hand-building pottery at home:
How to Make Pottery at Home – Slip Casting
Slip casting doesn’t involve molding clay. Instead, it involves pouring liquid clay or clay slip into plaster molds. Water from the clay slip is absorbed by the plaster and the clay hardens into the shape of the mold.
The plaster molds are normally made out of casting plaster. You can either buy these molds, or you can make them.
A lot of molds used for slip cast pottery consist of two halves that fit together. This means that when the clay slip has become leather hard, the two parts can be taken apart. This enables the cast pottery to be removed easily.
Once the cast pottery is removed, any excess clay or seam lines can be tidied up.
The beauty of slip casting is that you can create very smooth pieces of pottery. And you can replicate these pieces very precisely.
My own experience of using plaster casts is connected to making molds for sculptures. However, this video is a clear, helpful demonstration of how pottery can be made through slip casting.
Slip Casting with Plaster Molds – In Six Steps

General Tips on How to Make Pottery at Home
Whatever way you choose to use your clay, here are some general tips about how to make pottery at home.
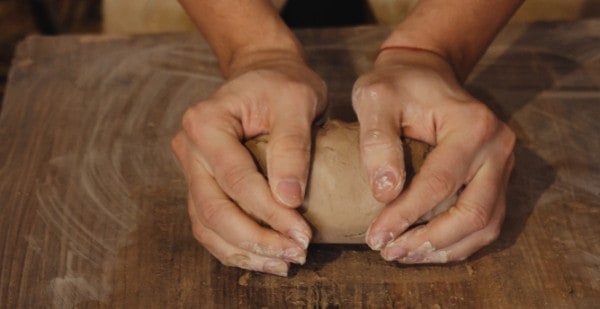
Wedging Clay
Wedging is a way of preparing your clay for pottery. Some potters liken it to kneading dough. And in some ways, that’s a useful comparison. The action feels similar.
However, the difference is that when you are kneading you are trying to get air into the dough. By contrast, when you are wedging, the aim is, in part, to get rid of air pockets in the clay.
There are a few different wedging techniques. As well as getting air out of the clay, wedging is designed to give the clay a more even consistency. And it can be used to dry the clay out a little if the clay is too sticky.
You can buy wedging tables and portable wedging surfaces. But really what you need, is a smooth, somewhat absorbent surface, like plywood or MDF. This can be clamped to any solid surface like a heavy table or dresser. As long as the board doesn’t move when you move the clay around on it, then you are good to go.
In the long run, you might want to think about getting a wedging table. Or even building one, if you are handy with DIY.
But when you are just starting to make pottery at home, a simple wedging surface is completely adequate. It can be removed and stored when you are not using it, and it takes up much less space.
Storing your Pottery Between Sessions
As I mentioned at the start of the article, some spare shelves are a really good idea. You don’t necessarily have to install more. Just do a declutter and free up some space on your existing shelves.
The one thing I have heard potters repeatedly say is that they never feel they have enough shelf space.
Between pottery sessions, you will need to store your pieces so they don’t dry out. There are different ways to store pottery. The right way depends on whether you want to keep your pottery soft and workable. Or if you want it to become leather hard, or even bone dry.
I have found the best way to keep pottery workable between sessions is to use a damp box. These are extremely easy to make and I would really recommend them as an addition to your pottery arsenal.
Essentially a damp box is a storage box, with a layer of plaster in the bottom. You can keep the plaster damp, and put a lid on the box. In doing this, you are creating a small damp environment that your pottery can sit in.
In this damp atmosphere, the pottery will stay workable indefinitely. They are genius, and I wouldn’t be without mine.
How To Make A Damp Box for Clay

To Fire or Not to Fire – That is The Question
The other thing to think about is whether you want to use air-dry clay or ceramic pottery clay.
As you might have guessed from the name, air dry clay goes hard, without being fired in a kiln. By contrast, ceramic pottery clay does need to be fired in a kiln to be hardened.
There are a number of different types of air-dry clay. Some air dry clay is made to look and feel much like normal pottery clay. However, it is reinforced by fibers. Sometimes these fibers are nylon. It is these fibers that give the clay some strength as it dries, without it being fired in a kiln.
Ceramic pottery clay that does not contain these fibers is very fragile in its bone dry state. However, once it has been fired in a kiln and turned from clay into ceramic pottery, it becomes very durable.
Using Air Dry Clay
One advantage of air dry clay is that you don’t need access to a kiln to enjoy making pottery. Air-dry clay can be painted with acrylic paints and made to look attractive. You can also apply sealers to the paint. These sealers will toughen the surface and make it more durable.
The disadvantage of air dry clay is that even with sealers, it is never going to be waterproof. Pottery made from air dry clay can’t be used as dinnerware, as a functional mug, or a waterproof vase.
It can be used to store lightweight dry goods, like potpourri or a trinket dish. However, its uses are a little limited.
Using Pottery Clay
The advantage of using pottery clay that needs to be fired is that you can make functional pottery from it.
Once clay has been fired and becomes ceramic, it is no longer soluble in water. Different types of clay vary in how porous they are. For example, earthenware clay is still porous once it has been fired. However, once glaze has been applied, even porous ceramic can be made waterproof.
Some potters do have kilns that they use in their own homes. However, not all potters have their own kiln. If you don’t have space or resources to buy a kiln, that does not have to be a problem. There are various ways that you can find a pottery firing service in your local area. You may need to do a little investigation, but there is bound to be a kiln firing service nearby.
If you want ideas about finding a local kiln, check out my article for suggestions about where to look.
Glazing Your Pottery at Home
Pottery firing is normally a two-step process. Firstly, the pottery is left to dry naturally until it is bone dry. Then it is bisque fired. The bisque fire is the first fire, and this is when the clay becomes ceramic.
After the bisque fire, glaze is applied to the pottery, and it is fired a second time. This is the glaze fire. During the glaze fire, the applied glaze will melt and form a glassy layer on the potter. This is because the glaze is made up in part of glass-forming ingredients.
There are a few ways to glaze pottery. One way is to dip your pottery in a large bucket of glaze using tongs. Dipping glaze is ideal for potters with a studio and lots of space.
However, if you are starting to make pottery from home, having big buckets of glaze may not be practical. Fortunately, there are other ways of glazing pottery. Probably the best way to glaze your pots, if you want to make pottery at home, is to use brushing glaze.
Brushing glaze is as the name suggests, applied with a brush. It is very simple to use. And although you might need to give your surfaces a wipe down afterward, it is more or less mess-free.
There is a wide range of glazes to choose from. Glazes vary in color, texture, tone, opacity, and fluidity. There is a lot to experiment with and have fun with. It may take you time to find your glazing style, but you will definitely have fun as you do.
Cleaning up your Pottery Space
It’s important to clear up after you have made pottery. Clay dust is not good to have lingering around on surfaces, so it’s important to wipe down afterward.
Working on a table that has a surface that is easy to wipe down is a good idea. And it’s best to make your pottery on a hard floor, rather than on a carpeted area. With the best will in the world, you will get dust and splatters. And these are much more easily wiped up off a hard floor than a carpet.
It’s also a good idea to install a clay trap under your sink too. Lumps of clay or plaster going down your sink is a bad idea. The sediment will build up over time and you will end up with a blocked drain.
Fitting a sink trap is very straight forward and inconspicuous. This is the trap that I have under my sink.
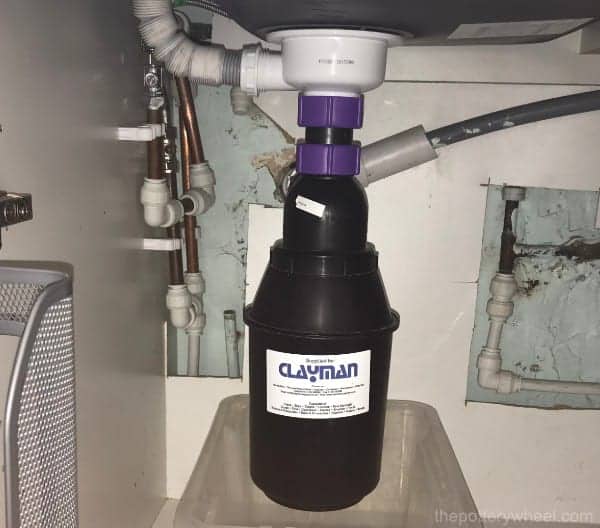
It catches any debris before it passes on down through the pipes into the drain. You do need to empty a sink trap over time. This is not the most fun aspect of making pottery. But it is necessary and it only takes minutes.
Pottery Clothes
It’s a good idea to wear comfortable clothes that you can wash regularly. Even if you wear an apron, you will probably end up with blobs of clay on your clothing. So be prepared to put it in the washing machine after you have been using clay.
Another tip is to check your face after you have finished making pottery. I have wandered down to the shops with clay across my face more times than I care to remember. So, my tip would be to check the mirror!
Learning your Craft
There are lots of online resources that will help you learn to make pottery at home. YouTube has some great tutorials from very experienced potters. Potters are generally very generous with their knowledge and want to spread the joy of making things out of clay.
You can also access courses online through organizations such as Udemy.
Better still, if you are able to, it’s a very good idea to go to a local pottery class. That way you get access to one-to-one personalized feedback. And you may also get access to a kiln.
Final Thoughts
This article has been a whistle-stop tour of how to make pottery at home. I said at the start of the article that making pottery is simple. And in one way it is. It really is about shaping clay, enjoying the process, and delighting in your triumphs. There is nothing quite like making something you love.
On the other hand, there is a lot to making pottery. You need to learn about techniques, types of clay, ways of firing, and how glazes behave. And you also need to learn about your own style. However, it’s entirely possible to make pottery at home, and you just need to take one pot at a time.