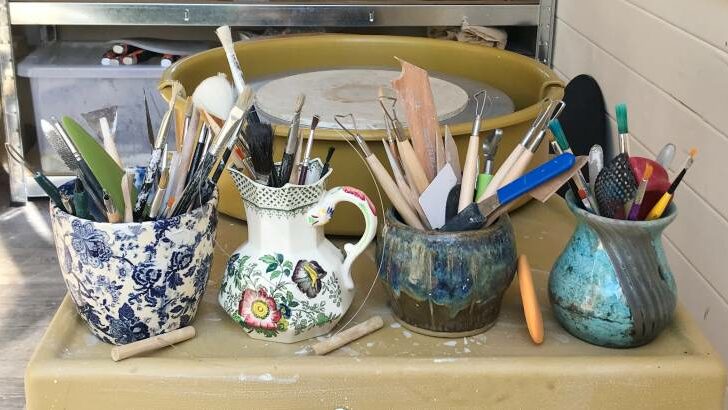
If you are starting out making pottery, it really helps to have a selection of essential pottery tools. You have probably noticed that you can buy bundles of tools, but it’s not always clear what each of these tools is for.
So, I’ve put together this list of tools that I use almost every day and could not do without. You can buy each tool individually and make your own tool kit. Or you can buy a bundle of tools to get you started.
I will recommend some of the bundles I think are good later in the article. If you want to check out the bundles now, you can jump to that section here.
In the meantime, here are the tools that I use daily and that will make your life as a potter a whole lot easier.
18 Pottery Tools I Would Not Be Without
Whether you are making your pottery on a potter’s wheel or hand building your pots, these tools will be your friend. I’m going to start off with a quick list of the tools I’m going to be reviewing. So, if you know what you want, you can jump straight to that section.
- Clay wire cutter
- Potter’s sponge
- Needle tool
- Metal rib tool
- Wooden modeling tools
- Wooden bat
- Loop tools
- Rubber rib
- Potter’s canvas
- Rolling pin
- Roller guides
- Clay knife / fettling knife
- Serrated rib tool
- Stylus tools
- Fine modeling tools
- Clay shredder
- Chamois leather
- Clay stamp
For anyone who is still unsure about what they need, here is a more complete review to help you decide…
1) Clay Wire Cutter
Clay is usually bought in large blocks. It will arrive in a big strong plastic bag to stop it from trying out. However, wet clay sticks together, that’s what makes it good for pottery. You will find it very hard work to tear a handful of clay off the block, or to slice it off with a knife.
The best way to cut a handful of clay off the block is with a clay wire cutter. This is a piece of wire, usually about 2 feet long, with two simple handles attached to either end.
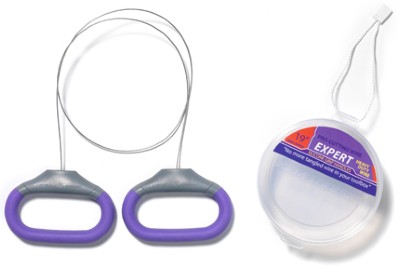
Clay Wire Cutter by Xiem – View on Blick
Place your large block of clay on the table or on the floor. Gently pull on each of the handles so that the wire is taut. Then pull the taut wire through the block of clay. This will easily slice a chunk of clay off for you to work with.
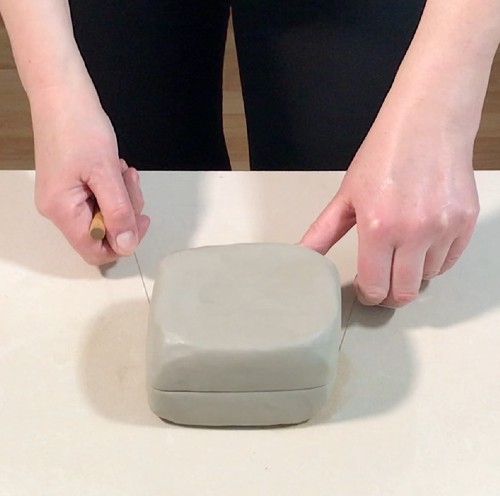
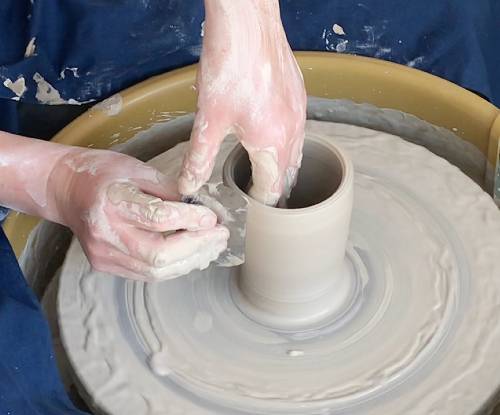
Another use for your clay wire cutter is to help you remove freshly made pots from the potter’s wheel. After you have thrown a pot, it will be very firmly attached to the wheel head, or the pottery bat.
Whilst the clay is still wet, you need to slice through the base of the pot. This will separate it from the wheel head or bat so that you will be able to lift it off.
Your clay wire cutter is the tool for this job. Pull the wire gently through the clay at the base of the pot. This will slice the pot off the surface so that it can be removed. You can read more about removing a pot from the wheel head here.
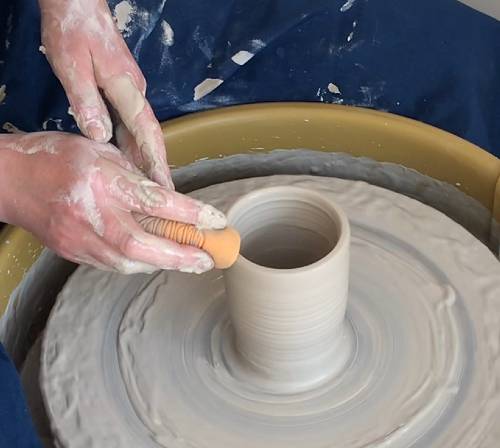
2) Potter’s Sponge
Clay needs to contain enough water so that it is soft and workable. The more you handle clay as you work, the more moisture it loses and the drier and harder it becomes.
To work with clay, you will have to add water, and the easiest way to do this is to use a potter’s sponge.

Mudtools MudSponge – View on Blick
When you start out, you can use a general-purpose domestic sponge. The problem with using a regular sponge is that when you first use them they can be too firm, and they can distort the shape of your pot. Or when they get older they can disintegrate and leave chunks of old sponge on the surface of your pottery.
A potter’s sponge is designed to withstand the rigors of making pottery. In addition to this, they are often designed to be quite absorbent. I love this pottery sponge by Mudtools. It’s soft and absorbent, so you can use it to tidy up the rim of a pot. But because it’s absorbent, you can use it to mop up excess water that is sitting in the base of my pot.
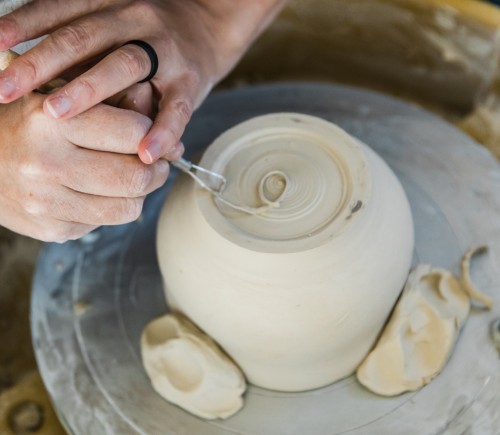
3) Needle Tool
A needle tool is like the pencil of the pottery world. It is a fine metal point mounted on a wooden, plastic, or metal handle. I like my needle tool with a wooden handle as I find them less slippery. But that’s just me, you might prefer a plastic or metal handle.
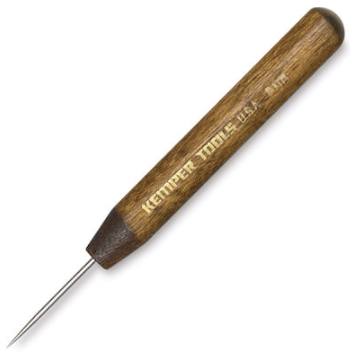
Needle tools have a wide range of uses. You can use them to gauge the thickness of the base of your pot when you are throwing. They can be used to score into clay when you are joining pieces of clay together. You can use them to sign your work or you can use them for decorating your pottery sgraffito style.
The number of ways to use a needle tool is endless. Either way, it will be a staple in your pottery tool kit. So, they really are one of the first items you should get your hands on.
4) Metal Rib Tool
A metal scraper or rib tool is designed to smooth out clay. It can be used to scrape slip off freshly thrown pots. Or scraper tools can be used to remove unwanted texture off hand built pottery.
They come in a range of shapes and sizes. I find the two that I use most are the oval-shaped tool and the scraper with one pointed edge.
You can buy an assortment pack and with time you will figure out which of the metal scrapers work best for you.
The good thing about metal rib tools is that they are hard but flexible. You can bend them easily with one hand, so the fit of the scraper will fit around the curve of your pots.
You can buy ribs that are wooden. These are handy to have, but the disadvantage of a wooden rib is that it doesn’t bend and flex like a metal rib.
If you are on a budget you can make your own scraper tool from an old bank card or travel card. As well as being free, the good thing about making your own pottery tools, is that you can make them exactly as you want them.
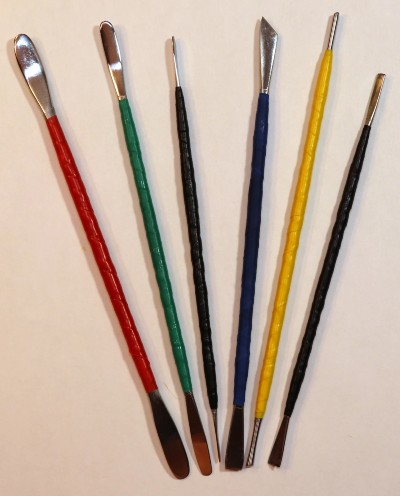
5) Wooden Modeling Tool
It’s a good idea to get a selection of wooden modeling tools. Often you can buy these in packs of 10 or more, and each has a slightly different shape.
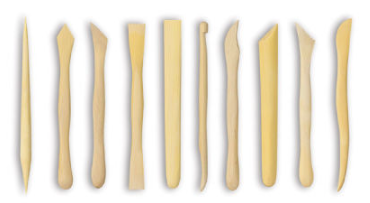
Pottery Modeling Tools – View on Blick
You will probably find in time that you use two or three of them much more than the others.
Wooden tools have endless uses. They are essential for removing excess clay from the foot of your pot once you’ve thrown it on the wheel.
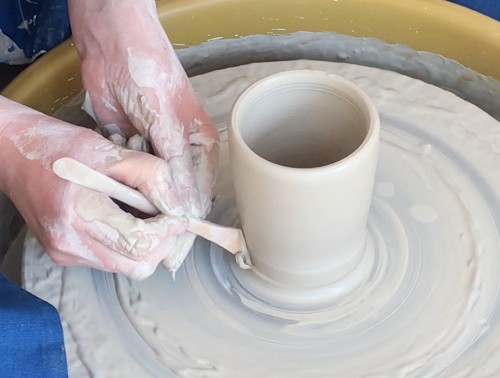
They can also be used for blending and smoothing clay when you are hand building.
Wooden tools are great for finessing the shape of your pottery. Your fingers and thumbs are good for shaping too. But once you have a favorite wooden tool you won’t know what you did without it.
The wooden tool in the pictures above is my favorite modeling tool. It has a sharp pointed end and a curved smooth end that is great for blending.
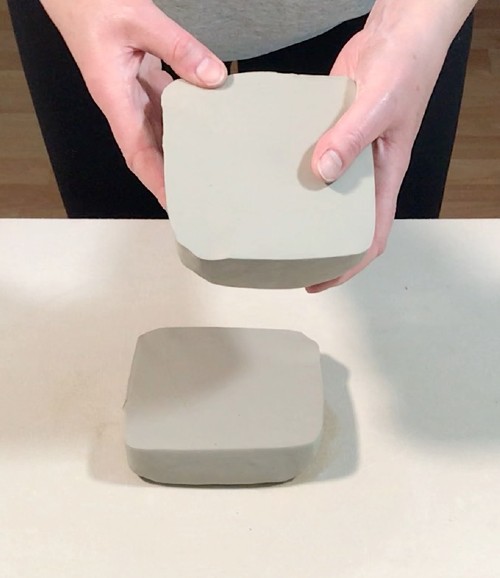
6) Wooden Bat
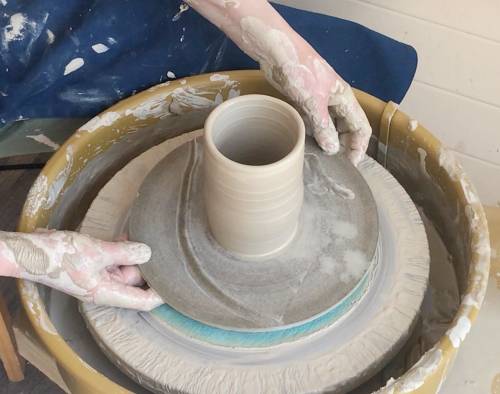
Wooden bats can be used on the pottery wheel. The bat is attached to the wheel head and you can throw directly onto the wooden bat. This makes it much easier to remove your pottery from the wheel if you are throwing something wider like a plate or large bowl.
However, wooden bats have many more uses. Here are some of the ways that I use my wooden bats all the time:
- As a base for hand building
- To move pottery around without handling the clay too much
- As a drying board for pottery before it’s fired
- To sandwich slabs of clay and keep them flat when I’m slab building

I’d suggest getting two or three wooden bats to start off with.
Over time, you will probably build up a collection of bats. But a good starting point is to buy a couple and build from there.
If they are fiber board make sure that you dry them out after you used them, to keep them in good shape.

7) Loop Tools
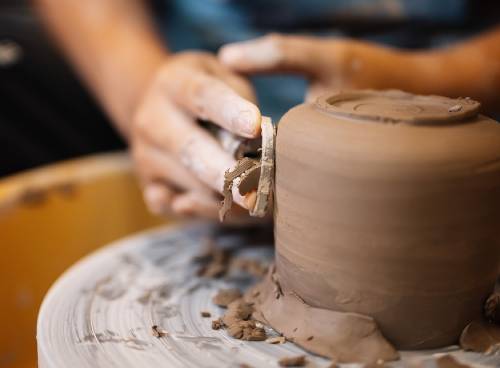
Loop tools are especially important if you are throwing your pottery on the wheel. No matter how good you become at throwing on the wheel, you will always need to trim your pots before they are fired.
Trimming (also called turning) your pottery is a way of removing excess clay and bulk. It’s also a way of refining the shape of your pots and adding details such as a foot ring to the base.
There are a number of pottery tools that you can use for trimming pots. However, probably the most popular, and certainly my favorite is called a loop tool.
Loop tools, as the name suggests, are a loop of metal mounted on a handle. The metal loop is then held up against the pot and used to shave off excess clay.
They come in a whole range of shapes and sizes. Like the wooden modeling tools, you will probably find that you use one or two loop tools more and they will become your favorites.
I have two favorite loop tools. The first is a larger teardrop-shaped loop tool made by Xiem.
It is made of strong sharp metal and it’s good for removing a lot of the excess clay when I start trimming.

But I also have a number of smaller loop tools, sometimes called ribbon tools. They are good for trimming finer detail on my pots, like adding a foot ring.
I’d suggest getting a small set of these finer loop tools like this. You can experiment and find out which one you like most.
You will probably find that you have a couple of favorite loop tools that you use all the time for trimming.
Double-ended tools are good as you get two for one.

8) Rubber Rib
Trimming pottery is important, but it usually leaves marks and lines on your pottery made by the trimming tools. Some potters like to leave these trimming marks on their pottery. It shows that the pots have been handmade.
I prefer to smooth out marks made by trimming tools. One of the easiest ways to do this is to use a soft rubber rib tool.
Rubber ribs, sometimes called kidneys can be held against your pottery as it turns on the wheel. As it turns the soft silicone smooths away any marks made by the trimming tools.
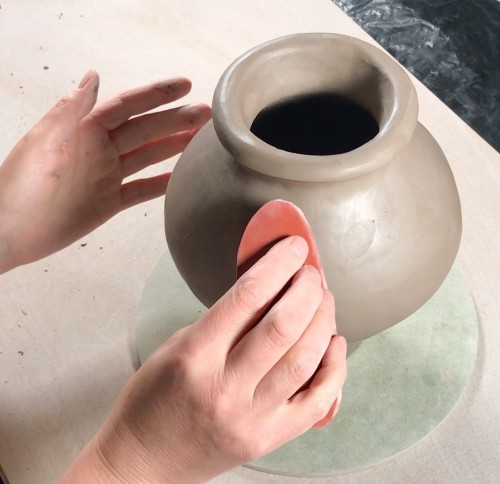
Rubber ribs are also great for smoothing pottery in general. I use my rubber ribs all the time when I’m hand building.
They are great as a finishing tool to remove finger marks and other imperfections in the clay surface. You can get rib tools with different levels of firmness.

Most of the tools mentioned above can be used for wheel thrown pottery and also hand build pieces. However, the next few items are particularly useful if you are hand building with your clay. Incidentally, if you want to know more about hand building techniques you can check out my article here.
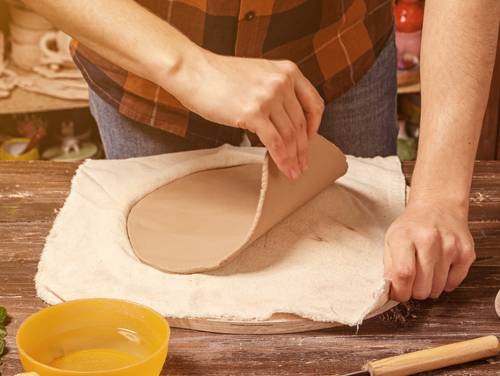
9) Canvas Sheet
If you try hand building your pottery directly onto your table, chances are, your pots will stick to the table.
This is particularly true when you are rolling a slab of clay. Clay needs to contain enough moisture so that it is soft and workable. But all that moisture makes it sticky, and it will stick to your work surface.
Once it’s stuck to the worktop, it’s very hard to remove it without damaging the shape of what you’ve made.
The solution to this is to make your pieces on a sheet of canvas fabric. Canvas is a little absorbent, so the clay doesn’t stick to it as easily. And if the clay does stick, you can easily lift the canvas and peel it away from the clay. You can read more about the best surfaces for rolling clay here.
If you are intending to make slab pottery, then getting a sheet of canvas is an absolute must.
It’s also great if you can stretch the canvas over a wooden board.
A board with canvas will double as a wedging board and a work board.

10) Rolling Pin
Rolling pins don’t need much explanation! Everyone knows what they do. There are a number of ways to make slabs of clay without using a rolling pin. For example, if you are making pottery in a studio, you might have access to a slab roller. You can read more about making slabs of clay here.
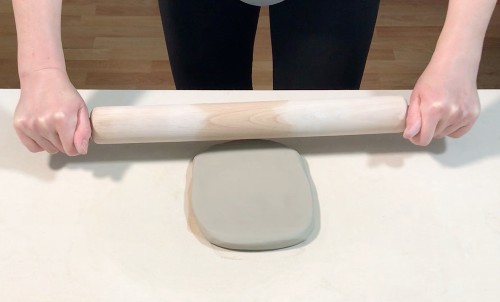
But if you are making pottery at home, chances are you don’t have your own slab roller. So, you are going to need a rolling pin.
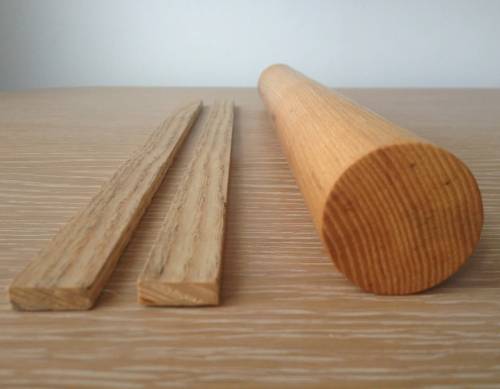
The best rolling pins for clay are wide and have rotating handles. I have found that rotating handles allow me to roll the clay more evenly, and they are less of a fiddle to use.

11) Roller Guides
A rolling pin is only part of the picture when you are rolling slabs of clay. The other lifesaver pottery tool is a good set of roller guides. These are strips of wood (or plastic) that you place on either side of your clay as you are rolling.
The roller guides are made to a specific thickness, such as a 1/4 or 1/3 of an inch. Once the rolling pin touches the roller guides, you can’t make the clay slab any thinner.
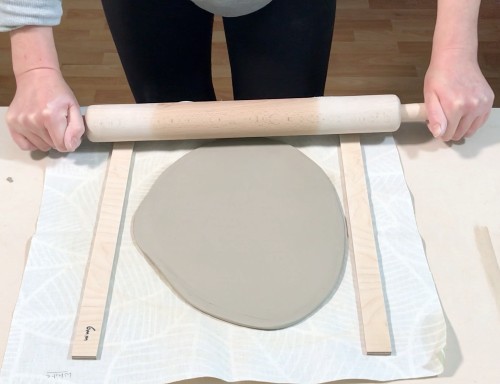
Roller guides are a great way to make nice even slabs of a very precise thickness. If you are rolling without roller guides, chances are your slab will be uneven. And it’s easy to over-roll the clay and make it too thin for your purposes.
I’d recommend getting a set of roller guides. It will save you a lot of time and frustration. I like these guides because you can choose what length and thickness you want them to be.
12) Clay Knife / Fettling Knife
When you start making pottery, you use whatever you have to hand. It’s fine to use a regular dinner knife to cut your clay to start off with. But in time, it’s worth investing in a clay knife.
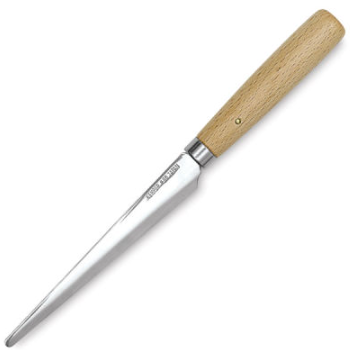
Clay Fettling Knife – View on Blick
Clay knives are shaped so that you can do finer detail work than you can with a regular dinner knife. Also, they are shaped so that they slice through clay easily.
Clay tends to stick to a regular domestic knife, so as you slice it can drag the clay with it. By contrast, fettling knives have a tapered end and don’t get gummed up and stuck in the clay as you slice.
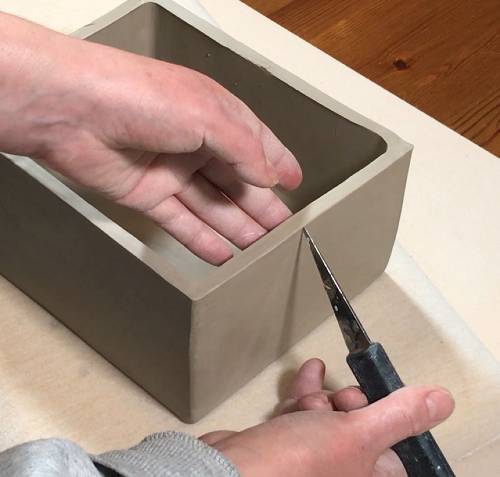
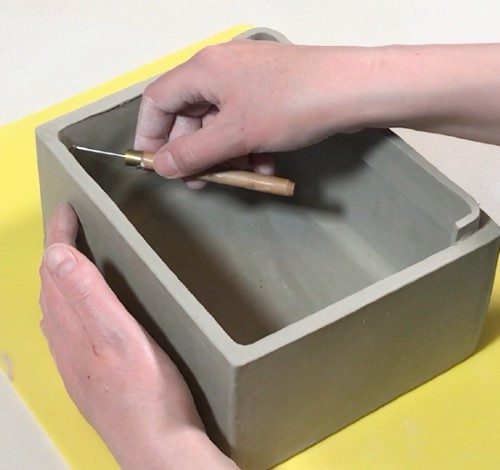
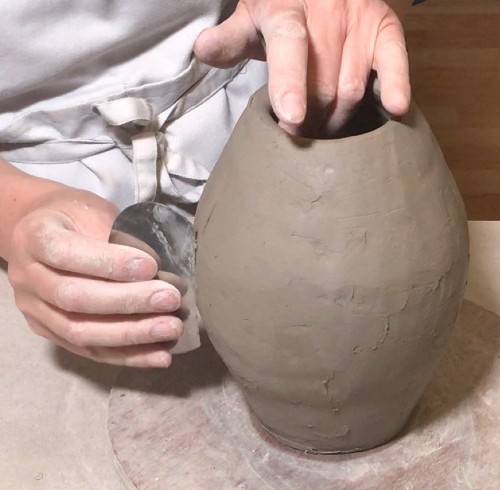
13) Serrated Rib Tool
Making pottery often involves joining pieces of clay together. For example, you might be adding a handle to a mug, or attaching two halves of a slab vase. Whatever you are making, you will need to join your clay using slip-and-score.
The slip-and-score technique involves scoring into the surface of the clay to create a rough texture. Clay slip is then painted onto the rough texture. This makes the surface of the clay sticky. You can then press your two pieces of clay together and they will adhere to one another.
I find that the best tool for scoring into clay is a serrated rib tool. This is a metal rib with a zig-zag pattern cut into the edge. You can use the serrated edge to score into the surface of your clay.
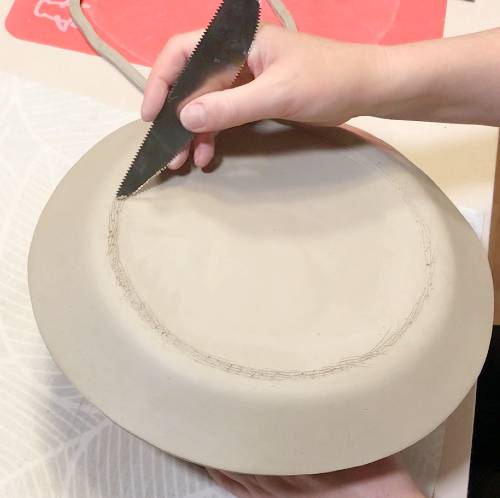
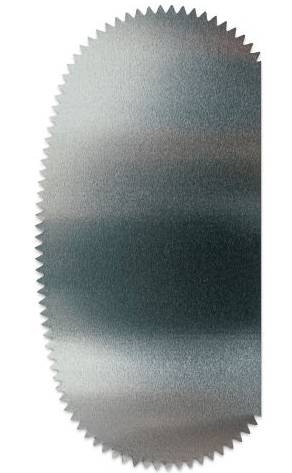
Serrated Pottery Rib Tool – View on Blick
Other pottery tools, such as a feather wire texture tool can be used to score into clay. Personally, I prefer the serrated rib as I find I have more control over where I’m scoring the clay.
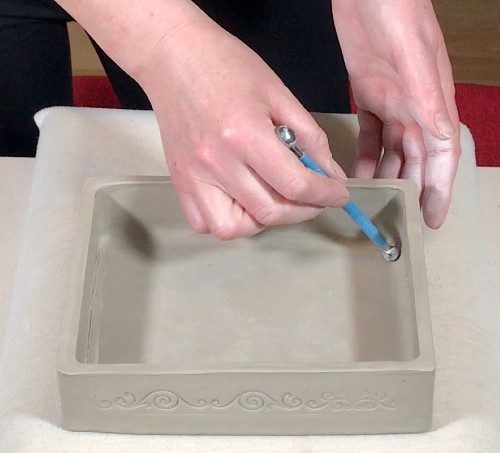
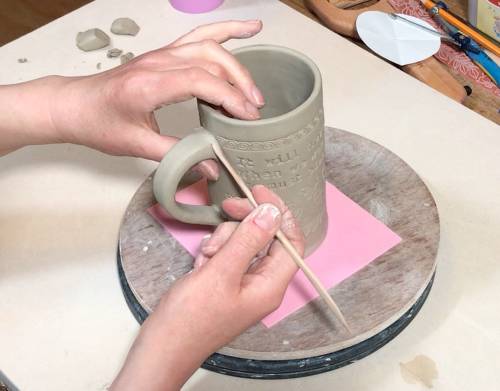
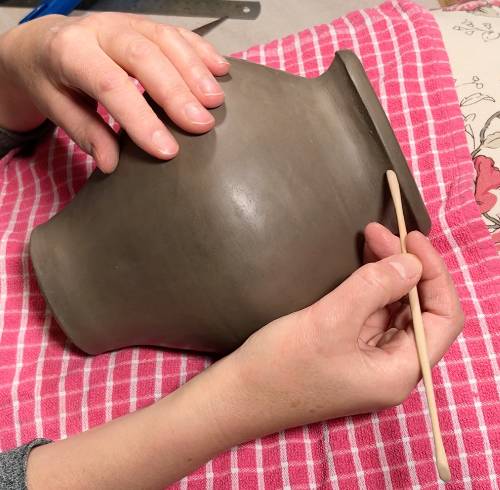
14) Stylus Tools
Regardless of how delicate and nimble your fingers are, sometimes you just can’t reach the parts of your pottery that you need to get to. This is when a stylus tool comes in handy.
Stylus tools are shaped a bit like a pencil. However, they have smooth metal balls on either end. They come in different sizes. You can hold them like a pencil and use them to smooth your pottery.
I absolutely love my stylus tools. When I’m blending joins, they create a lovely smooth finish. And, they help me reach joins in the clay that it would be impossible to reach with my fingers.
These tools are good because they improve the overall finish of your pottery.
A nice smooth join in clay makes all the difference and can give your work the look of being well crafted.
You can take a look at the stylus tools that I use on Amazon here.
15) Fine Modeling Tools for Detail Work
I’ve already included wooden modeling tools in this list earlier on. But I wanted to distinguish standard modeling tools from fine modeling tools that can be used for intricate details.
Fine modeling tools are, as the name suggests, smaller and easier to use on detailed areas of your pottery. These are great if, like me, you are a bit of a stickler for detail.
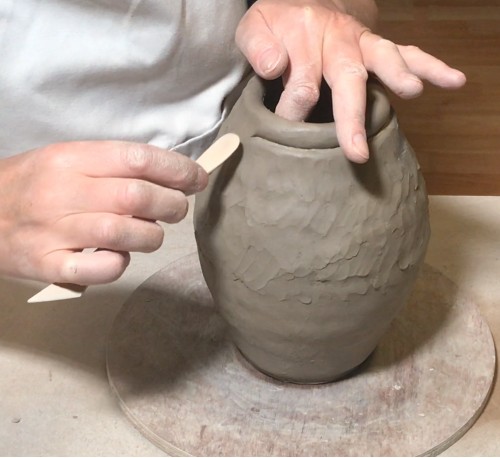
I have a selection of fine modeling tools that I use for little fiddly areas on my pottery. For example, I usually use a fine tool to finish details when I’m adding handles.
Or, another example might be when I’m finessing the rim of a hand built vase.
These detail tools can be wooden or metal, it doesn’t matter too much what they are made of, provided they are made well and are good for intricate work.
Fine Detail Pottery Tools – View on Etsy
16) Clay Shredder
A clay shredding tool will help you remove any lumps and bumps from the surface of hand build pieces.
Usually, when you hand build pottery you will leave finger marks and marks from your pottery tools as you work. After your piece has firmed up and become leather hard, you can remove this unwanted bulk and texture. The easiest way to do this is a shredder.
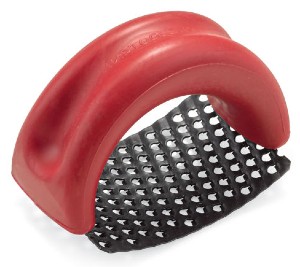
A clay shredding tool works like a cheese grater. You hold it against your leather hard pottery and pull it across the surface. It will then literally grate (or shred) off the surface of the pot.
The surface of your pot after using the shredder will have a bit of a rough texture. However, you can smooth this over easily with a metal rib. Once the rough texture is removed you will see that the surface of your pottery is now much more even.
I use my shredding tool all the time to remove bulky parts of my pottery and to get rid of lumps and bumps.
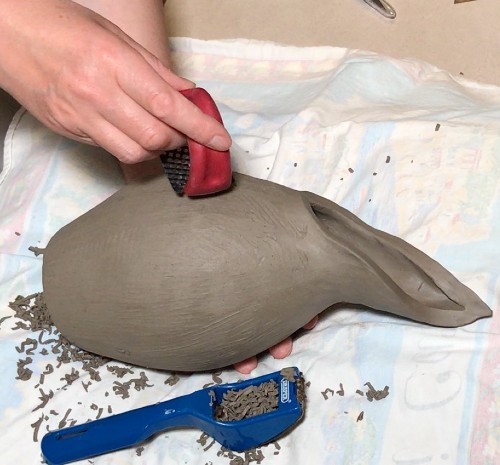
You can see in this picture that I have two shredding tools. One is a smaller shredding tool by Mudtools that is specially designed for pottery. The other shredding tool is a general all purpose shredder called a Surform that can be bought at most hardware stores. They are handy too because they have a handle.
17) Chamois Leather
Once you have finished forming your pots, you might find that the surface of the clay still has finger marks and tool marks. The best way to smooth these final blemishes is to use a piece of chamois leather.
Chamois leather is very soft and doesn’t leave a texture on your clay. Wet the chamois and ring it out so that it’s only slightly damp. Then wipe it across the surface of your clay. It will smooth away small marks without wiping away significant amounts of clay.
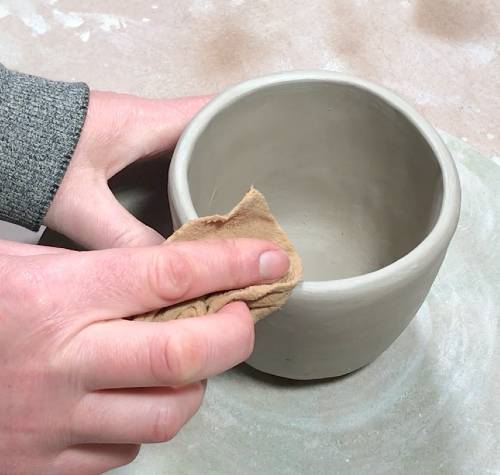
You can also use a damp chamois leather after you have thrown a pot. Gently run it along the rim of your throw pot before you remove the pot from the wheel. This will even out the rim and wipe away any excess slip sitting on the rim after throwing.
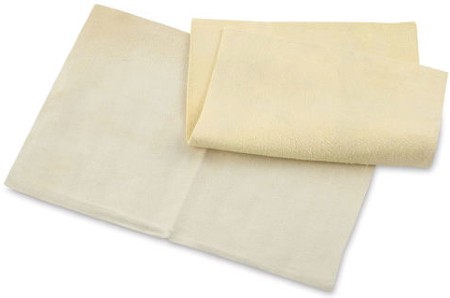
Chamois Leather – View on Blick
18) Personalized Clay Stamp
Ok, so maybe this isn’t an essential pottery tool, but it’s very nice to have! Adding your signature to your pottery can feel like the cherry on the cake. You can score your name into the clay with a needle tool, stylus, or wooden tool. However, a custom-made personalized pottery stamp will give your pottery a professional well-crafted finish.
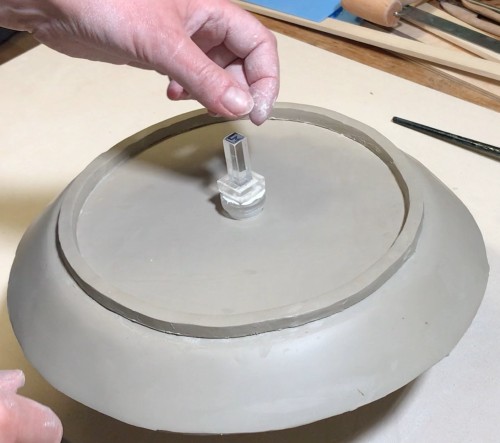
And why not, after all that hard work, it’s nice to give your pottery the personal seal of approval.
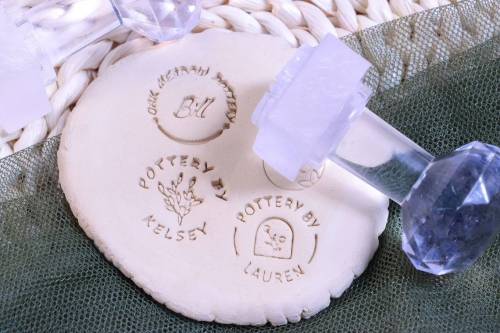
Personalized Pottery Stamp – View on Etsy
Pottery Tool Sets
The benefit of buying your pottery tools separately is that you get a selection that you really want. However, it can take some time to build up your set if you buy them one by one.
Another option to get you started is to buy your pottery tools in a set. You may not get absolutely everything you need and want in a set. However, you will get a lot of the items reviewed above. And you can supplement a tool set with additional pieces as you go.
The two pottery tool sets below would be a good starting point. My first recommendation would be the set by Kemper Tools. Whilst you get fewer items in the Kemper set, Kemper Tools have a good reputation for being well-made and lasting a long time.
It’s tempting to go for the option of buying a set where you get more pieces. However, pottery tools need to be robust. They go through a lot of wear and tear. My opinion is that it’s best to pay a little more for better quality. This will save you money in the long run.
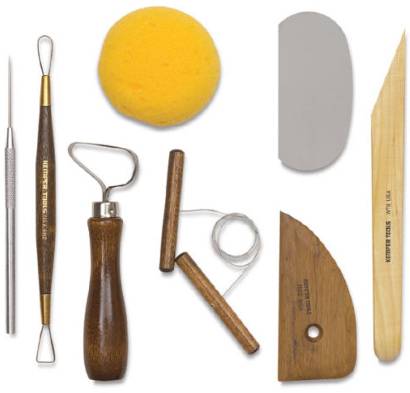
Kemper Tools Pottery Set – View on Blick
If you want to get a set, my recommended buy would be the Kemper Pottery Tool Kit above.
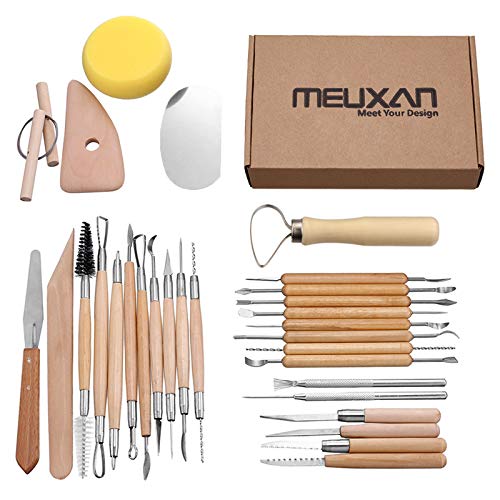
However, if you are on a budget and you want to buy a larger set to get you started, then the following kit on Amazon is a good option.
It comes with almost everything you need to get started containing 30 pottery tools. And it is reasonably priced too.
Final Thoughts
There seems to be an endless amount of nick-nacks and doohickeys in pottery. You will probably never own every pottery tool there is on the market. The best way to approach getting going with your pottery tool kit is to think of it as starting a collection. Along the way, you will find you have favorites that you return to again and again. As you learn to make your pottery you will buy tools to help you master certain techniques. But remember, the most important tool that you have is your hands!


