You may find wedging clay tricky if you have any trouble with your wrists or hands. I have had carpal tunnel in both hands, and I find most wedging techniques cause me trouble. Stack and slam wedging is a godsend and makes wedging easy. Plus, it’s quite enjoyable!
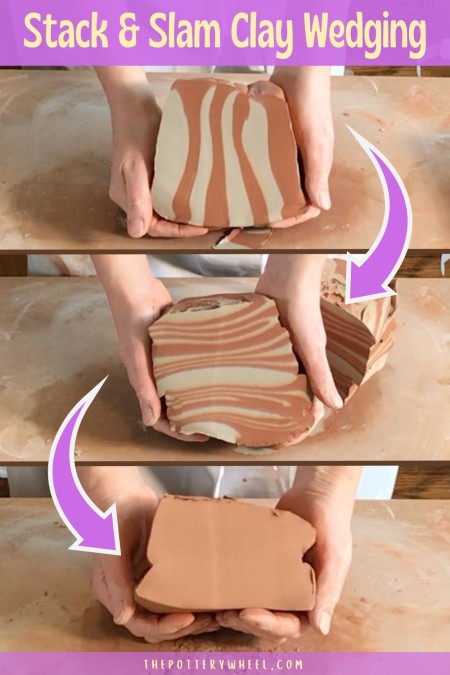
Stack and slam wire wedging involves stacking one block of clay upon another and slicing through both blocks. The sliced blocks are then sandwiched together and slammed on the table a few times to compact them. These are then sliced down the middle again, and the process is repeated.
You can check out my short video on this way of wedging pottery clay here.
There are several different clay wedging techniques. Stack and slam wire wedging is also known as stack and slam wedging, wire wedging, cut and slap wedging, or simply slap wedging.
Stack and Slam Wedging – Why it’s a Great Way to Wedge Clay
Reason 1
Often when potters work, they will end up with bags and buckets of clay with different consistencies. My pottery shed is full of different bags of clay. Some of it is soft and mushy and some of it is a bit too dry to use.
Wedging clay together with different consistencies is difficult. It’s particularly difficult if you are just wedging with your hands. The soft clay tends to squelch out from between the harder clay. Stack and slam wedging blends clays of different consistencies together easily.
Reason 2
Stack and slam wedging is great for blending different clay bodies. If you have different types of clay, you can mix them provided they fire at the same temperature.
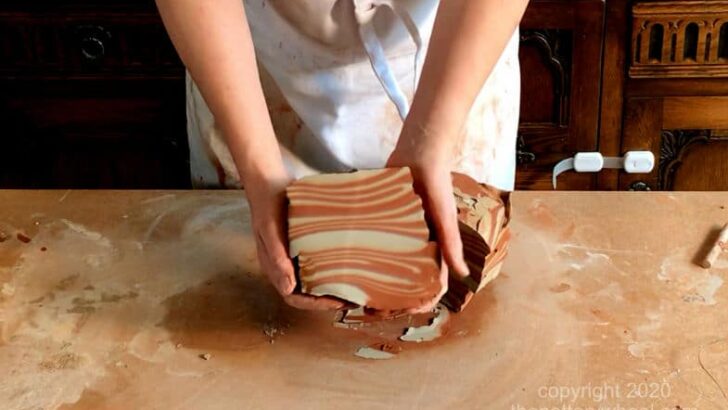
Stack and slam wire wedging is great for mixing clay bodies for a few reasons. If you want a marbled effect, you can stop short of completely blending the clay.
This method of wire wedging gives you distinct layers in your clay. So it’s good if you want to experiment with agateware.
However, if you want to blend your clay completely, you just carry one wedging until the layers are not visible. Stack and slam wedging is the most efficient way of blending clay and you will be done in no time.
Reason 3
Because you are not pushing the clay around on your wedging table, it is much easier on the wrists. Techniques such as rams head and spiral wedging involve putting some pressure on the clay.
This is fine if your wrists are up to it. But if you have any issues with your hands such as carpal tunnel or arthritis, it can be painful.
How to Wedge Clay the Stack and Slam Way
There are two ways wire wedging clay. One uses a handheld wire cutter tool. The other uses a wire mounted on a wedging table. I will describe both, starting with the handheld wire cutter method.
Wedging Clay With a Hand Held Wire Cutter
Step 1
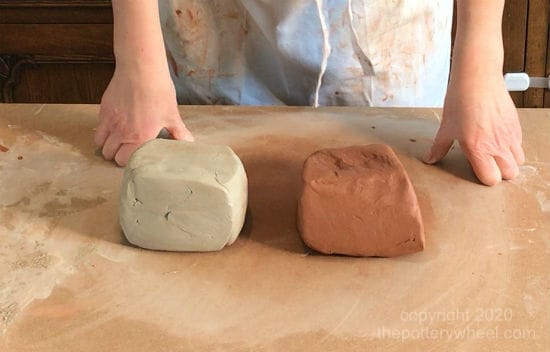
Shape your pieces of clay into two blocks of roughly equal size. You can do this by simply dropping the clay onto your wedging table until it is in a block shape.
The blocks don’t need to be exactly the same size. You may want to wedge a smaller amount of one clay with a larger amount of another. However, it’s a little easier to get started if they are similar in size.
You can wedge small quantities together. However, stack and slam is also really good for wedging clay of quite large quantities.
Step 2
Throw one block onto your wedging table. If your wrists are good, you can bring it down quite heavily on the table.
Some potters bring their hands down and smack the clay onto the table with their hands. This is fine if you don’t have wrist issues.
However, if you have problems with your wrists or hands, you can just fling the block at the table.
When you fling it, you let go of the clay before it smacks into the table. This way you are saving your wrists from the impact of the slamming action.
If flinging is too much, you can just drop the clay onto the table.
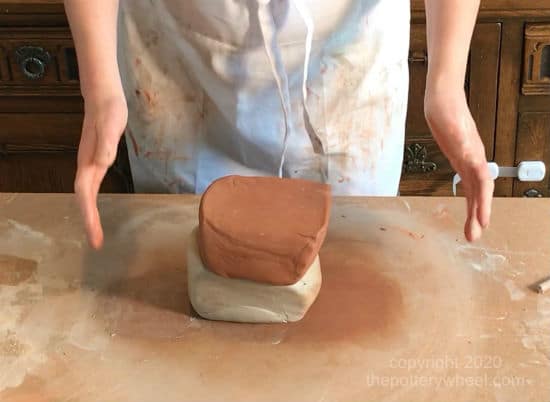
Then throw or drop the second block of clay on top of the first. So that they are stacked on top of one another.
Pick up the stacked pieces of clay and fling them together onto the table a couple of times. Turn them over between flings so that both sides get a bit of impact.
Step 3
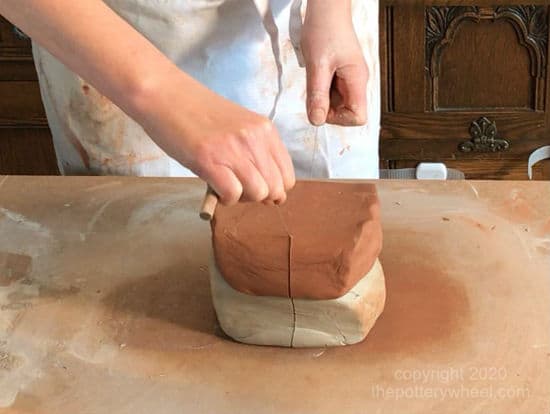
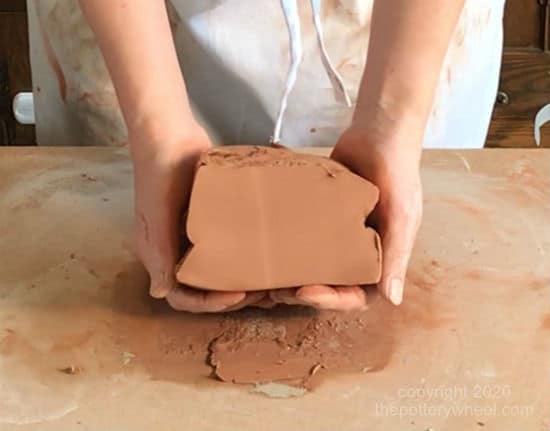
Slide your wire cutter underneath the stacked blocks and slice through the clay completely.
Step 4
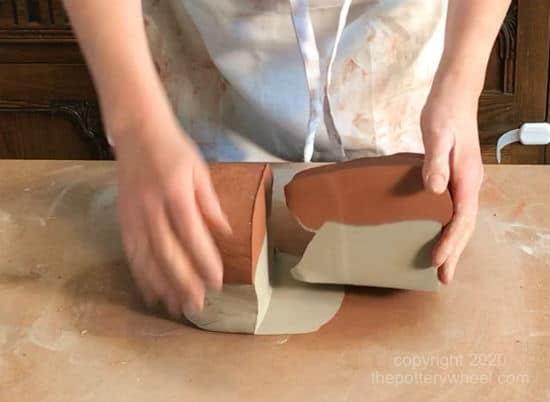
Separate the two pieces of sliced clay.
Step 5
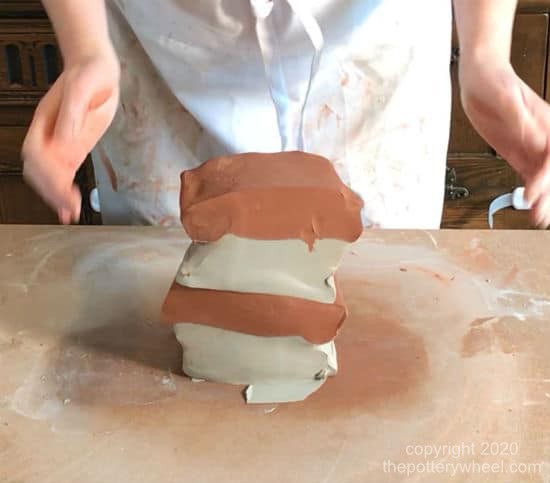
Take one-half of the sliced clay and slam it down on the table again. Then slam the second half of the clay on top of the first to create a 4 layered stack.
Step 6
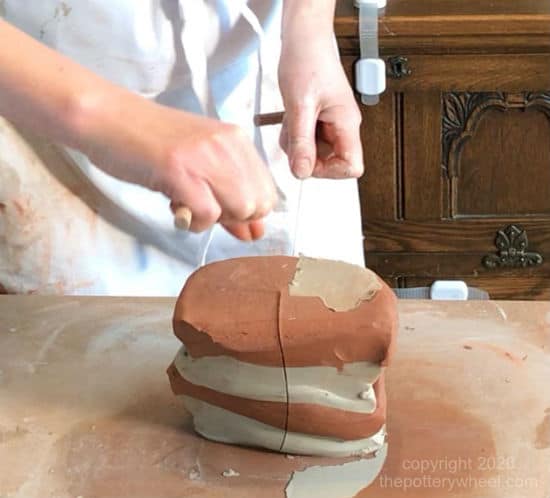
Using your wire cutter, cut completely through the stacked clay layers again. Repeat the above process by slamming one section of the sliced clay onto the table. And, then slamming the second section on top of the first.
Make sure that when you stack and slam them together you are aligning them so that the layers go in the same direction. Try to avoid stacking them so that the layers are horizontal in one section of the stack and vertical in the next.
One of the reasons for wedging clay is to align its particles. The clay platelets will be more aligned if the layers are all in parallel. This will make it easier to throw the clay.
Step 7
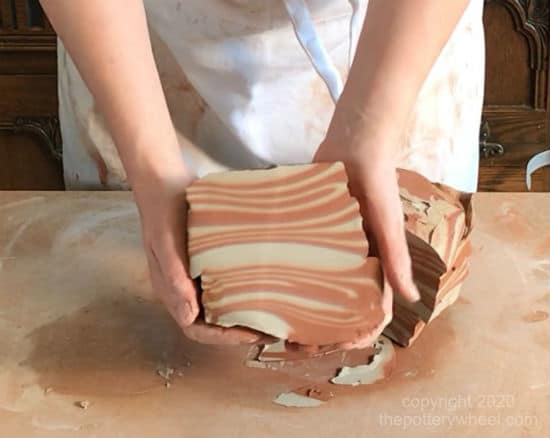
As you continue this stack and slam process, the layers will become thinner and thinner as the clay blends together.
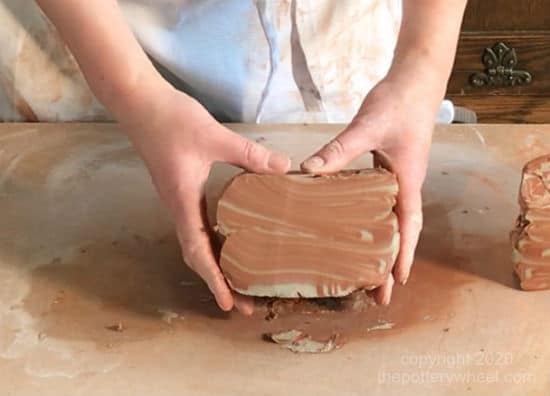
I tend to slam the clay on the table a few times between slicing. The reason I do this is to keep the stacked clay square. If I just drop it a couple of times, the stack gets taller and thinner, and harder to work with. By slamming it a few times I can compact it down to a stout block.
Step 8
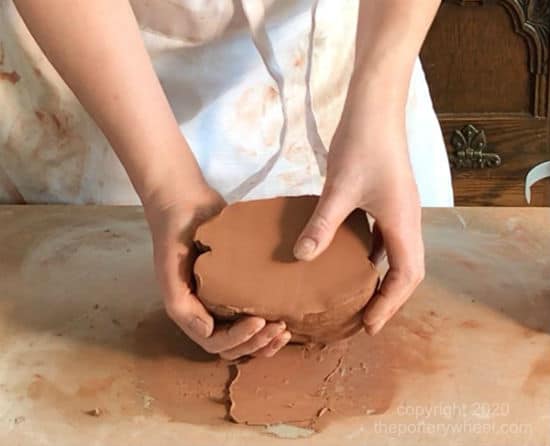
Continue the process until there are no visible layers in the clay. Check for air bubbles and any areas of clay that have not been mixed enough. Air bubbles combined with moisture in your clay may contribute to it exploding in the kiln.
Step 9
It doesn’t take long before the clay is completely mixed. This batch of wedged clay only took about 10 minutes.
Wedging Clay – Stack and Slam Wedging With a Mounted Wire Cutter
An alternative to using a handheld wire cutter is to mount some wire at an angle to your table. This arrangement can speed up stack and slam wire wedging quite a bit.
The wire is attached to your table at around a 45-degree angle, like this…
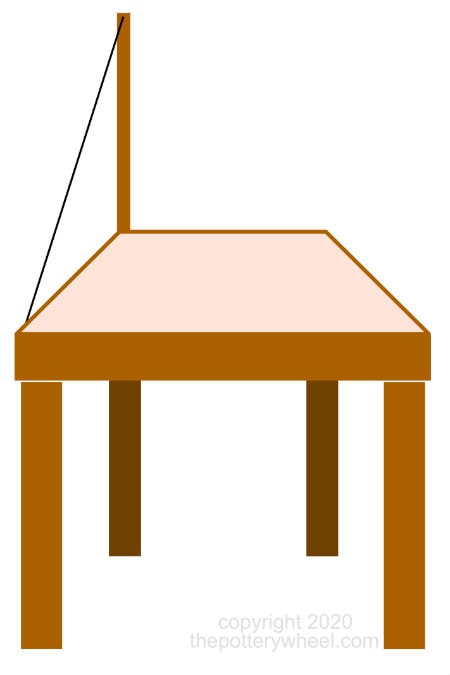
With a mounted wire cutter, you simply pull the clay through the wire to slice it in half. The process is then exactly the same as the wedging clay with a handheld wire cutter.
The only difference is that you are cutting the clay by drawing it through a mounted wire. This setup can speed up the wedging process quite a bit.
It’s relatively easy to make a wedging table with a wire attached. But if you want to save yourself some time, you can also buy a table with a cutting wire like this one…
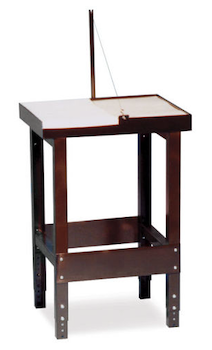
Debcor Wedging Table
The wedging board and stand for this table are sold separately, so you can buy either or both.
Another Way of Wedging Clay with Hand-Held Wire:
I’ve also seen potters use another method of wire wedging to mix two batches of soft and hard clay.
This process involves the following steps:
- Using a handheld wire cutter, they cut a slice from one lump of clay. The slice is about 0.5-1 inch thick. The slice is then placed on the wedging table like a slice of bread.
- They then cut a slice of the same thickness from the other lump of clay. This slice is then placed on top of the first one.
- The process is repeated, with slices from one batch being alternated with the other, until both batches have been sliced up and stacked in an alternating pile.
- The potter then slams the stack a few times to compact the slices. The stack is then turned on its side, so the slices are at a 90-degree angle to the table. Like a loaf of sliced bread on its side.
- The slicing process is then repeated. As you cut into the clay you can see the striations, or layers, in the clay. This time, as the potter puts the slices on the table, they alter the direction of the layers. The layers crisscross one another.
- This process is repeated around 3 times. The result is that you have semi-blended clay.
However….
- You will likely have introduced some air pockets between the slices. Therefore, you will still need to wedge the clay afterward using another method like rams head or spiral wedging.
Wedging Clay – Stack and Slam Wire Wedging for Agateware
If you are blending clay that is two different colors, you can stop wedging before the clay is completely blended. This will give you a marbled effect when you are throwing the clay. This is one of the techniques used for agateware.
Final Thoughts
Wedging clay is unlikely to become the favorite part of your day. However, the stack and slam wire wedging method is speedy and efficient. And once, you get into a flow, it can feel quite satisfying. All that slamming is a good way to get your frustrations out, and it’s cheaper than therapy!


