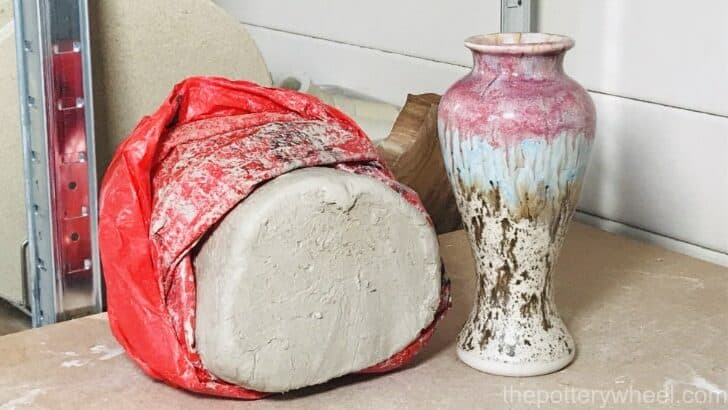
Clay is a natural resource that is mined from the earth and processed. Once processed it can be made into useful objects and beautiful things. Clay goes on an amazing journey from being dirt in the ground to pottery on your table. Here are the 8 incredible stages of clay…
Raw clay is mined from the ground. It is then processed to become dry powdered clay. This can then be made into wet workable clay or clay slip which is liquid clay. Workable clay can be made into objects and dried out so that it’s bone-dry. Bone dry clay can then be fired in the kiln and turned into bisqueware. Finally, bisqueware can be glazed to make glaze ware.
Each of these parts of the journey from the ground to your table is important and unique. So, let’s take a closer look at each of the 8 stages of clay.
The Stages of Clay
Have you ever wondered where the nice bags of clay that you use to make pottery come from and how they are made?
It’s easy to think that clay is simply dirt that has been dug up from the ground and bagged up to be used.
There is an element of truth in that idea, but the picture is a little bit more complicated than that. Broadly speaking there are 8 stages of clay.
What are the Stages of clay?
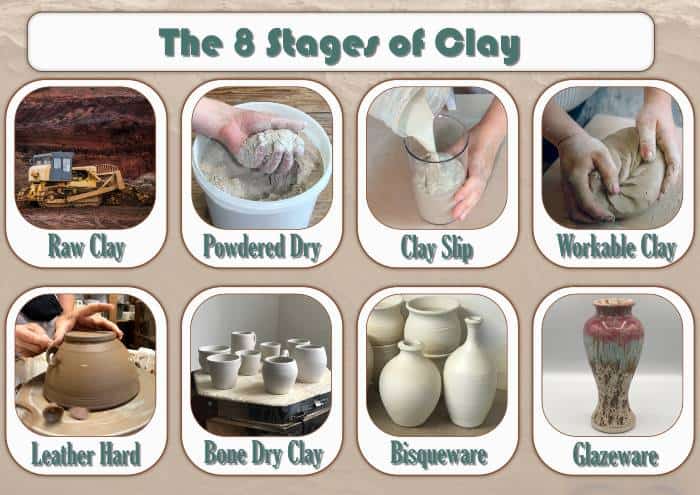
Clay goes through a lot of change in its journey, but for simplicity, these can be divided into the following:
- Stage 1 – Raw Clay
- Stage 2 – Dry/powdered clay
- Stage 3 – Clay slip
- Stage 4 – Workable clay
- Stage 5 – Leather hard clay
- Stage 6 – Bone dry clay
- Stage 7 – Bisqueware
- Stage 8 – Glazeware
We will look at each stage in turn. But to begin with, here is an overview of each of the different stages of clay.
Stage # 1: Raw Clay
Clay is a natural resource that is located at many points in the earth across the world. One of the earliest stages of clay is the raw clay that is nestled in deep in the ground.
Some potters and small-scale potteries like to dig their own clay from the earth. The clay needs to be processed once it has been dug up. However, the clay that has been dug from the ground is often called ‘wild clay’.
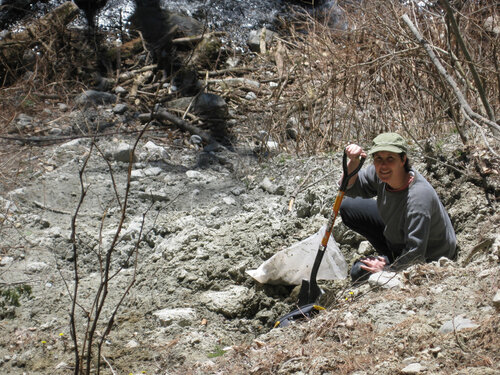
The process of digging up clay is done on an industrial scale too. When the ground is found to be rich in clay, manufacturers build clay mines and processing plants.
The clay is excavated from the ground using large powerful diggers. Or it can be blasted from the ground with huge strong jets of water.
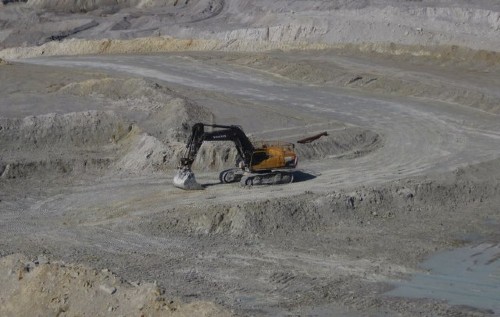
via Wikimedia Commons
The raw clay is taken in trucks back to the processing plant. At this point, the clay is in damp clumps and contains stones, organic matter, and other impurities.
When it arrives at the plant, it is unloaded into big piles. Samples of the clay undergo chemical analysis of the mineral content.
This allows the clay to be portioned up into categories that can be used for specific things. For example, some clay may suit being used for dinnerware whilst other portions of the batch might suit being used in glazes.
The large clumps of clay are broken down into smaller chunks by a machine. These smaller clumps are then dried out by heat from a furnace. Once it has been dried out, the clay can be ground to a powder in a mill.
When it’s in its powdered form, impurities like sand can be extracted from the clay. This leaves behind pure powdered clay.
The powdered clay can be bagged up and sold in its dry form. Alternatively, water and other chemicals can be added to the clay powder to create either a slurry or a soft workable clay that is sold in bags.
Stage #2: Dry Clay
When you are making things with pottery clay, you may notice that it starts to dry out quite quickly.
If moist clay is exposed to the air, it starts to lose moisture straight away. This means that when you are working with clay if you leave it out in the open, it will dry out gradually.
Eventually, if clay is left in the open air, it will become dry and solid. So, scraps that you have lying around will turn into solid chunks of dried clay.
Equally, if you finish making a piece of pottery and leave it in the open air, it will dry out and form what’s called ‘bone-dry clay’. We’ll take a closer look at bone-dry clay later.
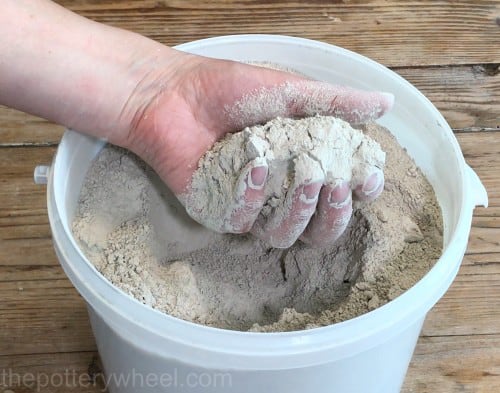
Powdered Dry Clay
The other form of dry clay is the powdered dry clay that was mentioned earlier on. This is the processed clay powder that can be bought in bags from a pottery supplier.
Here are some of the ways that you can use powdered dry clay:
A) Mixing Your Own Clay
Some potters like to make their own pottery clay by mixing powdered clay with water.
This is a good option for potters who are making a lot of ware. It can be cheaper if you buy clay powder in bulk and mix it with water than it is to buy clay that is already workable and ready to use.
B) Making Your Own Clay Recipes
If you want your pottery clay to have particular qualities, then it’s possible to mix different types of clay according to a clay recipe.
There are many different types of clay powder including china clay (or Kaolin), ball clay, fire clay, and bentonite.
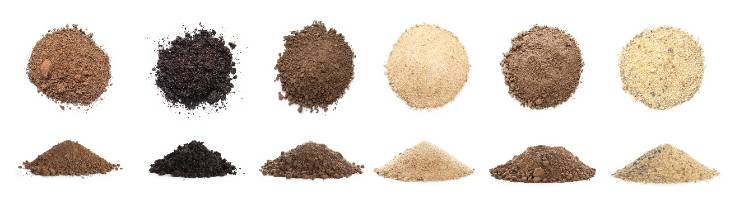
These all have different properties, and when mixed together in different ratios create different clay bodies. For example, you can add ball clay to a clay body to give it additional plasticity.
In addition to clay powder, other materials such as grog or sand can be mixed with clay.
Grog is a granular material that is added to clay to make the clay stronger and to stop it from shrinking or cracking when it dries or is fired.
C) Recycling Your Clay
Potters often collect scraps of clay and clay slop in a bucket whilst they work. This wet clay (or slurry) can be recycled and reused.
A clay reclaim bucket often has very high water content and is way too soggy to be used. Before it can be re-used, it needs to be brought back to a workable, plastic state.
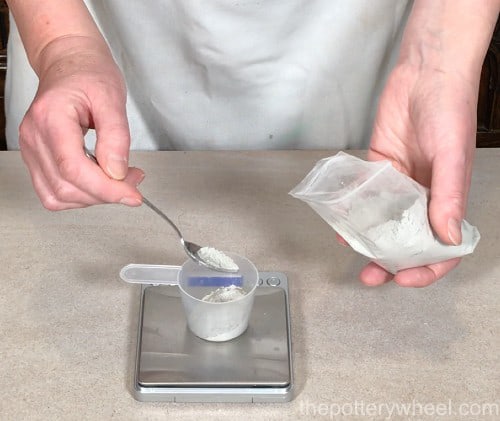
One way to do this is to add some clay powder to the slurry. The clay powder needs to be the same clay body as the water-logged clay in the bucket.
After adding the clay powder to the reclaim bucket, you need to mix the liquid clay and clay powder together well.
Eventually, the clay will be workable enough so that you can wedge it, or put it through a pug mill.
D) Adding Stains
Another good reason for using powdered clay is that you can easily mix it with coloring stains. Ceramic stain powder is used to color clay and glaze. These stains are often referred to as Mason Stains.
Simply add the mason stain color to the clay powder and mix it together well in its powdered form. Then add water to the clay powder to make a workable colored clay.
E) Powdered Clay In Glazes
Clay such as ball clay is sometimes used in glaze recipes. Glaze is the glassy coating that covers the surface of pottery.
One of the key ingredients of glaze is silica. This is a glass-forming substance that melts when the glaze heats up in the kiln. This molten glass forms the glazed surface on the pottery as the kiln cools and the glaze becomes solid again.
Different kinds of clay powder can be added to glazes in precise amounts for various reasons. For example, bentonite clay is sometimes added to liquid glaze to act as a suspending agent. It holds the glaze particles in suspension and stops them from settling out and separating.
Ball clay is a source of silica and this is one of the reasons it is sometimes added to pottery glaze.
Stage # 3: Clay Slip
The third stage of clay is called ‘slip’. Slip is liquid clay and it is what happens to clay when it’s mixed with a lot of water. The clay particles dissolve and become suspended in the water.
Clay is sometimes transported from the clay processing plant in the form of slip. Large container lorries are used to take the slip to factories that then transform the slip into items such as sinks, tiles, and toilets!
Slip is also occasionally called ‘slurry’. Sometimes slip and slurry are used interchangeably. However, the word slurry is often used to refer to the thicker, gloopier liquid clay that forms out of scraps of clay that are discarded into the clay reclaim bin in a studio or classroom.
Clay slip can be used to do many things. However, it is used in three important ways by potters. So, let’s take a look at those now…
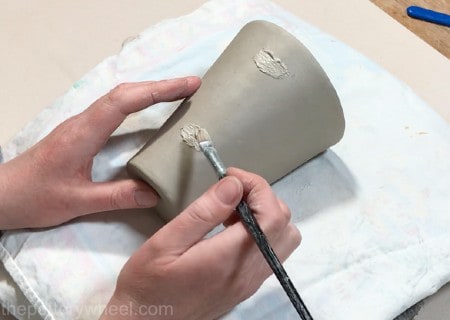
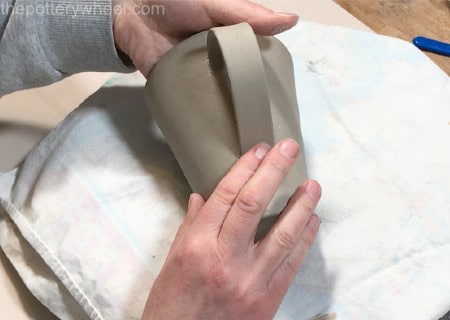
Joining Slip
Slip can be used as a kind of glue that bonds pieces of clay together. For example, when you attach a handle to a mug, slip helps the two clay surfaces to key into one another and stick firmly.
Joining pieces of clay is usually referred to as ‘slip and score’. The most effective way to join two clay surfaces is to score into the clay at the points where they will meet. This scuffs up the clay creating a rough texture.
Then clay slip is applied to the scored area. When the two pieces of clay are pressed together, the areas that have been slipped and scored mingle together well and create a strong bond.
Decorating Slip
Slip is one of the most versatile stages of clay because it can also be used for decorating your pottery.
You can add color to your slip by mixing it with ceramic stains. This can then be painted onto your pottery.
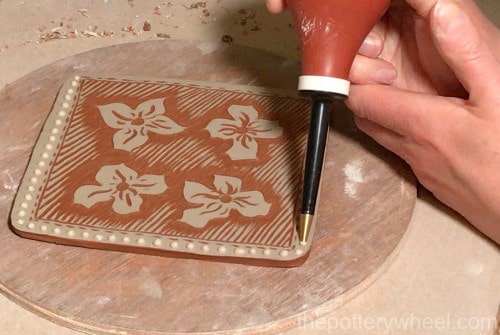
Or you can try a technique called slip trailing. Slip trailing is when clay slip is loaded into a rubber bulb or bottle that’s small enough to be held easily in your hand.
The bulb has a nozzle attached to it. When you squeeze the bulb a trail of slip comes out of a hole at the end of the nozzle. This technique can be used to create beautiful textures and colored designs on the surface of your pottery.
Alternatively, slip can be applied to the clay and then moved around on the surface of the clay when it’s still liquid. There are many ways that slip is used to decorate clay.
In fact, there is a whole category of pottery called ‘slip ware’ that has many lovely designs created using slip. If you’d like to know more about this you can check out my guide to slipware here.
Slip Casting
Slip casting is a particular way of producing pottery. It involves pouring ‘casting slip’ into plaster molds to create clay forms in the shape of the mold.
This is a good technique if you want to reproduce identical copies of the same item. For example, if you want to produce a set of matching mugs, slip casting is a good option.
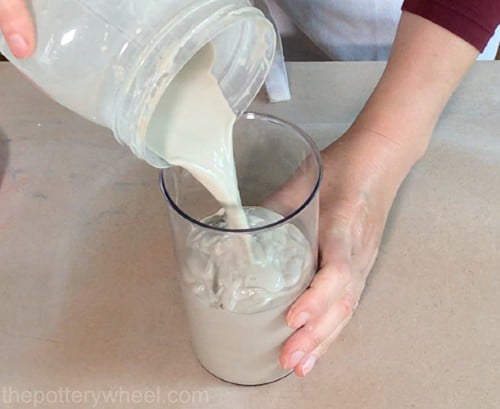
With slip casting, the slip is poured into the mold. The plaster mold draws out some of the water from the clay and a clay skin is formed on the inside of the mold.

After the slip has been allowed to sit in the mold for a little while, the mold is turned upside down, and the excess slip is allowed to drain out of the mold.
Once the clay in the mold has dried out enough to be solid, the clay is removed from the mold, and the piece is tidied up and finished. For this technique, slip is one of the most important stages of clay.
Making Clay Slip
You might imagine that the easiest way to make slip is to add water to already quite wet clay. However, the quickest way to do it is to add water to dry clay.
If you add water to dry clay, the clay absorbs the water very quickly and dissolves into fine particles suspended in the water. This is called ‘slaking down’.
By contrast, when clumps of clay have a higher water content, the clay particles are stuck together quite firmly. This makes it harder for the clay to dissolve in water. If you add water to moist clay, you will often end up with a lumpy clay soup.
If you’d like to know more about exactly how to make slip, you can check out my step-by-step guide on making clay slip here.
Stage # 4: Workable/Plastic Clay
Wet or workable clay is the stage in which the clay can be formed and shaped. At this stage, the clay is soft and pliable. Clay is often referred to as plastic at this point.
In fact, the term plasticity in pottery is a property that some types of clay have. A clay body is said to be plastic when it can be formed into a shape, and the clay keeps its shape, rather than slumping or returning back to its original form.
Plasticity also refers to clay that can be bent and shaped without cracking. Not all types of clay are pliable like this. Some clay will crack and crumble when they are bent.
Ways to Use Workable Clay
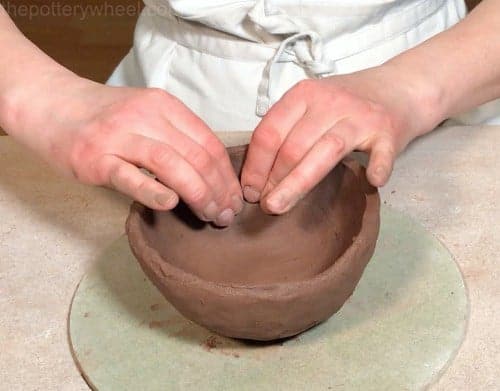
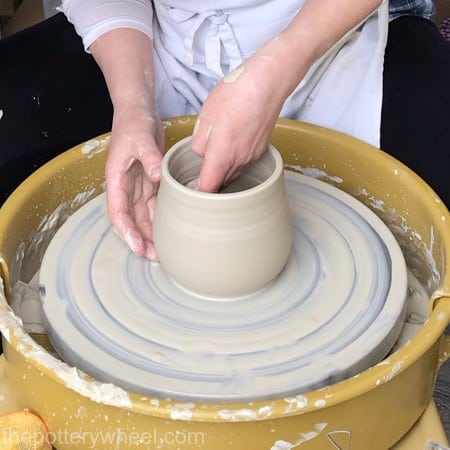
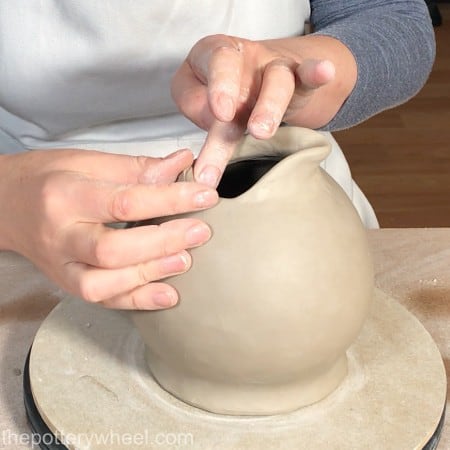
The two main ways that clay is shaped at this stage are wheel throwing and hand building.
Wheel throwing refers to making pottery on the potter’s wheel. Whereas hand building refers to constructing pottery with one’s hands and without a wheel.
Manufacturers will often use pieces of machinery such as a clay press to make pottery. A machine like this is called a ‘ram press’. It compresses the clay into the required form and the compressed clay is then removed from the machine and finished by hand.
What Makes Clay Soft and Workable
You may be wondering how is it that clay has this magical workable quality. You can shape it and form it into most shapes and it will stay in the form that you have given it.
After all, if you pick up a handful of soil and try to shape it into something, it will usually simply crumble or break. What makes clay different?
The difference lies in the clay particles themselves. I mentioned earlier that in its raw form, clay is dug up from the ground. In fact, the clay that is mined from the ground is made out of pulverized granite (also known as rock).
But it isn’t the clay processing plant that pulverizes the rock. Instead, this rock has been eroded and ground down over millions of years by the weather to form deposits in the earth. As the granite is eroded, the minerals in the rock break down to form clay particles.
Two Reasons Clay is Workable
- When clay contains water, the water sits between the clay particles. The water lubricates the particles and allows them to glide over one another as the clay is shaped.
But also, the water creates a film over the particles, this film is sticky and causes the particles to cling to one another slightly (source). - The second reason wet clay is moldable is to do with the shape of the particles themselves.
Clay particles are flat and hexagonal (six-sided). But they are also lath shaped, which means they have a slender elongated form. So, under a microscope, clay particles are flat, elongated, and have six sides.
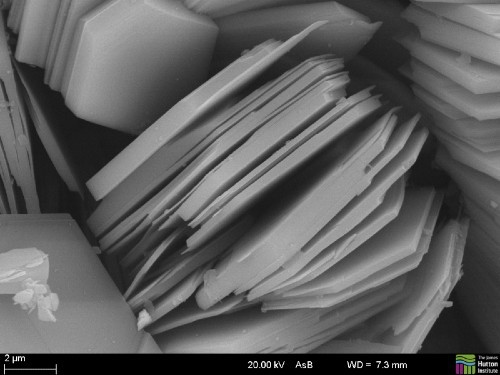
Image courtesy of Evelyne Delbos at The James Hutton Institute
It is the shape of the particles that allows them to create a matrix in the clay which binds it together. Also, when clay is molded and shaped the clay particles can begin to align with one another in the same direction. This gives the clay additional strength and holding power.
What Happens When Clay Starts to Dry Out?
From a practical point of view, this means that as clay starts to dry out, the particles stop sliding over one another. This is one of the reasons that as clay gets drier, it becomes stiffer and harder to work with.
The good news is that if your clay starts to dry out, you can always rehydrate it. Once rehydrated the clay will be workable again.
Likewise, provided you keep your clay hydrated, you can keep working on it for as long as you want. I find that the best way to keep my ‘works in progress’ hydrated, is to keep them in a damp box between sessions.
A damp box is a container that can be sealed with a lid or door, and that has a high moisture content. These are very easy to make and I can promise you, making a damp box will change your life as a potter! If you want to know how to make a damp box, check out my article here.
Stage # 5: Leather Hard Clay
Although it’s good to keep your clay pliable when you are working on it, there comes a time when you will need to let your clay start to dry out. Clay dries out gradually and in stages. The first stage of the drying process is when the clay becomes leather hard.
When clay is leather hard, it has lost the plasticity of the workable stage. The clay has lost enough moisture so that the particles no longer glide over one another when pressure is applied to it.
However, leather hard clay also goes through stages too. In fact, there are three stages of leather hard clay.
The Stages of Leather Hard Clay
Here is an overview of the three different stages that leather hard clay passes through.
The Early Stage of Leather Hard Clay
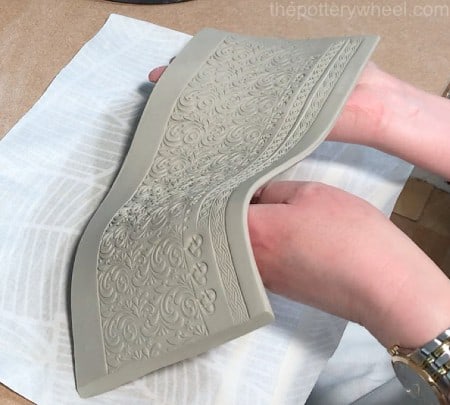
The first or early stage of leather hard clay is often called ‘soft leather hard’. This is when the clay still contains enough moisture so that it can be bent without cracking or breaking.
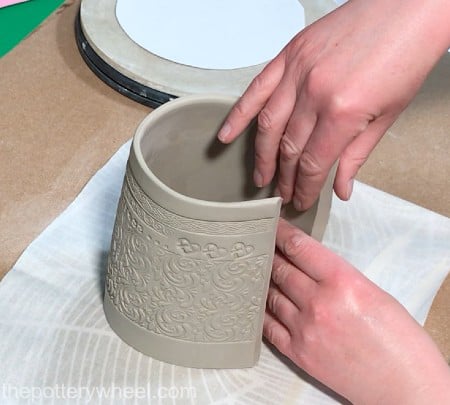
When clay is soft leather hard it has enough strength so that it can hold up its own weight without collapsing. So, for example, soft leather hard clay is often used to make slab pottery.
The clay slabs can be handled and used to build pottery. They are pliable enough to bend but strong and dry enough that they keep their shape without flopping about and losing their shape.
This is also a good stage to join pieces of clay. The clay contains enough moisture so that pieces bond together well.
The Middle Stage of Leather Hard Clay
As the clay becomes harder, it is more difficult to bend and shape the clay. At this point, the clay is referred to as being ‘stiff leather hard’.
When clay is in the middle stage of being leather-hard, you may be able to flex the clay a little bit. It’s a little bit like stiff cardboard. But you won’t be able to reshape it very much as there is a danger that the clay will break at this point.
Also, it’s worth remembering that clay is said to have a memory. This means that when clay has dried out in a particular shape, it will want to return to that shape as it continues to dry out further.
So, you may be able to reshape clay a little when it is stiff leather hard. However, as the clay dries out, or is fired, there is a tendency for it to want to return to the shape it was when it originally started to dry. This can cause your pottery to bend and warp back into its original shape.
Nevertheless, there is plenty that you can do with stiff leather-hard clay. Including the following:
- Cutting the clay
- Joining pieces of clay
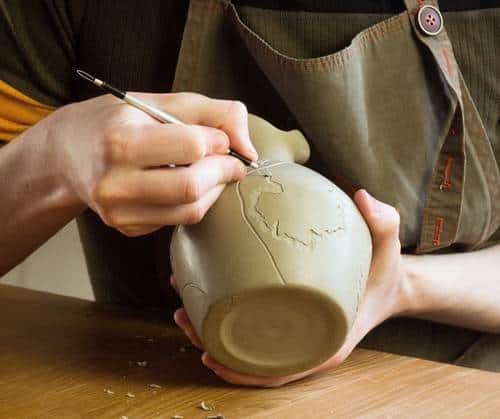
- Carving into the clay using techniques like Sgraffito or Mishima
- Decorating with clay slip or underglaze
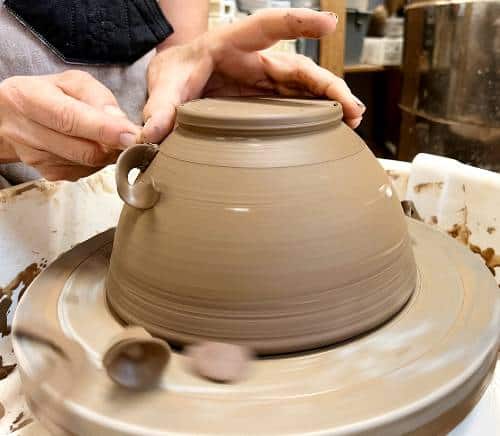
- Trimming your pots
The Later Stage of Leather Hard Clay
At this stage, the clay still contains some moisture. However, it has begun to dry out enough that the clay has started to change color. As the clay dries out, it will start to become paler and develop a slightly dusty surface.
Also, at this stage, the clay will be too stiff to bend. Instead of being like slightly bendy cardboard, as it was in the middle stage, the clay is now hard and inflexible like wood.
At this point, if you tried to bend the clay it would almost certainly crumble. The clay is also now too dry to join especially well.
If you apply ‘joining slip’ to leather hard clay now, it will suck all the water out of the slip very quickly. The slip usually dries out fast on the surface of the clay and flakes off rather than bonding to the pottery.
However, there are still a few things that you can do to clay when it’s in the last stages of being leather-hard. Here are some examples:
- Burnishing the clay
- Decorating with ceramic stains
- Applying underglaze
- You can still carve it though it will be crumbly
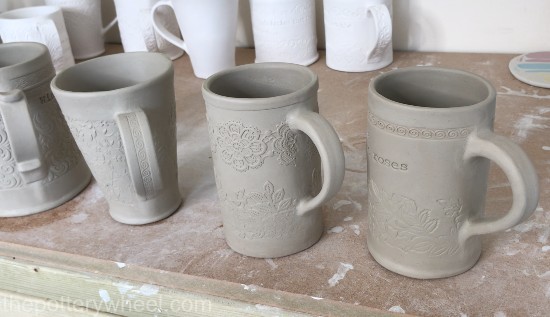
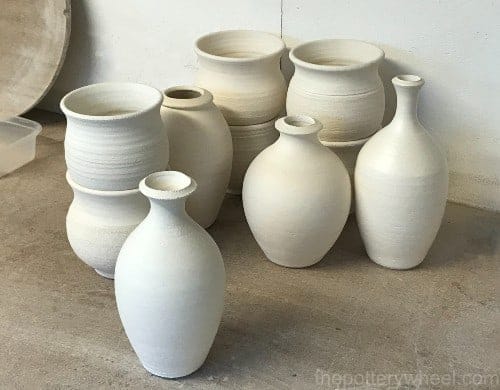
Stage # 6: Bone Dry
When clay has lost all the moisture that it can lose before it has been fired, then it’s said to be in the bone-dry stage.
Bone dry clay is usually a lot paler than it is when it is in its workable state. It is also solid but brittle and very fragile.
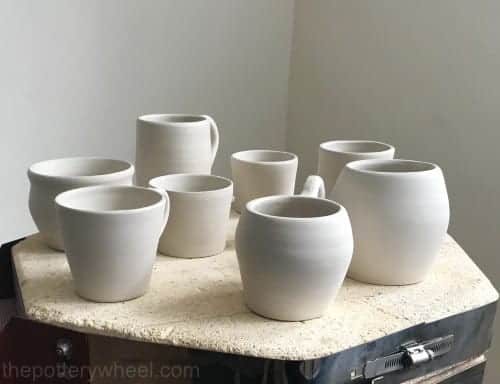
At this stage, the clay may look stronger than it did when it had some moisture. However, bone-dry clay breaks very easily. For example, if your pottery has a handle or fine decorative detail, these can break and snap off very easily the bone dry state.
Being bone dry is one of the very last stages that the clay goes through before it is fired in the kiln. So, this is the last chance that you have to make changes to your clay before it’s turned into ceramic ware.
One of the things you can do with bone-dry clay to make your pots perfect before they are fired is to gently sand the surface.
If you do sand your clay, it’s important to follow certain suggestions:
- Sand outside and use a respirator mask. Sanding creates dust which you should avoid inhaling.
- Use fine sandpaper to avoid scratching your work
- Avoid sanding clay that contains grit, grog, or sand, as it will scratch easily
- Sand slowly and carefully because it’s easy to take off too much clay
For more tips on sanding clay, you can check out my guide on that subject right here.
You can also add certain decorative finishes to bone-dry clay too. For example, now is a good time to apply terra sigillata to your pottery, if you want your pots to have a lovely buttery soft shine when fired.
Stage # 7: Bisqueware
The previous 6 stages of clay are when the clay is still ‘greenware’. The term greenware refers to when the clay has been shaped and formed but not yet fired in a kiln.
When clay is greenware, if it is placed in water, it will break down and lose its shape. Greenware will dissolve into slip or workable wet clay depending on how much water it is sitting in.
This is obviously no good if you want to use your pottery to contain liquid. A mug or a vase needs to be able to come into contact with water without dissolving.
The next step to create pottery that is stronger than bone-dry clay and won’t dissolve in water is to fire it.
Firing clay takes place in a pottery kiln. Kilns are basically very hot ovens, that are made especially for baking clay.
The difference is that they heat up to a much higher temperature than a domestic oven. Kilns can be fueled by gas, wood, or electricity. Electric kilns are most common these days.
To turn bone-dry clay into ceramic material, it is fired in the kiln at temperatures between 1840-1940F (999-1060C). These temperatures are high enough to change the clay physically and chemically from clay to ceramic material.
This is known as the bisque fire, and the ceramic material that comes out of this firing process is called ‘bisque’ pottery.
Once clay has been bisque fired, it will not dissolve when it is placed in water. So, it has been changed permanently from its clay state, into a hard ceramic material.
Bisque pottery or ‘bisqueware’ has a matte finish. It also has a slightly rough texture that feels dry and a little ‘toothy’.
Stage # 8: Glazeware
Although bisqueware is stronger than unfired clay, it is also still porous. Whilst it doesn’t dissolve in water, it does absorb water easily.
So, if you filled a bisque vase with water, the water would eventually seep out of the pottery wall and make the surface it was sitting on damp.
This is one of the reasons that pottery is glazed. As mentioned earlier on glaze is the glassy coating that covers pottery. The glazing process is often one of the final stages of clay.
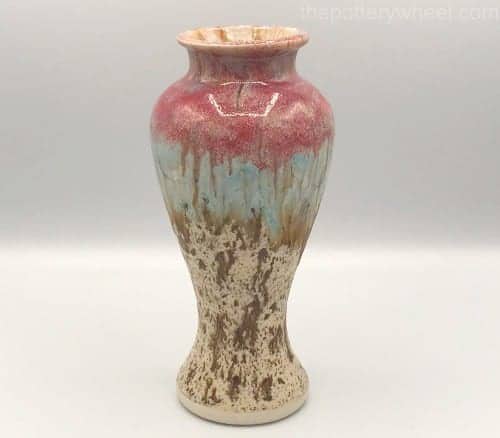
This glassy coating achieves two things. Firstly, it seals the porous underlying clay providing a water-tight surface. And secondly, it provides a decorative coating.
Glazing pottery involves firing it for a second time. Before it’s fired, the actual pottery glaze is a liquid. In fact, glaze is made up of silica, alumina, and flux suspended in water. For more information about what glaze is made from, you can check out my article here.
This mixture is applied to the bisque pottery. It can be applied to the bisque ware in the following ways:
- Dipping
- Pouring
- Painting
- Spraying
The liquid glaze dries quickly on the bisqueware to form a powder coating. This pottery is then fired a second time. During this second ‘glaze firing’ the glaze melts on the surface of the pottery. When the kiln cools the glaze becomes solid again and forms a glassy coating.
Because the glaze melts, it’s important that the bottom of the pottery is unglazed. If the whole of the piece was to be coated in glaze, the pottery would stick to the kiln shelf when it was being fired. That’s why the bottom of your mugs, plates, and bowls are usually unglazed.
Glaze Firing Temperatures
Different types of clay are glaze fired at different temperatures. For example, earthenware pottery is fired at the same temperature as a bisque fire, or sometimes just a bit lower.
Other types of clay, such as stoneware or porcelain are glaze fired at higher temperatures. A common temperature to glaze fire stoneware is 2232F (1222C). However, some stoneware and porcelain are fired at temperatures as high as 2381F (1300C).
Final Thoughts
Clay goes through 8 stages in its journey from the ground to our table. Of course, the clay goes through lots of changes between each of these stages. But these are the major changes that it undergoes in its transformation. The amazing thing is that these processes have been going on for thousands of years. That makes us clay fanatics part of a long incredible tradition. Amazing!


