Learning how to prepare your clay for pottery will make your life as a potter much easier. A few simple steps to get your clay ready can save you hours of frustration going forward.
Preparing clay for pottery involves making sure the clay is moist but not too wet and sticky. You also need to make sure the clay is free of air bubbles, is free of lumps, and has an even consistency. Wedging your clay is an important step in clay preparation.
Here are the steps that I take when I’m getting my clay ready for wheel throwing or hand building.
Prepare Your Clay for Pottery
I usually prepare my pottery clay the day before I need to use it. That’s because, if my clay doesn’t have the right moisture content, it can take a while to get it ready. So, my first tip would be to check if the clay is too moist or too dry in advance.
Tip: The day before you are planning to make your pottery, check to see if the clay is moist enough, or if it’s too moist.
How Moist Should the Clay Be?
Ideally, you want your clay to be soft and pliable. But you don’t want it to be so wet that when you roll it on your work surface it leaves a sticky mess.
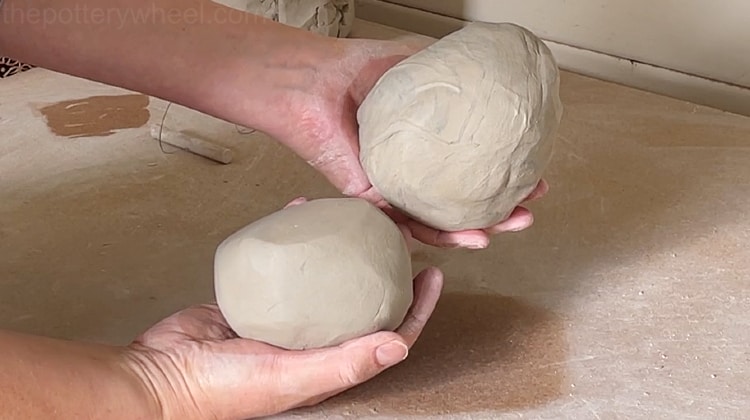
I’d suggest taking a handful of clay, about the size of an orange, and handling it to see how it feels. If the clay is very firm and difficult to shape, or a bit crumbly, then it’s probably too dry.
Equally, if the clay is leaving a sticky paste on your hands, or if it smears on the work surface, then it’s probably too wet.
Don’t worry if your clay doesn’t feel like it’s got the right water content. There are some very easy ways to revive it and make it workable. Here’s what to do if you open your bag of clay and it doesn’t look like it’s in very good shape.
How to Prepare Pottery Clay if it is Too Dry
Over time clay dries out. Even if the clay is in a sealed plastic bag and container, it will lose moisture gradually.
So, if your clay has been sitting about in storage for a few months, there is a good chance it may have gone a bit hard.
If your clay is not very workable, it makes using it more difficult, particularly if you are throwing on the wheel. Here are a few ways to soften it up…
1) Use a Damp Towel or Cloth
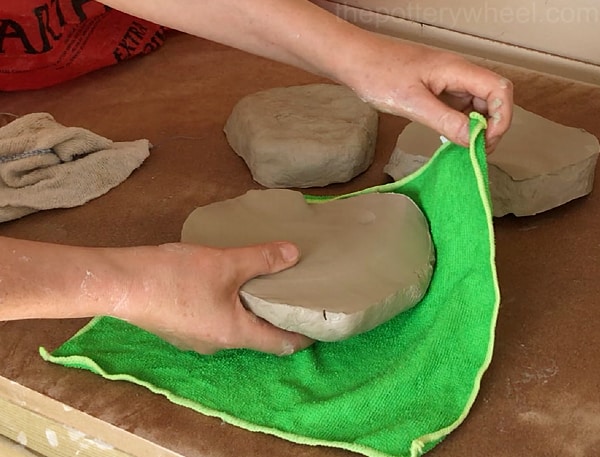
The day before I use a bag of clay, I check to see if it’s soft enough. If it needs softening, I slice the clay up into sections. Usually, I slice it into slabs that are about 1 inch thick.
Then I wrap each slice in a damp cloth. You can stack the wrapped slabs on one another and put them in a plastic bag overnight. The next day the clay will be moist and ready to use.
2) Adding Water to The Clay Bag
Another way to rehydrate clay that’s a bit hard is to simply add a bit of water to the clay bag.
If you pour a little bit of water into the clay bag, it can collect at the bottom of the bag. As a result, the clay at the bottom of the bag can become waterlogged and soggy. So, don’t add too much water.
Instead, you can simply spritz it and then reseal the bag. Check the next day to see if it’s moist enough, and if it isn’t you can add some more water and repeat the process.
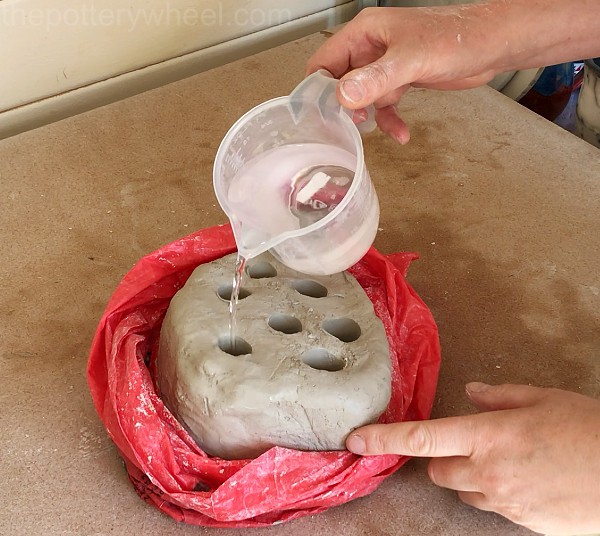
Another way to stop the water from sinking to the bottom of the bag is to poke holes in the block of clay. Then pour water into the holes. This helps the water to get into the lower layers of clay and stops it from pooling at the bottom of the bag.
When you have poured some water into the holes, reseal the bag and leave it overnight for the clay to absorb the moisture.
You can read more about how to rehydrate clay in this way in my article on how to store clay.
What to Do if Your Clay is Bone Dry
If your pottery clay has become so dry that it’s hard and crumbly, the best way to prepare it is to let it dry out completely and then rehydrate it.
Once clay has become leather hard, it doesn’t absorb water easily. If you add water, it tends to stay in sticky but hard clumps.
But if you break the clay into smaller pieces and let it dry out completely, it will be much easier to rehydrate.
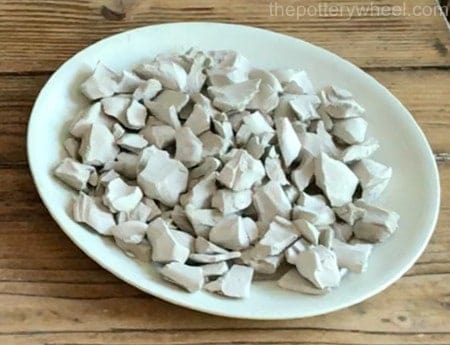
Bone dry clay absorbs water very quickly and evenly. When you put bone-dry clay in water it will suck up the water and quickly soften. This is called slaking down.
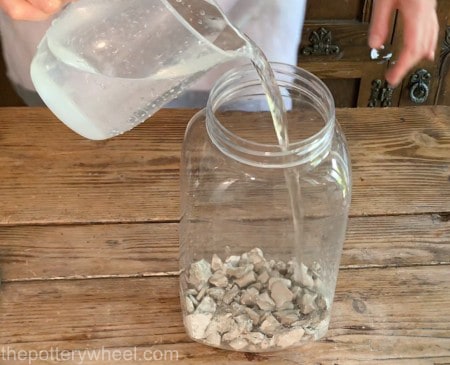
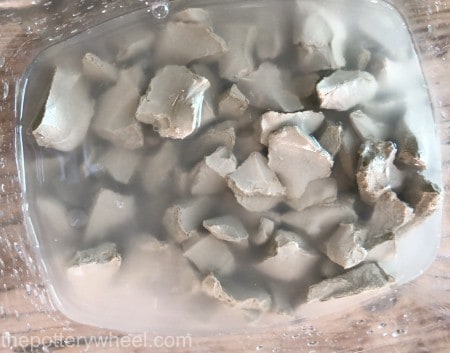
Once you’ve added the water, the clay will probably become a soft liquid slip. So, it will be too wet to use. But firming up soft wet slip clay is easy enough. Let’s take a look now at what to do if your clay is too wet.
How to Prepare Pottery Clay if it is Too Wet
If your clay is a sticky mess, here are a few things you can do…
3) Using a Plaster Slab
Sometimes clay is so wet that it’s too soft to handle. Perhaps you have a bucket of slip and wet clay scraps sitting in water that needs to be dried out and made solid again.
If your clay is so wet that it’s become liquid, the best way to prepare it for pottery is to spread it out on a plaster slab.
Plaster is very absorbent, and it will draw liquid out of the clay very quickly. Here is a link to my step-by-step guide on making a plaster slab. They are very easy to make, and they are so handy to have that they are a complete game changer when you are preparing clay for pottery.
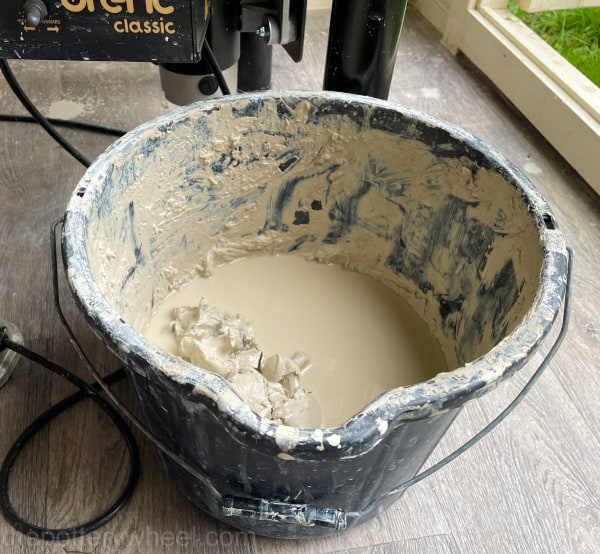
When I’m making pottery, I have a bucket of clay scraps that I collect over time. The clay scraps sit in water to stop them from drying out completely. When the bucket is full of scraps, I recycle them.
Recycling clay scraps is great because it will save you a ton of money. You can check out how I recycle my clay here.
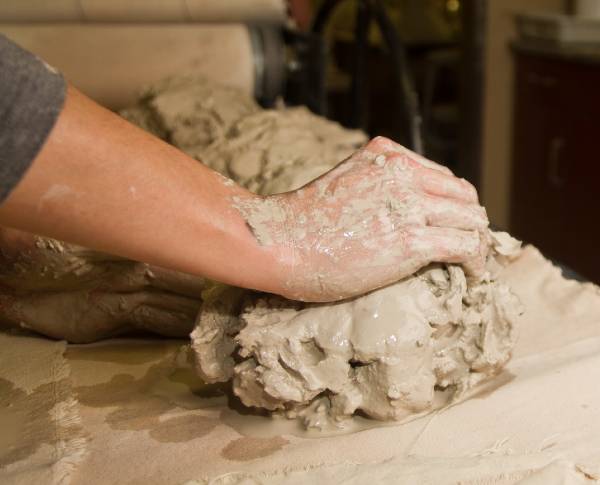
The first thing I do when I’m recycling a lumpy bucket of clay is blend it into a smooth paste using a paint mixing bit attached to a drill.
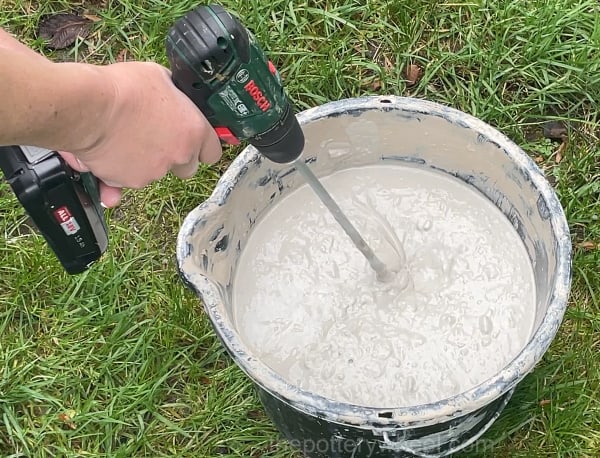
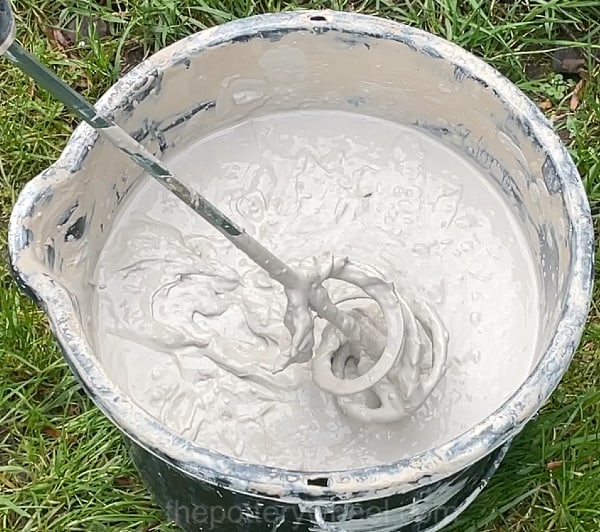
If you want to try this process, you can get a cordless drill and paint mixing drill bit here.
Then I spread the mixture over my plaster slab and let the plaster suck most of the water out of the clay.
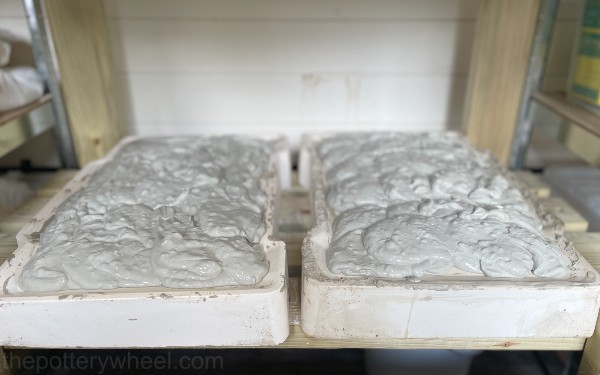
Once the clay is firm enough, you can peel it off the plaster slab and use it again to make more pots.
Before using the clay, you will need to get rid of the air bubbles and ensure it is nice and smooth. This process is called wedging, and I will say a bit more about how to wedge your clay later.
4) Air Drying
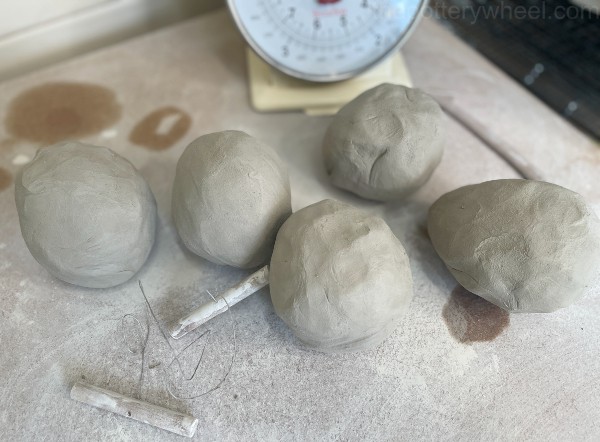
Here’s what you can do if your clay is too sticky. Clay dries out quite quickly when it is left in the open air. Take some of the clay from the bag, shape it into balls using your hands, and simply set it to one side to let it dry out a bit.
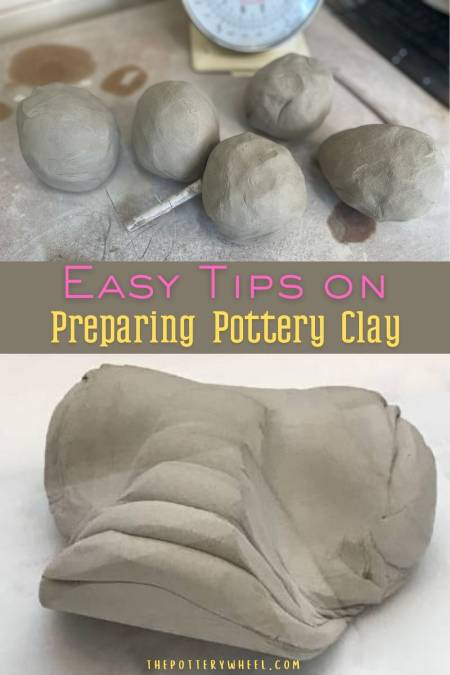
Let’s say you plan on making a mug. I usually use around 600g (1.3lb) of clay to make a mug. You can either weigh out the right amount of clay, or you can eyeball it. 600g of clay is about the size of a large orange.
Get your balls of clay ready and let them sit for a while whilst you get on with something else.
I’d suggest checking the clay regularly to make sure that it isn’t drying out too fast. If you are in a warm dry climate, clay will stiffen up quickly. So, don’t leave it for too long.
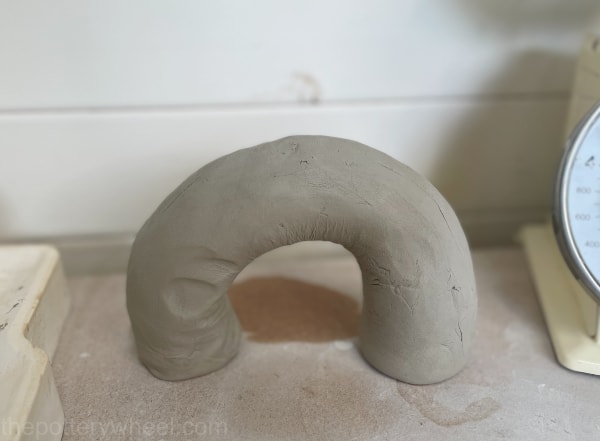
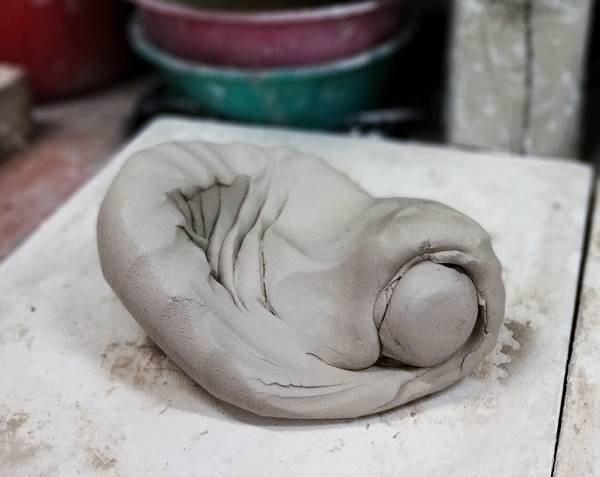
5) Horseshoeing
Another way to help sticky clay dry out is to make it into the shape of a horseshoe or arch. This is sometimes called ‘horseshoeing’.
Roll the lump of clay into the shape of a fat sausage and then curve it round into an arch. Then stand the arch up on your pottery work surface and leave it to dry out for a while.
I do this when I’m recycling clay and it is still quite wet after being on the plasterboard.
Getting Rid of Air Bubbles to Prepare Your Pottery Clay
It’s important to get rid of air bubbles and air pockets in your clay. If your clay contains air bubbles it will be hard to throw with it on the wheel. An air bubble in your clay will feel a bit like a pebble in the clay as you are throwing.
If you don’t prepare your pottery clay and get rid of the air bubbles, they can make your pot uneven and wonky.
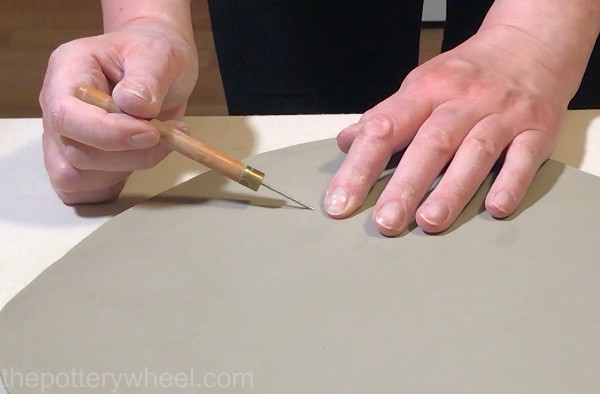
Air bubbles are also a pest when you are hand-building. In particular when you are slab building. If you roll a slab of clay, an air bubble will appear in the clay like a blister, spoiling your lovely slab.
These can be popped with a needle tool and smoothed over. But if you have lots of air bubbles in your slab, it can look unsightly and be a pest to get rid of.
Another reason it’s a good idea to get rid of bubbles in your clay is that they can contribute to your pottery exploding in the kiln.
It’s not the air bubbles themselves that will cause your pots to shatter when they are fired. However, what happens is that leftover moisture in the clay evaporates and turns to steam during a bisque fire.
When it turns to steam it expands into any air bubbles in the clay. This puts a lot of pressure on the pot and can cause it to shatter. You can read more about stopping your pottery from exploding here.
It’s best to get rid of any air bubbles in your clay before you start. And the best way to do this is to wedge your clay.
Wedging Your Clay
An important step in the preparation of clay is wedging. But what is wedging clay? Wedging is sometimes described as being similar to kneading dough. This is a handy comparison in that the action can look a bit similar.
You are using your hands to press the clay and mix it. But wedging and clay kneading are different things. When you knead dough, you are trying to fold air into the mixture. In contrast, when you wedge clay you are trying to push air bubbles out of the clay.
Different Ways of Wedging Clay
There are a few different ways of wedging clay. The first technique that is usually taught is called ram’s head wedging. This is the method that I learned first, and it’s probably the easiest to get the hang of, so let’s take a look at it now.
Ram’s Head Wedging
Also known as forward wedging, this technique is called ram’s head wedging, because your clay ends up looking a bit like a ram’s face!
To wedge your clay using this method, take a ball of clay that’s about the size of a large orange. You can wedge larger amounts than this, but when you are learning, it’s best to keep to smaller sizes until you get the hang of it.
Pat your clay into a brick shape. Then hold the clay so that it is resting on one of its edges. Put the palms of your hands so that they are cupping each end of the clay brick.
The balls of your hands should be resting against the side of the brick. Then push the clay away from you and down. It’s important not to push the clay straight down towards the table.
Instead, push it away from yourself towards the opposite wall. This will roll and compress the clay against your work surface.
Then use your fingers to lift the clay and roll it back towards yourself. Repeat the process, pressing the ball of clay down and away with the palms of your hands. This will force the air bubbles out from the clay as you work. You may even hear the satisfying sound of the air bubbles popping as you wedge.
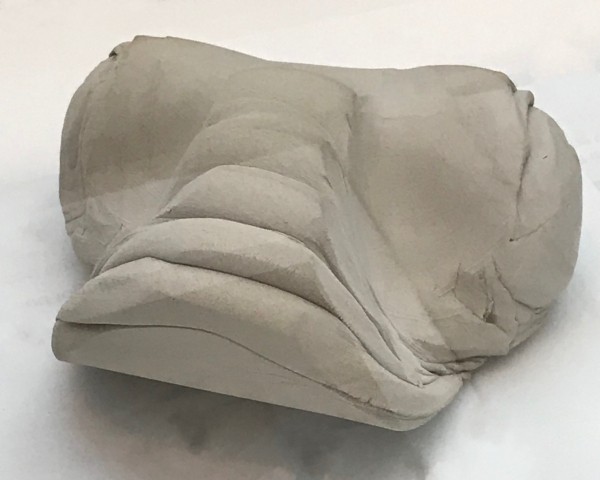
Spiral Wedging
Spiral wedging is also called shell wedging because you end up with a piece of clay that looks a bit like a shell.
This technique is a little trickier to get the hang of than Rams head wedging but it’s worth starting to practice it. Give yourself time to learn this method, because it’s helpful to use spiral wedging to prepare larger pieces of clay for pottery.
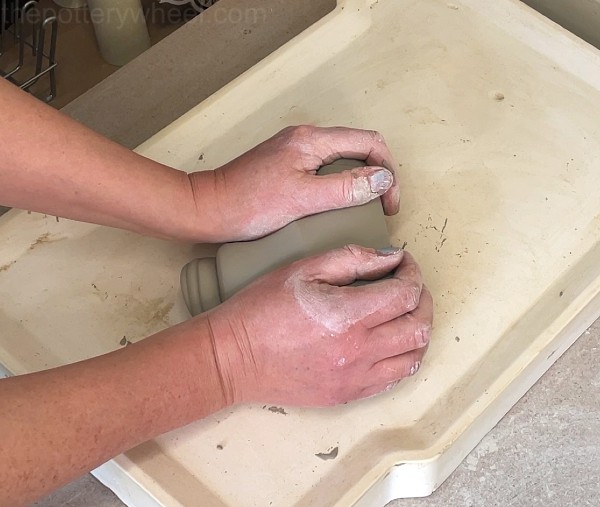
When you are spiral wedging you start by pressing down and out, like you do with Rams head wedging. The difference is that when you lift the clay, you turn the clay a bit. Then you push the clay down and out again.
By rotating the clay about an inch each time, you start to form what looks like a clay spiral. I found a handy article on how to spiral wedge here if you want to check it out.
Stack and Slam Wire Wedging
This wedging technique has various names including slap wedging, slam cut wedging, and wire wedging.
Wire wedging is great if you have a lot of clay to wedge or if you have issues with your wrists. Wedging clay can be tough on the wrists. If you have strong wrists, then wedging shouldn’t be an issue. But if like me you have any sort of joint issues like carpal tunnel, it can be hard.
Stack and slam wedging takes the pressure off your wrists. The process involves slicing through the clay and then stacking the sliced blocks on top of one another. Then slamming them down onto the work surface.
You repeat this process over and over. Gradually it blends the clay, gets rid of air bubbles, and gives the clay an even consistency.
If you want to know exactly how to do stack and slam wedging, you can check out my step-by-step guide here. It has a video and everything!
Your Wedging Surface
You need to wedge clay on a slightly absorbent surface. If you try to wedge clay on a shiny surface like a kitchen counter, the clay will just skid across the worktop.
A piece of plywood or a plaster slab is ideal. There are lots of different surfaces you can wedge your pottery on. Check out my list of clay wedging surfaces here.
You can buy a wedging table, like this one here. If you have the money and space to buy a wedging table, that’s great. But don’t worry if you don’t have the means to splash out on a special wedging table. You can also buy a portable wedging board like this one by Penguin Pottery, or you can make your own.
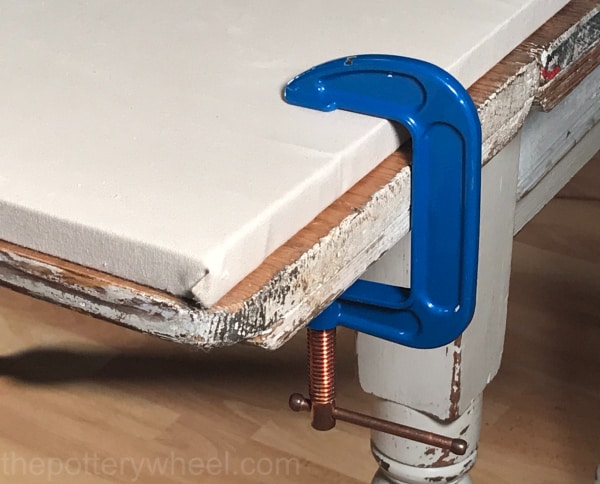
Making your wedging table is easy. You can simply use G-clamps to fix a piece of plywood or HardieBacker board to a table and use that as your wedging surface.
Tips About Your Wedging Surface
Here are a couple of things to bear in mind about your wedging surface.
- Unless your table is very heavy, it will probably move about and skid across the floor as you wedge. This is because you are pushing the clay away from yourself. Butt your wedging surface up against a wall to stop it from moving about too much.
- Check the height of your wedging surface, ideally, you should be wedging on a surface that comes up to between the top of your legs and your hip bones.
The height of your wedging surface is important. If your table is too high, you won’t be able to use your body weight to wedge, and this will make the process harder on your wrists and arms. If your table is too low, you will end up hunching forward, which will feel awkward.
Tip: If your table is too high, you can stand on blocks so that the table is between the top of your legs and hips
I have a couple of concrete blocks in my pottery shed next to my wedging table. This brings me up to the right height so I can use my body weight to wedge clay and not just the strength in my arms.
Clay Needs to Have an Even Consistency
If your clay has a mixture of consistencies, it can be hard to work with. This is especially true if you are throwing on the wheel. If your clay is a mixture of soft and harder lumps, it will be hard to get nice even walls on your pot.
One of the other benefits of wedging your clay is that it makes the clay homogenous. This means that it evens out the texture and consistency of the clay.
Wedging the clay distributes the water content evenly, and breaks up harder drier sections in the clay.
It also helps to align the clay particles. Clay is moldable because clay particles are flat. When flat surfaces are wet, they stick together. Imagine two glass slides in a biology lab. If the slides are wet, they stick together with a strong bond. The same is true for clay particles. Water between the particles holds them together.
Also, because clay particles are flat, they hold a small electrical charge. This charge means that clay particles are attracted to one another and stick together.
When clay is wedged, the particles are aligned. If the clay platelets are going in the same direction, it is easier to throw on the wheel. Clay with aligned particles has more plasticity and will mold easily. This is another reason why wedging clay is a key part of how to prepare clay for pottery.
Final Thoughts
Even if you are using clay from a new bag, it’s worth checking its condition before you start using it. Sometimes clay is fresh and soft when it’s straight from the bag. If that’s the case, you may get away with using it straight away.
But if the clay has been sitting at the store in its plastic bag for months, it may need a bit of TLC before you use it. I hope you’ve found some of the methods of clay preparation described above helpful. Once you are in the swing of it, the way you prepare your clay will be part of your pottery routine.


