Pottery clay starts to dry out as soon as it comes out of its plastic bag. As it dries, clay particles form clay dust. It is unavoidable that if you use clay you will be exposed to some amount of clay dust. As potters have become increasingly aware of environmental hazards, they have wanted to know how to clean up clay dust safely.
It’s best to avoid ingesting and inhaling pottery clay dust. Clay dust can get everywhere and can be tricky to clean up. However, you can keep your studio safe by minimizing how much clay dust you create. Also, following basic handling methods, and cleaning your studio carefully will help.
How to Clean up Clay Dust – 3 Simple Steps
Clay itself is safe. It is non-toxic and no longer lead-based. However, directly ingesting, inhaling, or absorbing it through cuts and grazes can cause problems. Therefore, it is best to minimize your contact with clay dust. You can do this by taking some precautions and cleaning up after yourself.
With that in mind, let’s take a look at some ways to minimize the risk by reducing clay dust.
Step 1: Try to Minimize the Clay Dust
First and foremost, you should try and minimize clay dust however possible. This makes your working space safer, and you will avoid having to clean lots of clay dust and debris later.
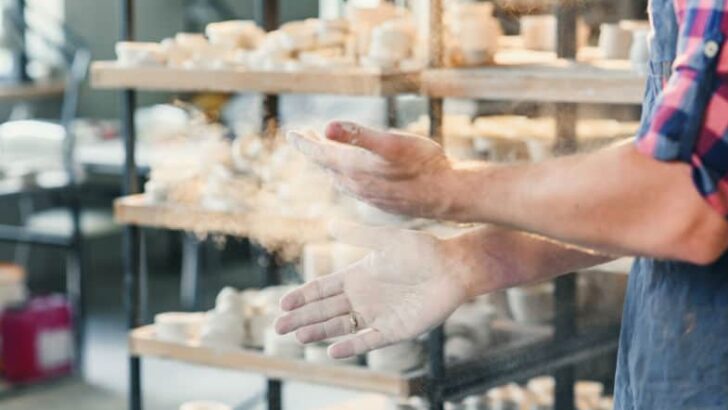
That said, this is easier said than done. Clay dust has a way of getting everywhere. Not only that but generating dust is an inevitable part of making pottery. As you, throw, trim, or even sand your pottery, you create clay dust that gets into nooks and crannies everywhere.
This is also where some of that aforementioned danger comes in. If you blow the dust off a pot or nearby surface, the dust will linger in the air. This makes it that much easier to accidentally inhale.
But you have to get rid of the clay dust somehow. The key here is to be smart about how you remove the dust from the finished ware. Don’t just blow it into the air and scatter the dust particles everywhere.
Instead, you’ll want to be tactical about how and when to get rid of the dust. If you can dispense with some of it outside, that is ideal. Or you can get rid of some of it into a basin or alternative receptacle.
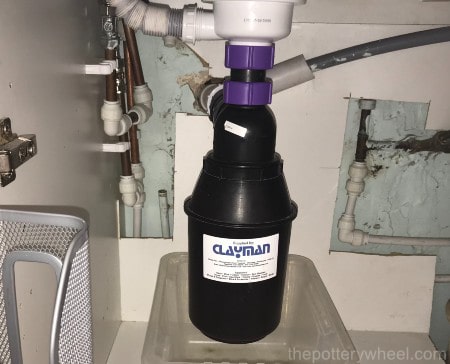
Don’t Forget to Use a Clay Trap
Bear in mind that if you are getting rid of clay dust down the sink, you’ll need a clay trap. Clay in your pipes and drains can cause major blockage problems. Though this can be avoided by the installation of a clay trap.
As the name suggests clay traps use gravity to capture lumps of clay and clay particles in a tank. This prevents the clay from finding its way into your plumbing system.
You can make a clay trap quite easily, though these tend to be quite bulky. Alternatively, some manufacturers make clay traps specifically for potters. These are often used by plasterers too, which is handy if you do plaster casting.
Alternatively, there are companies that make them specifically for potters. Again, some of these are quite large. A large one is suitable for a studio or school with multiple users.
But if it’s just you, there are smaller clay traps available. Here is a picture of mine. It works like a dream, though it does also collect my coffee grounds, which is a bit gross!
How to Clean up Clay Dust When Wedging
Dust is generated as the clay dries out and in particular, as the clay body is disturbed. The more you move the clay around, the more dust you create. Throwing on the wheel normally involves quite a bit of water, which keeps the particles bonded to the clay. However, wedging is a different story.
When you are wedging, you are purposefully agitating the clay. Also, the objective of wedging is often to get rid of some of the excess moisture in the clay.
As a result, wedging can create quite a bit of dust. How you wedge will have some impact on the amount of dust you create. The stack and slam method involves throwing the clay about and will create more dust than rams head wedging.
But regardless of your method, you will be creating clay dust as you smush the clay into your wedging table. It is best to keep on top of how much dried-out clay is lingering on your wedging table.
Minimizing Clay Dust When Wedging
One way to do this is to wipe your wedging table down with a damp cloth at regular intervals. I’d emphasize that the cloth should be damp enough to pick up the clay dust, rather than soak your table.
Having a wet wedging table is difficult, as the clay will skid across the surface as you try to wedge. But using a damp cloth lightly and quickly to remove debris and dust should be fine.
This will help you clean up dust build-up as you go. When you rinse out the rag, rinse it in a bucket. Then tip the bucket outside if possible, rather than down the sink. Even if you have a clay trap, it is preferable to dispose of clay-laden water outside whenever you can.
How to Clean Up Clay Dust from Sanding Pottery
Getting a smooth finish on your ceramics is sometimes very important. For example, if you are burnishing your ware, you will want the surface of your pottery to be smooth.
It’s best to make the surface as smooth as possible with a rubber kidney when the clay is still workable. But even after doing this, some potters like to sand their pottery when it is bone dry. Sanding can get rid of any remaining textures and bumps.
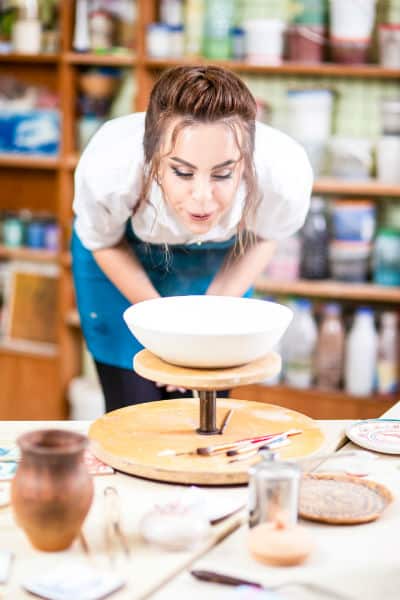
However, sanding unsurprisingly creates a huge amount of clay dust which will settle in a blanket on everything around you. If you must sand clay, do it outside.
Also, even when you are outside, it’s advisable to wear a mask or respirator when you sand. The pottery is close enough to your face so that even outside, you will inhale the dust that is being kicked up.
Step 2: Follow Basic Safety and Handling Tips
As you work, it’s good to aim towards cutting down the amount of clay dust you leave lying around. I don’t think it’s necessary to be too obsessive about it. However, if that thought is in the back of your mind as you go about your pottery work it’ll help.
Ultimately you are working towards keeping a safe environment to make pottery in. To that end, here are a few basic safety handling tips to help you achieve this.
- Firstly, it’s best to avoid eating or drinking while working with clay. If you have food lying around whilst you do pottery, a fine layer of dust will likely settle on it. If the clay is in your food or drink, you will inevitably end up ingesting it, which can create problems. Besides, a mouthful of clay with your sandwich is no picnic.
- Secondly, if you smoke, it’s not advisable to do it when you are making pottery. Clay dust can get transferred from the tip of the cigarette into your mouth. Plus, you may well be inhaling a combination of clay dust and smoke at the same time.
Clay dust can also be problematic for those who wear contact lenses. The particles can easily get trapped against your eyes. Really, it’s best to leave your contacts at home and wear glasses when you are working with clay. - Finally, if you make pottery, your clothes will get dirty. It’s best to just accept that as a given. It is best to have a few clothes that you keep as pottery clothes.
At the end of a session, change out of these clothes, and wash them. That way, you don’t risk dragging clay particles with you out of the studio and leaving a clay trail behind you.
Other Handy Tips for Minimizing Exposure to Clay Dust
- Wear a mask whenever you are doing anything with clay that creates dust
- If you are doing something that makes a lot of clay dust, like sanding, wear a ventilator
- Don’t use clay tools or utensils for other purposes, like preparing food
- If you have cuts, grazes, or cracked skin on your hands, wear gloves until your hands are healed
Step 3: How to Clean up Clay Dust – Do’s and Don’ts
It’s good to keep on top of the clay dust levels in your pottery workspace. One way to do this is to have a good clean-up after each session.
This can seem like a tedious exercise, and most potters find workspace clean-up a real chore. However, if you are working with dirt, you have to be prepared to do a bit of cleaning up afterward. Take a breath and try channeling Marie Kondo!
Clay is dirty and messy, it’s probably one of the reasons it’s so much fun. But it’s good to aim for a bit of order and cleanliness, otherwise, the mess can get a bit distracting.
However, clay dust needs to be handled in a particular way, otherwise, you might end up making things worse.
Things to Avoid When Cleaning Up Clay Dust:
Don’t sweep! Sweeping up dry clay will simply stir it up, causing a cloud of clay dust before the particles re-settle elsewhere.
Don’t vacuum! The same goes for using a vacuum cleaner. A vacuum cleaner will suck up some of the clay dust. However, the dust is fine enough it will blow back out of the dust bag on the vacuum. And given how many very fine particles there are, it would take forever to vacuum them away.
Dusting is also a ‘no-no’ with clay debris. Basically, any kind of cleaning technique that involves moving the dry dust around is not going to help matters. It will just create billows of clay dust.
It’s also worth bearing in mind that some clay bodies have a higher content of potentially hazardous ingredients. Some clays have a higher content of silica than others, silica being an ingredient that it’s dangerous to inhale.
Generally, high-temperature clays have a higher silica content. So, if you are cleaning up after using a high-temperature clay, it’s good to wear a mask.
Also, as you clean, keep your room ventilated if possible, even if that just means opening the windows.
Some Simple Suggestions for Cleaning Up Clay Dust
It’s good to work from the top down, i.e. cleaning away clay waste and wiping down. Then work your way down to the floor.
- Carefully collect up any debris, like small bits of dried clay, and throw it away. You can scrape this up with a paper towel and dispose of it without creating billows of dust.
- Tidy away unused materials and bag them up for future use.
- Clean your tools well with warm water.
- Wipe down equipment like a banding wheel and a wheel head.
- Some splash pans are made up of parts that can be separated and cleaned. If this is the case, it’s a good idea to rinse off or hose down your splash pan.
- Wipe down your work surface with a wet sponge or cloth.
- Wipe your surface down a second time if it’s streaky once it’s dried.
- Instead of sweeping the floor, mop it. Or if you’re working in a small area, you can wipe it down with a cloth.
- Rinse out rags, cloths, and sponges and let them dry out for the next time you are in the studio. It’s best not to let clay dry in clumps on your tools and cleaning equipment.
- Remember to empty out your sink trap periodically (otherwise, they can get clogged and a bit smelly!)
Final Thoughts
These steps for minimizing clay dust boil down to two basic tips. Firstly, be mindful not to make more dust than is necessary when handling clay. And, secondly, clean your space properly after every pottery session.
In principle this is simple, but in practice, clay dust is tricky and gets everywhere. It can be harder to clean up clay dust than you think. However, following these tips, you can enjoy a safe, clean workstation while making pottery.


