The beauty of hand building pottery is that you can get started without having to fork out for a lot of costly pottery equipment. It helps to have some basic tools but you can improvise with most of these and use items you have around your home.
The other appeal of hand built pottery is that it has a lovely organic look about it. Although hand built pieces can be very well crafted and beautifully made, they will always have small irregularities.
This is part of the charm of their charm. In fact, a lot of potters who hand build like the fact that their work is not 100% symmetrical and that the occasional fingerprint is visible. It’s often felt that these details give the pottery an individual hand-crafted feel.
What is Hand Building Pottery?
There are many different ways to make pottery. Some of them involve using equipment like a potter’s wheel, or a ram press which is a machine that presses the clay into the shape that you want it to be.
However, many pottery techniques rely mainly on the clay being shaped and formed by the potter’s hands. This is known as hand building pottery, and it’s often a lot like modeling or sculpting the clay.
There are three main ways of hand building pottery. They are:
In addition to those 3 core hand building methods, there are a couple of other approaches. These include:
- Use of molds (hump and slump molds)
- Combining the pinch, coil, and slab method all in one piece
Let’s take a closer look at each of these methods so you can choose which one you like the look of most.
Different Ways of Hand Building Pottery
Potters were making pottery thousands of years before the invention of the potter’s wheel. A lot of the hand building techniques outlined below are ancient, and haven’t changed much since the stone age.
One of the oldest methods of hand building pottery is pinch pottery, so let’s start there.
Technique # 1: Pinch Pottery
As the name suggests, the pinch pottery approach involves pinching the clay into shape.
It’s often the first method that is taught to young children. This is because it uses a simple technique of pinching the finger and thumb together. And because you can easily make a little pinch pot bowl, even with very small hands.
However, don’t be deceived by the simplicity of this approach. Many outstanding potters use the pinching technique to produce beautiful pinch pottery. If you want to know about some amazing pinch pot artists and their work, take a look at my article on their work here.
The Pinch Pottery Technique
Pinching can be used to make any kind of object you like, including bowls, plates, mugs, teapots, vases, and more.
However, the basic pinching technique remains the same. Once you have mastered the basic technique you can adapt it to make whatever you like.
Step 1 – Preparing the Clay for Pinching
Start off with a ball of clay. I good rule of thumb is to use a ball of clay about the size of a small orange. Roll and pat the clay until it is a nice even shaped ball.
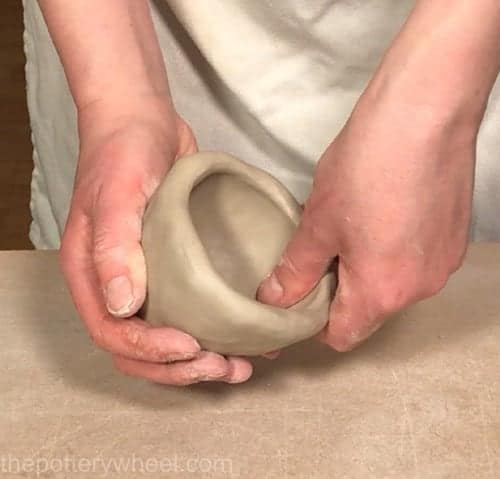
Support the ball in your non-dominant hand. That is, if you are right-handed, cup the clay ball in your left hand, and vice versa.
Press your thumb into the center of the ball of clay. Keep pressing your thumb until you start to feel it with your supporting hand.
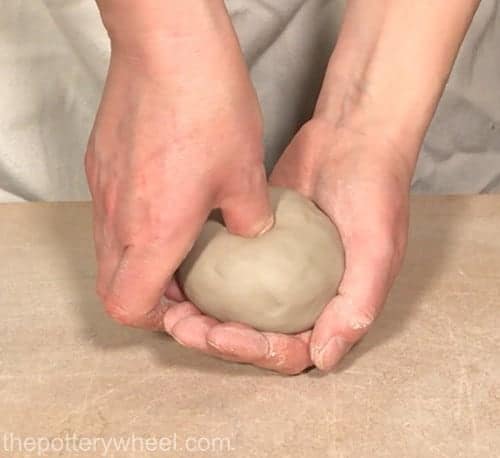
You want to make sure that you don’t press your thumb right the way through. Aim to stop pressing when the clay is about a ½ inch thick between your thumb and your palm.
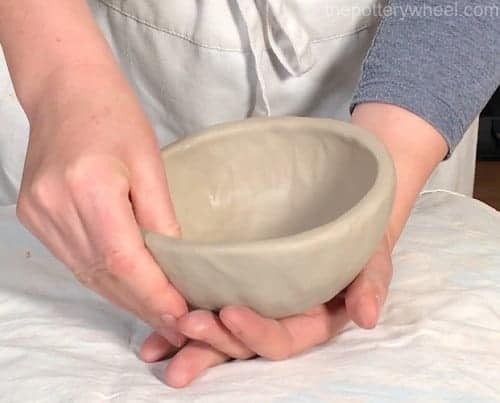
Step 2 – Pinching the Clay
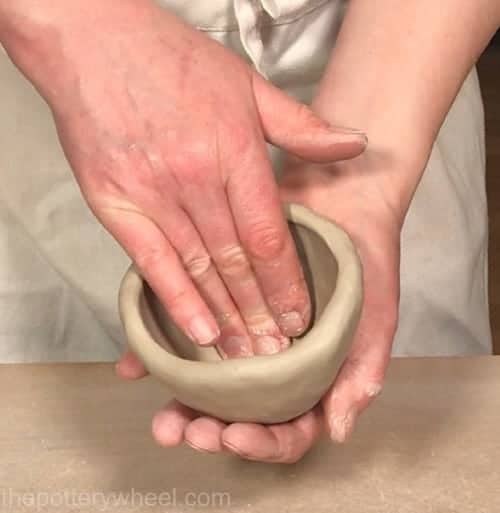
Then using a pinching motion with your thumb and fingers start to squeeze out the clay. Pinch the clay once then turn the clay in your supporting hand. Repeat the pinching action on the next section of clay.
Slowly work your way around the clay with a ‘pinch turn, pinch turn’ rhythm. As you do this, the clay will start to open up into a bowl shape.
As you work the clay you can also swipe the tips of your fingers over the surface of the clay to smooth it out and thin out the walls of your pot.
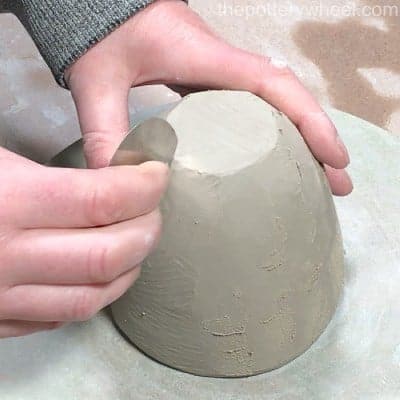
Step 3 – Tidying Up the Pinch Pot
Once you have pinched out your clay, the bowl will be quite soft and probably a little floppy. It’s best to let the clay sit for a while to firm up. When the clay is firmer you can tidy up the surface of the pot using a few simple tools.
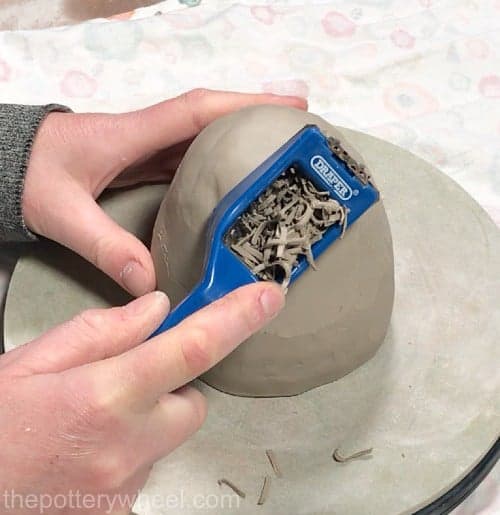
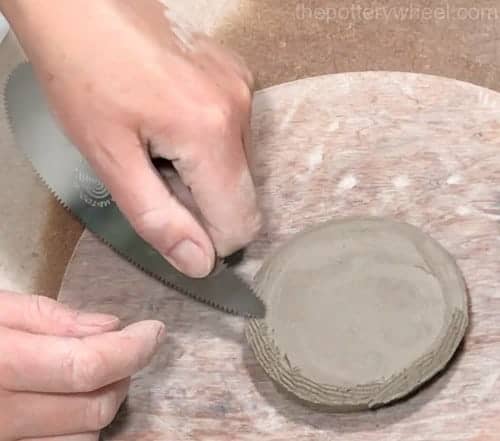
A very handy tool when you are hand building pottery is a clay shredder. This is also known as a Surform. It works a bit like a cheese grater.
You can drag the shredder over your pot once the clay has firmed up. This will remove any lumps and bumps from the surface of the pot. It’s also a very handy way of leveling out the rim of your pot if it’s a bit uneven.
The shredder will leave a rough grated texture on the clay. This can be tidied up by running a metal rib over the surface of the pot.
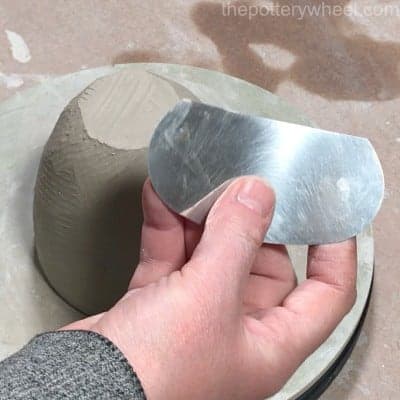
Another invaluable tool when you are hand building pottery is a soft rubber kidney. If you run this over your clay it will create a beautifully smooth surface.

Pinch Pottery Projects
This basic pinching technique will enable you to make a pinched-out clay pot. You can build upon this basic form to create whatever you like.
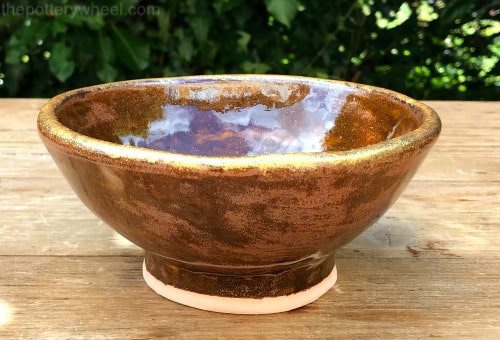
For example, if you add a foot ring, you can make a pinch pot bowl. If you want to know how I added the foot ring to this bowl, take a look at my step by step guide on making pinch pottery.
You can also make a pinch pot mug by adding a handle.
And once you have got the hang of the technique, you can make ‘composite forms’. This is when you join two pinch pots together to create a clay sphere. These are very helpful if you want to make a bigger pinch pot, like a vase or a teapot.
If you’d like to know how to make a pinch pot teapot, you can take a look at my step-by-step guide here.
Technique # 2: Coil Pottery
Making coil pottery involves constructing pots out of coils of clay. Like pinch pottery, the coiling tradition is a very old one that hasn’t changed much over many 1000s of years.
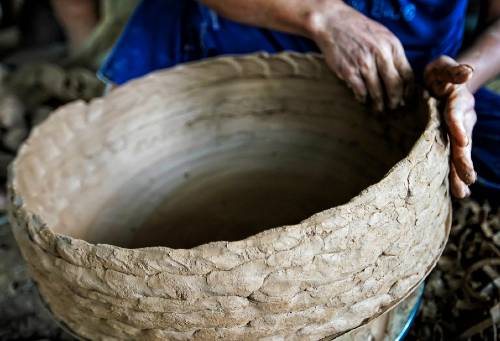
In fact, pinching and coiling have often been combined together to make functional pottery like cooking pots and storage containers for grain.
The coiling technique can also be used to make a large range of vessels, from pitchers and vases to teapots.
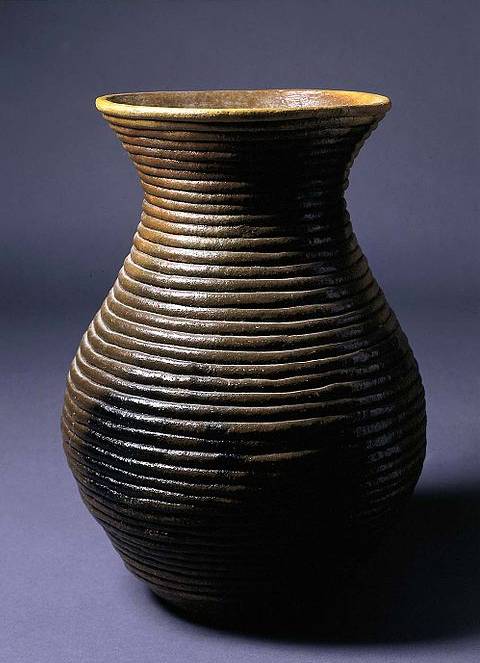
Like pinch pottery, the coiling method is used by many artists to make beautiful works of art in clay. In my article about famous coil pottery artists, you can take a look at some of their artwork.
This elegant coil pot is by Louise Goodman.
The Coil Pottery Technique
Coil pottery is very versatile and can be used to make anything from a palm-sized finger bowl to a huge garden planter.
The exact techniques for adding coils depend upon the size of the pot you are making. Very large pots often need very large coils of clay, which can be tricky to handle when you are starting out.
So, a good starting point for learning how to coil is to begin by making a coil vase.
Step 1 – Rolling Some Coils
Begin by making a batch of coils. To make a coil, simply squeeze a ball of clay into a cigar shape and begin rolling it out into a coil using your fingers and palms.
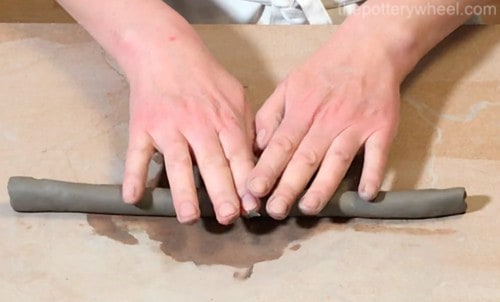
When I’m making a vase, I usually roll the coils until they are about the thickness of my pinky finger.
It’s best to the clay onto a slightly absorbent surface like smooth unvarnished wood, or a piece of canvas. If you roll it onto a shiny polished surface like a kitchen worktop, the clay will stick to your table.
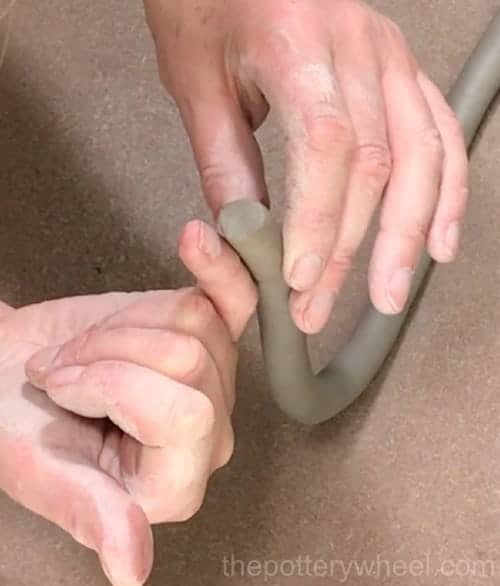
Although it’s a simple process, rolling an even clay coil can be tricky. It’s common to end up with a coil that’s a bit wonky, or flattened. I’ve written a simple guide on how to roll and even clay coil here.
Once you have rolled your coils, keep them covered with plastic to stop them from drying out.
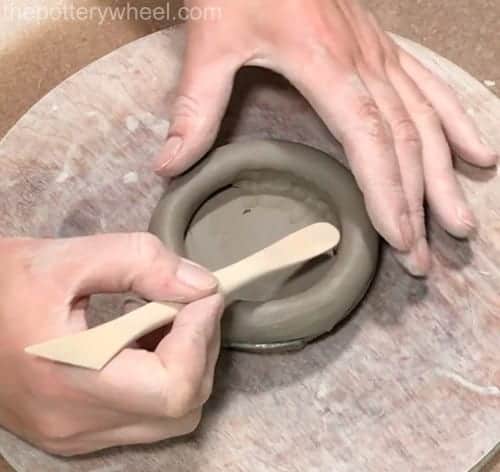
Step 2 – Making a Base
Before you start adding any coils, it’s best to make a base to build the walls of your vase.
The easiest way to make a base is to roll out a slab of clay with a rolling pin. Then cut out a circle of clay from the slab, the size that you want the base to be.
Put the base on a wooden pottery bat or a wooden chopping board so you can move your pot around easily as you work.
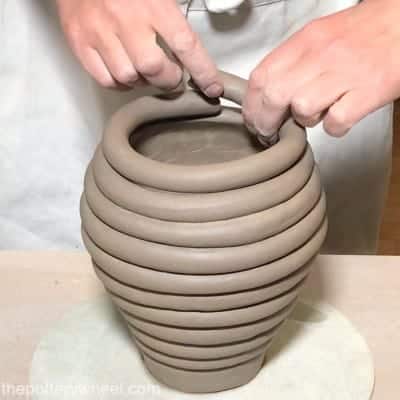
Step 3 – Adding the Coils
To build up the walls of your vase, you drape the coils around the side of your pot. Gradually you stack the coils on top of one another to create height.
I find the easiest way to make a nice even pot is to drape a coil around, cut it to length and then add it to the vase.
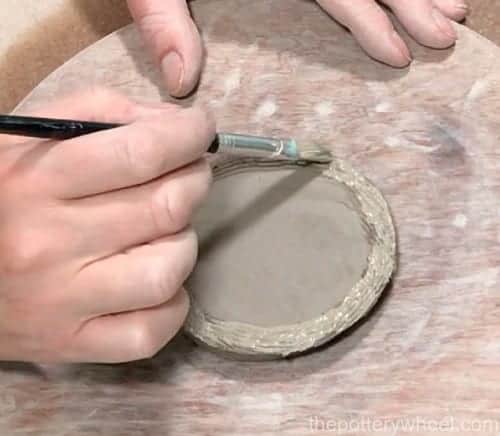
When you are starting out, the best way to attach a coil is by using a technique called score and slip. This involves scratching the two surfaces of clay that you want to join together so that they have a rough scored texture.
You can score the clay with a regular kitchen fork, or with a serrated rib tool if you have one.
Then paint a little water or clay slip to the scored areas of clay. The clay particles in the liquid form a glue-like substance that will bond your coils together well.
If your clay is very fresh and moist, score and slip aren’t 100% necessary. But when you are starting out, I think it’s good practice to make sure your clay bonds together well.
Press the coil into place gently but firmly.
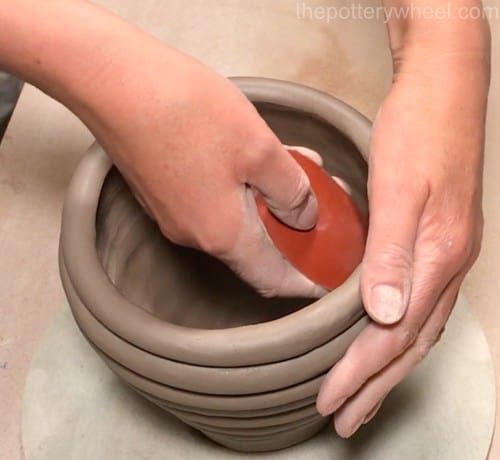
Step 4 – To Blend or Not to Blend?
In addition to scoring and slipping the clay, it’s best to blend the clay coils in on the inside surface of the pot. This will create a firm join and ensure that the pot is watertight.
On the outside, you can leave the coil pattern visible. This can create a lovely intentional design. Or you can blend the clay in so that your coil pot is smooth.
You can blend the clay in with your fingertips, or with a wooden modeling tool.
It’s best to blend the clay in as you work your way up the pot. Add a few coils and then blend them together. If you wait until the pot is quite tall, it will be harder to get your hand inside to blend the coils together.
Once the clay has been blended in with the modeling tool, you can tidy up the surface with some pottery ribs. I like to use a metal rib to scrape off any excess clay, and then polish the surface up with a rubber rib.
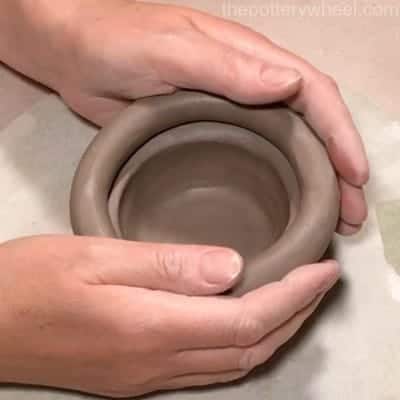
Step 5 – Putting a Curve on the Walls
The walls of your pot can either be completely straight. Or if you prefer you can add a curve to the design. You can do this by adjusting where you position the coil as you build the walls of the pot upward.
If you want the wall of your pot to curve outward, add the coil slightly on the outside edge of the coil below. This will bring the wall of the pot outwards.
Likewise, if you want the wall to slope inwards, then position the coil slightly on the inside edge of the coil below.
Coil Pottery Projects
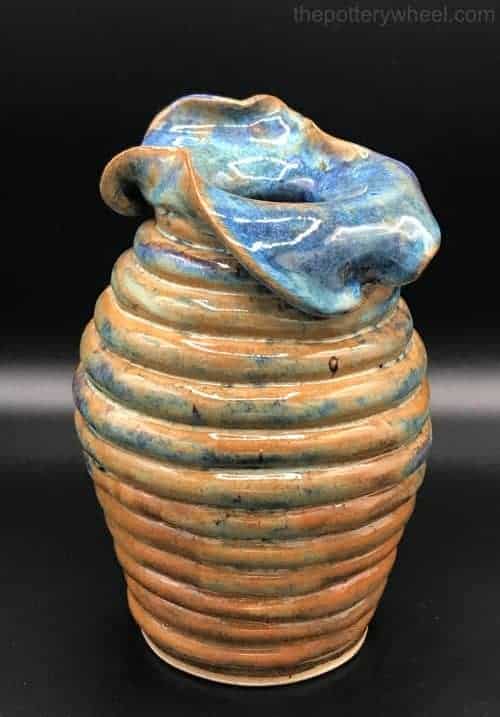
The lovely thing about coil pottery is that the coils can become part of the design of the piece.
Coils don’t need to be limited to building the walls of the pot, you can play with their shape to add intricate designs to your piece.
For example, the coils can be rolled into spirals, waves, or points and then added to your pottery.
I made this bowl by adding a combination of spirals, waves, and balls of clay.
Alternatively, you can smooth out the coils on the outside of the pot too. This will disguise the way the pot has been built. I have put together a step-by-step guide on how to make smooth coil pots here.
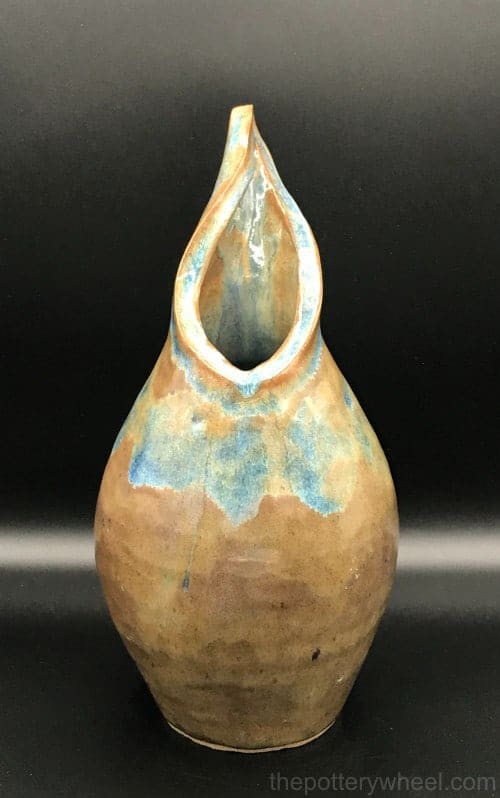
Another option is to create a coil pot and add some sculpted clay details. For example, adding a uniquely shaped neck to a coil pot.
Really, with coil pottery the options are limitless, so have fun with it.
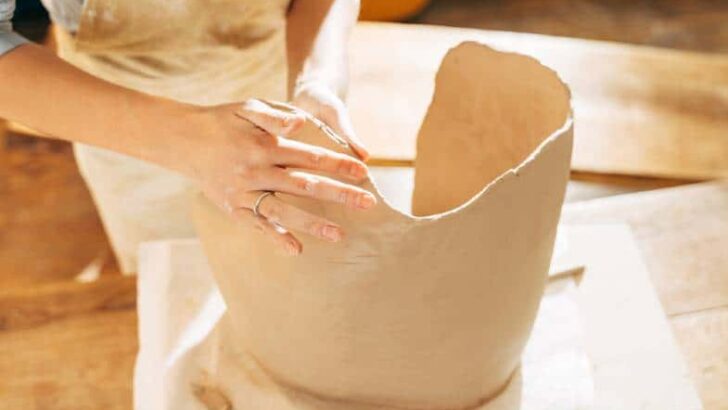
Technique # 3: Slab Pottery
Making slab pots involves hand building pottery from slabs of clay. Sometimes slab pottery is made from freshly rolled slabs of clay.
These contain enough moisture to be quite flexible. They can be easily folded, curved, and shaped into nice flowing forms. This is called soft slab pottery.
By contrast, hard slab pottery involves waiting for the slab to firm up to the point of being leather hard.
These ‘board-like’ slabs are handled in quite a different way. They are often cut up according to a template and assembled like a jigsaw into larger more angular forms. This is also called stiff slab construction
So far in this guide to hand building pottery, we have covered how to make a bowl and a vase.
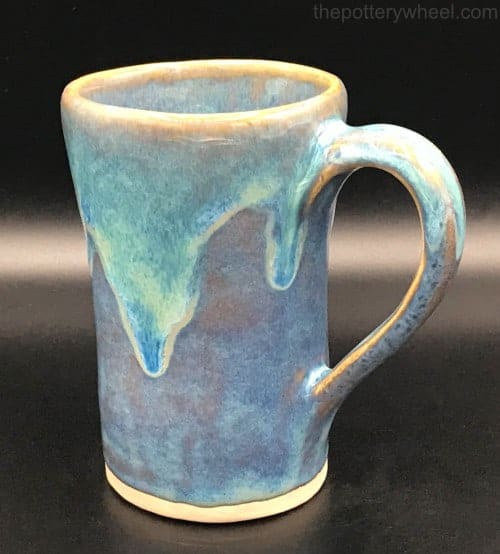
Now, let’s take a look now at how to make a slab built mug.
The Slab Pottery Technique
Often when you are making slab pottery, you begin by making an even slab of clay. There are lots of different ways to make a slab of clay. But probably the two most common ways to make a slab involve using a rolling pin or a slab roller.
Slab rollers are very large and expensive, and if you are starting out, it’s much more realistic to use a rolling pin.
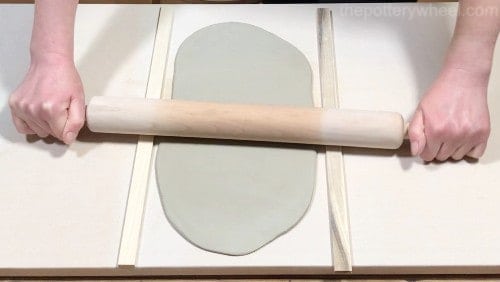
Step 1 – Rolling Out a Slab of Clay
Shape your piece of clay into a rectangular-shaped block and place it on a piece of canvas or smooth fabric. Flatten it out a bit with the heel of your hand so that it’s easier to roll the clay.
Using a rolling pin, roll the clay into a slab that is about ¼ inch thick. If you put ¼-inch thick sticks of wood on either side of the clay as you roll, these act as rolling guides. They help you roll an even slab and stop you from rolling it out too thin.
Step 2 – Cutting the Clay
Place a template on the clay slab and cut around the template. If you’d like to know how I make my slab pottery mug templates, have a look at my step-by-step guide here.
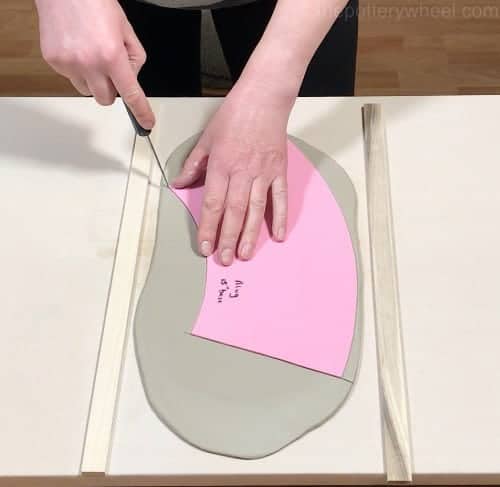
Leave the slab to firm up just a bit. The clay needs to be soft enough to curve easily, but not so soft that it flops about everywhere when you handle it.
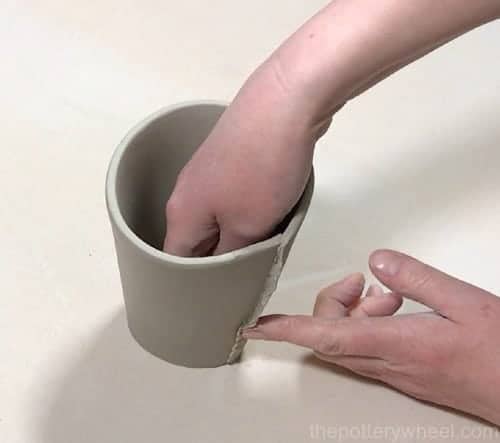
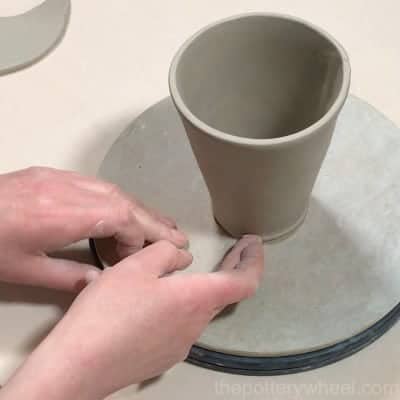
Step 3 – Assembling the Mug
Gently curve the slab around and join the seams together to make the beginnings of a cone-shaped mug. It’s best to join the seam by scoring and slipping the edges that are going to meet. This will create a good bond at the joint.
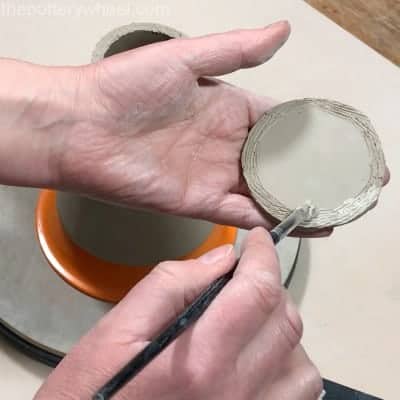
Step 4 – Adding a Base to the Mug
I also use a template to cut out a circle from the clay slab to make a base for the mug. Again, you can have a look at my article to find out how to make base templates that are the right size.
Once you have cut out the base, you can score and slip the edge of the base and the bottom of the mug. Then join the two prepared edges together to create a base for the mug.
Blend in the base to the walls of the mug so that it creates a nice-looking foot for the mug.
Step 5 – Adding a Handle
There are lots of different ways to make handles for pottery. A nice way to make a handle for a slab mug is to make a strap handle. Simply cut out a strip of clay from your clay slab and smooth off the edges of the strip with a damp sponge.
Curve the strip into a handle shape and let it firm up for a while.
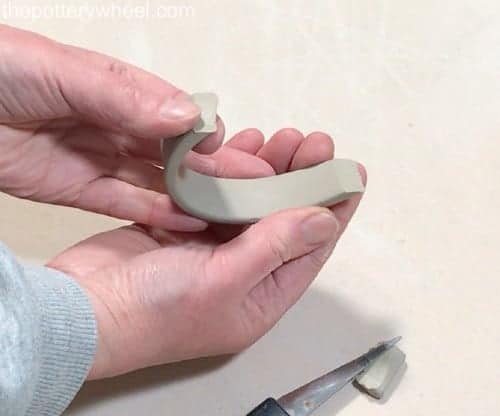
Once the handle is firm but a little flexible, trim the ends so that it’s the right length for a comfortable handle.
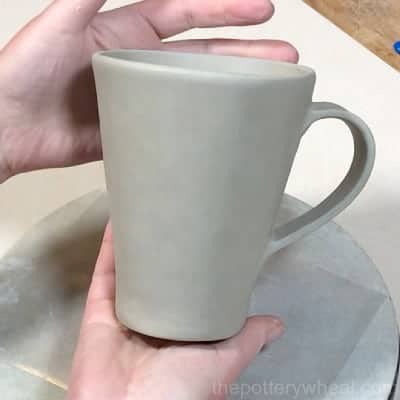
Score and slip two points on the mug where you want to attach the handle. Also, score and slip the ends of the handle itself. Then press the handle firmly up against the wall of the mug to make a firm bond.

Slab Pottery Projects
You can use the slab pottery technique to make really lovely-looking functional pottery. Here are some examples of this:
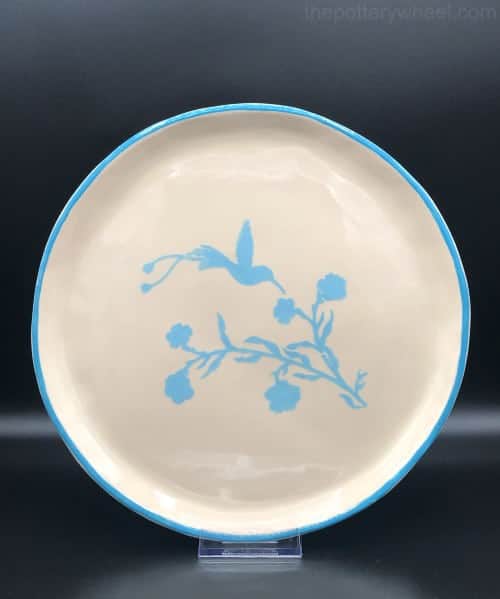
1) Slab Plates
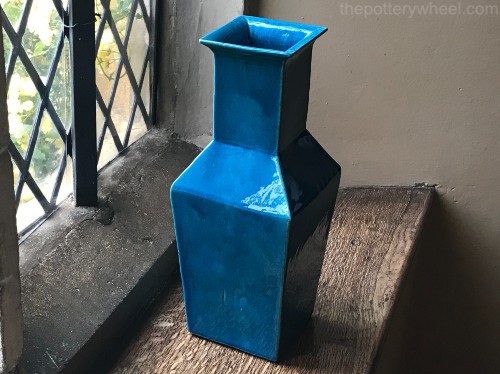
2) Slab Vases
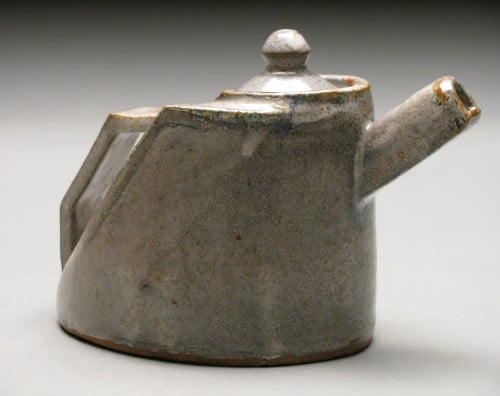
3) Slab Teapots
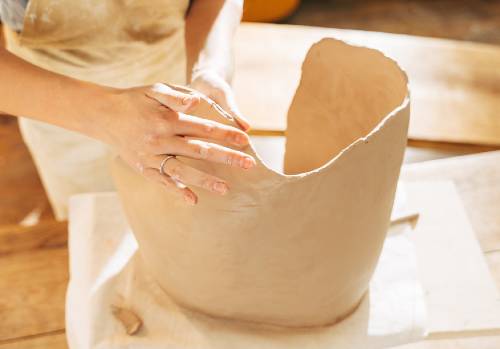
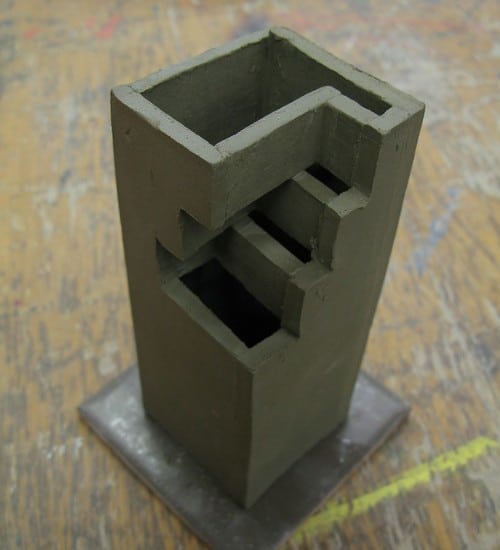
4) Or, slab pottery can be used to make larger more abstract, sculptural pieces like this…
Technique # 4: Hand Building Pottery with Molds
One way to build upon the slab pottery technique is to use molds to shape the clay.
Pottery molds come in all shapes and sizes. They are usually made out of either plaster or wood. This is because both of these materials are absorbent. This helps the clay to dry out a bit and separate from the mold as it shrinks.
Molds are usually either hump molds or slump molds.
Hump Molds
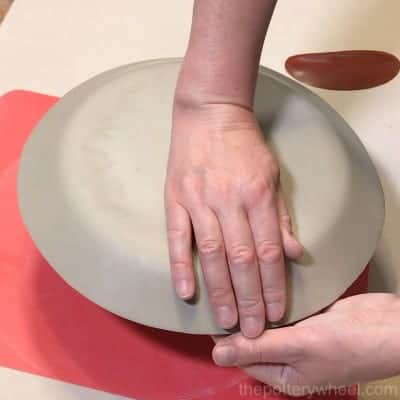
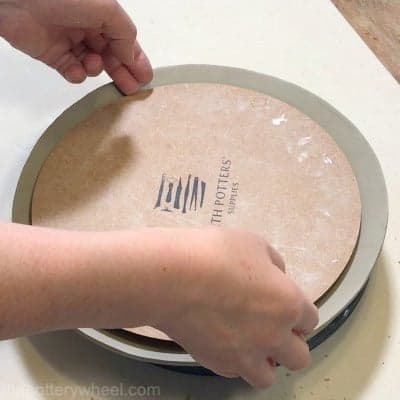
A hump mold is convex, which means that the mold curves outwards in a hump shape. A slab of clay can then be draped over the hump and shaped around it. As the clay firms up it keeps the shape of the mold.
In these pictures, I’m positioning a wooden hump mold on a clay slab. The slab and the mold are then turned over and the clay is shaped around the mold.

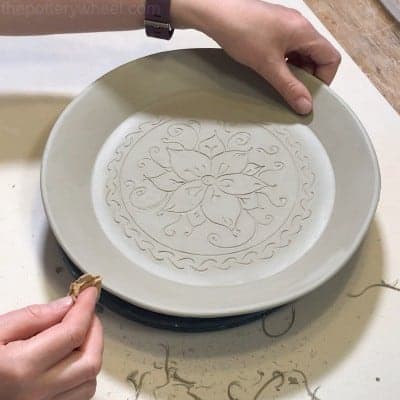
When the clay has firmed up, the mold can be removed and the edges of the plate can be tidied up.
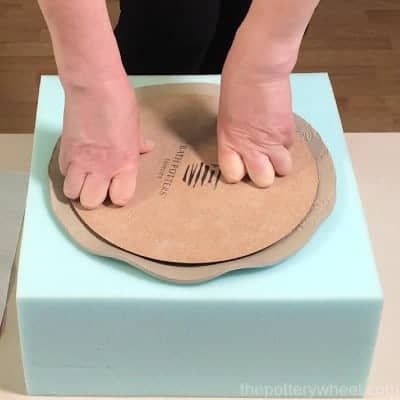
It’s worth mentioning that hump molds can also be used as ‘press molds’. When making press mold slab pottery, the clay slab is placed on a block of foam. A cube of upholstery foam works well.
The mold is then positioned over the slab and the potter presses down onto the mold. As the mold is pressed down, the slab takes on the shape of the mold.
In the following pictures, I’m using the same wooden mold to make a press mold slab plate.
If you are good at woodwork you can make your hump molds into whatever shape you like.
I’m not good at woodwork! So, I either buy my wooden molds made by GR Pottery Forms, or I make my hump molds out of plaster. They are straightforward to make. If you want to learn how to make your own unique plaster molds, check out my guide on making molds here.
Slump Molds
A slump mold is concave in shape. The mold curves inwards, and the clay slab is draped into the concave shape. As with the hump mold, as the clay firms up it takes on the shape of the mold.
You can buy a range of plaster slump molds. However, it’s also quite easy to improvise and make a slump mold out of household items that you already own.
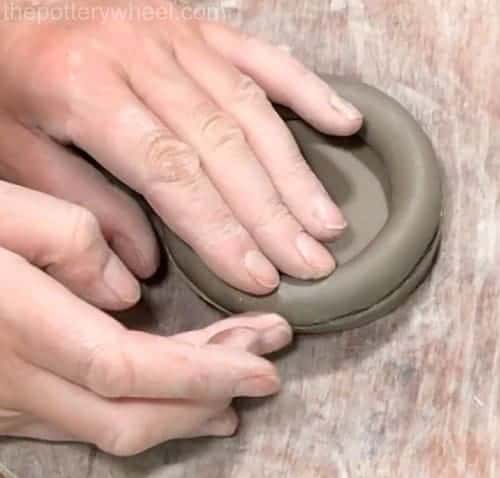
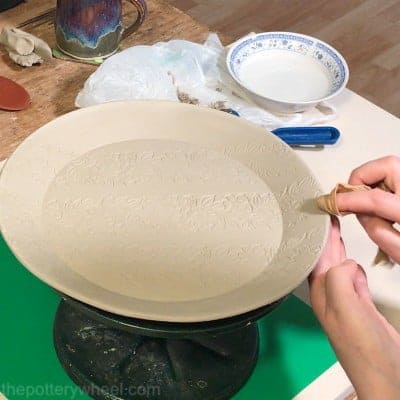
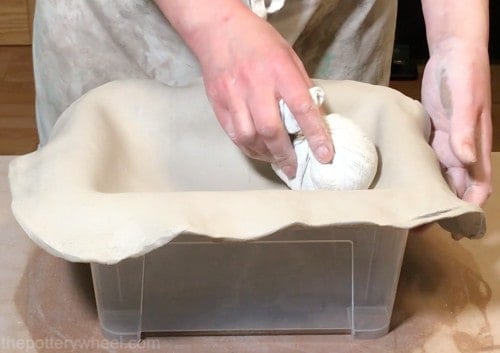
For example, you can use an old container or bowl that you like the shape of. Drape your slab of clay over the lip of the container. Then gently encourage the clay slab to slump down into the container.
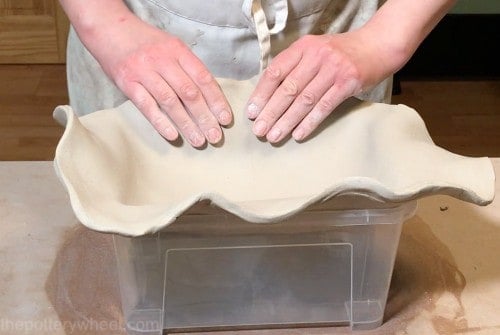
You can pat the clay slab with an old piece of cloth filled with rice. This makes a nice smooth round surface to pat the clay into shape.
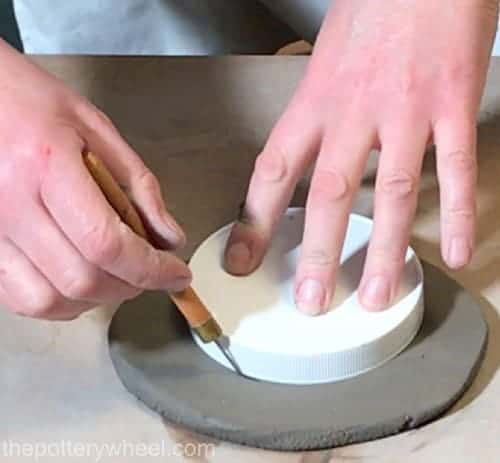
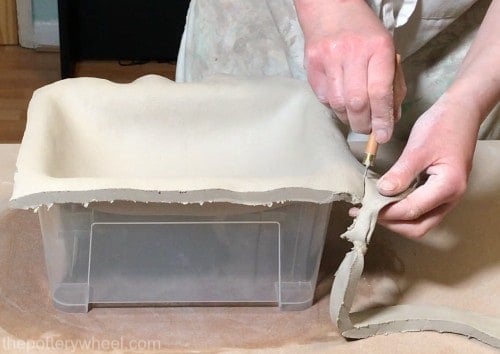
After the slab has been draped into the mold, trim the excess clay off around the edge with a clay knife or needle tool.
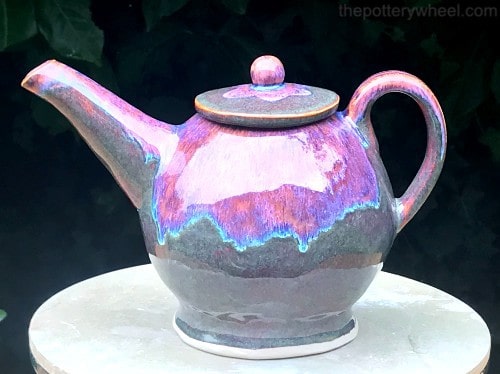
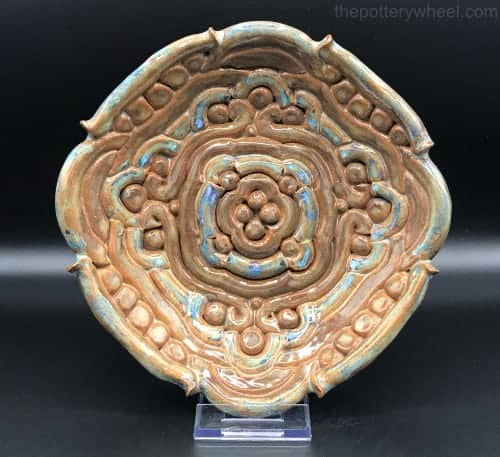
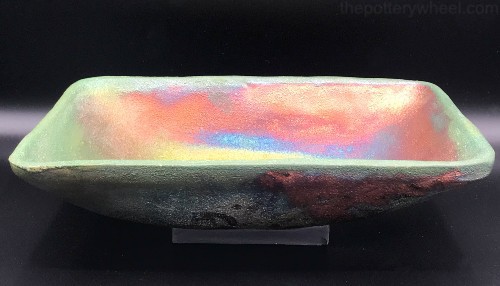
Once the clay has become leather hard, you can remove it from the container. Then tidy up the rim and add a foot ring. That is how I made this raku-fired dish.
Final Thoughts
When you are making pottery, you don’t have to limit yourself to one technique per item. You can mix and match different approaches to achieve the form you want. For example, you might make a slab box using stiff slabs, and then drape a soft slab over the rim to make a perfectly fitting lid.
Equally, potters will often use a combination of pinching and coiling to make their pots. The process of adding large coils of clay to pottery and then pinching it into shape is part of a very old tradition of hand building pottery. You can combine techniques in whatever way you like to create your own unique style.


