
Pottery for beginners can be very exciting. It can also feel a bit overwhelming. It can seem like there is a lot to learn. And like most hobbies, the more you learn, the more you realize you don’t know. But pottery is really just about making things out of mud! All you really need to start is a bit of clay in front of you, and the rest will follow.
So, let’s have a look at some of the things that will help you on your journey as a new potter….
Pottery For Beginners – Your First Steps
When you start making pottery, you will have a few choices about different techniques and tools. These are some useful questions that will help you find your way around pottery for beginners. You can click on one of these links if you are particularly interested in one question.
- How Do You Want to Make Your Pottery?
- What’s the Best Pottery Clay for Beginners?
- What Things do You want to Make?
- Useful Tools When Starting to Make Pottery
- Firing Your Pottery
- Glazing Your Pottery
1) How Do You Want to Make Your Pottery – Choosing a Technique
There are three main ways that you can make pottery. When you’re thinking of starting out it’s helpful to think about which method appeals to you most. Then you can focus on that particular approach to start out with.
You can always switch and experiment later on. But to start with, it’s helpful to focus on one technique. These techniques are:
Let’s look at each of these methods in turn. And you can decide which one you like the sound of best…
Hand Building Pottery
Hand building pottery is exactly how it sounds. Your main equipment when you are hand building pottery is your own hands.
There are 4 main ways of hand building pottery. They are….
- Pinch Pottery – This involves using your fingers (mainly thumb and forefinger) to pinch the pottery into shape.
- Slab pottery – Slab pots are made by rolling out slabs of clay and shaping them into the form you want.
- Coil Pottery – With coil pottery, you are building a pot out of coils of clay. The coils can either be a feature of the pottery, or the surface can be smoothed out and made flush.
- Using a mold – Hand building pottery with a mold normally involves draping a slab of clay over the mold. You are using a combination of the mold and the weight of the clay to shape your pottery.
If you want to know more about these different ways to hand build pottery, check out this article.
Wheel Throwing Pottery
Making pottery on a potter’s wheel is called ‘throwing on the wheel’. You use a combination of the rotation of the wheel and the positioning of your hands to shape the clay.
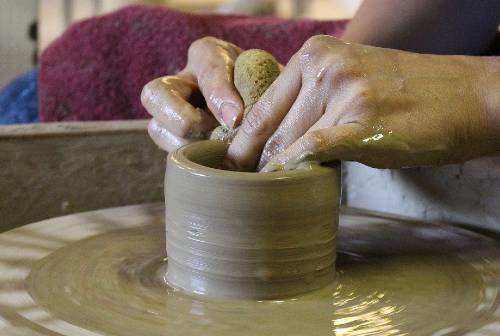
The first thing you need to learn when you are throwing clay on the wheel is to center the clay. Centering the clay means getting the ball of clay stuck to the center of the wheel head. The wheel head is the metal plate on the wheel that supports the clay and rotates around.
Once you have centered the clay, you can start to pull and fashion the clay into the shape you want. There are lots of different techniques to learn when you are throwing pottery on the wheel. These can take a little while to master, but you can have a lot of fun learning.
When you have mastered the basics of wheel throwing, you can start to learn other skills like making handles. By adding a handle to a basic cylinder shape, you suddenly have a mug. It’s a great feeling to make your first usable mug!
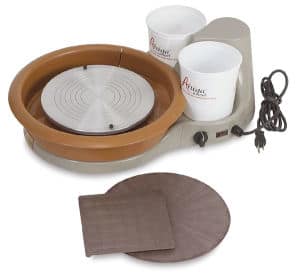
Your Pottery Wheel
Pottery for beginners does involve buying a few tools. I will say a little more about a basic toolset below. If you want to learn wheel throwing, it’s a good idea to have regular access to a wheel. Wheel throwing is one of those motor skills that needs regular practice to become second nature.
You may be lucky enough to know a potter or a school that will let you practice on their wheel. If not, you can buy a pottery wheel for a reasonable price. The cost of pottery wheels varies a lot.
They range from top-end wheels at $2100, to starter wheels at around $200. A good middle ground would be a Speedball Artista Potter’s Wheel. This is a good option because Speedball is a reputable brand, and the price point is reasonable too.
You don’t want to shell out a fortune on a top price potter’s wheel, only to lose interest.
I’d recommend a more reasonably priced wheel like this to road test if pottery is for you. If you catch the pottery bug, you can always upgrade.
Alternatively, you can look on eBay or Craigslist. You will often find good bargain pottery wheels on second-hand sites.
If you are buying second-hand, be sure to check if the wheel is electric or a kick wheel. A kick wheel is a non-electric wheel that you rotate using a foot pedal. These are nice to use, and it may be that this is what you are looking for. But if you want an electric one, be sure to check that this is what is being sold.
Slip Casting
Another way of making pottery is slip casting. Slip is really just liquid clay. It is clay particles suspended in enough water to make the clay fluid.
With slip casting, you are pouring liquid clay into plaster molds and letting the clay set hard in the mold. Once the clay has become solid, you remove the plaster mold to reveal the clay pottery.
When the clay is still fresh, you can tidy up the surface and remove seam marks left by the cast.
You can either buy your plaster molds and your clay slip. Or you can make them. It really depends on your budget and how much creative control you want. Making slip is easy and cheap. If you want to know more about it, check out this article.
Likewise making plaster molds for slip casting can be fun and easy. And the advantage of slip casting is that you can make lots of pieces that are more or less identical. This is good if you can see yourself making lots of dinner sets or sets of matching mugs.
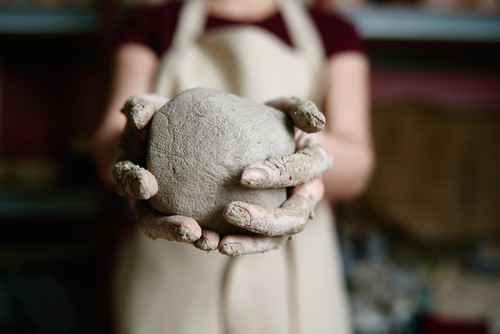
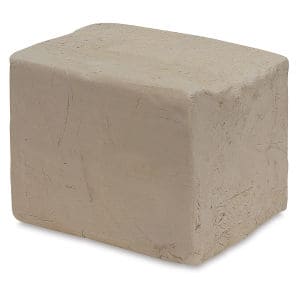
2) The Best Pottery Clay for Beginners
There are lots of different brands of pottery clay, and if you are new to pottery the range can feel overwhelming. The first thing to point out is that there is a difference between ‘brands’ of pottery clay and ‘types’ of clay for pottery.
Clay is sold by different suppliers and manufacturers. This is why there is a range of ‘brands’. What is more important to understand is the different ‘types’ of clay.
From a beginner’s point of view, there are 3 main types of pottery clay. These are:
- Earthenware
- Stoneware
- Porcelain
There are a few differences between these types of clay. As a beginner, the most important one to know is that different types of clay are fired at different temperatures. And that different types of clay feel different to use. Some types of clay are easier than others to use as a beginner.
Firing Ranges
Pottery clay needs to be fired in a kiln. A kiln is basically an oven that heats up to very high temperatures. Firing the clay changes the clay from a fragile material that will dissolve in water, into hard ceramic.
Clay is usually fired two times. The first firing, known as the bisque fire, turns the clay into ceramic material. Once the clay has been made into ceramic bisque, it can be coated with pottery glaze. This is then fired a second time, and the glaze melts onto the pottery surface to produce a glassy layer. This is called the glaze fire.
Clay is said to ‘mature’ in the glaze fire. A clay has matured when it has become as dense and hard as it can be. Different types of clay mature at different temperatures. These are typical firing ranges of different types of clay.
- Earthenware clay matures around 1828-1945F (999-1060C)
- Stoneware clay matures around 2161-2383F (1100-1300C)
- Porcelain clay matures at temperatures at or above 2300F (1260C)
So, earthenware clay is often called a low fire clay, because it is fired at lower temperatures. Whereas stoneware clay and porcelain are fired at mid and high range temperatures.
How to Choose Between Low Fire and High Fire Clay
Often when people start out making pottery, they are asking someone else to fire their pottery for them. If you are using a local pottery firing service, you should find out what type of clay they can fire.
Some pottery firing services only fire to stoneware temperatures. If they are going to be firing your pots, you need to use stoneware clay too. If you fire earthenware clay at stoneware temperatures it will either crack or melt.
Check with the person who is going to be firing your pots if they fire to earthenware or stoneware temperatures. Then buy some clay that suits their kiln.
You may go on to buy your own kiln. If you do, then you can choose whether to buy a kiln that fires to higher stoneware temperatures or not. But in the meantime, you can check with the pottery firing service what type of clay they can fire.
What are the Different Types of Clay Like to Use
The type of clay you prefer to use is a matter of personal choice. Nevertheless, as a general rule, it is said that porcelain is harder to work with than earthenware or stoneware.
Porcelain clay is quite soft and a bit floppy. So, it can be harder to get porcelain to stay where you want it to stay. This is true whether you are hand building or wheel throwing. It’s also quite ‘thirsty’ clay, meaning that it dries out quite quickly. So, you have to work fast when using porcelain.
Some potters do learn their craft using porcelain. However, as a recommendation for pottery for beginners, either earthenware or stoneware clay is the best to start out with.
What is Grog In Clay?
If you have heard potters talking about grog, you might have wondered what on earth it is. Well, grog is clay that has been fired, and then ground up into granules or powder. These granules are then added back into the clay that you buy in bags to make your pottery.
Grog makes clay stronger and easier to mold its shape. It also helps clay dry without cracking and less prone to breaking when being fired.
So, grog is good! However, because grog is ground up hard ceramic, it can also make clay quite grainy. It alters the texture of the clay. This is good if you want your pottery to have a ‘toothy’ look.
But it can also make the clay quite gritty to work with. Especially if you are throwing on the wheel. If you try to throw heavily grogged clay on the wheel, it can feel gritty and uncomfortable.
The best option if you are a beginner is to get clay with a fine grog rather than a course grog. A fine grog will give your clay extra strength and make it easier to use. But it won’t be so gritty that it is hard on your hands.
Just ask your local pottery supplier for a stoneware or earthenware clay with a fine grog. I’ve found that most pottery suppliers are extremely helpful. If you explain that you are starting out they will probably recommend a good clay for a beginner.
If you want to see my complete video on the best clay for beginners, check out it out on YouTube.
Here are some suggested clays that would suit pottery for beginners….

3) What Do You Want to Make?
Another choice to ponder upon is what kind of pottery you want to make. You may have a hankering to make mugs, plates, or bowls. Or perhaps you want to make vases, ornamental pieces, or jewelry.
If you have a clear idea already, then you can just start practicing. Otherwise, you can start to experiment and find out what you enjoy.
You can get inspiration from lots of sources. It can be a good idea to take a local pottery class. Or alternatively, there are lots of online tutorials. There is lots of helpful information on YouTube. You can check out some of my videos here. And there are lots of amazing potters online who share their knowledge on YouTube. I’d recommend having a look at videos by Karan’s Pots and Glass, Hobby Potter, Jon the Potter and Tim See to name just a few.
4) Pottery For Beginners – Good Starter Tools
Pottery for beginners doesn’t need to involve a lot of extra equipment. You can get by with a few tools whilst you find your feet and decide what you like making. However, here are some essentials that will make your experience with pottery easier:
- A wire clay cutter
- A needle tool
- Some smooth and serrated steel scrapers
- A rubber finishing tool
- Some modeling tools
- Trimming tools
- A rolling pin
- Some sponge
You can buy these individually if you want to shop around. Or if you like you can get a starter kit that contains pretty much everything you will need to get going.
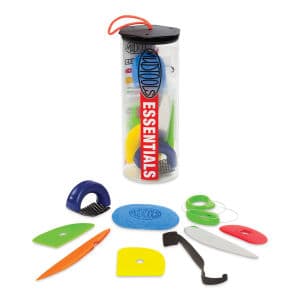
Mudtools Essential Starter Kit – View on Blick
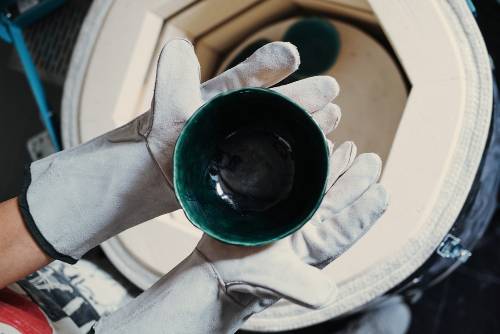
5) Pottery For Beginners – Firing Your Pottery
I mentioned earlier that pottery clay needs to be fired once you’ve finished working on it. The reason for this is that in its unfired state pottery clay is extremely fragile. It would be unusable for any functional purposes like dinnerware. And even as an ornament, it’s so fragile that it probably wouldn’t last very long if left unfired.
So, if you want to use pottery clay to make your work, then you will need to fire it somehow. You could, of course, buy a kiln. However, kilns are not cheap, they require space to install safely, and they take time and money to maintain. So, whilst owning a kiln might be a long term goal, it’s not an essential part of pottery for beginners.
There are however ways that you can access a pottery kiln without buying one. For example, if you take a local pottery class, the studio will probably have a kiln. They will be able to fire your pots for you. Or you can try to find a local potter or pottery supplier who has a pottery firing service.
There are lots of unexpected places that you will find someone with a kiln that can help you out. If you want more ideas about where to look, check out this article on finding a local kiln firing service.
Just remember, someone near you will have a kiln that they would be willing to hire out to you. You just need to find them!
Buying a Kiln?
In the first instance, buying a kiln is absolutely not necessary for most people starting out in pottery. However, eventually, once you have caught the pottery bug, you may want to think about buying your own kiln.
If you have the budget, you can either buy a new kiln from a pottery supplier. Or like lots of potters when you start out you can buy a used kiln. You can pick up a real bargain if you look. Then you can start on the journey of learning to fire your own pottery. Firing pottery is full of challenges, but also a lot of fun.
6) Glazing Your Pottery
As I mentioned earlier, pottery is bisque fired first to make it into hard ceramic. Once it’s been bisque fired, it’s ready to be glazed. Pottery for beginners also involves learning a bit about glazing too. There are a couple of key things to know about glazing pottery when you start out. These are:
- What glaze to use
- How to glaze your pottery
Let’s look at both of these questions briefly in turn.
What Glaze to Use
There are A LOT of different types of pottery glazes on the market. And when you first start looking, it can make your head spin. Glazes differ in color, texture, and opacity. In addition, some glazes are quite static and stay put when they are fired, whilst others move about and ‘flow’.
These features are creative decisions about how you want your pottery to look. In time you will find glazes that you love the look of.
Like clay, glazes are designed to be fired at different temperatures. Some glazes are low fire and designed to be fired at lower earthenware temperatures. Other glazes are designed to be used on stoneware clay.
The thing to look out for is the ‘cone rating’ on the description of the glaze. Normally a glaze that is suitable for lower fire earthenware clay will be described as a “06-04 glaze”. Whereas a clay that is suitable for stoneware clay will be labeled “cone 5 or 6”.
Cones in Pottery
The cone system can seem confusing at first, but it’s actually quite simple. It refers to something called pyrometric cones or Orton Cones. Pyrometric cones are small pieces of ceramic material that are used when kilns are being fired. These pieces of ceramic material, shaped like triangular cones, bend when the kiln has been hot enough for long enough. When the cone has bent, the potter knows that the clay and glaze are mature.
There are a range of different cones from the lowest cone at 022 to the highest cone at 14. Cone ratings with a leading 0 are lower than cone ratings without a 0. So, cone 06 glaze and clay mature at a much lower temperature than cone 6.
Each cone represents a particular firing temperature. Low fire earthenware temperatures are around 06 to 04 range. Whereas stoneware temperatures start at cone 4 and go all the way up to cone 10.
The thing to remember when choosing a glaze for your pottery is to get a glaze that matches your clay. So, if you are using earthenware clay, get a glaze that is suitable for earthenware temperatures around 06-04. And if you are using stoneware clay, use a glaze that is cone 5 or 6.
If you are confused, just ask your pottery supplier for clarification and guidance. They will help you figure out which glaze will suit your clay.
How to Glaze Your Pottery
There are a number of ways to apply glaze to pottery. The most common ways to glaze pottery are…
- Dipping – this involves holding your pottery with a pair of metal tongs and dipping it in a bucket of glaze. Dipping glaze is fast and easy. This is because you just need to dunk the glaze for a few seconds and pull it out again. However, large buckets of glaze take up space and can be expensive to buy in the first instance. For that reason, a preferred method of glazing pottery for beginners is often brushing glaze.
- Brushing – this involves applying the glaze to your pottery with a brush. Usually, it is applied to the pot with a generous mop brush that will hold quite a bit of glaze. The glaze is then daubed on the pot. It will dry quickly on bisque clay, so it isn’t like painting a picture. You have to apply it quite quickly to get an even coat.
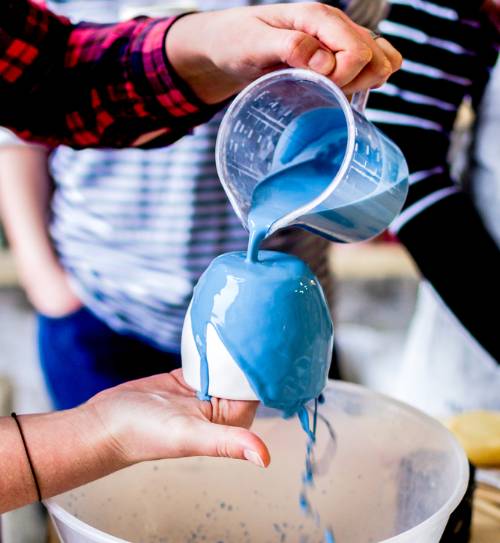
- Pouring – Glaze can also be poured over pottery. If you don’t want to brush your glaze, and you don’t have enough to dip, you can pour it instead.
- Air Brushing – Glaze can also be applied using a spray. This is a good way of applying an even thin coat. It can also be used to apply an even gradient between two glaze colors.
Although you have these options for applying your glaze, brushing is the most common method for beginners. So, really all you need to get going is some bisque pottery, some glaze, and a brush. If you want to know more about your options for glazing pottery at home, check out this article.
Key Tips on Glazing Pottery
- Most of the glazes you can buy in pint pots are suitable for brushing. Dipping glazes are normally thinner.
- Wipe any dust off your bisque pottery with a damp sponge or cloth before you glaze it.
- If you are brushing your glaze on, you should apply 2-3 coats. You need to allow the glaze to dry between coats. However, you will find it dries quickly as the bisque will absorb water in the glaze fast.
- Don’t apply glaze to the foot of the pot. The foot is the area of the pottery that sits on the table surface. Glaze melts when it’s fired. If you glaze the foot of your pot it will melt and stick onto the kiln shelf.
- If you make a pot with a lid, be sure not to apply glaze where the lid touches the pot. The lid will stick to the pot if it is glazed on the rim.
Final Thoughts
Pottery for beginners is the start of an exciting creative journey. Clay can be wonderful and challenging to work with. If you’ve watched experienced potters, you may be surprised to find how tricky potters can be in the beginning. But like any skill, you will get better with time and practice. And the first time you make something you feel proud of is very satisfying. But be warned, pottery is a bit addictive! Once you get started, you might find it hard to stop.


