Making pottery can be tough on your hands and fingernails. Clay can dry out your skin and your nails. Also, clay is abrasive, which can make your nails thinner. So, how do you protect your nails when making pottery and ceramics?
Fortunately, all is not lost. I’m someone with naturally thin nails. Even before I started using clay every day, my nails would break easily. Nevertheless, I’ve found a way around this and can make pottery without my nails being in too bad of a state. I’ll share some of the tips I’ve picked up along the way.
This article is in two sections:
- How to protect your nails from becoming split and damaged using pottery clay
- What you can do if you have longer or acrylic nails and you want to make pottery
How to Protect Finger Nails When Throwing on The Pottery Wheel
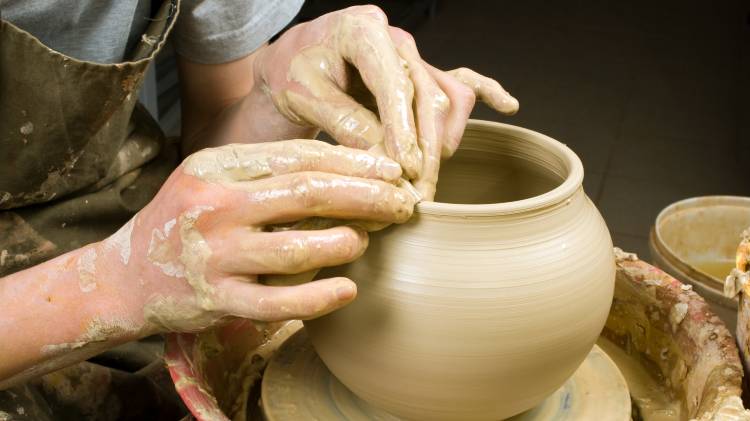
When you are using a pottery wheel, the combination of water and clay makes for a natural exfoliant. Even if you are using smooth clay that doesn’t contain gritty particles of grog or sand, the clay will still be a little abrasive.
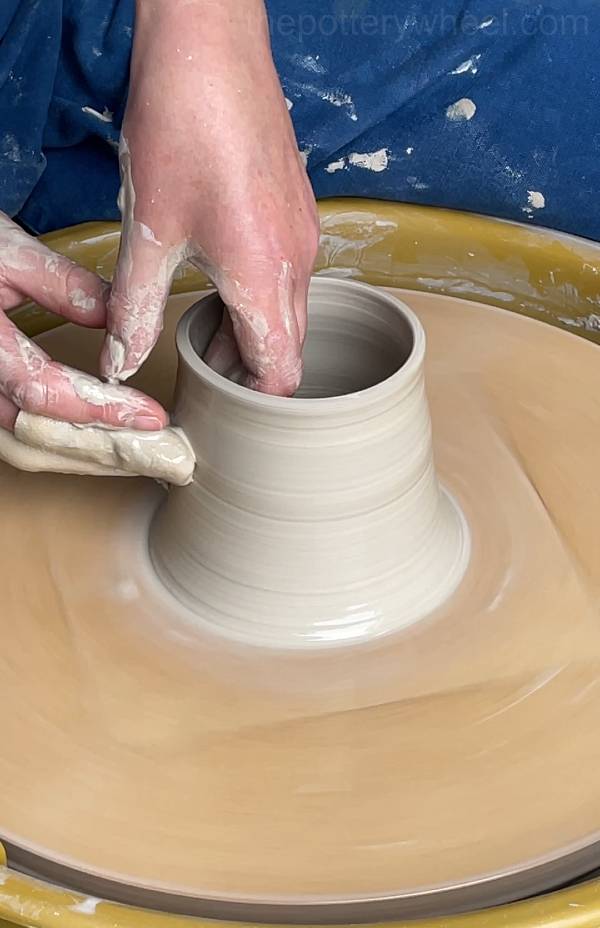
As you throw, you use your fingers at all sorts of angles to shape the clay. This often involves pressing your fingers and nails into the clay as it turns. It’s not surprising that fingernails can become thin when you use the wheel regularly.
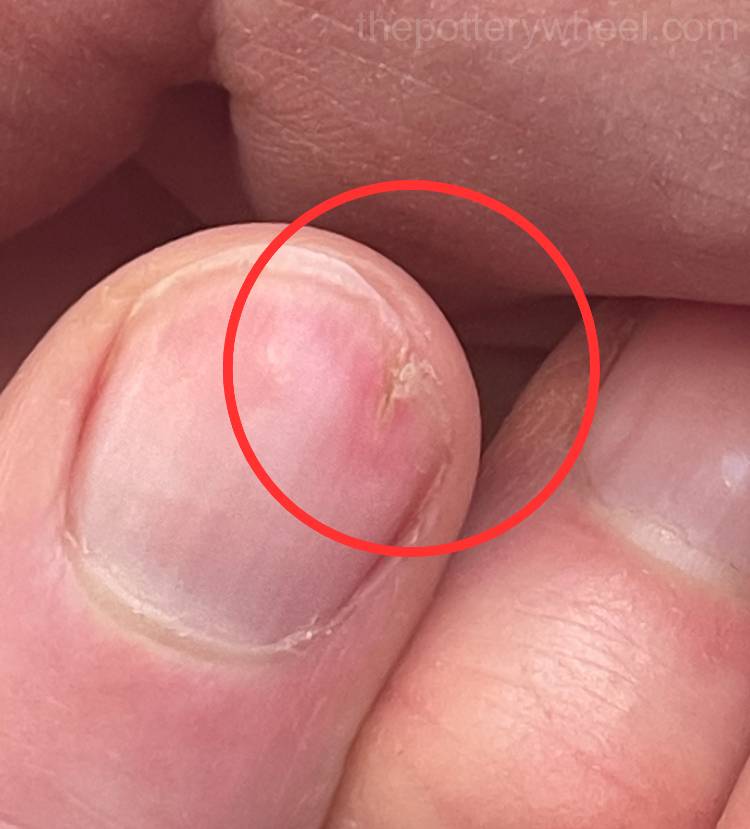
Potters have different techniques and habits on the wheel. I found that the three fingernails that suffered the most were the little finger, ring finger, and index finger on my right hand.
This is because when I center clay, I cup the clay with my right hand, and my nails are briefly pressed into the wheel head as it turns. At one point, during the winter when the weather was cold, I actually wore the nail on my index finger down to the nail bed. The nail was split and very painful.
Plus, there is always the danger of infection. Clay and slip contain microbes, and if your nails are split and worn away the risk of bacterial infection is higher.
So, I had to find a way to stop my nails from splitting and being ground away by the abrasive effect of the wheel.
These are some of the things that I tried to address the issue:
1) Be Mindful of Your Technique
Some potters are lucky and they have Teflon nails that will survive anything. But if you are reading this, it’s probably because, like me, you have weaker nails that need a bit more protection.
One suggestion is to analyze your technique when you are at the wheel. Figure out if there are specific actions that you are doing that are wearing your nails away faster.
I wasn’t aware that I tend to press the wheelhead with the outside edge of my fingers and nails quite hard when I’m centering. When my nails became paper thin I started to wonder why it was mainly affecting three fingernails.
Once I realized that I was dragging the back of my nails over the wheel head when I center, I adjusted my technique a little.
But even if you make adjustments to your throwing methods, your fingers are still in contact with the abrasive clay. So, what else can you do?
2) Covering Your Fingernails When Throwing
I have found that the best way to protect my nails is to cover them when I am throwing. But how, you might ask is that possible? Plasters and band-aids come off in seconds when you are throwing, so I needed to find a better solution.
Finger Covers for Throwing
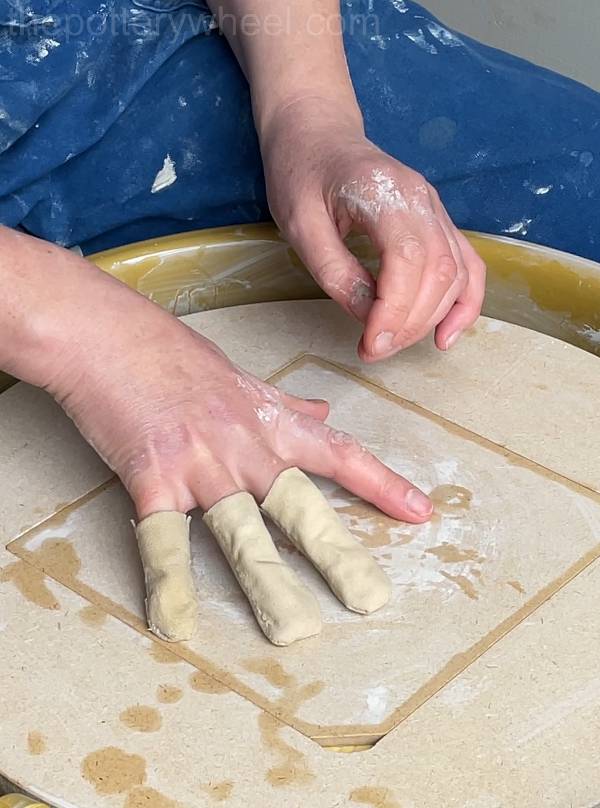
After trial and error, the best solution I have found is to make some small covers for the tips of my fingers out of chamois leather. I call these my “Finger Bobs”.
I cut out a strip of chamois leather twice the length of my finger. Then I fold it in half so that it’s just long enough to cover my finger.
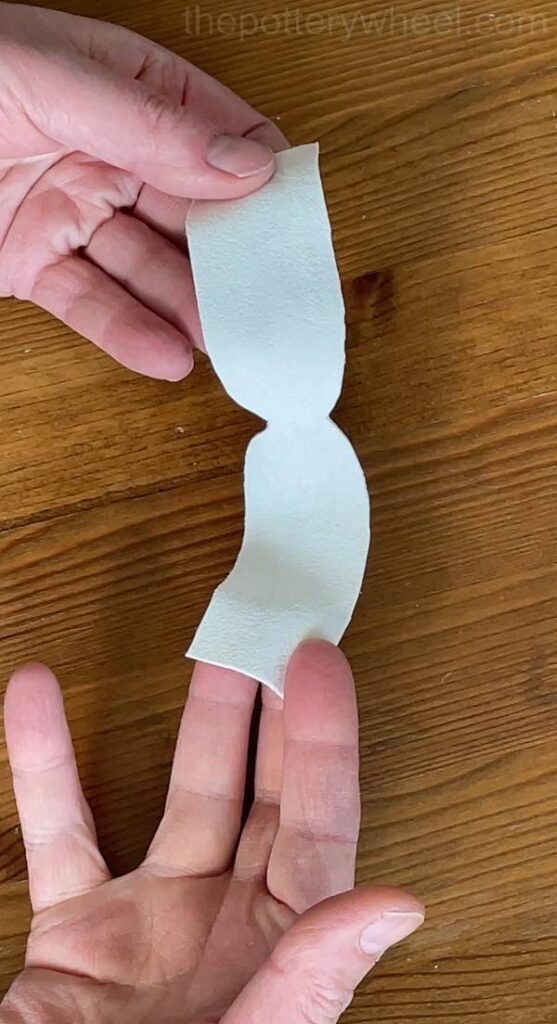
I then sew it down both long sides to create a little sleeve that fits snuggly over my finger.
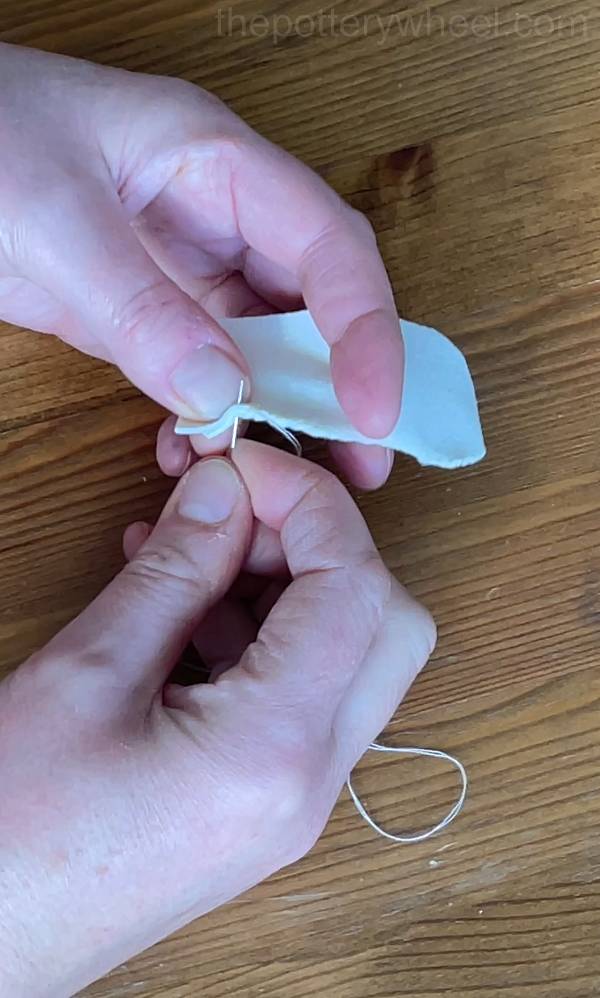
Before I put it on, I turn the finger sleeve inside out so that the sewn seams are on the inside of the chamois leather. If the seams are on the outside, it will leave marks in the clay as you throw.
I make these in different sizes to fit each of the three fingers that get damaged nails.
I’ve found the best way to use these finger sleeves is to wet them in my throwing water, and then slide them over my fingertips. Once you’ve used them a few times, the chamois leather gets very soft and smooth.
It does take a little bit of getting used to, but I’m happy to say that my nails have fully recovered. I’m never going to have strong nails, but at least now, the damage has healed and they are no longer worn away to the nail bed.
Why Use Chamois Leather?
The best thing about using chamois leather is that it is very smooth. Once it is wet, it glides over the clay easily and doesn’t leave marks in the clay. After all, chamois leather is usually used to smooth out marks from your pottery. So, it seems ideal for the job.
You can buy chamois leather here. It’s also possible to purchase rubber finger protectors. I did try these in the hope that they would work. I didn’t find them easy to throw with. They curled up quite often when I was throwing, and when they are wet they slide off your fingers easily.
Plus, the rubber is quite thick and I found it hard to feel the clay underneath it. It was a bit like trying to dance in Wellington Boots.
3) Using a Sponge
Sponges are handy when you are pulling up the walls of a pot. I didn’t used to like using a sponge for pulling. It felt a bit weird to me and I preferred using my fingertips. But, to protect my nails, I’ve trained myself to use a compressed sponge when I’m pulling up walls.
I tend to use a sponge when I’m doing the first couple of pulls. I hold a wet sponge between my finger and thumb and press it into the clay rather than using my finger. This is helpful when I’m moving clay from the base of the pot up the walls. I like using this MudSponge.
4) Using a Nail Strengthener
In addition to covering my nails when I’m throwing, I put a nail strengthener on every evening. Honestly, I’m not sure how much this actually does to make my nails stronger. But I figured it can’t hurt. I use OPI Nail Envy.
5) Nail Strengthening Supplements
I’m not a nutritionist and don’t know about vitamins, but from what I understand certain supplement might to help with nail strength. There seem to be a lot of these available. But the one that seemed to have the most encouraging reviews was Biotin, which I understand is B7 (source).
I now take calcium and biotin to support my nails. But as I say, I’m not an expert on vitamins. So, if you are considering taking supplements, talk to a doctor or a nutritionist.
Making Pottery with Long Nails or Acrylic Nails
Because my nails are thin, I keep them short to make pottery. Also, I’m quite clumsy, and if I had long nails I would almost certainly gouge them into my pots.
That being said, there is a lady in my pottery class who has long fingernails. And I’ve seen some impressive videos on social media of potters throwing with long nails. So, yes, it is possible to make pottery with long nails.
Tips on How to Make Pottery with Long Nails
Here are some of the things I’ve seen potters do, to work with longer nails:
- Learn to pull your pots using your knuckles on the outside of the pot.
- Keep your nails away from the pottery surface as much as you can.
- Use a sponge as a barrier between your nails and the clay.
- Sponges are especially useful when you are opening the clay, or when you have your fingers inside the pot. Press down into the moist sponge, rather than directly onto the clay.
- Avoid very long pointy nails, and keep them a little shorter and rounder.
You could also try the chamois finger covers that I described above, or the rubber finger protectors that you can buy on Amazon.
Any of these adaptations to protect your nails when you make pottery might feel awkward at first. However, with a bit of practice, most changes to technique can begin to feel natural after a while.
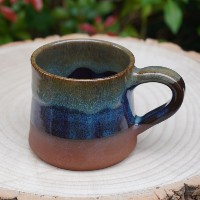
Visit The Pottery Wheel Store
Fancy treating yourself to some homemade pottery? Looking for a unique gift? Check out my handmade pottery store…
Final Thoughts
You may have been blessed with granite-like fingernails that can withstand most things. But I suspect if you’ve made it down to the bottom of this article, then you probably don’t. I hope you’ve found some handy ideas to help you protect your nails while you make pottery. And that making a few simple adjustments to your technique will help you carry on doing what you love. If you are having difficulties with dry skin from making pottery, you might like to look at my guide to looking after your potter’s hands.


Leave a Reply