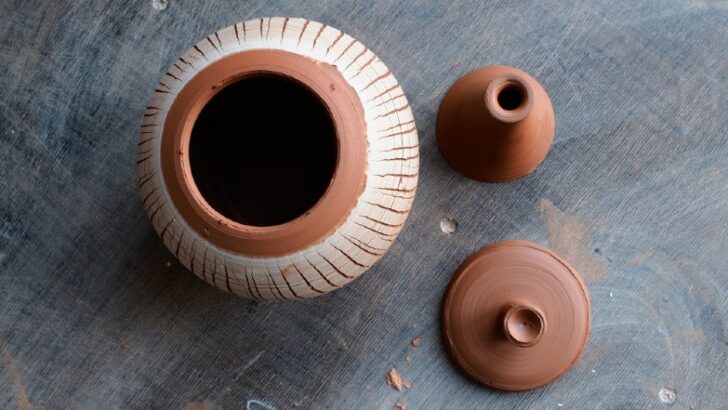
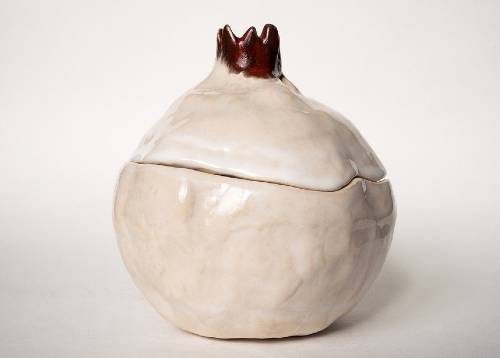
I recently made my first pot with a lid on it. I was at pains to make sure the lid was a perfect fit. But I know that clay shrinks when it dries and can warp when it’s fired. And I didn’t want my perfect lidded pot to be ruined. So, before I let it dry out, I did some research into drying and firing pots with lids on them. And this is what I found out…
Most potters dry out, bisque, and glaze fire pots with the lid on as it helps the lid fit. For glaze firing, apply wax resist to the part of the lid that touches the pot. If you glaze the lip of the lid and the gallery, they need to be separate when glaze firing.
However, like most things in pottery, there are different ways to achieve the same outcome. So, let’s have a closer look at some of the options when drying and firing pots with lids.
The article covers drying and firing pots with lids. If you want to jump to the section on drying or firing, you can jump there with the following links:
Drying Pots with Lids
It is usually recommended that you dry your lidded pot out with the lid on. There are a couple of reasons for this. They are:
- Clay shrinks when it dries out. As it shrinks it can change shape a little. If the lid is on your pot it’s more likely that the pot and lid will change shape together. So even if it does change shape a little, the lid will still fit the pot.
- It’s important to dry clay out evenly and slowly. If a piece of pottery dries out unevenly one part dries more quickly than another. This can set up tension in the clay, which causes it to crack when it is fired.
Details and edges on a pot tend to dry faster on pottery. Lips and edges are usually quicker to dry. That’s why it’s often recommended that you turn your pot upside down as soon as it’s leather hard.
Turning the pot upside down protects the lip from too much exposure to air. And enables air to circulate around the underside of the piece.
However, another way to protect the lip of the pot is to keep the lid in place. This way the pot and the lid create a sphere. As a result, neither the lip nor the edges of the lid dry out faster.
Drying the Pot and Lid Separately or Apart?
Nevertheless, not all potters dry their lidded pots with the lid in place. Some prefer to remove the lid and dry them separately upside down.
Generally, if you do this, it’s best to keep the pot and the lid close together as they dry. This means that they are drying in the same atmosphere, with the same level of humidity.
As with drying all pottery, it’s best to keep the pot and lid out of draughts to avoid uneven drying.
This method can work provided the pot is a straightforward pot shape. However, if the top of your pot has a less straightforward shape it can be more difficult. For example, you may have made a teapot, with a spout that sticks up above the lip. If that’s the case, then turning the teapot upside down and resting the lip flush against the table won’t work.
In this scenario, it’s best to dry the pot with the lid on.
Stopping the Lid from Sticking to the Pot as it Dries
You can keep the moist clay of the pot from sticking to the lid by using a strip of paper. When it’s plastic, the clay of the pot can stick to the lid. To avoid this, potters sometimes use a strip of newspaper, paper towel, or waxed baking paper between the two.
I don’t especially like using paper as I find it gets pulpy and can leave marks on the clay. My preference is to use a small strip of saran wrap around the edge of the lip. This peels off easily when the clay is leather hard, and dry enough not to stick together.
Another suggestion is to dust the lip of the pot and the gallery with cornstarch. The gallery of the pot is the shelf that sits inside the lip of the pot and supports the lid. A light dusting of cornstarch on the lip and gallery will prevent the clay from sticking. And the cornstarch burns off during the bisque fire, leaving the clay unaffected.
Protecting Small Clay Details
Your lid will most likely have a handle or a knob for lifting it. It’s good practice to protect handles when you are drying out your pottery. Handles and knobs are prone to drying out more quickly. So, it’s helpful to wrap details like handles in a small piece of plastic, to slow their drying process down.
Poking a Hole in Your Pot
During firing, residual moisture in clay turns into steam. If there are pockets of trapped air in the clay, the steam expands rapidly into the air pockets. This can cause the pottery to crack or explode in the kiln. This is one of the reasons why it’s important to wedge clay. Because it removes air bubbles and pockets from the clay.
This is one of the reasons some potters don’t fire pots with lids on. Their reasoning is that when the lid is on, it creates a big air pocket. Sometimes the fit between a lid and a pot can get very snug.
If moisture expands into the internal cavity of the pot then it can create problems. The lidded pot, may for example explode. Particularly if the fit between the lid and the pot is too tight.
One way to avoid this is to poke a small hole in a discreet area of the pot using a needle tool. This isn’t always possible, or desirable. If you are planning to make a casserole pot, you probably don’t want to poke a hole in it. However, if your piece is more sculptural, and decorative, you might find a place to put a discrete hole.
If I can, I put a small hole in a lidded pot so moisture can escape during firing. It’s more of a belt and braces measure, but I find it reassuring.
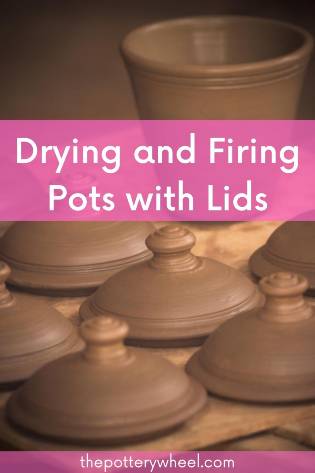
Firing Pots with Lids
Firing pots with lids on presents its own challenges. Let’s take a look at firing your lidded pots, starting with a look at bisque firing…
Bisque Firing Lidded Pots
It’s normally recommended that you bisque fire your pottery with the lids in place. This is so that in spite of shrinking or small changes in shape, the pot and lid will fit together.
Again, not everyone does bisque firing pots with lids on. Some potters fire lids off the pot and find that they fit fine after the fire. Other potters will do a mixture of both. Firing some pots with the lids on and some with the lids off.
One factor to consider is space in your kiln. Firing with the lid off does of course take more space up in the kiln.
I have now tried both methods, namely bisque firing pots with lids on and with lids off. I have found that the lid fits a little better when it has been bisque fired with the lid on.
Glaze Firing Pots with Lids
Most commonly, potters glaze fire pots with the lids in place. The reason for this is that pottery can warp a little during a glaze fire. If the lid is in place, the pot and the lid will warp in the same direction. As such, even if there is a bit of warping they will still fit together.
Some suggestions that are usually made when glaze firing pots with lids on are as follows:
- Leave the gallery of the pot and the lip of the lid that touches the pot clear of any glaze. If there is glaze on the parts of the pot that touch, the lid will fuse to the pot.
- Make sure that even small traces of glaze are wiped off the surfaces that touch.
- Apply a coat of wax resist to the gallery and the lid to prevent the lid from fusing to the pot. Wax resist is handy for many things. Firing pots with lids is just one of them.
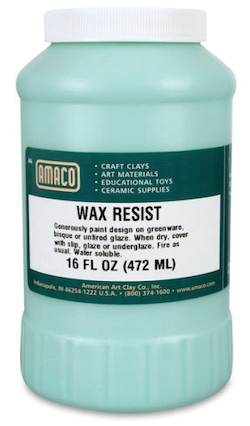
- Mixing in a small quantity of alumina hydrate powder into the wax will prevent any sticking. About 2-3 teaspoons per cup of liquid wax will be enough.
- Use a glaze that you are familiar with and which you know tends to be quite static when it’s fired. Some glazes, flowing glazes, move about when they are fired. Avoid using a glaze that is likely to run into the gap between the pot and the lid during firing.
- Similarly, don’t use too much glaze. If you apply your glaze too thickly, it may drip into the gap between the lid and pot. This will also fuse the lid and pot together.
Drawbacks
However, there can be drawbacks to not glazing the gallery and lip of the lid. One of the main issues is that you end up with a line across your pottery of unglazed clay. Sometimes this can look good, especially if you are using a nice speckled stoneware. You can make it into a feature.
But an unglazed line where the pot and lid meet is not to everyone’s taste. So, what can be done about it?
Solutions
- Some potters do glaze fire the pot and the lid separately. Although received wisdom is that firing the two together ensures a good fit, not everyone follows this approach.
Many potters successfully glaze fire lids and pots separately. This gives them the freedom to glaze the gallery and the lid.
It’s worth experimenting to find out which approach works best for you. My experience has been that I get a better fit if I glaze fire the lid in place. But you might find that glaze firing separately suits you and your pottery best.
If you want to glaze fire lids separately, it might be worth experimenting with different clay bodies. This will help you find a clay that doesn’t warp when it’s glaze fired. - You could paint/decorate the unglazed area of the pot where the lid meets the pot. Some ways of concealing the joint might include concealing it with a colored slip, engobe, or underglaze that compliments the glaze you are using. Or staining that part of the bisque ware with iron oxide.
- An alternative way to deal with the unglazed line is to experiment with lid designs. Different styles of lid expose less of the unglazed area than others. You can play about with design ideas and find which style suits you best.
Firing Pots with Lids on Them – What if the Lid Gets Stuck?
Even when you are careful, lids can sometimes stick to pots when they are being fired. This can happen for a couple of reasons…
The Lid is Fused with Glaze
The first is that glaze has fused the lid to the pot. If this is the reason it’s stuck, the only way you can separate the two is to grind them apart. You can grind glaze either with a Dremel tool or a diamond cutting tool.
However, in practice, the chances of breaking the lid are high if you are trying to grind it off.
Also, the glaze will not look at its best once it has been ground. Most often, potters will chalk it up to experience if glaze had fused a lid to the pot.
Most often, these pots make nice paperweights or doorstops but are not functional as pots.
The Lid is Too Tight/Snug
The second reason for a stuck lid is that the fit between the lid and pot is too snug. During firing the pot may have shrunk around the lid. This can cause the pot to grip onto the lid so that it can’t be removed.
There are a few tricks that you can try to remove lids that are stuck to pots for this reason. Here are those handy fixes….
Wait until the kiln has cooled enough for it to be safe to open. Remove the pottery from the kiln when it is warm but not hot. Gently tap the lid with a wooden spoon or a soft rubber mallet. The lid will come off more easily when the pot is warm and still in a slightly expanded state.
One thing to remember is to support the pot in your lap or on a cushion before you tap it.
It is possible to tap a lid that is stuck once the pot has cooled. This is usually enough to break the seal. But it’s sometimes easier if the pots are still warm.
If the tapping trick does not work, there is another technique to remove a stuck lid from a pot. Simply spray a little water on the pot where it meets the lid. Then put the pot in the freezer for a few hours. This will cause the ceramic clay to contract a tiny amount.
After a few hours, lower the frozen pot into warm water. Don’t allow the water level to cover the joint where the pot meets the lid. The warm water will cause the pot to expand, and the lid will stay in its contracted state.
Although the change in size is tiny, it’s normally enough to release the lid so that it will come off.
Final Thoughts
There is a knack to drying and firing pots with lids on them. It’s worth experimenting to find out which way works best for you and your pottery. Nevertheless, the tips above will give you some guidelines as to where to start. So, you can make beautiful pots with equally beautiful lids.


