Coil pottery is a great way to hand-build pots. You can make lovely, strong pots with character and individuality using simple coiling methods. This article is a step-by-step guide on how to make coil pots. I will look at 5 different coil pottery techniques so you can experiment and decide which one you enjoy most.
If you know which approach you want to try, you can use these links to jump straight to that section.
How to Make Coil Pots – A Few General Tips
There are lots of different coil pottery techniques that will produce different looking styles. However, there are tips and methods that are good to know, whichever coiling technique you want to use.
Here are the key tips on how to make coil pots, that will make your coiling sessions easier.
Making Clay Coils
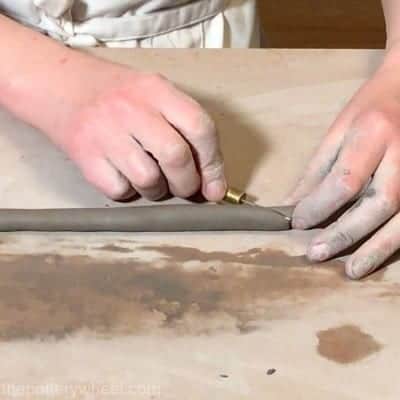
Making a clay coil is simple, however, when you are learning it can be frustrating. You might find your coils flattening out as you roll. Or you might find that some parts of the coil get much thinner than others.
Although it’s a simple process, there are some tips for making a clay coil that will make your life simpler. Plus, it’s important to make evenly shaped coils, if you want your coil pots to look even and well made.
This short video contains a few top tips on making even clay coils. Check it out and save yourself a few hours of frustration!
If you want to watch my full video, here is a step-by-step video on how to make an even clay coil.
Make a Batch of Coils
I find it preferable to make a batch of clay coils before I start working on a coil pot. That way, once I’m in the flow of making the pot, I don’t have to stop and make more coils. I usually make about 4 or 5 coils at a time and have them lined up and ready for use.
It’s worth remembering that clay coils dry out quickly if they are sitting around. So, as you make your coils, cover them over with a plastic bag whilst they are waiting to be used.
How Wide to Make Your Coils
The width of your coils depends on the size of what you are making. A very large coil pot will require larger coils. However, if you’re making a medium-sized bowl, or a vase, making coils about the width of your pinky finger is ideal.
What Kind of Clay to Use to Make Coil Pots
The best clay for making coil pottery is both plastic and strong. When clay is described as plastic, you can shape it and it will keep the form it’s been given.
Strong clay is clay that can support its own weight as you work. Normally strong clay contains some grog. Grog is a hard granular material that is added to clay to give it some structural strength.
For that reason, the best clay for coil pottery is either stoneware or earthenware clay that contains some grog.
Ideally, you need your clay to be soft and moist, but not sticky and wet. A good test is to roll a coil and check for 2 things:
- Does the clay coil stick to the table? If it does, your clay is a little too soft and wet.
- Does the coil surface have little cracks in it as you roll? If so, your clay is a little too dry.
Work in Stages / Sessions
If you’re building your coil pot without a mold, it’s best not to add too many coils in one session. The more weight you add to your pot in clay, the more likely it will be to sag.
I normally add around 5 or 6 coils per coiling session and then let it sit for 24 hours. This lets the clay firm up, so you can add more coils without the pot deforming.
You will start to feel when the clay is getting too heavy for the pot. When you reach this point the pot may start to slump a little. This is the point at which to exercise self-restraint! It can be hard to step away if you are enjoying the process. But it’s best in the long run.
A good tip to avoid frustration is to have a couple of coil pot projects on the go at once. That way you can continue working on another piece when you need to let your first piece settle.
How to Make Coil Pots – 5 Coil Pottery Techniques
With those general coil pottery tips covered, let’s get onto how to make coil pots…
How to Make Coil Pots – Method 1
The first coil pottery technique I’m going to look at is a simple coil pot design. This is the basic technique behind most coil pottery.
Simple Coil Pots
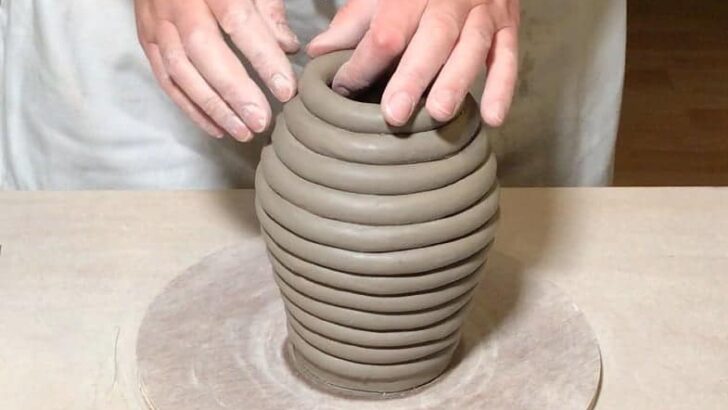
Simple coil pots are made from coils of clay positioned in consecutive rings, placed on top of one another. You can add more elaborate coil designs, which I will cover later. But for now, the simple coil pot design consists of straightforward coils bonded together to create a layered coil look.
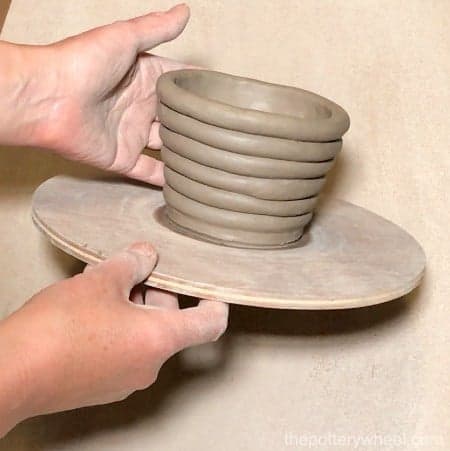
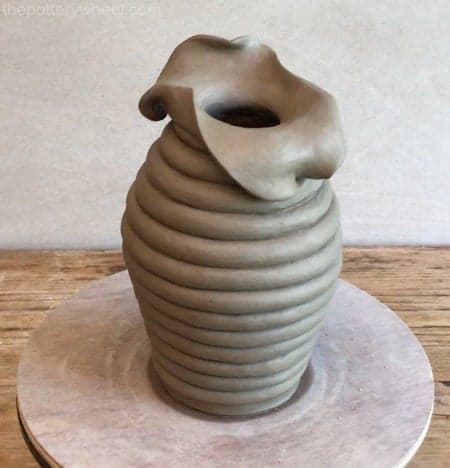
Simple coil pots are not necessarily plain. You can add design details to the pot to create your own individual style. For example, I will be describing how I made this simple coil pot.
You will see that I added a styled clay collar to the pot to finish the design. Nevertheless, the body of the pot is a simple coil pottery technique. And here is how it is made…..
Step 1
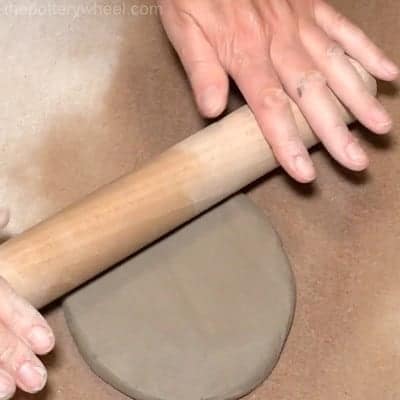
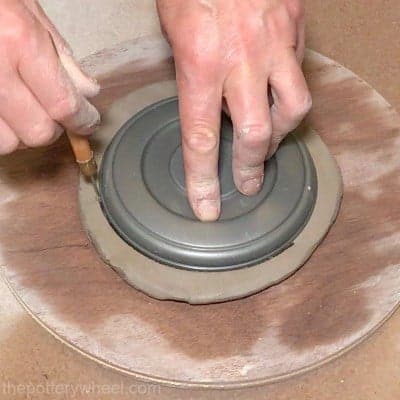
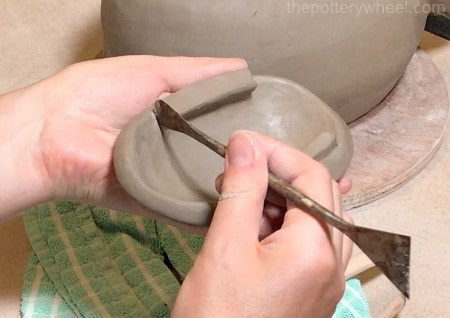
Roll out a clay slab to make the base of your pot. The base needs to be about the same thickness as the coil walls. If your coil is about the width of your pinky finger, the base needs to be about 2/3 of an inch thick.
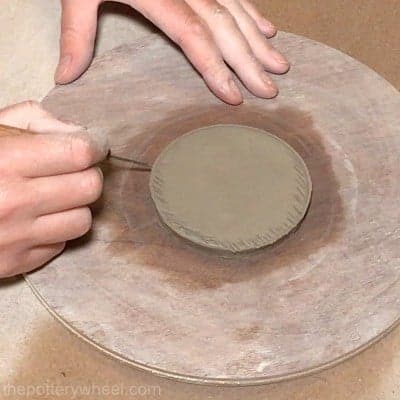
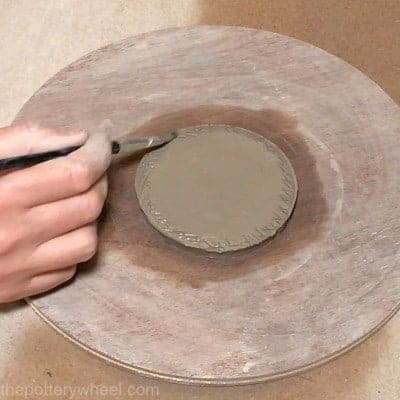
Once you have rolled out your slab, use a knife or needle tool to cut out your base. If my pot is going to be round, I usually use a round object, like a lid to score around. This gives a nice precise shape to start building with.
It’s a good idea to put your base onto a wooden bat, or a surface that you can move about. This helps when you want to store your coil pot between sessions.
Step 2
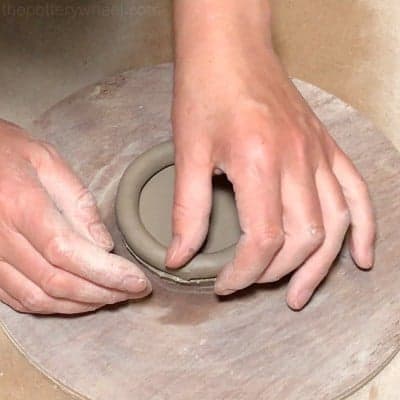
Once you have your base, you can start adding clay coils.
It’s important that the clay coils stick to the base and one another well. Simply pressing the clay coil down onto the base, or to one another is not enough. Often if you just press the coils against one another, they will separate when the clay dries or is fired.
You can make sure that your clay pot stays in one piece using one of two methods.
Slip and Score:
The first is to slip and score your surfaces and then press them together.
To slip and score your surfaces, you first use a modeling tool to make a texture on the clay surface. A needle tool, fork or metal tool with a serrated edge will do. Simply score the two surfaces you wish to join so that they are both rough.
Then paint a little clay slip onto the scored surface. If your clay is quite soft and moist, you can also simply dab a little water onto the scored surface. The water will create a little slip on the moist clay surface.
Press the two surfaces together and give them a bit of a squeeze. You need to apply enough pressure to bond the coils together, without squashing the coil shape. The scored surfaces will mingle and bond together and the slip acts as a glue.
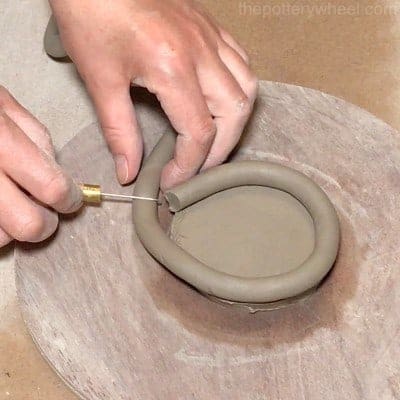
You will need to cut the coil to the right length. Do this by lining the coil upon the base, or on the coil below and trim the ends. You can cut the clay with a needle tool or knife.
Once it’s cut to length, you need to bond the two ends of the coil together. You do this by using the slip and score technique and then blending the join until it’s concealed.
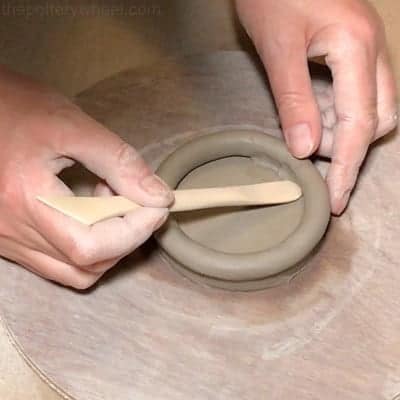
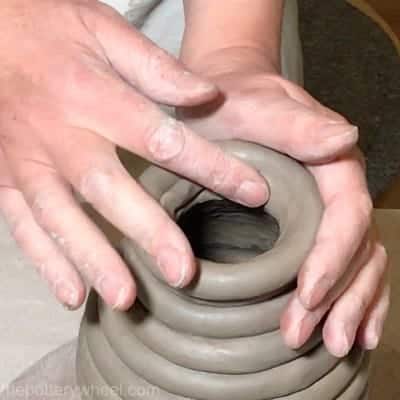
Blending the Coils
The second way to ensure the coils don’t separate when they dry is to blend the surface of the clay. Once the coil is in place, use your thumb or a modeling tool to blend the clay coils together.
I tend to blend using a modeling tool first. Then I use my fingers to smooth the blended surface.
When you blend the surface, you lose the coil design. So, if you want the coils to be visible, you should blend the surface on the inside of your pot.
If you want the coils visible on the inside and outside surface, you don’t have to blend your clay. However, if you aren’t blending, you need to make sure that you are thorough about slipping and scoring.
If I’m making a vase or a pot that will contain liquid, I almost always blend the inside surface. Once the smooth surface is glazed, it is thoroughly sealed and makes a good vessel.
You can use either slip and score, or blending. Or you can use both to be on the safe side. I tend to use a mixture of both, depending on what I’m making.
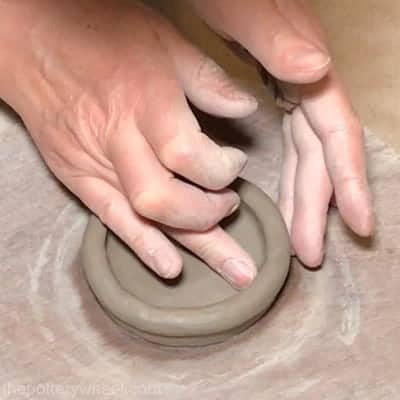
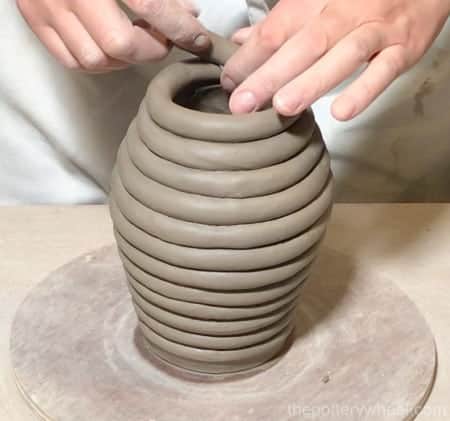
Step 3
Once you’ve mastered the slip and score and blending techniques, you can start building up the sides of your pot. To do this you add coils on top of one another using the same process.
Namely, cut your coil to length, then attach it using slip and score. Finally, you blend on the inside if you want a smooth interior surface and to add strength to your pot.
An important tip is to position the joint in your clay coils at different points around the pot. If the joins are stacked on top of one another this can make a weak spot on the pot.
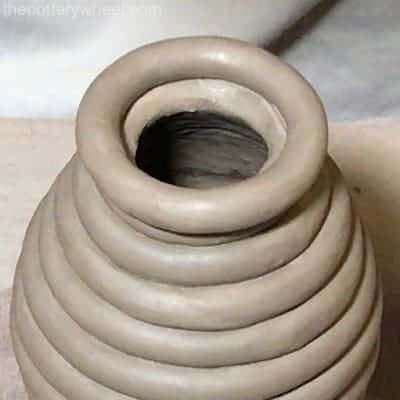
You can add shape and design to your pot in the following way:
By adding your coils slightly to the outer edge of the coil below, you can build your walls outwards. This will widen your pot.
Adding your coils on the inner edge of the coil below will bring the walls of your pot back in.
You can use this widening and narrowing technique to bring shape and interest to your coil pot.
Step 4
If you are making a simple coil pot, you can finish adding coils when you feel happy with the shape.
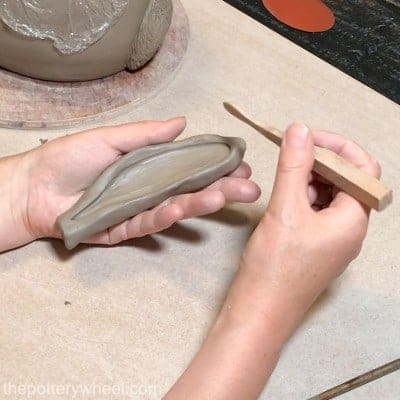
You can also add some additional design features such as a collar if you would like. The good thing about coil pottery is that you can adapt the technique to create a range of designs. For example, you could add a classic-shaped collar by blending a few coils into one another, like this….
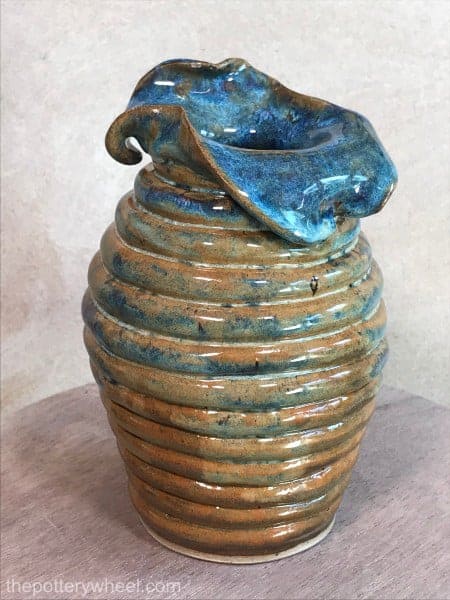
Or, to add a feature to your pottery you can add a sculpted collar to your coil pot like this…
How to Make Coil Pots – Method 2
The next coil pottery technique is the patterned coil pot. With the simple coil pot, consecutive rings are stacked on top of one another.
However, with coil pottery, there is plenty of scope for creativity. You can shape your coils in many different ways. And that is the essence of the patterned coil pot. So, let’s take a look at that now…
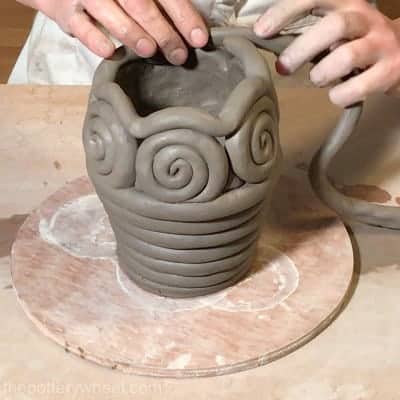
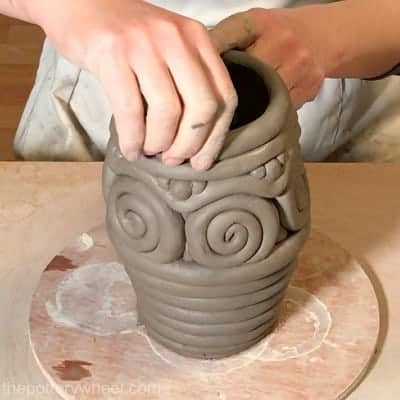
Patterned Coil Pots
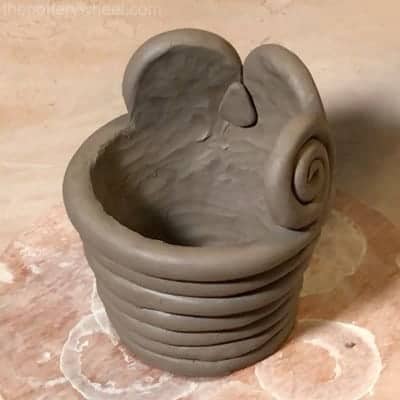
Here is an example of a patterned coil pot. The clay coils have been shaped to create a coil design on the outer surface of the pot.
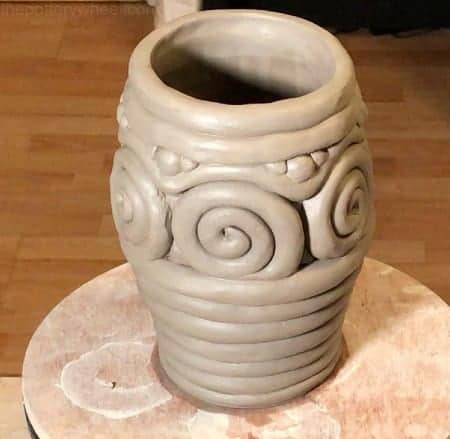
This is how to make coil pots with patterned coil designs such as the one in this picture.
Step 1
Start off with a simple coil pot base. In this example, I started off with the standard coil construction described above, using 6 coils of clay.
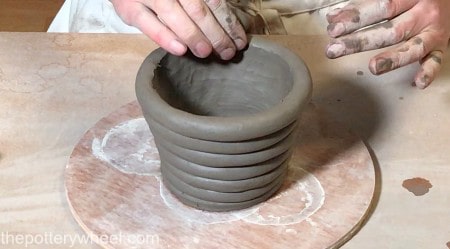
Step 2
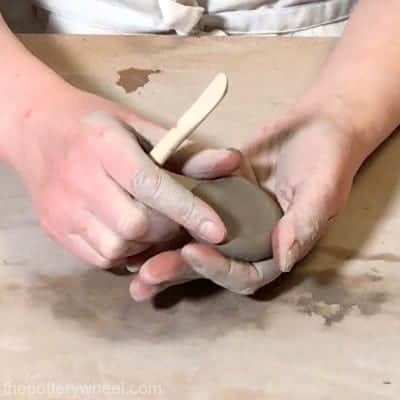
I then added some clay coil swirls. When making the swirls, I cut off a length of clay coil and curled it up carefully into a swirl.
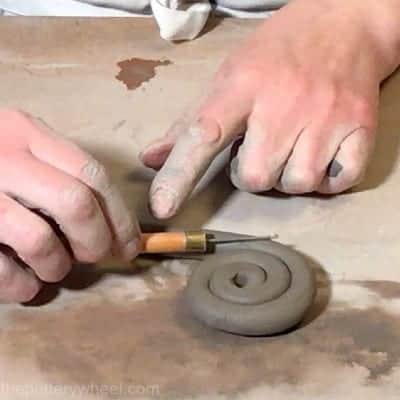
As with the rest of the clay coils you need to blend the inside surface of the swirls too. It’s much easier to blend the back of the swirl design before you have added it to the pot. So, using a tool and my thumb, I smooth out one side of the swirl.
Once it had been smoothed out, I used the slip-and-score method to attach it to the coil pot.
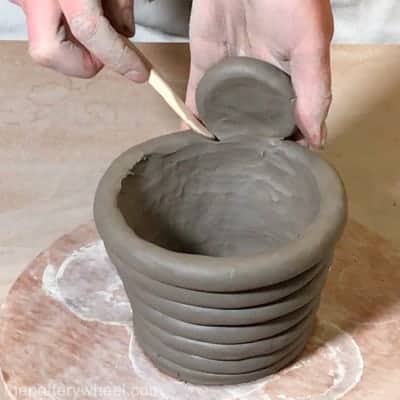
To make sure it is securely attached, I blend the back of the swirl to the pot. Once the clay swirl is firmly in place, I moved on to make a row of similar swirl shapes.
I wanted this coil pot to be a vase and hold water. So, I used small balls of clay to plug up small gaps between coils that were beside one another.
These balls of clay can become part of the overall design of the pot. Once again, I blended the clay plugs on the inside of the pot to make a smooth surface.
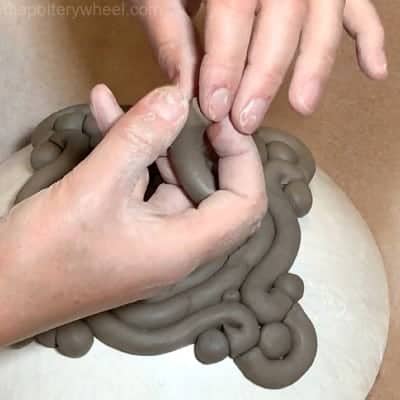
Step 3
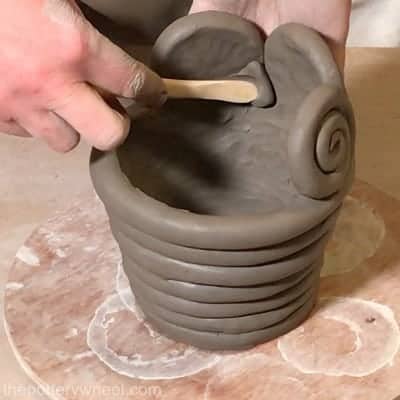
Continue to add more clay coil shapes to your pot to build up the pattern you want. Make sure that each of the clay coil shapes is secured to the pot using slip and score and blending. Provided the coils are firmly attached, you can add more or less whatever shape you like. It’s fun to improvise and try new shapes.
On this pot, I used a combination of swirls, clay balls, and wavy clay coils.
But really, it’s a matter of personal taste what patterns you want to create with your coils. Have fun with it.
How to Make Coil Pots – Method 3
Another way to make coiled pots is to use a mold to support your pottery as you build it. This is the method I’m going to have a look at now…
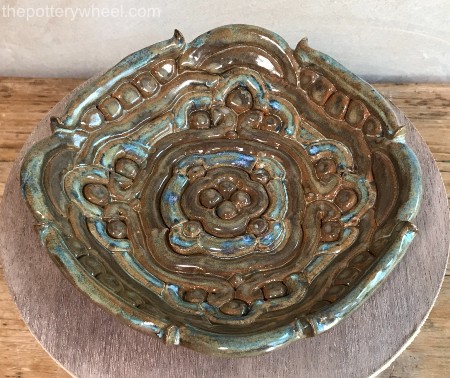
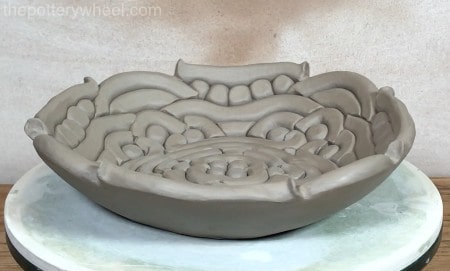
Coil Bowl Designs
Because molds support your design as you work, it can give your pottery a nice even shape. I made this coil bowl using a mold.
Here are some steps to coil bowl construction.
Step 1
Select a mold that is the size and shape that you want your bowl to be. There are two ways you can use a mold. You can either build your coils up on the inside of the bowl. Or you can build them up around the outside of the mold.
The mold does not need to be anything fancy. A simple plastic kitchen bowl will do just fine. However, you need to choose a mold that has a smooth surface.
Because you’re pressing your coils against the bowl, any patterns or ridges on the bowl will transfer onto your coils.
In this example, I actually used a plaster mold I made. I used this mold because it was the right size and shape for this coil pottery project. Making a plaster mold is extremely easy. If you’d like to how to make one, check out this article.
However, it’s not necessary to use a plaster mold. A regular bowl is completely adequate.
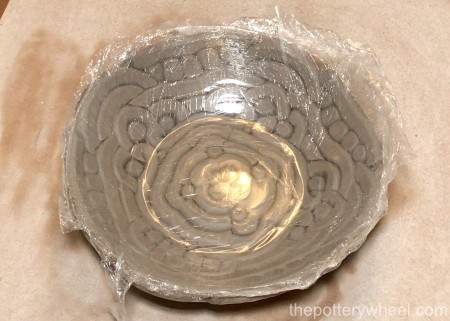
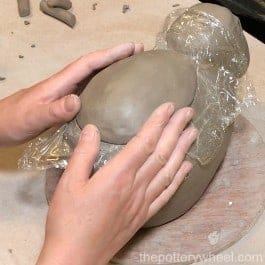
Step 2
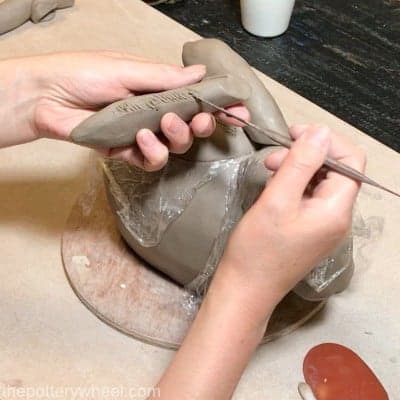
Cover your bowl or mold with saran wrap. Some potters use a plastic back to cover their mold. But I prefer saran wrap because it can be stretched quite smoothly. The smoother the plastic wrapping on the mold, the less of a crinkly pattern is transferred to your coils.
Adding the saran wrap makes it easy for you to remove the pot from the bowl when you have finished. If you build your coil pot directly onto the bowl, it can be difficult to remove it when it’s moist. And you need to remove it when it’s moist so you can tidy it up before the clay dries.
The saran wrap also stops your clay from drying out quickly if you are using a plaster mold.
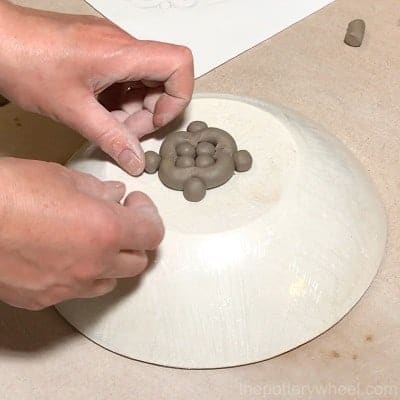
Step 3
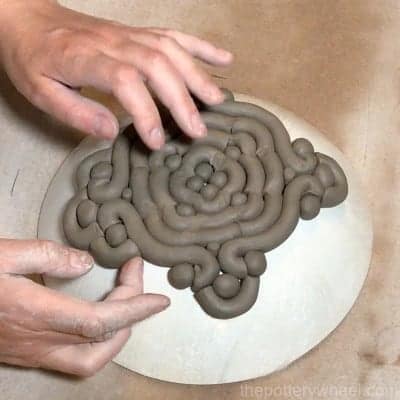
Once you have made a batch of coils, you are ready to start building your bowl. With this coil pottery technique, I find you really can use whatever design you like.
You might want to use coils, swirls, dots, balls, waves, or blocks. You can add them in a regular pattern like the one I have chosen here. Or you can make your pattern more random.
Simply cut off a section of the coil and shape it as you like. Then position it on the bowl and start to build up your design as you like.
When I’m making a coil pot using a mold, I don’t tend to slip and score the clay.
There are a couple of reasons for this. Firstly, the mold or bowl supports the clay coils as you work. And secondly, the pieces of clay coils that I use are often quite small. Using slip and score on these tiny pieces would be very fiddly and may make a mess.
Instead, I make sure that I use soft clay that I can blend in thoroughly once the design is complete.
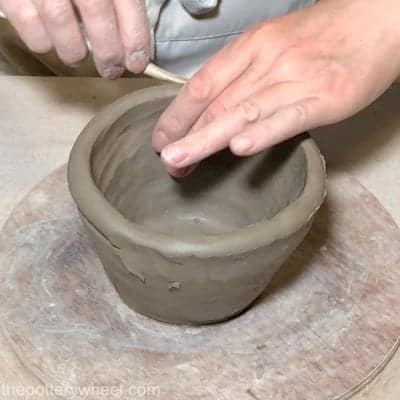
I also use a modeling tool as I build up the design to blend the coils together at the edges.
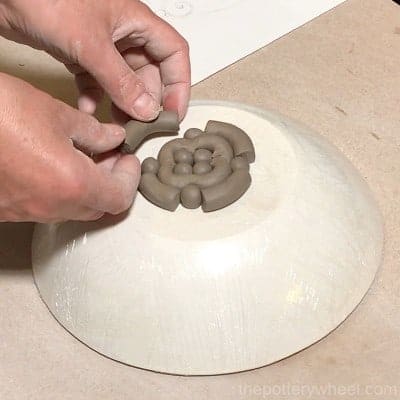
Step 4
Continue to add your clay coils and build up your pattern. Although I don’t slip and score with this coil pottery technique, I press the coils firmly together as I go.
I also try to keep the coils as tidy and smooth as I can. This helps the overall finish of the coil bowl and means less time tidying up your design later.
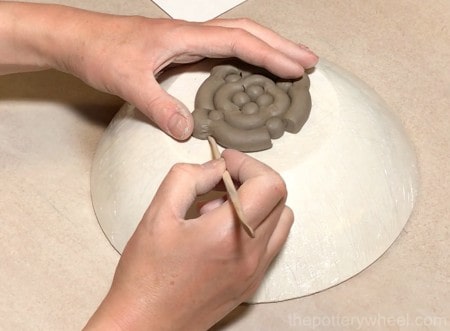
Step 5
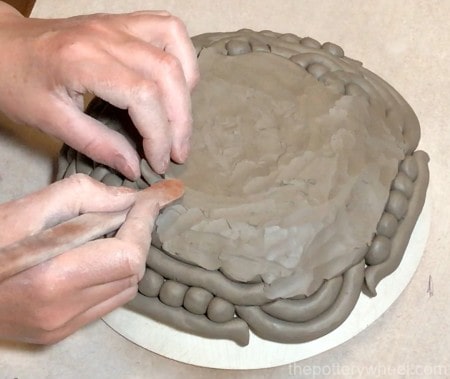
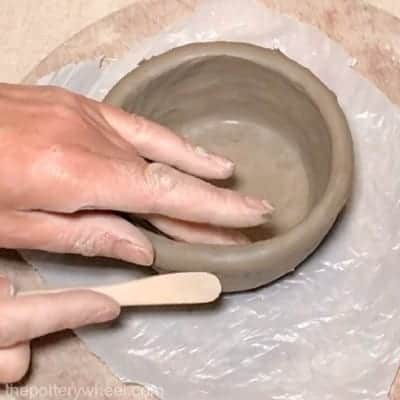
Once you have finished your design, you need to blend the outer surface of the bowl.
I do this using a wooden tool. If there are any small gaps between coils, you can use a small piece of extra clay to fill these. Simply break off a little piece of clay and use your wooden tool to press the clay into the gap.
Step 6
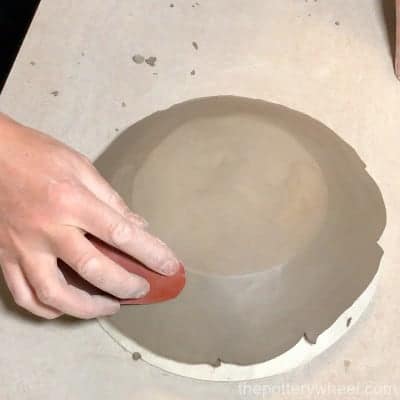
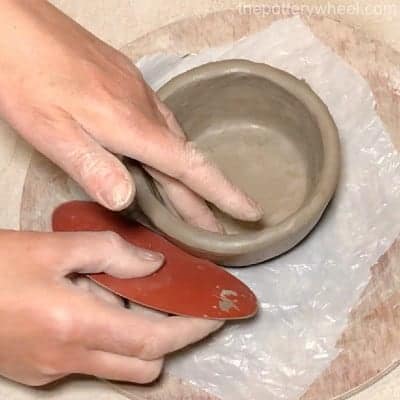
Once the clay coils are all blended in the surface of the bowl needs to be smoothed out.
I smooth the surface using a metal rib first. Then I use a rubber rib to compress the clay further and get a really smooth finish.
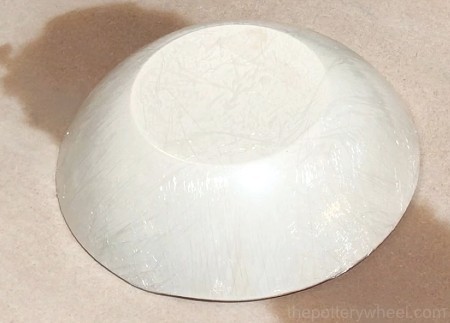
Step 7
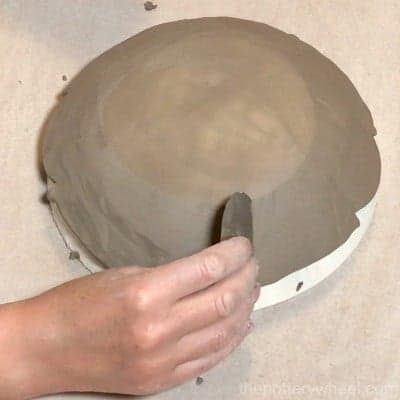
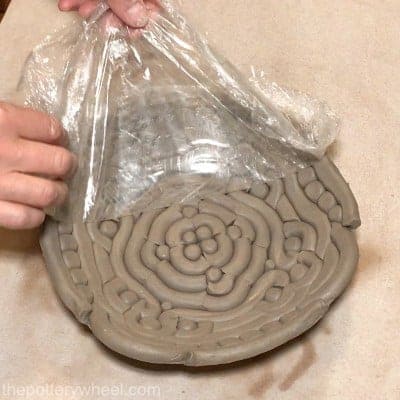
This is the exciting bit of this coil pottery technique. Using some scissors or a craft knife, cut the saran wrap so that it can be peeled off the mold.
When the saran wrap has been released, turn the bowl the right way up. Then, lift the mold off the bowl. You will see the clay coil design through the saran wrap.
Carefully peel the saran wrap away from the bowl to reveal the clay coil design. Then using a modeling tool and your fingers, tidy up any rough parts of the design.
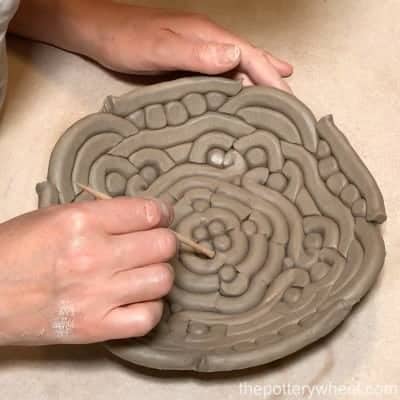
If there are places on the edge of the pot where clay coils join, you need to blend these well. Unblended joins, especially on the edge of the pot are in danger of cracking as the pot dries. You may need to add a small amount of extra clay to the joins to blend them securely.
Your coil bowl is now ready to be dried and fired.
How to Make Coil Pots – Method 4
In this section, I will describe how to make coil pots that have a smooth surface.
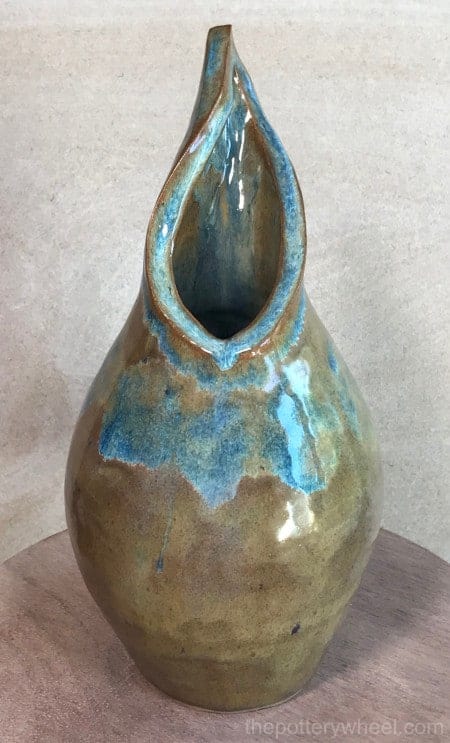
Smooth Coil Pottery
This section covers how I made this smooth coil pot…
The basic process of making a smooth coil pot starts off like making a simple coil pot as described above.
Step 1
Roll out a slab of clay about ¾ of an inch thick. Then cut out a circle of clay from the slab to make the base of the pot.
Step 2
Start to build up the sides of the pot wall by attaching coils using the slip and score method.
This is just like making a simple coil pot. The difference is that with a simple coil pot, you just blend in the inner surface of the pot. With a smooth coil pot, I also blend in the outer surface of the coil pottery too.
I blend the outer surface using a wooden tool to join the coils. Then I tidy up the blended area with a rubber rib.
Step 3
Continue to add coils building up the height of the coil pottery wall.
When I blend the outer surface, I blend the clay with a wooden tool using a diagonal stroke. I alternate the direction of the diagonal stroke with each coil. Blending the clay in different directions for each coil will give the pot a bit of added strength.
Step 4
You can change the shape of the pot as you continue to add coils. As described earlier, adding coils slightly to the outer edge of the coil below will widen your pot.
And adding coils to the inner edge of the coil below will narrow your pot. Narrowing the form will start to give your pot a neck.
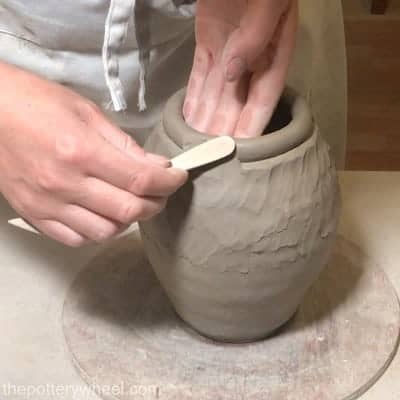
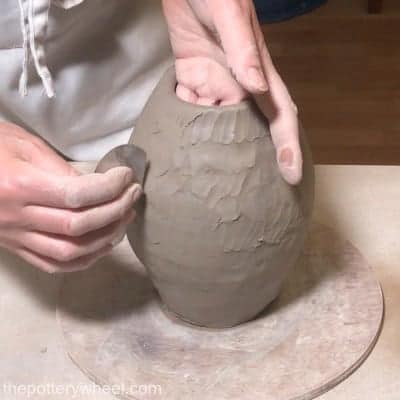
Step 5
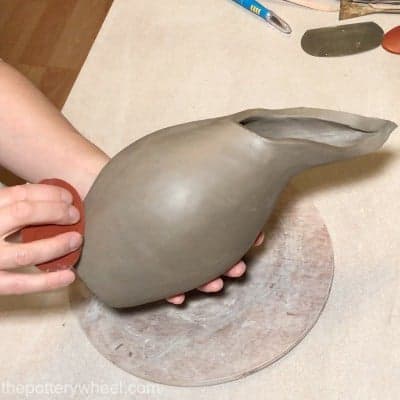
Once I’m happy with the overall shape of the pot, I will smooth the whole thing over. I do this by going over the outer surface with a metal rib first. The metal rib takes out the major bumps and lumps. Essentially you are scraping excess clay off with the metal rib.
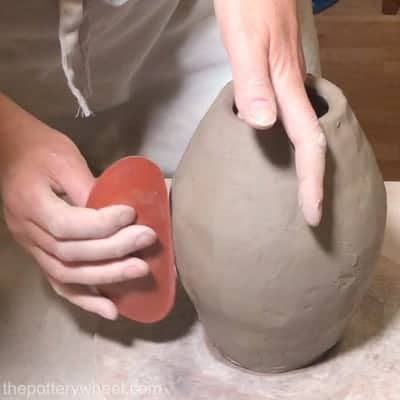
Then I use a rubber rib or kidney to smooth the clay. The rubber rib compresses the surface of the clay to smooth it out.
Step 6
You may be happy with the shape and form of your pot as it currently is.
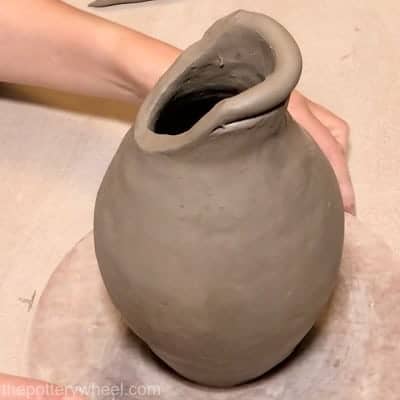
However, with this pot, I decided to build the neck into a twisted asymmetrical shape using some more coils.
The process of making the slanted neck opening is the same as the previous coiling technique. I added more clay to the neck by attaching more coils and blending them in. The difference is that each extra coil only covered part of the neck. So that one side of the neck started to build up and create an asymmetrical shape.
As with all the previous coils, you continue to blend in each following coil to the previous layer.

Step 7
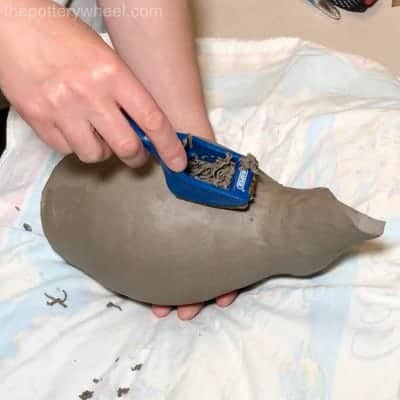
When you are happy with the shape of your pot, let it sit for a day to become leather hard. Once it is leather hard, it is time to start completing the smoothing process.
Using a scraping tool, you can grate off any remaining uneven areas on the surface of your pot.
The scraping tool acts a little like a cheese grater and will make the surface of the pot quite rough. Don’t worry about the rough texture, you are going to smooth it out again.
Once you feel you have scraped away enough of the remaining lumps and bumps, it’s time to smooth the surface.
Using your metal rib, smooth and scrape away the texture left by the scraping tool.
Then, once again you compress the surface of the clay with a rubber kidney. This will give you a nice smooth finish on the clay pot.
You can also tidy up the neck of the pot using a combination of wooden tools, and ribs. This will give your pot a nice finished look.
How to Make Coil Pots – Method 5
Coil pottery is very versatile and you can use the coil pottery technique to make themed, sculptural pots too.
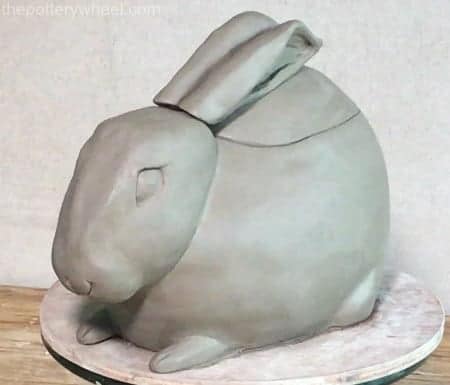
Making a Themed Coil Pot
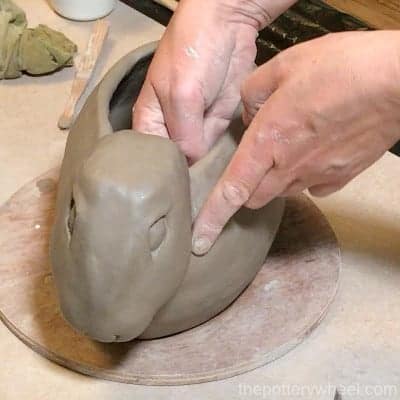
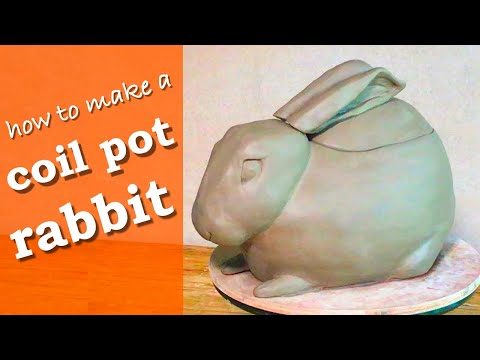
In this section, I will show you how I made this rabbit themed pot using the coil pottery method.
Step 1
As usual, I start off with a base to the pot that is made out of a slab of clay. You will notice that the shape of the base is roughly the shape of a rabbit!
Following the procedure of making a smooth coil pot, I built up the sides of the rabbit’s body.
Step 2
Once the body was starting to take shape, I began to make space for where the rabbit’s head will be. I did this by starting to make the coils a little shorter than the top rim of the pot.
That way, space starts to open up at one point on the pot, where the head can be attached.
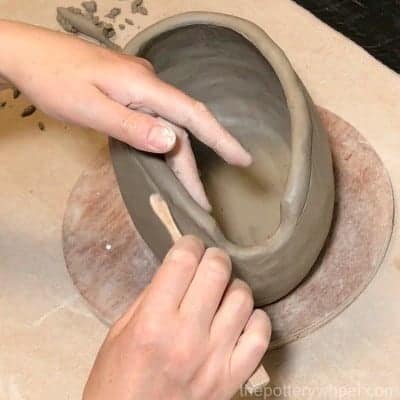
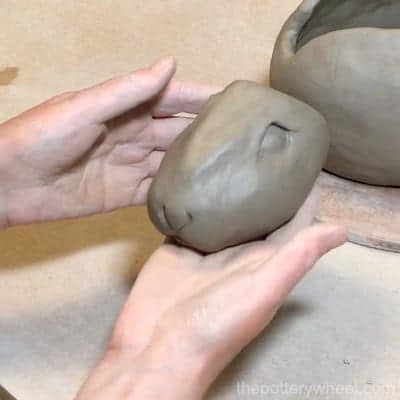
Step 3
Once I was happy with the size and shape of the coil pot body, I modeled the rabbit’s head. The head was modeled out of a solid block of clay. So, it needed to be hollowed out once the modeling was complete.
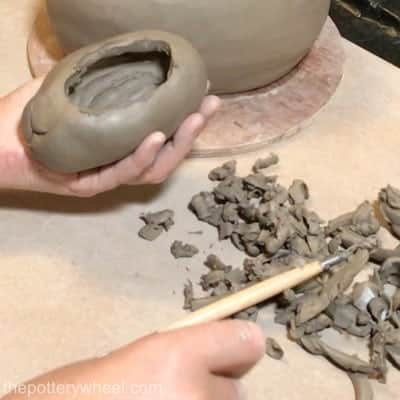
Solid chunks of clay are likely to explode in the kiln when they are fired. This is the reason you need to hollow them out using a trimming tool before firing.
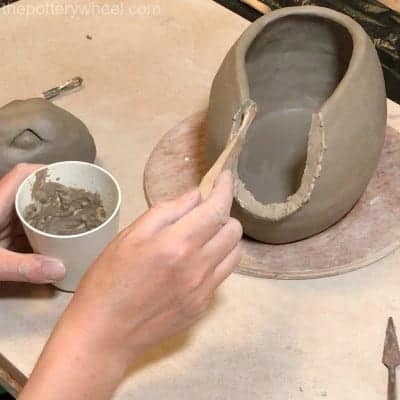
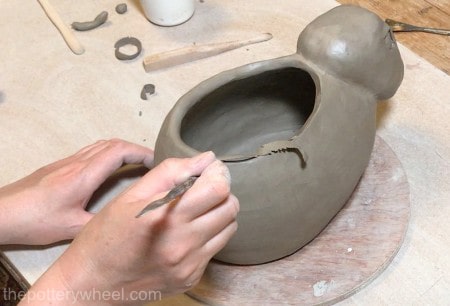
Step 4
To attach the head, I carved away some of the excess clay around the neck area. Then I used the slip and score method to securely attach the hollowed-out head to the body.
I also blended the head to the neck using small pieces of soft clay. Adding a little extra clay when blending makes sure that the join is strong and won’t crack when drying.
Step 5
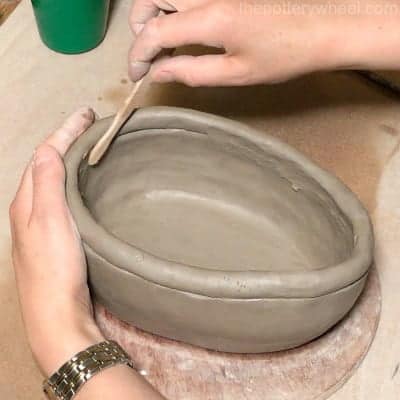
After the head has been securely joined onto the body, I tidied up the rim of the pot. To tidy up the rim, I used a combination of a sharp modeling tool. And a rubber rib. This created a nice smooth-edged rim, that would provide a good point of contact for a lid.
Step 6
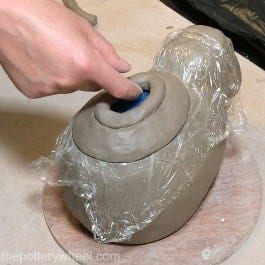
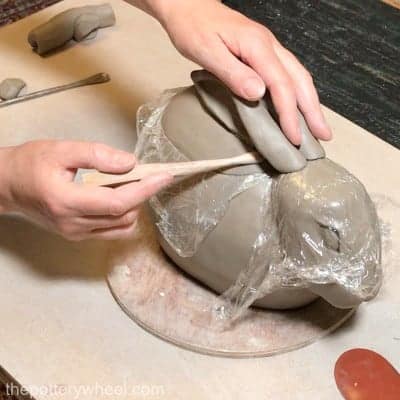
I made the lid for the rabbit pot as follows. Firstly, I put some soft cloths wrapped in plastic bags in the cavity of the rabbit’s body. This acted as a support for the lid as I build the coil pottery lid.
I also put a piece of saran wrap over the top of the rabbit. This was designed to stop the soft clay coil lid from sticking to the rabbit’s body.
Then using the same coil pottery technique of slip, score, and blend, I made a lid to fit the pot. Using progressively small clay coils I made the shape of the lid complete the shape of the rabbit’s body.
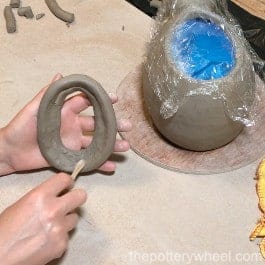
I also added some clay coils to the underside of the lid and shaped these using modeling tools. These were designed to keep the lid in place on the rabbit’s back.
Step 7
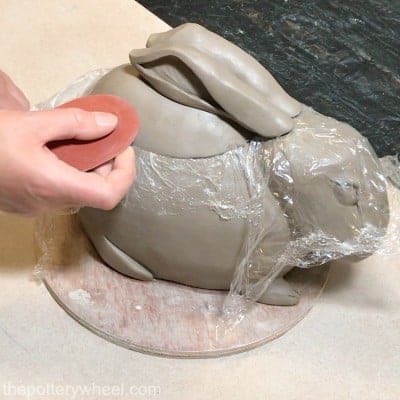
After smoothing out the rabbit’s coil pot body, I then modeled some final features to complete the pot.
These features involved adding feet, a tail, and some ears. The ears were modeled by hand and then attached to the lid using slip, score, and blending. By attaching the ears to the lid rather than the head, they were designed to function as a lid handle.
I gave the rabbit’s coil pottery body a final smooth over before letting it dry for firing. The saran wrap is left in place between the body and the lid whilst the pot dries. This prevents the lid from sticking to the body. It’s important to let the lid dry on the pot. This ensures that the pot and lid continue to fit one another.
Here is a timelapse video of all the above stages put together…
Final Thoughts
I hope that if you’ve been wondering how to make coil pots, this article gave you some ideas and inspiration. Coil pottery is one of the oldest ways of forming pottery. And it’s one of the first techniques we often learn in school. Because of this, coil pottery sometimes has the reputation of being simplistic or a little crude. However, this is not the case. You can make refined, imaginative pottery using the coil pottery technique. Have fun, and let your creative impulses guide you.


