If you’ve caught the pottery bug, you may well be thinking about setting up a home pottery studio. There are two unavoidable facts about making pottery. The first is that it takes up space and the second is that it costs money.
Fortunately, it doesn’t need to take up loads of space, and it also doesn’t need to cost lots of money. In this article, I will share my top 15 tips on how to create a pottery studio on a budget, without needing a large space.
Creating Your Home Pottery Studio
You may be completely new to pottery. Perhaps you haven’t bought any equipment yet, and you are wondering where to start. Or, you may be some way down the road with making pottery and found that your equipment and pottery are spreading out over your home.
Where ever you are in your pottery journey, ‘space’ is a key thing to think about when making a home pottery studio. Let’s look at the question of finding some space now…
Tip 1) Deciding on a Space for your Home Pottery Studio
Making pottery usually involves using some equipment. The equipment you use will depend on how you make your pottery and I will go into what equipment you might need later.
Either way, you are going to need some space to store your equipment and make your pottery. So, first things first, let’s consider what might make a good space for a home pottery studio.
Here are some suggestions about where you can set up your pottery space:
- A spare room in your home
- Garage
- Basement
- Shed
- Outhouse
- Summer house
How Much Space Will You Need?
When starting out, most potters simply make the most of the space that they have. Sometimes this is a corner of their kitchen or living room. Once you have a bit of experience and you know that you love pottery, you may want to have a dedicated room.
You may be lucky and have a large unused room that you can convert into a pottery studio. However, if your space is limited, you can make it work, don’t be discouraged! Some pottery spaces are very small. It’s possible to make an effective pottery studio out of a small space.
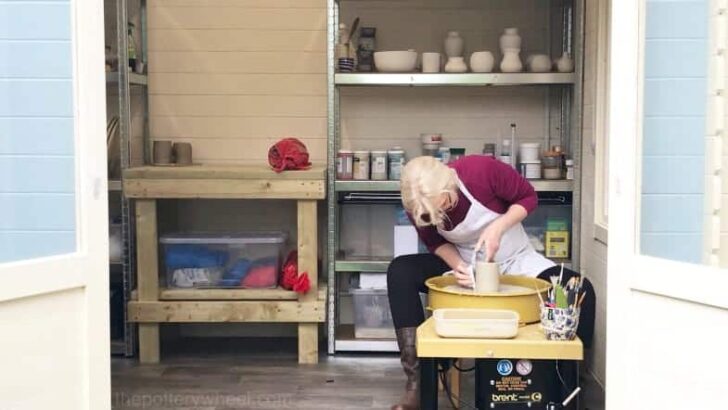
My studio is a good case in point. I live in the middle of a big city and space really is at a premium. I’m fortunate enough to have a small back garden, and I had a summer house built out there.
Here are a few pictures of my home pottery space being built, in my already tiny back garden.
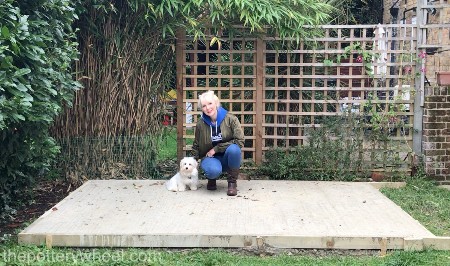
Here, the foundations have been laid. I included my tiny dog to give you a sense of the overall scale!
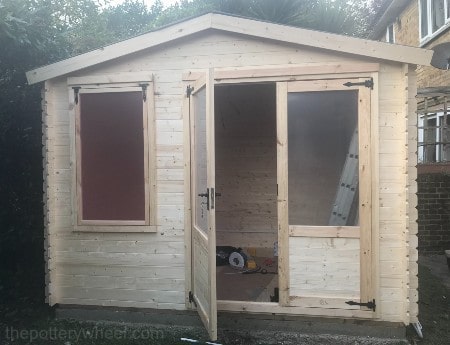
The shed is up and looking good. Forgive the hazy photograph, this was a typical rainy London day.
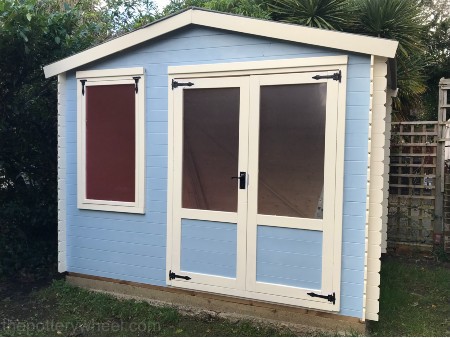
A lick of paint makes all the difference. Once it was built I just needed to get my kiln and equipment in there somehow. Not easy…kilns are heavy.
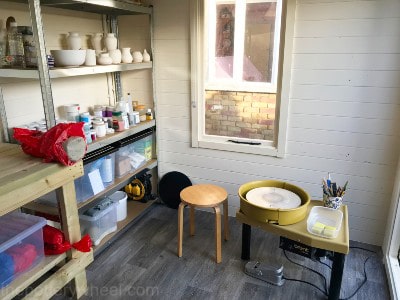
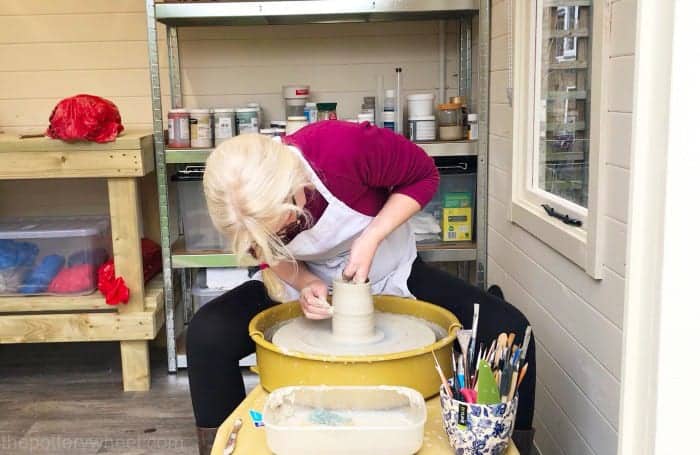
The summer house is now my home pottery studio. It measures in at 10 by 9 feet! Not large, but I manage to have a kiln, a pottery wheel, a workbench, and just about enough shelving in there.
Would I like a huge open plan, spacious pottery studio? Absolutely. But, it’s best to work with what you’ve got. And if you have a smaller space then you can definitely make it work.
The following tips will help you make the most of the space that you do have…
Having a Dedicated Pottery Space
If possible when you set up your pottery studio, it’s good to have a dedicated room or space. There are a few reasons for this.
- One reason is that having a dedicated space is good for your creativity. Virginia Woolf talks about the importance of having a “room of one’s own” to let your creativity flow. I think this is important. It’s a place for you to go and make your art.
- A second more practical reason is that pottery making is messy. Even with good studio practice, there will be dust and crumbles from clay and glaze. You will also get splatters of clay slip on the floor and walls.
So, it’s best to have a dedicated space where you aren’t too bothered about furniture being messed up.
However, there are some important factors to consider. Your pottery studio will have some requirements, so let’s take a look at those now…
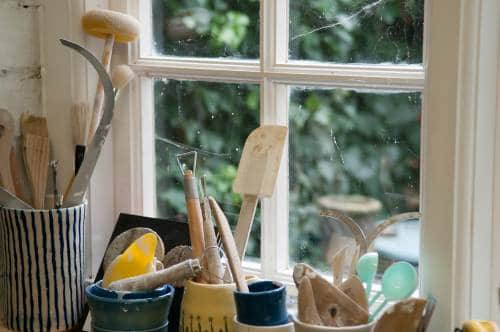
Tip 2) Choose a Space with Good Windows
It sounds so obvious, but windows are important for light and ventilation.
Light
Decent light is really important so that you can see what you are making! This sounds ridiculously obvious, but trying to make pottery in poor lighting is difficult.
You need to be able to look at your pottery and see anything that needs to be fixed or adjusted. Making anything in dim lighting is deceptive. It looks fine in dim light, but once you take it into decent light, you can see flaws.
If you don’t have good natural light from windows make sure you have enough electrical lighting. Though not pretty, good overhead strip light is a good addition to a home pottery studio.
Ventilation
Another reason windows are an asset is that they provide much-needed ventilation. Making pottery creates dust.
Pottery dust can come from clay, glazes, and underglazes. Clay dust is known to be the cause of health conditions. And some glazes contain ingredients that you should avoid inhaling if particles become airborne.
Dust in a pottery studio can be minimized by good cleaning practices. I’ve written an article on how to clean your pottery studio to minimize dust here if you would like to check it out.
Cleaning routines aside, windows are a good way to keep the air circulating and avoid dust building up in the atmosphere.
But clay dust isn’t the only reason that ventilation is important.
If you are planning to have a pottery kiln, it’s very important that you have good ventilation in your pottery studio.
Kilns and Ventilation
When you fire pottery in a kiln, gases, and fumes are emitted from the clay and glaze. These gases and fumes can smell bad, and some are hazardous to inhale.
For that reason, it’s very important to have good ventilation when you use a kiln. The simplest form of ventilating a kiln is called cross draft ventilation.
This basically involves using a fan to circulate the air around the kiln and having the windows open. The idea is that the draft from the fan moves the air around and out of the window.
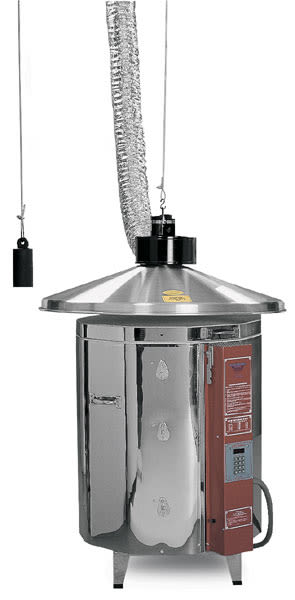
However, there are other ventilation systems that are specially designed for kilns.
They are either updraft ventilation systems that draw the fumes up and away from the kiln and out of a vent.
Or they are downdraft, where they draw the fumes out and down and out of a vent in the wall.
These specially designed ventilation systems are very effective but are costly.
Kilns Fumes
When I first started using a kiln, I installed it in a spare room in my home. When I fired the kiln, I had all the windows open and used a fan to direct the fumes out of the windows.
Nevertheless, there was still a strong smell from the clay and glaze when I fired the kiln. I would close the door and put blankets around the outside of the door to stop the smell from entering the house. But the smell still managed to seep through into the house.
This was the main reason that I decided to build the summer house and turn that into my home pottery studio.
If you do want to have your pottery kiln in your home, I would recommend getting a dedicated ventilation system.
I’ve written an in-depth article on using a kiln in your home which you may want to check out.
I don’t have a kiln ventilation system installed on my kiln. Mainly because of the expense. I simply don’t have the money!
When I’m firing my kiln, I put a fan on and leave the windows open. But this does mean that when I’m firing the kiln, I can’t work in my studio.
However, I don’t find this too much of an inconvenience. I fire my kiln about once every week or two, so I simply do other things on a firing day.
If you are planning to be a production potter you may want to be able to work in your studio every day. If that’s the case, then a dedicated kiln ventilation system would be a good investment. With a specialist vent system, you can work in your studio when the kiln is firing.
Tip 3) Check Out Your Electricity Supply
You can make a pottery studio in a shed, outhouse, or barn that doesn’t have electricity. But it will restrict you in terms of the equipment that you use.
For example, you won’t be able to run an electric pottery wheel. However, you could invest in a kick wheel or a treadle wheel. A kick wheel operates using a large heavy flywheel which you rotate using a kicking motion with your foot. This is known as a momentum wheel.
A treadle wheel is also a momentum. The difference is that the pottery wheel shaft is rotated by a lever that is at foot level. You move the lever back and forward with your foot, and this rotates the shaft.
Kick wheels have an ancient history that dates back to 1000’s of years BC. But there are still plenty of potters today who prefer to use a momentum wheel. You can read my article about the history of the pottery wheel here if you are interested.
You also would not be able to run an electric kiln. Electric kilns are by far and away, the most popular kilns used today. This is partly because they are more affordable than gas kilns and very easy to use.
But they are not the only way to fire clay. You could experiment with more primitive ways of firing pottery. Check out my article on DIY kilns. Or you might prefer to go down the route of investing in a gas kiln.
Alternatively, you might want to hire an electrician to run an electrical supply to your shed or outhouse. Here is a picture of the electrics being installed in my summer house.
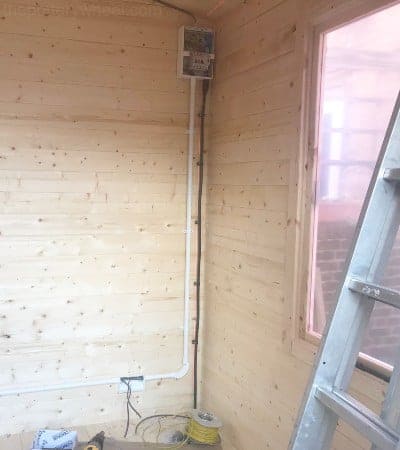
If you want to get electrics installed, do have a conversation with your electrician about your power requirements.
Electrical Requirements for Running a Kiln or Pottery Wheel
Electric pottery wheels simply plug into a domestic socket. However, kilns are a different matter.
Some smaller pottery kilns plug directly into a domestic socket. But a lot of them require more power than that.
Most pottery kilns will need to be plugged into something more like the socket that supplies power to your kitchen oven.
There are three requirements that you need to be aware of when you are sizing up the electricity supply to your home pottery studio.
These are:
- How many amps you have available
- What is your voltage supply
- Is your power supply single or three-phase power
All kilns will have certain power requirements, and you need to check that your electricity supply meets these.
Most kilns require a single-phase supply, and luckily, most homes are single-phase too. So that factor is generally less of an issue.
However, it would be wise to check out how many amps and volts are required before you buy a kiln.
If you speak to a registered electrician, they will be able to advise you what, if any additions need to be made to the electricity supply to your studio.
Depending on the kiln you get, you may need an electricity supply with its own circuit and breaker switch.
Tip 4) Water is Nice but Not Essential for a Home Pottery Studio
Having access to water is essential if you are making pottery. Do you need to have a tap and sink in your home pottery studio? No, not really.
It’s really handy to have a sink in your studio, but if you have to go to another room to get your water, it’s not the end of the world.
Let’s say you want to set up your studio in your garage, but you don’t have a tap and sink in there. If you have the money and you want to kit your studio out completely, then yes, a sink is great. But not essential.
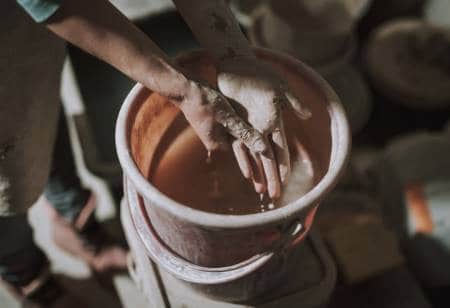
I don’t have a water supply in my summer house pottery studio. I’d like one, but paying for the plumbing to get water to an outhouse is a lot of money.
But I make do. I take a bucket of water to the studio when I’m working there. I use it when I’m making pottery, and I also use it to rinse my equipment afterward. Not glamorous, but functional.
Tip 5) Use a Sink Trap
After I’ve rinsed my splash pan and tools out in the bucket, I take them to the kitchen and rinse them well in the sink. This gets rid of any clay grim that is suspended in the bucket water.
Whether are using your kitchen sink, or a sink in your studio, it’s important to use a clay sink trap.
A sink trap is a container that fits onto the drainage pipes on your sink. It captures particles of clay and glaze so that they don’t settle in your plumbing.
The water you are rinsing down the drain may only have a small amount of clay in it. However, over time, those small quantities of clay can build up and block your drains.
There are some very affordable sink traps that are easy to fit onto your drainage pipes. I have one under my kitchen sink.
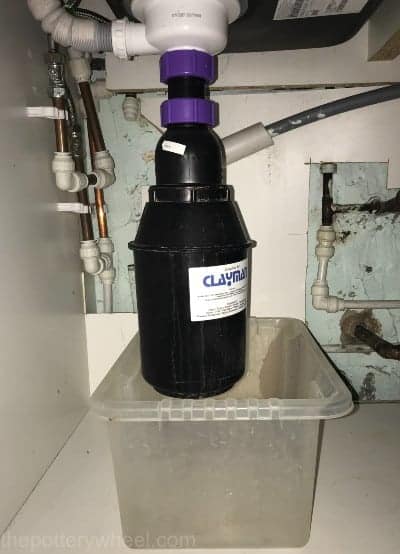
I empty it out once a week. I’ll be honest with you, emptying the sink trap is not my favorite job (they can get smelly). However, I’d much rather do that than pay a plumber to unblock my drains clogged with clay.
Like I say, wherever your sink is located, be sure to use a clay trap. A reputable brand is Gleco.
Tip 6) Buying Pottery Equipment – Don’t Break the Bank!
There is no way around it, making pottery does cost money. However, it needn’t cost a fortune. Especially if you are starting out and you aren’t 100% sure how committed you are.
The two pieces of equipment that will be your biggest expense when you start out are your pottery wheel and a kiln.
Maybe you hand-build your pottery rather than throwing it on the wheel. In which case, you may not want or need to buy a pottery wheel. But if you do like to throw on the wheel, then the best way to improve is to have your own wheel and practice whenever you can.
Buying a Pottery Wheel
A little bit of research will reveal that pottery wheels vary hugely in price. You can read my article on how much you can expect to pay for a pottery wheel. This article will give you a good idea of why pottery wheels vary in price, and what you can expect to get for your money.
But to put it briefly, a new pottery wheel can cost anything in the range of $200-$2000. And there are a couple of questions you can ask yourself before you decide to buy a wheel.
- Do you need to buy a new wheel, or is a second-hand wheel a good option?
- What’s your budget and how much do you need to spend?
Buying a New or a Used Pottery Wheel?
Used pottery wheels do quite often come up for sale on sites like eBay, Facebook Marketplace, and Craigslist.
If you are thinking of buying a second-hand pottery wheel, then it’s essential to go and check it out in person before you buy.
It’s much like buying a used car, you need to check that it runs well before you pay for it.
- Check the sound of the motor. Does it make a nice soft humming noise, or is does it sound squeaky or gritty as the wheel head turns.
- Does the wheel head feel stable, or does it wobble when you apply a bit of pressure to it?
- Is the wheel head level when it’s static and does it stay level when it turns or does it wave up and down.
- If it is operated by a foot pedal, does that feel smooth when you press it? Or does it feel either very loose or very stiff?
If you haven’t used a pottery wheel much, try to take someone with you who knows what to look out for.
That being said, you can get some bargains second-hand. This can really help save money when you are setting up your home pottery studio.
Of course, your other option is to buy a new pottery wheel. Choosing a new wheel can feel confusing because there is such a wide range in pricing. So, let’s take a look at that now…
Buying a New Pottery Wheel
There is a range of prices with new pottery wheels. However broadly speaking they fall into three categories. These are:
- Budget pottery wheels that cost around $200 or less
- Mid-range pottery wheels that cost around $700 – usually tabletop wheels
- Top of the range pottery wheels that cost over $1000
Top-of-the-range pottery wheels like Brent, Shimpo, and Skutt are better made and more powerful.
They can handle much more clay and allow you to throw much bigger pieces of pottery.
They also feel smoother to use, and all being well can last you a lifetime.
However, perhaps you are starting out in pottery and don’t want to spend a fortune yet. Or maybe you are taking classes and know you love throwing on the wheel but can’t afford to pay top dollar.
If that’s the case, then my thinking is that a budget pottery wheel is absolutely fine. A good model in this range is the Vevor. I started out using a Vevor pottery wheel. It was a good starting point too.
I would use a Shimpo VL Whisper in my pottery class and then practice on my Vevor at home.
Once I’d learned how to throw, and knew that this was a passion of a lifetime, I bought myself a Brent C potters wheel. I can’t deny that the Brent C is a joy to use, and feels like a quality wheel.
But I’d also recommend the Vevor as a budget wheel for anyone who is starting out. I’ve written an in-depth article about the best pottery wheel for beginners if you want more information to help you decide.
Buying a Pottery Kiln
If you are on a budget, the first thing to ask yourself is whether you need to buy a kiln right now?
Even used, second-hand kilns are a big financial investment. And if you can’t stretch to it at the moment, then don’t worry. There are usually a lot of local places that will fire your pottery for you. If you want some ideas about where to look for a pottery firing service, check out my article here.
Nevertheless, firing your own pottery in your own kiln is very exciting. If you can stretch to buying a kiln, then I recommend it. It will also help with your knowledge of the pottery-making process.
If you’d like more information about buying a kiln, you can check out these two articles.
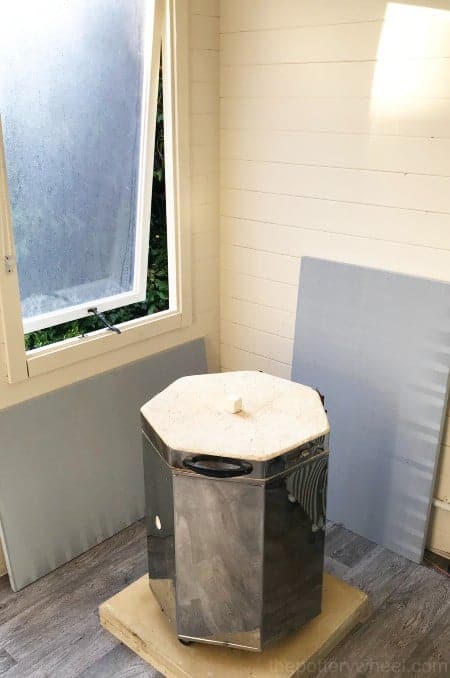
Tip 7) Kilns Take up a Lot of Space – Be Prepared!
One key factor when setting up a home studio is to consider the amount of space a kiln takes up.
Kilns are heavily insulated so that they are heat efficient. So even a small kiln with a modest firing chamber will have substantial outside dimensions.
Be sure to check how large the outside of the kiln is so that you know if you have enough space to accommodate it.
Also, most kiln manufacturers recommend that there is at least 12” between the outside of the kiln and any nearby surfaces (source).
In fact, a lot of them recommend leaving an 18” gap. This is to minimize the risk that the kiln will cause a fire (source).
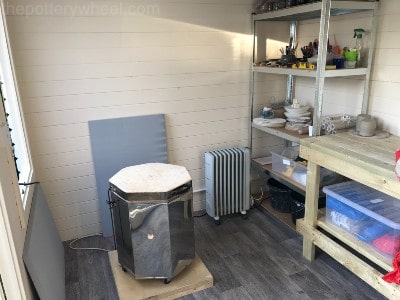
My kiln is 20 inches wide and I leave 18 inches on either side. So, in all this relatively small kiln takes up just over 3 square feet space in what is already a small studio.
I also have a couple of additional safety precautions to minimize the risk of fire. These are:
- The kiln is positioned on two concrete paving slabs
- Fire retardant board lines the walls where the kiln is located
This is important as my home pottery studio is a wooden shed construction.
Tip 8) Have Lots of Shelving in Your Home Pottery Studio
One of the reasons it’s good to have a dedicated pottery space is that you will need plenty of storage space and shelving.
I found my pottery materials were eventually taking over my home. That’s when I knew it was time to make a home pottery studio for all my equipment and supplies.
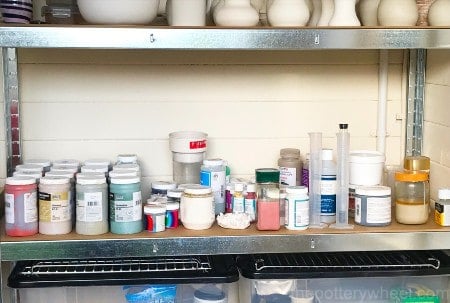
These are just some of the things that you will need shelving space for:
- Clay
- Glazes, underglazes, and slips
- Ingredients for glazes
- Tools
- Greenware pottery that is drying out
- Glazed ware waiting to be fired
- Damp boxes
- Kiln furniture
- Pottery bats
- Clay that is being recycled

One additional tip is to buy yourself some plate racks. You can use these to store pottery bats and kiln shelves on their side.
When they are stacked on their side they take up less space. Also, by stacking kiln shelves on their side, you avoid damaging any kiln wash you have applied to their surface.
You can buy carts that are specifically designed to hold bats or kiln shelves.
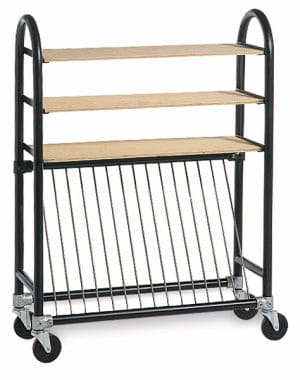
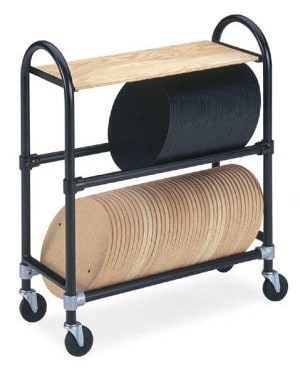
However, if like me, you’re on a budget, then you might find that plate racks will do just fine.
All of the above takes up space, so my rule of thumb is, that if you have more room for shelving, use it!
Tip 9) Choosing a Workbench for your Home Pottery Studio
You will need a work surface for the following activities:
- Wedging your clay
- Making hand-built pottery
- Finishing wheel-thrown pottery – adding handles and tidying up
- Decorating your pots
- Glazing your pottery – particularly if you brush glaze
If you have a lot of space you might want a separate area for different activities. For example, an area that is only used for wedging is a good idea.
This is because a wedging table should ideally be a bit lower to the ground than most other work surfaces.
In fact, generally, your wedging surface should be parallel to the tips of your fingers as your hands hang at your side.
And having a separate glazing area is nice because you can avoid any stray splatters of glaze contaminating a greenware piece you might be working on.
However, if like me, you simply don’t have the space for a number of dedicated tables, then you can use one for each of these purposes.
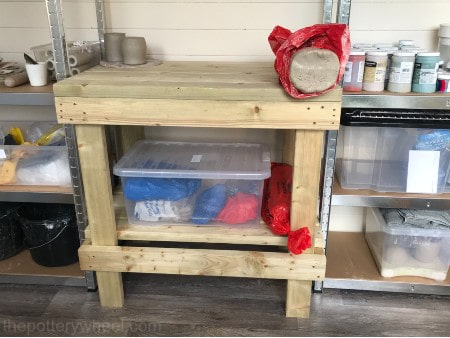
Tips about Choosing a Work Bench
- Choose the largest workbench that you have space for.
- A heavy, solid workbench is a good idea, particularly if you are going to use it for wedging. It can be annoying if you are wedging and the table is moving about. So, a good solid heavy structure is helpful.
- Have a few different sheets of plywood that you can clamp to the workbench. You can use each sheet of ply for different activities. For example, you can have a sheet of ply for wedging on, and a sheet of ply for glazing on. That way, you don’t cross-contaminate.
You can buy a portable wedging table which you can use on your workbench.
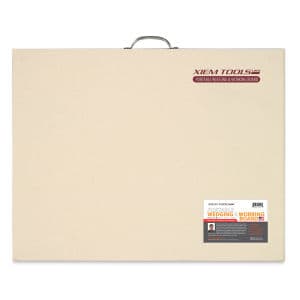
However, if you are on a budget, you might want to check out my article on different surfaces that you can use for wedging. It will definitely save you money.
Tip 10) Create a Damp Area or Damp Box
It’s important to have an area in your home pottery studio where you can keep your pottery damp and workable.
This is because at the end of a session you may not have finished your piece of work. Or you might want to control the rate at which your piece dries out.
It’s essential to have a ‘damp area’ to do this. A damp area is basically a sealed-off section of your studio where the atmosphere is wet.
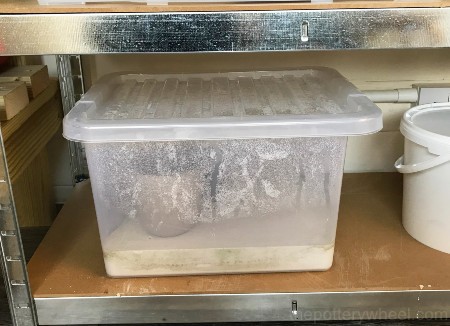
The simplest way to have a damp area is to make a damp box. These are very easy to make, simply pour half an inch of wet plaster of Paris into a plastic lidded box. Allow the plaster to set.
Then you can pour a little water onto the plaster to keep it wet. Clay items can then be placed on the wetted plaster and they will stay workable for a long time.
I’ve written an article here about how to make a damp box which you might find helpful. In fact, on that post, you can download a handy FREE eBook on how to make a damp box. So, it’s worth checking that out.
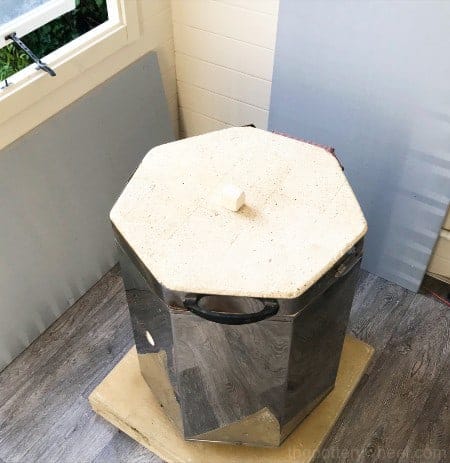
Using a Damp Cabinet
Alternatively, if you have the space, you may want to invest in a damp cabinet. These are galvanized steel cabinets with sealed doors to prevent drafts.
They are generally suitable for potters who produce a lot of work and who require a lot of storage space. Or they are a good idea for communal pottery workshops or schools.
You can also avoid the cost of buying a damp cabinet by making your own. Lots of potters use old fridges as damp boxes.
They are a good choice because they have sealed doors and racks to place your pottery. You can increase the moisture level in the fridge by putting a tray of water at the bottom of the fridge.
Basically, a damp cabinet can be any structure with shelves that you can create a damp sealed environment around.
Tip 11) Make Sure Your Home Pottery Studio is a Good Temperature
In an effort to make your home pottery studio the ideal environment for clay it’s easy to forget about making it a nice space for you too. However, you also need to feel comfortable working in your studio too.
If your studio is a room in your home, then the temperature of your space may already be sorted out.
However, if you are using an outhouse, basement, barn, or shed, then you will probably need to think about making the temperature of your space bearable to work in.
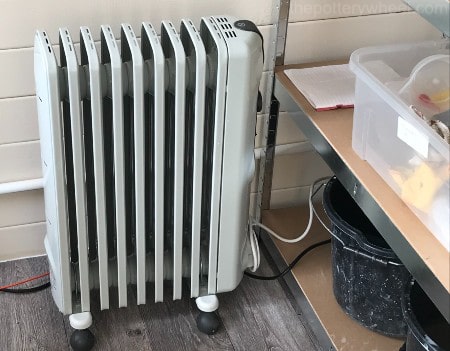
I live in London where it gets cold and rainy in the autumn and winter. Working in a pottery shed is misery without heating, so having a plug-in electric heater is essential.
Equally, if you live in a hot climate, then air con is a good idea.
It’s important to remember that heating and air-con will speed up the rate at which greenware dries.
So, if you are using a heating or air-con system, cover up your greenware with plastic sheeting when the heating is on. This will help stop your greenware from drying out too quickly and possibly cracking.
Keeping a reasonable temperature in your home pottery studio is also better for your clay and glaze. If your studio is very cold, your clay and glaze can freeze. Whilst frozen clay and glaze can be revived, it takes time and work. So, it’s best if you can avoid this happening if possible.
Tip 12) Have Waterproof Flooring
This sounds like a simple tip, but it’s a very good idea to have lino or tiling on your floor. Clay has a habit of getting everywhere. You will find that no matter how careful you are the clay splatters, slops, and crumbles as you work. It’s a very good idea to have a floor that you can wipe down easily. I would not recommend making pottery on a carpeted area, as the carpet will be ruined in a very short space of time.
Tip 13) Buying your Consumables
These are some of the consumable items that you will need to have in your pottery studio, plus some links to where you can buy them…
It’s also very useful to have a sealed container with slip made out of the clay you use most.
Most potters have a favorite clay. If you do use the same type of clay, again and again, make a small container of slip. This is really handy when you want to join pieces of clay together or add handles to mugs.
Whenever you want to add a handle, you can simply open up your slip container. If the slip stays in the container for a long time, it can get a bit nasty and moldy. But actually, this doesn’t stop it from being effective. Any mold will just get burned off when the pot is fired.
Tip 14) Buy Your Tools as and When You Need Them
There are a lot of pottery tools on the market for any number of techniques. I’ve definitely had that experience of walking around a pottery supplier’s showroom and feeling like I need to buy everything.
However, it’s best to just buy tools as and when you need them. You will eventually gather together a set of tools that are all useful to you, rather than a lot of stuff you don’t need.
That being said, there are some pottery tools that most potters can’t do without. Here are a few of them…
- Clay wire
- Needle tool
- Wooden modeling tools
- Pottery ribs (metal, rubber, and serrated)
- Sponges
- Wooden pottery bats
- Trimming tools (if you wheel throw)
- Glazing brushes
- A banding wheel
- A clay knife/craft knife
- Some buckets! (to recycle clay scraps in)
If you like hand building, then you may well need the following:
- A roller and roller guides
- A shredder or Surform
And here are some additional suggestions that will make your potter’s life more comfortable…
- A potters apron
- Towels
- Moisturizer (clay dries out hands)
Tip 15) Some Other Nice Things to Have
The following items are quite expensive, and you can get by without them. But they are nice to have if money is no object.
A slab roller
This will help you roll perfect slabs of clay with less effort. If you are a hand builder then this might be part of your essential equipment category.
An Extruder
Clay extruders can be used to make lots of perfectly even handles quickly. There are lots of ways to make handles manually without an extruder.
But if you find it a bore or you make lots of mugs and want a quick way to make lots of handles, an extruder may well be a good buy.
Final Thoughts
My final tip is to make sure you carve out some time for yourself to enjoy your pottery studio.
I don’t know about you, but I find life is busy. I find it really important to prioritize a bit of time in the day when I can go to my studio and lose myself in making some pots. It’s that simple.
I try to make sure that every day I spend some time in my home pottery studio getting down and dirty with some clay. I swear clay is good for the soul.