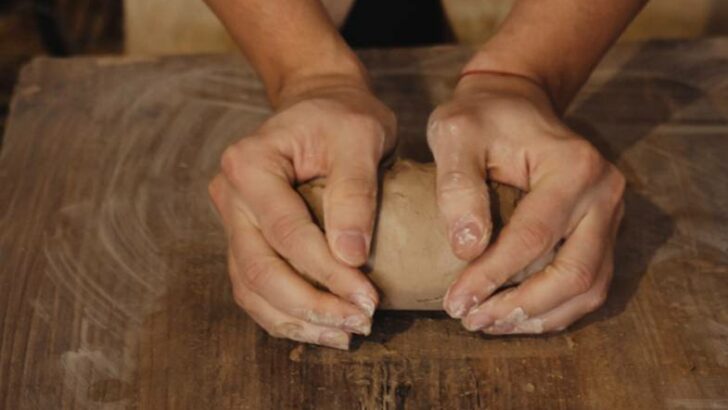
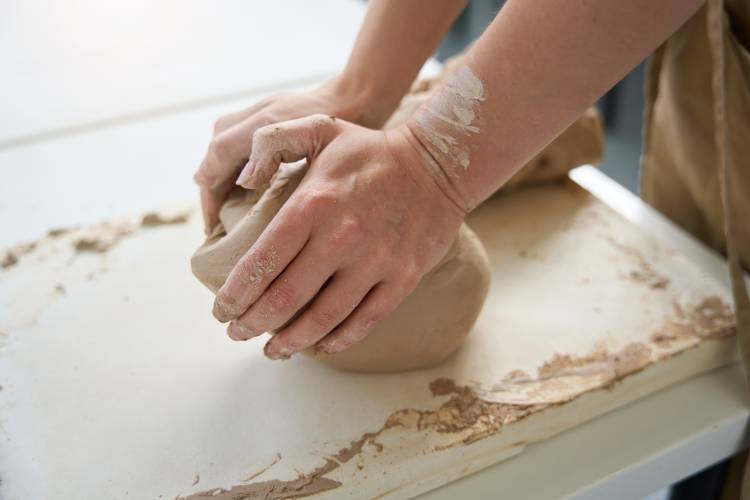
A purpose-built wedging table is an additional expense you might want to avoid. If this is the case, then don’t stress. There are many inexpensive ways to find the perfect clay wedging surface for your studio.
A wedging surface needs to have a bit of grip on it. If it’s a very smooth surface like a kitchen worktop, your clay will skid across the top as you try to wedge. It also needs to be a bit absorbent. If it’s too absorbent, it will draw too much moisture out of your clay. But if it is not absorbent enough, you won’t be able to use it to prepare overly wet clay.
Here are some great ideas of materials that make a good clay wedging surface, that won’t break the bank.
13 Clay Wedging Surface Ideas
Have a look at these ideas. You might find that you already own something that would make a perfect clay wedging surface.
1) Unpolished Stone
Leftover stone from a kitchen makeover. Unpolished stone makes a great wedging surface. It can be expensive to buy firsthand. However, getting your hands on a piece cheaply or for free is sometimes possible.
The sort of stones that work well are marble, quartz, granite, or slate. So, if you have just had a new kitchen countertop installed, order 2 or 3 feet more than you need. Or you might be able to get a free offcut from a countertop maker.
If you try to wedge on polished marble, the clay will skid across the surface. But if you turn it smooth side down, and use the unpolished side, it will be a perfect wedging surface. Some kitchen stone is polished on both sides, so it’s good to be aware that you need an unpolished side.
There are other places where you might stumble across a nice old stone surface. Some old occasional tables or side tables are inset with a stone surface. If you can take the inset stone out, turn it over, and fit it back into the table frame, this is a perfect wedging table.
Because the stone is inset, it doesn’t move about when you wedge. You may need to adapt the table a little to make it heavy enough to keep it from moving while wedging. But essentially this is a great option.
The other great thing about unpolished stone is that it cleans down easily. Granite kitchen surfaces are notorious for picking up stains. So, if you are wedging terracotta, you might find the stone becomes a little discolored.
However, if you clean off the excess before you use a different color clay, the staining shouldn’t be an issue.
2) Stretched Canvas On Your Clay Wedging Surface
Canvas makes a good wedging surface because it is a bit absorbent and has some grip too. You can make a simple wedging surface by stretching some canvas over a sheet of wood and pinning the canvas in place with an upholsterer’s staple gun like this.
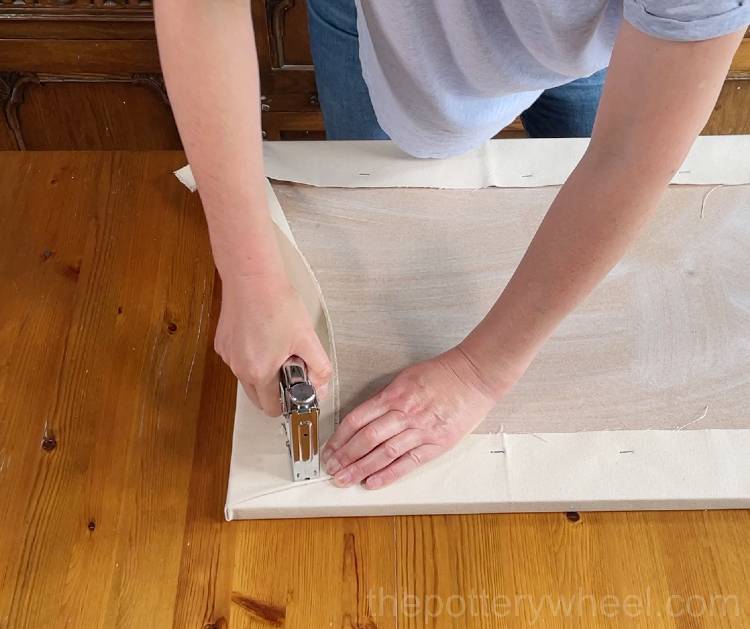
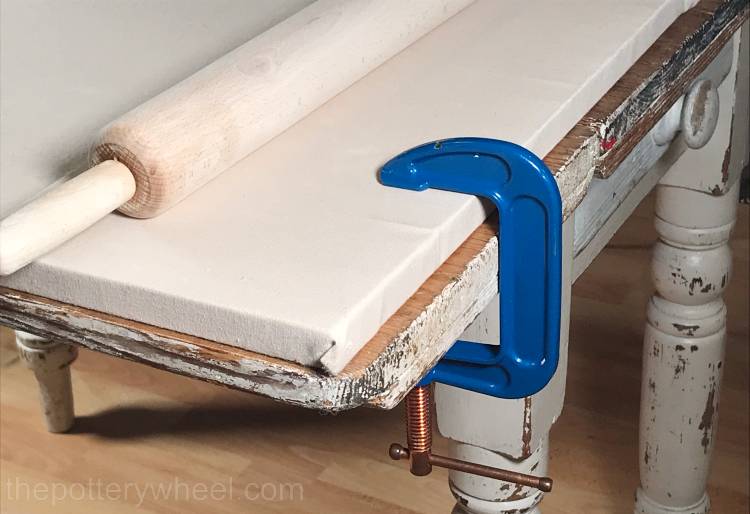
Once you have stretched the canvas over the board, you can clamp the board to a solid table. By clamping it to the table, you can ensure that the board won’t slide around as you wedge.
You Will Need:
Alternatively, if you have an old table you can stretch the canvas directly onto the tabletop. If your table or dresser is a bit flimsy, it may not be the ideal item. Use a table that is solid and heavy or adapt the one you have.
You can make tables heavier, by adding a shelf underneath the wedging surface. Store something heavy, like your clay supplies on the shelf.
If there is a drawer underneath the wedging surface, fill it with concrete or concrete bricks. It’s possible to pour wet concrete into a drawer and let it set.
If you do this, make sure the edges of the drawer are sealed so the concrete doesn’t run out when you pour. You can seal them with a builder’s sealant. Or you can run a bead of clay around the edge to plug it up.
You need to wipe the canvas down between wedging sessions. Even with a regular wipe-down, some potters find the canvas still gets a bit crusty. If your table is relatively mobile, you can put it in the backyard and sponge it down.
If wedging on canvas appeals to you, but don’t feel confident stretching it, you can buy a canvas-covered board. They are an inexpensive option and you can buy a pack of 10 from Blick. Buying in bulk means you can use a different board for different clay bodies.
3) An Old Baby Changing Table
You can pick these up second hand and they are very inexpensive. The top of a baby changing table has built-up sides. This is because the changing table is designed to contain a rubber mattress for the baby to lie on.
If you remove the mattress, you have the perfect depth inlay to fill with plaster or concrete.
The raised sides are normally about 2 inches high. If you seal any gaps between the tabletop and the edges, you can pour plaster or concrete into the inlay.
Some changing tables are a little bit flimsy and lightweight. So, you may need to beef them up a bit to make them more stable. Others, however, are quite solid.
This is one of the wedging tables I used. I had an old changing table with drawers underneath. I stored my clay in one of the drawers, which made the table heavy. In addition to this, I put some building bricks in the bottom drawer too.
4) A Poured Plaster Clay Wedging Surface
Plaster is quite a common choice for a clay wedging surface. It’s versatile in that it can be poured into various constructions.
A simple way to make a plaster wedging surface is to pour a mix of plaster and water into a large plastic storage container. You can pop the plaster slab out of the storage container when the plaster has set.
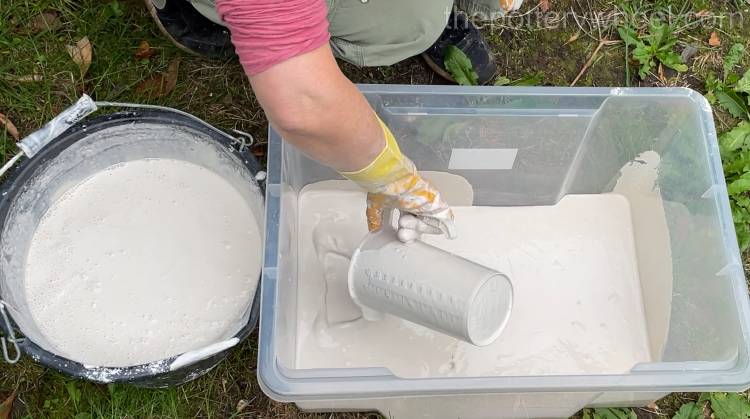
You will need to tidy up the slab and remove any crumbly plaster bits on the slab’s edge. But once it is clean and tidy, this slab will make a great clay wedging surface. Have a look at my step-by-step guide to making a plaster slab here.
Some potters fill old cupboard drawers with plaster and use these as a wedging surface.
You can fill lots of different kinds of containers with plaster and use the surface to wedge on. Provided the container can be secured somehow so it doesn’t move about as you wedge.
Alternatively, you can construct a wooden frame and fill that with plaster. The gaps in the frame would need to be sealed before you pour the plaster in.
One of the problems with plaster is that flakes of plaster can sometimes get into your clay. These bits can cause problems when you are firing as they can cause your pottery to crack or explode. However, I wedge on a plaster slab, and I haven’t had issues with plaster getting into my clay.
To avoid plaster contamination I look after the plaster slab well, and make sure that it doesn’t get damaged and crumbly. I also wipe it down before I wedge on it, to get rid of any debris that might be sitting on the surface before wedging.
There are different kinds of plaster available. A fine-grade pottery plaster is tougher and less likely to flake than Plaster of Paris. So, using a pottery plaster, like Pottery Plaster No 1, may reduce the risk of flaking.
Some potters cover their plaster wedging surface with stretched canvas to remove any chance of flakes contaminating their clay with plaster particles.
5) Plaster Board Clay Wedging Surface
Plasterboard makes a good alternative to pouring plaster. There are various brands of plasterboard, including drywall and sheetrock.
The advantage of using plasterboard is that it can be cut to size easily. And the surface is sealed so that it won’t contaminate your clay.
If you choose to use plasterboard as a wedging surface, it’s a good idea to seal the edges. You can do this by simply running some masking tape along the edge. This will help prevent crumbs and flakes from the edges from getting into your clay.
Other advantages of using plasterboard are that it can be screwed down onto a solid table surface. You can also have different boards for different clay bodies, to avoid mixing different types of clay. Simply swap the board out when you want to use a different type of clay.
However, if you would rather avoid plaster altogether, then concrete is a good alternative.
Concrete is tougher than plaster and less likely to flake and contaminate your clay. So, let’s have a look at the option you have with concrete…
6) Pourable Concrete Clay Wedging Surface
Instead of using pouring plaster, you can use pourable concrete to make your wedging surface. You can use any of the containers described above, and replace the plaster with concrete.
However, if you’d rather not use pourable concrete, other solid concrete options are good to wedge on. So, let’s explore those…
7) Concrete Pavers
A concrete paver is a great option as a wedging surface because it is the perfect size. It can be used on the floor. Or it can be secured to a tabletop.
There are numerous ways you can fix a concrete paver to a tabletop. One way would be to screw wooden battens around the paver. That way, the paver wouldn’t slide around on the tabletop.
One issue with a concrete paver is that they are often quite textured. Some potters prefer to wedge on a textured surface, however, you can buy concrete paving stones that are texture-free. Alternatively, you might want to try wedging on a concrete board.
8) Concrete Board
Another option is concrete board. It is also known as cement board. Many potters like to use HardieBacker board made of cement, sand, and fiber.
The good thing about cement board, whichever brand you go for, is that you can cut it to size easily. It’s soft enough to cut easily with a regular saw or jigsaw. You can cut a piece that fits your tabletop and then attach it to your work surface with clamps or screws.
Or you can create a brace with wooden battens for the board to sit in. The good thing about sitting the board in battens is that it protects the edges of the board.
Concrete board can be crumbly at the edges. You want to avoid getting the crumbles in your clay. And you also want to avoid breathing in the concrete dust. So, it’s a good idea to either seal or tape the edges. Or secure the board with wooden battens so that the edges don’t get damaged and crumble.
Having said that, provided the edges are protected, an advantage of cement board is that the surface does not crumble. This gives it the edge over plaster as a clay wedging surface.
An additional advantage is that cement board doesn’t generate much clay dust. This is one of the complaints that potters have about canvas. So, all in all, concrete board is a good, cheap, versatile option.
9) The Concrete Floor
If all else fails then a clean, swept concrete floor can be a perfect wedging surface. The advantage of using the floor is that you won’t have any trouble with the floor wobbling or sliding around as you wedge. Also, you don’t have to carry or store it, it’s easy to clean, and it costs nothing.
If you have a concrete floor in your studio, you can have a dedicated wedging corner. You can keep this relatively clean and free of debris on the floor.
One disadvantage of using a concrete floor is that you have to get down on your hands and knees. This may not be a comfortable option for everyone.
10) A Sheet of Wood
A simple sheet of plywood is a good, flexible option as a clay wedging surface. This can be screwed down to a tabletop, dresser, or counter. Or, if you want a moveable solution, you can secure it with G-clamps.
I like plywood because it doesn’t crumble or flake like plaster or plasterboard. And it can be wiped down over and over. Another option to avoid cross-contamination of clays is to have one sheet for light clay and another for dark clay.
One of the benefits of using a wooden surface is that it can be sanded down. Over time a wooden wedging surface can get a bit grainy and worn with the moisture from clay. This is easily rectified by giving it a light sand.
An alternative wood option is a sheet of MDF, which can also be easily secured to a solid surface. MDF can also be wiped down after being used. However, it does tend to feel a bit fuzzy once it has been used multiple times.
11) An Old Wooden Table
If you like wedging on wood, then an old heavy wooden table can be a good option as a clay wedging surface. The table would need to be unvarnished, or old enough for the varnish to have worn off.
Unvarnished wood has some grip and it is absorbent, without drawing too much moisture from your clay.
If your wooden table does have a varnished surface, you can sand this down. Or, you can cover it with canvas, or even an old bedsheet. Bedsheets are thinner than canvas, so you need to pull them tight to prevent them from wrinkling as you wedge. Nevertheless, an old bedsheet can make an effective budget-friendly wedging surface.
It may be a good idea to take a bit of height off the table legs. This will ensure that the surface is the right height to wedge on. Remember to use a spirit level, so that you don’t end up wedging on a slope!
12) A Wooden Bat
Some potters like to wedge directly onto their wheel head. Wedging does require that the surface is a little absorbent and ‘grippy’. So, if you want to wedge on your wheel head, you need to use a wooden bat as a wedging surface.
The wheel head is a relatively small surface area for wedging, but it is very solid. So, if you want to keep your pottery equipment to a minimum, this is a simple solution.
13) Diatomaceous Earth Board
An inventive suggestion as a clay wedging surface is diatomaceous earth board. Diatomite is soft sedimentary rock. It’s very absorbent and is used in various household items like boards for drying dishes, door mats, and bath mats.
A lot of diatomaceous beart boards have a texture on them. But you can buy smooth ones that work well as a clay wedging surface. For example, this bathmat has a textured top side, but if you flip it over, the underside is smooth.
One of the key qualities of diatomaceous earth is that it is absorbent. So, for this reason, it’s helpful for wedging clay that is a bit on the soggy side.
If your clay is a little dry, then it might be an idea to avoid this surface. But it’s a handy option to have in the studio if you are trying to recycle wet clay.
Visit The Pottery Wheel Store
Fancy treating yourself to some homemade pottery? Looking for a unique gift? Check out my handmade pottery store…
Other Tips About Your Clay Wedging Surface
Here are a couple of other tips to bear in mind when selecting your wedging surface.
The Height of Your Wedging Surface
Wedging is physically demanding and it can be tough on your wrists. It’s a good idea to take some time to get your wedging surface at the right height. This will differ from person to person.
However, one way to gauge the right height is to stand with your hands relaxed by your side. Your wedging surface should be parallel to the tip of your fingers as they hang down.
If you’re adapting a table you may need to shorten the legs to make it the right height for wedging. Or you may need to build the height up a bit, depending on the dimensions of what you are using.
Stabilizing Your Wedging Surface
Wedging involves pushing your clay about and at times slamming it. This can make your clay wedging surface slide and bounce around. So, it’s a good idea to find a way of keeping your wedging surface in one place.
The way you keep it static will depend on the surface you are using. If you are using a heavy table or dresser this won’t be an issue. Otherwise, you can improvise with G-clamps, wooden braces, and a non-slip mat.
Alternatively, you can nudge your table up against a wall. Or better still you can make a fold-down wedging table. This has the added advantage of saving space when you are not using it.
Final Thoughts
Most potters will admit that wedging is not their favorite part of making pottery. However, wedging your clay thoroughly will make your life a lot easier, particularly if you are throwing on the wheel. Finding a clay wedging surface that suits you is one way of making the wedging experience less tiresome.


