One of the terms that you may hear applied to clay is the word ‘greenware’. But what is greenware and what exactly can you do with it?
The term greenware refers to clay that has been shaped into its desired form but that has not yet been fired in a kiln. Greenware consists of 3 different stages, including soft workable clay, leather hard clay, and bone dry clay. Once it is bone dry, it can be fired and turned into ceramic ware. When clay has been fired, it is no longer greenware.
As such, greenware is a broad term that applies to pottery before it has been fired in a kiln. However, the story doesn’t end there. There are lots of important things to know about greenware pottery. In this article, I will look at the following key areas that you need to know about greenware…
- The 3 stages of greenware
- Why is unfired clay called greenware?
- Tips on drying greenware clay
- How to handle greenware pottery
- Buying greenware pottery
- Mending greenware pottery
- Recycling greenware clay
- Decorating greenware
- Preparing greenware pottery to be fired
- Firing greenware pottery
- The difference between greenware clay and Chinese Green Ware
What is Greenware?
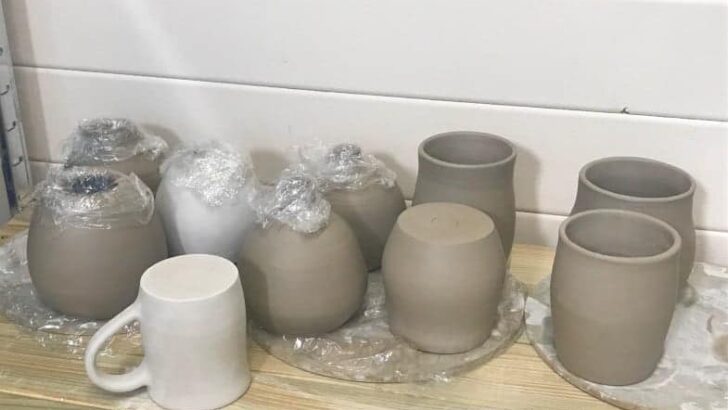
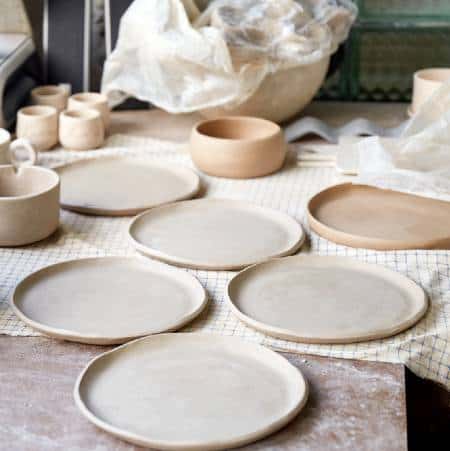
Before it’s fired and whilst it’s being made into pottery, clay goes through 3 distinct stages. At any point in this journey, the clay is referred to as greenware pottery.
The 3 Stages of Greenware
The first stage is when the clay is still soft and workable. The second stage is when the clay is beginning to dry out and harden. This is called the leather hard stage. And the final stage is the bone dry stage. Let’s take a closer look at each of these stages individually…
Stage 1 – Workable Clay
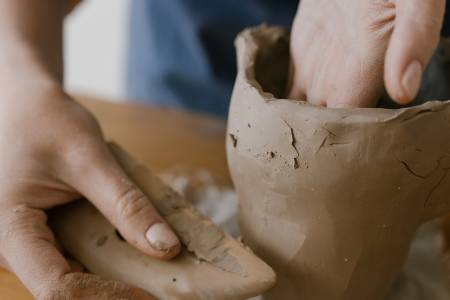
When clay is workable it still contains enough water so that it is soft and pliable. There is water actually in the clay particles. And there is also water between the clay particles. It is this water that allows the clay particles to glide over one another so that the clay can be shaped.
In its soft, workable state clay is referred to as being ‘plastic’. The clay can be pinched, rolled, and bent, without cracking. If the clay is starting to lose some of its moisture, it can start to crack a little when it’s being shaped. However, at this point, you can smooth out cracks easily with your thumb or a modeling tool.
Stage 2 – Leather Hard Clay
The moisture in clay starts to evaporate as soon as it is removed from its plastic bag. Eventually, it will have lost enough of its water content that it will start to stiffen up. This is a gradual process. However, there is a point at which the clay becomes leather hard. When clay is leather hard, it is still greenware, it has just changed its physical properties.
Leather hard clay goes through three phases. They are as follows…
Soft Leather Hard Clay:
When clay is soft leather hard you can still bend and flex it a bit. And if you pinch between your finger and thumb the clay will still compress and change shape.
However, it is much stiffer than plastic clay, so you can pick it up easily without it losing its shape.
Stiff Leather Hard Clay:
This stage is also sometimes called the ‘hard cheese’ stage. At this point, the clay still has quite a bit of moisture and a little bit of flexibility left. You can carve into the clay at this point without it crumbling and you can join pieces of clay successfully using clay slip.
Dry Leather Hard clay:
At this stage, the clay is hard enough so that if you try to bend it, it will break. The clay has started to get a little lighter in color, and if you carve into it, or try to trim your work, the clay will start to feel a bit crumbly.
Joining pieces of clay at this point is difficult. This is because the clay is quite dry and when you apply slip to bond the two pieces together, the moisture is sucked out of the slip quickly. As such, the slip dries out and doesn’t glue the two pieces together.
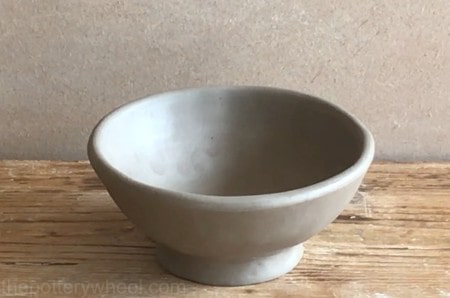
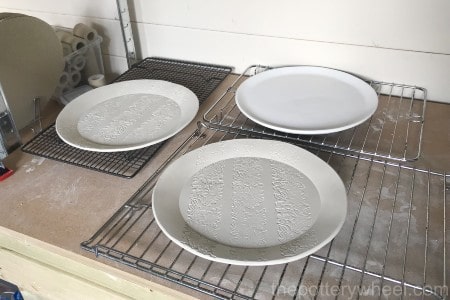
Stage 3 – Bone Dry Clay
When clay is drying out, the final stage that greenware clay goes through is to become bone dry. Clay is bone dry when it has lost as much moisture as it can before it is fired.
Greenware clay contains two categories of water. One category is called mechanical water. This is the water that sits between the clay particles. As clay dries out in the air, mechanical water migrates from the deeper levels of the clay outwards to the surface and evaporates.
The second category of water in clay is chemically bonded to the clay particles themselves. This is known as chemical water and it is only driven out of the clay during the firing process.
Clay is bone dry when it has lost as much chemical water as possible in the surrounding atmosphere.
It’s important that greenware clay is bone dry before it is fired. Any moisture left in the clay when the pottery is fired will turn to steam when the kiln reaches 212F (100C). When it turns to steam it expands rapidly and fills any small air pockets and bubbles in the clay. This puts a lot of pressure on the clay and can cause the pottery to crack or explode in the kiln.
Why is Unfired Clay Called Greenware?
There are a couple of suggested reasons why unfired clay is called greenware. The first suggestion is that the word ‘green’ refers to things that are not ‘ripe’ yet and that they need to go through some changes and growth before they are ready (source.)
The second suggestion has a similar logic. The thinking is that ‘green’ wood is alive and still contains damp sap. In a similar way, clay that is still damp is ‘green’ ware (source).
This second suggestion overlooks the fact that bone-dry clay is also a stage in the clay’s greenware journey. However, it is true that no matter how dry bone dry clay feels, it will still contain moisture nestled deep down.
That’s why it’s recommended that the first part of a firing schedule is slow. A slow bisque fire is a way of helping to nurse the clay through the many changes that it goes through during the firing process.
Tips on Drying Clay
Clay shrinks and can change shape when it is drying. This can cause clay to warp as it dries or it can cause your pottery to crack.
Part of the problem is that the edges of a piece and fine details like handles dry faster than other parts of the pottery. As they dry they shrink. If one part of the pot is shrinking faster than another, then it puts the pottery under strain. This can result in warping or cracking.
There are certain things you can do to help avoid these difficulties. Here are some tips:
- Dry your pottery slowly by keeping it loosely covered as it dries.
- Avoid putting your pottery in the sun or in a drafty area where one part will dry quicker than another.
- Turn your pottery upside down as soon as it can be handled without losing its shape. This will create a seal around the rim of your pot and prevent it from drying quickly.
- Keep handles and fine details covered in plastic.
- Transfer pottery onto a grid or rack as soon as you can, so that air can circulate around the whole piece.
- If you are drying large flat slabs like tiles, start the drying process with the tiles sandwiched between two boards. For example, sandwich them between wooden pottery bats.
How to Handle Unfired Clay
When clay is workable and soft, it can lose its shape if you don’t handle it with care. The good news is that when the clay is plastic, you can often shape your piece again so that all is not lost.
However, when clay is bone dry it is extremely fragile. It can chip and break easily if handled without care. And details such as handles can snap off very easily if too much pressure is applied.
As a result, it’s best to avoid moving bone dry greenware clay around too much. However, you may need to transport your greenware between venues. For example, if you take your pottery to be fired at a kiln elsewhere. I’ve written a guide on how to transport your greenware safely if you are in this position. You can check that article out here.
Can You Buy Greenware Pottery?
Because greenware pottery is so fragile, it’s very unusual to find a pottery supplier who sells it. The chances of it breaking in transit are very high.
Whilst suppliers might make their own greenware to sell, these pieces are fired before they are shipped to customers.
Can You Mend Greenware Pottery?
So, what happens if the worst occurs and you accidentally break your greenware pottery? Can it be mended?
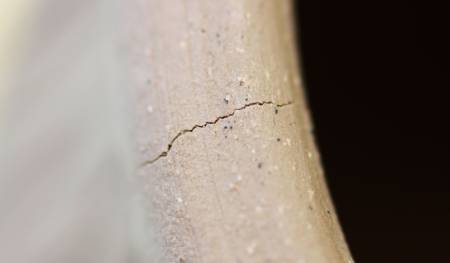
This depends a bit on how serious the damage is. If you find that there is a fine hairline crack in one of your pieces, you can try to repair this.
One way to try to repair a hairline crack is to drop a little vinegar and water onto the damaged area of clay. This will moisten the clay, so you can use a small modeling tool to work the area around the crack.
Vinegar is a ‘flocculant’ which means that it causes the particles of clay to stick together. I’ve found that I can repair some small cracks using this method.
Sometimes a small dent is left behind in the clay where the modeling tool has worked the crack. It can sometimes help to fill the dent with a mixture of slip and vinegar.
A Word of Caution About Mending Cracks
Whilst it is sometimes possible to repair hairline cracks in this way, there are a couple of things to be aware of…
- If a crack appears around a handle join, it’s probably best to recycle the project and start again. A crack at the greenware stage is likely to be a point of weakness once the pottery has been fired. You don’t want a handle coming off a mug or teapot which contains hot drinks.
- If the crack is larger than a hairline crack it is hard to repair. Usually, cracks in greenware get larger as the clay dries out and when the clay is fired.
That being said there is a product called Magic Mender which can be used to fix both greenware and bisque pottery.
It’s also worth mentioning that certain types of greenware clay are easier to mend than others. For example, Paper Clay is ceramic pottery clay that contains added cellulose fibers. These fibers give paper clay additional strength and it’s possible to join pieces of bone dry paper clay together.
Can You Recycle Greenware Clay?
It can be very disappointing when your greenware cracks or warps. However, the silver lining to this cloud is that potters often learn most from their mistakes.
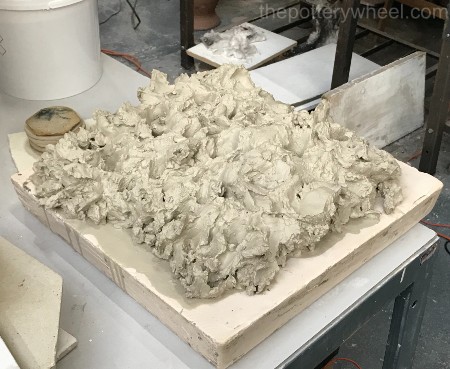
The other bit of good news is that greenware can be recycled, so you don’t need to waste your valuable pottery clay.
At any point, before clay has been fired, it can be rehydrated and recycled. If your greenware clay is dry, you can break it up into smaller pieces and submerge it in a bucket containing some water. Once the clay has reabsorbed the water, you can mix it up and wedge it so that it’s reusable.
Alternatively, if the recycled clay is very soggy, you can dollop it on a slab of plaster. The plaster will draw excess water out of the recycled clay. When the clay is a little less gloopy and slurry-like, you can then wedge it and use it again.
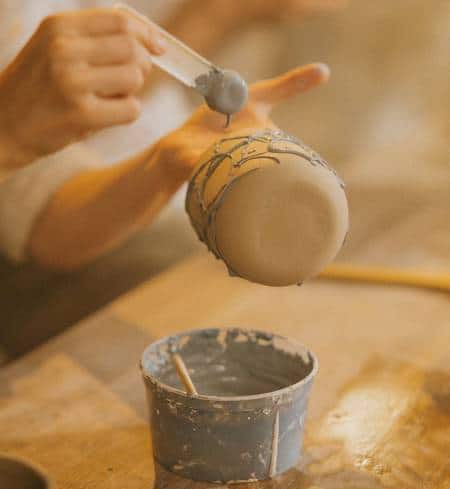
Decorating Greenware
There are a lot of ways that you can decorate greenware. Some suggestions are:
- Adding texture to the clay through carving, or using texturizing stamps
- Using liquid decoration such as slips, engobes, or underglaze
Most of the time it’s best to decorate greenware before the clay is bone dry. Whilst you can carve dry clay, it’s fragile and crumbly, and it creates a lot of clay dust. Inhaling clay dust is bad for your lungs, so it’s best to avoid techniques that make dust.
One carving technique is called sgraffito. I find the best time to use sgraffito tools on clay is when the clay is soft leather hard. The clay carves easily, but the clay that you carve away is dry enough that it just falls away from the pottery surface.
Likewise, if you are decorating your greenware with a liquid like underglaze or slip, it’s best to apply it to leatherhard clay.
If you paint colored decorating slip onto bone dry clay, the dry clay will draw the water out of the slip quickly. The slip will dry out very fast and peel away from the surface of the pottery, rather than bonding to it.
The same thing happens if you apply underglaze to very dry clay. So, it’s best to paint or spray decoration onto clay that contains enough moisture to bond with the decorative liquid.
Some potters skip bisque firing altogether. Instead, they apply glaze directly to the greenware pottery and glaze fire the pottery from start to finish in one firing. This is called ‘single firing’ or ‘raw firing’.
Potters who love raw firing can be very passionate about it. If you’d like to know more about it you can check out my article here.
Preparing Pottery to be Fired
I mentioned earlier that it’s best not to do things to greenware clay that will make a lot of dust.
Having said that, there are times when it’s helpful to sand your bone dry clay a little. Generally, it’s best to tidy up your pottery as best you can when the clay is still a little workable. However, there are times when you will notice some blemish on the greenware that it’s best to smooth away before it’s fired.
On these occasions, I gently sand greenware. It’s much easier to sand away blemishes before clay has been bisque fired.
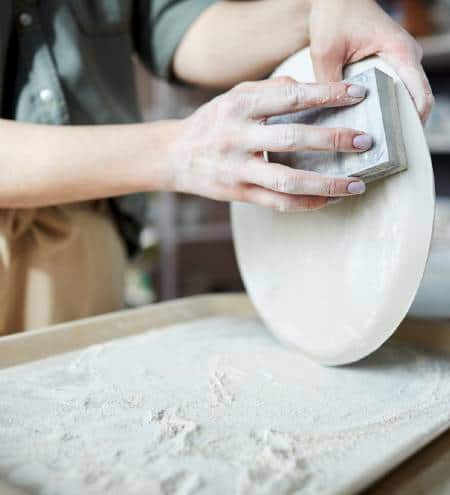
When I’m sanding greenware clay, I make sure to do it outside in the open air to avoid dust build-up in the atmosphere. And I wear a mask to minimize the chances of breathing in clay dust.
Once the greenware is bone dry, it’s ready to be fired. If you are in any doubt about how dry your pottery is, it’s best to candle the kiln for a few hours before doing the bisque fire.
Candling involves holding the temperature of the kiln at around 194F (90C) for a few hours. This ensures that any residual free water has evaporated from the clay before the kiln goes above 212F (100C).
Bisque Firing Pottery
When you are glaze firing pottery, you have to be careful that the pots aren’t touching one another. This is because when the glaze becomes hot, it melts, and if pots are touching then the glaze will stick your pieces together.
The good thing about firing greenware pottery is that your pots haven’t been glazed yet. This means that you don’t need to worry about your pieces resting against one another in the kiln.
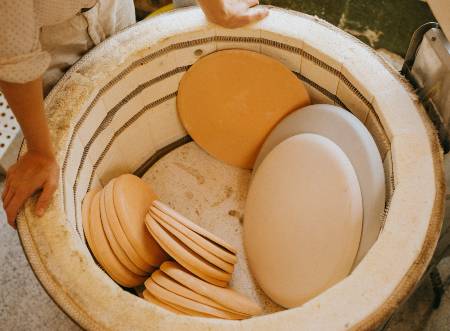
As a result, you can stack greenware pots inside one another, provided that you aren’t putting too much weight or stress on any one piece. And you can fit a lot more into a bisque firing.
In fact, you can rest pieces like plates and platters against the wall of the kiln, as long as you avoid resting the greenware against the kiln elements which get red hot when firing.
Chinese Greenware
I also wanted to mention that the name Greenware is used to refer to a particular kind of pottery that originated in China. It was developed as early as 960-1270 AD (source).
Chinese Greenware is sometimes referred to as Green Ware. It is glazed with a jade colored translucent glaze called celadon. The term ‘celadon’ was actually coined in Europe around the 17th century. However, Chinese greenware is now often referred to simply as Celadon.
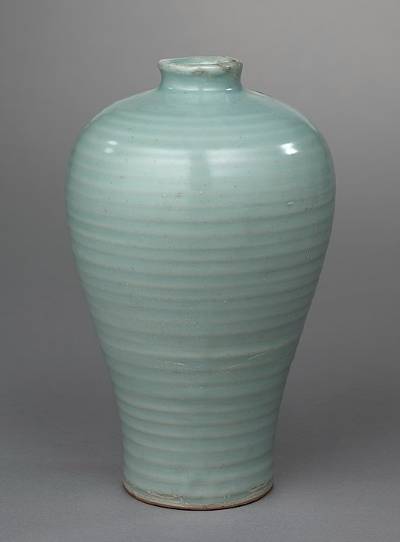
via Wikimedia Commons
Final Thoughts
Greenware makes up the building blocks of all pottery. It can be shaped, decorated, dried out, rehydrated, and ultimately recycled if you aren’t happy with what you have made. Once your greenware pottery has been fired, there is no turning back. But until it has gone through the magical change from clay to ceramic in the kiln, greenware clay remains endlessly forgiving and versatile.


