Using clay that’s in good condition makes pottery making a lot easier. To keep it in good shape it’s important to know how to store pottery clay. Here are some essential tips on storing clay, so it’s in tip-top condition.
You can store pottery clay either in a dry state or a moist state. If kept in moist conditions, it needs to be stored in an air-tight sealed bag, and preferably in a lidded storage box too. By contrast, if clay is stored in its dry form, it needs to be contained in air-tight conditions to keep moisture out.
Most potters store their clay in a moist condition. So, let’s take a look at how to store wet clay first.

How to Store Moist Pottery Clay
Pottery clay dries out quickly, and storing it well is all about managing the environment to prevent this.
Choosing the Right Place to Store Your Clay
The first thing to think about is where you are going to store your clay. Ideally, you should store clay in a cool place, out of direct sunlight.
1) Avoid Excess Heat and Light
You might like to make your pottery by a large window or in a conservatory that lets in a lot of light. But if the room gets very hot in the sun, it’s better not to store your clay by the window.
Instead, find a room or a closet that is shaded from the direct sun to keep your clay when you are not working on it.
Even when clay is stored in a thick plastic bag it will still lose moisture over time. And this is accelerated if your clay is stored somewhere that gets very warm.
Dehumidifiers will also make clay dry out more quickly too. So, you might also want to store your clay in a different space whilst the dehumidifier is working.
2) Avoid Excess Cold
Workable pottery clay has a water content of around 20%. If the temperature in your pottery space drops below 32F (0C), your clay will freeze.
Clay that has frozen can still be used. However, you will need to let it thaw out gradually. And then you will need to wedge it well before using it.
When clay freezes the ice crystals force the clay particles apart. This gives the clay a funny stiff but wobbly consistency when it’s thawed out. And it can create splits or gaps in the clay that need to be wedged out before you can use it. You can read more about what to do with clay that has been frozen here.
Either keep a wall heater on in your pottery space to stop the temperature from dropping below the point of freezing. Or move your clay to another warmer space when the weather gets cold.
Moving Clay Between Storage Areas
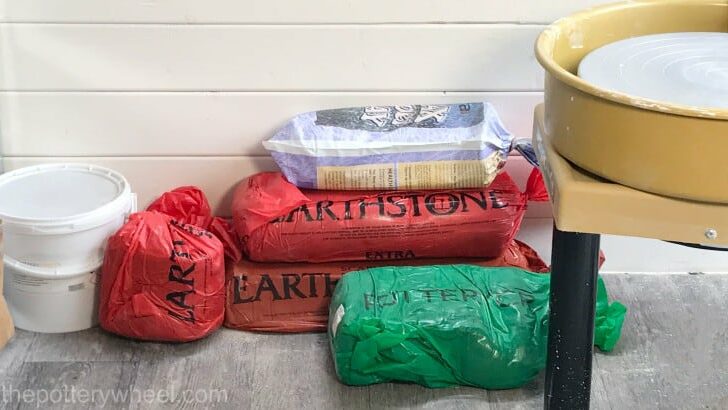
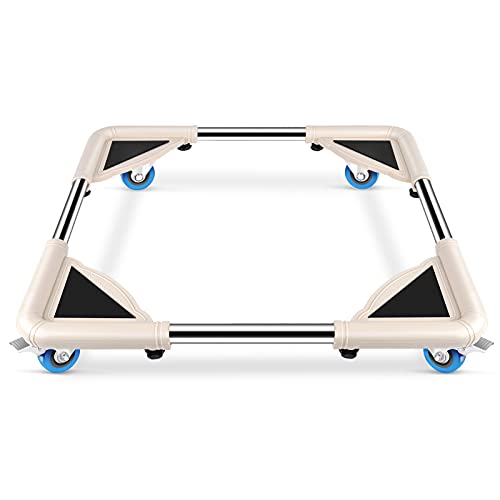
Clay is heavy and it can be a pain to move bags of clay trying to protect it from the elements. You can make this easier by storing your clay on a sturdy trolley with wheels.
You can buy portable clay carts to store your clay. These are large steel boxes on wheels that can be moved around easily. However, they are expensive.
A more affordable option is to store your clay on a furniture dolly.
Put a sheet of plywood on a furniture dolly and stack your clay on the sheet of wood.
This can then be wheeled easily from room to room. And will save you from straining your back.
Alternatively, you can use a hand cart and dolly. You can load this up with clay like a builder loading up with bricks and then wheel your clay between rooms or buildings.
Proper Packaging and Containers for Clay
Your clay will likely be delivered to you in a thick plastic bag. This will fit snuggly around the clay and it’s best to leave your clay in its original bag.
Nevertheless, once you open the bag, air will get in and the drying-out process speeds up. Here are some ways to slow that process down as much as possible.
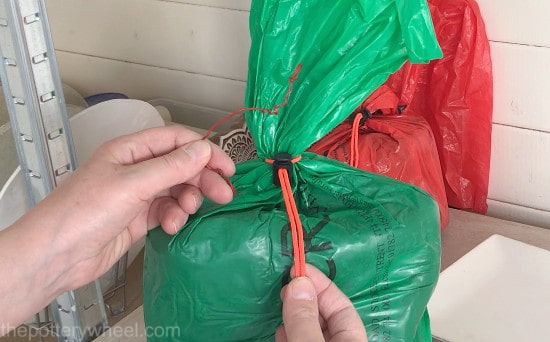
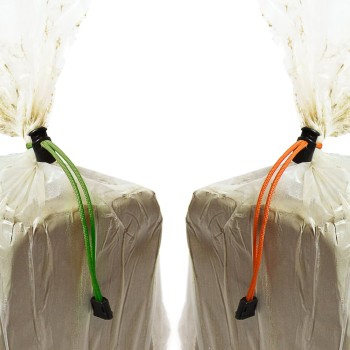
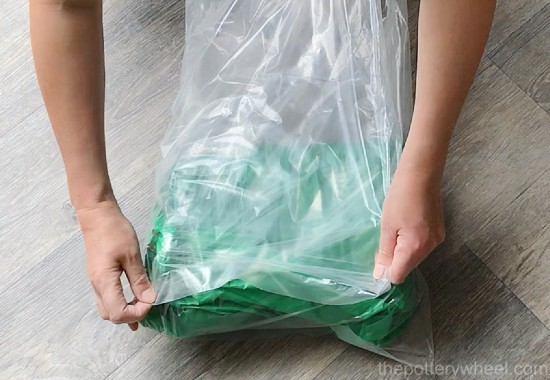
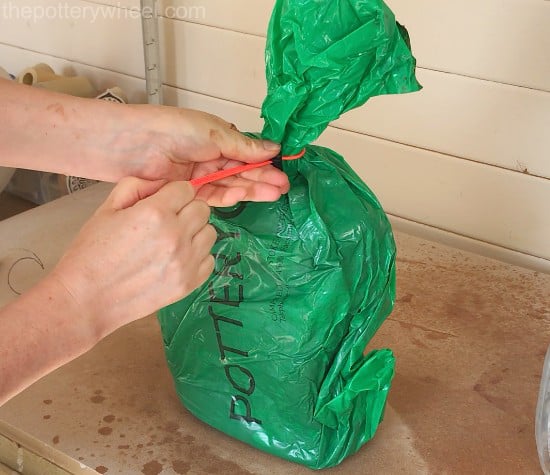
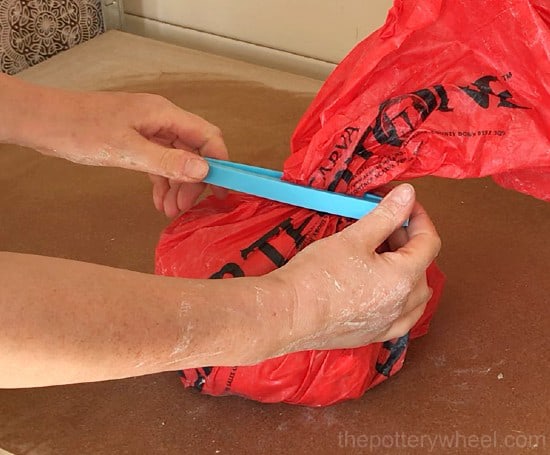
Sealing Your Clay Bags Well
Once you’ve used your clay, press the air out of the bag and seal it up again. The clay will probably come with a wire tie that you twist around the plastic bag.
But somehow these little wire ties always seem to get lost. Xiem makes some handy clay bag ties. I find these easier to use than the wire ties that the clay comes with, and you can slide them close to make an air-tight seal.
Another handy option is to use these clips for food storage bags. They don’t last as long as the Xiem bag ties, but they will do in a pinch.
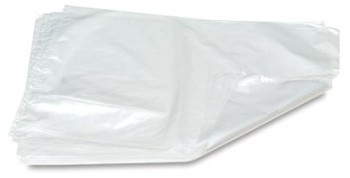
Pottery Clay Storage Bags
In addition to the bag that the clay arrives in, I tend to store my clay in a second thick plastic bag. This helps to reduce moisture loss even more.
I’d recommend using clear bags so that you can see which clay body is inside the bag. With a clear bag, you can see the original bag that the clay arrived in and you don’t have to unwrap it each time to check.
Also, I’d avoid using black storage bags as these absorb heat, which you want to avoid. Here are some great heavy-duty clay storage bags.
Clay Storage Bags – View on Blick
You might also find this video helpful. It describes a handy way to wrap your clay in a large plastic bag to get the maximum benefit of a few layers of plastic.

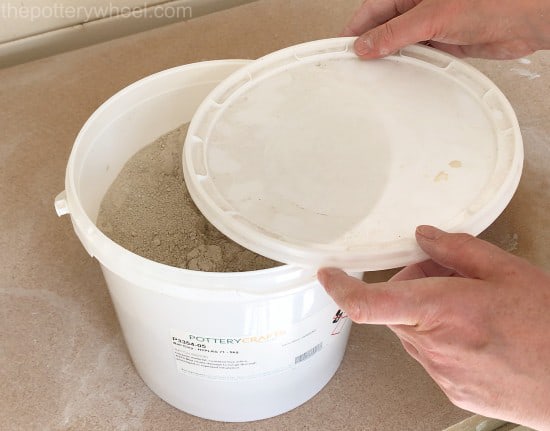
Pottery Clay Storage Containers
If you live in a place with a mild temperature that gets neither too hot nor too cold, wrapping your clay in plastic bags may be sufficient.
However, to be on the safe side, it’s also a good idea to store your pottery clay in a lidded plastic storage box. I live in a place where it can be hot and sunny one day and pouring with rain the next. So, I try to keep my clay in an atmosphere that is as regulated as possible.
Once I’ve bagged up my clay, I also place it inside a plastic storage box. This creates helps to control the conditions that the clay is stored in.
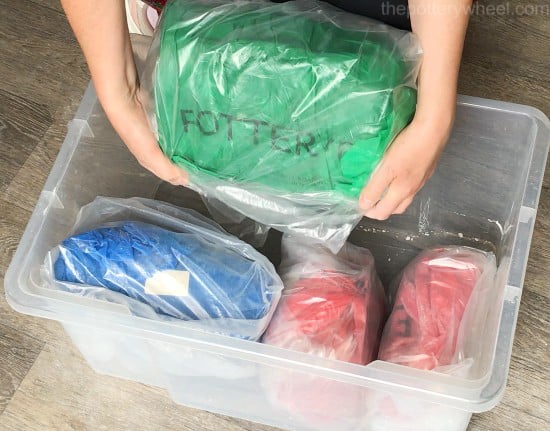
Here is a recommendation for a pottery clay storage container. They need to be strong, lidded, and ideally clear so that you can see inside without having to open them.
It also helps to keep the atmosphere moist. So, you can put a dish of water in the box too. This makes the air in the box moist and helps to prevent the clay from drying out.

One genius suggestion that I came across recently was to store your pottery clay in an old refrigerator. The beauty of this is that the door on a fridge is sealed tight, and you have lots of shelves. You can put a slab of damp plaster in the fridge to keep the air moist.
If I had the space for an old fridge in my pottery studio, I’d seriously consider this suggestion. Alas, I’m pushed for space as it is, so I will have to stick with my plastic container boxes.
How to Store Clay So It Doesn’t Dry Out
If you find that your clay has become a little hard and dry there are things you can do to soften it up again. Here are a few of the best ways to revive your stored clay.
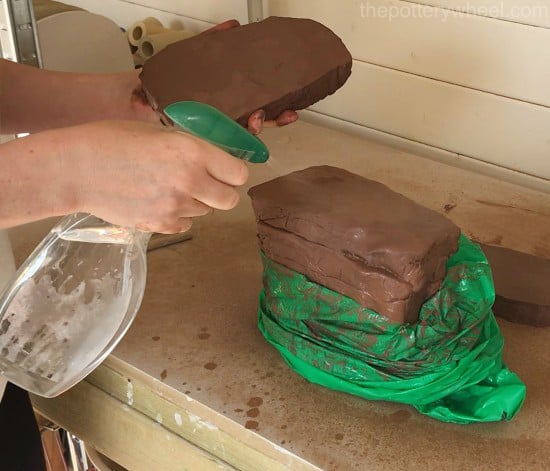
1) Slice and Spritz The Clay
Slice the clay into sections, and spray between each slice with water. Put the slices of clay back together like a loaf of bread and then reseal the bag. After 24 hours the moisture in the clay will have evened out.
Because you’ve sliced the clay, will need to wedge it well before you use it. But it’s a good way to reintroduce moisture throughout the clay body when you store it.
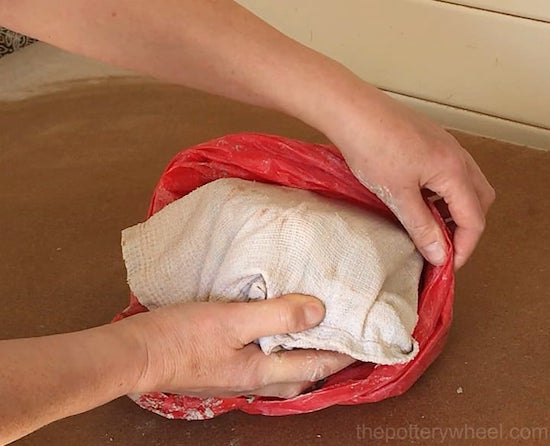
2) Wrap The Clay in a Damp Cloth
Run an old towel under the tap and then wring it out so that it’s damp rather than soaking.
Take your clay out of the bag and place the block of clay on the towel. An old kitchen towel is good as it’s thick but not too bulky. Wrap the damp towel around the clay and then put the towel and clay back in the bag. Leave the clay overnight and it will soften up in the towel.
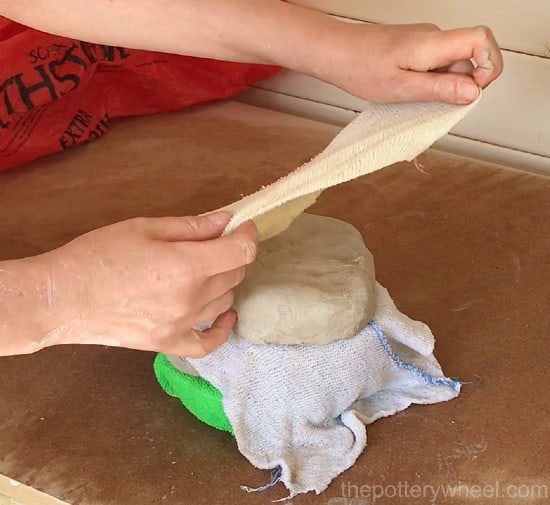
I also use a variation of this technique. If I have a block of clay that is a bit too hard to use, I slice off sections in the quantities that I know I’m going to need the next day. Wrap these sections in a damp dusting cloth and put them in a plastic bag.
Leave these sections overnight. The next day, they will be ready to be used. That way you are rehydrating the quantities of clay that you know you will need.
3) Make Holes in The Clay for Water
Another way to refresh clay that has become a little dry is to poke some holes in it and then pour water into the holes.
Making holes in the clay allows you to reintroduce water right the way throughout the clay body. Once you have poured the water in, seal the bag up again and leave the clay to sit.
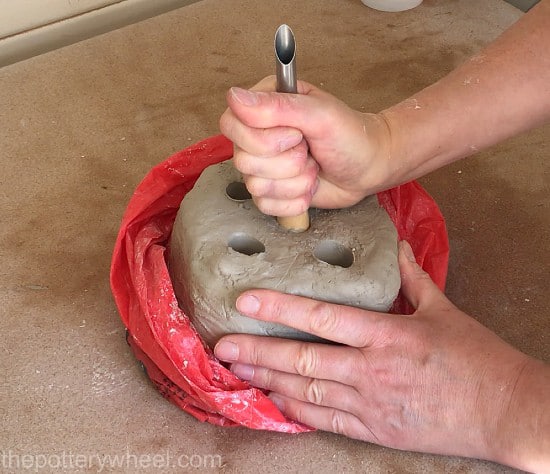
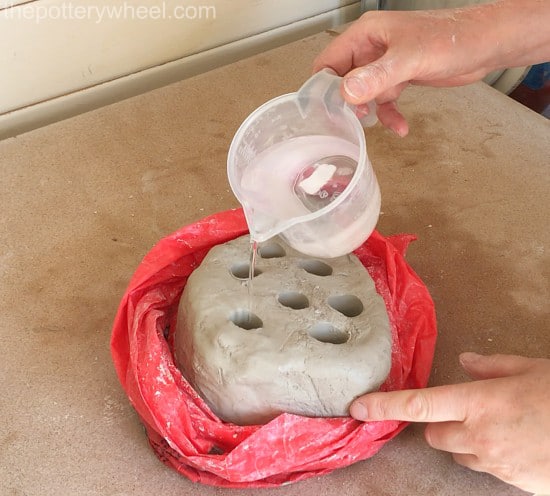
When the water has been absorbed, you will need to wedge the clay well. This will get rid of any pockets of air made in the clay when you poke the holes in it. Plus it will even out the consistency of the clay.
4) Sprinkle and Reseal The Clay
One of the simplest things that you can do is to sprinkle a bit of water in the bag and seal it up again. Leave it overnight and in the morning, the clay will have revived a bit.
I find this works if my clay has become just a little bit dry. Be wary of this technique though. If you add too much water, you will probably find that the clay in the bottom of the bag has become too soggy to use.
If that happens you will need to wedge the soggy clay to get rid of some of the excess moisture.
How to Store Clay Slabs
If you work with clay slabs, you will know that it’s easy to end up with lots of offcuts and spare bits of slab. When you want to store these spare slabs of pottery clay rather than recycle them here are some tips:
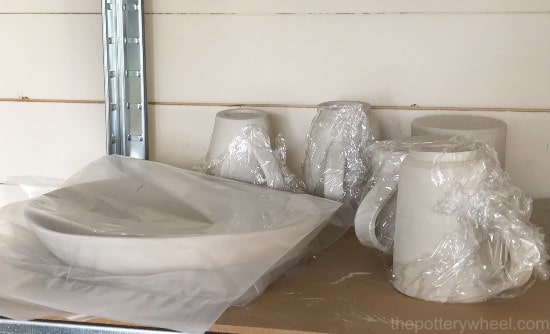
- Slabs of clay dry out quickly, so you need to cover them with plastic. I wrap small clay slabs in a layer of saran wrap. I then put the covered slab into another plastic bag to prevent the clay from drying out.
- Store your clay slabs on a flat surface. If they are resting for a long time on a wonky surface, the clay will want to return to that wonky shape when it dries out.
If you have more than one slab, you can store clay slabs stacked upon one another. This is how I store my slabs in a stack.
- Wrap one slab between sheets of plastic.
- Place a piece of plywood on top of the slab.
- Wrap another slab between sheets of plastic and put this on top of the plywood.
- Continue to alternate clay slabs with plywood to create a stack of slabs.
- Cover the whole thing with a plastic sheet to keep the edges of the slabs moist.
Pros and Cons of Storing Moist Clay
Storing your clay in its moist state has pros and cons. Let’s take a look at the advantages first:
The Advantages of Storing Moist Clay
- Your clay is ready for you to use as and when you need it
- It’s thought that clay matures with time and that the longer it sits in its moist state the more plastic and workable it becomes
The Disadvantages of Storing Moist Clay
- Keeping your moist clay in a usable condition can require a bit of monitoring. You need to check it regularly to make sure it doesn’t dry out.
- If you live in a place where the weather changes you may have to move the clay around to find the best place to store it at different times of the year.
- Moist clay can go moldy over time
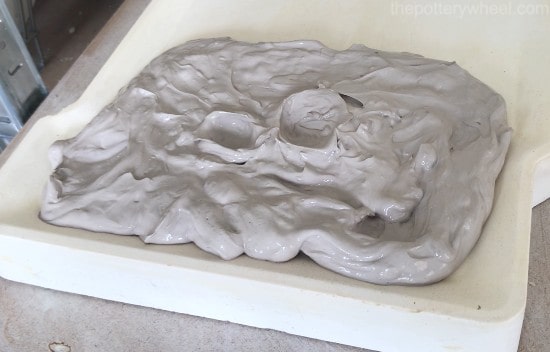
What to Do if Your Stored Clay Gets Moldy
If you find that your pottery clay has a bit of mold on it, don’t worry, this is normal. Clay is the perfect breeding ground for mold because it’s moist and it contains organic matter.
Here are a few options if you encounter mold on your clay:
If your clay grows a little bit of mold you can just slice it off and use the clay as normal
Alternatively, you can wedge the mold into the clay. Lots of potters swear that a bit of mold on their clay makes the clay more plastic and easier to use.
If your clay is very moldy, you can slice the mold off and then add a little Dettol or vinegar to your clay to prevent its regrowth.
You can read more about how to remove and prevent the growth of mold when you store your clay here.
How to Store Dry Pottery Clay
It’s also possible to store your clay in a dried form. Here are some of the pros and cons of storing dried clay:
Advantages of Storing Dry Clay
- It’s less maintenance as you don’t need to manage the moisture levels
- You don’t need to worry about your dry clay getting too warm or too cold
- It will store indefinitely with little or no attention
Disadvantages of Storing Dry Clay
- You need to prepare it when you want to use it. This will involve hydrating the clay and wedging it, so it’s less convenient than moist clay.
- If you store your pottery clay in powdered form, you need to make sure that it isn’t exposed to moisture.
Preparing Clay to Be Stored in Dry Form
This is how to store your moist clay in a dry form:
Slice your block of moist clay up into smaller pieces. The easiest way to do this is with a clay wire cutter or with a bow harp.
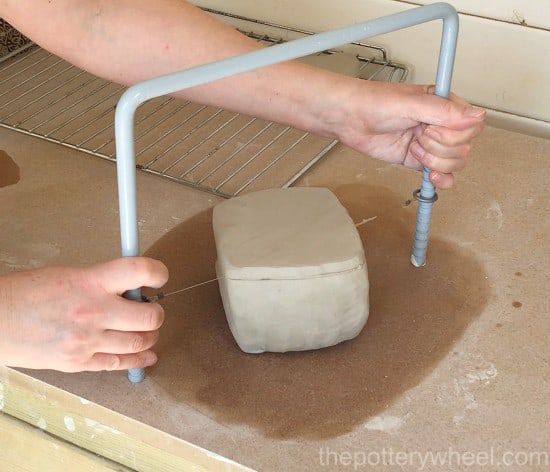
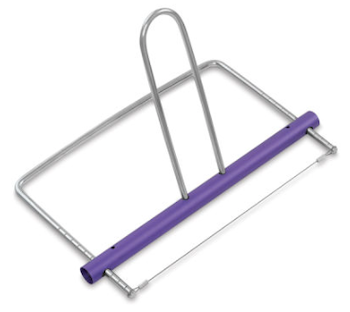
Adjustable Clay Slicer – View on Blick
Allow the clay slices to dry out thoroughly
Put the clay slices in a container that has an air-tight seal on it.

Using Clay That Has Been Dry Stored
Here is how to rehydrate the dry clay:
- When you want to use your dry clay, remove the number of slices that you need from the container.
- Put the dry slices in a bucket and cover them in water
- Allow the dry clay to dissolve, or slake down, into the water
- Mix the clay into a smooth slurry consistency
- Pour the slurry onto a slab of smooth plaster
- Allow the clay to firm up
- Wedge the clay to get rid of any air pockets and give it an even consistency
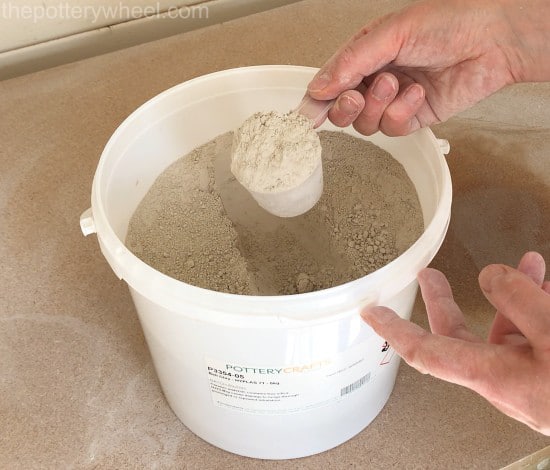
Storing Powdered Clay
Pottery clay is sold in powdered form. Some potters like to buy individual ingredients for clay and mix them together to make their own clay body. Others buy a readymade combination of powders and mix it with water when it’s been delivered.
Smaller quantities of powdered clay are often delivered in sealed plastic containers. Provided the lid and the seal are good on these clay containers, they are easy to store.
Larger quantities of powdered clay are sometimes packaged up in large toughened paper sacks. You need to store bags of clay like this in a dry environment so that they don’t absorb moisture and harden.
Alternatively, you can decant the dry powdered clay into sealed plastic containers.
How to Store Different Types of Clay
On the whole, the same guidelines apply whether you want to store earthenware, stoneware, or porcelain clay.
An exception to this is storing paper clay. Paper clay is regular pottery clay that contains paper pulp.
The paper fibers in the clay make it stronger which is beneficial if you want to hand build your pottery.
Storing Paper Clay
One of the problems with paper clay is that over time the fibers in the clay start to break down and it can become quite smelly.
Some potters add a few drops of bleach or Dettol to paper clay. This can help to prevent it from smelling over time.
An alternative is to store your paper clay in a dried form. You can dry out your paper clay in the way described above, and then store it in a sealed bucket.
Making paper clay is quite easy. You simply make some clay slurry out of your regular pottery clay, and then add some paper pulp fibers to the slurry.
The fibers can be blended into the slurry using a drill mixing bit. If you make your own paper clay, storing it in a dried form is easy.
Simply pour the newly made slurry onto a plaster slab and let it dry out completely. You can then store the slab of dried paper clay for as long as you like without the pottery clay starting to pong (source).
Can You Store Clay Outside?
If you have large amounts of clay and not enough space indoors to store it, you can keep it outside. Depending on the climate where you are, you will need to take some measures to keep the clay in good condition. Here are some steps you can take:
- Store your pottery clay on wooden pallets so that it is raised off the ground. This will prevent it from becoming waterlogged in the rain.
- Cover the bags of clay with tarpaulin to protect them from the elements. During the summer months, it would be a good idea to store it under a reflective tarpaulin which will reflect the heat rather than absorb it.
- Cover it with a frost blanket to protect the clay during the wintertime.
- Keep it in a shady area outside, ideally under some sort of covering like a lean too, or a shed.
How to Store Clay Projects
Here are some tips for if you are midway through making a clay project and you want to store it for a while between making sessions.
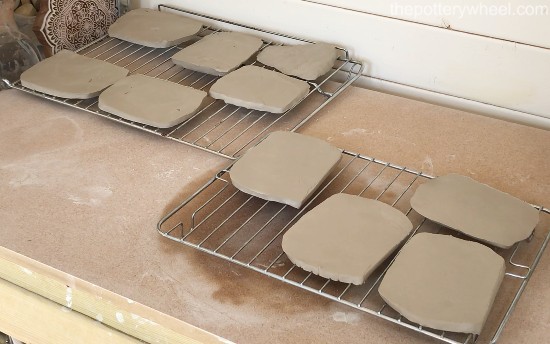
- Store your clay project on a ware board or a pottery bat. This will make it easy to move about.
- Put your project on a plastic pottery bat or board. Wooden boards will absorb moisture from your pottery, plastic will help retain moisture. If you don’t have a plastic board, cover your wooden board with a sheet of plastic instead.
- If it’s going to be a few days between sessions, it’s a good idea to cover up details and edges on the pottery with saran wrap. For example, carefully wrap handles with saran wrap, or fold some saran wrap over edges and rims.
- In addition to putting saran wrap on details and edges, also cover the pottery entirely with a sheet of plastic. Tuck the sheet underneath the edges of the board that the pottery is sitting on.
- If it’s not possible to tuck the edges under the board, find a way to secure the edges of the plastic sheet so that the sheet creates an enclosed space around the pottery.
- If your pottery has a textured surface or fine details make sure that the plastic sheet isn’t lying directly on top of the clay. Condensation can build up on the inside surface of the plastic sheet. If this touches your pottery it can make those areas of the clay mushy, and you might lose details on your piece.
Using a Damp Box to Store Clay Projects
A great way to store your pottery clay projects is to use a ‘damp box’. An easy way to make a damp box is to pour a 2-inch layer of plaster into the bottom of a plastic storage container. Allow the plaster to set and dry out.
Once the plaster is set, pour some water onto it and allow it to absorb into the plaster. Place your pottery pieces on the damp plaster and then put a lid on the container.
The damp plaster will keep your pottery hydrated. However, because the water is contained in the plaster it won’t make your pottery soggy. You can read my step-by-step guide on how to make a damp box here.
Final Thoughts
Pottery clay is not cheap, so it’s important to look after it and keep it workable. Learning how to store your pottery clay, may not be the most glamorous part of making pottery. But, taking some of the measures outlined above will help you save money and time. And ‘time plus clay’ equals happy days.


