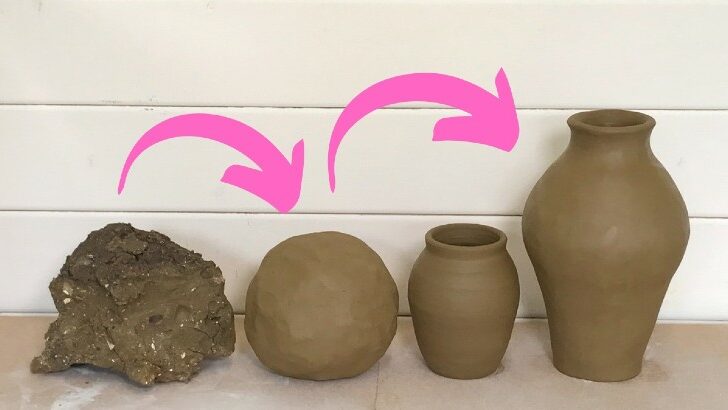
Buying clay from a pottery supplier is easy, but learning to make clay from dirt is incredibly satisfying. If you have ever been curious about how to find and process your own wild clay, this article is for you.
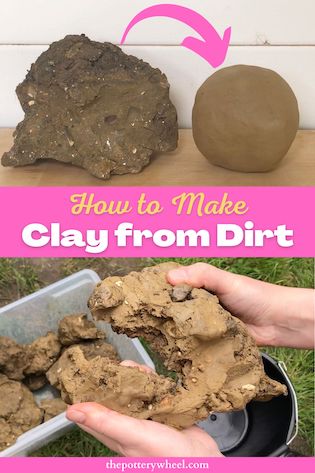
How to Make Clay from Dirt
For ages, I thought that you could only harvest natural clay if you lived in the countryside. Natural clay is another name that is used to refer to wild or native clay.
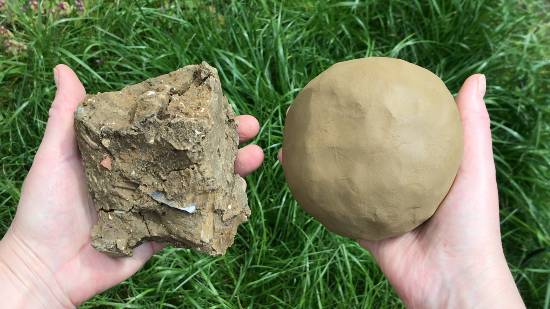
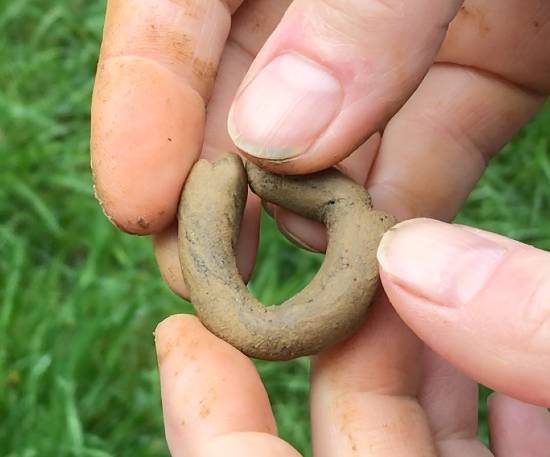
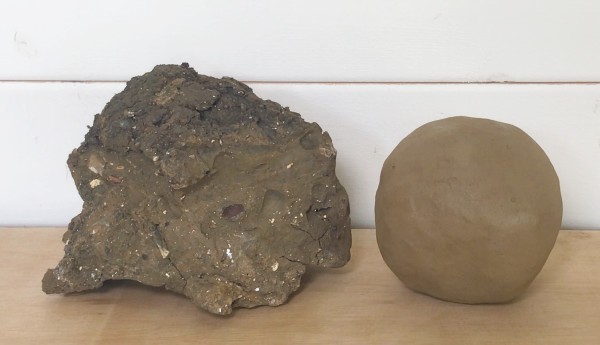
But it turns out I was wrong. Whether you live in a city or the countryside, it’s likely that you are surrounded by dirt that you can make into clay. Here is the process that I used to turn the dirt on the left-hand side of this picture below into the pottery clay in my right hand.
Finding Local Clay Deposits
Clay is different from soil or sand. If you pick up a handful of wet sand, you can compress it into a shape. Think of making sand castles on the beach. But imagine trying to squash the wet sand or roll it into a ball or coil. Wet sand will crumble.
The same is true of most soil that you find in your backyard. You may be able to make mud pies out of wet soil. But if you try to bend or stretch wet soil it will crumble or break.
This is because soil and sand lack an essential quality that clay has. That quality is called plasticity. Plasticity in clay is the moldable quality that allows the clay to bend and keep its shape when it is wet. Think about rolling out a sausage of clay and bending the clay into a ring.
If the clay bends into an arc without crumbling or breaking, it’s said to have plasticity. Some clay is more plastic than others, but all pottery clay needs to have some plasticity to make it moldable.
This is one of the qualities that you need to look out for when you are searching for local wild clay sources.
How Do I Find Local Natural Clay?
When I first started looking for wild clay, I began on the internet. I searched online for places where I could find local deposits.
This was not the right approach. The internet would have sent me hundreds of miles away from where I live, on a wild goose chase.
Actually, I have found the best thing to do is to simply go out and keep your eyes on the ground. Once I started to take notice of the quality of the ground beneath my feet, I started to see clay everywhere.
In fact, after just a little bit of research, I found that London (where I live), is built almost entirely on clay.
When I’m out walking in a rural part of the city (like a park, or along a canal) I keep my eyes open for signs of clay.
As soon as I started looking, I could see clay everywhere. It’s often on river banks, or on the slopes of hills that have been eroded by rainwater.
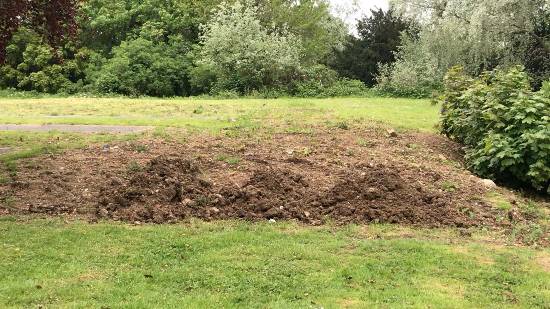
Another place where I have found clay is on ground that has been dug up recently by a builder’s digger. For example, I was walking recently in a local park. I noticed a pile of dirt that had been left by landscapers after making a pathway in the park.
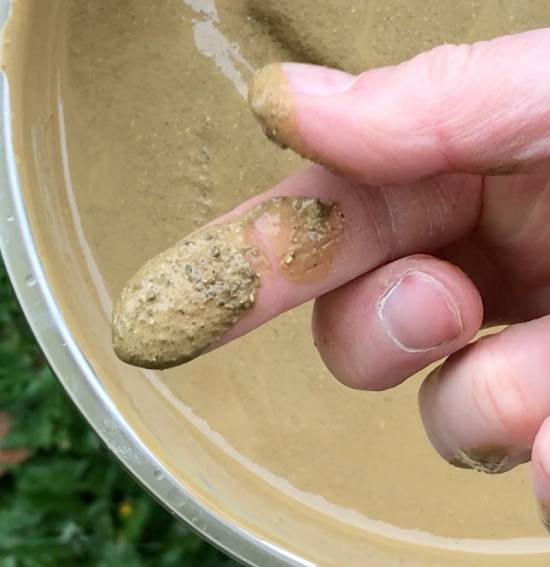
I looked closely at the dirt, and I could see it had the look of clay. It looked silty, smooth, and slightly orange/red. When I picked some up with my thumb and finger it had the plastic feel of clay.
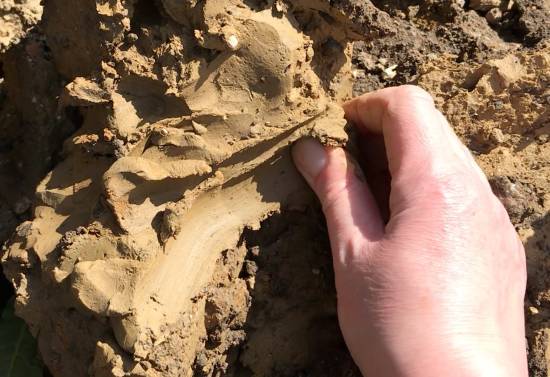
I scraped up a bit with my finger and rolled it into a coil. The coil bent like plasticine without breaking. If you can roll dirt into a coil and bend it without it crumbling, this is a sign that it has clay content.
Processing Dirt to Make it Into Clay
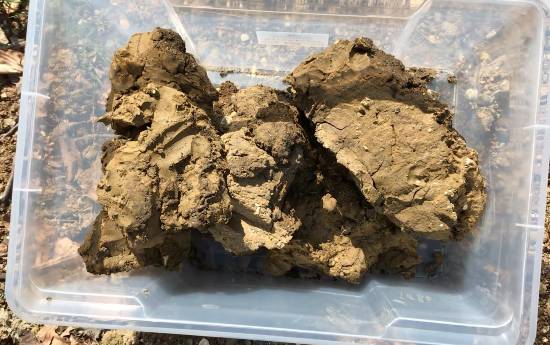
When you find your clay, it will be chunks of dirt that contain stones, grit, and vegetation. You will need to process your dirt to make it into useable clay.
Breaking Up the Clay into Smaller Pieces
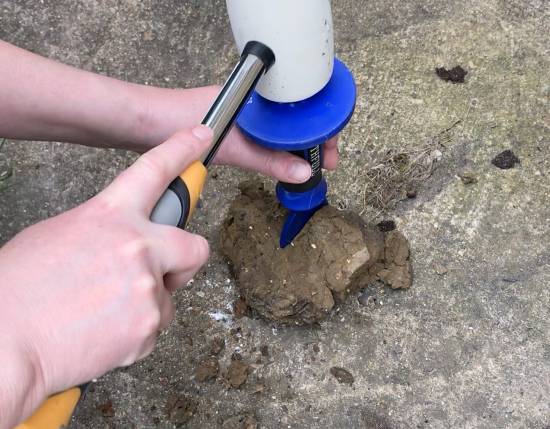
The first thing that I do is break the larger chunks into smaller pieces. Dirt that contains clay will stick together well and can be harder to break apart. It won’t just crumble in your fingers, and it may be too hard to break up by hand.
Instead, you can break up large chunks of clay and dirt with a wide brick chisel and mallet. Be careful with your fingers!
As you break up the chunks of clay, you will probably see stones, debris, and impurities in the dirt.
Dissolving the Earth in Water
Toss the smaller chunks of dirt and clay into a bucket. Add enough water to the bucket so that the chunks are submerged. It doesn’t matter if a few bits of clay are poking out of the surface of the water. As the dirt breaks down, it will all eventually submerge.

Cover the bucket so debris doesn’t fall into the water. There is enough dirt and debris in the clay already, so you don’t want to add more.
I usually cover the container loosely with another inverted bucket. As long as the liquid is more or less covered, then that is good enough.
I then leave the dirt to dissolve in the water. This can take some time. Clay that is submerged in water doesn’t dissolve especially easily. As mentioned earlier, when clay particles are bonded together by water, they will continue to adhere, even when submerged.
Mixing up the Clay and Dirt
Nevertheless, after a few days to a week, the clay will be soft enough to mix up. What you need to do now is to mix the clay and water into a pourable consistency. You could mix it by hand with a gardening fork or something similar. However, this would be quite hard work.
The quickest and most effective way to blend the remaining chunks is to use a paint-mixing drill bit. Attach the paint mixer to your drill then put it into the bucket that contains the dirt.
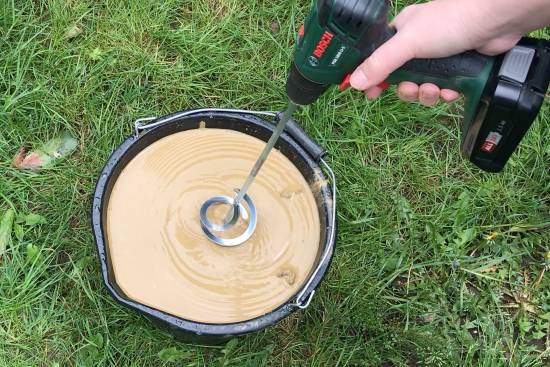
The drill bit will blend the dirt and water together into a smooth sludge-like consistency. The next step will be to filter out the debris from the sludge, so it will need to have a pourable consistency.
If I have a large bucket of sludge, I separate it into two buckets. I then mix some more water into the sludge to make it more liquid and pourable.
Filtering the Dirt Out of The Liquid Clay
After making a pourable liquid, I pass the mixture through a series of sieves to remove the dirt and debris from the clay.
I start off with a sieve that has large holes in it. This will remove the large stones and bits of vegetation from the liquid.
You can buy a set of gardening sieves, with different-sized meshes. I use a set that has a circular metal frame. The sieves are interchangeable, so I start off with the largest mesh size (approximately 1/2 an inch) and sieve the clay mixture.
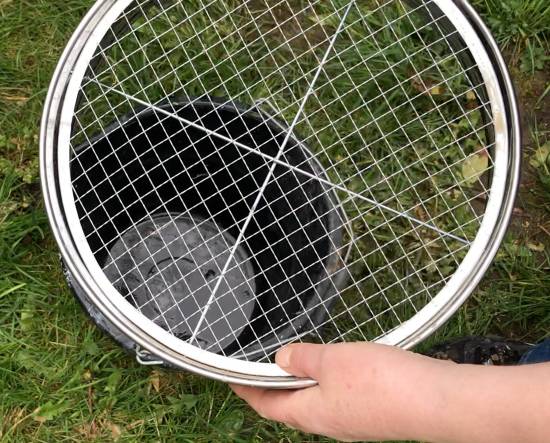
My gardening sieve set is 30cm (12 inches) wide. This fits on top of the rim of the bucket. I then pour the clay/dirt liquid through the largest mesh sieve.
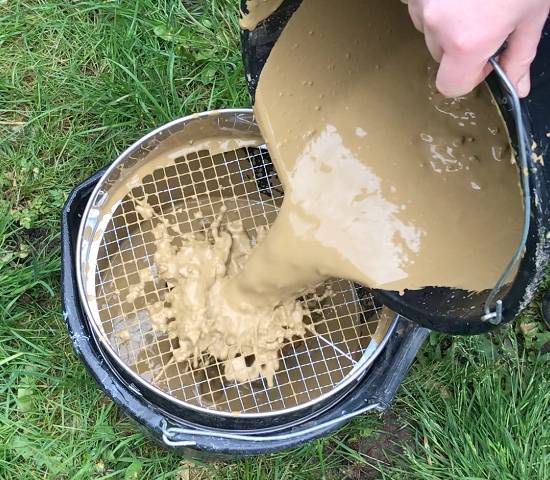
This filters out the large chunks of debris. Once you have done this, it’s a good idea to clean the sieve as soon as you are done. Otherwise, the dirt will dry on the sieve and make it hard to clean up.
I then repeat this process passing the liquid through progressively smaller mesh sizes. Each time you pass the liquid through a smaller mesh, it filters out smaller bits of debris.
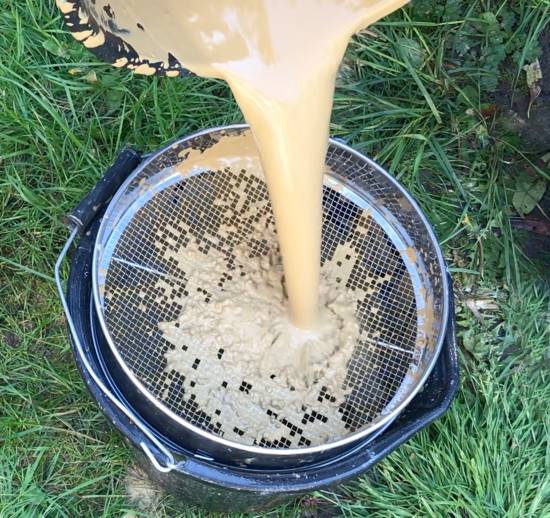
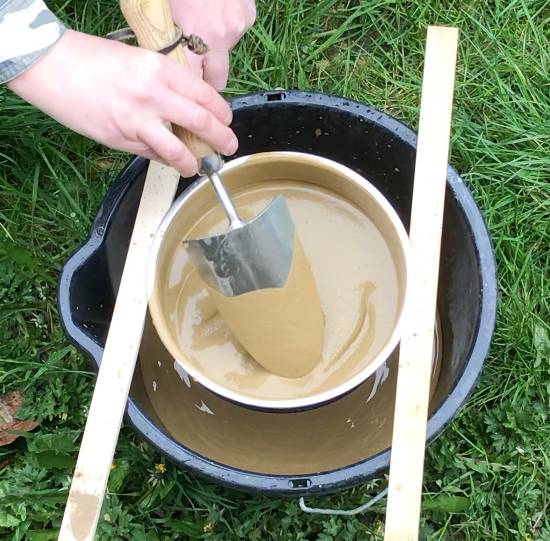
After the liquid has been passed through all the gardening meshes, I then strain it through a regular metal kitchen sieve.
The mesh on the kitchen sieve is smaller. So, to get the liquid clay to pass through you will most likely need to stir it gently with a garden trowel.
Refining the Liquid Clay
Once the liquid has been passed through the kitchen sieve, it will be pretty smooth. However, it will still contain small bits of grit and sand that are small enough to pass through the sieve.
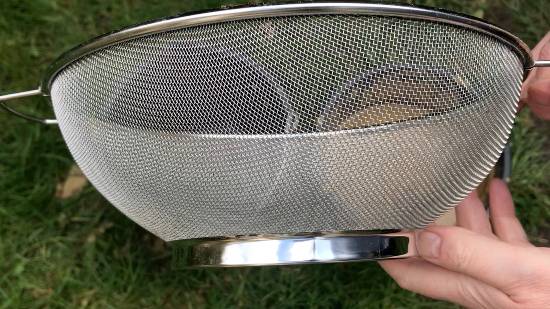
So, the final stage of refining the clay mixture is to pass it through a fine mesh sieve. Ceramic mesh sizes range from 25 to 325. The higher the number the smaller the hole in the mesh. So, a 100 mesh sieve will filter out more than a 50 mesh sieve.
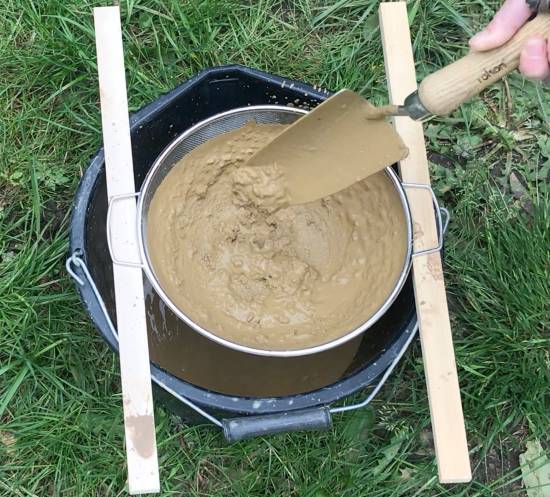
When making clay from dirt, I find a good-sized final mesh is a 60-mesh sieve. This mesh is refined enough to filter out a lot of the sand and debris without removing too much of the character of the harvested clay.

This 60-mesh sieve is smaller than the rim of the bucket, so I rest it on two wooden strips over the bucket.
The holes in the mesh are very small, so you will need to push the clay liquid through the mesh. I find that the quickest way to do this is to use a gardening trowel. Gently stir the liquid clay so that it passes through the mesh.
Once the liquid clay has passed through you can see the grit and debris left behind in the mesh sieve.
Drying Out the Liquid Clay
You now have a lovely creamy feeling clay slip. The next step is to separate the clay particles from enough water so that it firms up and becomes plastic workable clay.
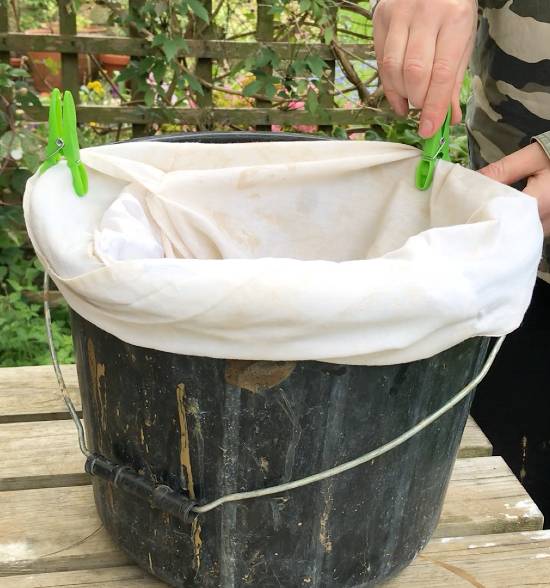
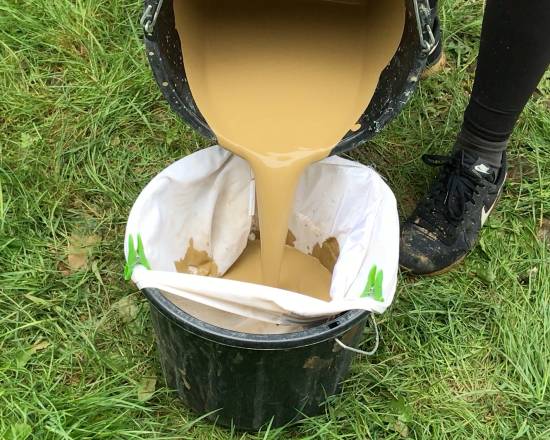
One way to do this is to pour the liquid clay into some fabric. The fabric needs to work like a bag that contains the liquid mixture and slowly allows the water to drain away. I find the easiest way to do this is to use an old cotton pillowcase.
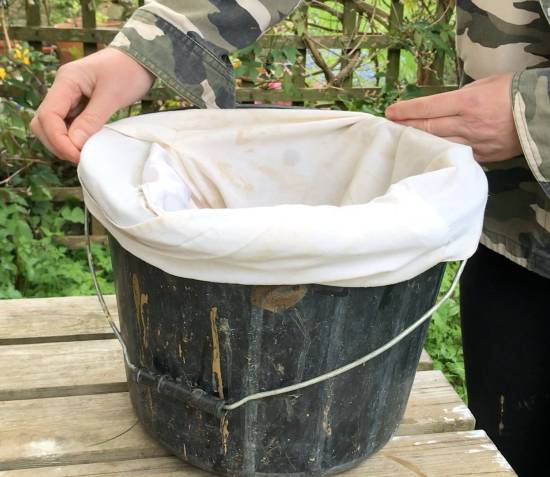
Line a bucket with an old pillowcase. Pour the clay liquid into the pillowcase. To prevent the pillowcase from falling into the bucket as you pour, you can peg it to the rim with clothes pegs.
Once the liquid is in the pillowcase, you need to find a way to hold it up so that the water drains away.
If you have a tree in your backyard that has strong branches, you can tie the pillow case around a tree branch.
There are two reasons that I don’t do this. Firstly, I don’t have any tree branches that are strong enough to support the weight. Secondly, I live in a place where it rains quite a bit. I need to be able to dry the clay out under shelter or inside so it doesn’t get soaked when it rains.
If you are in a similar situation, don’t worry. You can easily improvise with the resources that you have. This is how I tackle the situation…
Allowing the Water to Drain Away
I put a metal rack into a large plastic storage box. You can use an old oven rack. I usually raise the rack off the base of the plastic box by putting it onto some old Lego blocks. Raising the metal rack prevents the clay from sitting in a puddle of water.
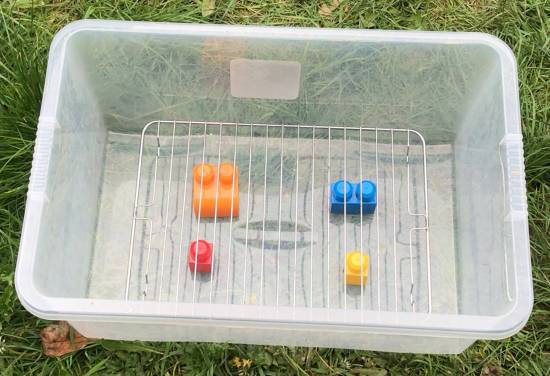
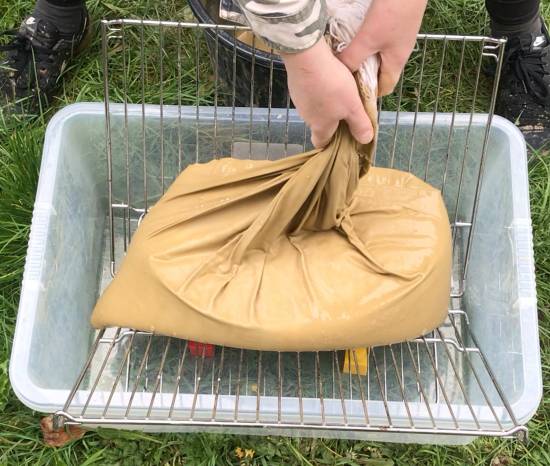
I then put another couple of old oven racks on top of the first rack. I position these in a ‘V’ shape to give the bag of clay some extra support. If you don’t have any old oven racks, you can buy some spares here. I find these very useful to have about my studio. You can use them to dry slabs of clay if you are making slab pottery.

Now the bag of clay liquid is supported, the next thing to do is wait. The excess liquid will slowly drain away and evaporate. The clay liquid contains a lot of water at the moment and it can take quite a long time to firm up.
Exactly how long this takes depends on how warm and dry the atmosphere is. I usually leave mine for about 10 days, but then as I say, I do live in a damp climate. I’d recommend checking it every few days to see how it’s doing. You can get an idea of how much water has been lost by pressing the pillowcase with your fingertips.
You will notice that as the water starts to drain out, the clay will begin to feel firmer under your fingers.
Are you finding this article helpful so far? If so, why not download my free easy-to-follow cheat sheet so you can make your own clay from dirt.
The Final Stages of Making Clay from Dirt
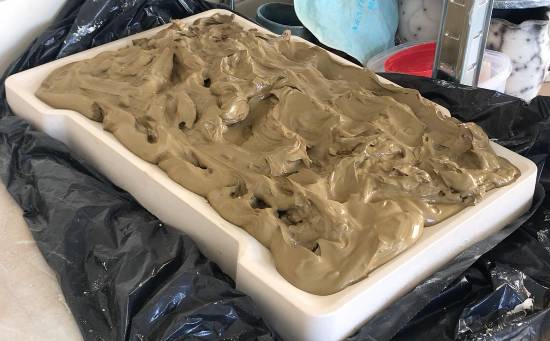
You may notice that some parts of the mixture are becoming quite a bit firmer than others. I want to avoid hard chunks of clay forming whilst other parts of the clay remain soggy. So, once the clay has the consistency of a chocolate mousse, I remove it from the pillowcase.
At this point, the clay is still like a thick slip and is nowhere near firm enough to make anything with it. So, I transfer it from the pillowcase onto the plaster slab that I use for recycling my clay. Transferring it onto any kind of absorbent wedging surface will work.
I find a good way to transfer the clay onto the plaster slab is by scooping it up with an old ladle.

I then leave the clay on the plaster slab until it has firmed up.
If you live in a damp climate, the drying process can take a long time. Here are a few tips to help speed it up:
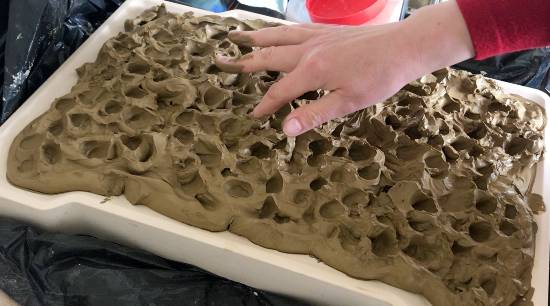
Tip 1
As the clay starts to firm up, it can help to press holes into it with your fingers. These dips increase the surface area of the clay and create channels for the moisture to evaporate more quickly.
Tip 2
If your studio or clay space is cold and damp, put a heater in there to warm up the surrounding air.
Tip 3
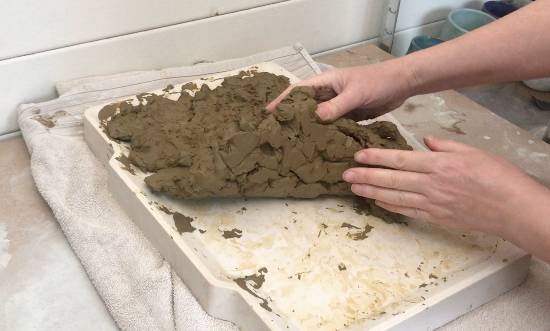
The clay will eventually become firm enough to be peeled off the plaster slab. However, at this point, it may still be quite soggy on the top surface. Peel it off the plaster slab and turn it over so that the soggy side is in contact with the plaster slab.
Making Workable Clay from Dirt
Once the clay is firm enough to be lifted off the plaster slab, lift it off and press it into rough balls of clay.
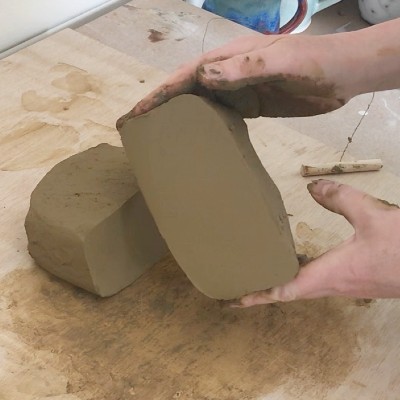
At this point the clay is workable, but it will still be quite wet. In addition to being a bit soft, the clay will also be harder in some sections than others. To make it useable you need to wedge it. Wedging will also get rid of air pockets from the clay too.
Most potters will have their own preferred ways of wedging clay. When you make wild clay and when you are recycling old clay scraps the clay needs to be wedged well.
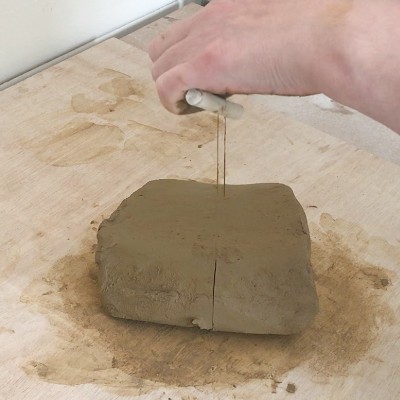
This is the process that I use to wedge the clay thoroughly. I start off by stack and slam wedging the clay. This is also called wire wedging or slap wedging. You can see how I do this in my article on stack and slam wedging here.
When the clay first comes off the plaster slab it’s full of air pockets. So, stack and slam wedging is a good start. It gets rid of a lot of the air and also evens out the consistency of the clay.
Once I’ve wire wedged it for a while, I divide the clay into smaller chunks and then wedge using the rams head technique.
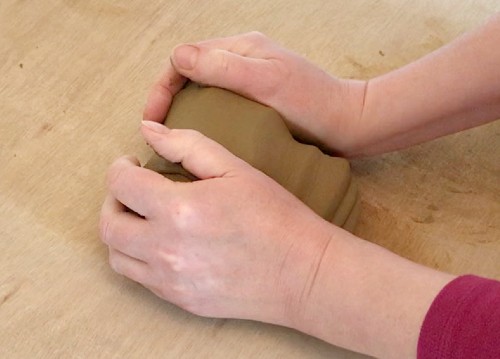
And voila! Once the clay has been wedged up well, you have made a batch of lovely wild clay from a pile of discarded dirt.
Making Pottery with Wild Clay
What your wild clay feels like to use will depend on where you found it and what minerals the clay contains.
Some clay will be quite short (this means that it is a bit crumblier than you’d like it to be ideally). If you find that the clay is a bit short, you can mix it in with a bit of your regular commercially made clay.
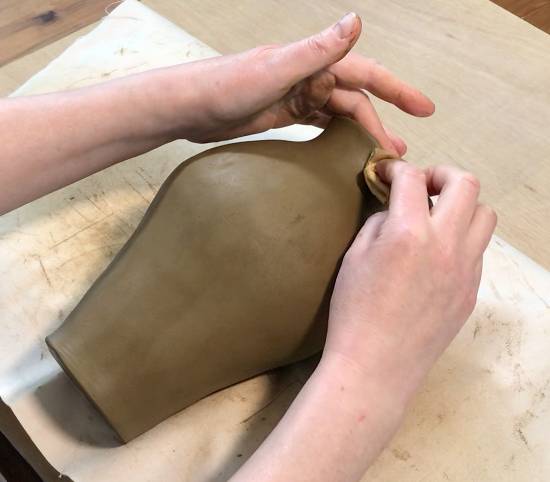
Other wild clay made from dirt will be nice and plastic. This particular batch was fine as it was and didn’t need any additions to make it usable. You can see from the pictures below that is was suitable for throwing on the wheel and for hand-building.
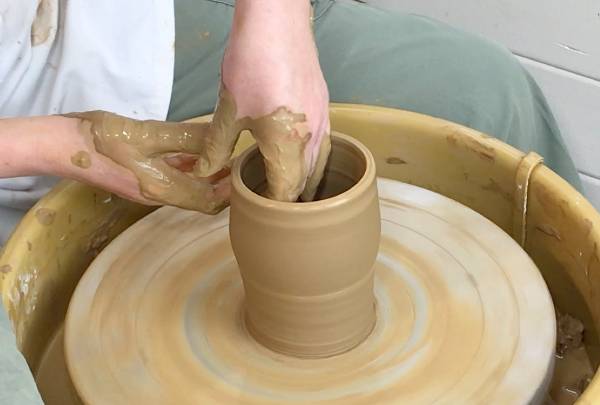
The clay that I have made in this article is a creamy red color. This is likely because it has a high iron content. Iron oxide is essentially rust, and it will turn clay a red color.
Firing The Clay You Make From Dirt
When I’m firing clay that I’ve made from dirt, I proceed with a bit of caution. Firing natural or wild clay isn’t like firing commercially bought pottery clay.
When you buy clay in a nice sealed bag, it comes with the manufacturer’s guidelines about what temperature to fire at. This is not the case with clay that you have made yourself, and you don’t know how it’s going to behave in the kiln.
Before I fire a large quantity of the clay I’ve made from dirt in the kiln, I do a test fire. I make a small object out of the wild clay and I put it in my regular bisque fire. It’s a good idea to make a small bowl out of your regular clay and bisque-fire the test piece in the bowl.
This means that if the wild clay does something unexpected in the kiln, your kiln shelves will be protected. If the test piece looks fine when it comes out of the bisque fire, then I move forward and will bisque fire larger pieces.
Glaze Firing Wild Clay
Generally speaking, when I glaze fire wild clay that I’ve made from dirt, I will glaze at earthenware temperatures. This means that the target temperature is around 1832F (1000C).
Clay that contains a higher level of impurities such as iron, won’t tolerate higher stoneware firing temperatures. There is a risk that it will shatter in the kiln or worse still melt on your kiln shelf.
If you want to try firing your wild clay to higher temperatures it’s best to fire a test tile first. Again, place the test tile in a clay pot that you know can manage stoneware temperatures. Fire the kiln up and see how the wild clay copes in the higher temperature range.

Final Thoughts
There are other ways to make clay from dirt. I find this process works best for me, as it creates the smoothest wild clay body without creating a lot of clay dust. The process is simple and really amounts to sieving the clay to remove as many impurities and dirt. Once you’ve gotten used to the process, you can start experimenting with blending the natural clay with other clay bodies. This can give interesting results. I hope you have fun experimenting.


