Your cart is currently empty!
How to Make Slip for Clay – 3 Ways to Make Perfect Clay Slip
Published:
Last Updated:
Affiliate Disclaimer
As an affiliate, we may earn a commission from qualifying purchases. We get commissions for purchases made through links on this website from Amazon and other third parties.
This article is all about how to make slip for clay. There are different kinds of slip, used for different purposes. And there are some variations in how to make slip for clay depending on how you want to use it. I will cover these differences and outline a step-by-step guide for making different kinds of slip for clay.
The basics of making slip for clay involve breaking pieces of bone dry clay into small parts. Then submerging the dry clay in water so that it breaks down and dissolves. The dissolved clay is then blended into the water to make a smooth suspension.
However, there are different techniques involved in how to make slip for clay depending on its use. Slip is used in 3 main ways, they are joining slip, decorating slip, and casting slip.
I will divide this article up into three sections to cover each of these uses. And how to make slip for clay for each of them.
If you know how you want to use the slip, use the link below to jump straight to that section.
- Making Clay Slip for Joining Clay
- Making Clay Slip for Decorating Clay
- How to Make Slip for Clay Slip Casting
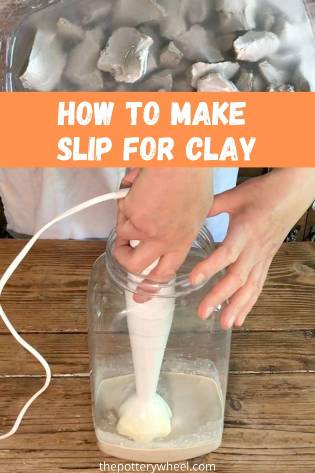
Table of Contents
show
How to Make Slip for Clay – Joining Slip
At its simplest, clay slip is clay mixed with water to thin the clay down into a liquid state.
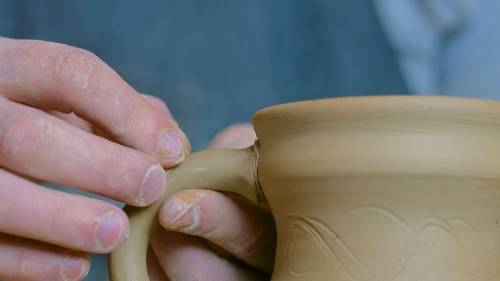
Slip is used to join pieces of clay together. For example, to attach handles to mugs, or to bond slabs or coils of clay together when hand building.
Clay is often said to have a memory. What this means is that once clay has settled into a shape it tends to want to stay like that.
Also, once clay has dried, even a little when you press two bits together, the surfaces won’t bond effectively.
Therefore, clay pieces that have settled and dried even a little, will need help to stick together.
For example, if you simply press a handle onto a mug, the handle will likely come off when it dries. And if it hasn’t come off during drying, it will most certainly separate when it’s being fired. Or worse, it may look like it has attached properly and then break off when it’s full of hot coffee.
The Simplest Way to Make Joining Slip
Joining slip is applied using the slip and score method. This involves daubing a bit of slip on your clay surface to soften it up a little. A pottery tool is then used to score into the softened surface.
You can use a variety of tools, depending on what sized area you want to score. And actually, if you don’t have a tool to hand a fork or even a pencil would be fine.
Once the slip has been scored and mixed onto both surfaces, the pieces of clay can be pressed together. The slip enables the clay particles from each surface to mingle and bond together.
When I’m making a one-off piece, I may only need a very small amount of slip. Let’s say, I’ve made a mug and I just want to attach a handle. Something like this will use less than a teaspoon of clay slip. As such, I may not want to make a large batch of slip.
Under these circumstances, I may simply break off a bit of clay, and mix it with a little water. This will make a small amount of clay paste. It is usually a bit lumpy and uneven. And whilst it’s okay at a pinch for a small item, it’s not ideal.
How to Make a Jar of Joining Slip for Clay
If you use the same clay body frequently, it’s likely that you will need the same kind of slip regularly. Under these circumstances, it’s better to make a jar of slip that you can use when you need it.
Simply dropping a lump of clay into water and hoping it will dissolve will not work well. Plastic workable clay tends to hold together in a sticky lump if it is dropped into water. It does not absorb water well or evenly. At best, you will have a sticky lump of clay sitting in a runny clay/water liquid.
The following technique is a more effective way to make a jar of clay slip.
Use Bone Dry Clay
First, collect some scraps of bone dry clay of the clay body you want your slip to be made from. If you don’t have any scraps to hand, you can make some bone dry clay very easily. Using the clay of your choice, make some cookie-sized discs of clay.
Set these on a wooden bat to dry for a few days. If you put them on a wire baking tray they will dry quicker, as the air circulates underneath.
Breaking Up the Bone Dry Clay
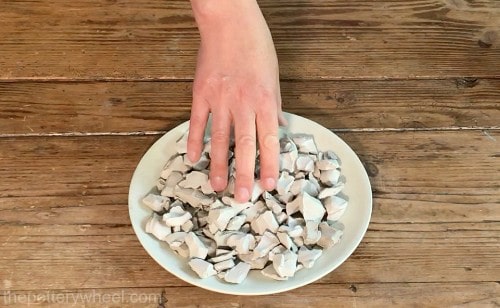
Once the clay is bone dry, break the bone dry cookies into smaller pieces.
Some potters like to break the bone dry clay up into an almost powdered state at this point. If you want to do this, place the dry clay scraps in a tough plastic bag. The kind of bag you might use for disposing of building rubble. And then use a rolling pin to crush the clay into granules.
I don’t find that it’s necessary to break the clay into a powdered state. It just creates more clay dust, which is a health hazard. Instead, I simply break the clay up with my fingers into smaller pieces. I aim for them to be around a half to one inch in diameter.
Then place the dried clay into a container. Because it’s best not to inhale clay dust, I’d recommend wearing a respirator when handling broken bone dry clay.
Slaking Down
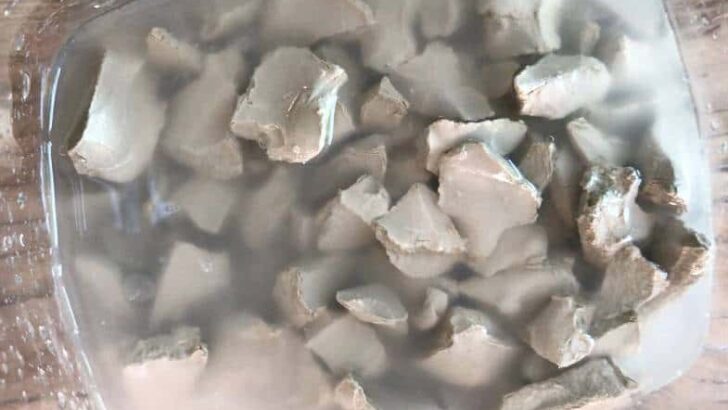
Pour some water over the pieces of clay in the container. Use enough water to make sure that each of the pieces of clay is fully submerged.
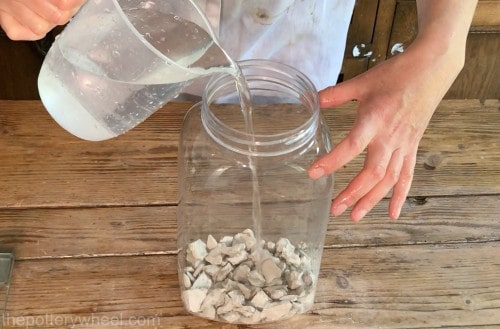
Then leave the clay to absorb the water. The bone dry clay will absorb the water evenly and completely in a way that plastic clay will not do. As it absorbs the water it will dissolve. This process is called slaking down.
Ideally, I like to leave the clay overnight to slake down completely. However, if you use small thin pieces of clay, you can get away with leaving it for a few hours.
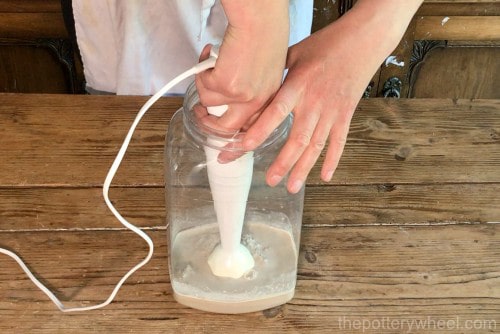
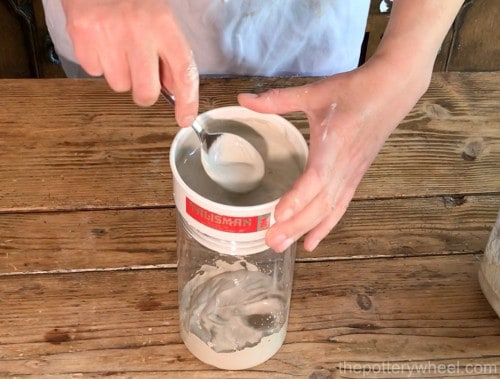
Mixing Up the Clay Slip
Once the clay has slaked down, I use a hand blender to make sure it is thoroughly mixed. You can, however, simply put a lid on the jar and give it a shake. Or mix it in with a fork.
If you are using the mix as joining slip, it’s best to have it at the consistency of whipped cream. If you find the slip mix is too thin, you can let it settle. Overnight the water will separate out from the clay and some will sit on top of the mixture. You can simply pour off some of the excess water to thicken the slip.
Once you have it at the right consistency, store it in a sealed container. Then you will have it to hand for future use.
You can put a layer of saran wrap or a piece of plastic bag on the surface of the slip. This will prevent the slip from losing moisture between uses.
Extra Ingredients
Although clay slip is really just clay particles and water, some additional ingredients can help.
Vinegar or Epsom Salts
Some potters add a little white vinegar to the water they are making the slip with. Adding vinegar to the mixture will do a couple of things.
- Firstly, vinegar helps to speed up the slaking down process.
- Secondly, vinegar makes the slip a stronger joining agent. The reason for this is that vinegar acts as a flocculant. A flocculant is a substance, that when added to a liquid makes the particles in that liquid stick together.
By contrast, deflocculants are substances that cause clay particles to repel one another. One of the deflocculants present in clay is sodium ions. Vinegar neutralizes the sodium ions present in clay and therefore acts as a flocculant (source).
So, adding vinegar to slip will thicken the slip. And it will make the slip more adhesive because the particles of the clay in the slip adhere together more.
I don’t use a precise ratio of vinegar to slip. But if I’m making half a pint of slip, I will normally add about a tablespoon of vinegar. It’s best to mix the vinegar with the water before you pour it over the clay. That way, the vinegar is evenly distributed in the water.
Some potters use Epsom salt to flocculate their clay slip. Epsom salt comes in crystal form, so you need to dissolve it before you add it to your slip.
Dettol or Bleach
Similar to bags of clay, slip can go moldy when it’s in storage too. In fact, I find that clay slip gets smelly and moldy more quickly than a bag of slip. I think this is because of the levels of moisture present in slip. Clay contains organic matter and combined with moisture, can create mold and odor.
If I open a jar of slip even after a couple of weeks in storage, the smell is normally pretty potent.
One antidote to smelly moldy slip is to add a few drops of Dettol to the mix (source). Alternatively, you can add a few drops of bleach if you prefer.
Many potters actually welcome a bit of mold in their clay. Mold is said to add to the plasticity of clay and slip. Nevertheless, some people are sensitive to clay mold. And if that’s the case, then you may want to add a little Dettol to eliminate the mold.
How to Make Extra Strong Joining Slip
You can also make a super-powered, extra-strong joining slip. This is helpful for attaching handles to pottery. Handles crack at the join easily when they are drying or being fired. Making extra-strong slip is one solution to that problem.
The best recipe I have come across for making extra strong joining slip is Martha Grover’s paper clay slip.
It’s very simple to make, but it does bond clay together very effectively. To make paper clay slip, follow these simple steps:
- Tear up a few sheets of toilet paper and put them in a container.
- Add 1-2 cups of white vinegar to the torn-up paper.
- Blends the paper and vinegar together using a hand blender. Or if you don’t have a blender, you can use a fork.
- Then add some small pieces of broken bone dry clay to the liquid.
- Leave the clay to slake down and then stir the mixture together.
- Allow the mixture to sit overnight
The resulting paste-like slip can be used like normal joining slip. It will form an extremely strong bond between surfaces when you use the slip and score method of attaching.
How to Make Slip for Clay – Decorating Slip
Slip can also be used for decorating clay. Two of the most popular ways to use slip for decoration are to paint it on or slip trailing.
Slip that you are going to paint onto your pottery needs to have a smooth liquid consistency. The thickness needs to be something like single cream.
If the slip is too thin, it won’t give you coverage or opacity when painting. But if it’s too thick, it will give you an uneven textured finish.
By contrast, slip that you are going to use for slip trailing needs to be thicker than painting slip. Slip trailing involves trailing drops and lines of slip onto leather hard pottery. The aim is to create a textured pattern. So, the slip needs to be thick enough to sit in a raised shape on the surface of the pot.
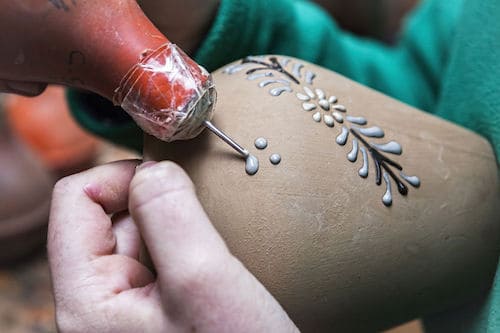
However, as the slip dries, it loses moisture and can shrink and lose its nice plump look. If the slip shrinks the lines and dots lose their definition. So, you need to make your slip with a higher percentage of clay content to stop it from shrinking too much.
In this section, I will look at how to make slip for clay painting and slip trailing
How to Make Slip for Painting Your Pottery
The process for making slip to paint on your pottery surface is similar to making a simple joining slip. For more details on this process, check out this section.
The essential steps are as follows:
Break up some bone dry clay into small chunks of around a half-inch in size.
Place these into a container and cover the dry clay with enough water to submerge each piece of clay.
Leave the clay to slake down overnight. Then once it has dissolved, use a hand blender to mix the clay and water thoroughly.
If you find the slip is too thick you can add a little water to get the right consistency. If it is too thin, allow the slip to settle, and then pour off the excess water from the top.
It’s a good idea to sieve your decorating slip to get out any lumps of bits of grit. Put the slip through a ceramic sieve. If you are making stoneware or earthenware slip, use a sieve with a 60-mesh size. However, if you are making porcelain slip, use a mesh size of 80.
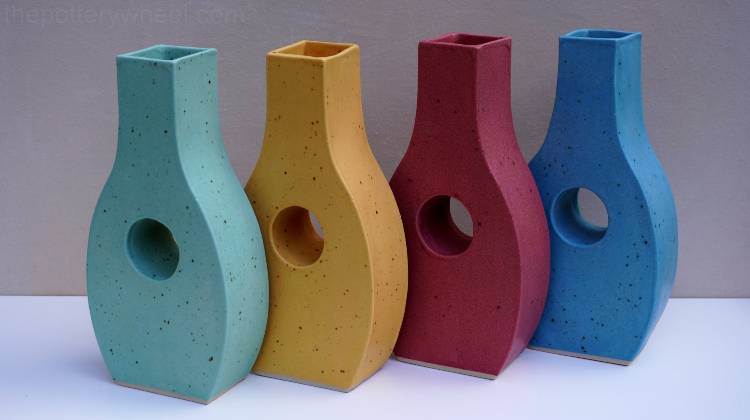
Once you have sieved your slip, you will have a nice smooth decorating slip. However, simply painting your pottery with slip that is the same color as the clay body is not very decorative. If you are using slip for painting, it can be nice to add some color to the slip.
Making colored slip is a straightforward process. Here is an overview of how it’s done…
Making Colored Slip
The simplest way to make colored slip is to add some ceramic stain into the mix. A popular brand of ceramic stains is Mason Stains, though there are other brands of stain available.
Mason stains come in powdered form. The more stain you add to the slip, the deeper the color will be once it’s fired. You might want to make a test tile before you paint your pottery, to decide on the depth of color.
Let’s say, you have decided that you want to add 5% of ceramic stain to your slip. This would mean that the stain was 5% of the weight of the dry clay you used.
These are the steps to make a colored slip with a 5% stain:
- Weigh out your bone dry clay before you put it in water. In this example, let’s assume you are using 2 lbs of bone dry clay.
- Make your clay slip in the way described above.
- Work out how much stain you will need. 2lb of clay is equal to 32 ounces. 5% of 32 is 1.6 ounces. So, you are going to need to add 1.6 ounces of stain to your slip.
- The best way to add a ceramic stain to clay slip is to make the stain into a paste first. So, transfer 1.6 ounces of stain into a clear plastic bag. Add a couple of tablespoons of water to the bag. And, gently massage the bag to mix the stain and water into a paste.
- Snip the corner off the bottom of the bag and squeeze the colored paste into the slip.
- Use a hand blender to mix the stain into the clay.
- Sieve the colored slip again to get rid of any remaining chunks of colored stain.
If you want to see my full step by step video on how to make colored slip, check it out on YouTube.
How to Make Slip for Slip Trailing
Clay slip for slip trailing ideally contains more clay particles than a painting slip. When the slip dries it shrinks and your lovely slip trail decoration will shrink too. What was a lovely plump-looking slip pattern will wither and shrink to something less attractive.
To avoid this, you need to add more clay particles to your slip. The higher the percentage of clay in the slip the less it will shrink when it dries.
There is a simple way of packing more clay into your slip. Let’s assume you have a container of slip that you want to thicken up for slip trailing. Here is how you do that….
Firstly, you need to make your existing slip more liquid so that it will absorb some more powdered clay. You do this by adding a few drops of a deflocculant to your slip. Deflocculants are substances that cause the particles of clay to repel one another.
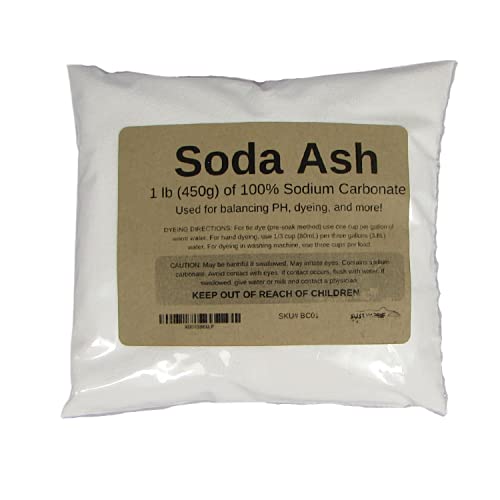
Examples of deflocculants are Darvan 7, or sodium silicate and soda ash. Sodium silicate is sold in a liquid state. And, you can mix the soda ash in with some water to make a solution.
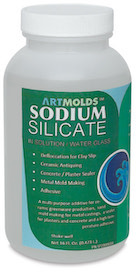
Sodium Silicate
If you add a few drops of a deflocculant to your clay slip, the slip will have a thinner consistency. You can then add more powdered clay particles to the slip mixture and it will be absorbed easily.
You can repeat this process until the slip has the consistency of double cream.
How to Make Slip for Clay – Casting Slip
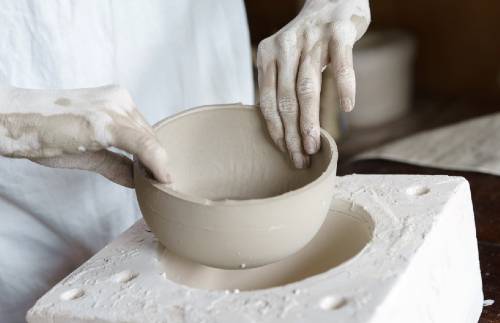
The process of slip casting involves pouring clay slip into a plaster mold. The porous plaster absorbs the water from the slip and the clay particles solidify into the shape of the mold. Excess slip from the center of the mold is poured away to create a hollow form.
For simple shallow shapes, a single part mold might be used. But normally for more complex shapes, the mold will be in at least two parts. The parts are bound together whilst the clay slip sets. And then taken apart to release the cast item once the clay is firm.
Making Slip for Slip Casting Your Clay
When you make slip for slip casting, the ratio of clay to water in the slip needs to be correct. There need to be enough clay particles suspended in the slip for the cast to work well. And for the cast ware to be sufficiently strong.
Casting slip can be made in much the same way that is outlined above. Namely, bone dry clay can be covered with enough water for it to break down. This can then be mixed up into a slurry with a hand mixer. Alternatively, if you are making larger quantities of casting slip, you can use a drill with a mixing attachment.
Casting slip needs to be smooth, so an important step in making casting slip is to sieve it. This is especially the case if you are making your slip out of recycled trimming scraps. Grog, lumps, and bits of debris need to be sieved out so that the slip makes smooth cast pieces.
Measuring the Specific Gravity of Casting Slip
To check whether there is enough clay suspended in the mixture you need to measure the specific gravity of the slip. The specific gravity measures how dense a substance is compared to water.
On the specific gravity scale, water has a value of 1. If a liquid has a specific gravity of 1.05, then it is 1.05 times denser than water. The ideal specific gravity for casting slip is usually around 1.8. (source)
However, the best specific gravity for your slip will depend on what you are making, and the clay you’re using. You may need to experiment with slips of different consistencies to find the ideal density of your particular slip.
Measuring the specific gravity of a liquid is easy enough. You simply pour some of the slip into a 100ml graduated cylinder and weigh the liquid. Then divide the weight of the slip in grams by 100. This will give you the specific gravity reading.
Let’s say 100ml of your slip weighs 180g. If you divide 180g by 100, this tells you that the specific gravity of the slip is 1.8.
How to Increase the Specific Gravity of Casting Slip
If the specific gravity of the casting slip is not sufficient, you need to add more clay to the mixture. The easiest way to do this use a deflocculant in the way that is described above.
Adding a few drops of deflocculant will make the slip more liquid. You can then add more powdered clay to the mixture. You can make the powdered clay by simply crushing bone dry clay in a tough plastic bag.
Once you have added more clay, you can measure the specific gravity. You can continue the process of adding deflocculant and extra clay until you reach the right slip density.
How to Make Casting Slip Pourable
Once the casting slip is dense enough, it will be too thick to pour into your mold. So, you will need to add a little more deflocculant to the mixture to thin it out.

You need to be careful not to add too much deflocculant. If you add too much, it can make the slip too thin. When the slip is too thin, it will either refuse to set in the mold. Or you might end up with soft patches in the cast piece.
To avoid overdoing it, simply add a few drops of deflocculant at a time. Making sure to mix the slip well with a mixer, each time you add a few drops.
If you are using Darvan 7, you can simply pour a little of that into the slip. But, if you’re using sodium silicate and soda ash, add a little soda ash solution first and stir the slip. Then add a little sodium silicate too.
You don’t need a lot of deflocculant to thin out the slip. In fact, the deflocculant only needs to be about 0.05% of the volume of the slip.
However, if you over thin the slip, all is not lost. It is possible to thicken it up again by adding a few drops of Epsom salts to the slip. The Epsom Salts need to be dissolved in a little water before being added to the slip.
A good consistency to aim for is single cream. One way to check consistency is to dip a stick or brush into the slip. When you remove the stick from the mix, the slip should drip easily of the stick.
Final Thoughts
In this article, I looked at how to make slip for clay. Slip is simply clay particles suspended in water. Although you can buy readymade decorating slip, it is relatively expensive, considering it is really just clay and water.
Learning how to make slip for clay will save you money. And once you get the knack for adjusting its consistency, you can make clay slip to meet your exact requirements.