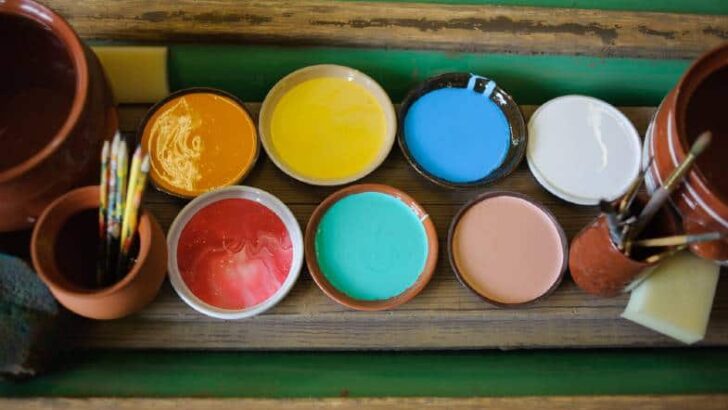
Over time I have collected a wide range of underglaze colors and brands. Nevertheless, I still sometimes find that don’t have the exact color I want. And I found myself wondering about mixing underglazes. Questions came up for me like whether you can mix underglaze colors? What about mixing different brands of underglaze? And can you mix underglaze with clay, slip, or glaze? So, I looked into it and this is what I found out…
Underglaze colors can be mixed together to create new colors. Slip and underglaze can be used together, though it is best not to mix underglaze directly into slip. Clay and underglaze can be wedged together to create colored clay. However, it is not wise to mix underglaze directly into glaze.
However, as with most things in ceramics, you normally have a few options to try out. So, here is a more detailed look at some of the possibilities of mixing underglazes and some underglaze techniques.
Mixing Underglazes – Can You Mix Underglaze Colors?
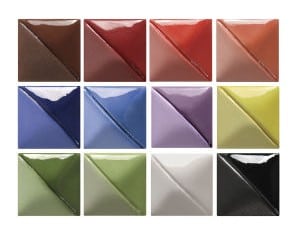
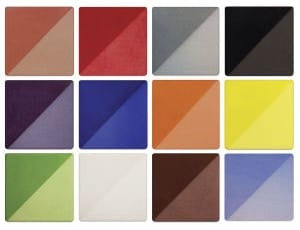
Different colored underglazes can be mixed together to make a new color. The range of colors available in commercially made underglaze is quite wide. Nevertheless, you may not find the exact color that you are looking for. You might want to try mixing two or more underglaze colors to find the exact shade you want.
Most underglaze colors can be treated much like mixing water-based paints. You can mix different colored underglazes to create new colors. Or you can add white or black underglaze to a base color to create different shades of the same color.
You can also experiment with adding water to your underglaze. Underglaze can be thinned out with water and used as a watercolor wash. It’s usually recommended that you use 3 layers of underglaze to build up opacity. So, if you dilute underglaze with water, you will need more layers to build up the color.
How to Mix Your Underglaze Colors
You can either mix underglaze colors in a palette or container before application. Or you can blend them with your brush on the piece itself. It’s also possible to layer up different colors of underglaze on your pottery.
When you are mixing different layers of color, it’s important to let the layers dry in between applications. If you put a layer of underglaze on a coat that is not quite dry, the underlying layer will dissolve. A wet layer of underglaze will be pulled away from your pottery by a brush applying a new layer.
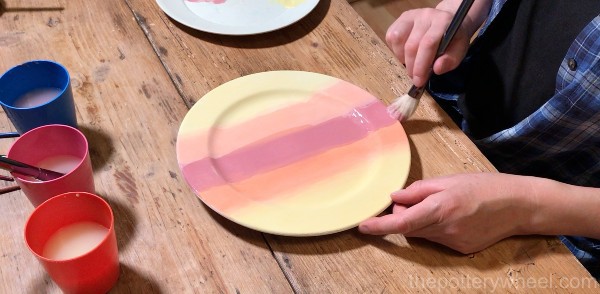
However, you can blend underglaze colors on your piece in an ombre effect. This involves applying one color to your piece and then using a brush to blend the next color in. The result of this technique is to create a color gradient. If you are using this technique, the colors need to be blended on the piece when they are wet.
Testing Out Your Color Mix
If you are planning to mix underglaze colors it’s a good idea to do a test tile first. If you’d like to know more about making a test tile, check out this article.
It is often said of underglaze that the unfired color is close to how it will look once fired. This is in contrast to glaze. Usually, glaze looks very different in its unfired state compared to when it has been fired.
Underglaze colors will often darken and intensify when they are fired and glazed. However, the color of underglaze on the unfired pottery will be quite close to the fired and glazed piece.
However, when you are mixing underglaze colors, the results can be a bit less predictable. An underglaze may look a particular color in your palette, and even when it’s been bisque fired. However, it can look quite different once it has been glaze fired, particularly if you are firing to stoneware temperatures.
Mixing underglaze colors can give surprising results once your work has been fired. Sometimes the surprise is pleasant. At other times, colors that look good in the bisque fire can be a disappointment once glazed.
So, it’s a good idea to do a test tile before you apply an underglaze color you have mixed yourself. Check the results of your underglaze mixing on a test tile, before committing it to your carefully crafted pottery.
Underglaze Consistency
Another reason to do a test tile is that different underglaze colors can have different consistencies. Some commercially made underglaze colors can be quite thin and watery before application. By contrast, other colors may be thicker and more opaque. Because some colors are more watery, they need more layers of application to build up opacity.
As such, when you mix different colored underglazes, it can be difficult to predict the consistency of the new color. If you don’t put sufficient layers of underglaze on it can look streaky when fired.
Underglaze is versatile, and if your fired ware is streaky, you can apply more layers and bisque fire it again. However, this is time-consuming. Also, if you are using a pottery firing service in a community pottery studio, this may not be practical.
So, if you can, it’s best to experiment with your underglaze colors and make a test tile.
Can You Mix Different Brands of Underglaze?
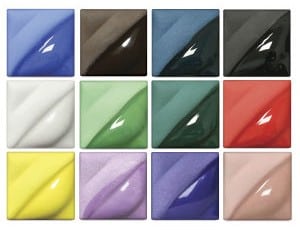
There are many brands of commercially made underglaze. Each of these has somewhat different properties and ingredients. Some underglaze brands may mix successfully with others. While other brands may not do well together.
The only way to find out if two brands of underglaze can be mixed is to do a test piece. As stated above, when making a test piece, it’s important to bisque fire and glaze fire it.
Colors that look good and work well in a bisque fire, may not work so well once they are glazed.
Mixing Underglazes with Slip?
Clay slip is basically just clay and water mixed up to make liquid clay. It can be used for joining pieces of clay or for decorating pottery.
Because unfired clay is the main ingredient in slip, slip should only be applied to pottery when it’s greenware. That is before it’s been bisque fired. This is because it shrinks when it dries.
If slip is applied to bisque pottery, it will simply shrink and flake off, rather than bonding to the bisque.
Similarly, slip does not do well on bone dry clay, as very dry clay absorbs the water from slip quickly. As a result, the clay particles will usually flake off the bone dry clay rather than bonding to it.
Whilst underglaze does contain clay particles and water, it also includes other ingredients like frit and gum. These extra ingredients mean that most underglaze can be applied to greenware and bisque pottery.
In theory, you could add underglaze to slip and use this to decorate your pottery before you bisque fire. A mix of underglaze and slip would need to be applied to greenware, not bisque.
However, in practice, mixing underglaze into slip is not an effective way to color slip. The color in the underglaze will get lost in the slip. And at best you are likely to get a muddy-looking slip. Or a slip that is a very slight variation of its original color.
A more effective way to make colored slip is to mix it with either stains or oxides. Check out my article here for a step-by-step guide on making colored slip.
Can You Use Slip and Underglaze Together
Mixing underglaze into slip in order to color it is not very effective. However, there are ways you can use underglaze and slip together.
Here are two suggestions…
Alternating Layers of Slip and Underglaze
You can alternate layers of slip and underglaze color. When the layers have dried, you can carve into them with a sgraffito tool. The colors in the different layers will be revealed on the edges of the sgraffito design.
If you use alternate layers of underglaze and colored slip, it’s important to let the layers dry between each application. Otherwise, the layers will absorb into one another, and you will lose the color of the underglaze.
Painting Underglaze over Slip Trailed Texture
Slip can be used for adding texture to pottery. This is the principle behind slip trailing. In slip trailing, thin lines or dots of slip are added to the surface of greenware pottery. Because of the high clay content, the lines and dots create a raised texture on the clay surface.
By contrast, when underglaze is added to pottery, it acts more like paint and will absorb into the surface. So, although it colors the clay, it does not add texture.
However, slip and underglaze can be used in combination to create interesting effects. One way to do this is to use slip to create a textured surface on the clay.
When the textured slip trailed surface is leather hard, you can paint it with an underglaze color. Then, once the underglaze has dried, you can lightly sand the surface of the textured clay.
The underlying color of the slip trailed clay shows through the sanded areas. And the underglaze color is retained in the recessed areas of the textured surface.
Mixing Underglazes with Glaze?
Mixing underglazes with glaze to make a new color is a risky business. There is a high chance that the underglaze and glaze will not be compatible.
If the glaze and underglaze are not compatible, then you are likely to get problems with the fired result. These problems can include the glaze blistering or bubbling. Alternatively, you might get a pin holing effect from mixing underglaze in with glaze.
In addition to this, the underglaze may make the glaze more matte and less glossy than originally intended.
Each of these problems can compromise the glaze surface and make it less food-safe.
That being said, some potters know a lot about glaze chemistry. This knowledge, plus an understanding of the ingredients in underglaze may enable them to mix underglaze with glaze effectively.
Different Kinds of Underglaze
Some underglaze has a high clay content. This underglaze is likely to cause problems if it’s mixed in with glaze.
Other underglazes are designed to be used for the majolica technique. In majolica, the pottery is painted with a base of glaze. The base is normally white. Then colored underglaze is painted on top of the unfired glaze.
The ware is then fired at earthenware temperatures. The colored underglaze decoration embeds into the glazed surface. However, most majolica underglazes are stains combined with glass-forming ingredients. They are specifically designed to be compatible with the glazes they are painted onto.
Mixing Underglazes into Clay
Underglaze can be used to color clay. Because underglaze is designed to be used on unfired clay, it can also be mixed into clay to color the clay body.
I’ve seen underglaze wedged into clay to make a marbled effect on the clay (source).
Using underglaze to create marbled clay is a straightforward process. You simply add a little underglaze to your ball of clay and then wedge it a little. Remember that you only need to wedge your clay a bit to partially mix the underglaze in. If you wedge it too thoroughly, the underglaze will blend in completely and you will lose the marbled effect.
Nevertheless, potters usually color clay using powdered stains or oxides. Strictly speaking, underglaze is designed to decorate the surface of your pottery rather than staining the clay body. As well as colorants, most underglaze has other ingredients, such as frit. This can change the way clay behaves when it’s fired.
Adding a small amount of underglaze to your clay to make marbled clay can work. However, if you want to color the entire clay body, you would be better off using a ceramic stain. These are specifically designed for precisely that purpose. Here is my step-by-step guide on making colored clay using ceramic stains.
Final Thoughts
Underglaze is versatile and quite adaptable. You can mix underglaze colors, combine it with slip to decorate pottery, and even use it to color clay. However, when you are trying something new, it’s always a good idea to do a test tile first. Trying new things in ceramics can result in surprising effects. These can be nice surprises. However, when you’re mixing underglazes, it’s best to test out your combinations before you apply them to your carefully made ceramics. Happy Experimenting!


