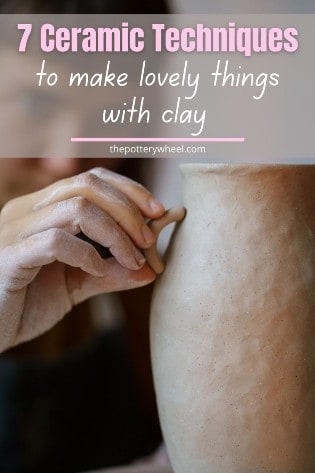
Clay is one of nature’s most incredible building blocks. You can make almost anything out of clay. It is very versatile and once you grasp a few key ceramic techniques, you can make almost anything.
If you are learning how to work with clay, here are some of the most important ceramic techniques to try out. I’d recommend having a go at all of them and seeing which one of them you love most.
Ceramic techniques are often split into two broad areas. The first one is hand building, which, as the name suggests involves constructing your pieces mainly with your hands. The second one is wheel throwing, which is making pottery on the potter’s wheel.
Hand Building Ceramic Techniques
I thought I’d cover hand-building first, as it is something that you can start to do with little or no equipment. Here are some of the main ceramic techniques used by potters who like to handbuild their pieces.
Ceramic Technique # 1: Pinch Pots
The pinching technique is one of the oldest known ways of making ceramics. There is evidence of pottery being made using this technique many thousands of years ago.
If you’re interested in knowing more about the history of pinch pottery, you can check out my article here. It will give you a real feel for exactly how ancient this pottery practice is.
Amazingly, the ceramic techniques involved in making pinch pottery have changed very little over 1000’s of years.
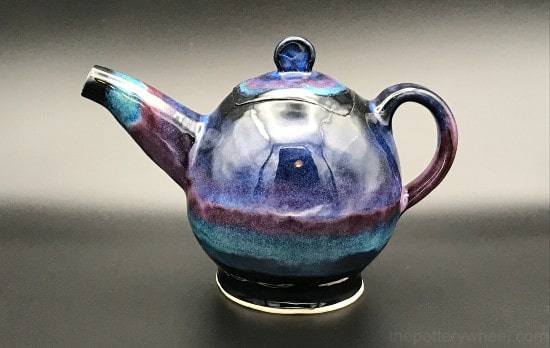
Although pinching is a simple technique, you can make a great range of pieces of pottery using this method. For example, I made this teapot using the pinching technique.
When you are starting out, the key is to learn the basic ceramic techniques. Then you can build on those to make whatever you want. Here are the fundamental steps of making a pinch pot…
How to Make Pinch Pottery
With pinch pottery, you are shaping, or forming, your piece using a pinching motion with your fingers.
Most of the time you are pinching the clay between your thumb and forefinger.
However, at different times as you shape the clay, you might compress the clay between your thumb and all your fingers.
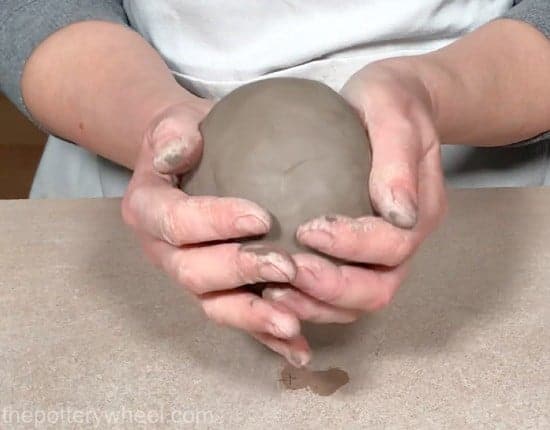
Step 1
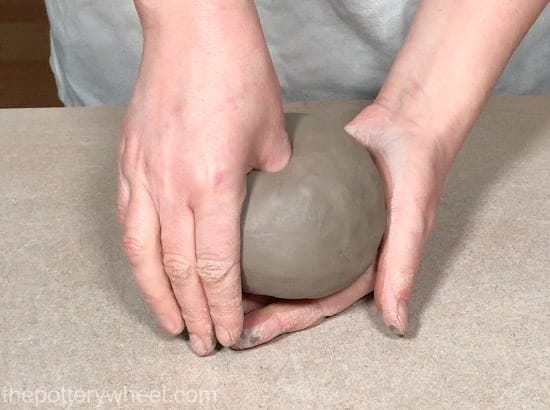
Roll your clay into a ball. The amount of clay you use depends on how big you want your pinch pot to be.
However, be aware that pinching a larger amount of clay is harder work. And it’s tricker to pinch large amounts of clay into an even and attractive form.
So, when you are starting out, it’s best to stick to a ball of clay that is the size of a small orange or smaller if you are working with children.
Step 2
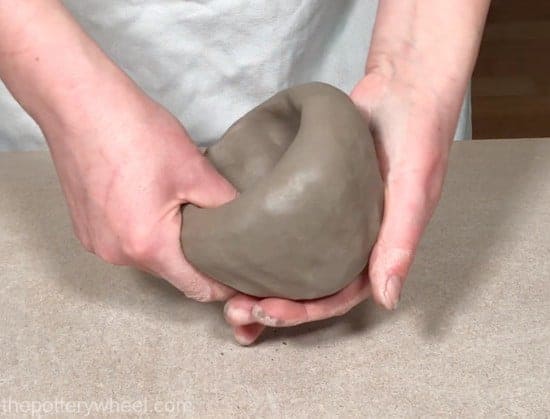
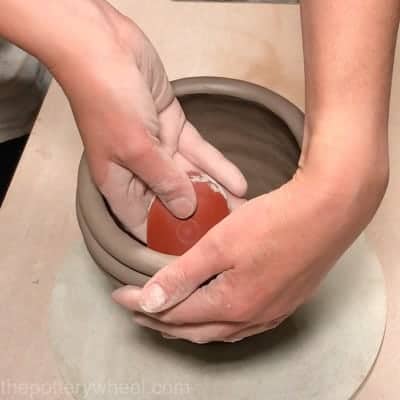
Once you have your clay in a nice round ball, support it in one cupped hand. Then press your thumb into the center of the ball.
Keep pushing your thumb until you begin to feel it in the supporting hand. You don’t want your thumb to go right through.
Ideally, you want the clay to be about 1/3 of an inch thick, or the width of your pinky finger.
Step 3
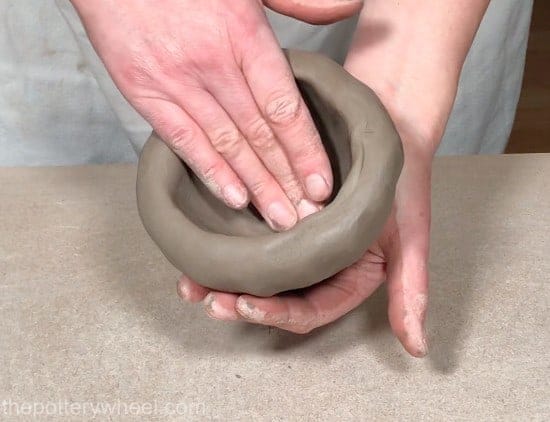
Start to pinch out the walls of the pot with your thumb and forefinger. A good tip is to keep your fingers and thumb reasonably straight. That way you are pinching the entire depth of the clay ball.
If you pinch just with the tips of your fingers you will make a thin band around the base of the pot. However, the pot wall will not thin out and become shaped as well.
Once you have pinched one section of the pot, turn the clay in your hand and pinch the next section of clay along. As you work, you can build up a bit of a ‘pinch turn, pinch turn’ rhythm.
Step 4
Once you have pinched the clay into a bowl shape, check if the walls are of even thickness.
You might find that the base of the pot is a bit thicker than the rest. If that’s the case, you can use the tips of your fingers to drag some of the clay on the bottom of the pot up the walls.
Step 5
When you are happy with the shape, size, and thickness of your pot, you need to leave it to firm up.
Turn it upside down, so the rim is resting on a wooden pottery bat or a plate. Then leave it until the clay is leather hard. Leather hard is a stage that clay goes through when it is drying out.
There are a few stages of leather hard clay. If you want to know more about what leather hard clay is, check out my article on exactly that topic here.
When making pinch pots, I find it’s best to leave the pot overnight covered in a plastic bag.
Then in the morning, I remove the plastic and let it firm up a little more. I will check it now and then to make sure it’s not getting too dry and hard. Ideally, I want it to be softish leather hard.
Step 6
Once the clay is firm enough to handle without losing its shape, you can refine the surface.
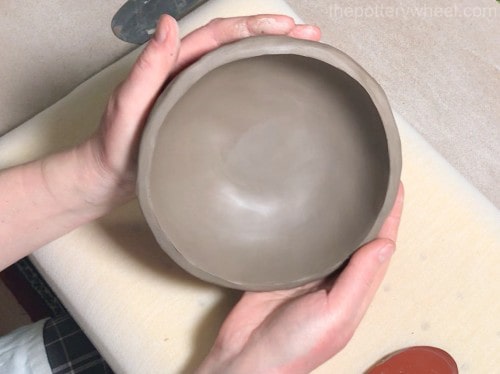
Smoothing the Inside of the Pot
You will probably want to tidy up the inside surface of the pot as well as the outside.
An easy way to smooth the inside surface of a pinch pot is to use a platter tool. This is a long thin plastic potter’s tool that can reach easily inside cupped forms. If you don’t have a platter tool, you can also use the back of a dessert spoon.
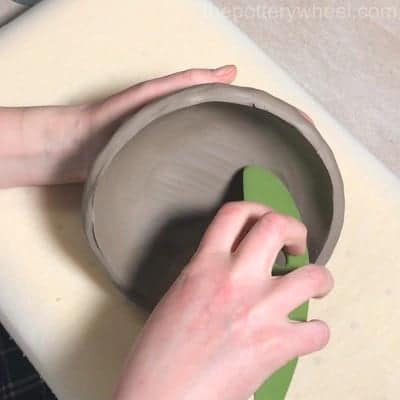
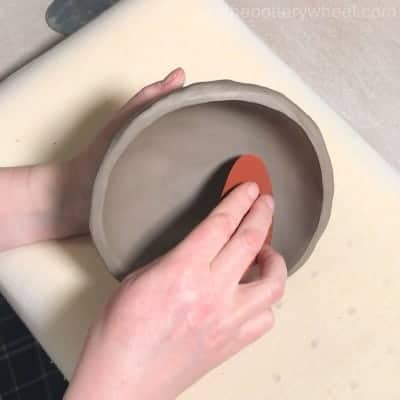
Then you can compress the inside surface of the pot with a soft rubber rib.
Smoothing the Outside of the Pot
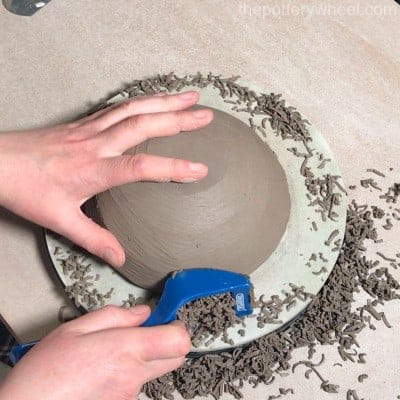
The easiest way to smooth down the outside of a pinch pot is to use a Surform. This is also known as a clay shredder.
A shredder is a bit like a cheese grater for clay. You simply drag it over the surface of your pot and shred off the uneven lumps and bumps. It does leave a serrated texture on the clay.
However, you can remove this texture by running a metal potter’s rib over the surface. After that, you can give your pot a nice smooth buffed finish by running a soft rubber rib over the clay.
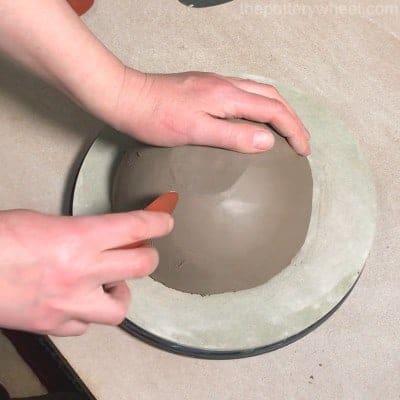
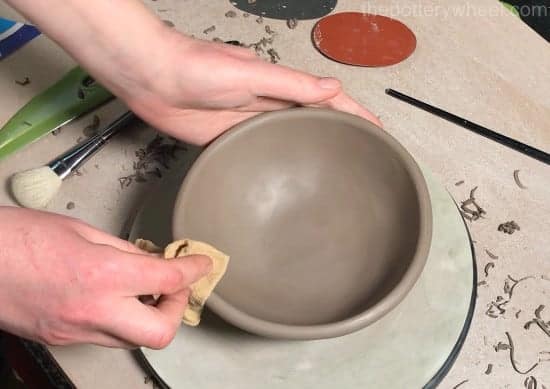
Finally, you can tidy up the rim of the pot with a damp piece of chamois leather.
Different Pinch Pot Forms
You can make all sorts of items using the pinching technique. It’s possible to make cups, mugs, bowls, plates, platters, teapots, and pitchers using the pinching method.
It is one of the simplest and most versatile ceramic techniques to learn.
I have written some articles on how to make the following items using the pinching technique. If you want to know more about these more advanced techniques check out these articles below.
You may also be interested in how ceramic artists and potters use this technique to make their pottery. I’ve written an article about some incredible pinch pottery artists, if you want to take a look at that here for some inspiration to get you going.
Ceramic Technique # 2: Coil Pottery
Coil pottery is also one of the oldest ceramic techniques recorded by historians and archeologists. And like pinch pottery, this ancient technique has changed very little over time.
How to Make Coil Pottery
The principle behind coil pottery is that you build the walls of the pot up by adding clay coils to your pot.
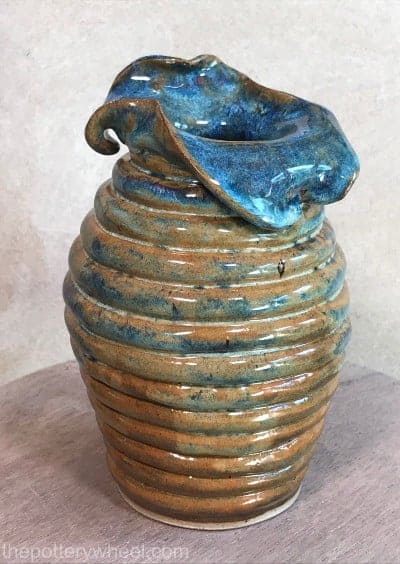
These coils can either be left with the texture of the coil visible. Or the clay can be blended in and smoothed out so that you have a smooth surfaced coil pot.
You can compare these two pots that I made, both using the coiling technique. Read on to find out how these different finishes can be achieved using the same ceramic techniques.

Step 1
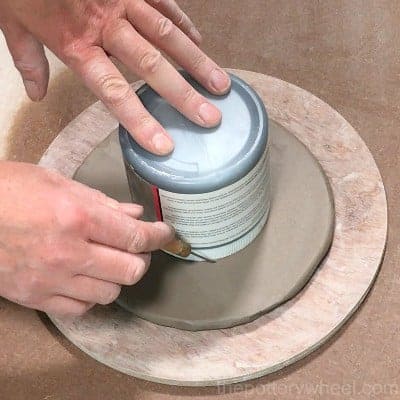
The first thing to do is to make a base for your coil pot. You can make the base in various ways. One way is to pinch out a shallow pinch pot and rest it on a turntable.
Another way to make the base is to roll out a slab of clay with a rolling pin. Then cut the shape of the base out of the clay slab.
Step 2
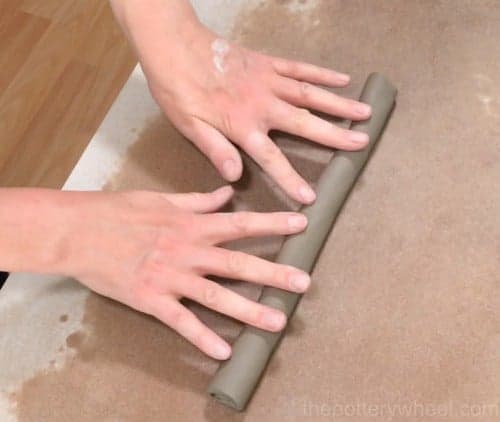
Once you have made your base, you need to roll out some coils of clay.
Rolling out a coil of clay sounds simple enough, but there is a bit of a knack for doing it well. It’s important that your clay coils are of an even thickness, and this can be tricky.
To make an even coil of clay squeeze a lump of clay into a sausage shape and then start rolling it with your fingers.
Spread your fingers out wide, roll the clay the entire length of your hand and fingers. Also, as you roll move your hands away from one another towards the ends of the clay coil. This will stretch and lengthen the coil of clay.
If you find your clay coil is getting lumpy, flattened, or uneven, check out my article and video on how to make an even coil of clay.
Once you’ve made some clay coils you are ready to start adding them to the base of your pot.
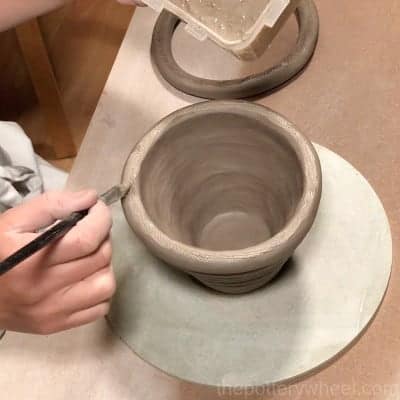
Step 3
The walls of the pot are built by adding the coils to the base. To attach the coils securely, you need to use a method called slip and score. This way of bonding clay involves scoring the two surfaces to be joined.
A mixture of clay and water is then applied to the scored surfaces. The liquid clay, called ‘clay slip’ acts like a glue that bonds the coil to the base.
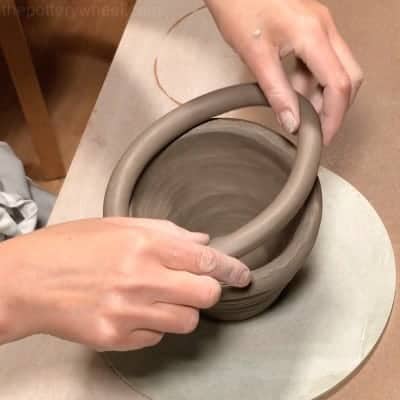
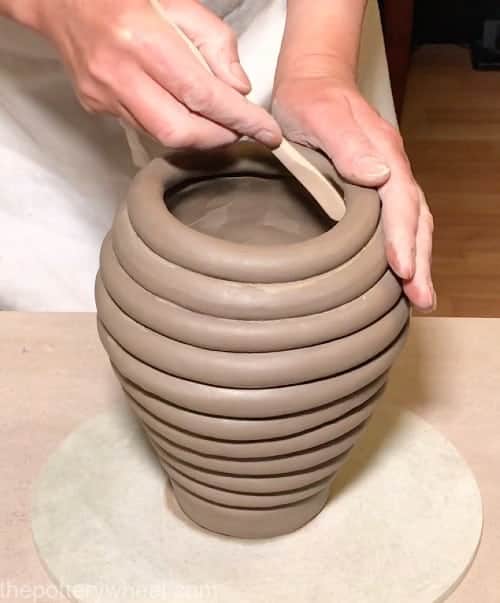
More coils of clay are added on top of one another using slip and score. Gradually the sides of the pot are built up.
Step 4
To make sure that the clay coils are firmly bonded together, it’s a good idea to blend the clay together on at least one side of the wall.
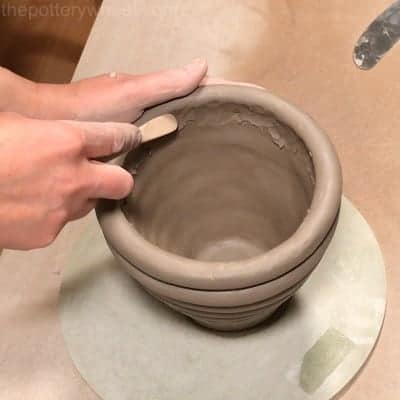
You can blend the clay on the inside of the pot and leave the coils visible on the outside surface as decoration.
Or if you want to have a smooth-looking coil pot, you can blend the coils on both sides. If you’d like a step-by-step guide with a video on how to make a smooth coil pot, you can check out this article here.
Different Coil Pot Techniques
Like the pinching technique, coil pottery is very versatile and can be used to make a whole range of ceramic pieces.
If you are making a larger form, it can be harder to get a symmetrical shape. So, another technique that can be useful for larger forms is to use a template when coiling.
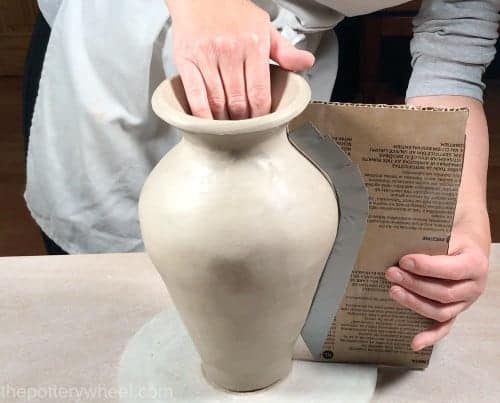
This involves holding a template up against the pot whilst you are adding the coil. You can then make sure that the coil is being added in the right place to build a symmetrical even shaped pot.
If you’d like to know exactly how to make and use a template to create symmetrical coil pots, have a look at this article I wrote here.
Ceramic Technique # 3: Slab Building Pottery
With slab building, pots are constructed out of slabs of clay. There is less evidence of slab building being used in an ancient historical context. Nevertheless, building pottery out of slabs of clay is one of the key ceramic techniques used by hand builders today.
Step 1
The first thing to do is to roll out a slab of clay. There are a few ways to make clay slabs.
One method is to use a slab roller. This is a hefty piece of equipment that squeezes clay through two rollers to make a very even slab.
It works a bit like a pasta maker. The advantage of a slab roller is that you can make large, very even slabs of clay really quickly.
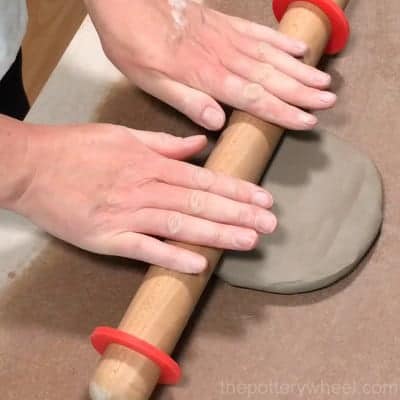
However, there are other ways to make clay slabs. Another common technique is to roll out the clay using a rolling pin.
Place two wooden battens that are as thick as you want the clay slab to be on either side of the clay. The battens act as a guide for the roller and will help you roll out a clay slab that is of an even thickness.
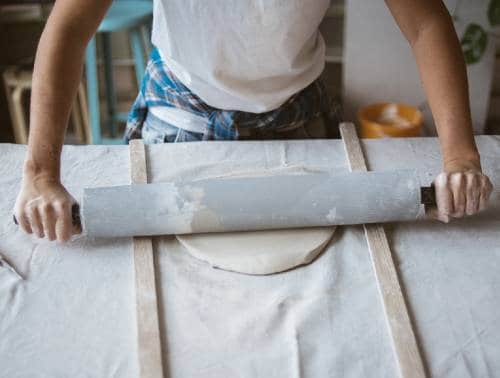
A key tip is to roll the clay out on a piece of fabric that has little or no texture. The fabric will stop the slab from sticking to your work surface, and you can peel the clay off it easily.
Step 2
Once you have prepared your slab, you can cut out the pieces of your pot. A slab pot can be made out of one single clay slab. For example, you can drape a single clay slab over or into a mold to create a nice fluid-shaped piece of pottery.
Alternatively, you can cut a few pieces out of the clay slab and join them together to make a more angular piece.
If you are thinking of making a slab pot by joining different slabs of clay together, it helps to use a template.
A template is a guide that will help you cut out your pieces of clay so that they are the right size and shape. It works a bit like a fabric pattern when you are making clothes.
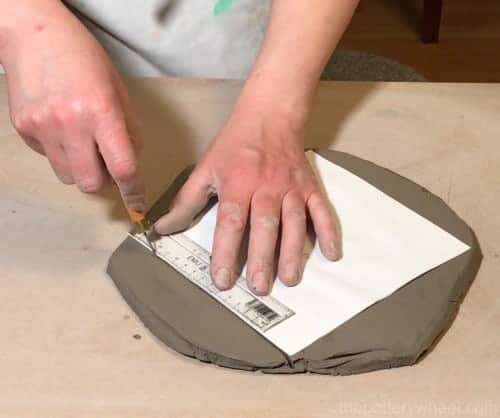
It’s possible to buy pre-made templates for slab pottery. Equally, it’s simple to make your own template to your own exact preference.
Step 3
Once you have your pieces cut out of the clay, they need to be joined together to assemble your pottery.
Clay slabs can be joined when they are still soft and bendy. Or they can be left to firm up so that they are stiff and almost leather hard. This is the difference between soft and hard slab pottery.
It is good to use soft slabs if you want to make a piece with curved fluid-looking surfaces. However, if you want to make a more angular piece with flat surfaces, the hard slabs are easier to handle.
The clay slabs are joined together using the slip and score technique mentioned above. It can also help to reinforce the joins with a small coil of clay. The thin coil is pressed into the joint then blended in until it is smooth.
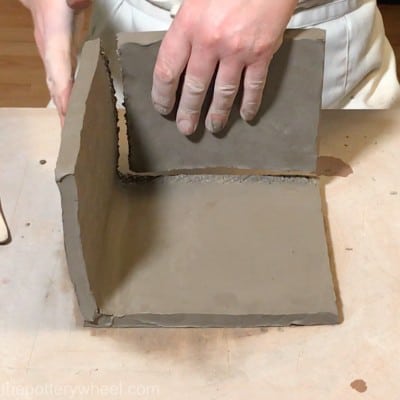
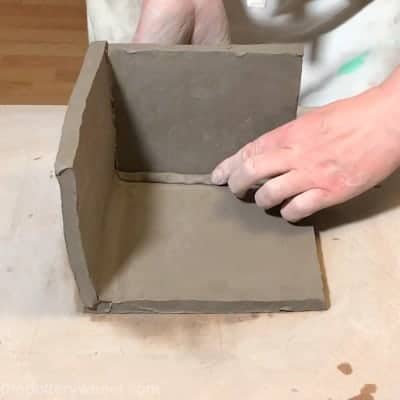
Slip and score are essential if you are joining hard slabs of clay. However, not all potters using soft slabs will use slip to join the edges of their clay. It’s best to experiment with the type of clay you are using.
Step 4
Once the slab pot has been assembled, you can tidy up the clay surface. Any lumps and bumps can be scraped away using a metal rib tool.
Then the surface of the clay can be smoothed and compressed using a rubber rib tool.
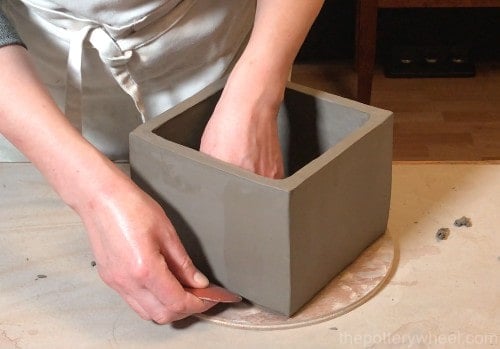
At this point, your clay pot is like a canvas. You can decorate it in whatever way you choose.
Once the clay is firm you can carve into it, or you can paint it with underglaze, or simply bisque fire it so that it’s ready for glazing.
Mix and Match Your Ceramic Techniques
There is no rule that says you can’t mix different ways of hand-building pottery. For example, you might make a base for your pottery by pinching out some clay. Then add some walls to your piece using the coiling method.
In fact, mixing the pinching technique with the coiling technique has an ancient history that stretches across continents.
You might also make a lid for your piece by draping a slab of clay over the top of your coil or pinch pot. Once you are familiar with these techniques, you can experiment and combine them in whatever way you like.
Further Ceramic Techniques
The ceramic techniques that were just covered fall in the category of hand building. The next ways to make pottery fall into categories of their own. The first one that we will look at is wheel throwing…
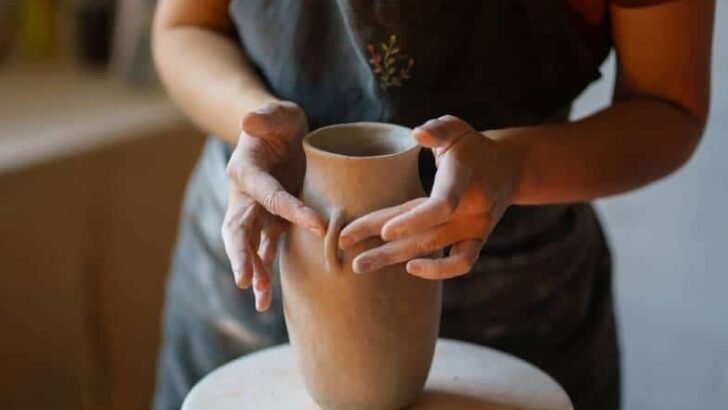
Ceramic Technique # 4: Wheel Throwing
I mentioned at the start of this article that hand building and wheel throwing are two of the main ceramic techniques.
The term ‘wheel throwing’ refers to making pottery on a potter’s wheel. It’s occasionally said that making pots on the wheel is called throwing because sometimes potters throw a ball of clay onto the wheel head before they start the forming process.
However, the term wheel throwing actually comes from the old English word ‘thrawan’, which means to twist or turn.
You can make all sorts of things on a potter’s wheel, including mugs, bowls, plates, and jugs amongst other things. However, a good starting point is how to make a basic cylinder shape, as follows.
Step 1
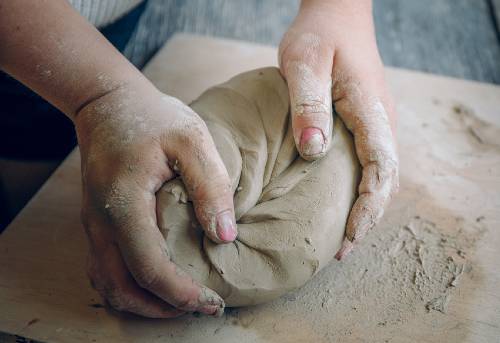
An important step in wheel throwing pottery is to wedge the clay before you start to make anything. Wedging is a process a little like kneading bread dough.
However, the difference is that when kneading dough, you are trying to get air into the bread to make it rise. In contrast, when you wedge clay, you are trying to get rid of any air pockets in the clay.
Another reason for wedging is to give the clay a nice smooth homogenous consistency. If a ball of clay is made up of hard sections and soft sections, it can be very hard to throw on the wheel.
So, ideally, you wedge your clay until it is homogenous and free of air pockets.
Step 2
The clay is then pressed down onto the center of the potter’s wheel. Once it’s stuck firmly on the wheel head, the clay needs to be ‘centered’.
Clay is centered when it’s been formed into a nice smooth dome shape right in the middle of the wheel head.
There are different methods of centering clay, one of the most effective methods is to cone the clay up and down.
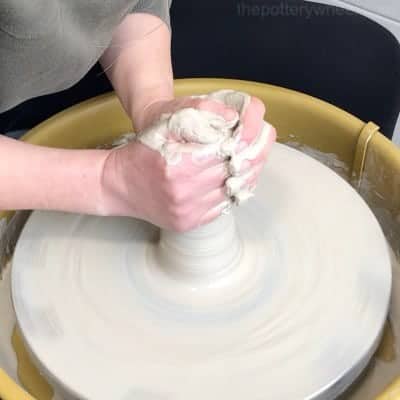
Centering your clay is one of the first things you learn how to do when you are wheel throwing and it can take time and patience to get the hang of it.
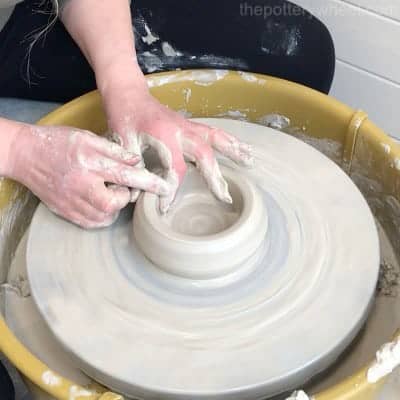
Step 3
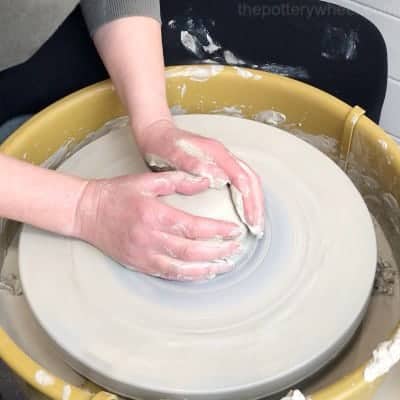
Next, the potter presses the tips of their forefinger and index finger into the center of the clay to create a hole in the dome. Some potters use their thumbs to do this.
The hole doesn’t go right the way through the pot to the wheel head. Instead, about 1/3 of an inch of clay is left at the base to form the bottom of the pot.
Once a hole has been created the clay can be ‘opened up’ to create a donut-shaped bowl.
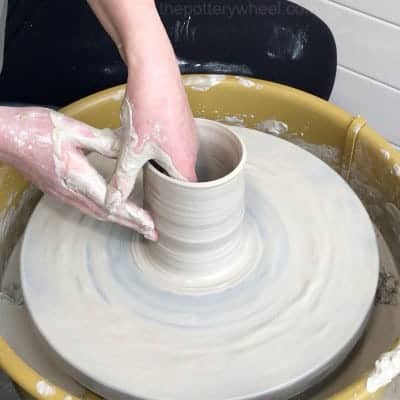
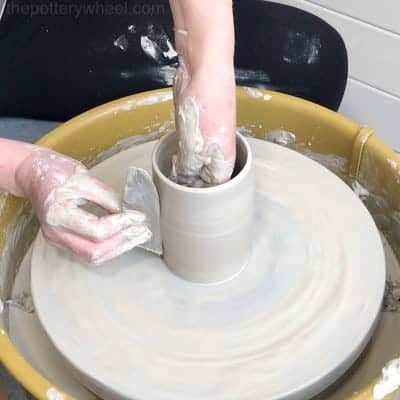
Step 4
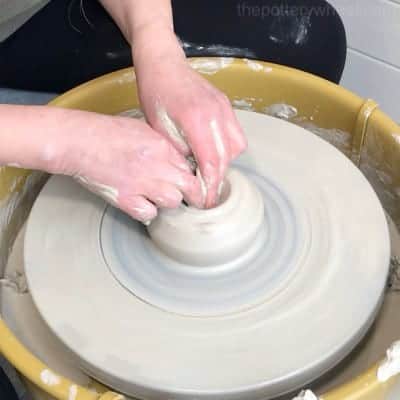
The last stage in making a cylinder involves pulling up the sides of the pot. ‘Pulling’ the sides involves putting light pressure on the inside and outside of the pot.
This can be done using the tips of your fingers or your knuckle on the outside and fingers on the inside.
Either way, the potter’s hands move up the pot a few times as it rotates on the wheel. This squeezes the clay upwards from the bottom of the pot towards the rim, turning the clay donut into a cylinder.
Step 5
A clay wire cutter is pulled under the clay pot once it’s been thrown. This separates the base of the clay from the wheel head. The pot can then be lifted off the wheel head carefully and set aside to dry.
Once the clay is leather hard, the pot can be fixed back on the wheel head. A selection of trimming tools can be then be used to trim off the excess clay and add definition to the shape of the pot.
Ceramic Technique # 5: Slip Casting
Slip casting is different from the previously mentioned ceramic techniques, in that you are working with liquid clay rather than solid clay.
Broadly speaking, clay slip (liquid clay) is poured into a plaster mold and allowed to harden before it is removed.
Slip casting is useful if you want to make a set of identical items because the pots come out of the same mold.
Step 1
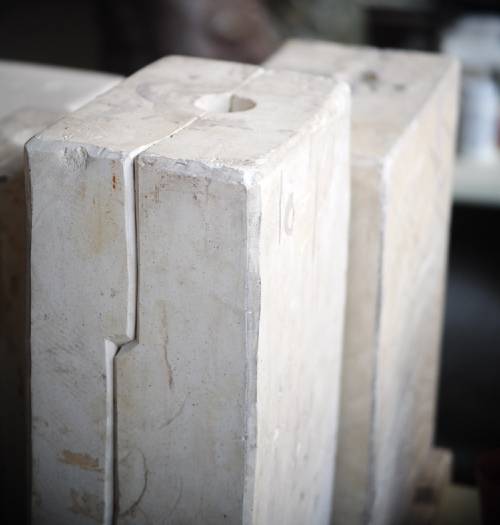
The first step with slip casting is to purchase or make a plaster mold of the item that you want to cast.
Simple plaster molds come in two halves. The two halves fit together to create a negative version of the item that you are making. Usually, each half of the mold will have ‘locating keys’ so that you can fit the mold together easily in the right position.
Once you have placed the two halves together, you need to bind them together so that they are firmly attached.
You can bind the two-piece mold together using masking tape, large rubber bands, or a rubber belt.
It can help to run some masking tape along the outside edge of the joint where the plaster molds meet. This can stop clay slip from leaking out during step 2 of the process.
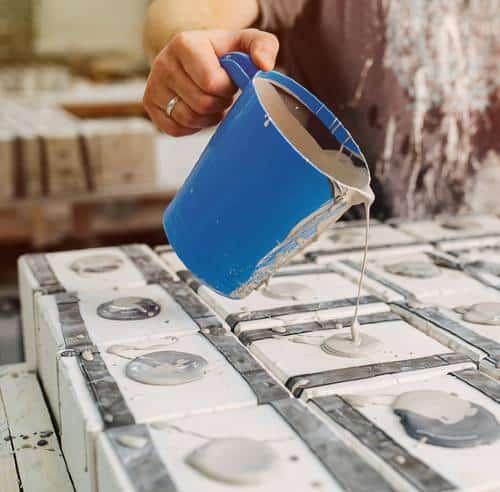
Step 2
When the two parts of the mold have been firmly bound together, you are ready to pour clay slip into the mold.
Position the mold on a level surface and prepare the slip. Before pouring the clay slip, it’s important to stir the slip thoroughly so that it has an even consistency.
Pour the clay slip into the molds quickly but carefully into the mold. The clay slip will shrink inside the molds, so pour it right up to the brim of the mold. You can always trim off any excess after the cast clay has been released.
Once the slip has been poured into the mold, the plaster mold will absorb water from the clay. As the water is drawn out of the slip, the clay that is next to the surface of the mold will begin to firm up. And as it firms up it starts to take on the shape inside the mold.
The clay slip needs to be left in the mold for a while. Exactly how long it should be left depends upon how big the cast is. However, for a medium-sized piece like a mug or a bowl, it should be adequate to leave the mold to set for 5 or 6 minutes.
Step 3
The excess clay slip that is still liquid in the mold needs to be removed. This is done by picking up the mold, turning it upside down, and pouring it back into your slip bucket or jug.
After you have poured out the excess slip, it’s a good idea to leave the mold upside down for around 30 minutes. This will allow any leftover drips of slip to run out of the mold.
Once all of the liquid slip has drained out, you can turn the mold back over so that it is sitting on its base.
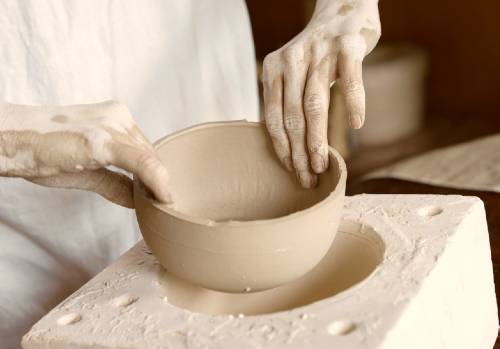
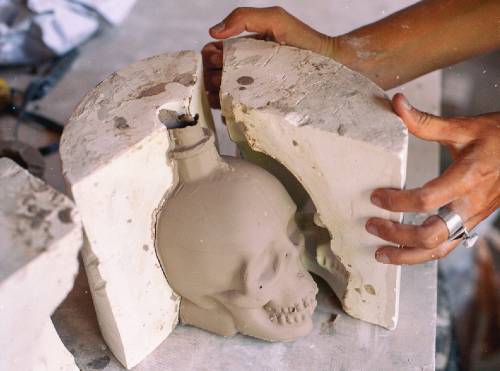
Step 4
The mold now needs to be left for the clay to firm up and become leather hard. Once the clay is leather hard, it can be carefully removed from the mold. Removing the cast involves carefully taking the two-piece mold apart and lifting out the cast clay.
Because the water has been drawn out of the clay it will have shrunk away from the plaster walls a little. So, it should be easy to remove the cast once the mold has been taken apart.
Step 5
The cast will have seam lines on it where the clay slip has spread out a little into the join on the mold.
Because the clay is still leather hard, these seam lines can be tidied up using a modeling tool or fettling knife. The lip of the pot will also, most likely need to be trimmed to make it level and tidy.
Ceramic Technique # 6: Jiggering, Jollying, and Ram Pressing
Jiggering, jollying, and ram pressing are somewhat different ceramic techniques. However, I’ve grouped them together for a couple of reasons.
The first is that these techniques share some similarities. And the second reason is that they are often used in a commercial setting or by production potters where uniform sets of pots need to be made. What’s more, in this setting production needs to be rapid. (source)
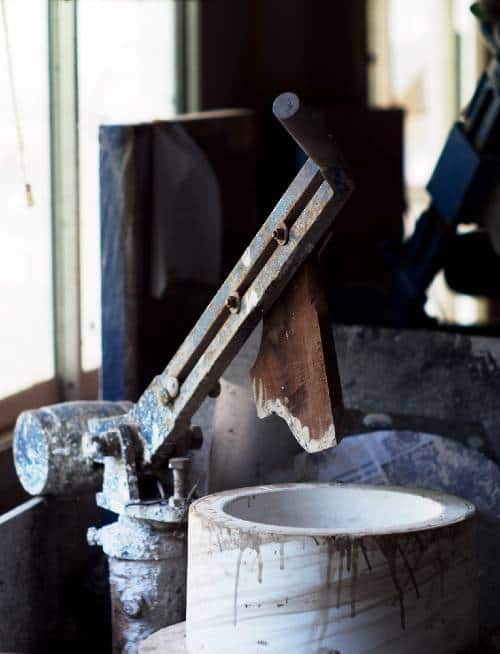
Jiggering
A jigger is a plaster mold and normally has a convex shape. The jigger mold is attached to the wheel head of the potter’s wheel and a slab of clay is draped over the mold.
A mechanical device called a jigger arm is then used to shape the clay. The jigger arm is a lever that can be lowered over the slab of clay as it turns on the wheel head.
The part of the arm that comes into contact with the clay slab has a shaped wooden die or template attached to it.
As the clay slab turns on the convex mold the wooden die scrapes away excess clay and shapes it into a particular form, such as a plate. It’s important for the potter operating the jigger to keep the clay wet so that the jigger slides over the slab as it turns.
Once the clay has been jiggered into shape and the rim has been tidied up, the plate can be left on the mold to become leather hard.
Jiggers are mostly used for flatter pieces of pottery such as plates and platters.

Jollying
A jolly works in a similar way to a jigger. The main difference is that a jolly is a concave plaster mold, which means that it dips inwards, rather than curving out. It is also use for items with a deeper hollow, like cups, mugs and bowls.
Like a jigger, the jolly mold is attached to a wheel head. A ball of clay is pressed into the mold and a lever arm is lowered down into the concave hollowed-out shape.
The lever arm has a die attached to the end, and this scrapes compresses and shapes the ball of clay into the shape of the mold.
Ram Pressing
A ram press is also a piece of equipment that compresses the clay into the required shape. However, a ram press does not rely on a rotating wheel head.
Essentially a ram press relies on a two-part plaster mold. A lump of clay is placed in the concave part of the mold. Then a heavy-duty compressing machine pushes the concave mold onto the convex mold, essentially squeezing the clay into the shape of the pot.
Ceramic Technique # 7: Modeling and Sculpting
This last item on the list of methods falls into a different area of ceramics to pottery.
The previous ceramic techniques described above are most often used for making pottery. And pottery is usually considered to include items like mugs, cups, plates, vases, bowls, pitchers, and plates.
By contrast, sculpture and modeling are often thought to be made for decorative or aesthetic purposes.
However, this distinction isn’t completely black and white. Some pottery is purely decorative rather than functional. Likewise, some models and sculptures do have a functional purpose too. And some pottery is a combination of being functional and highly sculpted. A good example of this is Anna Pottery.
Different Types of Sculpture
There are lots of different kinds of sculptures. Some are figurative, meaning that it’s a representation of a form in the world. An example of this would be portrait sculpture.
Other sculptures are abstract and a representation of the artist’s imagination. And then there are sculptures that are a mixture being figurative and abstract.
Although sculpture is quite different from pottery, I have included it on this list of ceramic techniques as sculptures made from clay are a type of ceramic artwork.
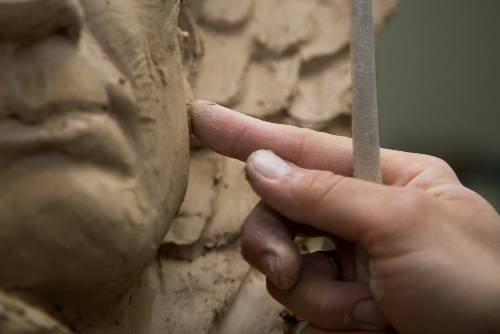
How Portrait Sculptures are Made
There are different approaches to making a portrait sculpture. One way is to make a supportive armature to build the head and shoulders, or ‘bust’ around.
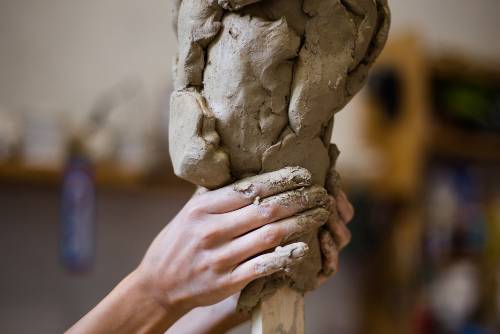
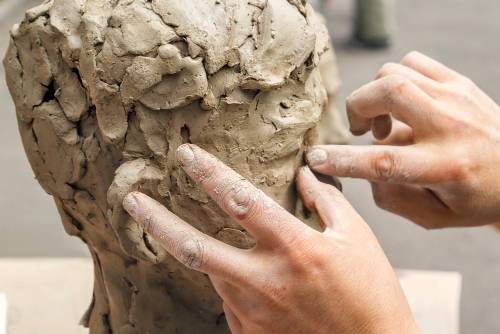
An armature is a wire frame mounted on a stable, usually a wooden base. Clay is then pressed onto the armature and modeled to form a representation of the person who is being sculpted.
Once the likeness is complete the clay sculpture can be finished in a number of ways.
Firing the Clay Sculpture
One way is to cut the sculpture in half and remove it from the armature. A lot of the clay on the inside of the sculpture is then cut away.
This process thins out the walls of the piece so that they are not too bulky. Once the walls are of an even thickness and not too thick, the two pieces can be joined back together again.
The best way to join the two halves of the sculpture is to slip and score the two surfaces and then press them together. The seam left at the joint will need to be tidied up and re-sculpted.
The process of hollowing out and re-joining the halves of a sculpture is a delicate one. And care has to be taken not to damage the details of the sculpture.
Once the clay has dried, the bust can then be fired in a kiln.
Making a Cast of the Sculpture
An alternative to firing the sculpture in a kiln is to make a mold and cast the sculpture in plaster. I have found the best way to make a cast of a sculpture is to make a two-part plaster mold.
The way that I prefer to do this is to paint the finished clay sculpture with a silicone rubber mold-making mixture.
When this rubber mixture is fresh out of the can, it is liquid and can be painted onto surfaces. However, when exposed to the air, the rubber layer will become solid rubber but remain soft and flexible.
I then make a two-part plaster mold around the rubber layer. Once the plaster mold has dried and is solid, you can separate the two halves. The rubber layer next to the sculpture can be sliced open a little way. It’s just sliced enough so that the mold can be peeled off the sculpted head.
The rubber mold then fits nicely inside the two-part plaster mold. Liquid plaster can then be poured into the inverted rubber mold and it will create a plaster positive of the clay head.
The good thing about this approach is that you can make more than one copy of the sculpture. And you can decorate the plaster with whatever finish appeals to you.
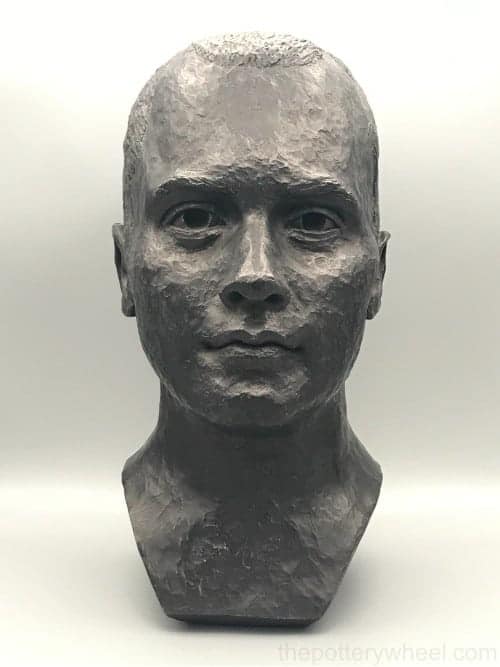
For example, you can decorate it so that it has a bronze-like finish, so your sculpture will look like it’s made out of bronze. I made this sculpture below out of clay, then cast it in plaster and gave it a bronze look finish.
You can find out how I created this bronze look using boot polish and bronze powder in this article that I wrote on glazing your pottery at home.
Final Thoughts on Different Ceramic Techniques
I hope this article has given you a sense of how broad the range of different ceramic techniques is. You may find that one approach naturally appeals to you more than the others.
But there is no rule that says you can’t make pottery in a number of different ways. I’d suggest experimenting and seeing which of these ceramic techniques you feel more at home with. Then take it from there. I hope you enjoy exploring.


