The first step in making coil pottery is learning how to roll a clay coil. This might sound simple, and of course, in some ways, it is. But, it is also a bit of a skill. When I started making coil pots, I was surprised by how tricky it can be to roll a clay coil. So, I thought I’d write an article about the problems you might have when making a clay coil. And how to deal with these difficulties if they arise.
To make a roll a clay coil, squeeze a ball of clay into a sausage shape. Roll the clay sausage on the table using the whole length of your hands, from fingertips to wrist. Spread your fingers out and move your hands from the middle of the coil outwards.
This sounds easy, and if you see someone experienced in coil pottery making a coil, it looks easy too. However, if you are new to making clay coils, these are some problems you might encounter:
- Your coil starts to flatten out and thump on the table as you roll
- Hollow clay at the end of your clay coil
- Uneven coil width
- Coil clay cracking
- Lines and creases along the length of the coil
- Ridges along the surface of the coil
I will go through some top tips on how to deal with these problems. It’s worth mentioning, that if you’d rather not spend time making coils, you can use an extruder. However, I think learning to roll a clay coil is a useful skill. So, read on… you never know when you may need to roll a clay coil without an extruder handy…
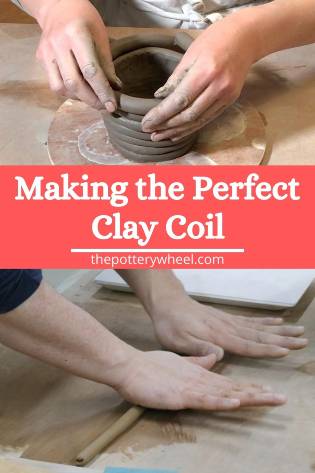
How to Roll a Clay Coil
Here are some top tips on how to make the perfect round clay coil. Here is an overview of the process…
Tip 1) What Clay Are You Using?
There is no right or wrong kind of clay to use for making a coil. Different potters will recommend different types of clay for coiling. Ultimately it depends on your own personal preference. However, here are a few things to bear in mind when you are choosing.
Grog?
A clay that contains grog will be stronger than ungrogged clay. Grog is granules that are added to clay to give it grit and strength. It is clay that has been fired and ground up into granules of different sizes. Some grog is fine, other grog is coarse. Either way, clay with grog will keep its shape and support its own weight more than ungrogged clay.
For that reason, potters will often recommend clay with grog for hand-building pottery and sculpting. My own experience is that working with clay with a fine grog in it does make pottery easier.
However, other potters prefer to work with ungrogged clay for coiling. The reason for this is that sometimes grogged clay is not quite as elastic as ungrogged clay. Whilst it might be strong, if you bend grogged clay, it can sometimes get a bit crumbly and crack.
I would suggest trying for yourself and seeing which you prefer.
Porcelain?
A word on porcelain and clay coils. Porcelain clay dries out quite quickly as you work. Because coiling takes longer than throwing on the wheel, you may find porcelain clay dries out too quickly for coiling. One suggestion is that if you are making coils out of porcelain, you use them for smaller coil pots. That way you can complete the piece in a shorter time frame. And it’s less likely to dry out unevenly.
The other thing about porcelain is that it’s quite soft and not especially plastic. Plastic clay is clay that is easily shaped and keeps its form after it has been shaped. By contrast, porcelain tends to slump back into a shape of its own choice.
Overall, my suggestion is that either stoneware or earthenware clay with a fine grog would be a good choice.
Whichever type of clay you use, it’s important that the clay is soft and moist for rolling a clay coil. If the clay is too dry and hard, it will be difficult to roll a clay coil of even thickness. It is also much more likely to crack when you bend the coil if it’s too dry.
Tip 2) How to Avoid Your Clay Coil Cracking
When you roll a clay coil the clay can dry out a little. This can happen even if your clay is soft and moist, particularly if you are rolling on an absorbent surface.
If your clay is too dry, I’d recommend rehydrating it before you start coiling. The simplest way to do this is to wrap your clay in a damp towel or rag. Place the wrapped clay into a plastic bag and leave it overnight. By the morning your clay will be nice, moist, and soft.
Another tip is to mist your work surface with water. I use an MDF surface for rolling and wedging. It’s relatively absorbent. To stop it from drawing water out when I roll a coil of clay, I often spray it with water.
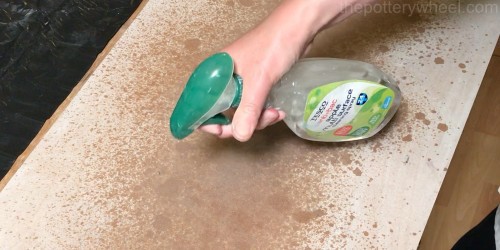
Spray your surface and give the water a moment to soak into the surface. Or wipe the excess off with a cloth. The surface needs to be damp, but not wet and slippy. If it’s wet and shiny the clay will just skid about on the surface.
Tip 3) How to Avoid your Clay Coil Sticking to your Surface
Alternatively, if you may find your clay coil is sticking to the rolling surface. If that is the case, then make sure the surface is dry. You should not have this problem with an absorbent surface.
If you are rolling clay coils on a non-absorbent surface like melamine, the clay coil may stick. You can avoid this by covering the surface with a piece of canvas.
Tip 4) How Much Clay to Use?
You will be surprised how long a clay coil will become from a modest-sized ball of clay. The length of coil you want, does, of course, depend on the piece that you are making.
However, a good rule of thumb is to roll your clay out to the width of your pinky finger. If you use a large chunk of clay, this will make a very long coil indeed. And the longer your coil gets, the trickier it will be to keep it even.
When I’m making a coil, I use a ball of clay about the size of a lemon or a small orange. This is normally enough for a coil if you are making a medium-sized bowl or cup. If it gets too long you can always cut it in half and turn it into two coils.
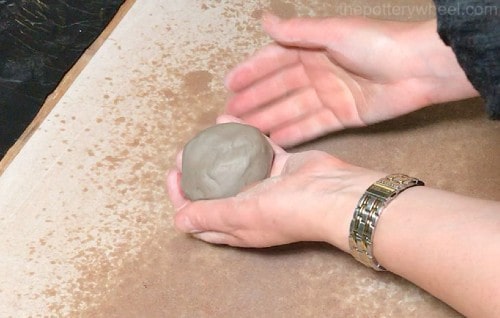
Tip 5) Squeezing The Ball of Clay into a Sausage
After you have patted your clay into a ball, you squeeze it with your hands into a sausage shape. I find the best shape is to make it into a cigar shape with tapered ends.
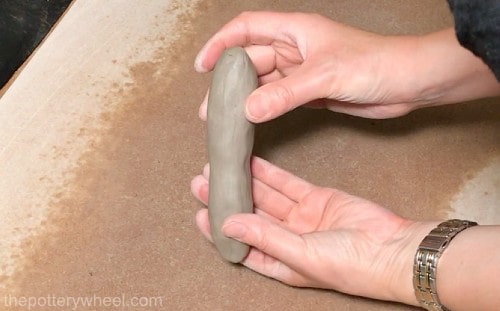
Tapered ends are a good idea because they help you avoid the problem of your coil getting hollow ends.
Hollow coil ends look a bit like a spring roll. The clay on the surface of the coil starts to spread out over the ends and creates a hollow shape.
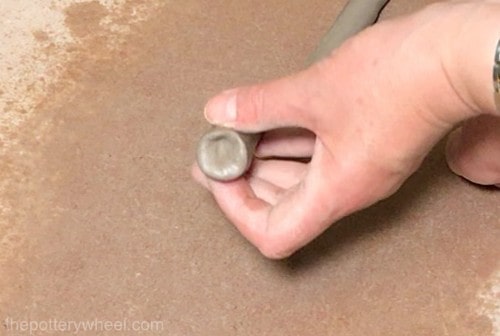
This becomes a problem if you don’t notice that it’s happened. Air pockets can get trapped in the clay coil and cause your piece to crack or explode when being fired.
Whilst you can just cut the hollow ends off if you spot them. This takes away some length from your coil. And you end up with little dry offcuts of clay. Additionally, it’s harder to keep the coil of an even thickness at the ends when the ends are hollow.
Once you have it in a tapered sausage shape, roll the clay log between your palms to smooth the shape. Do this a few times, until the sausage is relatively round.

You are then ready to roll the clay coil on the work surface.
Tip 6) Twisting the Sausage!
When you roll a clay coil, it is easy for the roll to start flattening out. Once the coil is no longer circular, it becomes very difficult to roll. You will know when it’s flattening out because it will make a thumping noise as you roll.
If this happens the best thing to do is stop rolling. Put the coil on the table with the narrow side of the flattened coil in contact with the tabletop. Then pat and press the coil so that it becomes square, rather than oblong. Once each side of the flattened coil is equally sized, you can start to roll again.
However, a trick to prevent the roll from flattening out in the first place is to twist the sausage. This is a tip I picked up from Karans Pots and Glass and it’s a genius technique.
Turn one end of the coil in one direction and the other end in the other direction. This will create a twist in the coil.
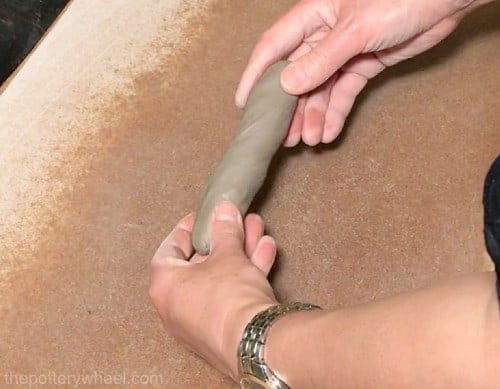
Twisting prevents the roll from flattening out. It’s a good idea to twist the sausage right at the start before you begin rolling. Then now and again as you roll, pick the coil up and give it another twist.
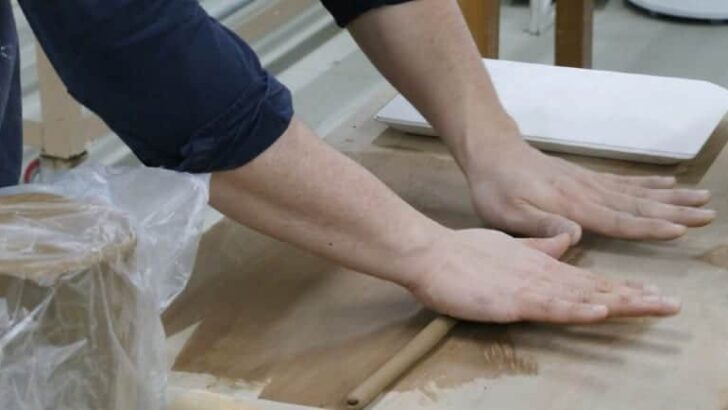
Tip 7) Which Part of the Hands Should You Use to Roll?
Most potters recommend using the whole of your hand when you roll a clay coil. Ideally, you start rolling at the tips of your fingers and roll all the way through to your wrists. Using your whole hand means that the clay will go through a complete revolution when it’s being rolled.
If you use a small portion of your hand, the clay is moved back and forward an inch or so. The result of this is that one side of the clay will be worked on more than the others. The upshot of this is that the coil will start to flatten out.
So, generally, potters recommend that the clay goes through at least one full turn (ideally more) during each roll.
Nevertheless, as with many techniques in pottery, not everyone agrees with this. I’m aware of some potters who only roll using their fingers. And others who prefer to roll with their palms.
Personally, I use a mixture of using the whole hand, and sometimes just using my fingers. Whichever part of the hand you use, it is important that you are moving your hands in the right direction. So, let’s take a look at how to move your hands.
Tip 8) How to Move Your Hands when You Roll a Clay Coil
When you roll a clay coil, your hands are actually pulling the clay out into a thinner coil. You do this by moving your hands backward and forwards. But also, by moving your hands outwards as you roll. Really you are fanning the clay out, with an outwards movement of your hands.
Start with your hands positioned in the middle of the clay coil, and migrate your hands outwards. Because of this outwards movement, your hands will be positioned at a slight diagonal. This will help you avoid ridges in the clay coil. Ridges can happen if your fingers stay rolling in the same place for too long.
Tip 9) Keep an Even Light Pressure
If your clay is soft enough, you should not need to apply much pressure to roll a clay coil. Focus on stretching the clay outwards rather than squashing it down. You will need to apply a little pressure, but this should be light and even.
If one area of the coil has become thinner than another, simply focus on the thicker section for a while. This should even the thickness out.
Tip 10) What to do if You Roll Too Thin?
If one section of the coil gets too thin, you can try to thicken it up again. You do this by reversing the motion of your hands. Rather than moving your hands outwards, start to move them inwards on this section.
Sometimes you will be able to compress the clay back together and thicken it up. However, this doesn’t always work and can make your coil messy. Usually, if I have made a roll too thin, I just cut that section off, or I start making the coil again.
Tip 11) How Thick to Roll a Clay Coil
How thick to roll a clay coil, depends on what you are making. Your coils need to be thicker if you are making a large planter for the garden. By contrast, if you are making a dainty trinket dish they will need to be quite refined.
However, a useful rule of thumb is to make your coils about the thickness of your pinky finger. Coils of this diameter are normally a good size for medium-sized vessels like cups, bowls, and vases.
When you blend your coils in, you will lose some of the thickness. So, your pottery walls will end up being thinner than the width of the coil you roll.
Tip 12) Covering Your Coils
When you are making pottery with clay coils, it’s best to make a few coils at once. Then you will have a supply prepared before you start coiling. However, coils of clay dry out quickly. Therefore, it’s best to cover them with a plastic bag whilst they are waiting to be used.
To watch a complete video of the process, check out my YouTube video, How to Make a Perfect Clay Coil.
Final Thoughts on How to Roll a Clay Coil
Like most things in pottery, learning to roll a clay coil simply takes a bit of practice. It can be fiddly and frustrating at first, but once you have mastered it, it will become easy and fast. You will then be ready to make beautiful coil pottery.


