
Pinch pots are one of the easiest and fastest ways of hand building pottery. Once you have mastered the basic pinch pot technique you can use it to make a lot of clay projects. So, I thought I’d write a step-by-step guide on how to make a pinch pot.
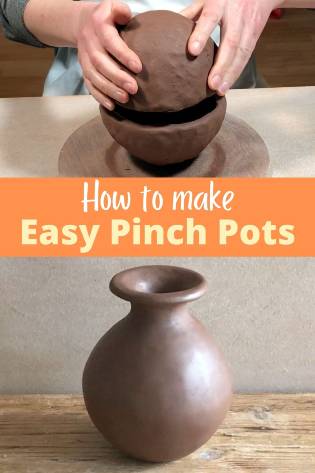
In this article, I start off by demonstrating the basic pinch pot method. Then I go on to show how this method can be built on to make different pottery designs. These pinch pot ideas will include:
Here are the pieces that I made using the techniques described in this article.
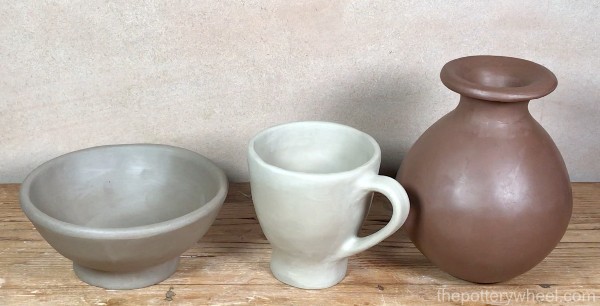
If you are interested in a particular project you can use the link above to jump straight to that section. Otherwise, I will start off with an overview of the basic pinch pot technique.
The Basic Pinch Pot Technique
To make a pinch pot, first, decide how large you want the pot to be. Then slice off a piece of clay. The size of the pinch pot you are going to make will depend a little on the size of your hands. Pinching a big piece of clay can be a little tricky for small hands. So, if you are helping a child then it’s best to start off with a small ball of clay.
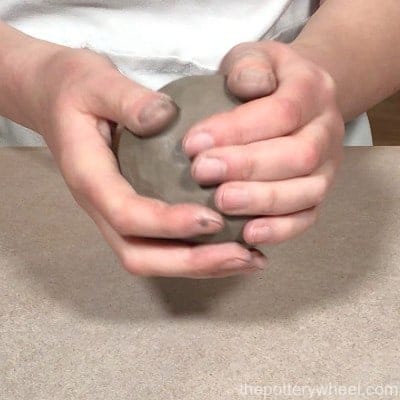
To make a small pinch pot, like a candlestick holder, use a ball about the size of a satsuma. Gently pat and roll the clay in your hands so it is a nice neat ball of clay.
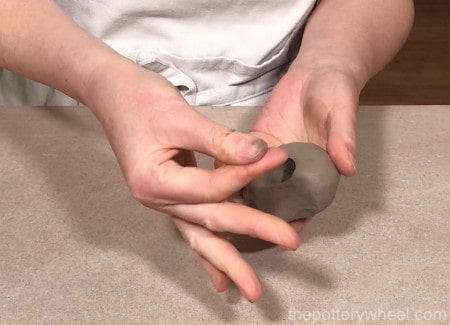
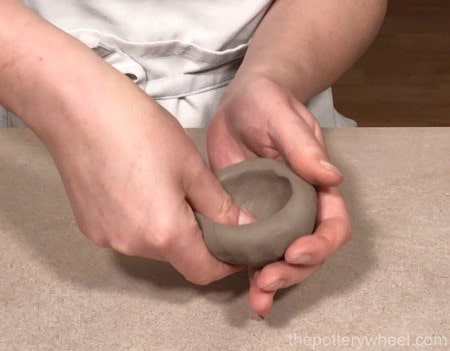
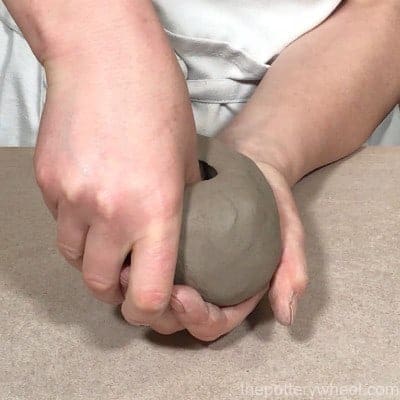
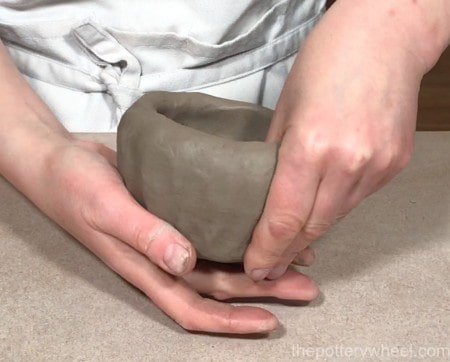
Then supporting the clay ball in one hand, press the thumb of your other hand into the clay. The thumb needs to be pressed into the center of the clay.
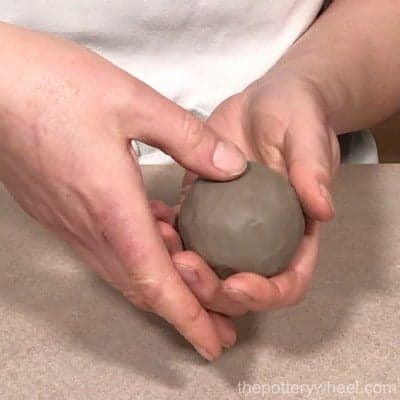
Ideally, the clay around your thumb needs to be of equal thickness. If you press your thumb into the clay off-center, the process of pinching the pot will be harder. This is because as you start to pinch the clay out, the walls of your pot will be uneven.
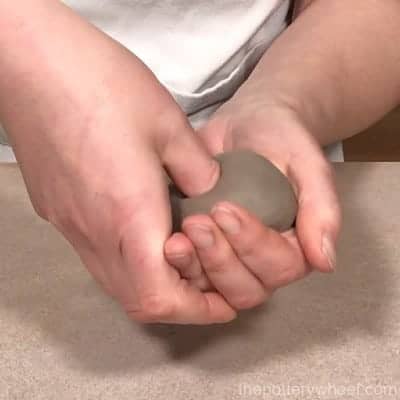
So, aim for the center of the ball of clay. Keep pushing your thumb in until you have passed the center of the ball. You will start to feel your thumb in your supporting hand. Don’t push your thumb right through the clay, or you will end up with a donut. The distance between your thumb and supporting hand should be about the width of your pinky finger. Which is about ½ inch thickness of clay.
Once you feel that your thumb is far enough into the clay, stop pushing and start pinching!
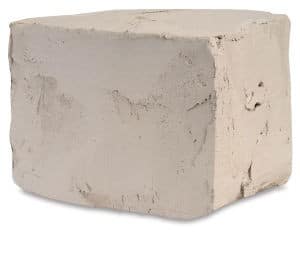
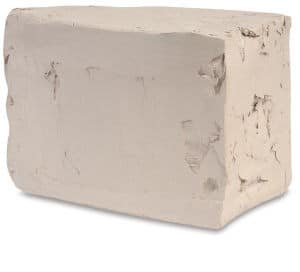
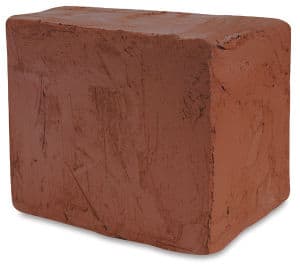
Here are some suggested clay’s that work well when you make pinch pots:
How to Pinch the Clay
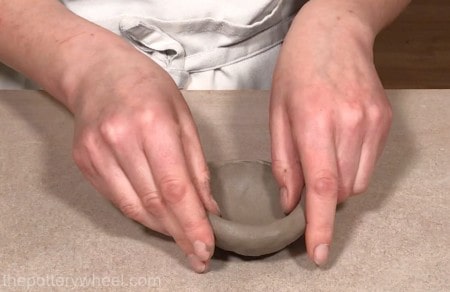
There is a knack for pinching the clay. Instead of pinching the clay with the tips of your fingers, keep your fingers straight. By keeping them straight, you use the whole length of your finger to pinch, not just the fingertips. If you only use the tips of your finger, you will only be pinching one area of the clay ball. Whereas if your fingers are straight, you pinch the whole ball of clay. This helps compress the clay into a pot shape.
Pinch the clay once with your straight finger pinch, then turn the clay a little in your supporting hand. This will position the clay so you can pinch the section of clay next to the piece you just pinched. Continue to pinch and rotate the clay. As you do this, you will find that the clay ball is beginning to open out into a pot shape.
If you like you can alternate pinching between hands. When you make a pinch pot, it can be a bit tough on the wrists and hands. Swapping hands as you pinch can give your hands a bit of a rest.
As the pot starts to open up, you can relax the shape of your fingers a bit. They don’t need to stay straight throughout the pinching process. They can begin to curve and help you shape the pot as you want it to be. Just as long as you are not nipping small sections of the pot with your fingertips.
Tidying Up your Bowl
As you pinch, you might notice that small cracks appear in the clay. This is because as the clay is being pinched out, it is being stretched. When you make a pinch pot, you are working quite quickly, and the clay is going through a lot of change. So, it’s not surprising that a few cracks appear.
If you see cracks, you can simply blend them in with the tip of your finger. If your clay feels a bit dry, you can use a little water to smooth the clay.
But I emphasize that this should be a little water dabbed onto the dry cracked area. If you use too much water the clay will become slippy and hard to work with. It’s best to smooth out small cracks as soon as they appear. If you leave small cracks they will open up into bigger cracks as you carry on working the clay.
Eventually, your pot will get to be about the size that you want it to be. This will vary depending on the size of the ball of clay that you started out with. Ideally, your pot should be about the thickness of your pinky finger. You can gently pinch the rim of the pot to make the rim a little finer.
The rim of a pot is usually the first thing that anyone sees of your pottery. So, it’s good to focus on making that look nice. If you like you can turn the pot upside down and gently drop it onto your work surface. This will level out the rim. You can make a basic pinch pot using this method in less than 5 minutes.

So, that is the basics of how to make a pinch pot that has a very simple design. You can build on this technique to make really lovely hand built pottery. First of all, let’s take a look at how to make a pinch pot bowl, with a foot ring….
How to Make a Pinch Pot Bowl
The main technique for making a pinch pot bowl is the same as the one outlined above. Basically, you are making a pinch pot, but it is larger and you are using more clay. In addition to that, you will be adding a foot ring, if you want to. And you will probably be spending more time finessing the look of the bowl. Unless, of course, you want a very organic-looking rustic bowl. Which does have a charm all of its’ own.
Here are some tools that it will be handy for you to have:
- Modeling Tools
- Serrated Rib
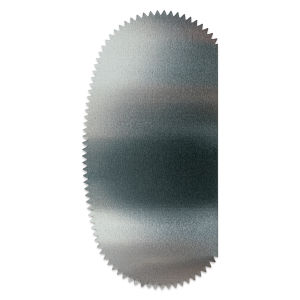
- Metal Rib
- Rubber Rib
- Platter Tool
- Shredder
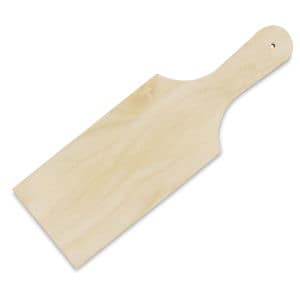
- Wooden Paddle
- Pottery Bat
- Banding Wheel
If you don’t have these tools and you want to get started, don’t worry. You will be able to find some alternatives from your home that will work well. I will suggest some of these alternatives as I go through the step-by-step process in the next section.
How Much Clay to Use?
The amount of clay you use will depend upon how large you want your bowl to be. A medium-sized cereal bowl requires a ball of clay the size of a large orange or a small grapefruit.
When you are starting out, I would recommend sticking to medium-sized pieces. Anything larger can be a bit difficult to manage until you feel confident with the technique.
How to Make a Pinch Pot Bowl – Step-by-Step
This is a step-by-step guide to making a pinch pot bowl:
Step 1 – Starting Off
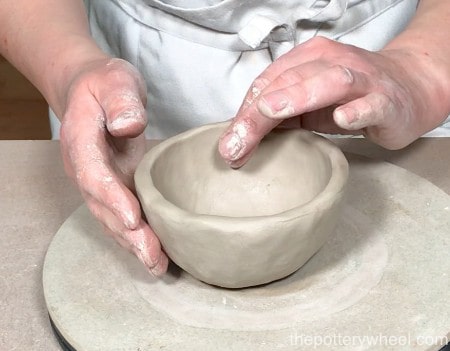
Roll and pat your clay into an even-shaped ball. As described above, you need to support the ball of clay in one hand. Then press your thumb into the center of the clay. Because you are using more clay than a little pinch pot, you will need to press your thumb in deeply.
If you have petite hands or are using a large ball, chances are, your thumb won’t get quite deep enough. That’s fine, I’m going to describe how to make the base of your pot thin enough in a moment.
Step 2 – Pinching your Clay
Once your thumb is as deep as it will go, begin to pinch the side of the clay ball. Pinch with the length of your fingers and turn to gradually open up the ball of clay.
Step 3 – Thinning the Base and Walls
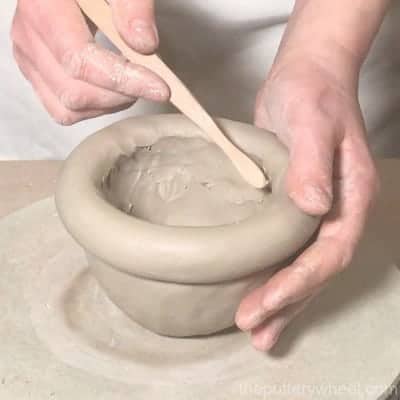
Once the clay has opened up a bit, you will feel if the base of the pot is very thick. If the clay on the base is thicker than ½ inch, you need to thin it out. To do this you need to move some of the clay on the base up the walls of the pot. An easy way of doing this is to use the tips of your fingers.
Start by supporting the pot in one hand. Then using the tips of your fingers, gently stroke the clay on the base of the pot. The stroking motion should go from the base of the pot up the walls of the pot. As you do this, some of the clay in the base will be pulled up the side of the pot. This will thin out the wall of the base.
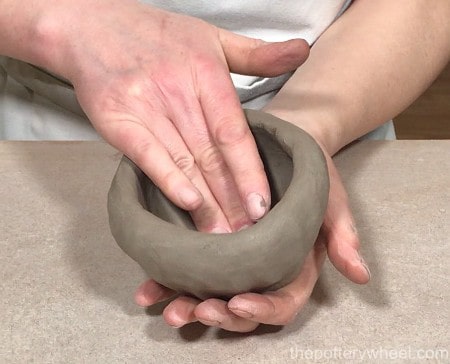
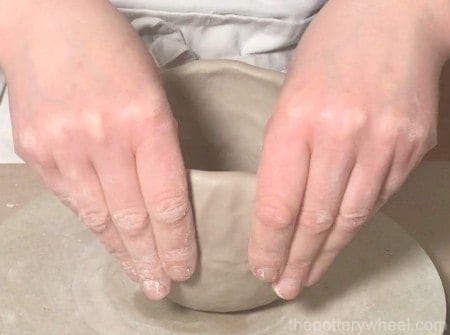
Once you have done a few strokes in one direction, turn the pot and continue. By turning the pot, an even amount of clay from the base is added around the circumference of the bowl. If you keep stroking in one position, all the clay will end up on one side of the bowl.
You will start to feel the base of the bowl thinning out in your supporting hand. The base will feel less heavy, and you will begin to feel the tips of your fingers through the clay. Be careful not to overdo it. You don’t want to make the base too thin. Aim to make the walls of the bowl of an even thickness all over.
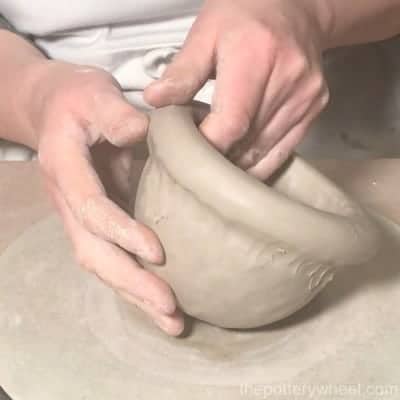
Step 4 – Shaping the Bowl
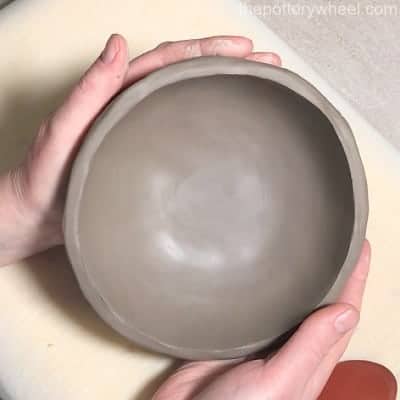
As you work, turn your bowl over and check the overall shape. Is it taking on the shape that you want? In this example, I wanted the bowl to be a nice even shaped hemisphere. So, I turned the bowl over and used my hands to shape the bowl into a half-sphere.

Step 5 – Using a Banding Wheel
Continue this process by using a combination of pinching, stroking, and shaping. As you do this your bowl shape will open up. Also, the sides of your pinch pot bowl will become thinner and more even.
Once you are happy with the thickness and shape of your bowl, turn it upside down on your work surface. At this point, it is best to use a banding wheel and a pottery bat to support your work. A banding wheel is basically a circular plinth that you rotate with your hand.
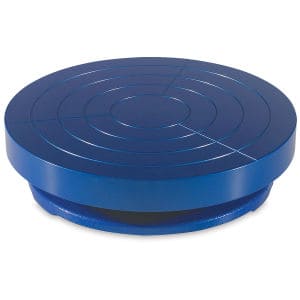
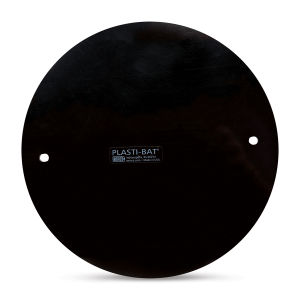
Until this point, you have mainly been supporting the pinch bowl in your hand. However, a banding wheel will allow you to turn your bowl easily on the work surface. Putting your bowl on a pottery bat means that you can transport it easily once you’ve finished working on it.
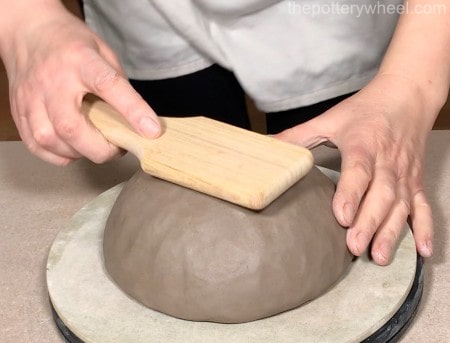
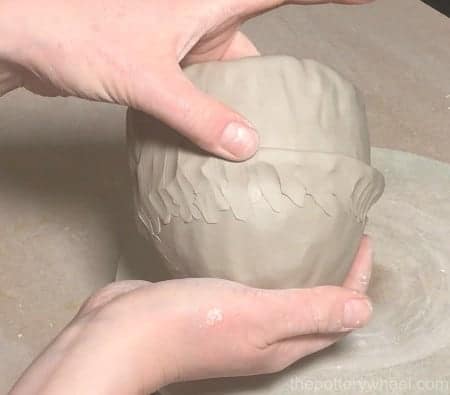
Step 6 – Making the Foot Ring
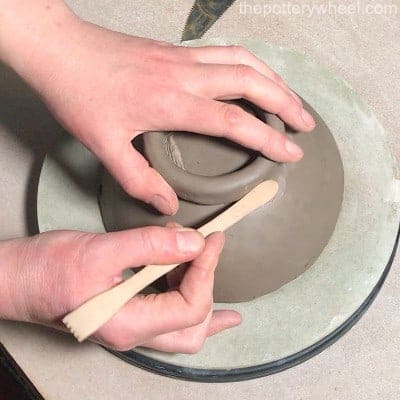
Gently pat the base of the bowl with a wood paddle, or a regular kitchen spatula. This will flatten the base of the bowl so that it sits level on your table.
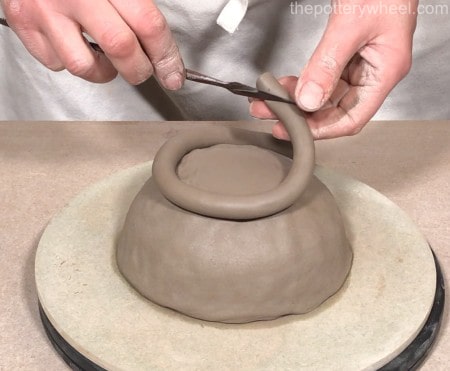
Then roll a coil of clay about the thickness of your pinky finger. This coil is going to become the foot ring on the bowl, so you need to cut it to the right length. Drape the coil around the base of the bowl, where you want the foot ring to be. Then cut the ends of the coil so that it is the correct length.
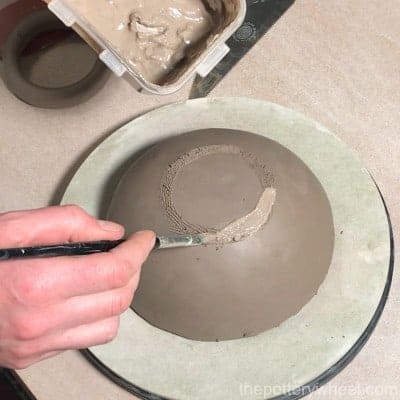
Once your clay coil has been cut to length, scrape the ends of the coil with a serrated rib tool. If you don’t have a serrated tool, a kitchen fork will work fine. The point of scratching the surface of the clay is to help the two ends bond together securely. So, anything that will scuff and scratch the surface of the clay will work.
When you have scored the surface, paint some clay slip on each end of the coil. Clay slip is really just clay and water mixed up to make liquid clay. Here are some easy ways to make clay slip.
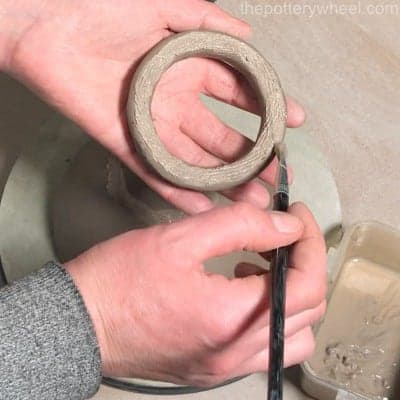
Once the ends of the coil have been scored and slipped, join the two surfaces. Blend the clay together with your fingers to make a smooth donut shape from the coil. Position the clay coil on the base of the bowl, but don’t attach it to the bowl yet. Instead, pinch the coil gently into roughly the shape you want it to be as the foot ring. Then wrap the bowl and foot ring in a loose plastic bag and leave overnight to firm up.
Step 7 – Tidying Up the Inside Surface
The next day, check to see how firm the clay has become. If it is still soft, you can take it out of the bag and let it sit in the open. Be careful that if it’s a hot or dry day, it doesn’t get too hard and dry.
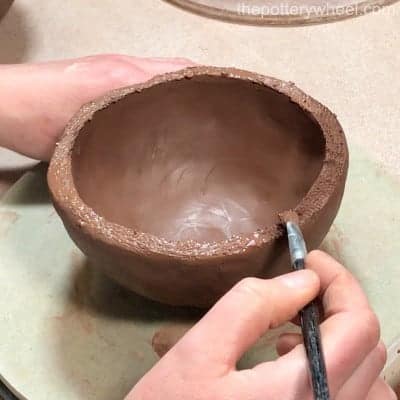
Once the clay is almost leather hard you can start tidying up the surfaces of the bowl. Start by scraping the surface of the inside of the bowl to remove any lumps and bumps of clay. You can use the back of a metal kitchen spoon. Or any implement that fits the curve of the inside of your bowl.
If you want to buy a tool to do this job, the Mudtools platter rib is a good choice. It’s what I’m using in this picture here. It’s perfect for this job as the curve of the tool fits perfectly in the bowl. This creates a smooth finish.
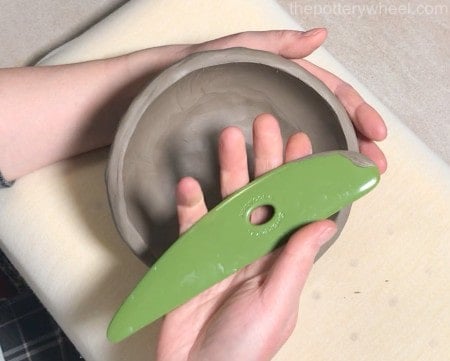
You can see that I’m resting the bowl on a piece of foam positioned on the table too. This prevents the base of the bowl from getting flattened on the hard tabletop.
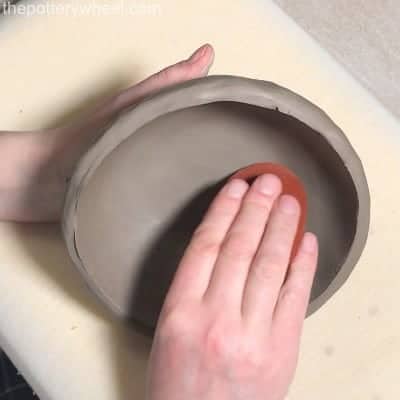
To smooth the surface off, I also use a combination of a metal rib tool and a soft rubber rib. First of all, I scrape the surface with the metal rib. Then I smooth the surface with a rubber rib. This combination of tools will create a lovely smooth, satin, compressed clay finish.
By the way, if you are finding this helpful, perhaps you’d like to learn how to make a pinch pot teapot.
If you would, you can download my ebook here for free. It’s a complete step-by-step guide on how to make a pinch pot teapot…
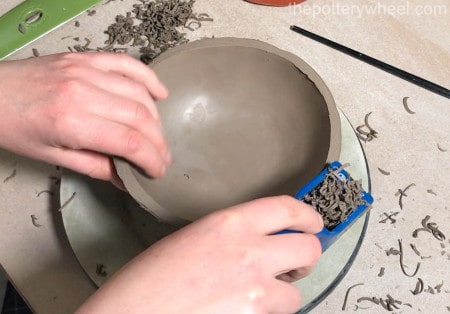
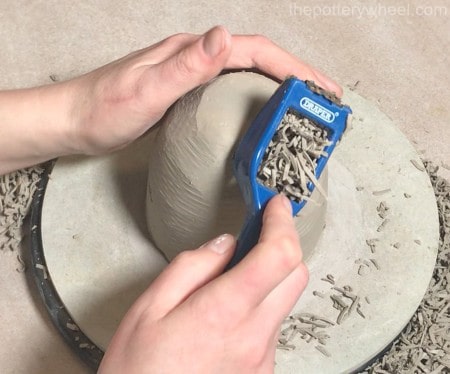
Step 8 – Tidying Up the Outside Surface
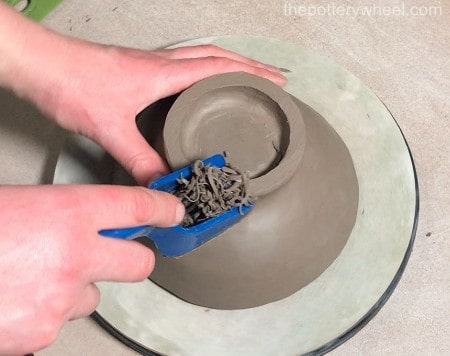
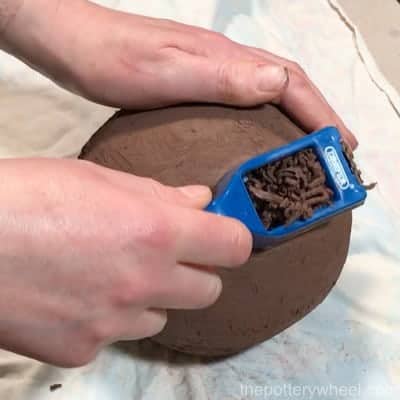
The next step when you make a pinch pot is to tidy up the outside of the bowl. An easy way to do this is to use a shredder to remove the lumps and bumps on the outside. A shredder is basically a rasp that helps you shave excess clay off leather hard clay. You either use a shredder that is made especially for pottery. One example of this is the Mudtools shredder. However, you will also find a similar tool in a local hardware store. The one I’m using in this picture is just a shredder I picked up from a DIY store.
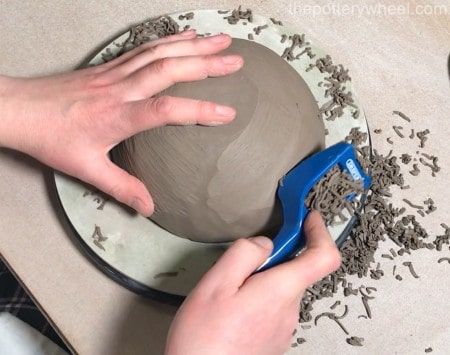
Run the shredder across the outside surface of the pinch pot bowl gently to remove unwanted surface imperfections. The shredder will leave a texture on the leveled-out clay. You can remove this texture easily with a combination of a metal rib followed by a soft rubber rib.
Step 9 – Attaching the Foot Ring
Use the serrated rib tool to score the base of the bowl where the foot ring will be attached. Also, score the side of the foot ring that will be joined to the base. Then apply slip to both surfaces.
Once you have scored and slipped the surfaces, position the foot ring carefully on the base of the bowl. Make sure you are happy that the foot ring is positioned centrally. Then you can use a wooden modeling tool to blend the clay of the foot ring onto the bowl. If you don’t have a modeling tool, you can use the rounded end of the handle on a teaspoon. Blend the foot ring in on the outside and inside of the join.

When the foot ring is attached, you can tidy up the join using your rib tools again.
The foot ring also needs to be trimmed and leveled off so that the bowl sits steadily on the table. The easiest way to do this is to use the shredding tool to remove any excess clay. Simply run the shredder over the bottom of the foot ring until it is the depth that you want it to be. And so that the bowl rests evenly on the work surface. Again, the marks from the shredder can be removed easily with your rib tools.
Step 10 – Levelling the Rim and Finishing Touches
One of the last steps, when you make a pinch pot, is to level off the rim of the bowl. This is done using a combination of the shredder and rib tools. I use the shredder to level off the rim. However, I also run it around the inside and outside edge of the rim to make the lip thinner. A chunky rim can look unfinished. So, shaving a bit of the clay off either side of the lip can make it look more refined.
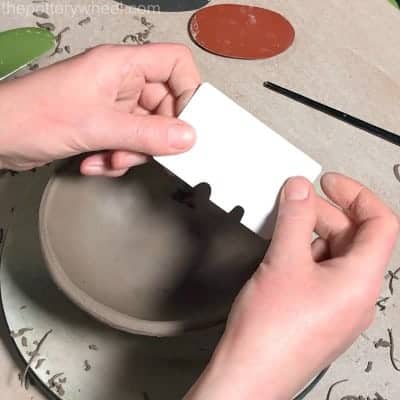
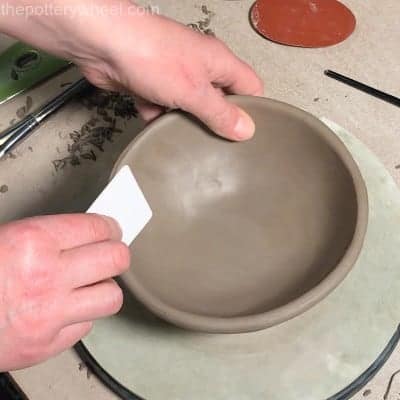
Another tool that I use to finish the rim is a gadget that I made myself. I snipped some curved sections out of an old library card. I’ve found the easiest way to do this is to cut the curves out using a pair of scissors. Then smooth the snipped-out sections of plastic with a small piece of sanding paper.
The snipped-out curve in the card can then be run around the rim of the bowl. This takes away any uneven lumps and bumps in the clay and leaves a nice curved even lip.
The last step is to run a small damp piece of chamois leather around the lip of the bowl. This gets rid of any small marks that have been left by your tools or your fingers. You can also run this around the foot ring too, to give the foot ring a final tidy up. It’s important that the chamois leather is just a little damp. If you use a very wet chamois, it will create too much slip on the surface of your clay.
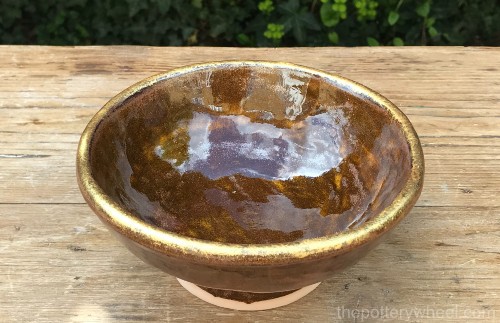
And here is the finished piece. It has been glazed using Mayco Elements, Copper Adventurine. And some gold leaf has been applied to the lip.
How to Make a Pinch Pot Mug
One way to make a pinch pot mug is to build upon the technique described above.
Step 1 – Making the Basic Mug Shape
Start off with a ball of clay about the size of a medium-sized apple. Using the basic pinch pot method, you pinch the ball into a simple cup shape. If you want to make a smaller, shallower cup, then this pinch pot might be big enough as it is.
However, to make a taller mug, then you can add height to your piece in the following way.
Roll out a chunky coil of clay, approximately 1 inch thick. Cut the coil of clay so that it is the length of the rim of the cup you have pinched. An easy way to do this is to drape a piece of string around the rim of the cup. Cut the string so that it is the same length as the circumference of the cup. Then lay the piece of string along your coil, and cut the coil to that length.
Slip and score the ends of the clay coil. Then join the two ends of the coil to make a clay donut, by blending the clay with your fingers.
Next, slip and score the rim of the pot and one side of the coil donut. Then place the donut on top of the clay cup that you have pinched out. Gently press the coil onto the rim of the cup. Then join the coil onto the cup by blending the clay together with a modeling tool, or your fingers.
Step 2 – Adding Height to the Mug
Once the coil is firmly attached, use a pinching action to create a mug shape with the clay. If you simply pinch the clay coil the clay will spread out to make a bowl shape.
So, the action with your fingers needs to be pinching the clay up and together. As I pinch the clay, I’m also moving my hands towards one another. Using this method, the clay coil will add height to the cup, rather than making it wider.
Once you’ve joined the two pieces of clay together, you can do an optional extra step to reinforce the join. Roll out another thinner coil of clay about the width of your pinky finger. This coil needs to be long enough to go around the circumference of the join.
Once you’ve rolled the coil out, flatten it a little with your fingers, so it’s a strip of clay. Then place the strip of clay along the section of the mug that you just joined together. Blend the strip onto the outside surface of the join.
This extra layer of clay will help make the joint a little stronger. Once you’ve blended the strip onto the mug, use a metal rib to scrape off any excess clay. And to smooth out the outer surface of the mug.
Step 3 – Scraping and Smoothing the Surface
In order to tidy up and smooth out the pinch pot mug, the clay needs to become leather hard. You can let the pot settle overnight loosely covered with a plastic bag. However, before you do this, it’s a good idea to smooth out the surfaces a little. So, using a mixture of the metal rib and rubber rib, you can scrape and smooth the surface of the mug. Try to get the inside and outside of the mug as smooth as possible before leaving the mug to harden.
Step 4 – Making the Foot Ring
Make a foot ring for the mug in the same way described above for the pinch pot bowl. It’s important to make the foot ring now so that the mug and the foot ring can harden together overnight. By placing them together as they firm up, they will have the same moisture content the next day. This will make it easier to join them, and also less likely that the two will separate when the clay dries.
Step 5 – Tidying up the Leather Hard Mug
Leave the mug and foot ring overnight to become leather hard. Depending on how warm or humid the atmosphere is, you may need to leave the clay covered in plastic. But if the weather is cold and damp, you may need to leave the mug completely uncovered for 24 hours.
Once the clay is almost leather hard, you can tidy up the surface of the mug. I find the best tools for the inside of the mug are the platter rib, metal rib, and rubber rib. I start off using the platter rib, then I use the metal rib. Finally, I smooth out the clay nicely with a soft rubber rib.
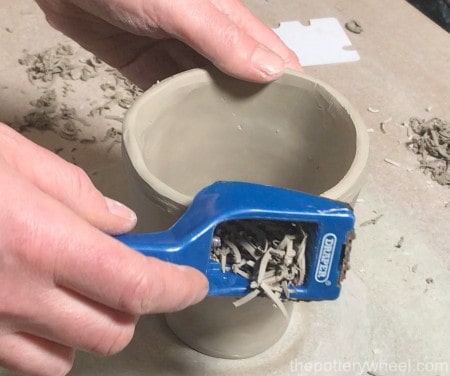
To tidy up the outside of the mug, I use the shredder first to remove lumps and bumps of clay. The shredder also takes some of the bulk of the clay away too. This is good because at this point the mug a little too chunky.
When the clay has been evened out using the shredder, I remove the marks made by the shredder. I do this using a mixture of the metal rib and soft rubber rib.
Step 6 – Adding the Foot Ring and Levelling the Rim
The foot ring is attached to the mug, using the same slip, score, and blending method described above.
Getting the rim or lip of the mug smooth and thin is important. Drinking out of a mug that has a rough lip or a lip that is too chunky is not comfortable. So, to make the rim of the mug less chunky, I run the shredder around the top edge. This takes away a lot of the unwanted clay, and also smooths out the lip.
I also use the shredder to level out the top edge of the rim, so that the mug looks even. Any marks left behind by the shredder need to be smoothed away with rib tools. The final step to smoothing is running a damp chamois leather across the lip and foot ring.
Step 7 – Making the Handle
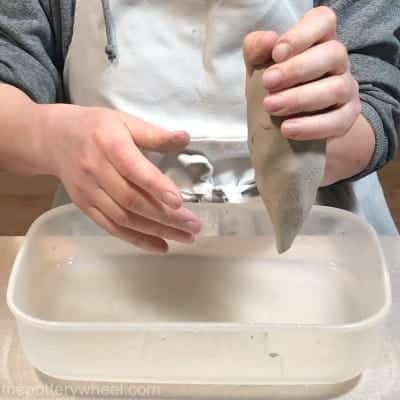
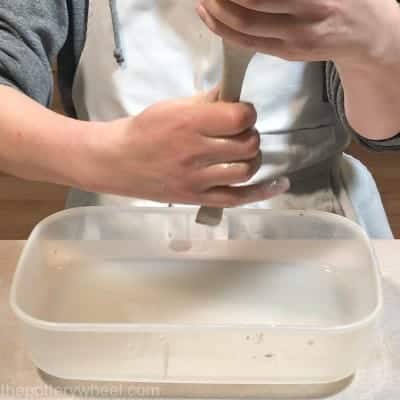
I find the easiest way to make a handle, is using a method called pulling a handle. Take a lump of clay and squeeze it into the shape of a large carrot or sweet potato. Then hold the fat end of the clay carrot over a bowl of water. Wet your free hand in the bowl of water and close your fingers around the narrower part of the carrot. Gently but firmly draw your closed fingers over the length of the clay. It’s a bit like milking a cow. Repeat this motion, stroking the clay downwards with a wet hand. By doing this you are ‘pulling’ the clay into a handle shape.
You can rotate the lump of clay in your hand so that you make an even-shaped handle. The clay handle will start to dangle down towards the bowl of water. Continue to do this until the handle looks and feels like it’s the right length and thickness. Then pinch the clay off at the top of the handle. Position the handle in a curved handle shape on a wooden bat. When it’s just been made the clay is very soft. So, you will have to let it become leather hard overnight.
Step 8 – Attaching the Handle
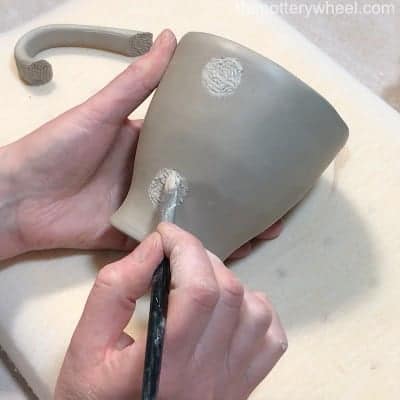
Once the handle is almost leather hard, it can be attached to the mug. To do this, you should trim the handle to the right length, so that it fits the mug. Then hold the handle up against the mug. Make small marks on the mug where you are going to attach the handle. Then slip and score these areas and the ends of the handle too.
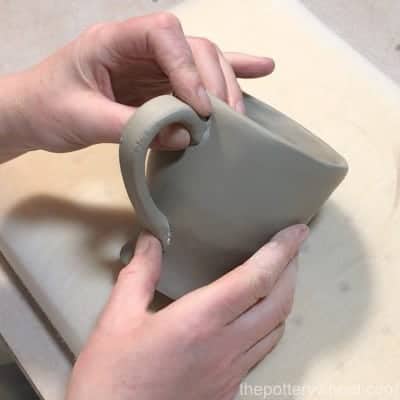
Press the handle against the mug gently but firmly, so that the slip bonds the handle to the mug. You can reinforce this join by adding a small coil of clay around the join. And blending the clay coil in where the handle joins the mug.
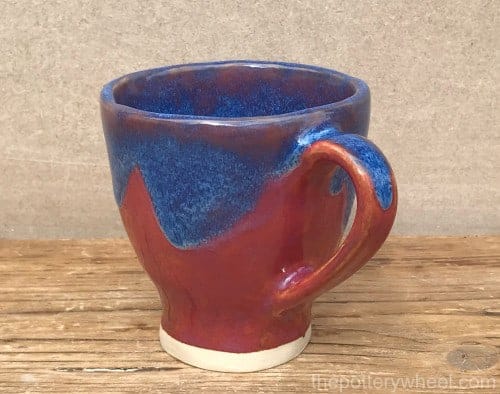
And here is the finished mug. It’s been glazed with Amaco Potter’s Choice glazes. The combination is Chun Plum as a base, with Blue Rutile on top.
How to Make a Pinch Pot Vase
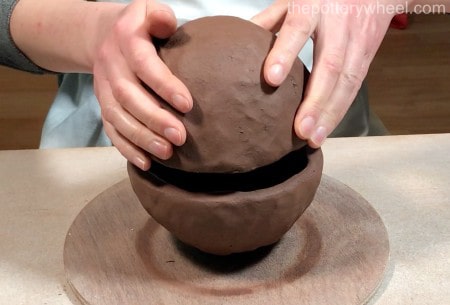
The easiest way to make a pinch pot vase is to make two pinch pots that are the same size. And join them together to make a hollow sphere.
Step 1 – Making your Pinch Pots
Start with two balls of clay that are the same size and weight. Then make a pinch pot out of both balls of clay. Before you let the clay go leather hard, check that the lips of the pots are the same size. You are going to join these two pots together by the rim, so it’s important that they match in circumference. Then let the pots firm up overnight.
Once the clay has become firm, tidy up the inside of each bowl. Once the vase is finished, you won’t be able to see the inside surface directly. However, at certain angles, it’s usually possible to see some of the inside surface of a vase. So, it’s best that you tidy this up before you bond the pinch pots together. You can tidy up the inside surface of the pots using a combination of tools and methods described above.
Step 2 – Joining your Pinch Pots
To join the pinch pots securely, simply score and slip the rim on both of the pieces. Then gently lower the lip of one of the pinch pots onto the lip of the other. Press the pinch pots carefully but firmly together.
You may have to wiggle and bend the pinch pots a little to make them line up. Once they are positioned next up against one another, you can use a modeling tool to blend the clay together.

When they are blended together, you can reinforce the join with a clay coil. To do this, simply make a clay coil and flatten it a little with your fingertips. Then drape the coil around the join on the pinch pots and blend the coil onto the join. You will need to tidy up the excess clay from the join once you have added the coil.
Step 3 – Tidying up your Pinch Pots
Leave the joined pinch pots to settle overnight. This will give the clay a chance to bond together firmly. Then using a shredder tool, shave off the rough surface from the joined pinch pots. The texture from the shredder will leave the piece looking a bit like a coconut. You can remove this texture using a metal rib tool and a rubber rib.
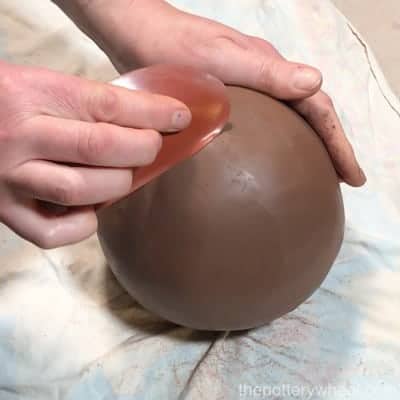
At this point, your vase is a completely closed hollow sphere. So, you can apply a bit of pressure to it to reshape it if you like. I usually pat the bottom of the vase with a wood paddle. This creates a flat base for the vase to sit on.
You can also use the wooden paddle to alter the shape of the sphere.
Step 4 – Cutting a Neck into the Vase
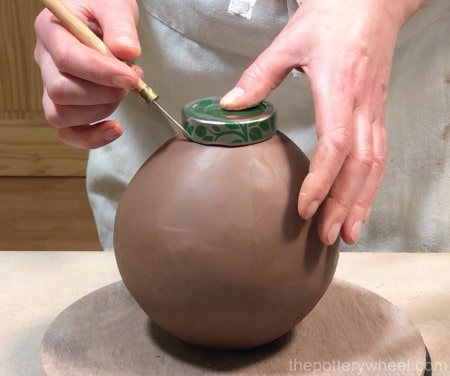
Find a circular object that is the same size that you want the neck of the vase to be. In this photo, I have found the lid of a jam jar. Place the object on the vase where you want the neck to be. Draw around the object with a needle tool.
When making a neck, you can simply cut a hole in the sphere, and smooth the edge of the hole. The hole in the clay is the neck acts as the neck to the vase. And no additional clay is added to build up the shape of the neck. This can look really lovely.
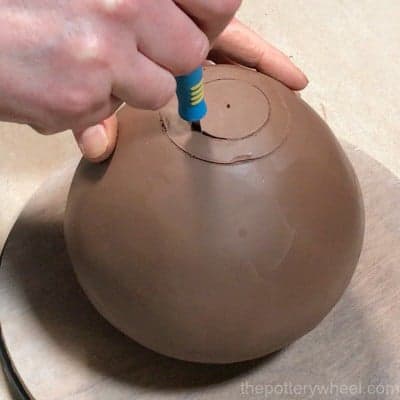
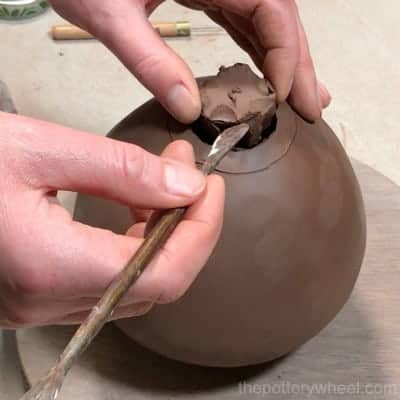
When you have drawn the circle on the clay, cut this section of the sphere out with a craft knife. After you have run the craft knife around the guideline you can remove the plug of clay. Removing the clay plug can take a bit of digging and wiggling. But if you are patient, it will eventually pop out leaving a hole in your sphere.
Step 5 – Building the Neck of the Vase
If you like you can add some clay coils to build up the neck shape. Which is what I did with this vase.
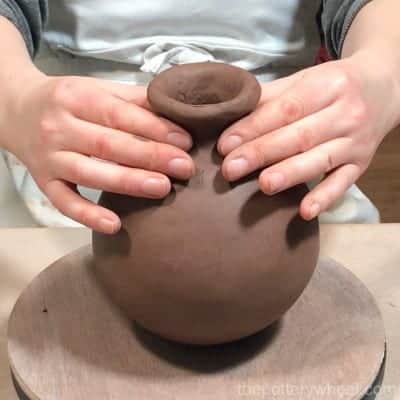
One way to build up the neck is to add come clay coils to your piece. You make the clay coil rings as described here. Attach the coils to the neck using the score and slip method of bonding the coils onto the piece. Then blend the coil onto the vase. You can add as many coils to the neck as you like. Once you have added a few coils, you can pinch and shape the neck into shape.

You can leave the neck with an unfinished uneven look. This can give your piece a nice organic or rustic look. Alternatively, you can try to level the neck out. Leveling rims and lips when you make a pinch pot can be a challenge. One way to do it is to use a spirit level.
Simply rest a spirit level on the neck of the pot and see which side of the neck is higher. Then shave a little bit of clay off the higher side of the neck using a shredding tool.
Once you are happy with the shape of the neck you can smooth the clay with your tools or fingertips.
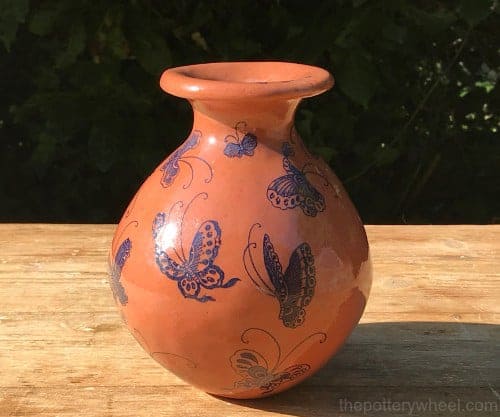
Here is the finished vase. It has been bisque fired, then decorated with underglaze decals. Once decorated, it is glazed with Mayco Crystal Clear Brushing glaze.

Final Thoughts
The basic method to make a pinch pot is very simple. And you can build upon it to make some lovely and functional pieces of pottery. Another advantage of making pinch pots is that the technique is quite fast. Making the basic pinch pot shape can take as little as 5 minutes. What you choose to do with that basic shape is up to you. Whatever you do, enjoy experimenting!


