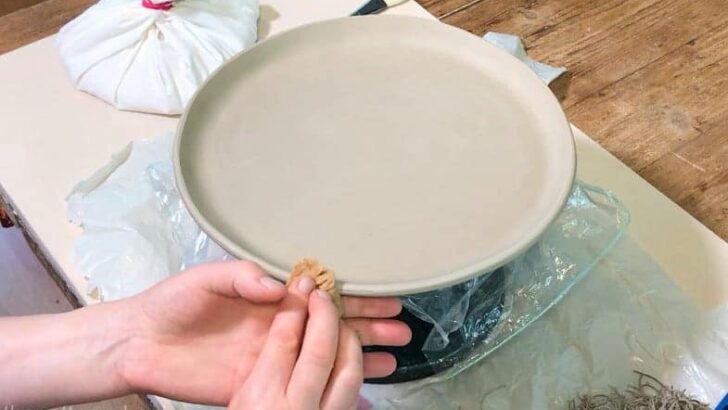
Slab plates are easy and very satisfying to make. This is a simple step-by-step guide on my 3 favorite ways of making slab plates. These are straightforward techniques and you will be able to make your plates at home with ease.
The three techniques that I will be looking at are:
Each of these requires very little in the way of pottery equipment. As long as you have some clay (and a few other inexpensive bits and pieces) you are good to go.
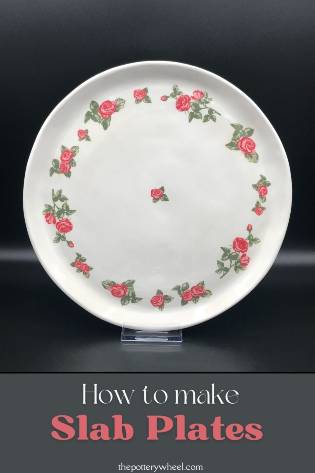
Why not save this guide for later too?
I’ll put a handy list of the things you will need to make your slab plates at the end of the article. You can jump to the list here if you’d like to check that out now.
On the subject of clay, before I get into the process, it’s helpful to say a little about what clay to use…
What Clay to Use for Your Slab Plates
If you are making plates that are intended for decorative use only, then you can use air-dry clay.
Bear in mind that air-dry clay is fragile when it’s dried. So, if you are making decorative slab plates, then it’s best to hang them on the wall, where they won’t get broken.
However, if you want to use your plates as dinner plates, you need to use pottery clay. You can use earthenware, stoneware, or porcelain clay for making slab plates. If you would like more information about choosing a type of clay, have a look at my guide on the best pottery clay for beginners here.
If you use pottery clay your slab plates would need to be fired in a kiln. Don’t worry if you don’t own a kiln. It’s quite easy to find somewhere local to fire your pottery pieces. Here are some ideas about finding a pottery firing service near you.
Here are some suggestions for different pottery clays that I like to use:
How to Make Slab Plates
The method of making slab plates that requires the least equipment is what I call ‘freestyle hand modeling’.
Method 1: Free Style Hand Shaping Slab Plates
This is possibly the simplest of the three approaches that I will outline. So, let’s take a look at that method now. These are the steps I took to make this plate…
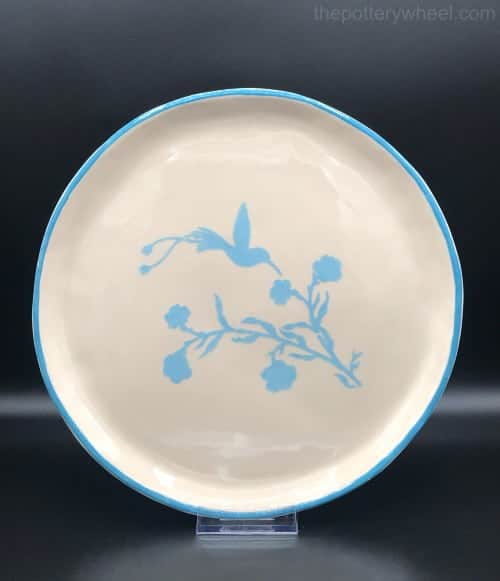
Step 1 – Preparing the Clay
Slice off around 3 lbs of clay from your block of clay. If I am slicing my clay directly from a fresh block straight from the bag, I usually don’t wedge it.
However, if you are using recycled scraps of clay from another project, you will most definitely need to wedge the clay. If you don’t wedge the recycled clay, as you roll out your slab, your clay will be covered in small blisters and bubbles of air.
Once you have wedged your clay, pat it into a circular disk shape. This will help when you are rolling your clay.
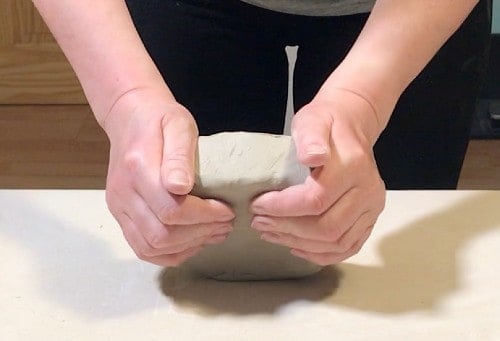
If your chunk of clay is a wonky shape, and you start rolling it out, your slab will be a random shape too. But if your slab is very misshapen, you might find it hard to cut out a circle from the clay large enough for your plate.
So, it’s best to shape the clay into a circular disk. That way, you will end up with a circular slab.
Step 2 – Shaping the Clay
Press the circular disk of clay onto your work surface with the heel of your hand. It’s best to put a section of canvas fabric onto your work surface before you start flattening and rolling the clay. This will stop the clay slab from sticking to your table.
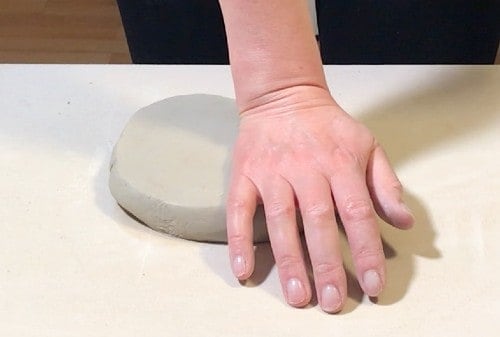
Flattening the clay with the heel of your hand makes it easier when you start rolling the clay.
Step 3 – Rolling the Clay
Place your rolling sticks (also called roller guides) on either side of the somewhat flattened clay.
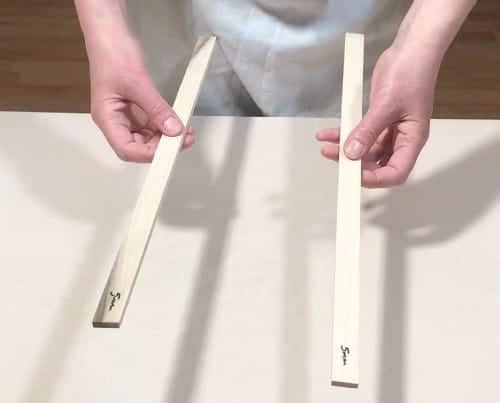
Rolling sticks are just lengths of wood of an even thickness. You can use rolling sticks of whatever thickness you like. I like to use 3mm sticks for plates as this is quite thin, without being too fragile.
You can buy rolling sticks from a pottery supplier. But you can also use lengths of dowel or sections of wooden strips that you find at a hardware store. Some potters cut an old yardstick into two pieces and use that.
Alternatively, you can buy roller guides that you fit onto the end of your rolling pin. These are quite handy. However, they are made of flexible silicone and can bend a bit if you are rolling harder clay.
Once your rolling sticks are in place, start rolling your clay with the rolling pin.
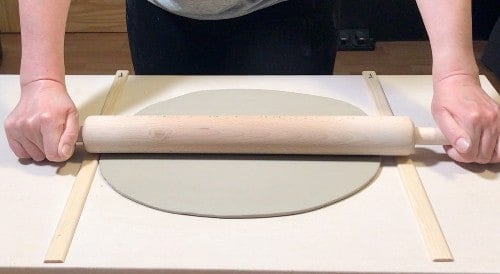
Rolling a clay slab is simple, however, here are some tips to help you roll out a nice even clay slab…
Tips on Rolling Clay
Choose a nice wide rolling pin and roll the clay in one direction a few times. Then lift the clay and turn it over. Whilst you are turning the clay over, also change the orientation of the clay.
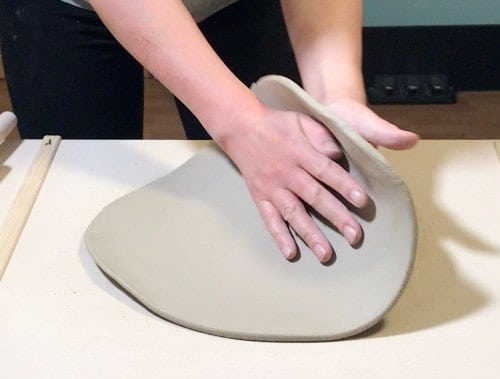
This will ensure that when you start rolling the clay again, you are rolling it in another direction. This helps avoid continually stretching the slab in one direction and putting the clay under stress.
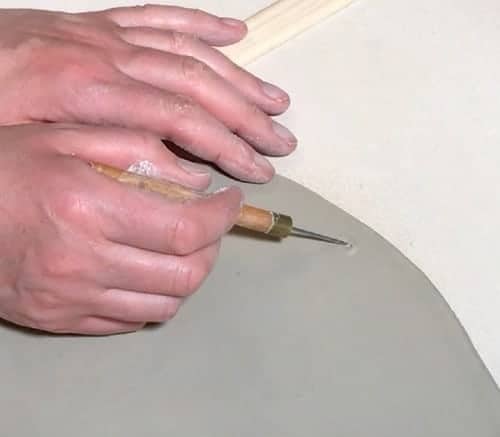
If any air bubbles appear on the surface of the clay, pierce the blister with a needle tool or a cocktail stick. Then press either side of the blister gently to squeeze out air from the clay.
If you are rolling your clay onto a loose piece of fabric, the fabric might go a bit baggy and wrinkled. This is because it has absorbed moisture from the clay.
Be sure that you don’t trap any wrinkled fabric beneath the slab as you roll. Rolling on a wrinkle will leave an impression on the slab.
Better still roll your slab onto a piece of fabric that has been stretched over and pinned to a wooden board.
Step 4 – Compressing the Clay
After you have rolled out your clay slab, run a rubber rib over the surface of the slab. If you don’t have a rubber rib (also known as a kidney), you can use an old bank card or travel card.
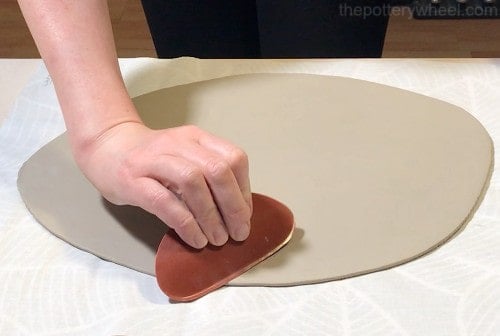
This is known as compressing the clay. It’s important to compress the clay because as you roll the clay it is stretched, and stretching the clay puts it under stress.
This stress makes the slab more likely to crack or warp when it dries or is fired. Compressing the clay helps to strengthen it, partly because it aligns the clay particles.
Ribbing the clay also removes any texture that the slab has picked up on its surface from the rolling canvas.
Step 5 – Cutting Out the Plate Shape
Once you have prepared your slab, it’s time to cut out the shape that you want your plate to be.
The shape that you cut out is really up to you. If you want a more organic-looking plate, you can cut out a free-hand shape. This will give you a plate that has an uneven and relaxed look.
Or you can use a template and cut your plate out to match a particular shape more exactly. Using a circular template will give you a traditional shape.
However, you can make slab plates using different shapes. For example, a moon or crescent shape can be a nice shape for a slab plate made in this way. You can experiment with shapes that you like.
You can make a template out of craft foam. If you’d like more information about how I make my craft foam templates, check out this article here.
Or if you have an item lying around that is the right size that you are looking for, you can use that. For example, I often use this silver-colored cardboard cake board that I found at my local homeware shop. It’s exactly the same size as the foam templates that I made for slab plates.
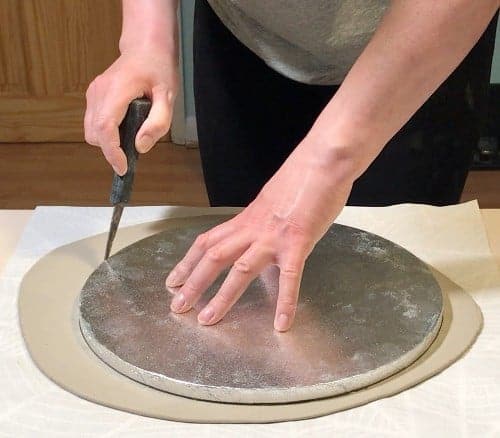
Place the template onto the clay slab, and cut around it using a clay knife or a regular dinner knife.
This cake board works well because it’s made out of stiff cardboard. This means that I can run my knife around the cake board and the board doesn’t bend. It makes cutting out the slab easier.
Remember to keep your knife at a 90-degree angle to the worktop as you cut.
Once you’ve cut around the template you can peel away the excess off-cut bits of clay.
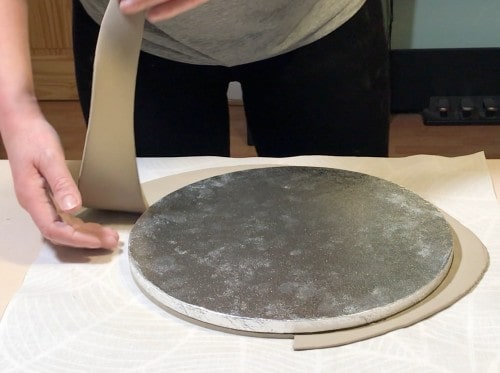
If you want to add a foot ring to your plate you can keep these off cuts for later.
I’m not adding a foot ring to this particular plate. But I will show you how to make and add a foot ring later.
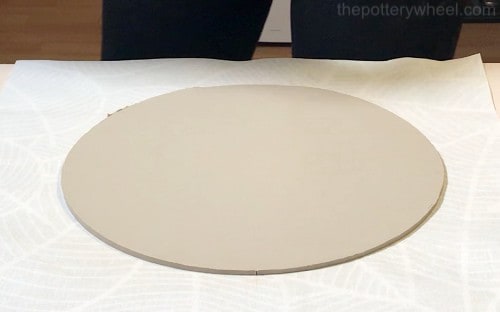
Once you lift the template away, you are left with a perfectly round slab of evenly rolled clay.
Tip
Whatever shape you choose for your slab plates, keep the shape reasonably simple. Some examples of simple shapes are crescent or heart shapes.
The next step will be turning up the edges of the plate. This is harder to do successfully if your plate is a very detailed design.
Step 6 – Letting the Slab Firm Up
Immediately after cutting out your plate shape, the clay will be very soft and fresh. It’s best to leave the clay for a while to allow it to firm up. How long you wait depends on how warm and dry your room is.
If your room is at a moderate temperature and there are no breezes coming through the windows, you can leave your slab for a couple of hours.
But it’s important to keep checking the slabs to see how they are doing. Clay can sometimes dry out and harden quickly.
For example, sometimes if I want the clay to firm up quicker, I will put the slab outside in the sunshine. If it’s a sunny day, 10 minutes outside will be more than enough to make the clay firm enough to continue working with.
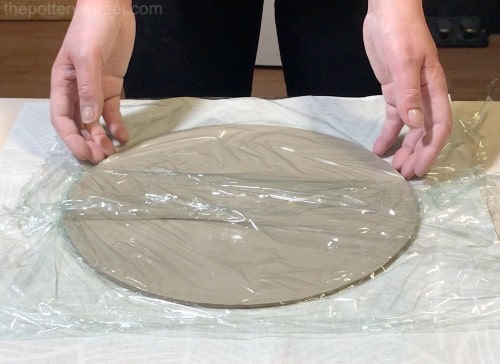
Another option is to cover the slab with saran wrap and leave it overnight. By the next day, the slab will be firm enough to work with but won’t have dried out.
Step 7 – Adding a Rim to Your Plate
Using your fingers and thumbs gently bend the clay on the side of the slab upwards. This will curl the edge of the clay into a nice rim.
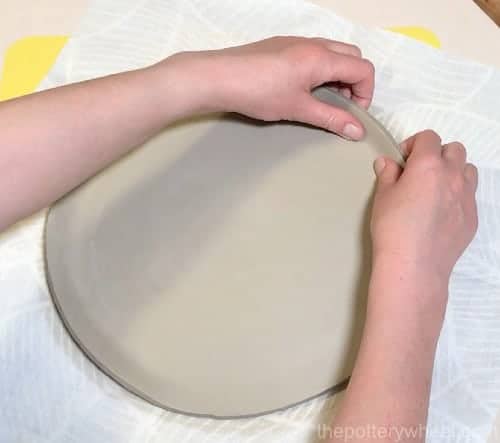
Turn the slab round and bend the next section of the edge upwards. Continue to turn the slab and bend the edge, until the whole edge of the slab has been curled up into a rim.
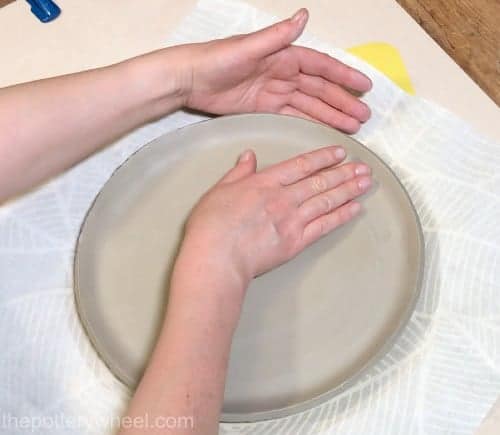
You might find that this leaves thumb marks on the inside surface of the plate. These can be removed easily by supporting the outside of the rim with one hand and using the thumb of your other hand to smooth out the clay.
Tip
If your clay is still quite soft, you might find that the rim starts to slump down. As the rim slumps, your plate can start to lose its shape.
You can prevent this from happening by supporting the edges of the plate. You can prop the rim up with coils of clay. However, the rim of the plate can stick to clay coils.
Instead of using clay coils, I support the rim of my plates using foam hair rollers. These are bendy pieces of wire covered in smooth soft foam. I find them to be ideal for supporting clay as it dries to leather hard.
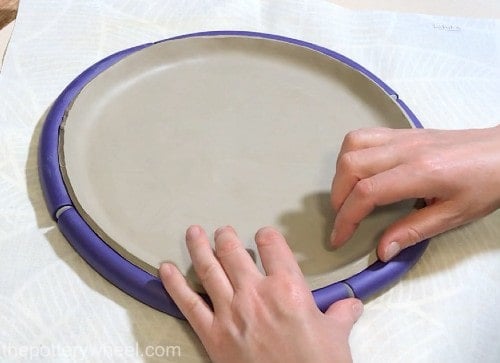
Foam hair rollers can be bent into the shape that you want them to be. They are non-absorbent, so they don’t draw moisture from the clay. Also, they don’t stick to the clay and they are inexpensive to buy.
Step 8 – Let the Plate Dry to Leather Hard
Before you tidy up the rim on the plate, the clay needs to dry out to be leather hard. I would suggest leaving it until it’s soft leather hard, rather than stiff leather hard.
Soft leather hard clay is clay that can still be bent just a little but won’t lose shape when you handle it.
Tip
As slab plates dry out, they are notorious for bending and curving. This is known as warping. You can help to prevent the clay from warping by placing a bag of rice or sand on the center of the plate.
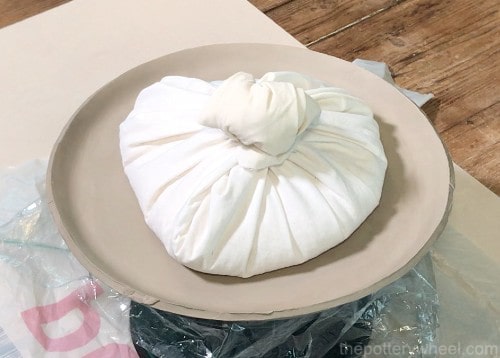
These are easy to make. Simply take an old T-shirt and cut out a section of smooth fabric. Pile some rice or sand onto the middle of the fabric. Then gather the edges of the fabric together and tie them together using an elastic band.
This can then be placed on the middle of the plate to stop it from curving when it dries out.
Put a piece of saran wrap or a smooth plastic bag on the center of the plate and place the rice bag on top of the plastic. This will stop the rice and fabric from drawing water out of the clay and drying it out too fast.
Step 9 – Shredding the Rim
When the clay is soft leather hard, you can tidy up and smooth out the rim of the plate.
At this stage, your plate will have a square-shaped rim from the knife that you used to cut out the slab.
It’s best not to have sharp or square edges on a plate, as these will chip and break easily when the plate is being used. You can round the edges off using a clay shredder or surform.
A clay shredder works a little bit like a cheese grater. As you run it over the surface of the clay, you shred away uneven lumps and bumps and can reshape the clay too.
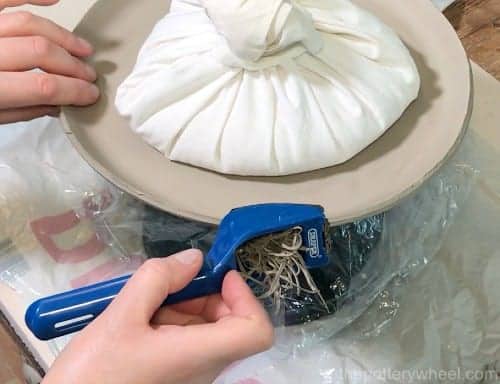
Run the shredder over the edge of the plate to round the clay off.
Tip
It’s best to put your plate onto a banding wheel to shred the edges. The banding wheel makes it easy to turn the plate round as you tidy up the rim.
But also, the banding wheel raises the plate up from your work surface. This means that bits from the shredded rim will fall away from the banding wheel onto your work surface.
If you shred the rim when the plate is directly on your worktop, the shredded bits can get stuck against the underside of the plate.
Step 10 – Smoothing the Rim
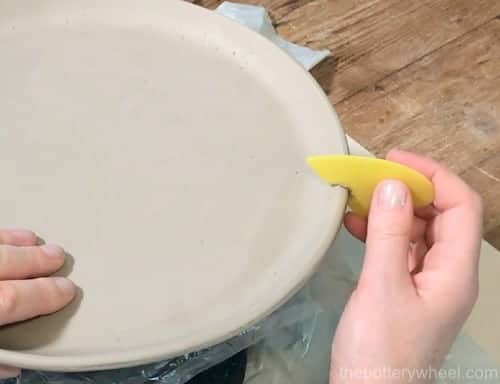
The shredder leaves a rough texture on the rim of the plate. An easy way to remove this texture is using a notched rib. Also called a rounding notch rib or an edger. This is a rubber rib that has a little notch cut out of it.
Place the notch over the rim of the plate and draw it over the surface of the rim. This will remove the rough shredded surface from the rim.
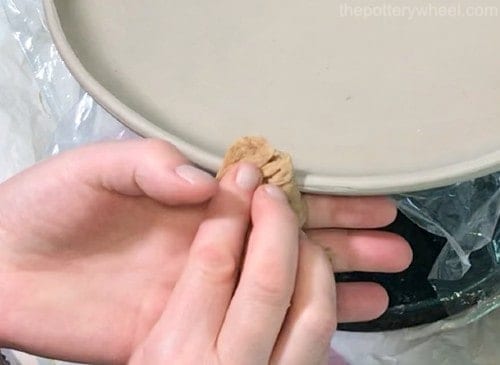
After using the notched rib, I then run a small piece of damp chamois leather over the rim. This will smooth away any texture that has been left by the shredding tool.
Step 11 – Drying Out Slab Plates
As mentioned earlier, slab plates are prone to warping when they dry. Even if they don’t look warped when they are bone dry, if they dry unevenly, they can warp when they are fired.
The best way to avoid your slab plates warping is to dry them out slowly and evenly. After I have finished the plate I put the rice bag weight described above back in place for a couple of days.
I also cover the plate up loosely with a plastic bag and if possible keep it in a cool room out of the direct sunlight.
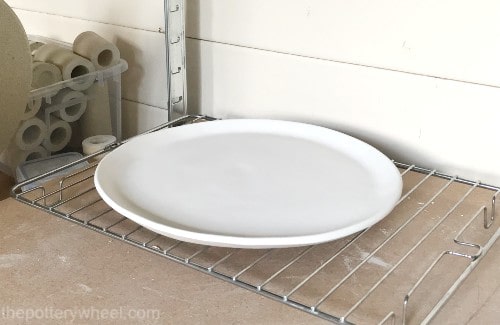
After a couple of days, I remove the rice bag and transfer the plate onto a metal grid. The metal grid allows air to circulate around the whole plate. This enables the plate to dry more evenly.
This plate below is still greenware, but it’s been painted with white underglaze, which is why it’s looking so white.
Once the plate is bone dry it’s ready to be bisque fired.
Step 12 – Firing and Glazing Slab Plates
What I love about making slab plates is that they lend themselves to all sorts of decoration. You can decorate them with underglaze and then apply a clear glaze on top.
Or you can simply glaze using whatever colors appeal to your palette.
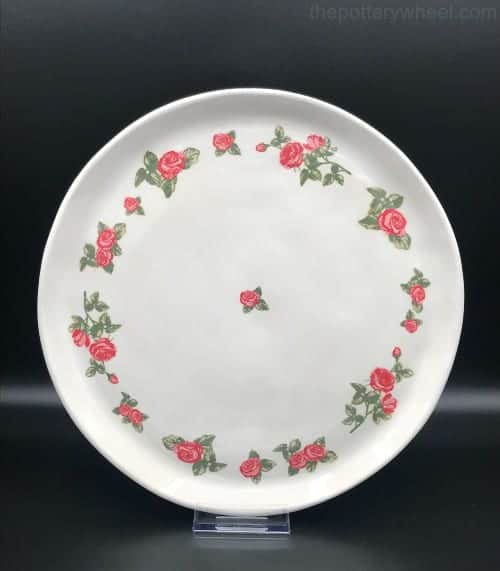
Applying various underglaze designs can create a completely different look. I used underglaze transfers with this plate and applied a clear glaze on top.
Another way to decorate slab plates is to add some texture to the slab too. I will show you how I add texture to my slab plates in the next section, so read on…
Method 2: Making Slab Plates with a Hump Mold
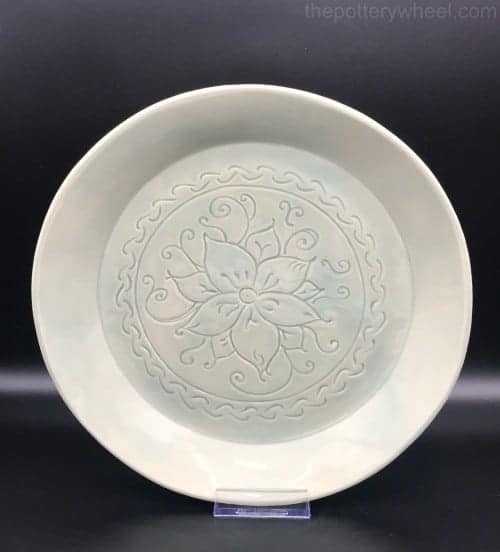
A hump mold is also known as a drape mold. This is because the clay slab is draped over a mold and shaped around it. I made the following plate with a hump mold, and these are the steps I took…
Step 1 – Making Your Slab and a Foot Ring
I roll out the slab and cut out my clay circle in exactly the same way described above for method 1.
However, I’m going to add a foot ring to this slab plate. I use the off-cut bits of slab from the clay circle to make some strips that I will use for the foot ring.
You can simply use a ruler and cut some strips of clay out with your clay knife.
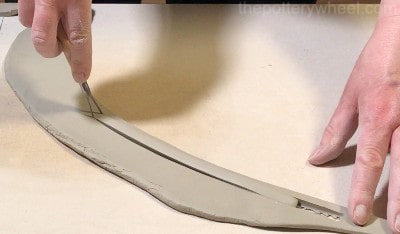
However, I like to use one of my trimming tools as a quick way to create some strips.
I press one end of a narrow trimming tool down into the off-cut of slabbed clay. Then I pull the trimming tool across the slab. This slices out a nice evenly shaped strip of clay, that makes a good foot ring.
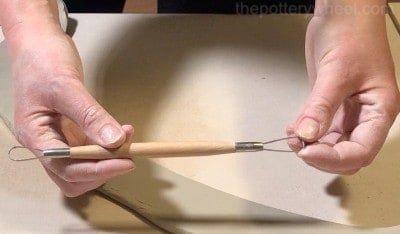
You can also buy a tool called a foot maker by GR Pottery Tools. These are also a very handy way to make a foot ring. You simply draw the foot maker across the clay slab, and it cuts out a nice even, and beveled foot to attach to your pot.
I do have a foot maker, but for this plate. And this is what foot makers look like…
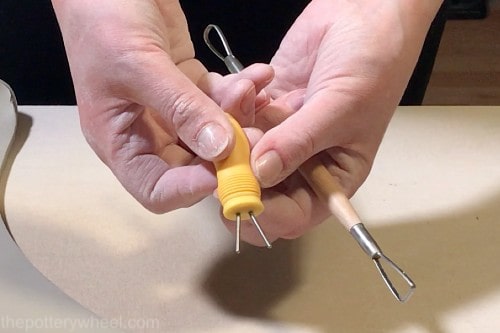
Foot makers are definitely handy gadgets to have, however, I wanted the foot ring to be a little narrower than the strip made by the foot maker. So, I used my trusty narrow trimming tool.
I’m not going to attach the foot ring until a little later, so I wrap the strips up carefully in plastic to stop them from drying out.
Step 2 – Adding Texture to the Slab Plate
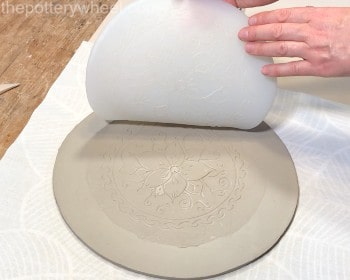
One of the simplest ways to add a nice texture to slab pottery is to use a texturizing mat. You can buy these from a pottery supplier and you can also buy them here. And you can also make use of other texturizing mats intended for cake decoration.
However, if you want your design to be truly unique, you can make your own clay texture mats. In this example, I use a texture mat that I made myself. If you’d like to know how I made it, check out my step-by-step ‘how to’ guide here.
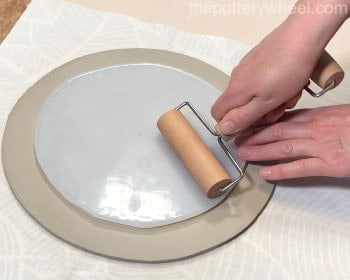
Once the slab has firmed up a bit, I position the mat on the slab.
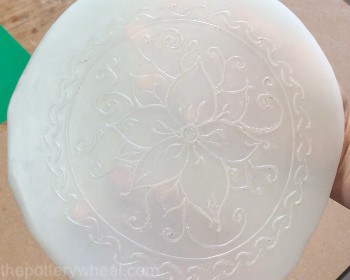
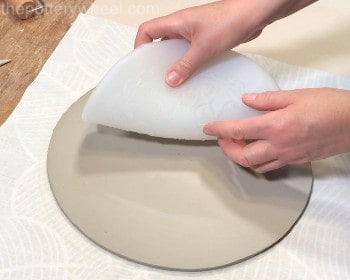
Then I use a pony roller to press the mat into the clay. To be extra sure that all of the texture has been transferred, I also run my thumb over the surface of the mat too. Peel the mat away to reveal a lovely textured design on your clay slab.
Step 3 – Using the Hump Mold
The hump mold that I’m using here is a mold by GR Pottery forms.
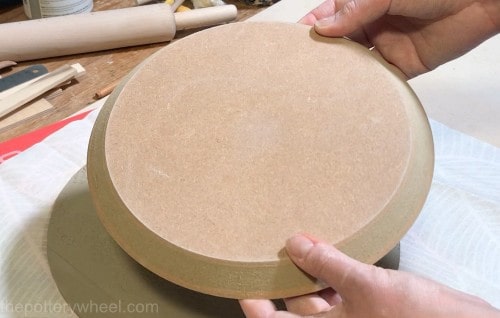
When I use this technique, I make sure that the slab is on a movable piece of fabric. This ensures that I can slide my hand under the fabric and pick the slab up easily when I need to turn the slab over.
Line it up carefully so that the mold is right in the center of the textured slab.
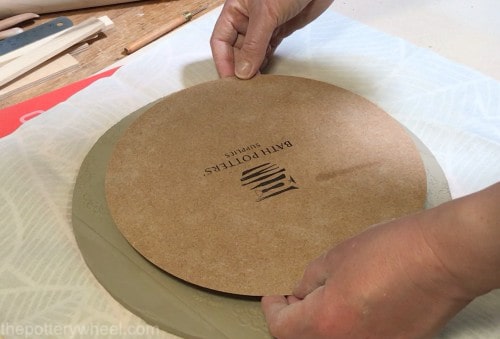
Then slide my hand under the fabric that the slab is lying on. I put my other hand on top of the mold and hold it firmly in place.
Then, I flip both hands over, so that the slab is draping over the mold.
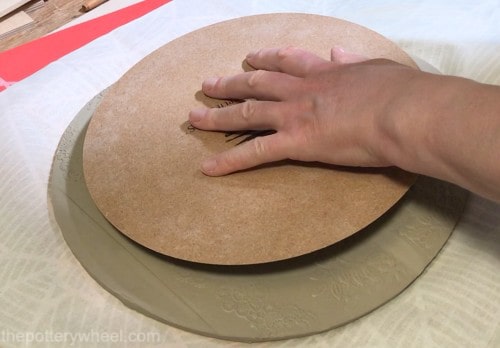
Place the mold onto the banding wheel. I actually put an old glaze container onto the banding wheel and then put the mold onto the container. A jam jar or something similar will do just as well as a glaze container.
This ensures that the clay is draping down freely and resting on and being bent by the banding wheel.
I then gently press the clay slab around the mold.
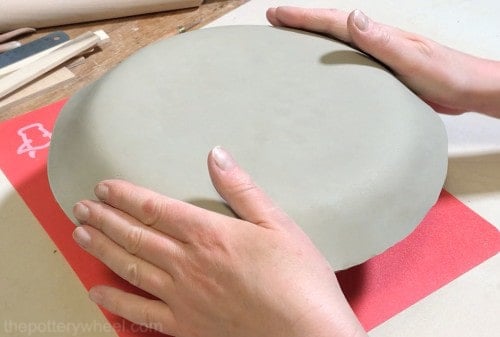
After the slab has been shaped around the mold, I smooth the base out with a rubber rib.
I then leave the slab on the mold to firm up for a few hours.
Step 4 – Adding the Foot Ring
I place a smaller mold onto the base of the plate. Then I draw a circle around the smaller mold with a needle tool. This circle will be where I will attach the foot ring.
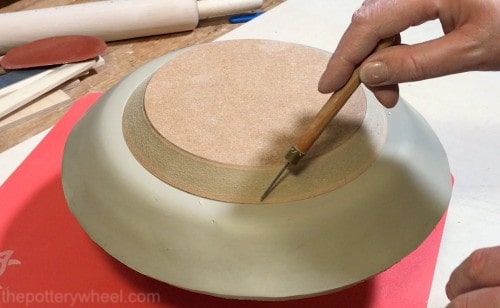
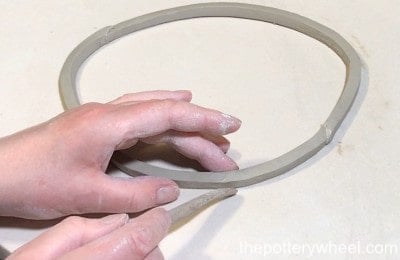
Before I attach the foot ring, I drape some of the strips that I made earlier on the circle. None of the strips are quite long enough to go all the way around the circle, so I cut them to length and join them together.
When I join them together I do so by scoring the ends of the strips and then applying slip to each end. I then press the ends together to create a strong bond. And I blend the ends so that the join is concealed.
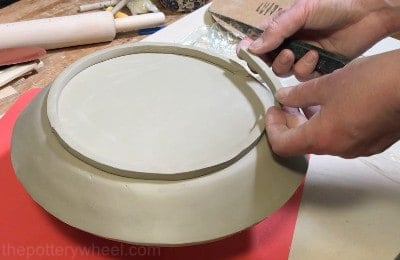
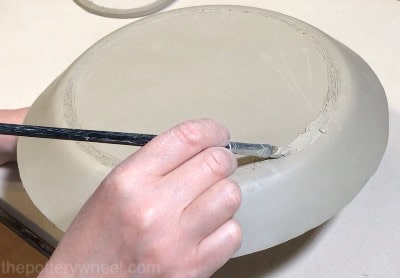
Score the base of the plate where the foot ring will be attached. And also score the underside of the foot ring.
Then apply slip to both scored sides, and lower the foot ring onto the base of the plate.
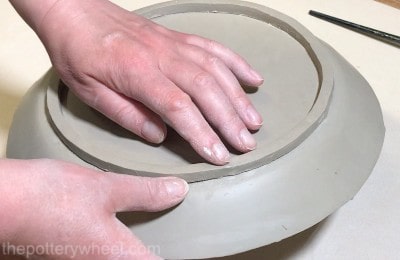
Press the foot ring gently into place so that it feels securely bonded to the plate.
I then use a small wooden tool to blend the inside and outside edge of the foot ring onto the plate.
The wooden tool will leave little blending marks on the foot ring. I remove these marks using a combination of a damp chamois leather and my fingers.
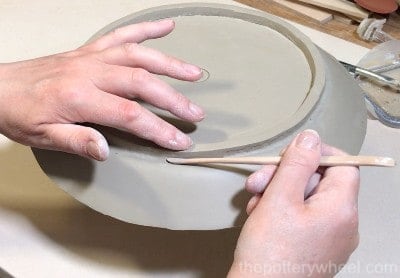
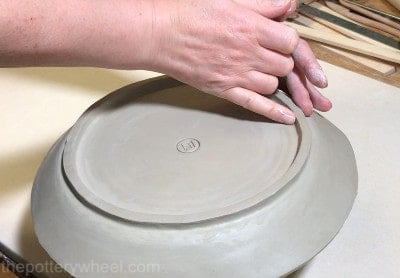
Step 5 – Tidying up the Rim and Foot Ring
The last thing to do is to tidy up the rim of the plate and the foot ring. I like to tidy up the rim of the plate first.
I use the same process described above to tidy the rim. This involves using a shredding tool to create a curved edge. Then run a notched rib around the rim before finally smoothing off the rim with a damp chamois leather.
However, before I start using the shredder, I check that the rim on the plate is even. Sometimes one section of the rim will be a little bigger than another.
To even out the size of the rim I do the following.
- I find the narrowest part of the rim.
- Then I use my large compass and set the width of the draftsman’s compass to the width of the narrowest part of the rim.
- After setting the compass to that measurement I go around the outside surface of the plate rim and make a small mark in the clay. This gives me a guideline when I’m shredding the rim so that I can shred it into an even size all the way around the plate.
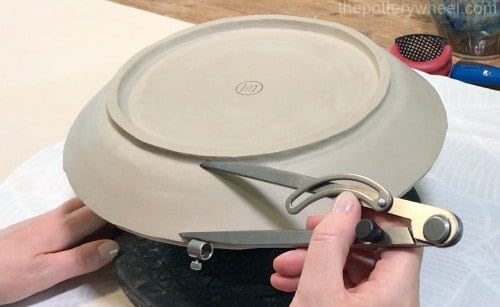
Once I have marked the clay at points around the plate, I use the shredder to shave back some of the rim.
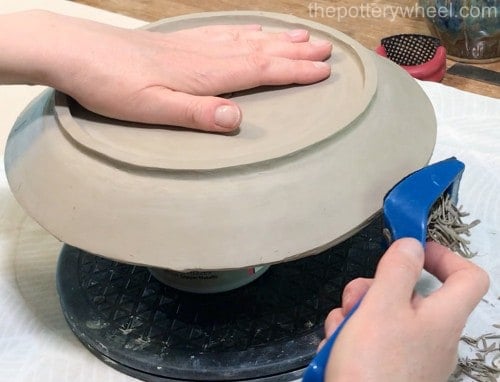
Then I smooth the rim with the notched rib and chamois leather.
When the rim is smoothed, I turn the plate over and tidy up the foot of the plate.
The first thing that I do when tidying up the foot is to make sure that the foot is flat and level. I do this by running the shredder all the way around the foot and getting rid of any bumps and high spots.
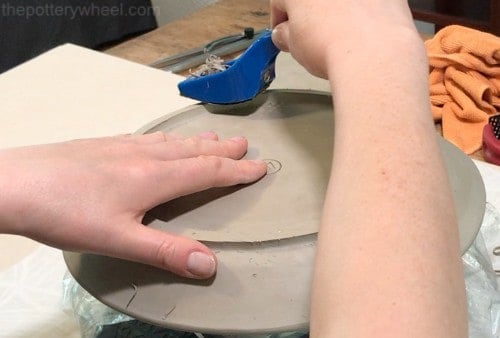
I check that the foot is level by putting the plate on a flat surface foot down, and checking that the plate doesn’t wobble.
Once I’m happy that it’s flat and level, I smooth down the edges of the foot ring. I smooth it using the chamois leather and my fingers.
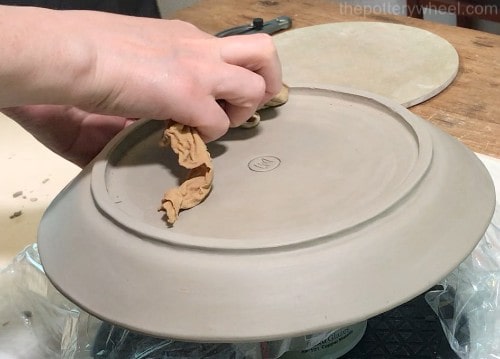
Later on, I will trim and smooth the foot ring. But for now, I leave it as it is so that it bonds firmly to the base of the plate.
Step 6 – Drying the Hump Mold Plate
As mentioned above, slab plates need to dry out slowly and evenly. The plate needs to dry out a bit before I can refine any of the edges.
To begin to dry a hump mold plate, I place a piece of saran wrap into the bowl of the plate. Then I put the mold back inside the plate.
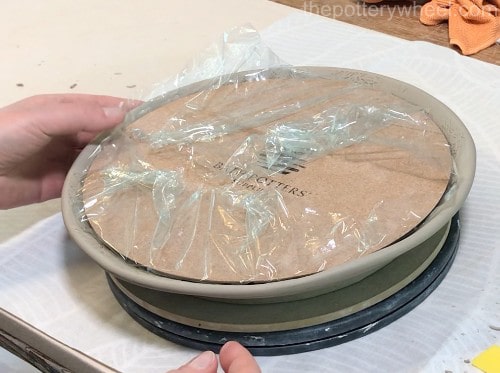
I turn the plate upside down and place it face down onto the glaze container. The container acts as a prop, keeping the mold in place.
I then put a piece of saran wrap on the underside of the plate and place a rice bag on top of the plastic.
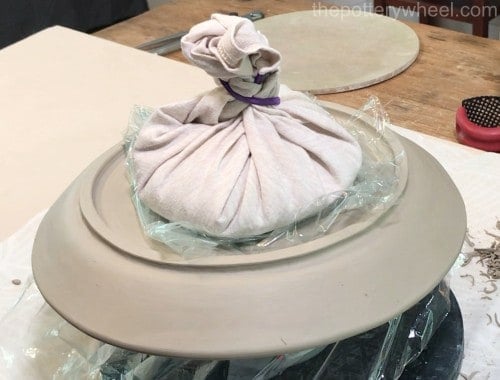
The saran wrap stops the mold and the rice bag from drying the clay out too quickly. And at the same time, the plate is sandwiched between the mold and the rice bag. This stops it from warping as it dries out.
I wrap the whole thing loosely in a plastic bag.
After 2 or 3 days, I remove the rice bag and mold. I then place the plate on a metal grid or cooling tray and cover it loosely again with a plastic bag.
It is only when the plate is almost bone dry that I remove the bag completely.
When it’s bone dry the plate is ready to be bisque fired. Once the plate is bisque fired, you can glaze it in whatever way you like.
Method 3: Making Slab Plates with a Press Mold
Another simple way to make slab plates is using a press mold. The good thing about making a press mold plate is that you can use the same mold that you used as a hump mold.
This plate was made using the following simple steps…
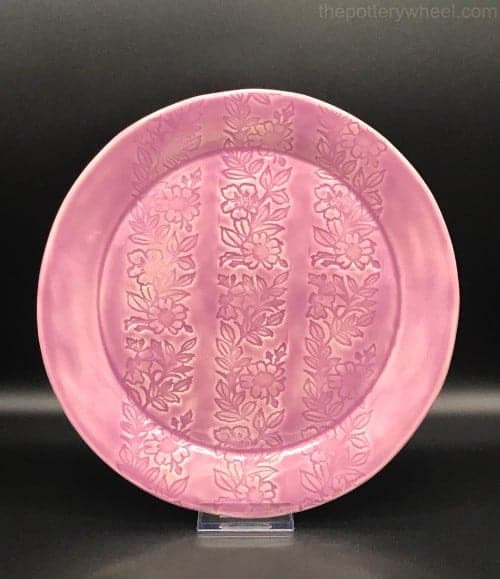
The first thing to do is to make your slab in the way that was outlined above.
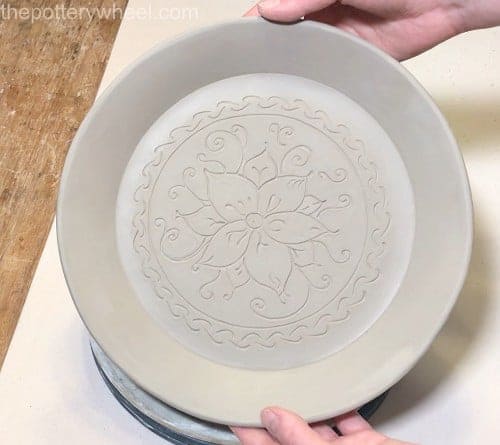
You can leave your clay flush and smooth, or you can add texture to the plate. With this plate, I did add some detail using a textured rubber mat as described above.
Step 1 – Positioning the Slab
Once your slab is prepared, carefully lift it and place it on a piece of foam. The foam that I am using is a piece of upholstery foam. It is quite thick and firm, so it offers a bit of resistance when you press on it.
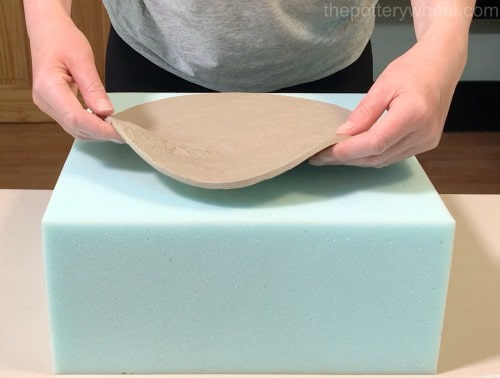
Step 2 – Pressing the Plate
Line up the mold on top of the slab. Make sure that the mold is right in the center of the slab. The narrower base of the mold needs to be in contact with the slab, and the wider part of the mold sits on top.
Push down on the mold so that it presses into the slab. Hold the mold down for about 10 seconds before releasing the pressure.
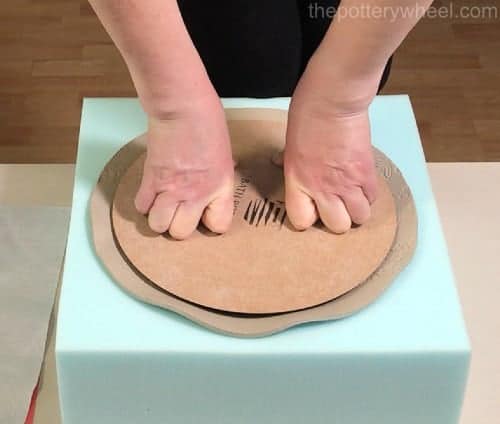
Carefully lift the plate and the mold from the foam and transfer them onto a firm work surface. Gently lift the mold out of the pressed clay slab. The slab will retain the shape of the mold.
Tip
Let your clay firm up a bit before you use the press mold. If your slab is very soft and fresh when you press it, the rim of the plate will flop down after you press it and remove it from the foam.
If the clay is a bit firmer it will keep its shape and the sides won’t flop as much.
Step 3 – Supporting the Plate
Nevertheless, even if you press the clay when it’s firmer, you might find that the side of the plate sag just a bit when you lift it off the foam.
Don’t panic! It may be that you like the look of the plate when the sides have relaxed a little. But if you want to keep the sides standing up proud in their original position, you can support the edges of the plate whilst it dries.
As described above, I like to use foam hair rollers to support the sides whilst the clay dries a little and firms up.
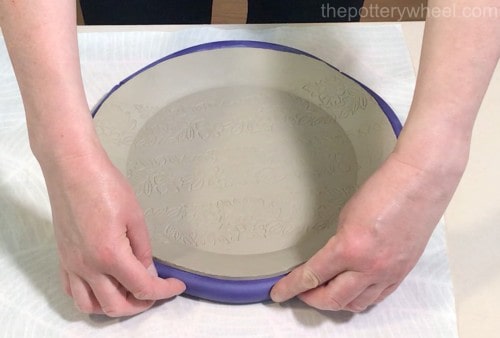
I place the foam rollers around the edge of the plate. Then I put some saran wrap over the plate and place a rice bag on the plate and leave it to dry until it’s soft leather hard.
Step 4 – Finishing Touches
If you want to add a foot ring to the plate, you can do so in the way I described above. However, I left this plate footless.
So, all that remained for me to do when the clay was leather hard, was to round and smooth the rim. To do this, I used the same combination of the shredder, the notched rib, and the chamois leather that I’d used with the other slab plates.
And here is the finished plate, ready to be fired and glazed.
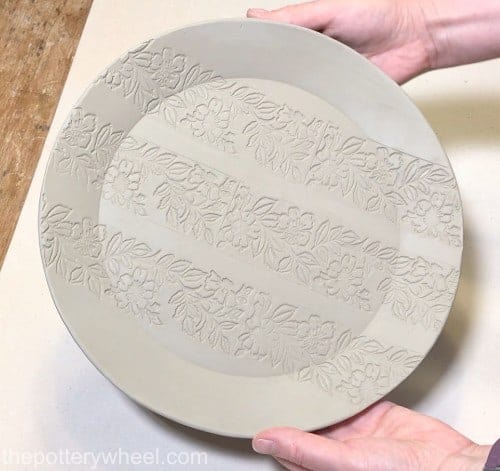
You may want to watch my video on how to make slab plates here…
Final Thoughts
Slab plates are super simple to make. However, you can make some beautiful and impressive pieces of pottery using these easy techniques. Once you’ve mastered the methods, you can experiment with the endless options you have for decorating the plates.
Equipment List
- Clay – Stoneware, Earthenware, Porcelain
- Rolling pin
- Canvas for rolling on
- Roller guides
- Rolling sticks
- Needle tool
- Rubber rib/kidney
- Clay knife
- Shredder/surform
- Notched rib/edger
- Wooden modeling tool
- Trimming tools
- Pottery mold
- Foam block
- Foam hair rollers
- Banding wheel
- Rubber texturizing mat
- Pony roller
- Chamois leather
- Grid for drying clay

