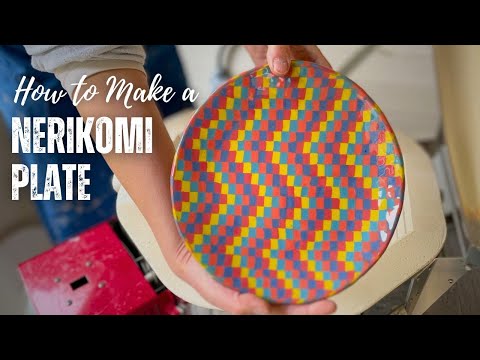
Nerikomi pottery is a particular way of working with colored clay to create striking patterns. In this article, we will look at 3 simple ways to create beautiful Nerikomi patterns. One technique I will cover is how I make Nerikomi plates, which you can watch in my video here..
What is Nerikomi Pottery?
Nerikomi pottery is originally a Japanese technique. It involves using different colored clays to create patterns in the clay body. These patterns can be repeating patterns or more random.
There are two key Nerikomi techniques. The first technique involves layering different colored slabs of clay with one another. These are then sliced up and arranged in repeated patterns, giving the pottery a geometrical look.
The second technique is to make long tubes of colored clay that look a bit like the colored canes use in glasswork. In glasswork, a cane is a long rod of glass that has colored patterns running along the length of the rod.
Similarly, in Nerikomi pottery, a cane is a long tube or coil of clay that is made by combining different colored clay. We will be looking at both of these methods in the techniques outlined below.

What Colorants to Use for Nerikomi Pottery?
You can color your clay using ceramic stains or colored oxides such as red iron oxide or black iron oxide.
Oxides are less processed than ceramic stains and come in a narrower range of more organic natural-looking colors. Ceramic stains on the other hand are manufactured colors and come in a wide range. You can read more about the difference between oxides and stains here.
Ceramic stains and oxides both work well when making Nerikomi pottery. Oxides are a bit cheaper to buy, so if you are experimenting with the technique, it can be a good idea to practice with oxides.
But equally, if you prefer the more organic rustic look, then oxides may be your preference anyway.
Preparing Your Colored Clay
In this instance, I’m using ceramic stains to color my clay. When you make colored clay, you need to mix the ceramic stain with the clay to create an even-colored clay body.
There are a few ways to do this. Here is my favorite way to make colored clay. It’s my favorite because it’s the least messy, and involves the least amount of wedging.
My Favorite Way to Make Colored Clay
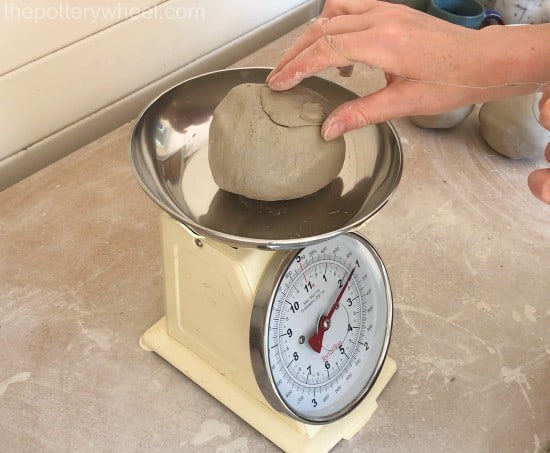
Weigh out the quantity of clay that you want to add color to. Make a note of the weight, as you are doing to need this information later.
Pinch the clay out into small patties of clay, like a potato chip. Put these on an old baking rack and let the clay dry out to the point of being bone dry.
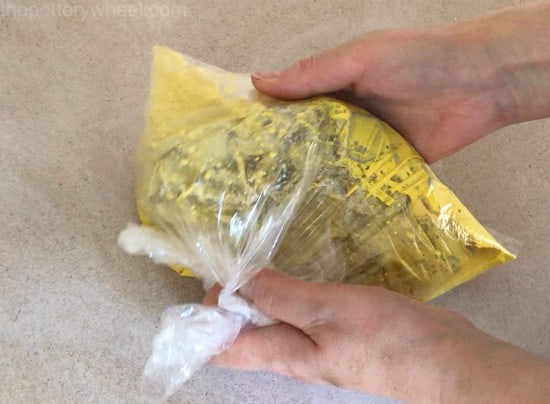
When the clay is dry, put it into a strong plastic bag, and crush the clay into smaller pieces with your hands or a rolling pin.
Weigh out your ceramic stain. You may need to experiment with how much stain to use to get the color that you want. A good place to start is to weigh out 8% of the weight of the clay that you recorded earlier. Dark colors like dark blue and black will need about 5%.

Mix the stain with a cupful of water and make it into a paste. Then mix the paste with some more water. Here are the weights and measurements I use:
Ingredients for Colored Clay
- 800g clay
- 64g stain
- 13fl oz water
Pour the colored water over the pieces of bone-dry clay in the bag and seal the bag. Let the bag sit overnight. The clay will absorb the water.
In the morning, the clay will have turned into a thick-colored slip. Squish it around in the bag with your hand to get rid of any lumps in the clay.
Unseal the bag and squeeze the contents of the bag onto a plaster slab. The water content of the slip will be absorbed quickly by the plaster. Once the clay has firmed up you can peel it off the slab, and wedge it a little to even out the consistency.
There are other ways to get the stain into the clay. You can read about the different ways I make colored clay here.
The Nerikomi Process – Making Patterns With Colorful Clay
Your creative options when you make Nerikomi pottery are endless. Here are some of the basic techniques. You can adapt these to suit your style and make more or less whatever you like.
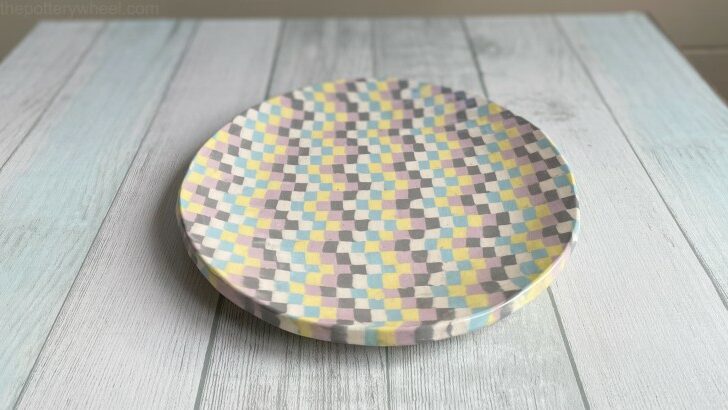
Making a Nerikomi Plate
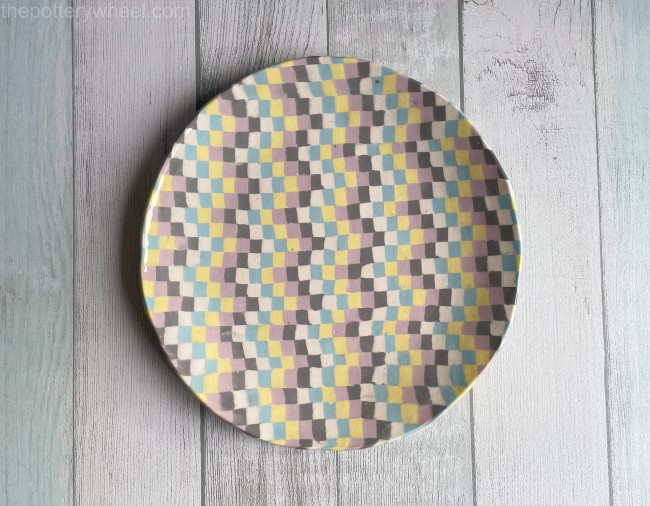
This is how I made this Nerikomi plate.
Here are some of the tools that will make this process easier…
You Will Need:
- Pottery clay
- Ceramic stains
- An old bedsheet
- Clay wire cutter
- Roller guides / Thickness rods
- A rolling pin
- Rubber rib tool
- Platter rib
- A bow harp (this is nice to have but you can get away without it)
- Fine water spray bottle
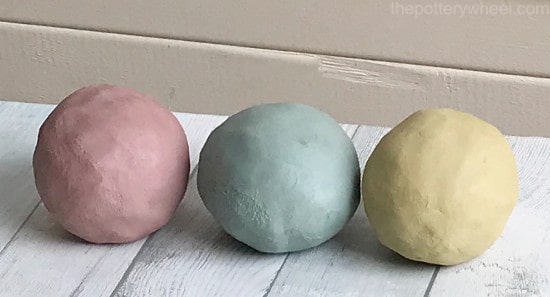
Make a few balls of colored clay in a range of colors that you like. Pat each ball of clay into a block with flat sides.
1) Making a Stack of Colored Clay Slabs
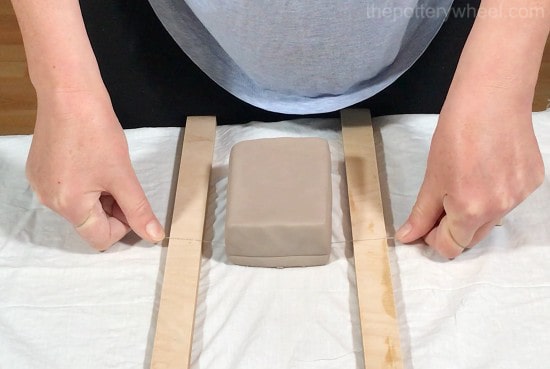
Put some roller guides on the table in front of you, and place the block in between. Then using a clay wire cutter, slice the bottom layer off the block. Put this first slice to one side, as you can reuse it later.
Repeat this process of slicing the clay into colored slabs. You can choose the thickness of the slabs you like.
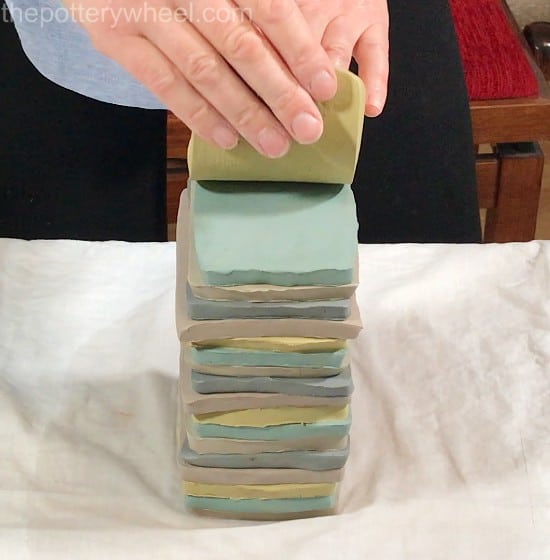
Once you have sliced the clay into slabs, reassemble the block. This time, alternate the colors. As you put the block of slabs together, spray the slab underneath with water, and then slowly lower the next slab on top.
Pat it with your fingers to get rid of as many air bubbles between the slabs as you can. You will end up with one bigger block with alternating color slabs.
The colors can be arranged in a repeating pattern, or they can be random. Wrap the slabs in plastic and let them sit for an hour or so. This will allow the clay to settle together.
2) Creating Colored Slabs of Clay
If you have a bow harp tool, you can tidy up the edges of the clay block like this…
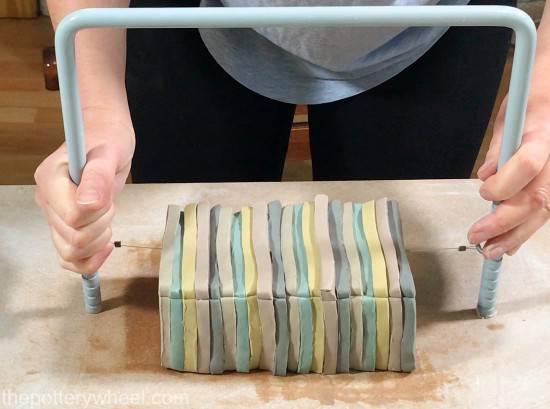
If you don’t have a bow harp tool, you can tidy up the edges with a wire cutter. Turn the block on its side between the roller guides. Slice through the bottom layer. Again, put this first slab to one side, it’s just tidying up the surface of the base.
Slice through the colored block again. Peel the stripy-colored slab off the block carefully and put it to one side. The clay has to stay moist, so I’d recommend placing the slab on a damp cloth and covering it with a plastic sheet.
Repeat this process until you have several stripey-colored slabs.
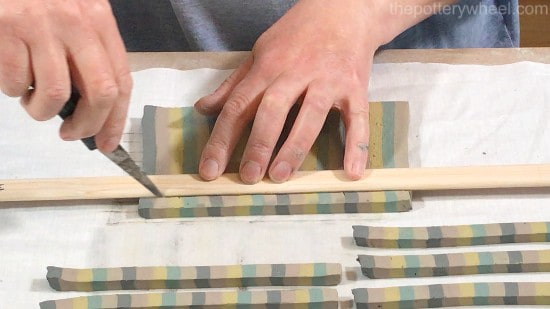
3) Creating Stripey Strips of Clay
Take one of the stripey slabs, and cut along the slab in the opposite direction to the stripes. This will give you a thin strip of clay made out of colored blocks. Put the strip to one side on the damp cloth.
Repeat this process so that you have a batch of clay strips.
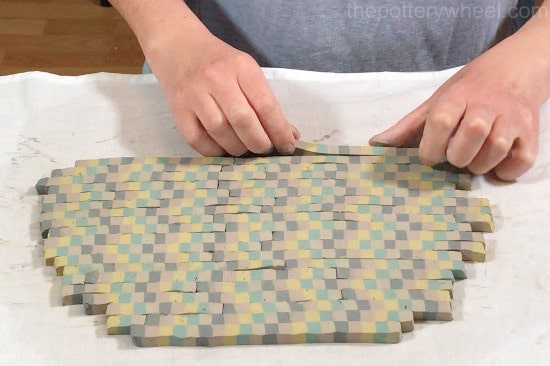
4) Making Your Nerikomi Pattern
Spray a piece of old bed sheet with water, and place a strip of clay blocks on the damp sheet.
Take your next strip and place it up against the first block. But stagger the strips so that the blocks of color are not in line.
Repeat this process. You can stagger them randomly, or you can stagger them so that you are making a repeating pattern.
5) Turning The Blocks into a Colored Slab of Clay
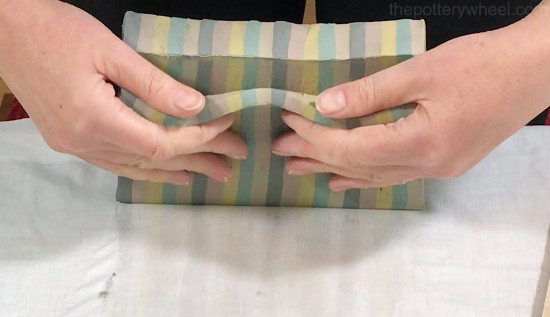
Once you have put all your strips in place, place another piece of bedsheet on top and spray it with water.
Take a rubber rib and gently but firmly compress the clay strips. I also use a platter tool, which is a wider plastic tool to put even pressure on the clay. The aim is to bond the clay blocks together. You need to use enough pressure to compress the clay together, but not enough to stretch the clay.
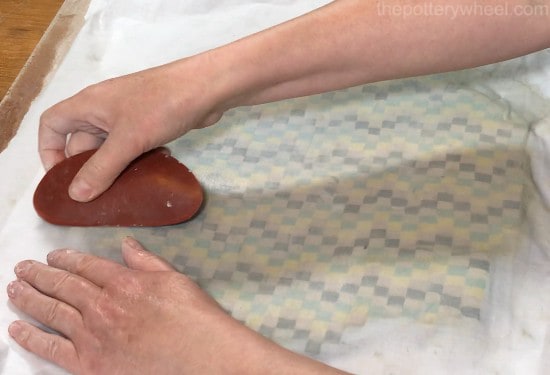
Continue to spray and compress the clay until the blocks underneath look like they are joining into a smooth slab. You can peel back the sheet and take a peek.

Carefully turn the slab over and repeat the process.
6) Transferring the Slab into a Mold
Once the clay blocks are firmly joined together, tidy up the edges of the slab with a clay knife.
Carefully transfer the slab of clay into a mold of your choice. I like using bisque molds, but you can use plaster molds too.

You need to be careful when you pick up the slab. Although the clay has been compressed together, the joints are fragile at the moment. You can pick it up by draping it over a rolling pin.
Allow the slab to firm up in the mold. Once it’s leather hard, you can lift it carefully out of the mold and tidy up the edges of the dish, with a metal rib or a rubber rib.
You can also carefully shape the edges of the dish with a shredder and then smooth out any rough texture left by the shredder with a rib.
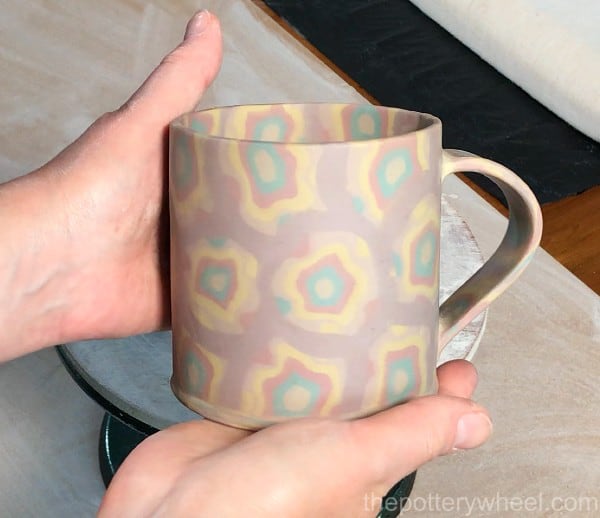
Making a Nerikomi Pottery Mug
Here are the steps to make this Nerikomi mug…
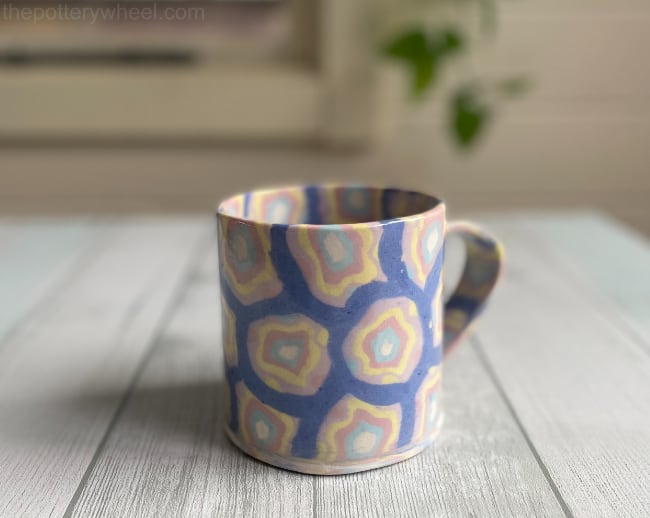
To make this mug, I’m going to use colored canes of clay.
You Will Need:
- Mini bow harp clay cutter
- A rubber rib tool
- Serrated rib
- Roller guides / Thickness rods
- Rolling pin
- Clay knife
- An old bedsheet
- Cardboard or plastic tubing (I’m using a tube with a 4-inch diameter for this mug)
- Fine water spray bottle
1) Making a Nerikomi Cane
You can make canes using any design that you like. An easy way to start is to roll out a thin coil of clay, and then start wrapping slabs of clay around the coil.
With this cane, I made a thin coil of buff clay that turns white when fired.
Roll out some thin slabs of colored clay. I roll the clay coil up in a slab of colored clay and cut off the excess clay from the slab.
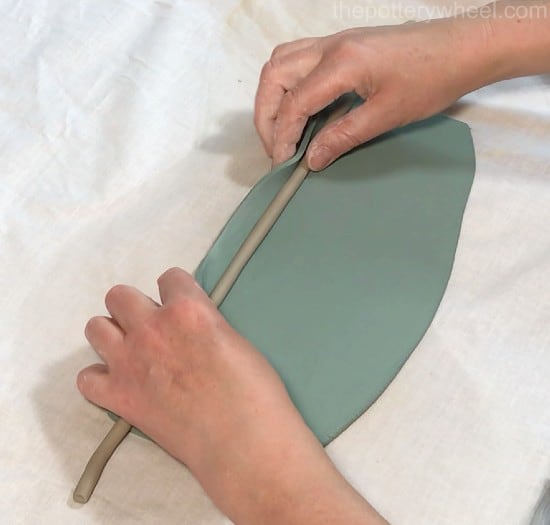
You can gently pinch the colored slab around the coil and blend in the seam. Build up your cane repeating this process with different colors.
I added a bit of extra interest to the cane, by pressing a piece of wooden dowel onto its surface. Then I made a thin coil of clay and pressed that into the dent made by the dowel. I repeated this process around the cane using different colored coils.
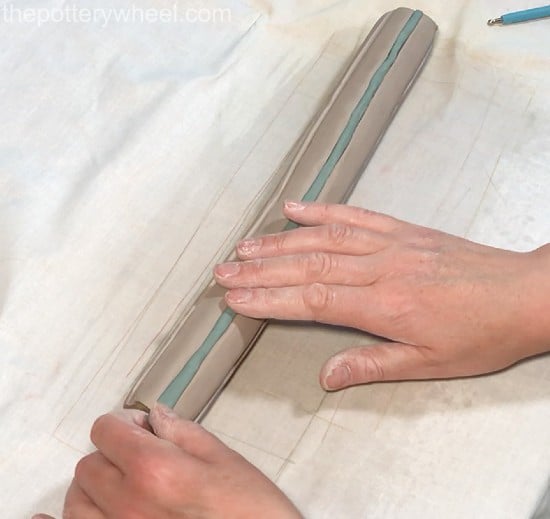
2) Slicing the Nerikomi Cane
When you have built up your cane with as many layers as you like, wrap it in plastic and let it sit for an hour or so for the clay to settle.
You are then ready to slice the cane into smaller discs of colored clay. I find the best way to do this is to use a small bow harp clay cutter. Put the wire of the bow harp on your work surface, and place the cane on top of the wire. Then gently pull the wire up through the clay.
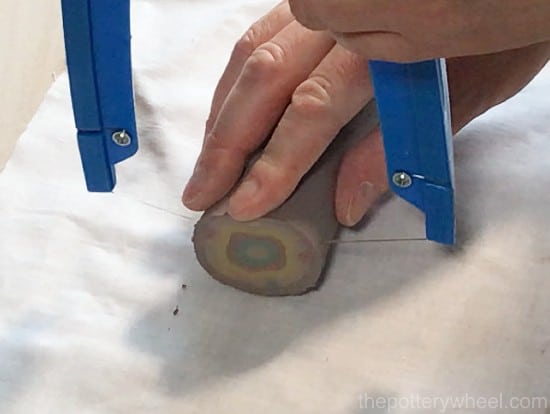
This will give you a clean slice and won’t distort the shape of the clay tube.
Slice the cane into sections that are about a quarter of an inch thick. Lay these on a damp cloth and cover them with a plastic sheet.
Let the colored clay discs rest under the plastic sheet for a while whilst you prepare the next stage.
3) Preparing Your Materials
Choose a plastic or cardboard tube that is the diameter that you want your mug to be. Remember that the clay will shrink when it dries and is fired, so your mug will be smaller once it’s finished.
Wrap some paper around the tube to stop your clay slab from sticking to it. Set the tube aside to prepare your slab.
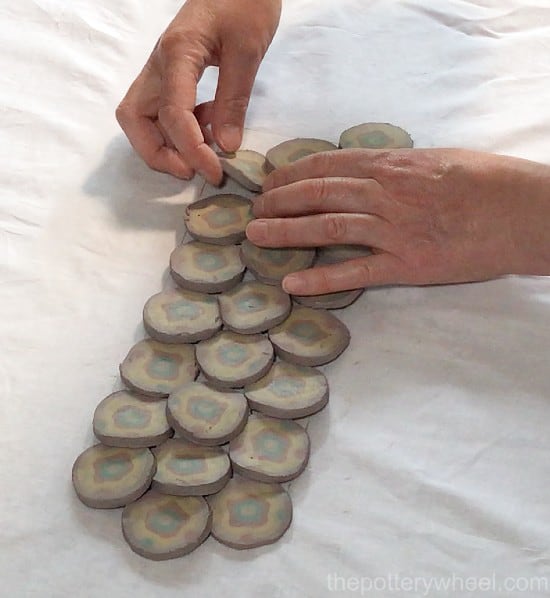
4) Arranging Your Colored Clay Discs
I normally work on canvas when hand building, but with Nerikomi pottery I use an old bed sheet. This is because it has a finer grain and also when it’s wet you can see through it.
Measure the circumference of the tube. Work out how big you need the slab to be to wrap around the tube.
The circumference of my tube is 13 inches. This is going to be the circumference of my mug, and I want the mug to be 4.5 inches tall. So, I mark an area on my sheet that is 13 by 4.5 inches. I mark the sheet in pencil. This is just a guide so I know that I’ve made a big enough slab.
The slab needs to be just a bit wider than the tube, so you can overlap the edges of the slab and join the clay. Incidentally, the tube I’m using has a 4-inch diameter.
Spray the sheet with water so it’s damp.
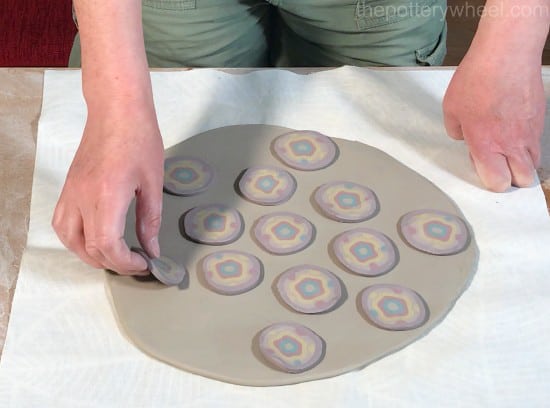
Place the canes on the sheet in your chosen pattern. It can help to overlap the canes a little to help them join together.
5) Making the Nerikomi Slab
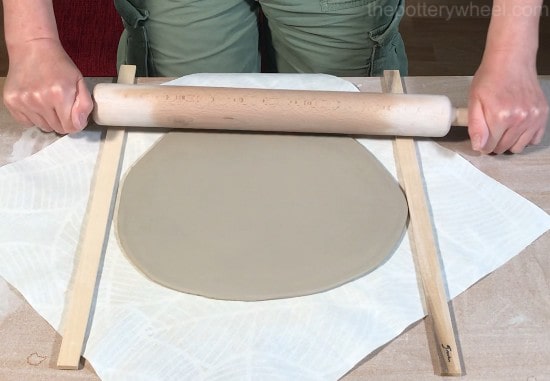
You are going to roll the clay to compress the pieces together. The slab will get bigger so place the canes so they are just up to the edge of the outline you’ve drawn.
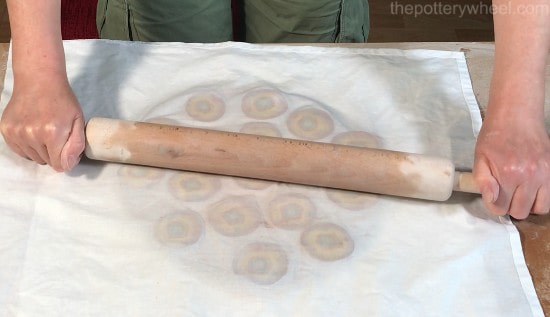
Cover with a sheet and spray the sheet. Spray the sheet rather than the clay as the clay is already quite moist and will become sticky and smudgy.
When you roll the clay, press downwards rather than roll the clay outwards. The idea is to join the discs of clay rather than stretch the clay outwards. Use roller guides to ensure that your slab is of an even thickness.
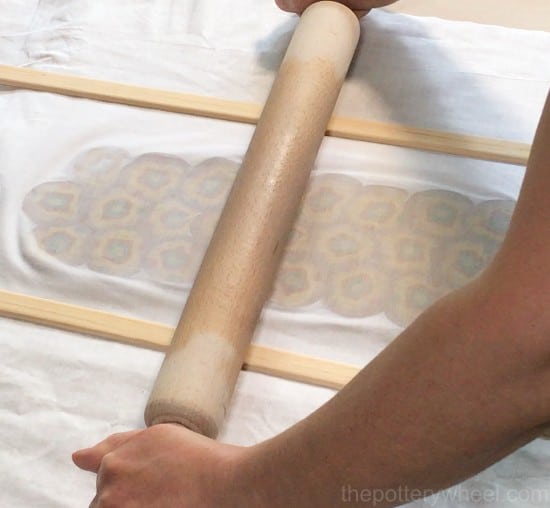
Change direction often so as not to stretch the design in one direction alone.
Once rolled, allow the slab to sit for a while.
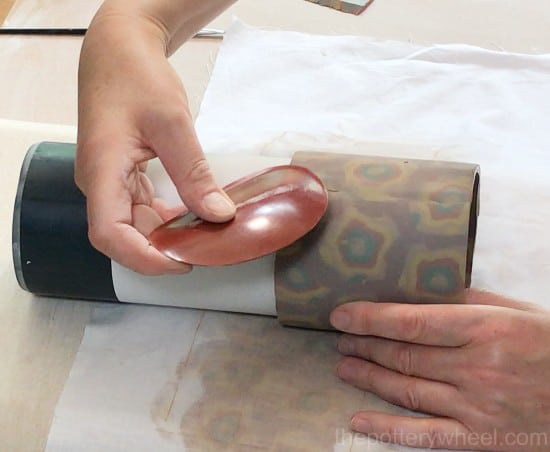
6) Assembling the Nerikomi Mug
Cut the colored slab to size, remember to leave the slab a bit longer than you need it to be so you can join the edges.
Roll the slab around the tube and mark on the clay where you want to join the edges.
Peel the clay off the tube and cut the edges to length. Cut the clay at a 45-degree angle. This is called a beveled edge and it helps to join the clay firmly.
Score the edges of the slab with a serrated rib.
Roll the slab around the tube again, apply some water to the scored edges of the clay, and gently press the seam of the mug together.
You can tidy up the seam by running a rubber rib gently over the seam.
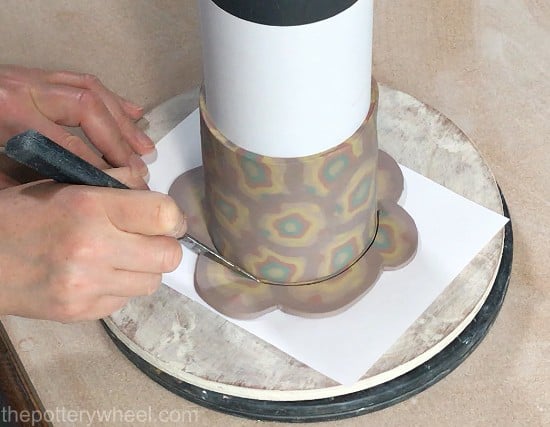
7) Adding a Base to the Mug
Place the mug on a slab of clay and carefully cut the slab around the base. I usually cut the slab about 1mm wider than the base. This gives you a bit of clay to blend the base with.
Score the edge of the base and also the bottom edge of the mug.
Paint some water onto the scored edges. Normally I’d use slip to slip and score when joining. However, this clay is really quite moist, so it should join well. Also slip may leave smudgy marks on the Nerikomi pottery. So, I find it best to use water to join the slabs together.
Place the mug on top of the base and gently wiggle and press the mug onto the base.
You can blend the clay base onto the bottom of the mug by running your finger along the edge of the slab.
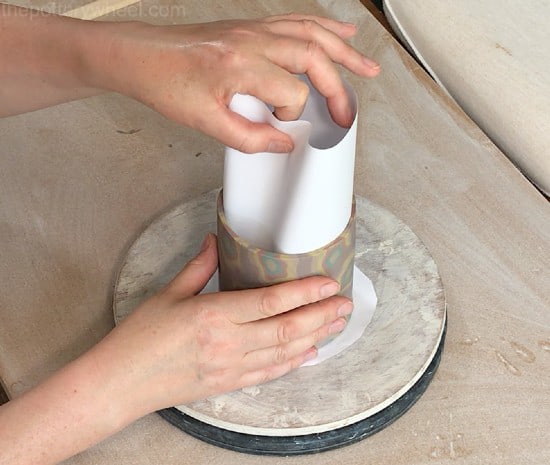
8) Removing the Tube
When the base is attached, carefully remove the tube from the mug. You need to remove the tube before the clay starts to dry out.
If the tube is in place as the clay starts to dry, it will shrink around the tube and start to crack. The paper around the tube should peel away from the inside of the mug easily too.
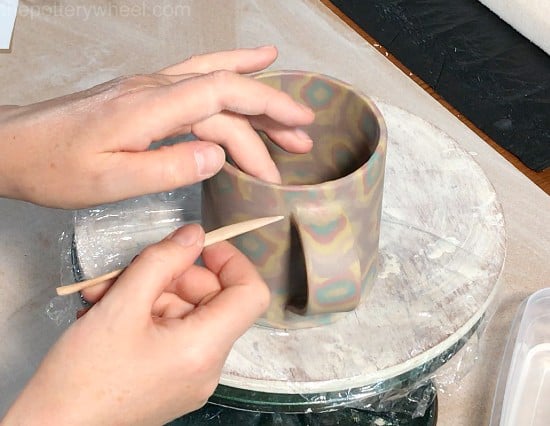
9) Adding a Handle to the Mug
You can add a handle that is one block color to the mug, or you can add a Nerikomi handle. Both can look lovely.
With this mug, I’m adding a handle made out of clay that has the same pattern as the body of the mug.
It’s a good idea to add the handle when the clay is still quite fresh. This will reduce the chances of the clay cracking as it dries.
I cut the handle to length and attached it by slipping and scoring the mug and the edges of the handle.
You can secure the join by adding a small coil of clay to the top edge of the handle.
Wrap the mug in saran wrap and let it dry out as slowly as you can. This will minimize the chance that the clay will crack. I will say a little more about drying Nerikomi pottery later.
Making a Nerikomi Bowl
Here is another simple Nerikomi pottery technique that can make really beautiful patterns.
I’m going to show you how I made this Nerikomi bowl, using the canes that I made above.

You Will Need:
A plaster hump mold
Roller guides / Thickness rods
1) Preparing Your Materials
Cut some slices of the Nerikomi cane and put them to one side on a damp cloth under plastic.
Roll out a slab of clay using roller guides. This slab of clay needs to be just a bit wider than the bowl that you want to make.
The clay I’m using for the slab is a light buff color that fires to a creamy white. But you can use any colored clay that you like. Just make sure that the clay is the same clay body as the colored cane.
2) Making Your Nerikomi Slab
Place the slices of Nerikomi cane onto the clay slab in whatever pattern you like.
Cover the clay slab with a piece of bedsheet and spray the sheet so that it is damp.
Roll the canes into the clay. Remember that if you roll the clay outwards it will stretch the shape of the canes. This can look nice. Equally, if you want the canes to keep their shape, roll downwards rather than outwards.
The canes will always change shape a little, but you can minimize this by rolling downward.
You will be able to see through the sheet when the canes have flattened into the clay slab.
Spray the sheet with a little more water and then run a rubber rib or a platter tool over the damp sheet to blend the canes into the slab and create a smooth join.
3) Forming the Nerikomi Bowl
Remove the damp sheet from the slab.
Carefully roll the slab over your rolling pin to lift it up. Drape the slab over your plaster hump mold.
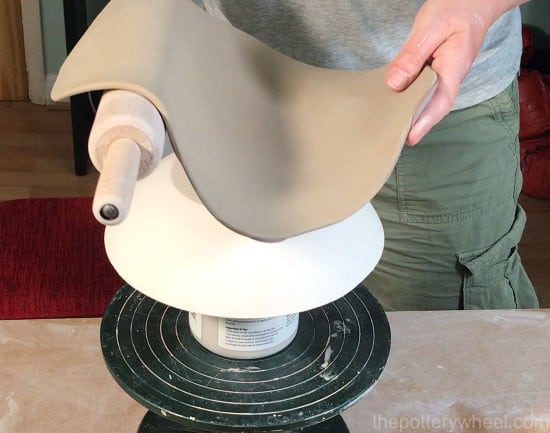
You can either buy a plaster mold or you can make one. Plaster hump molds are extremely easy and inexpensive to make. You can read more about how to make a plaster hump mold here.
Once your slab is draped over the mold, gently begin to fold the clay around the sides of the mold.
I find the best way to do this is to fold the clay so that it is fitting around the mold loosely, then trim off a lot of the excess clay. You don’t need the edges to be perfect at the moment. However, trimming off the excess will make it easier to shape the clay slab.
Once the clay slab is flush against the side of the mold, you can tidy up the edge of the slab with a clay knife.
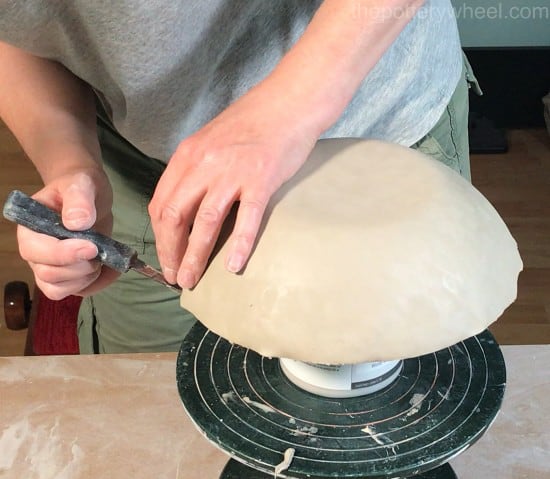
The plaster will turn the clay leather hard in a couple of hours. When the clay is leather hard, lift it from the mold. Tidy up the edges of the bowl with a craft knife and a rubber rib.
Drying Your Nerikomi Pottery
The key to drying your Nerikomi pottery is to dry it slowly. The Nerikomi has been built by joining together different batches of clay. These different batches of clay can separate when the pottery is drying.
Wrap your Nerikomi in plastic and allow it to sit for a few days. Then very gradually start to uncover it. I’d recommend loosening the plastic day by day and letting the clay dry out very slowly.
It’s immensely frustrating to spend hours on a piece and have it crack as it dries. So, the key tip here is to be patient.
Firing Colored Clay
Here are a few tips on firing colored clay:
- Ceramic stains can look different once they have been fired. It can help to fire some test tiles to see what the stain will look like before you spend time making your Nerikomi. Making test tiles will help you find colors that complement each other.
- If you are firing your pottery at stoneware temperatures, use a zinc-free clear glaze. Glazes that contain zinc can reduce the intensity of some ceramic stains. For example, pink and lavender will sometimes be leached out by a clear glaze that contains zinc (source).
The History of Nerikomi Pottery
The term ‘Nerikomi’ is actually quite a modern word, and began being used in Japan in the 1970s. However, working with colored clay has a long-established history.
Colored clay has been used for centuries and a number of terms have been used to refer to it. It is sometimes called marbling, because of its resemblance to the swirls and patterns in marble.
The marble look can be achieved by simply wedging colored clays together and rolling the clay out into a slab.

There is evidence of colored clay being used in Japan as far back as the 16th century. And over the centuries the use of the marbling technique spread across the globe.
In England, marbled pottery was referred to as agateware. With agateware, at least two clay colors were used to create striations (colored layers) in the pottery.
Originally agateware was often made by blending dark and light clay bodies. This was then thrown on the wheel to create swirls and lines that spiraled around the pottery.
The Difference Between Nerikomi and Neriage
The terms Nerikomi and Neriage are sometimes taken to mean the same thing. However, there is a bit of a difference in how they are formed.
Nerikomi refers to forming patterns in clay by placing different colored clays together. This is done by hand and the patterns are assembled a bit like jigsaw pieces.
Neriage also uses different colored clay. However, it’s also combined with the use of the wheel. The different colored clays are combined together by hand. Then the piece is thrown on the wheel to create swirls and layers in the clay.
The difference between these two techniques is reflected in the words Nerikomi and Neriage. Both Nerikomi and Neriage share the same root word which is ‘neri’. In Japan ‘neri’ means ‘kneading’ as in mixing together dough (source).
However, in Japan, the word ‘komi’ when used as a verb, ‘komi iru’ means ‘to push in’, ‘include’ or ‘press into’ (source). So, the word Nerikomi refers to the process of combining colored clays, followed by pressing them together.
In contrast, ‘age’ means ‘pull up’ in Japanese (source). So, Neriage refers to combining different colored clays and then pulling them on the potter’s wheel.
Final Thoughts
Making Nerikomi pottery can be extremely satisfying. It has that ‘oomph’ effect when you have made something you are happy with and you simply have to say ‘oomph’. It does take patience in the making and the drying process. But if you take your time, making Nerikomi will reward you in a big way.


