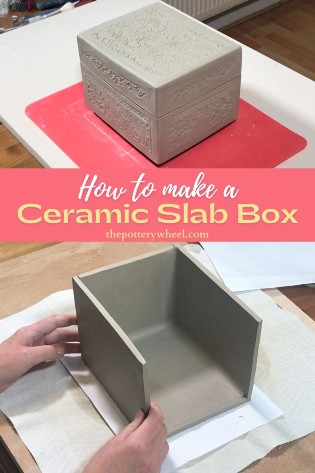
This is an easy-to-follow step-by-step guide on how to make a ceramic slab box. Once you have learned the process below you can adapt it to make boxes in any shape, size, and design.
In this guide, I will cover how to make a simple slab box, and a textured slab box too. This is the process that I followed to make these two slab boxes…
How to Make a Simple Ceramic Slab Box
First I’ll cover the basics of how to make a simple untextured slab box. Once it’s finished it can be decorated and glazed in whatever way you like, a lot like an artist’s canvas.
Step 1 – Planning Your Design
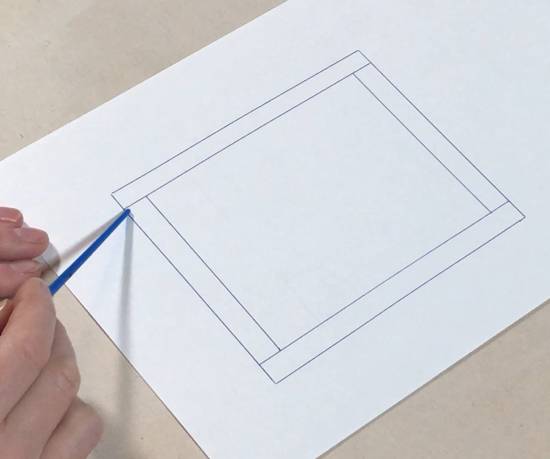
The best way to start making a slab box is to decide on a design and then make a template. A template is just a guide. It doesn’t need to be complicated. It can just be some squares of paper that you have worked out your measurements on.
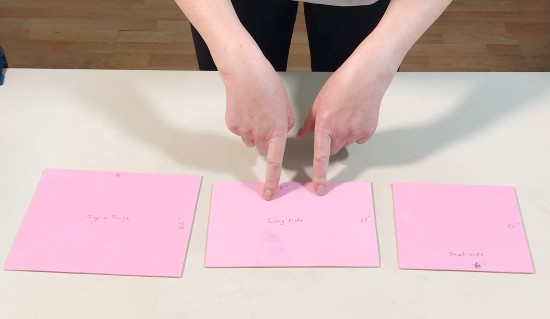
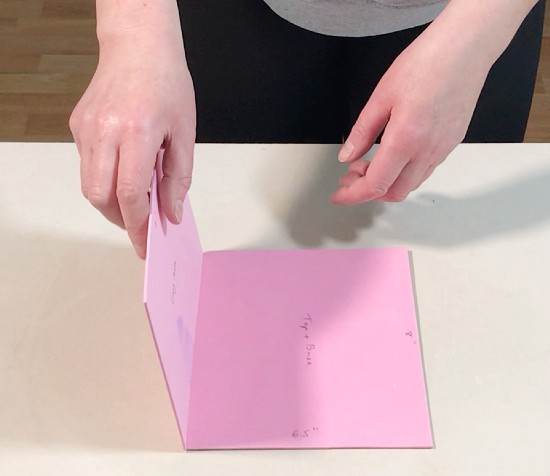
Once I’m happy with a design, I cut it out in craft foam. Paper templates absorb water from the clay, and can only be used once or twice. By contrast, the craft foam that you see in these pictures will last for a very long time and makes the templates reusable.
The template will help you visualize what the box will look like. It will also help you cut out your clay slabs using the right dimensions so they fit together well.
Download these FREE slab box templates here…
If you aren’t sure if you want them yet, I will link to them later too. So, you can choose to do that once you’ve read the article.
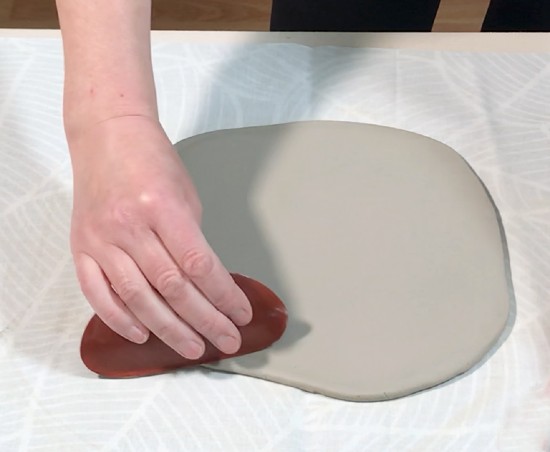
Step 2 – Roll a Slab of Clay
Once you have your template ready, you need to roll out a slab of clay.
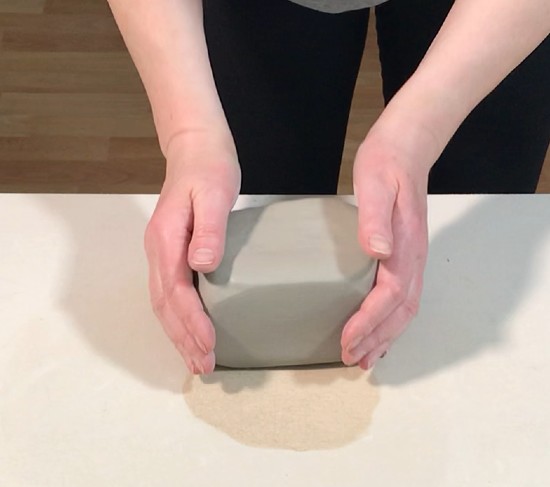
Start by slicing off a lump of clay. Before you start rolling, pat the clay into a square shape. This means that when you roll, you will roll a slab of clay that is somewhat square. If you roll a big circle of clay then you will have a lot of offcuts which will need to be wedged again.
Rolling a slab of clay is not difficult, but there are some tips that will make a better more even slab. I usually flatten the clay a bit with the heel of my hand before I start to roll it.
I roll my clay slabs on a loose piece of canvas. This enables me to slide my hand under the slab and pick it up easily. When you roll a slab directly onto a worktop, you have to peel the slab off the worktop. As you peel it off the slab can be stretched. So, I’d suggest you roll it onto a piece of canvas.
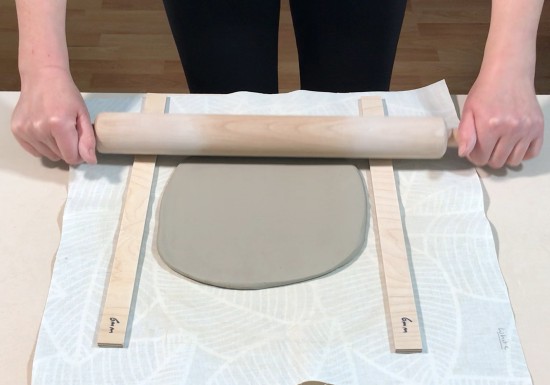
As the clay starts to turn into a slab, remember to lift the slab and turn it over. Also, whilst you are turning it over, change the orientation of the slab on your worktop. This means you are rolling both sides and also rolling the clay in different directions.
One of the benefits of doing this is that the clay is stretched in a number of directions. Stretching clay a lot in one direction puts the clay under stress and can result in the clay curling up when it dries. You can read more about rolling a nice even slab of clay here.
Use roller guides on either side of the clay to ensure that the slab is of an even thickness. I find that 6mm (about ¼ of an inch) is a good thickness for a slab box of this size.
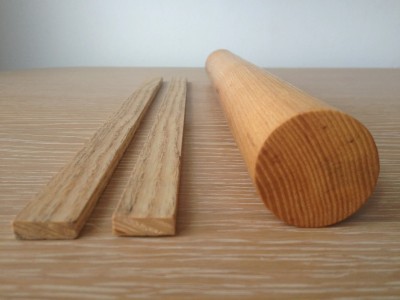
Roller Guides for Clay – View on Etsy
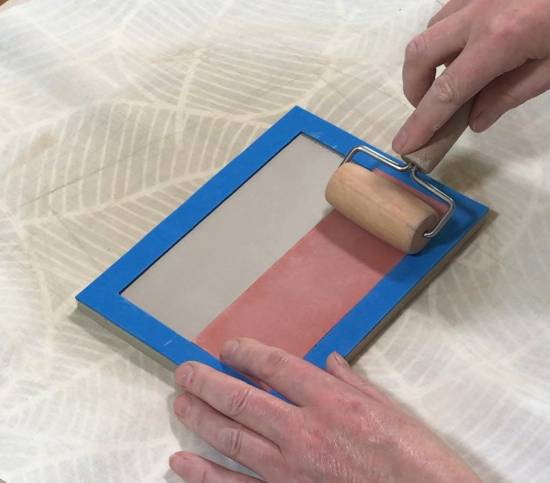
And remember to run a soft rubber rib over the clay slab after you have rolled it out. This takes away texture marks from the surface of the clay. It also helps to align the clay particles so your slab is less likely to curl when it dries.
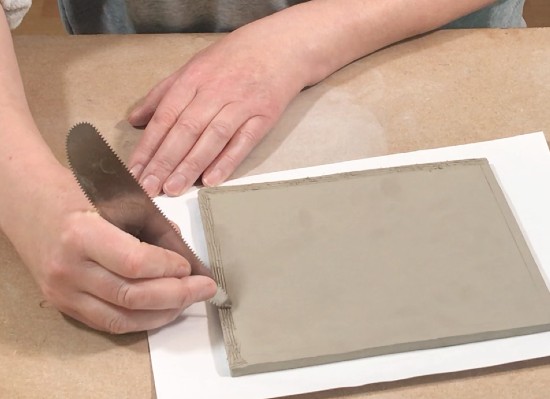
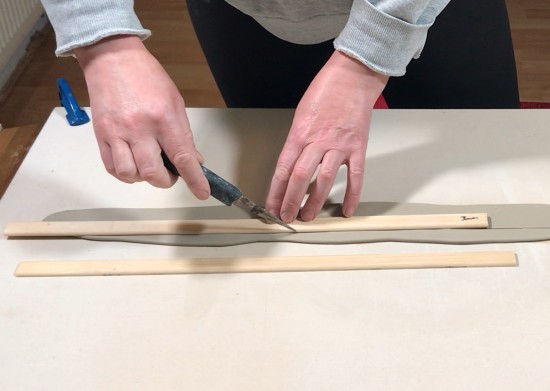
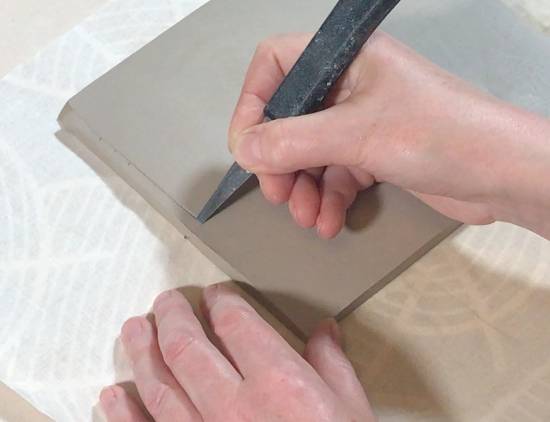
Step 3 – Cutting Out the Slab Box Sides
Place your template on the slab. If you have rolled out a very large slab, you can cut out more than one side at a time. But equally, you can cut them out individually and put them to one side.
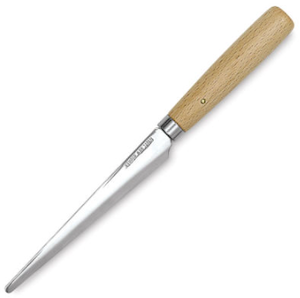
Cut out around the slab using a clay knife (fettling knife). When you are cutting out the clay, hold your knife upright at a 90-degree angle to the worktop.
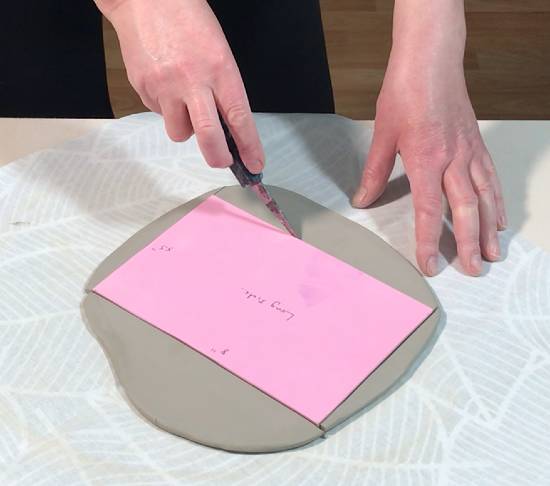
If you slant the knife in or out, you will create a beveled edge. We will look at beveled edges later. They can be a good way to join clay, but it’s best only to bevel an edge when you want to, and not by accident!
Remove the excess clay from around the slab.
Step 4 – Letting the Clay Slabs Firm Up
Immediately after you have cut out your slabs, the clay will be too soft and floppy to work with. You need to leave the slabs to firm up to the point of being soft leather hard.
Clay slabs are notorious for curling up and bending as they dry. However, there is a trick to drying out your clay slabs that prevent them from losing their shape.
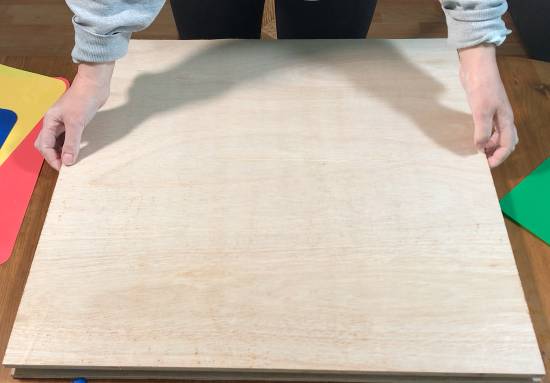
Transfer the slabs onto a piece of paper. Newspaper or regular printer paper is fine. Put the slabs onto a piece of flat plywood.
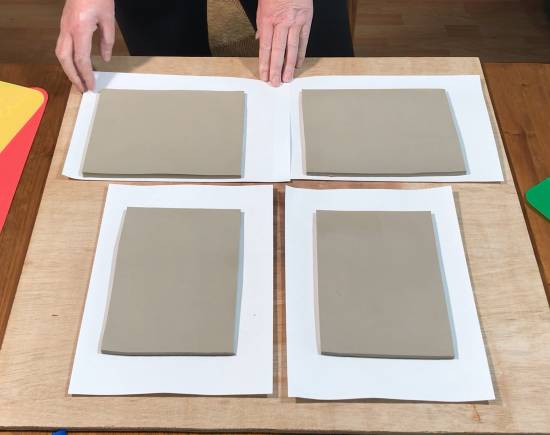
Then place another piece of plywood on top of the slabs. You are creating a plywood and clay sandwich.
Leave the slabs for some time sandwiched between the plywood. The wood will draw some moisture out of the slabs, but the slabs won’t be able to curl up. Exactly how long you should leave them will depend on how hot and dry the atmosphere is where you are.
I’d suggest checking them quite regularly so that they don’t get too dry. Ideally, the clay needs to be soft leather hard. This is when the clay will bend a little without breaking if you apply pressure to it. But it’s not so soft that it flops when you pick it up.
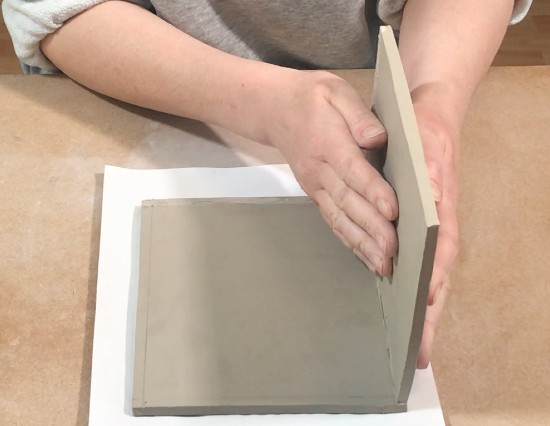
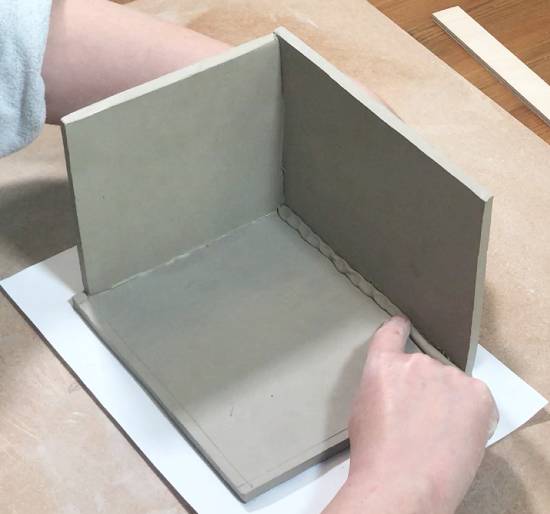
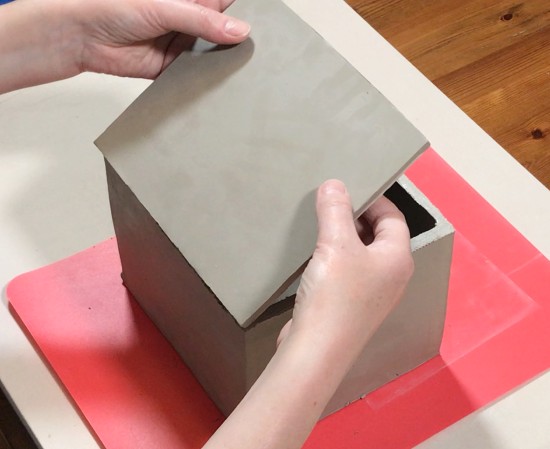
Step 5 – Constructing the Ceramic Slab Box
There are different ways of putting a slab box together. With this design two of the slabs of clay are just a bit shorter than the base of the box.
The reason for this is that you have to allow for the thickness of the clay slab. If your clay slabs are ¼ inch wide, when you attach them to the base, they will cover this amount of clay. The rest of your slabs need to be cut to take this into account.
Take a look at this picture below. It’s a diagram of how the clay slabs are joined. The short sides of the box need to be just a little shorter than the base so that all of the slabs can fit onto the base.
With this box, I know that the slabs are 6mm thick because that is the size of my roller guides. So, I put the roller guide on the bottom slab, and draw a light line on the slab with my needle tool.
I then score the clay with my serrated rib tool. Scoring the clay means scratching into it so you create a rough texture on the clay surface.
I also score the edge of the clay that is going to be joined to the base.

Serrated Metal Rib – View on Blick
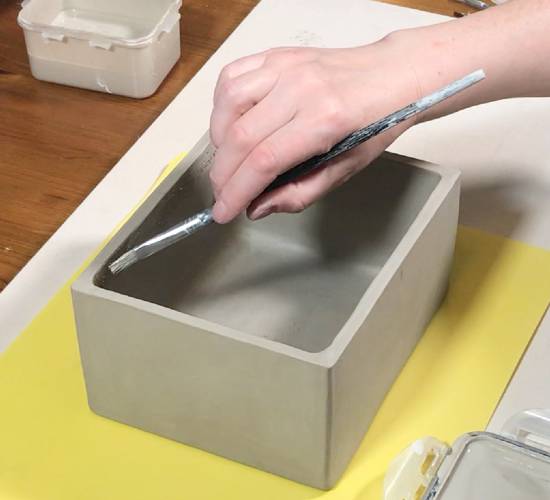
Once I’ve scored the surfaces that will be joined, I paint some clay slip onto the scored surface. Clay slip is just clay that is dissolved in water to create a liquid clay solution. You can learn about how to make clay slip here.
The slip acts like glue so that the two surfaces will bond together well. This is called the ‘slip and score’ method of joining clay.
Hold the two surfaces in place and allow the clay slip to adhere the slabs together.
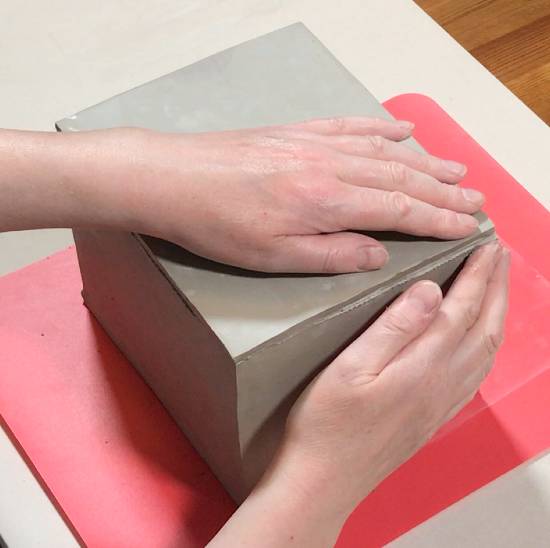
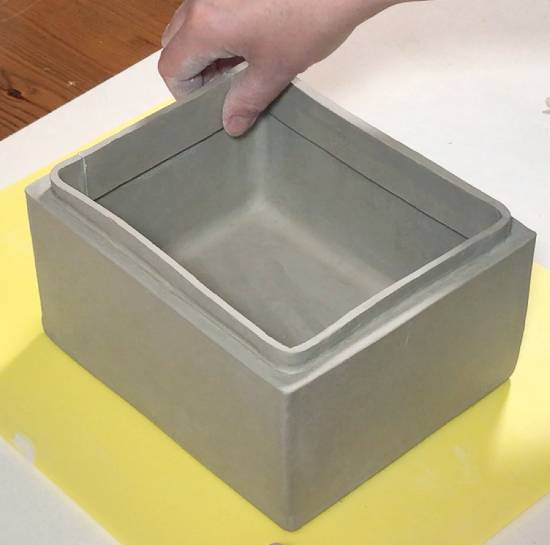
Once you have three slabs attached to one another, the slab construction will be quite stable.
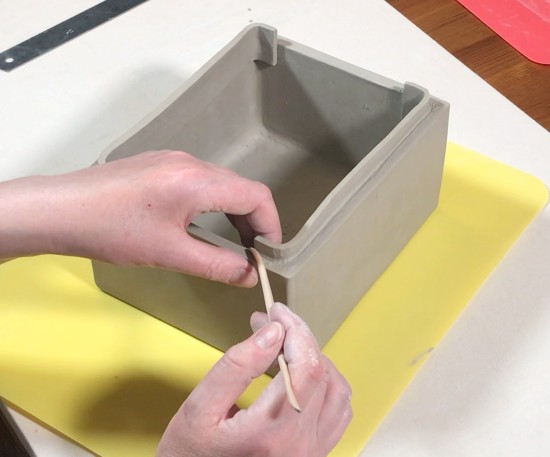
Step 6 – Adding a Coil to The Slab Box
To make sure that the clay joint is secure, it’s a good idea to add a thin clay coil to the inside surface of the box.
Roll out a thin coil of clay. You can get some tips on rolling even coils of clay here. Then press the clay coil into the corner of the join. Remember to support the outside of the slab box with your free hand, so that you don’t separate the join.
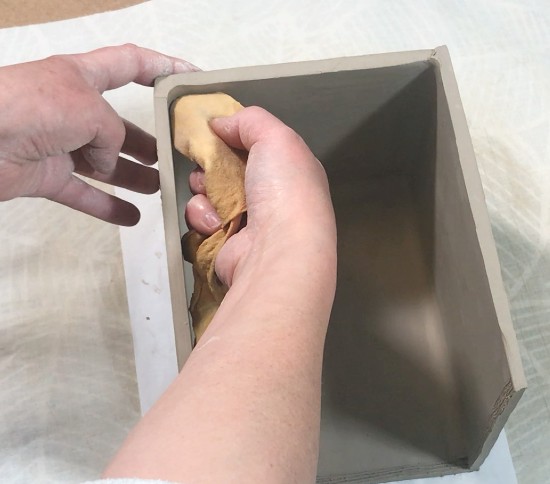
Once you have pressed the coil into the join, you can smooth it out with your finger and thumb. Another way to smooth out the coil is to wipe over it with a damp piece of chamois leather.
Whether you prefer to hand build or make pottery on the wheel, chamois leather is an invaluable pottery tool that I use all the time.

Here is a list of my favorite pottery tools that I wouldn’t be without.
Step 7 – Adding More Slabs
Continue to assemble the slab box, using the same method of scoring and slipping the clay. Add a coil to the clay whenever you create a join.
The joins on the outside surface of the box will also be visible at this stage. You can blend these in with your fingertips. However, at points, you may want to add a small amount of clay to fill in gaps or uneven surfaces on the clay.
You can also tidy up the outside surface of the box using a pottery rib. This can be a metal rib or a soft silicone rib such as the one by Mudtools used in this picture.
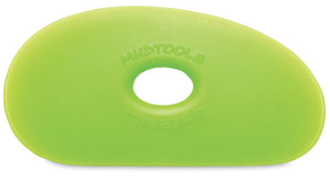
Rubber rib by Mudtools – View on Blick
Step 8 – Creating a Sealed Box
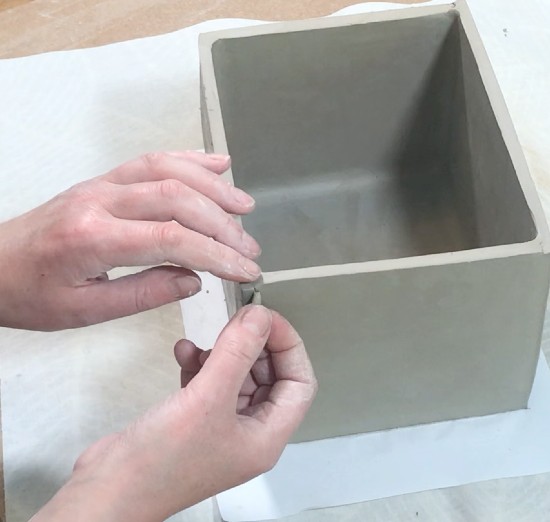
Add the final slab to the box by scoring around the top rim and also around the edge of your last slab.
Apply slip to both surfaces and then lower the last slab onto the top of the slab box.
Once the final slab is in place, you can press the join together firmly by gently.
Blend the outside surface of the top slab to create a smooth joint.
Important Tip!
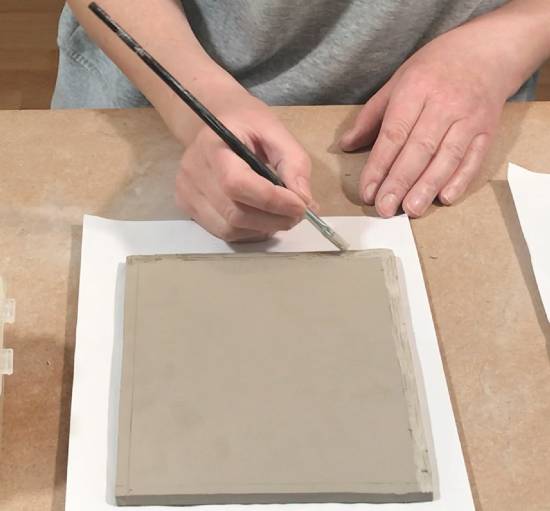
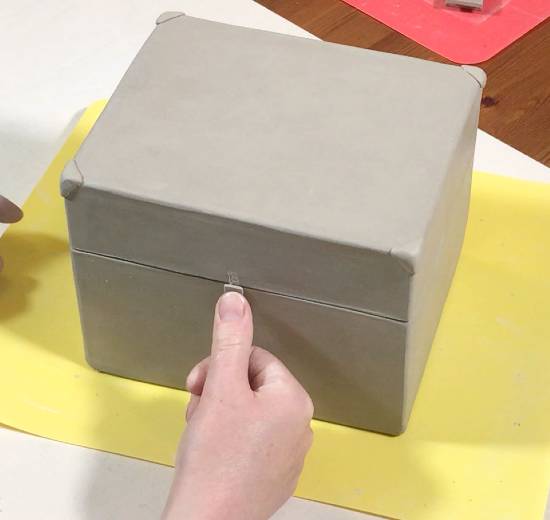
Before you start turning the box over, make a small mark on the top slab with a needle tool. This is very important because you want to know which slab is the last slab that you added.
You will shortly be cutting the lid off the box, and you want to be sure you are slicing into the ride side of the box. This little mark will help you remember which side of the box to remove.
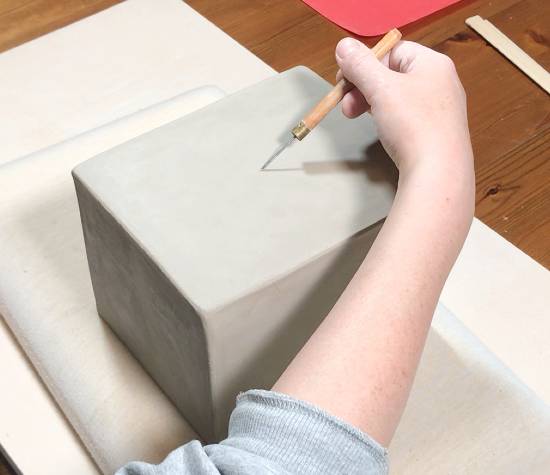
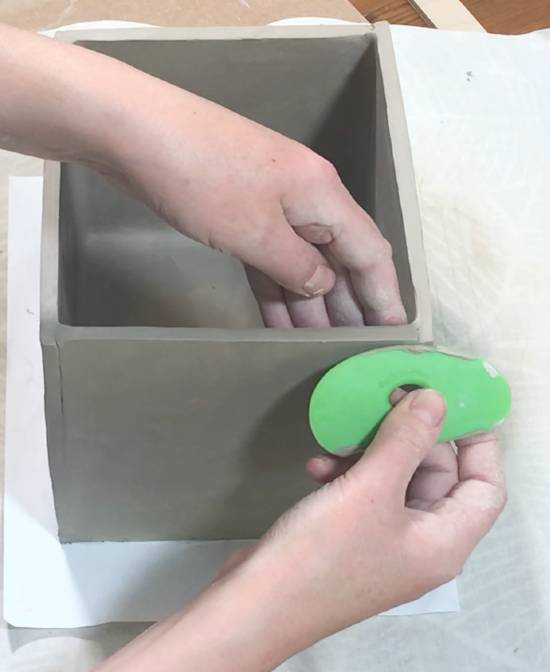
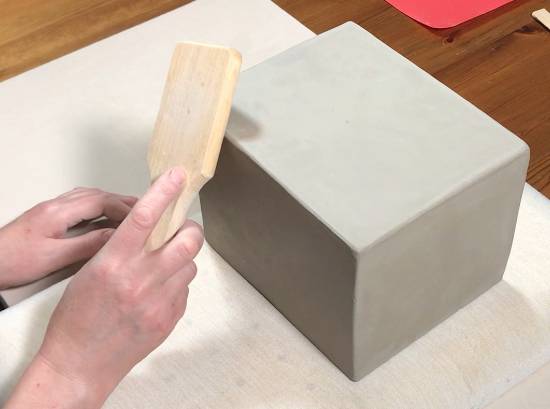
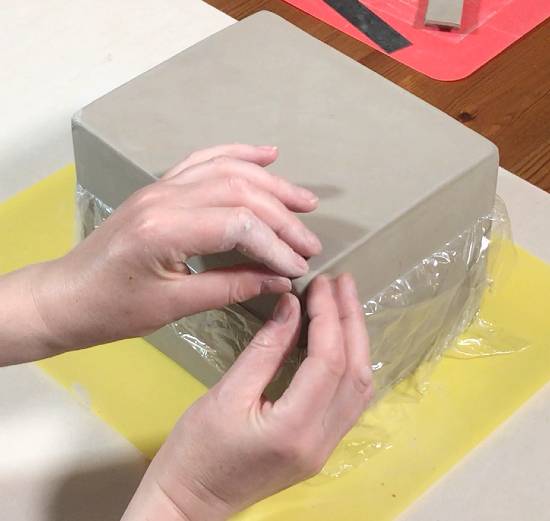
Once you have made a small mark on the top slab, you can soften off the edges of the slab box. At the moment, all the edges are quite sharp and possibly a bit uneven. It’s best to round the edges and corners off so that they aren’t as vulnerable to being chipped when the slab box has been fired.
I smooth off the edges and corners using a wooden paddle. This looks a bit like a spatula.
You can gently tap the edges and corners to soften them off and give the box a nicer more well-finished look.

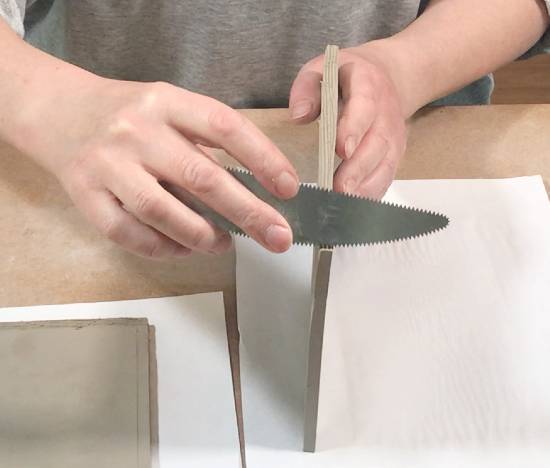
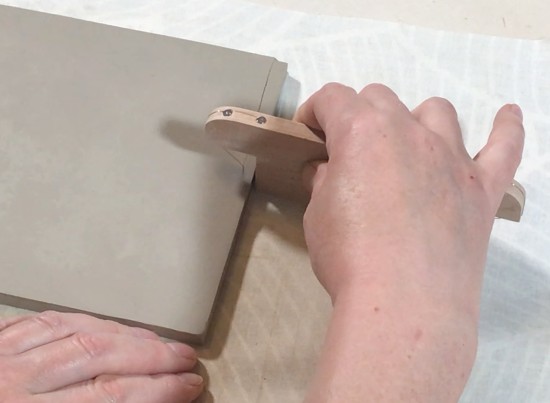
Step 9 – Separating the Lid
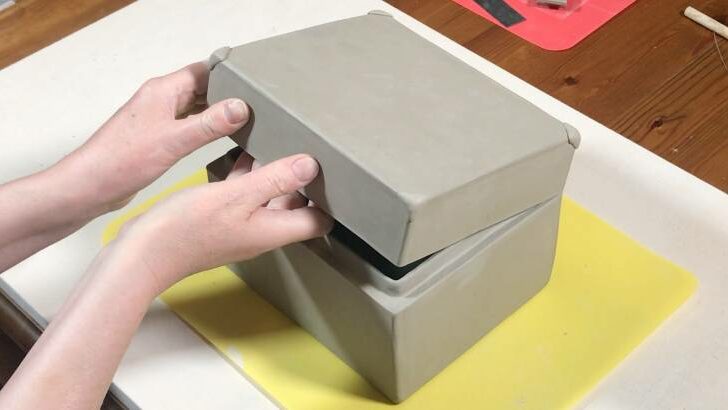
Have a look at the box, and gauge where you would like the lid to be. Make a mark on the box at the point where you want to cut the lid off.
Then make a series of small guide marks around the top edge of the box.

Then with a straight edge and a sharp craft knife, you can start to cut the lid off. It’s best to do this gradually.
Score into the clay about 1/8 of an inch, all the way around the box. Don’t cut all the way through on the first slice.
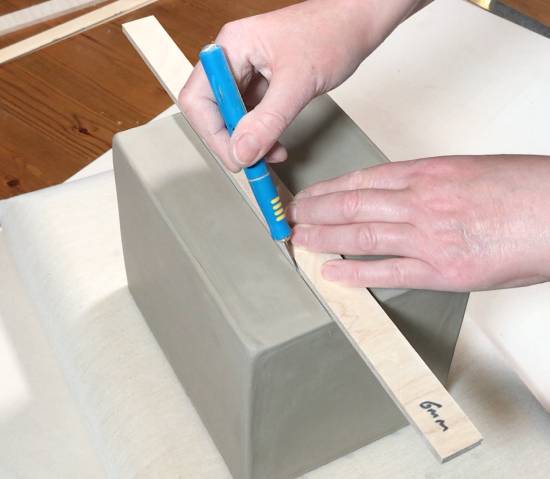
The reason for this is that the blade of the knife can wander. If you go wrong, you want to be able to smooth out the clay and have another go. If you do it slowly and go a bit deeper each time, you are much more likely to get a clean cut.
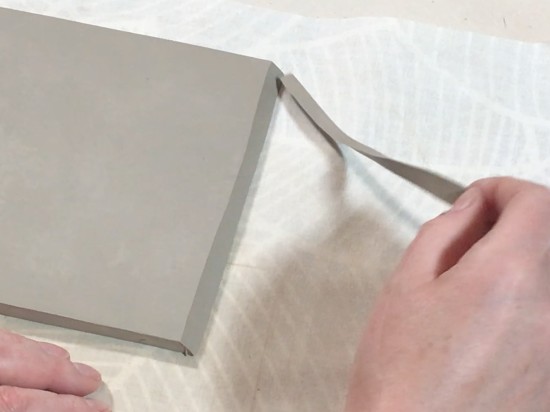
Eventually, the lid will come away from the base.
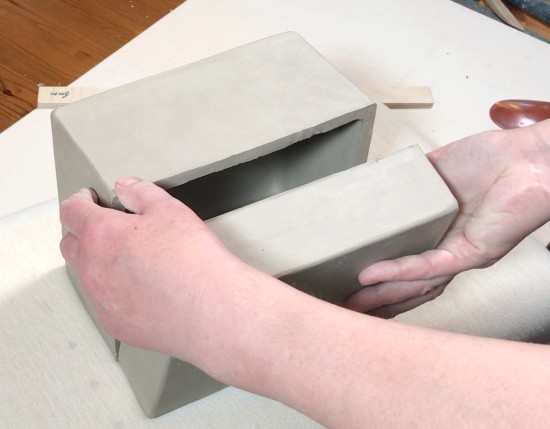
Once the lid is separated, you can reinforce the inside surface of the joint by adding a small coil of clay and then smoothing it out.
Step 10 – Adding a Gallery to the Box
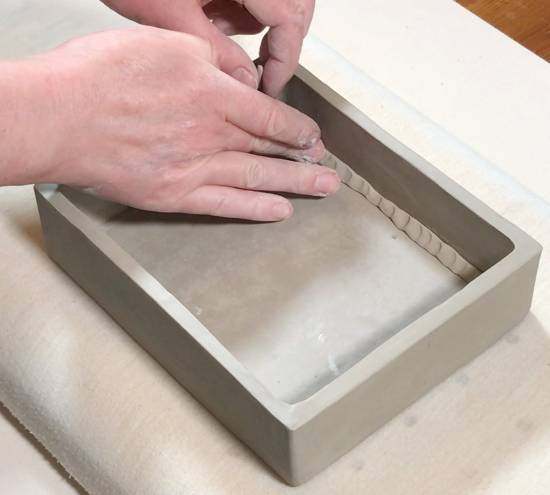
In order to keep the lid in place, you need to create a gallery for the lid.
One way to do this is to add a strip of clay to the inside rim of the box base.
Roll out a long strip of clay. This strip can be quite thin. I use 3mm (1/8 inch) roller guides to make the gallery.
Once you have rolled out a thin slab, cut out a strip of clay that is about 1.5 inches wide from the slab.
Cut this strip into 4 sections that are just a bit longer than the sides of your box. Allow the strips to firm up just a bit. They need to be a bit flexible, but not too floppy and soft.
Score along the inside top edge of the slab box. Also, score along the bottom edge of the strip you made for the gallery.
Add some slip to either side and then press the strip onto the inside edge of the box.
I find that the best way to do this is to press the strip into the corner of the box. This means that the strip curves into the edges of the box. Use a small wooden modeling tool to blend the clay strip onto the top edge of the box.
Cut the two remaining strips to length so that you can fill in the gaps in the gallery. Slip and score these pieces and then press them onto the rim of the box.
You will need to blend the gallery at the point where the clay strips join together.
One final tip on making the gallery is to put a piece of saran wrap on the top edge. Run your finger and thumb over the edge of the gallery. This will smooth out the upper rim of the gallery to give it a nice rounded finish.
Step 11- Check That the Lid Fits on Your Slab Box
Put a sheet of saran wrap over the top of the box, then try to slide the lid over the gallery. Don’t be alarmed if it’s a bit tight and doesn’t go on straight away. This is quite normal!
The solution is to gauge where the gallery is pinching a bit and then adjust it whilst the clay is still workable. You may be able to feel with your hands where the lid is sticking. Alternatively, if you peel off the saran wrap you can sometimes see where the gallery has been dented by the lid.
Either way, you can reshape and adjust the gallery until you find that the lid slides on without resistance. Whilst the clay is still wet, put a piece of saran wrap between the base and lid to stop them sticking together.
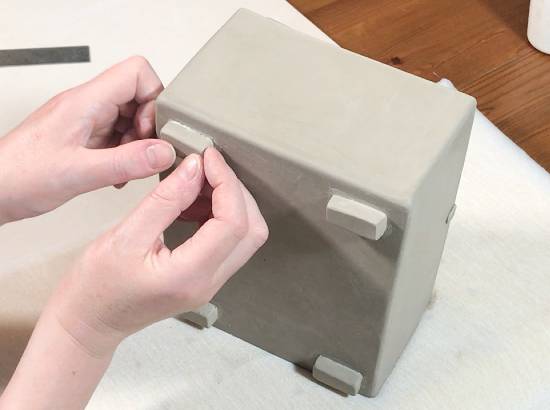
Step 12 – Adding Decorative Details
If you like you can add a few final touches to the slab box. On this particular box, I mold a small triangle of clay to each top corner.
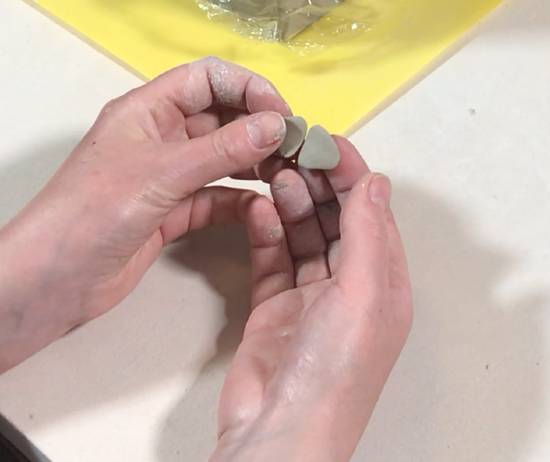
These will be glazed with gold luster overglaze at a later point. The idea is that they will give the slab box the look of an old treasure trove.
I also add a small ‘button’ of clay to the front of the box. This is positioned over the split between the top and bottom of the box and will also be painted with gold luster overglaze. This will give the look of being a golden clasp.
Step 13 – Adding Feet to The Ceramic Slab Box
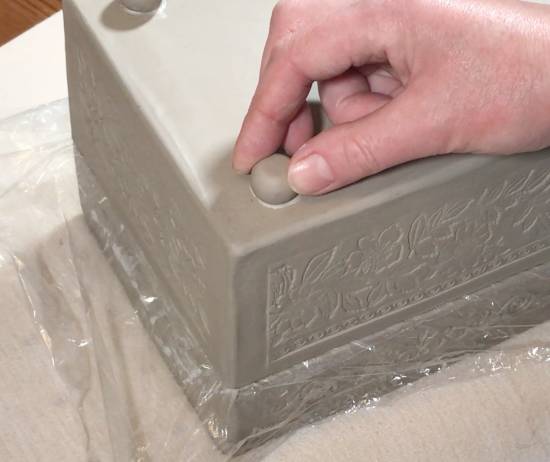
If you like, you can also add feet to your ceramic slab box. These can be any shape or design, however, it’s important that the feet are the same size so that the box is steady.
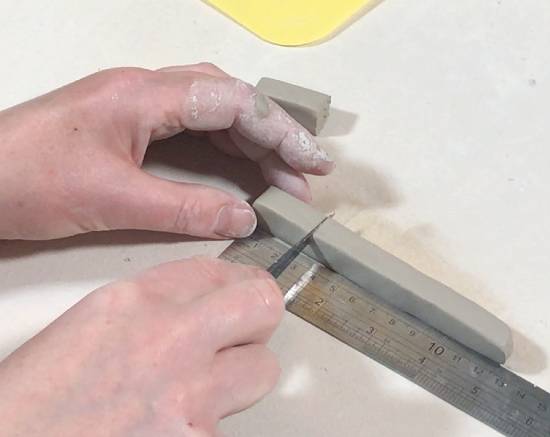
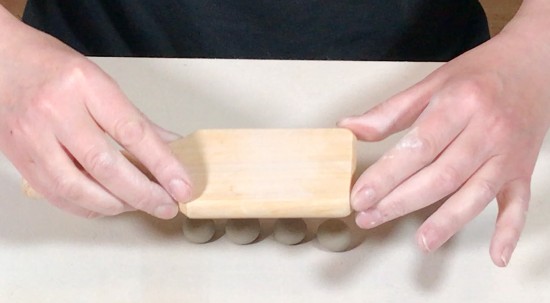
I am making block-shaped feet for this slab box. To make sure that they are all the same size, I roll out and even coil. The coil is then flattened into a long square block of clay using a pony roller.
Using a ruler, I cut 4 blocks off the square coil that are 3cm long.
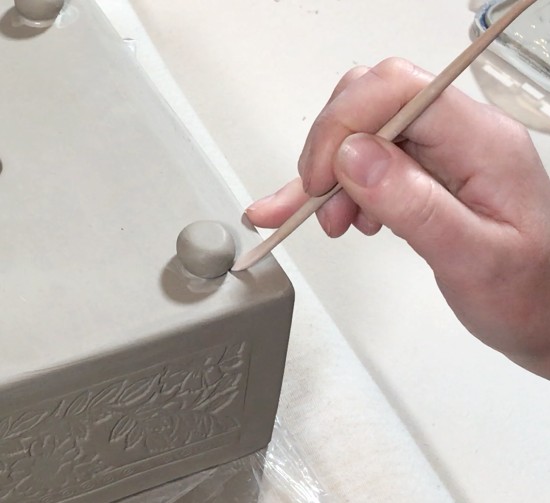
I tidy these up and then attach them to the base of the slab box using slip and score.
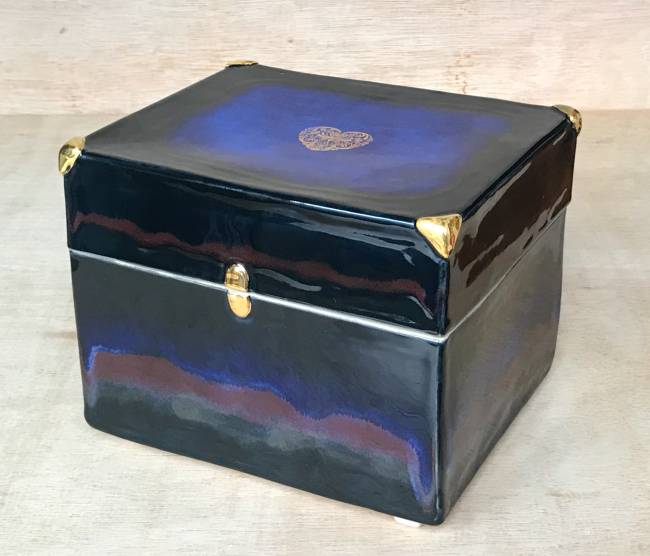
Once the feet are attached, your ceramic slab box is ready to dry out in preparation for being fired. I have a few tips on how to dry your slab box later on. Here is the finished ceramic slab box after it has been fired and glazed.
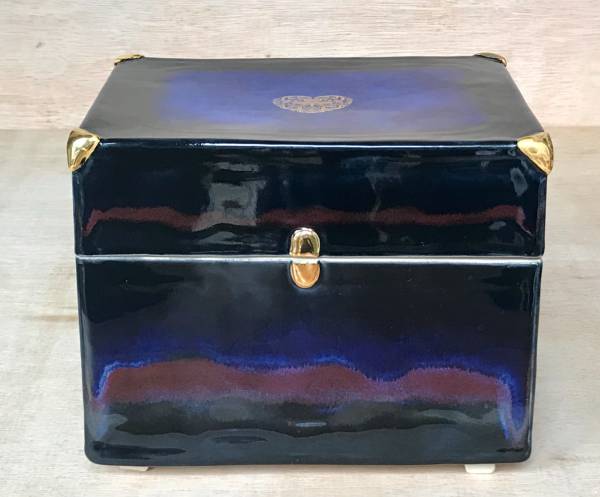
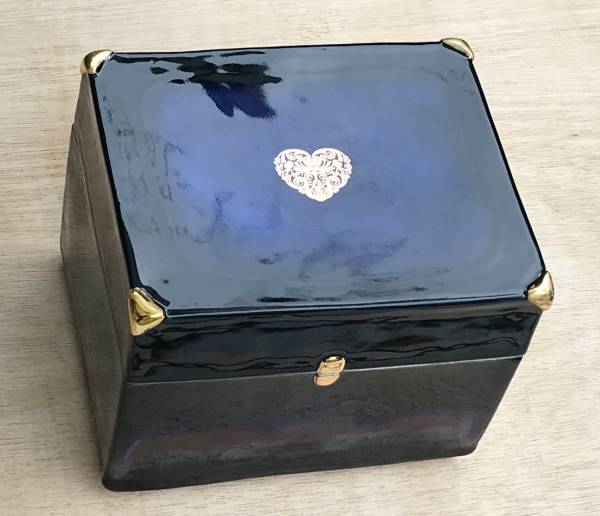
The slab box was glazed using Amaco celadon obsidian glaze as a base. It was then layered with Amaco Potter’s Choice Indigo Float, Smokey Merlot, and Seaweed.
The gold decal heart is by Sanbao. You can check out Sanbao decals here.
How to Make a Textured Ceramic Slab Box
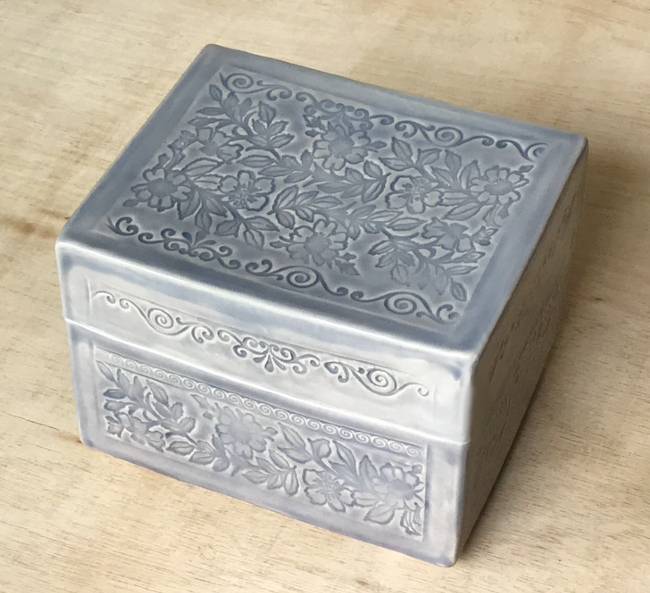
This ceramic slab box has the same dimensions, but it looks very different because of its textured surface.

Here are the things you can do to make a textured slab box…
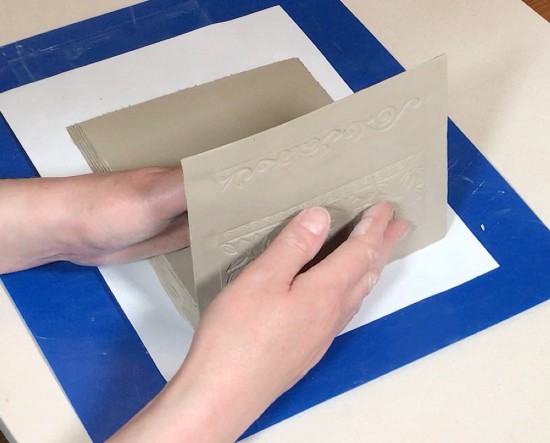
Adding Texture to the Slabs
I put a border to prevent the texture from being added to the edge of the slab. This border is made out of craft foam, and you can download the template for it here.
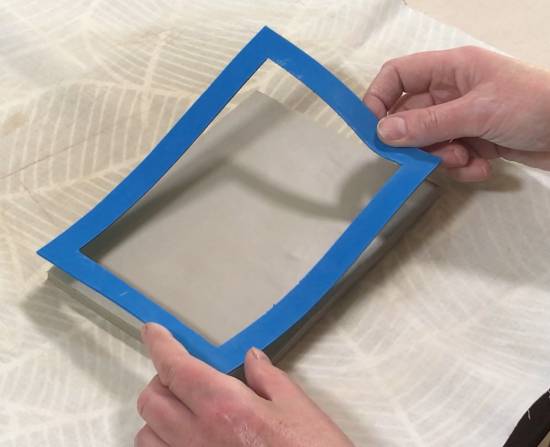
The idea behind using the border is that it covers the edge of the slab and keeps it clean and free of design. This is helpful later when you are assembling the slab box.
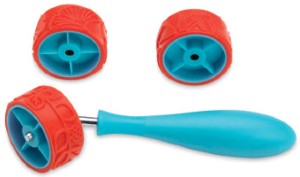
Then I use a range of texturizing tools. You can use whatever you like to add texture to your slab.
I like to use texturizing rubber mats because they create a nice precise impression. Also, you can use them again to create a series of items in a range with the same design.
The one that I’m using on this box here is a texturizing mat by Mayco.
You don’t have to use mats that are made specifically for pottery. There are lots of texture mats designed for adding texture to cake fondant that work really well.
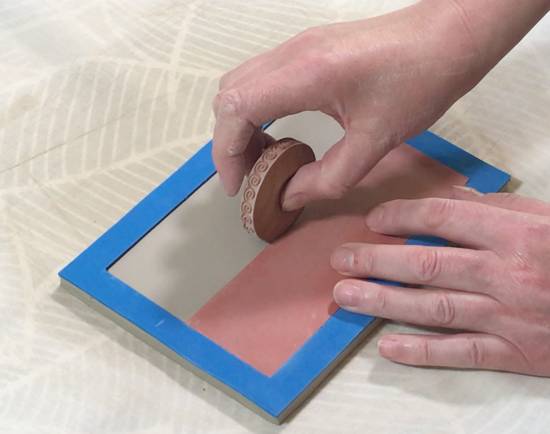
Place the mat on the clay and apply even pressure to it. An easy way to do this is to use a pony roller.
I also add some further texture details using a couple of finger rollers.
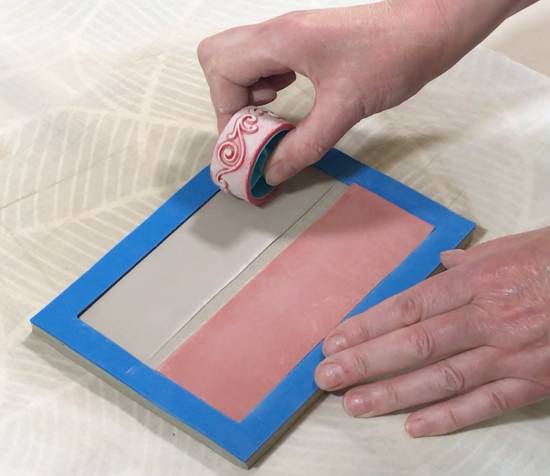
When you peel off the texturizing mat, you will reveal the nice texture that has been left behind.

If you want to design your own texturizing mats, you can check out my guide on how to do that here.
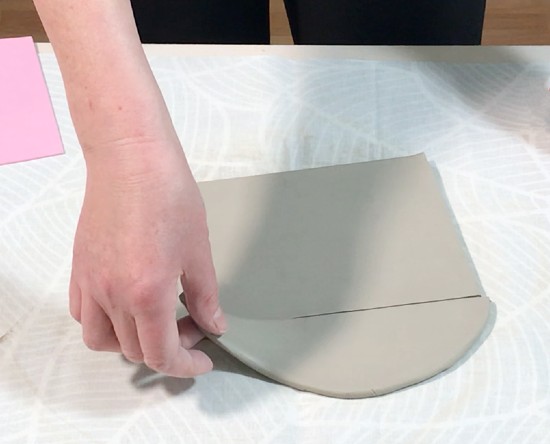
Beveling Your Clay Slabs
There are a number of ways to join slabs. One method is to create a beveled edge. This is slightly different from the method described above.
Here is what a beveled edge looks like on a slab box.

You can create a beveled edge in a couple of ways. One way is to use a clay knife. Simply hold the clay knife at a 45-degree angle to the worktop, and slowly draw it down and through the edge of the clay slab.
An alternative way to create a bevel is to use a clay bevelling tool. I like these because they create a nice precise bevel every time, and they are quick to use too.
Hold the bevelling tool up against the edge of the slab and draw it down over the clay. This will cut off an even triangle of clay from the edge of the slab.
It’s best to bevel the edges when the clay has firmed up just a bit. Once the clay is firmer, you can turn it over so that the textured side is face down. Then bevel all the edges on the reverse side of the clay slab that has not been texturized.
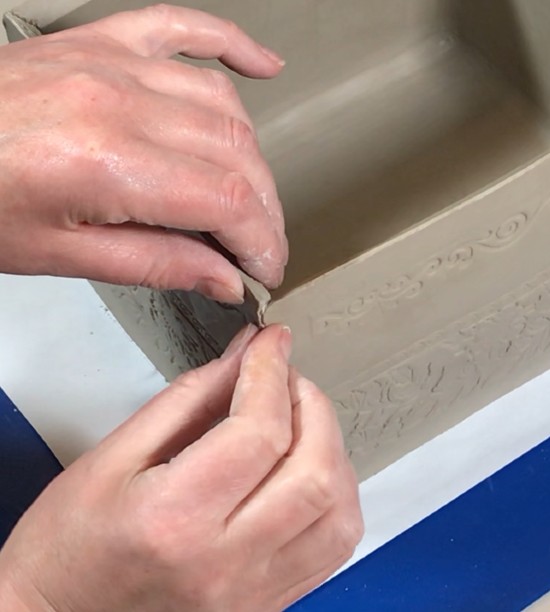
Joining the Beveled Edges
Once you have added the texture and beveled the edges, you need to let the clay firm up even further so that it can be handled easily.
Because the clay is soft leather hard when you join it, you need to slip and score. This is done in exactly the same way as described above.
Once both edges have been prepared, you can press the beveled edges into position.
When the slabs are aligned and in place, you need to pinch the two beveled edges together. Pinch gently so that you don’t distort the shape of the slab. But make sure that the join is secure.
Add a coil on the inside surface of each joint to make sure that they are bonded together well. Another way to add a clay coil is to use a stylus tool.
These are great when you are adding coils to awkward places that are hard to reach with your hand. They also give a nice smooth polished finish to a join.


Adding Feet to the Textured Slab Box
As mentioned earlier, if you want to add feet to the box, you can make them whatever shape and size you like. I am adding small round feet to this textured box as I feel they complement the floral design.
To make these feet, I roll three even-sized balls of clay.

Before I attach them to the slab box, I flatten them just a little with a wooden paddle. This will make them easier to attach. It will also make it more likely that the feet create a steady base for the box.
I attach them to the base with some slip and then tidy up the joint with a small wooden modeling tool.
Here is the textured box, once it has been fired and glazed. Celadon glazes like this work well on textured surfaces because they highlight the design. You can check out the lovely Amaco celadon glazes that I use here.

Drying the Ceramic Slab Box
Whether you add texture to your slab box or not, once it’s built you need to dry it out before it’s fired.
The process of drying out the box is an important one. Slab boxes can crack easily when they are dried. So, they need to be dried out slowly, evenly, and carefully.
I recommend leaving a sheet of saran wrap sandwiched between the lid and the base as it dries. It’s also a good idea to keep the box under a loose plastic bag during the initial stages of drying.
Important Tip!
Whatever you do, don’t try to speed up the drying process by removing the lid and letting them dry separately. If they dry separately, the edges of the base and lid will bend slightly and the pieces won’t fit together again after they have dried. So, always dry the slab box with the lid in position.
Decorating the Slab Box
One of the things that I love about slab boxes is that they make a nice canvas for decoration. You can glaze them, carve them, decorate them with underglaze, and use stencils. Really, you can decorate them in whatever way you like. You can read about different ways of decorating pottery here.
This slab box was made with a template that had the same dimensions as the ones above. However, the way I decorated it makes it look completely different.
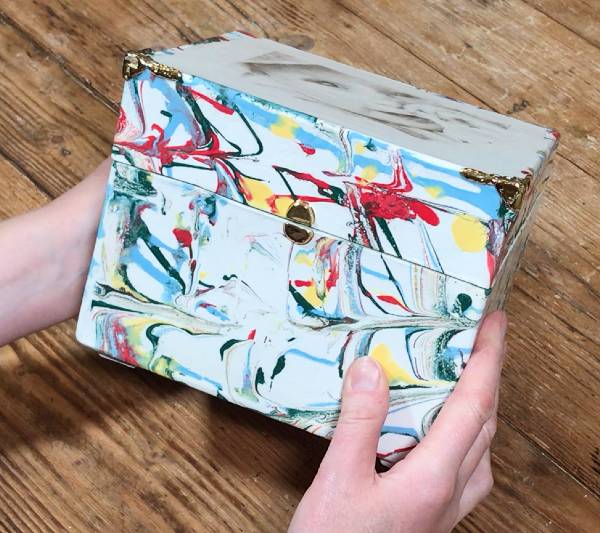
With this slab box, I transferred an image onto the lid and decorated the sides of the box with a marbled underglaze.
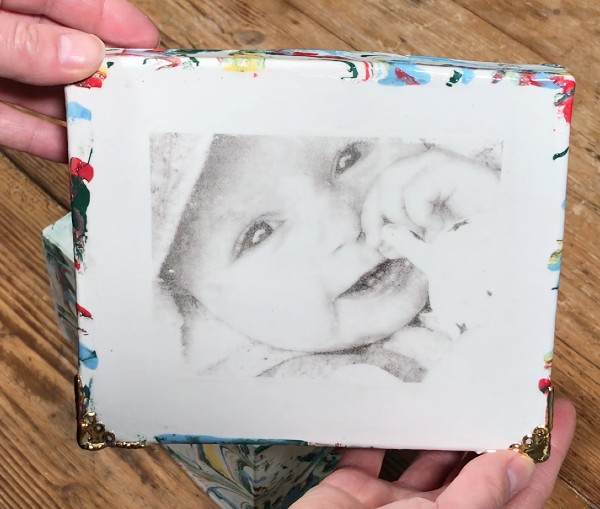
You can read more about how I transfer photographs and images onto clay here. And if you like the look of this marbled design, you can read about how I marble clay using underglaze here.
Tips on Firing Your Slab Box
It’s a good idea to fire your ceramic slab box with the lid in position. Clay changes shape when it’s in the kiln, and if the lid or gallery moves just a fraction, it can be hard to get them to fit together afterward.
This does mean that you can’t glaze the gallery and lid where they are in contact with one another. However, if you want to add some color to these areas, you can decorate them with underglaze. Be sure to choose an underglaze that doesn’t melt and become sticky when it’s being fired.
Download Your Slab Box Template
If you’ve decided you want to give this a go, you can download the template for this slab box here.
You can print these off on paper and then transfer the design onto craft foam if you prefer.
Equipment and Tools for Making a Slab Box
Here is a handy list of the equipment and tools I used in this article:
- Pottery clay
- Canvas
- Fabric-backed vinyl tablecloth
- Rolling pin
- Roller guides
- Craft Foam
- Clay knife (fettling knife)
- Flexible chopping board
- Rubber rib
- Mud tools green rib
- Serrated rib tool
- Potters chamois leather
- Sharp craft knife
- Pony Roller
- Texture mats
- Finger roller
- Texture roller
- Clay beveler
- Stylus tool
- Wooden paddle
- Celadon glazes

Final Thoughts
Making a slab box is a simple, fun project. And once, you’ve got the hang of the process you can use these techniques to make a whole range of items. Ceramic slab box designs can be adapted to create everything from tissue boxes to butter dishes.


