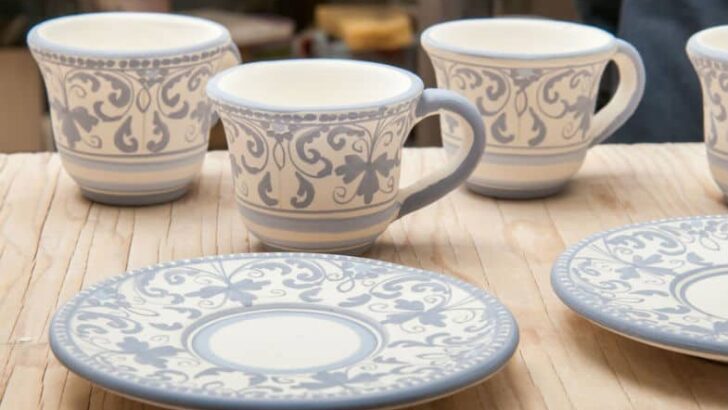
Underglaze can be used for detailed and precise designs on your pottery. Usually, these designs will stay in place when they are fired. But sometimes underglaze can smudge, bleed, and run. What causes underglaze smudging and what can you do about it?
There are three points at which underglaze can smudge or bleed. They are:
- When the decorated pottery is being handled before it’s been glazed
- While glaze is being put on over the underglaze decoration
- During the glaze fire
Underglaze Smudging – Causes and Solutions
Let’s look at each of those in turn and go over what you can do to prevent your underglaze from smudging.
Handling Underglaze Pottery Before It Has Been Fired
Underglaze is mainly made from clay and ceramic stains suspended in water. In its raw, unfired state, underglaze is fragile.
Modern underglazes also contain other ingredients that melt when they are being fired. Nevertheless, underglaze still has a high percentage of clay. They are colored slips with extra ingredients.
One of the first things we learn about bone dry greenware is that it’s very fragile. It needs to be handled carefully or it can break easily.
Well, the same is true of unfired underglaze. Underglaze that has been applied to your pottery and left to dry is really just bone dry clay. As such it tends to crumble and smudge if it isn’t handled carefully.
Also, the way you apply underglaze can affect its fragility. For example, if you spray or airbrush your underglaze onto pottery, it will be very delicate.
When you apply underglaze with an airbrush, you are misting your underglaze onto the pottery. As such, when it dries, it creates a fine powdery layer that can be rubbed off easily.
At this stage, underglaze can be damaged easily as you move your pottery around, or as it is being transferred into a kiln.
How to Stop Underglaze Smudging Before It Has Been Fired
Here are some ways that you can protect your underglaze in its fragile bone dry state.
Spray on Starch
One solution is to spray your unfired underglaze with the kind of spray-on starch that is used for laundry. You can buy it in a local grocery store or here on Amazon.
The best way to apply the starch is to put your pottery onto a banding wheel. Then, gently rotate the banding wheel and mist your pottery with the starch.
Banding wheels come in different price brackets. You can buy an inexpensive turntable here. Or if you want to invest in a sturdy turn table that will cope with heavier pottery and last a lifetime, you might want to check out these Shimpo banding wheels.
You can spray starch on greenware or bisque-fired ceramics. The starch will simply burn off in the kiln when your pots are being fired.
Once the starch has dried, it will form a hard protective layer over the underglaze. It can be very handy if you need to transport your pottery from A to B.
When you are starting out, and before you own a kiln, you will probably find yourself driving your pottery around. Most new potters take their pottery to a local kiln firing service to have their pottery fired.
Applying some spray on starch to your underglaze can help keep your decoration in place whilst it’s being transported. You can read more about how to transport your pottery safely here. Also, if you are looking for ideas about where to find a pottery firing service in your local area, you can check this guide out too.
Hair Spray
As an alternative to spray starch, you can use hair spray in the same way. Hair spray is cheap and readily available, and like starch, it will hold the powdery clay particles in place and stop your underglaze from smudging. Hair spray, like starch, will also burn off in the kiln.
Artist’s Fixative
Another way to stop your underglaze from smudging when you handle it is to use an artist’s fixative. These are usually made for artists to spray on chalks, pastels, and charcoal, all of which can smudge.
However, some are suitable for being used on underglaze. Usually, it won’t be clear from the label whether a particular fixative can be used on underglaze. I’d recommend reaching out to the manufacturer and asking them or better still making a test tile.
One brand that can usually be used on underglaze is Sennelier’s d’artigny Oil Pastel Fixative. That being said, it’s always work doing a test tile and checking to see that this fixative is compatible with the brand of underglaze and clay that you are using.
Mixing Liquid Starch Into Your Underglaze
Another inventive solution is to mix a small amount of liquid starch in with the underglaze. Liquid starch is sometimes used in glaze to improve brushability (source). The starch makes the glaze stiffer. But it can also be used in small quantities to make underglaze stronger when it dries. The starch binds the clay and stain particles together.
Starch will thicken underglaze, so add small amounts and test out a batch of your underglaze first, so that you don’t overthicken your whole pot of underglaze.
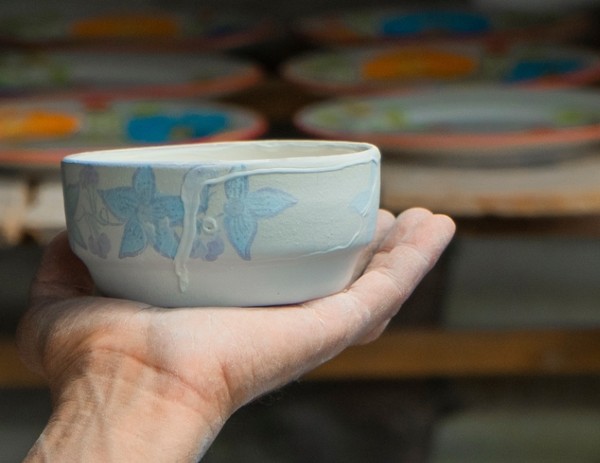
Underglaze Smudging and Bleeding When Glaze is Applied
Usually, if you apply your underglaze to greenware and then bisque fire it before glazing, the underglaze won’t run or bleed. However, if you apply underglaze to bisqueware and then put a clear glaze directly on top before glaze firing, there is a chance that it will run.
Underglaze designs can become fuzzy and blurred when glaze is applied on top because the unfired particles of underglaze dissolve into the glaze suspension.
If you are using a brush to apply your glaze, it can cause streaking. In effect, the glaze on the brush is dragging the underglaze across the pottery surface.
Or, if you are dipping your pottery in glaze, the underglaze can simply bleed into the liquid glaze.
How to Avoid Underglaze Smudging When Applying Glaze
Here are 5 tips on applying glaze over underglaze:
Tip 1
Apply the first layer of glaze carefully with a sponge. It’s also a good idea to dilute it down a little bit. Apply the glaze thinly so it dries quickly. This gives the underglaze particles less liquid to spread into.
Once this layer of glaze has dried and sealed, you can apply another couple of coats as you would normally.
Tip 2
You can also use some of the sealing techniques suggested above to stop underglaze smudging when it’s being handled. A layer of starch, hairspray, or fixative between the underglaze and glaze will burn off during firing and won’t affect the finished results.
Tip 3
If you are dipping your pottery in glaze, then dip your ceramics gently and draw it out again carefully. Don’t wiggle the pot around when it’s submerged in the glaze mix as this will drag on the underglaze.
Tip 4
When you are letting the glaze dry, don’t let the pot sit in one position whilst it dries. Instead, move the pottery around gently and change its orientation. You can do this by moving the pottery through the air with the tongs. This will stop the glaze from settling and pulling in one direction as it dries.
Tip 5
Make sure your bisqueware isn’t too cold. If your ceramics are at room temperature or a bit warmer, then the glaze will dry quicker. The quicker the glaze dries the less chance the underglaze will have of smudging or bleeding.
Underglaze Smudging and Bleeding Whilst Being Fired – Causes and Solutions
There are a few factors that can cause underglaze to bleed when it’s being fired. So, it may be a matter of trial and error to find out what is causing the problem. Here are some suggestions…
1) Underglaze or Glaze Becoming Fluid
Some underglazes become more fluid when they are fired in a kiln. The same is true pottery glazes. Some glazes are quite static when they are fired, and others flow and move. How liquid or fluid an underglaze or glaze becomes is referred to as ‘melt fluidity’ (source).
If an underglaze becomes very fluid when it melts, then it’s more likely to bleed. Certain colors like cobalt blue have a high ‘melt fluidity’ and are more likely to bleed and run when fired.
Likewise, you may have used a clear glaze over your underglaze that has become very fluid when it’s fired. If your underglaze is covered with a flowing clear glaze, then there is a greater chance that the underglaze will bleed.
If you find that your underglaze is running or bleeding, then you can switch brands. You may find that another brand will melt less when it’s fired and your problem will be solved.
It may be that the problem lies with the fluidity of the pottery glaze. In this case, switching to another glaze and testing it may help identify the cause of the bleeding.
2) Applying Your Underglaze Too Thickly
Applying your underglaze too thickly can cause it to flake off or bleed when it’s fired. This is a tricky one to gauge because achieving brightness or opacity in underglaze requires layering.
The solution to the question of whether your underglaze is too thick may again be one of trial and error. Do a few test pieces with underglaze of different thicknesses and see how they respond. Either use fewer layers or water your underglaze down and see if that makes a difference.
The other option is to apply a thinner layer of underglaze and then fire your pottery before adding the clear glaze. Then once the pottery has been fired, you could add another layer of underglaze to build up the color before applying your clear glaze.
3) Applying Your Glaze Too Thickly
Are you applying your clear glaze too thickly? This can also cause underglaze decoration to bleed and smudge.
Try thinning down your glaze with a little water, so that the glaze layer is not too dense.
Also, make sure the glaze is thoroughly mixed before application. This will help ensure that no patches of glaze on your pottery are thicker than any other. You can read more about some of the things that can happen when you apply too much pottery glaze here.
4) Firing Too Hot
Are you firing your underglaze to the right temperature? Like clay and glaze, underglazes have an ideal temperature range.
Check that your kiln is not getting too hot for the underglaze that you are using. If you overfire underglaze it can smudge, bleed and lose its pigment.
5) Firing Too Quickly
Try firing your ceramics more slowly. Sometimes underglaze bleeding happens because the pottery has been fired too quickly. If the kiln is ramping too fast, the underglaze, glaze, and pottery don’t have time to mature properly.
6) How Long Are You Holding Your Kiln?
A hold time, or soak is the final part of a firing schedule. It involves holding the kiln at its final temperature for a while to allow the pottery to mature fully. It ensures that any bubbles or imperfections in the glaze have healed over before the kiln starts to cool.
A hold time can vary from a few minutes to half an hour. I usually have a soak time of about 10 minutes, but some pottery prefer to hold their kiln for much longer.
Sometimes adjusting the soak time can help to address issues with underglaze too. Perhaps you are holding for too long and the underglaze is getting too much heatwork? Or maybe the pottery needs a little longer at the end of the schedule to give the underglaze a chance to mature.
It may be worth experimenting with the hold time to see it if reduces imperfections in your underglaze.

Final Thoughts
I hope this article has given you some ideas about why your underglaze might be smudging or bleeding. It might take a bit of experimentation to find out what is causing the issue. I find with pottery that my gut instinct about what is causing a problem is often right. I’d suggest following your gut and changing what seems like the most likely culprit. If that doesn’t work, you can work through the other possibilities to find a solution.


