Before it is fired, clay goes through three distinct stages. The first stage is when it is soft, plastic, and workable. The second stage is when it is leather hard. And the third stage is when it is bone dry. This article is all about leather hard clay. So, what is leather hard clay and what can you do with it?
Leather hard clay is partially dried clay. Because it still has around 15% water content, it can still be worked. However, it is firm enough that it does not distort when handled. Leather hard clay is versatile and can be trimmed, scored, smoothed, burnished, painted with slip or underglaze, and joined.
Although the drying of clay is often divided into stages, in fact, drying is a process. When clay dries out it gradually becomes harder. As a result, clay reaches different levels of being leather hard as it dries.
Clay that is later on in the leather hard stage will be harder and less workable. And clay that is earlier on in the process of becoming leather hard will be easier to alter.
The knack when working with leather hard clay is to catch it at the right time in the drying process. So that it is hard enough to suit your needs but soft enough to be workable. This raises the question of how long it takes for clay to become leather hard.
How Long Does It Take for Clay to become Leather Hard?
In its plastic workable state, clay contains around 20-30% water. This is called ‘mechanical water’ that is sitting between the clay particles. Clay starts to lose this water and dry out as soon as it is taken out of its sealed packaging. How long it takes for clay to become leather hard depends on a few factors. They are:
- How wet the clay is to start with
- The ambient temperature of the environment
- Humidity levels in the atmosphere
- Whether the clay has been positioned in a draughty spot
Aside from these factors, broadly speaking, it will take between 1 – 3 days for clay to become leather hard. I find that if I leave a piece of fresh pottery uncovered it will be leather hard in a day. If it’s a hot, sunny day, it might take less time than that.
However, usually, when I’m drying pottery out I keep it loosely covered with a piece of plastic. This slows the drying process down and makes it less likely that the clay will crack when it dries (source).
In particular, if I’m drying pottery with details like handles, I will cover them with plastic. Thinner parts of the clay will dry much faster than thicker parts. If your pottery dries at different rates, it’s more likely to crack. So, generally, I aim for the clay to be leather hard in around 3 days.
How Can You Tell if Clay is Leather Hard?
Leather hard clay still contains some water, so when you touch it, it feels cool. However, it does not feel sticky. Even though it contains moisture, it is not sufficient to make the surface of the clay tacky. If you touch the clay, you shouldn’t be able to leave a fingerprint in the clay.
Leather hard clay will still look a bit darker. When clay is bone dry it is usually much lighter than it was in its workable state. By contrast, leather hard clay will still be quite dark.
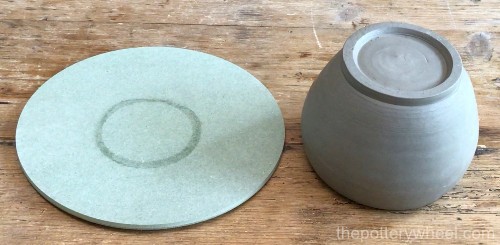
If you are working with light tan or white clay this is harder to gauge visually. If you’re finding it hard to tell whether your clay is still damp, try the following trick. Place your greenware on a piece of newspaper and leave it there for an hour or so. If it still contains moisture you will see a damp patch on the newspaper when you lift your pottery up.
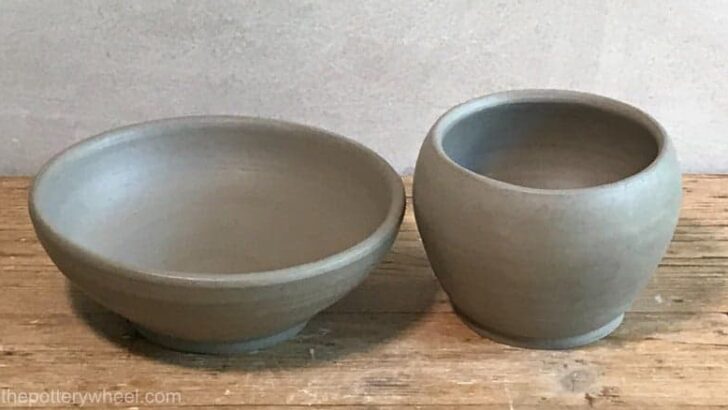
It’s easier to tell if buff or grey clay is leather hard. This is because it is noticeably darker when it’s leather hard than when it is bone dry.
The drier the clay becomes the lighter its color will be. In fact, as clay is just about to become bone dry, the leather hard surface will get a dusty look.
When you see that dusty pale layer on your pottery, you know that the leather hard stage is almost over. At this point, the leather hard clay will be really quite hard to work on.
So, let’s take a look at the different stages of leather hard clay. There are 3 different levels of leather hard clay. And you can do different things with your clay at each of these stages.
What is Leather Hard Clay? – And What are the 3 Stages?
I really like working with leather hard clay. It is cooperative, in that you can handle it without squashing it. But equally, it is quite forgiving. Mending cracks or damage to leather hard clay is much easier than mending bone dry clay.
Stage 1 – The Early Stage
In the early stage of being leather hard, the clay will still be somewhat soft. You will be able to touch the clay without it being sticky or easily moldable. However, you can still bend or move the clay carefully without it cracking or becoming damaged.
Reshaping Leather Hard Clay
This is a helpful stage if you find that your pottery has lost its shape somewhat. Let’s say you’ve thrown a bowl on the wheel. And you notice that the rim is less than perfectly round.
When clay is in the early stages of being leather hard, you can gently squeeze the pottery back into shape. Because the clay is firm, it will keep the shape you have formed it back into.
Joining Leather Hard Clay
Potters who like to hand-build clay will also use soft leather hard clay for slab building pottery.
Slab built pottery involves cutting out slabs of clay and joining them together using slip. The surface of two pieces of clay to be joined together is scored using a tool like a needle tool. Then clay slip is painted on the scored area. These two surfaces are then pressed firmly together.
The clay slip acts as a glue to secure the two surfaces together. The join can be reinforced by modeling a small coil of clay where the two pieces of clay meet.
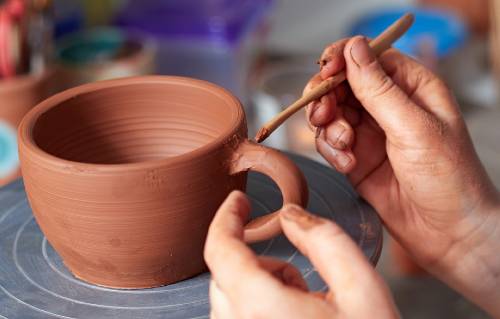
This is the basic technique of joining slabs of clay in hand building. But it is also the way that handles and other details are added to pottery when it’s leather hard.
Joining clay is best done when the clay is firm enough to be handled. However, your greenware also needs to contain sufficient water. If you try to join pieces of clay that are too dry, the slip will not function as a glue.
This is because there will be too much tension between the dry clay and the slip. The dry clay will suck the water out of the slip and the join will separate. Therefore, joining clay is most successful when the clay is in the early soft stages of being leather hard.
2 Top Tips on Joining Leather Hard Clay!
- When joining clay, it’s best if the pieces of clay have a similar moisture content. For example, you may be adding a foot ring to a bowl. A handy technique is to shape the foot ring and place it loosely on the pot without joining it.
Then wrap the pot and foot ring in a plastic bag and leave them together overnight. The next day the foot ring will have a similar moisture content to the pot, and you are more likely to achieve a good join. - Once you have joined your leather hard piece of clay together, leave the pottery, wrapped in plastic overnight again. This will allow the moisture content in the pieces of clay and the slip to equalize.
Stage 2 – The Middle Stage
At this stage, the leather hard clay will have stiffened up some more. You won’t be able to flex the clay without it cracking or breaking.
Nevertheless, at this stage, you can still work on your greenware to decorate it and tidy it up. There is still enough moisture in the clay so you can cut into it without the clay crumbling. So, this is the ideal time for the following techniques:
- Techniques such as sgraffito or mishima involve incising the clay using carving tools specifically designed to carve into firm clay.
- Decorating your pottery: You can use underglaze on greenware pottery at any point. However, if you want to achieve a gradient using underglaze, it can help to apply it to leather hard clay.
When clay is bone dry it draws water out of underglaze quickly. And it’s harder to create a wash or gradient through painting.
Because leather hard has more moisture, you have a little more time to work with the underglaze before it dries. Similarly, if you are decorating your pottery with slip, it’s best to apply it to leather hard clay. If you paint decorating slip onto moist clay, the clay can get waterlogged. And if you paint slip onto bone dry clay, it is likely to flake off.
However, leather hard clay is a more receptive surface and will create a better bond with the slip.
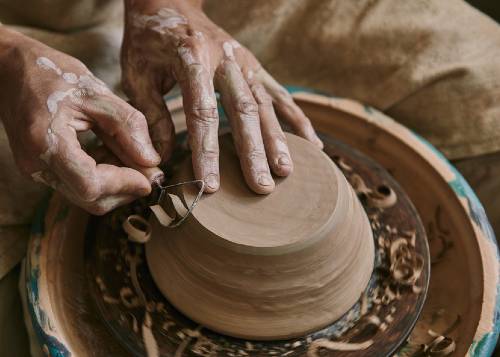
Trimming Leather Hard Clay
This is also a good time to trim your pottery. Trimming involves tidying up the foot and surface of your pottery. This is done by securing your pot to the wheel head and removing excess clay with a trimming tool.
As the clay turns on the wheel, strips of leather hard clay are trimmed away. Ideally, as you trim, the excess clay drops into the splash pan on your wheel.
If the clay is still too moist, the trimmed strips can stick to the surface of the pottery. This makes trimming awkward and can mess up the surface of your pottery.
Trimming is best done when the clay is dry enough that the trimmings drop away from the pot. But not so dry that the clay squeaks and crumbles as you trim.
Stage 3 – The Later Stage
In the later stages of being leather hard, the clay has lost even more moisture. At this point, the clay is not bone dry. However, it is a little too late to join or mend clay using slip.
If you do need to join or mend your clay, it’s best to rehydrate your clay a little. The best way to do this is to put the pottery in a damp box for a few days. This will reintroduce enough moisture so that you can use slip on your clay without it cracking.
Very firm leather hard clay is also a little too dry to do any significant carving or trimming. The clay will now be a bit crumbly when you cut into it.
Nevertheless, you can still do some fine detail work at this point. Small precise carving details are possible at this point. You can also tidy up edges, either by carving or compressing the clay.
Because the clay is now quite hard, this is also the time when potters will sometimes burnish their greenware. Burnishing involves rubbing the clay in very small circles with a hard implement
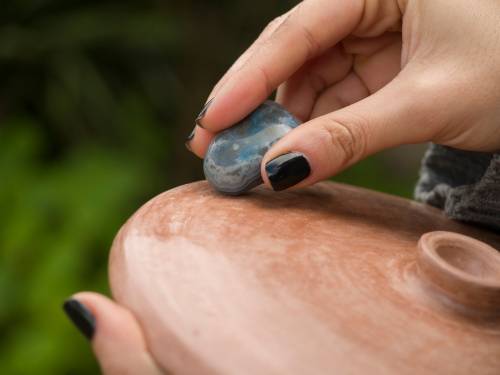
The burnishing tool can be anything from the back of a spoon to a smooth stone. The circular rubbing motion compresses the clay particles and leaves a highly polished surface.
Burnishing works best when there is a little moisture left in the clay. This is the reason why leather hard clay is a good stage at which to burnish.
Final Thoughts
Leather hard clay is versatile. It gives potters a chance to decorate and tidy work, and it makes the hand-building potter’s life easier too. It has the benefit of being a firm material that can be treated like a sculpting medium. But at the same time, it is water-soluble and can be softened up again if need be.


