Firing pottery can seem like a mysterious process to the new potter. There are lots of technical terms that can sound quite foreign. So, I thought it would be helpful to write an overview of the stages of firing clay. Here is a guide to the 3 stages of firing clay.
There are 3 main stages of firing clay. The first stage is the drying process. Clay needs to be bone dry before it’s fired. The second stage is bisque firing. During the bisque fire soluble greenware clay is transformed into ceramic material. The third stage is the glaze fire.
Each of these processes is important. So, let’s take a closer look at each of these stages of firing clay.
The Stages of Firing Clay
Drying your pottery properly is essential for firing successfully. Therefore, before you turn your kiln on, it’s important to understand a bit about the drying process.
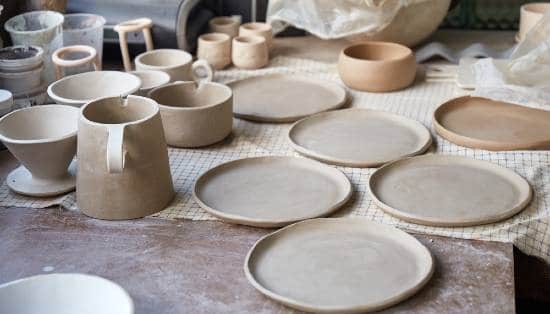
Stage 1 – Drying Your Pottery
Once you have made your pottery, you need to let your clay dry out thoroughly before it’s fired. When clay is completely dry, it is called bone dry clay. This refers to when clay is as dry as it can be before it is fired.
It’s important that clay is dry before you fire it because damp clay can explode in the kiln. This is because when moisture reaches the boiling point of water at 212F (100C), it turns to steam. When water turns to steam, it expands rapidly.
When you make pottery, it’s a good idea to avoid trapping bubbles of air in your clay. But, air pockets do sometimes form in your pottery. And if water turns into steam and expands quickly into those air pockets, it can cause your pot to explode.
The way to avoid this is to ensure that your pots are as dry as possible before firing them.
How to Dry Your Pottery Clay
It’s often said that the best way to dry your pottery out is slowly and naturally. This means, allowing your clay to dry naturally without trying to speed the process along.
However, what is more important, is that your pottery dries out evenly. If one part of your pottery dries out quicker than another, the pottery is put under a lot of tension.
For example, a handle on a mug will tend to dry out quicker than the mug itself. This is because the handle is more exposed and has a larger surface area. If this happens, then there is a risk that the handle will crack at the join.
The reason for this is that as the clay dries it shrinks. If the handle is shrinking faster than the mug, it can cause the handle to crack at the join.
So, the most important thing about drying your pots is to dry them evenly. One tip is to wrap extremities and details like handles with a piece of plastic bag. And loosely cover the whole piece with a bag, to stop draughts from drying out one area faster than another.
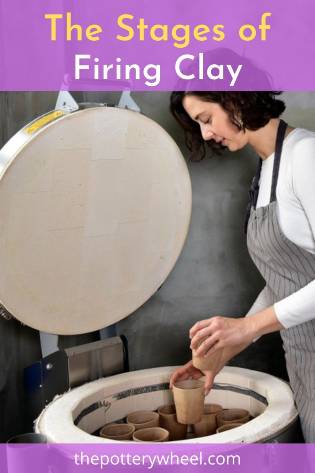
Once your clay feels dry, you can put it in the kiln on a low heat for a while. This is called candling.
Candling Your Pottery in the Kiln
Even though your pottery might feel bone dry, it may have moisture nestled in the deeper layers of clay. So, it’s a good idea to heat your pots in the kiln at a low temperature before you start firing.
Some potters will put their pots in the kiln overnight at a low temperature. A low temperature at this stage is anything below boiling point. If you are candling overnight, the kiln is often set to around at a very low temperature, such as 122F (50C). This is also called ‘water smoking’.
During the candling process, the lid of the kiln is propped open an inch or so with a kiln brick. This allows any moisture to evaporate out of the kiln. For the same reason, the peepholes, also known as spyholes, on the side of the kiln are left open.
As an alternative to candling overnight, a lot of potters will do a ‘pre-heat’ in the kiln. Pre-heating your kiln involves setting the kiln at a low temperature for a few hours. For example, you might set your kiln to heat up to 176 or 194F (80-90C) for a couple of hours.
These temperatures are below boiling point, but they are hot enough to ensure that your pottery is completely dry.
If the walls of your pottery are thick or uneven, it might be a good idea to pre-heat for longer. For example, pottery teachers in school will often pre-heat the kiln for about 4 hours. This is because student pottery is often a bit chunkier and needs more time to dry completely.
Now let’s take a look at the next stages of firing clay, starting off with bisque firing…
Stage 2 – Bisque Firing Pottery
Once the pottery is bone dry, it is normally fired two times. The first firing in the kiln is called the bisque fire. This is sometimes called biscuit firing.
Bone dry pottery, that has not been fired, is still raw clay. Bone dry clay is:
- Fragile – it breaks very easily. If it gets gently knocked by accident, it will shatter and details like handles will break off easily.
- Soluble – if you submerge bone dry clay in water it will dissolve and return to its plastic workable state.
For those reasons, bone dry clay is not very practical or useful.
During a bisque fire, pottery is turned from clay into ceramic. Ceramic materials is:
- Hard and brittle – bisque fired pottery is much stronger than bone dry clay. For example, you can pick up a bisque fired mug without worrying that the handle will break off.
- Non-soluble – this means that if you submerge bisque pottery in water, it will absorb water, but it won’t dissolve. Wet bisque stays intact, unlike unfired clay, which dissolves, or ‘slakes down’ in the water.

Changes Pottery Goes Through in a Bisque Fire
When a kiln is firing, the temperature in the internal chamber rises. Typically, a bisque firing will reach around 1832F (1000C). I will say more about bisque firing temperatures later.
Exactly how the kiln heats up depends upon the type of kiln you are using. The majority of kilns are electric and are heated by electrical elements that sit in grooves along the wall of the kiln. But there are other types of kiln too, like gas kilns or wood-fired kilns.
As the temperature in the kiln goes up, the clay undergoes a lot of significant chemical and physical changes. Here are some of the changes that occur at different points in the bisque firing process:
- Residual moisture in the clay, called mechanical water evaporates.
- Organic carbons and sulfur burn out of the clay.
- Clay also contains ‘chemically bonded water’, that is inside the clay particles. It is part of the chemical make-up of the clay platelets or molecules. At around 660F (350C) chemical water starts to be driven out of the clay.
Once the chemically bonded water has been driven out, the clay has become ceramic. It is no longer soluble and can’t be turned back into workable clay.
- Chemicals and mineral compounds are burned out of the clay.
- The clay undergoes a process called sintering. This is when the surface of the clay particles start to bond to one another. The particles move closer to one another and the clay becomes denser (source).
So, at the end of the bisque fire, a piece of pottery will have undergone some significant changes.
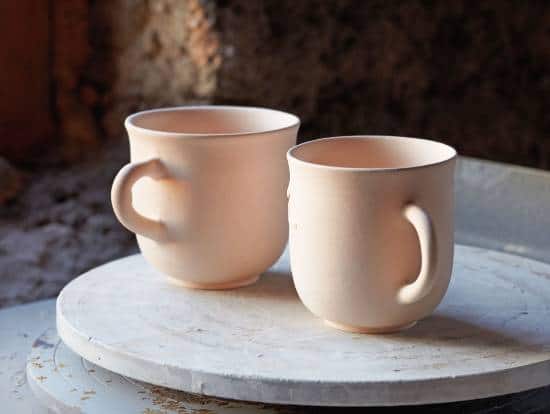
What is Bisque Pottery Like
Once clay has been bisque fired, it has become ceramic. Because of the changes, it undergoes during firing, bisque pottery is hard but porous. That means that it will absorb water but won’t dissolve.
During bisque firing, clay starts a process of becoming mature. Clay is said to be mature when it is as dense and as hard as it can be. Some types of clay are able to become much denser and harder than others.
The three most common types of clay that potters use are earthenware, stoneware, and porcelain. Stoneware clay and porcelain are capable of becoming harder and denser than earthenware.
Earthenware clay is a ‘low fire clay’ and usually become as hard as it can be during the bisque fire.
By contrast, stoneware and porcelain will continue to harden and densify in later firings. Stoneware and porcelain are known as ‘mid or high fire clays’, which mature at higher temperatures than a bisque firing.
So, earthenware is more or less mature after a bisque fire. Whereas stoneware and porcelain are semi-mature and still have a way to go before they are mature.
However, regardless of the type of clay you are using, bisque pottery has some things in common. Bisque is porous and hard and will make a sharp ‘ding’ sound if you flick it gently with your finger
Bisque Firing Temperatures
Usually, potters will bisque fire their clay to a target temperature in the range of 1823-1940F (995-1060C). Pottery is normally bisque fired in this temperature range regardless of what type of clay is being used.
By adjusting the bisque firing temperature a bit, potters can change the properties of the bisque pottery a little. But, bisque firing is almost always a ‘low fire’ process.
Once clay has been bisque fired, it’s ready to be glazed. Pottery glaze is made up of ceramic materials suspended in water to form a liquid. You apply liquid glaze to bisque ware and then it goes into a glaze firing.
Glaze firing is the last of the stages of firing clay. So, let’s take a look at glaze firing now.
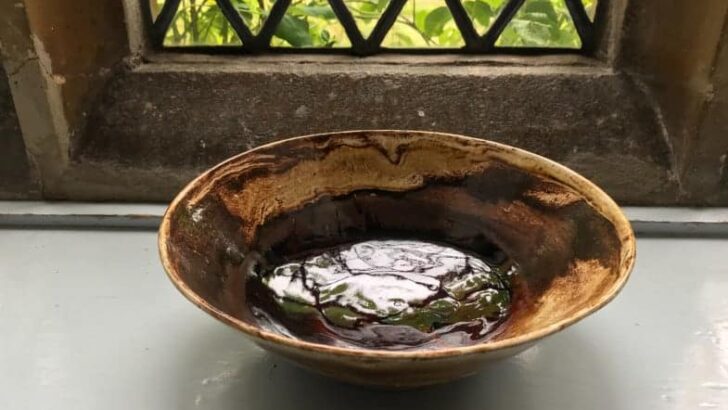
Stage 3 – Glaze Firing Pottery
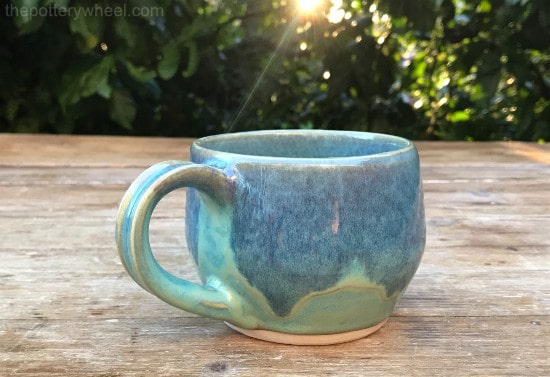
There are two main purposes of glazing pottery. The first is decorative. Glazing can give potter a range of colors, textures, and finishes. The second is functional. Glaze coats the pottery in a layer glassy layer that makes the pottery water-resistant and sometimes waterproof.
Pottery glaze is applied to bisqueware in a liquid form. It can be applied by painting, pouring, dipping, and airbrushing. When glaze is applied to bisqueware, it dries out quickly. The reason is that the bisque ware is very porous and draws the water out of the glaze quickly.
As the glaze dries on the pot a layer of the glaze materials adheres to the surface. Several layers of glaze normally need to be applied to a piece of bisqueware. Though the number of layers varies according to how it’s applied and the kind of glaze used.
Once the glaze has dried on the pot, it’s ready for its second firing. This is called the glaze fire, or sometimes glost firing. During the glaze fire, the ingredients in the glaze transform.
Some of the materials in glaze are known a glass-formers. Once they reach a certain temperature, they melt and form liquid glass. This liquid glass coats the pot, and as the kiln cools, the glaze hardens again to form a glazed surface.
Glaze Firing Temperatures
The temperature that you glaze fire your pottery at depends on the kind of clay you have used. If you’ve used earthenware clay, then the glaze firing will usually be around the same temperature as a bisque fire.
In fact, often when glazing earthenware, the glaze fire might be a slightly lower temperature. In a glaze fire, the clay itself continues to mature. Sometimes carbons and impurities in the clay are not fully burned out in the bisque fire.
If the temperature of the glaze fire is higher than the bisque fire the burn out process continues. These impurities can form gases as they escape the clay body, and these gases can cause defects in the glaze. The defects include blisters in the glaze, little pinholes in the texture, and a cloudy finish.
If the glaze fire temperature is below the bisque fire temperature, you can avoid these glaze defects. So, often it’s recommended when glazing earthenware to bisque fire at to around 1940F (1060C). And to glaze fire just below this temperature, at around 1823F (995C).
Like clay, glaze also matures. And glazes suitable for earthenware clay melt at lower temperatures than stoneware glazes.
If you have made your pots out of stoneware clay, then you need to select a different type of glaze. For stoneware clay, you need a mid or high fire glaze. This means choosing a glaze that matures at a higher temperature.
How to Choose the Right Glaze
You can buy glaze in powdered form which you then mix with water before using. Or you can buy ready-made liquid glaze in various sizes of pots.
Pint-sized containers of ready-made glaze are popular because they are handy and reliable. And they don’t take up lots of space like large buckets of glaze.
A key thing about choosing a glaze is to make sure that it’s suitable for the clay you have used. This means that the glaze is supposed to be fired in the same temperature range.
Usually, on the back of the glaze container, it will specify the right temperature range for firing. This is also true of clay. Generally, the clay manufacturer will state on the clay bag what the temperature firing range is for that clay body.
Check the temperature firing range of the clay body, and then buy a glaze that matches that range.
When you are looking into firing temperatures, you will hear potters talking about ‘cones’. The cones system is a shorthand way of talking about firing temperatures and heatwork.
Heatwork is a combination of the temperature and time a piece of pottery or glaze is fired. If you want to know more about what the cone system means, check out this article.
Stoneware Firing Temperatures
There is a wide range of stoneware firing temperatures. Different stoneware clays are designed to fire at different temperatures. Again, you need to check the firing range of the clay before firing. However, broadly speaking stoneware firing temperatures range from around 2158F (1181C) to 2377F (1300C).
During the glaze fire, stoneware clay continues to mature through a process called vitrification. Like glaze, clay also contains glass-forming materials. When the clay is fired these materials become soft and molten.
The glassy liquid moves into the gaps between the clay particles and fills up the spaces. When the liquid becomes solid again, the pottery is less porous because the pores have been filled with glass. This is the process of vitrification. When stoneware clay has become vitrified, it is referred to as being mature.
The more glass-forming materials the clay contains, the denser and less porous the clay will be once fired. Stoneware clay contains more glass-forming ingredients than earthenware.
Therefore, once it has been fired to a high enough temperature, stoneware is less porous than earthenware. Some stoneware contains more glass-forming material than others. So, some stoneware is more vitreous and less porous when fired than others.
A Word About Single Firing
Not all potter’s bisque fire their greenware. Some prefer to glaze unfired clay directly and go straight to glaze firing. This is sometimes called ‘single firing’ or ‘raw firing’.
Single firing has the advantage of being more immediate, less time consuming, and uses less energy to fire. However, because the raw clay needs to lose moisture, carbons, and gases this can cause glaze defects during firing. For that reason, single firing can be trickier to master.
If you want to know more about single firing, as opposed to bisque and glaze firing, check out this article.
Final Thoughts on the Stages of Firing Clay
There are lots of different types of kiln, regardless of this the stages of firing clay remain the same. Most commonly the clay is thoroughly dried, then it is bisque fired, followed by a glaze firing. Whilst raw glazing is a passion for some potters, I think it’s helpful to master bisque and glaze firing first. Firing clay is not rocket science, but it does involve chemistry and there is a lot to learn. Enjoy the journey!


