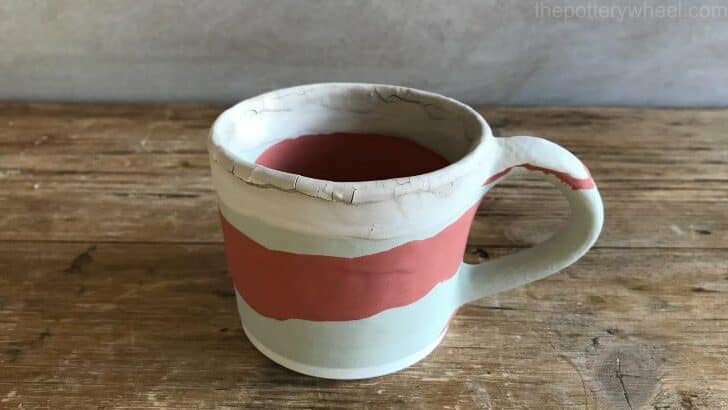
There are many different reasons why your glaze is not sticking to your bisque pottery. Maybe it looks fine when you apply it and it is damp, but it flakes off as it dries. Or maybe it’s simply rolling off the bisqueware as you try to apply it. Luckily, there is always a solution, it may just take a bit of investigation.
Glaze can be prevented from sticking to bisque pottery by dust, dirt, grease, and other contaminants. These prevent the glaze from adhering properly, and as the glaze dries out it flakes off the bisqueware. However, sometimes the glaze itself is too thick or has a high raw clay content.
With such a range of causes, figuring out what’s going on can sometimes be a matter of trial and error. Here is a list of reasons that you might be encountering this problem. Take a look and see if you can identify which one might be an issue for you.

Reasons Why Your Glaze is Not Sticking to Your Bisque
Some of the reasons why your glaze may not be sticking to your bisque are quite straightforward to address. So, let’s look at the simplest explanations first, and hopefully, this will provide you with the answer you’re looking for.
1) Dust and Debris on Your Bisque
Often when you take your pottery out of the bisque firing you may notice that it is quite dusty. This dusty powder is a residue that is often left behind during the firing process. It’s quite normal.
It’s equally common for bisque pottery to be sitting around in a studio for some weeks before it’s glazed. During this time, it can collect dust and debris from the atmosphere.
Sanding
Another cause of dust and debris on the surface of your bisque is the process of sanding the bisqueware down. After you have bisque fired, you may notice that there are little sharp burrs or uneven sections of the pot.
One solution to this is to give the bisqueware a bit of sand down. However, this does leave a dusty layer on your pottery. Ideally, it’s best to sand it down when it is either bone dry or leather hard. You can find more information about sanding pottery here.
A dusty residue on a bisque surface can sometimes interfere with the glazing process. Glaze can be applied in a number of ways including dipping, pouring, spraying, and painting. Regardless of how you are applying the glaze, a dusty surface can stop the glaze from sticking to the bisque.
Essentially the dust is creating a barrier between the glaze and the surface of the bisque. And it can prevent the glaze from bonding fully with the bisque.
You might find that if you dip your pots in glaze, certain areas of the pottery will remain unglazed. This is because dust has collected in nooks and crannies on the bisqueware. These collections of dust stop the glaze from coating the entire piece.
A dusty surface can also be a problem if you are painting on the glaze. As you draw your glaze brush across the surface, you might find that the glaze simply rolls off the bisqueware.
Solution # 1
Before you glaze your pottery, it’s best to give your bisqueware a bit of a clean. There are different ways of doing this. Some potters like to dunk their bisqueware in a bucket of water. Others like to run it under a tap of water.
However, if you completely submerged your bisqueware in water, you do need to let it completely dry before glazing it. If your bisqueware absorbs a lot of water, it will be difficult to get the glaze to adhere to the surface. So, you will need to make sure that you give it enough time to dry out.
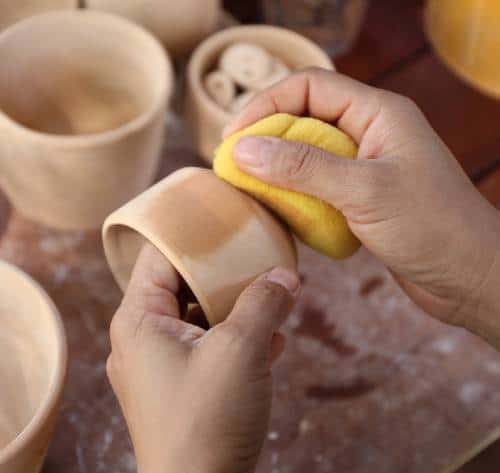
An alternative to completely submerging the bisque is to wipe it down with a damp cloth or sponge. I find that sponges can often leave little bits of fabric behind on the pottery surface. So, I prefer to use a lint-free cloth.
2) Greasy Marks
Pottery glaze is water-based, and if the bisque surface is greasy this can stop the glaze sticking. Avoid picking up your bisqueware if you know that your hands are greasy.
Maybe you have been handling another product in the studio such as linseed oil and this has left an oily residue.
Or maybe you have just applied some greasy hand cream to deal with your dry potter’s hands. Either way, it’s best to wash your hands before you touch your bisqueware.
Solution # 2
Even clean washed hands will have some natural oils on them. So, it’s best to avoid handling the bisque too much. If you are doing something that involves a lot of handling that is best to wear latex or plastic gloves.
3) Over Fired Bisqueware
The reason that glaze dries so quickly is that bisque pottery is very porous. The bisque sucks the water out of the glaze. Exactly how porous the bisqueware is will depend upon what temperature you bisque fired at.
The higher the temperature of the bisque fire, the less porous the bisqueware will be. And when pottery is less porous, the glaze will have a harder job sticking to it when it’s applied.
It’s particularly tricky if you make an error when setting your kiln, and fire your bisqueware at a much higher temperature. It’s quite common for potters to accidentally fire their bisqueware to cone 6 instead of cone 06.
When the pottery has been fired to cone to 6 the clay will be quite mature. This means that it will be much less porous. And it can be quite tricky to get your glaze to stick to the pottery. What’s more, often when it seems to have stuck you may find it flakes off as it dries.
Solution # 3
You can do various things if you’re trying to glaze pottery that is not very porous. One trick is to warm the bisqueware up before you try and apply the glaze.
This will encourage the water in the glass to evaporate quicker than if the pots were cold.
You can warm the pots up in a domestic oven, or with a pottery heat gun.
Another option is to adjust the consistency of the glaze so that adheres to the pots more successfully. You can do this by adding either gum or thickener to your glaze. If you’d like to know more about glazing pottery that has been overfired check out this article here.
4) Glaze Not Sticking to Underglaze
Underglaze sometimes stops glaze from sticking to bisque pottery. Especially if the underglaze has had a heavy application.
Sometimes you can use underglaze and it will have no impact on how the glaze sticks to the pottery. On other occasions, you might find that when you use underglaze it’s difficult to get a clear glaze to adhere to the decorated sections. You might notice that as you apply the glaze it is simply rolling off the underglazed areas.
Or, you might find when you take your pottery out of the kiln that your pieces have not glazed evenly. Sometimes the glaze on the areas that have been underglazed looks thin and matte.
There are a couple of reasons why this might be happening.
- Sometimes underglaze can make the area on which it has been applied more refractory. Refractory means that something is resistant to melting. So, if your glaze is applied to a refractory substance, it will have a hard time melting during the glaze fire.
- Another explanation is that a thick layer of underglaze will make your pottery less porous. Essentially the underglaze fills up some of the pores in the bisqueware and creates a barrier to the glaze. As a result, the glaze will not adhere as well to the decorated areas.
Solution # 4
There are a few ways of dealing with this difficulty. Some solutions include…
- Applying an extra layer of glaze to the decorated areas to even out the application.
- If you’re dipping your pottery glaze, it might help to hold the piece in the glaze for a few seconds longer than normal.
- Make sure that the first layer of glaze is dry before applying the second layer. Once the first layer is dry, it will create a bit of a barrier between the underglaze and subsequent layers of glaze.
- It can sometimes help to bisque fire the pottery twice. So, you bisque fire once, then apply the underglaze, bisque fire again, and then glaze the underglaze once it has been fired. This can sometimes even out the texture and porosity of the decorated bisque ware. You can read more about bisque firing your pottery twice here.
- Another solution is to try a different kind of underglaze. Certain combinations of underglaze and glaze simply do not get on well together. There are lots of brands of underglaze with an unlimited range of colors. This may be the simplest solution.
5) Layering your Glazes too Slowly
I mentioned earlier that it can help to ensure that the first layer of glaze is thoroughly dried before applying a second. But like lots of guidelines in pottery, there is often an exception to the rule.
Sometimes allowing the first layer of glaze to become too dry can cause the second layer to flake off.
This does depend on the glazes that you are using. I have found that with some glazes I can leave the first layer for days before applying the second. With other glazes, I’ve found that I must apply the second layer when the first is slightly damp.
Otherwise, the second layer will flake and peel off. If the first layer is too dry it will suck the water out of the second layer too quickly.
Solution # 5
If you find that the second layer is peeling, experiment with applying the second layer a little earlier.
If that doesn’t work, try reaching out to the glaze manufacturer to find out if they have any recommendations. My experience of approaching glaze manufacturers is that they are often very happy to recommend solutions.
6) Is the Glaze Mixed up Enough?
Pottery glaze is made out of a finely balanced combination of ingredients. These ingredients need to be present in certain ratios otherwise the glaze won’t behave as it’s supposed to.
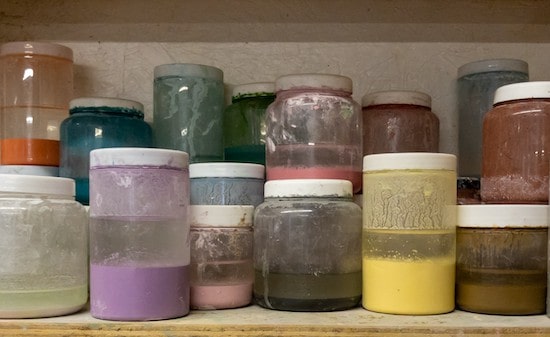
When glaze is sitting for any length of time, the ingredients in the glaze will settle out at the bottom of the container. What you end up with on the top of the glaze is a thin mixture with incorrect ratios.
If you haven’t mixed up the glaze sufficiently before using it, there’s a good chance that the glaze won’t adhere properly. If it does adhere, it may well peel off before it gets into the glaze fire. Or it may give you some strange and unexpected results when it comes out of the kiln.
Solution # 6
The solution to this issue is pretty straightforward. Just make sure you give the glaze a good old shake and stir before you use it.
Sometimes the glaze has really settled out and the sediment at the bottom of the container is quite hard. The best way to make this up is to scrape it with a loop tool.
Once you have scraped it off the bottom you can then give it a mix. The best way to mix glaze is with a stick blender or a drill with a glaze mixer attached.
Even if you mix it thoroughly there may still be small lumps of hard glaze in the suspension. So, it’s a good idea to sieve it too before you apply it to your pottery.
7) How Old is the Glaze?
Most of the ingredients in pottery glaze are inorganic, which means that they don’t break down with time. However, there are two ingredients in glaze that are organic and will degrade if they are in contact with bacteria.
These two ingredients are gum and suspenders. The gum in glaze is what helps to bind the glaze together and also to the surface of your pottery. The suspender is what keeps the ingredients in the glaze suspended in the liquid.
Both of these ingredients can degrade if bacteria get into the glaze mixture. An old glaze that has been sitting around in a studio for months or years is vulnerable to developing bacteria.
If either of these ingredients is lacking in a glaze mixture, this can stop the glaze from sticking to the bisque. If the gum is absent, you might find the glaze will peel once it’s dried. And if the suspender is absent, the glaze often settles out into a hard lump at the bottom of the container.
Solution # 7
Luckily, both of these two ingredients can be re-added to the glaze mixture. One solution is to add some binder to the glaze. A binder is it’s like glue that is added to the glaze. It helps the glaze harden as it dries on the bisque (source).
Different manufacturers use different binders in commercially made glazes. I would suggest reaching out to the manufacturer and asking them to recommend a binder. They may even send some to you or recommend where you can buy some.
If you have made your own glaze, there are different binders available to suit different types of glaze. One example of a binder is CMC gum (carboxymethylcellulose).
This can be added to the glaze recipe to help bind the glaze and adhere it to the pot (source).

8) How Thick is the Glaze?
Check your glaze and see if it is too thick. Sometimes glaze thickens up because the water in it has started to evaporate. At other times it has become flocculated.
Flocculation refers to when a liquid such as a glaze, or slip becomes thicker. Sometimes this is helpful, for example when you want to apply a thicker layer of slip to a pot. But sometimes when a glaze is flocculated, it creates problems when the glaze is drying out.
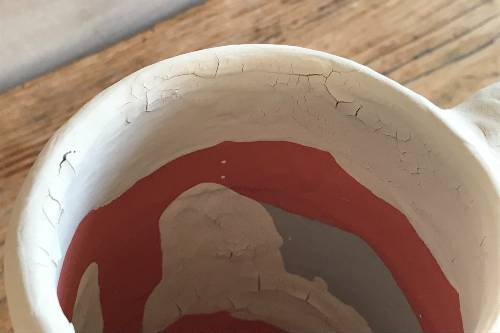
A very thick flocculated glaze will tend to crack and flake off when it is drying on a pot. Part of the reason for this is that flocculated glaze is high in acid.
The acid in the glaze makes the clay in the glaze clump together. These clumps are formed because there is an electrical charge created in the acidic solution that draws the particles together.
When the glaze is applied to a piece of bisque ware the glaze particles are more strongly attracted to one another than they are to the bisque. So as the glaze dries out, it pulls away from the bisqueware and flakes off. You can read more about what happens when you apply too much glaze to pottery here.
Solution # 8
It’s easy to think that if your glaze is thick the best solution is just to add a little water. Common sense suggests that this will thin the glaze out.
However, this can make the situation worse. Water will evaporate very quickly when the glaze is applied, and this can exaggerate the flaking issue. What you need to do is reduce the acidity level in the glaze.
By reducing the acidity, you reduce the electrical charge between the glaze particles. One way to do this is to add a deflocculant to the glaze. Adding a small quantity of a deflocculant such as sodium silicate, or Darvan 811 should help to rectify the flaking problem.

Sodium Silicate Solution – View on Blick
Glaze Not Sticking After the Glaze Fire
So far, we’ve explored some reasons why glaze might not be sticking to bisque before it has been fired. However, you might find that issues with the glass coming off only become apparent once the pot has been glaze fired.
9) Crawling
Sometimes, you might find that during the glaze fire, the glaze pulls away from certain patches on the pot. This is known as crawling because it looks as if the glaze has crawled away from areas here and there.
There are lots of different things that can cause your glaze to crawl. Many of them are similar to the causes outlined above. For example, dust, specs of dirt, greasy marks, and non-porous underglaze can cause crawling.
Crawling can be caused by anything that’s on the surface of the bisque that prevents the glaze from sticking properly. This can cause a tiny crack or weakness in the clay which isn’t visible before the pot has been glaze fired.
However, as the glaze heats up in the kiln it shrinks away from the areas where it is not firmly attached.
Another cause of crawling is when the glaze itself has a high clay content. If the glaze contains a lot of clay, it will shrink significantly as it dries out. As it shrinks it pulls away from the surface of the pot.
It may only shrink enough so that a small hairline crack is created in the glaze. However, these cracks open up and leave bare patches on the surface where the glaze has crawled away.
Solution # 9
One way to prevent crawling is to give your pots a wipe-down before you glaze them. This will help to remove any contaminants from the surface that may prevent the glaze from adhering.
If you have bought commercially made glaze then there is not much that you can do about the clay content. However, if you mix your own glaze there is a step that you can take to prevent crawling.
Before you add your kaolin to your glaze mixture, you can calcine the kaolin. Calcining involves heating the kaolin in until it has become ceramic.
A simple way of doing this is to put some kaolin powder in a bowl that has already been bisqued, and bisque fire the powder. This will produce calcinated kaolin, which can then be added to your glaze recipe. Because the kaolin is calcinated, it won’t shrink as the glaze dries out on the pot.
Final Thoughts
Trying to figure out why your glaze is not sticking to your bisque pots may be a process of elimination. There are lots of things that can cause this problem, and sometimes a process of trial and error is the only thing that will work. Hopefully, the information above will give you a starting point for your investigation.


