Making terra sigillata takes time and effort. Combining the ingredients is simple. Reducing the thin slip to a usable consistency takes quite a long time. So, it’s important that when you use this liquid gold, you use it well. This raises the question of when to apply terra sigillata to the best effect.
Terra sigillata can be applied to leather-hard, bone dry or bisque ware. When used on leather hard clay, it can lose its sheen. When applied to bone dry or bisque ware, it can flake off if too thick. Ideally, 2 or 3 thin layers are applied to smooth bone-dry clay.
Terra sigillata (terra sig or sig) is used in different ways by different potters. Some prefer to use it on leather hard clay, others prefer to apply it to bone dry ware. And then there are those that prefer to apply it to bisque ware. Potters can be quite emphatic that their preference is the best approach. When to apply terra sigillata is a source of debate. So, let’s take a look at the pros and cons of each technique.
When to Apply Terra Sigillata? Leather hard, Bone Dry, or Bisqueware?
There are advantages and disadvantages to applying at different stages. Here are some of the pros and cons:
Using Terra Sig on Leather hard Clay
One of the arguments for applying terra sig to leather hard clay is that it can adhere well. Because leather hard clay is still damp, it is a more receptive surface for the terra sig.
Terra sigillata is basically a thin clay slip made with refined clay particles. If you apply it to a very porous surface the water is absorbed quickly.
As such the clay particles can end up sitting on the surface of the pottery in a fragile poorly adhered layer.
By contrast, if terra sigillata is applied to leather hard clay, the two surfaces are more likely to bond. The clay does not suck the water rapidly out of the terra sig.
Instead, the water in the terra sigillata mingles with the moisture in the clay body. As such they have more time to absorb into one another and create some degree of interface.
However, the drying process for clay happens gradually, and some leather hard clay is drier than others. Its recommended that if you apply terra sig to leather hard clay, the clay needs to be very leather hard.
One reason for this is that terra sigillata can shine because it is made of finer particles of clay. If it is applied to damp leather hard clay, the terra sig and clay body may mingle too much. As such, the refined quality of the terra sigillata will be compromised.
Why Avoid Using Terra Sig on Leather Hard Clay?
Even then, some potters argue that using terra sig on leather hard clay is not ideal (source). This is because when terra sigillata has been applied, and polished or burnished, it is quite dense. It is made up of fine clay particles, that are tightly aligned. This is why it has a high sheen.
Because it is dense, there is little room for it to become more compact and shrink down further. So, when the underlying leather hard clay inevitably shrinks, even a little, the terra sigillata wrinkles up. These wrinkles are tiny, and not visible to the naked eye. However, they are enough to ruin the trademark terra sigillata sheen.
The result is that as the leather hard clay dries out and shrinks, the terra sigillata becomes duller. This loss of some sheen may not bother some potters. However, if it does then you may want to consider applying your terra sigillata to bone dry clay. Let’s have a look at the pros and cons of this option now…
Using Terra Sigillata on Bone Dry Clay
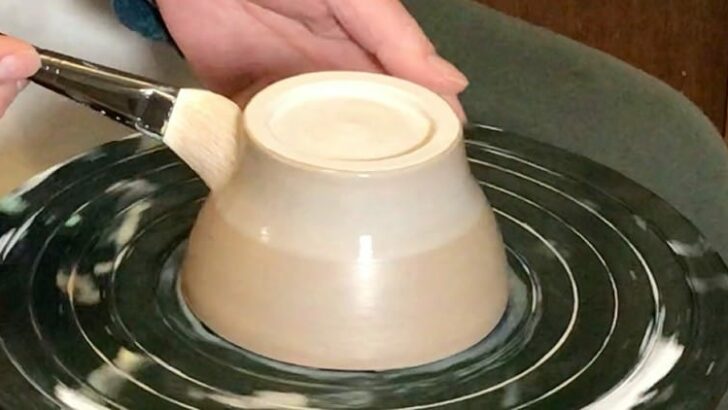
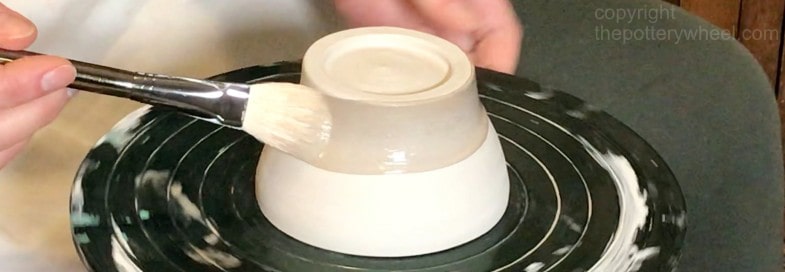
Most, though not all, potters use terra sigillata on bone dry clay. Applying to bone dry clay can give terra sig its highest shine. Also, if it is applied correctly, the water in the terra sigillata is drawn into the bone dry clay. The result of this is that it adheres well.
It is important when using terra sigillata to apply it to smooth clay. Terra sigillata has a thin consistency, and it does not cover imperfections well. Bumps and scratches will show through the terra sig finish and ruin the glassy finish.
Using a smooth clay body can help this. Heavily grogged clay, is not a good idea, as the grit will break the surface of the terra sig.
Even if you use a smooth clay, and are an experienced potter, most pottery will need a little smoothing. The question is, how best to do this to prepare your ware for the application of terra sigillata? Here are some options…
Burnishing Before Using Terra Sigillata
Some potters recommend burnishing pottery before the terra sigillata is applied. Burnishing involves rubbing the clay when it is at the drier end of leather hard, with a smooth hard object.
You can burnish with a variety of tools, and potters who like to burnish, usually have a pet tool. This can be anything like the back of a spoon, a small smooth pebble, or even a small light bulb. The clay is rubbed in small circular movements to flatten down and align the clay platelets.
Burnishing is time-consuming but can create a very smooth surface. Because the burnished surface is smooth, you would think it would be the ideal surface for terra sigillata.
However, burnishing before applying terra sig has mixed results. Some potters swear by it and state that it is the best way to prepare your pottery. Others find that the terra sigillata is prone to cracking and flaking when applied to a burnished surface.
My experience is the latter, in that, I have found the terra sig is more likely to flake off. It seems likely that this is because the sig is finding it hard to key into the compacted burnished surface.
So, if burnishing is not ideal, what are the other options?
Sanding Before Using Terra Sigillata
Another approach is to sand the bone dry pottery with fine sandpaper. This is an easy way to get rid of unwanted bumps and imperfections.
I think sanding is an underestimated art! It’s easy to get carried away when sanding and remove fine detail. Or to be too heavy-handed and make rims too smooth and lose their character.
Tips for Sanding Bone Dry Pottery
- Use fine-grade sandpaper and proceed carefully so you don’t over-sand your pottery.
- Once you have finished sanding, be sure to remove the residual dust from the surface. Any dust left on the pottery will mingle with the terra sigillata and ruin the finish.
The best way to get rid of dust is to start by brushing it off with a soft dry brush. Then get rid of the last bit by lightly wiping your pottery with a damp (not wet) cloth. - When sanding bone dry pottery, try to sand outside whenever you can. And wear a good quality respirator.
Some potters don’t recommend sanding before applying terra sigillata. Their argument is even using very fine sandpaper you will leave small scratches on the surface of the pottery. This doesn’t seem to be a problem for everyone. And certainly, I have found that any small surface scratches are concealed once the terra sigillata is applied.
Nevertheless, sanding is not every potter’s first choice. So, what are the options?
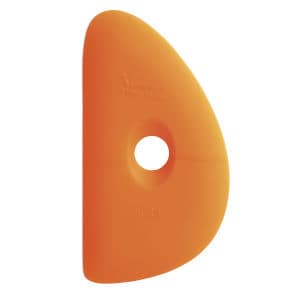
Using a Rib Tool
Another alternative to sanding is to carefully smooth your pottery with a rib tool when it is still workable. If you are making your pottery on the wheel, you can make extra sure to remove imperfections with a rib tool.
Rib tools are great at removing bumps and slurry from newly thrown pottery.
They can also be used after trimming to remove fine balls of clay and align the clay particles even more.
You can also smooth down the surface of hand build pottery with a rib tool.
Of the three options above, I tend to use a combination of smoothing with a rib tool and then sanding.
I will use a rib tool when I have finished throwing, and then lightly sand when it is bone dry. I find that if the terra sigillata is made well, with the right consistency, any tiny scratch marks are concealed.
Using Terra Sigillata on Bisque ware
The question of whether you should apply terra sigillata to bisque ware divides opinion.
Some potters prefer to apply terra sig to bisque. One advantage is that if you are applying to bisque, you can dip your ware in the terra sig mix. Leaving your bisque in the mix for around 12 seconds will apply a nice even coat. Once this is almost dry, you can then polish the surface to create a nice sheen.
Other potters find that terra sigillata does not adhere very well to bisque fired pottery. One of the problems that can arise is that the liquid from the terra sig gets absorbed quickly. Bisque is porous and will draw out moisture quickly. This is one of the reasons glaze dries so quickly on bisque.
As such, the terra sigillata can end up sitting on the surface of the bisque in a powdery residue. This then flakes of easily either prior to being fired or during the firing process.
Tips for Applying Terra Sigillata to Bisque Ware:
You can minimize the risk of flaking if you do the following…
- Apply one (or two maximum) thin layers of terra sigillata on bisque. If you apply it too thickly, it will almost certainly flake off bisque ware.
- Bisque fire to a lower cone before application. If you bisque fire to around 09 the terra sigillata is less likely to flake off.
- Apply one (or two maximum) thin layers of terra sigillata on bisque. If you apply it too thickly, it will almost certainly flake off bisque ware.
- Bisque fire to a lower cone before application. If you bisque fire to around 09 the terra sigillata is less likely to flake off.
That being said, how terra sigillata responds to being applied to bisque will depend on the clay you are using. It is always a good idea to test the combination of clay body and terra sig that you are using. If they fit well together applying terra sig to bisque may work.
Some potters who use this technique re-bisque their pottery after they have applied the terra sigillata. Others use a clear glaze over the top of the sig.
Final Thoughts
My preference is to apply terra sigillata to bone dry pottery, that has been ribbed smooth and lightly sanded. However, I don’t like to be too absolutist about these things. You may find that one of the other approaches outlined above suits you better.
I have shared my thoughts about when to apply terra sigillata. Like most things in pottery, there are no absolutes. Try out the above options and find the finish that appeals to you most.


