Your cart is currently empty!
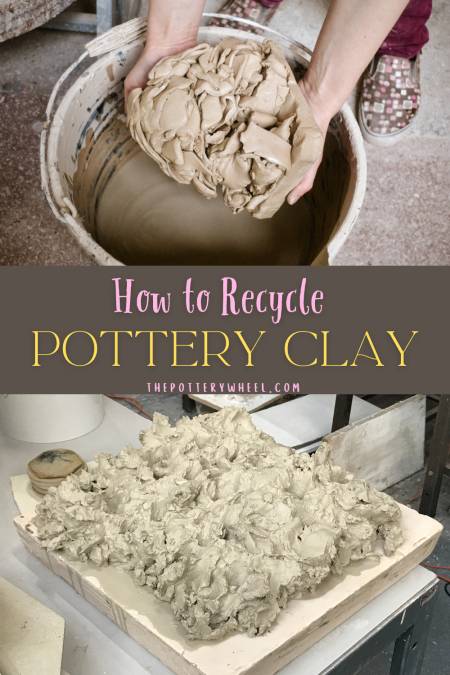
How To Recycle Clay – Easy Ways to Reclaim Clay Scraps
Published:
Last Updated:
Affiliate Disclaimer
As an affiliate, we may earn a commission from qualifying purchases. We get commissions for purchases made through links on this website from Amazon and other third parties.
Whether you hand build with clay or wheel throw, you are going to generate some clay scraps. But is clay recyclable? The answer is yes, clay scraps can be recycled and do not need to go to waste. Here is a step-by-step guide on how to recycle clay.
How to Recycle Clay
There are lots of different ways of recycling clay. And you may find that the way that works best for you is an adaptation of one of the methods outlined below. You can try them out and see which one suits you best.
Here are two important tips before we get into how to recycle clay at home. Firstly, recycling clay is also sometimes called reclaiming clay. I use the two terms interchangeably below, but they mean the same thing.
Secondly, whilst clay is recyclable, it can only be recycled when it is greenware. Regardless of how dry clay gets, before it has been fired, it can be recycled. Can fired clay be recycled? No, once it has been fired and turned into ceramic material, it can’t be turned back into workable clay.
Table of Contents
show
How to Recycle Clay at Home
If you are making pottery at school or in a shared studio, there is a chance you have access to a pug mill. This is a hefty bit of pottery equipment that is specifically designed to reclaim clay.
But pug mills are expensive and large. If you are making pottery at home, how do you recycle clay?
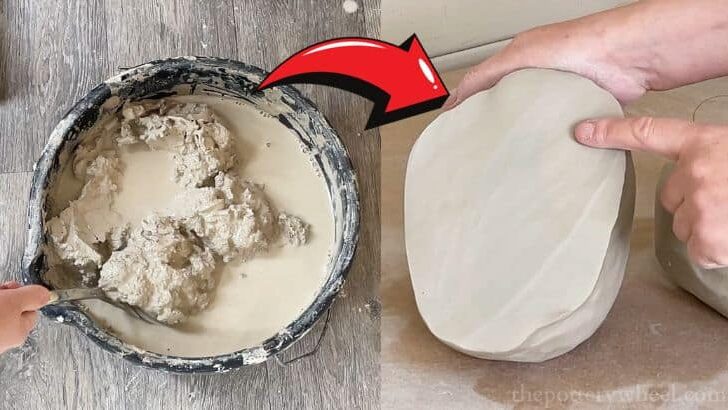
Clay Recycling (The Easy Way)
This is my preferred method of recycling clay at home. I love it because it’s so simple, and all you need is a bucket, some rubber gloves, and a plaster slab. You can read more about how to make a plaster slab for drying clay here.
Here are the steps that I take to reclaim clay.
Step 1) Collecting Clay Scraps and Waste
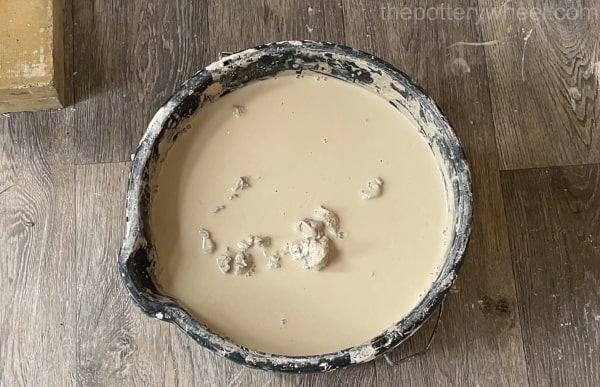
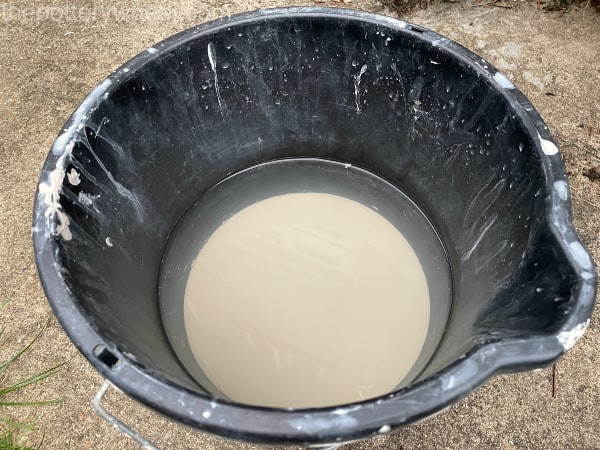
I keep a bucket in my pottery shed, which I fill with clay scraps over time. Everything goes in there. That includes slop from my splash pan and scraps from when I’m hand-building.
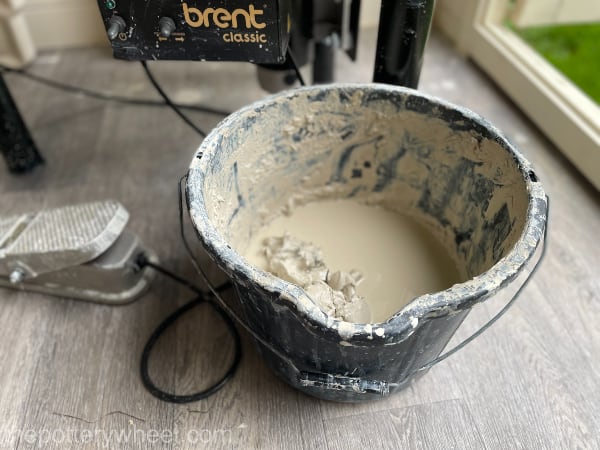
As a rule, I don’t worry at all about how wet or dry the clay is when it goes into the bucket. However, I do make sure that at all times, the clay in the bucket is submerged in water.
A few bits of clay may poke out from the surface of the water. However, I make sure that there is enough to ensure that the clay stays wet and soggy. I make sure the water doesn’t evaporate from the bucket by keeping the bucket covered.
Some potters prefer not to mix clay with different moisture levels. For example, they may have a bucket for dry scraps and a bucket for wet scraps of clay.
The reason for this is that they want the clay to have as much of an even consistency as possible. This makes wedging the clay easier later on, and it ensures that the recycled clay body has an even distribution of ingredients once it has been wedged.
However, it takes me a while to fill a reclaim bucket. So, usually, my clay has been sitting in water for quite some time before I recycle it. This means that it will have reached an equal level of mushiness by the time I get around to recycling.
Step 2) Stirring the Wet Clay Slurry
Once the bucket is getting full, I stir the clay and water together. This is a good way to start giving the clay an even consistency. You can do this with a stick, or an old metal ladle.
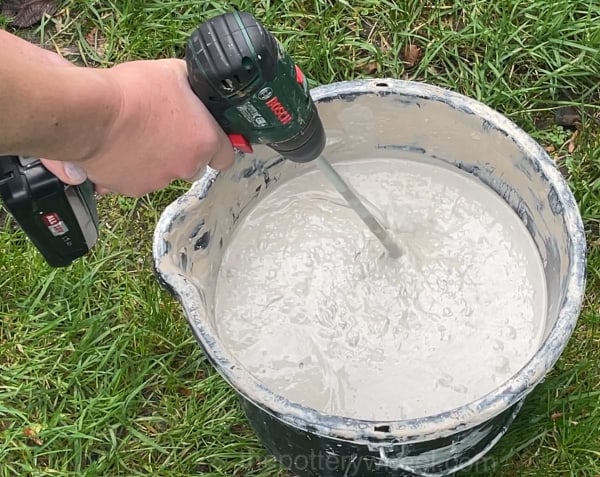
Alternatively, if you want to make life easier, you can mix it up with a paint mixing bit attached to a drill like this one.
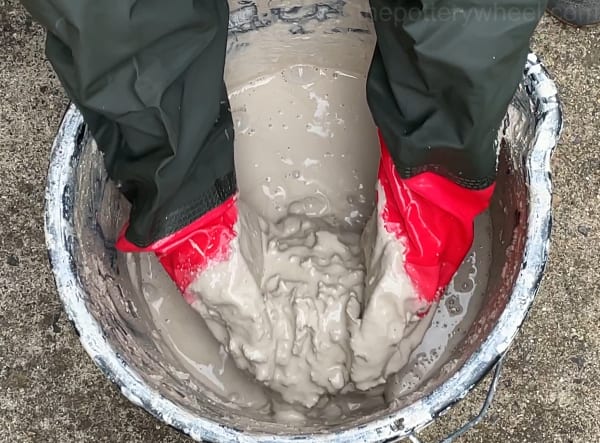
It’s also an option to stir it with your hand. I’d recommend wearing long rubber gloves if you are stirring it with your hand.
If the clay has been sitting there for some time, it can sometimes be a bit smelly. You can get some long rubber gloves like the ones I use here on Amazon.
The clay is smelly because it is made up, in part, of organic matter. Bacteria can grow in the wet sticky conditions of the reclaim bucket, especially if it’s been sitting around for a while.
You can add things to the clay slop to get rid of the smell.
How to Stop Reclaimed Clay Smelling
You can add a few drops of the following to your clay recycling bucket:
- Bleach
- Some Dettol
- Vinegar
- Dish soap
Using a small amount of the above will get rid of the smell. The problem is that it also gets rid of the bacteria that’s making the smell. But actually, a bit of bacteria helps boost the plasticity of the recycled clay, which is a good thing.
Personally, I don’t find the smell too bad. Maybe I’ve been lucky and I haven’t had especially smelly clay! But I can live with it, and I’d rather have slightly smelly clay that is nice to use.
On a related note, you might notice some black or dark grey streaks in the reclaimed clay too. Again, this is most likely mold from the bacteria. Normally it’s just a few streaks and nothing too unsettling. Also, it burns out and disappears when the clay is fired in the kiln.
If your recycled clay bucket has a lot of water in it you can get rid of some of it by soaking it up with a sponge and discarding the water. Let the clay settle first so that the water on top is clear, then sponge some off the top.
Also if you are recycling a lot of clay, it’s a good idea to mix it with a drill and paint mixing drill bit. It’s a very effective way to break down lumps in the clay and create a smoother mixture. This can make wedging a little easier later on.
Step 3) Transferring the Clay to a Plaster Slab or Plaster Bat
At this point, the clay is far too mushy and wet to wedge. Some of the water content needs to evaporate. The best way to do this is to spread the clay slurry onto an absorbent surface.
My preference is to use a slab of plaster. Plaster slabs are very absorbent and it usually only takes a couple of hours to turn clay slurry into wedgeable clay.
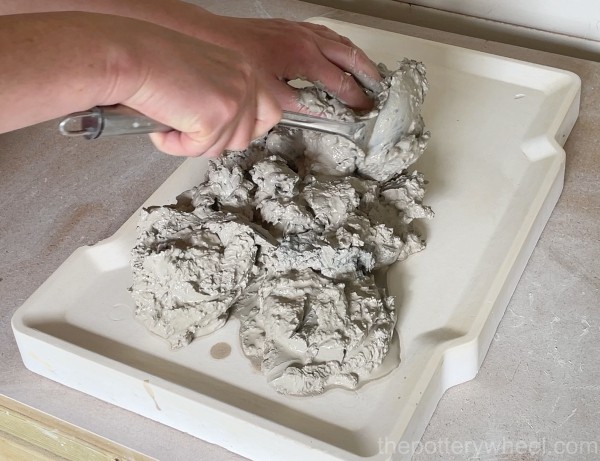
Putting the slurry on the slab is easy. You can either scoop it up with your hand and spread it on the plaster. Or you can use an old metal ladle to lift the clay slop from the bucket.
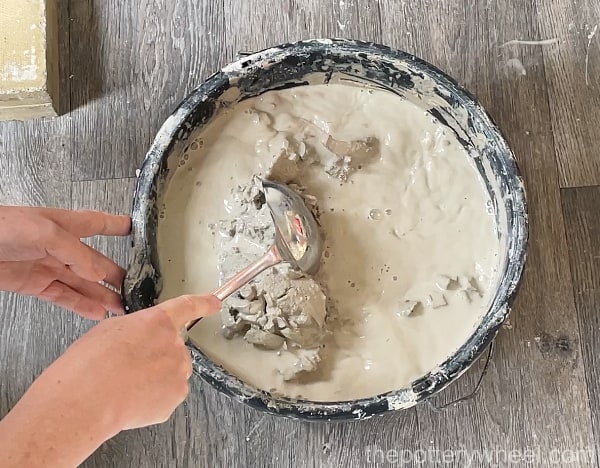
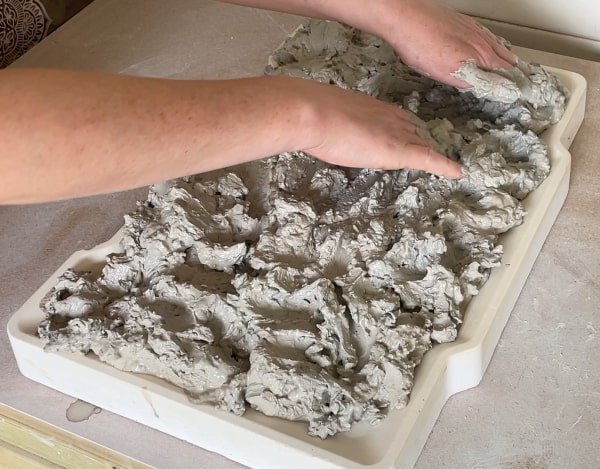
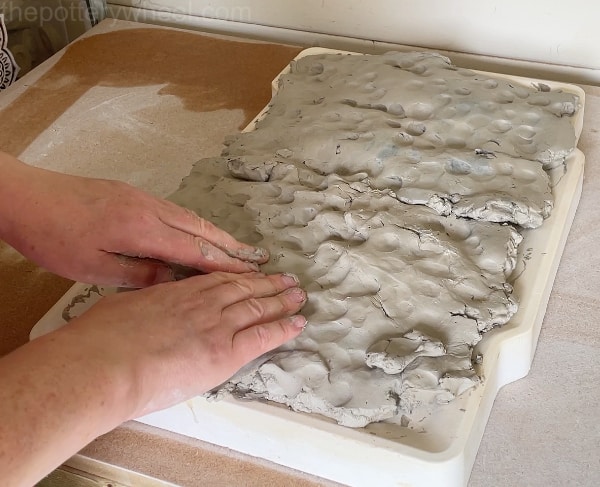
Spread the clay slurry over the surface of the plaster slab until you have a layer that is about 1.5-2 inches thick. I usually press my fingers into the clay to create dips on the surface. I find this helps the airflow and speeds up the drying process.
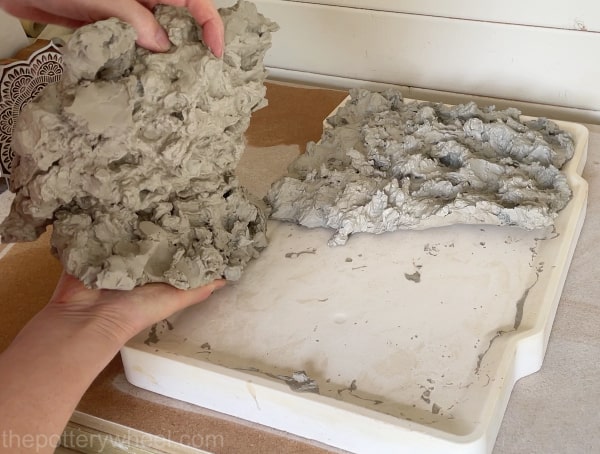
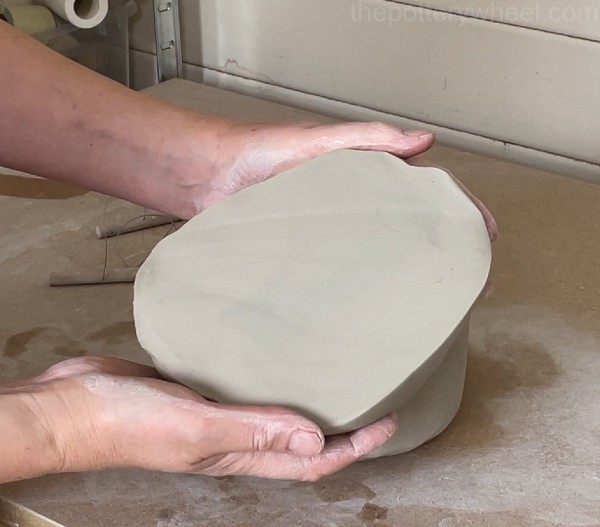
If it’s a warm day and your plaster slab is quite dry, you should be able to peel the clay off the slab in an hour or so. The clay will be solid underneath and still wet on top.
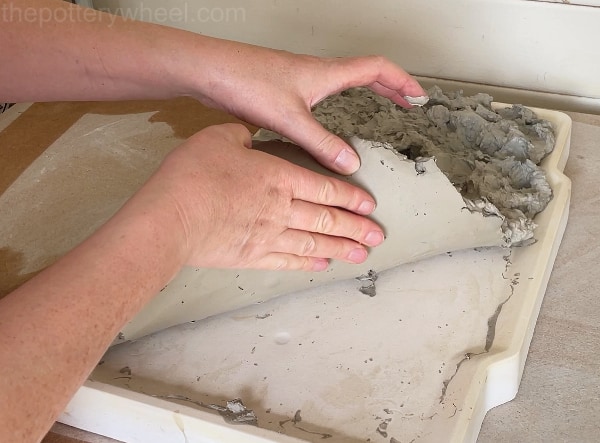
It’s a good idea to flip the clay over on the slab. Flip the clay over and press it so that the wet side of the clay is making contact with the plaster surface.
Let the clay rest there for another hour or so. It’s a good idea to keep checking the clay at intervals during that hour to make sure it’s not getting too hard.
If the clay gets too hard, you will have to rehydrate it again and you will be back at square one.
Wedging and Storing Recycled Clay
Once the clay is firm enough, you will be able to peel it off the plaster easily and roll it into a sausage roll shape.
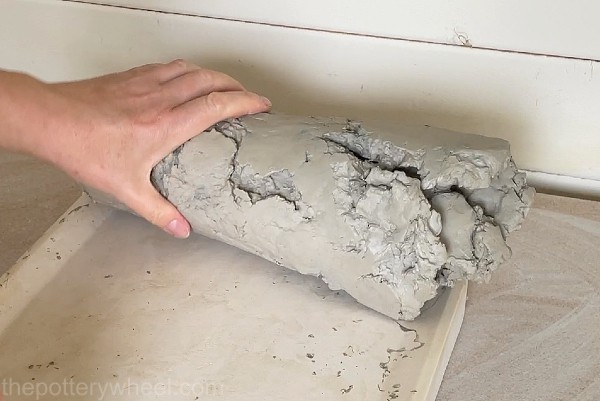
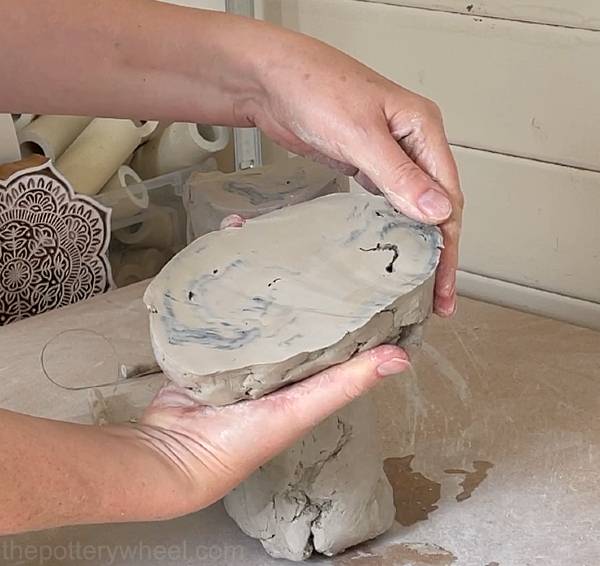
At this point, the clay will be full of air bubbles, and it won’t have an even consistency. If you slice through the clay sausage, you will see that it needs to be wedged well before you can use it.
When you slice it open, you may see some of those grey mold streaks that I mentioned before. These can be handy for wedging. When the clay has been wedged enough the streaks will have disappeared.
I start off wedging the clay using the stack and slam technique. I like this method because it’s a quick way to get the clay into a much better shape, and it puts less strain on the wrists.
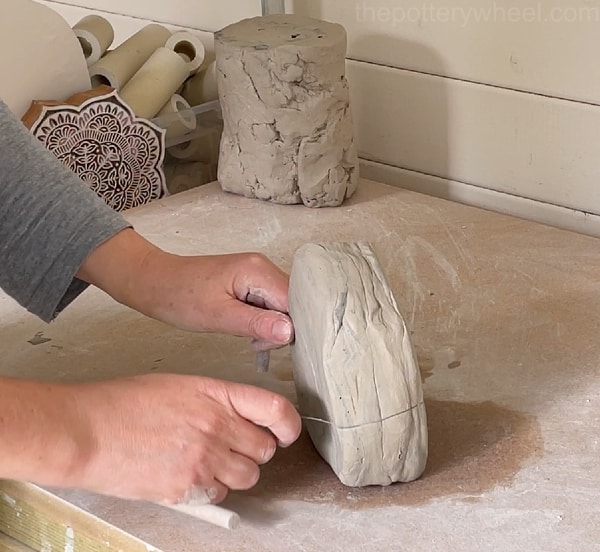
Stack and slam wedging is variously called wire wedging and slap wedging. Either way, it’s a handing wedging technique. You can read more about how to slam wedge here.
Once I’ve removed a lot of the air pockets by wire wedging, I cut the clay into smaller sections and I wedge them individually using the rams head wedging method. The smaller balls are then combined together to form a larger lump of recycled clay.
When it’s been recycled, the clay needs to be stored in a plastic back to keep it fresh. I like to double-bag my clay to prevent it from drying out. Ideally, it should be kept in a plastic storage box too. Here are some tips on how to store clay to keep it workable.
What Is it Like to Use Recycled Clay?
One issue that can arise with recycled clay is that it can be ‘short’. In this context, shortness doesn’t refer to length, instead, it’s referring to the texture and the plasticity of the clay.
When clay is ‘plastic’ it can be molded into a shape, and it keeps the shape rather than returning to its original shape. An elastic substance will bend and stretch when you pull or press it. But it will ping back to its original shape when the pressure is released.
By contrast, when a material is plastic, it will bend and stretch but it will stay in the new shape when the pressure is released.
Ideally, pottery clay has the quality of plasticity. Plastic clay will also bend and stretch without crumbling or cracking. Try rolling a piece of your clay body into a coil and bend it over. If the clay cracks or crumbles, then it is referred to as being ‘short’.
Short clay lacks plasticity and it can be hard to use because it crumbles and it doesn’t hold its shape.
What Gives Clay Plasticity?
Clay is made up of different-sized particles. Some clay particles are large and some are small. It is the mixture of large and small clay particles that gives clay its plasticity.
When we use clay, the clay body can lose the smaller clay particles. For example, when you are throwing on the week, the very fine slip that builds up on your hands is made up of the finer particles of clay.
Likewise, the slip water in your splash pan is full of fine clay particles. If you wash your splash pan and hands and dispose of this liquid, you are washing away the finer particles of clay.
When you only recycle the clay that is left behind, you are recycling the clay that contains a higher percentage of larger clay particles.
As a result, your recycled clay will contain too few of the smaller clay particles that it needs to be plastic and bendy. This can result in recycled clay being short.
But don’t worry, there are some things that you can do to prevent your recycled clay from being short. Here are some measures you can take:
Ways to Avoid Short Recycled Clay
You can add a bit of vinegar to your reclaim bucket. Vinegar is a mild flocculant, which means that it encourages the clay particles to stick together.
But ideally, it’s best to avoid your clay being ‘short’ in the first place. You can do this by ensuring that as many of the smaller clay particles stay in the recycled clay. Here are some tips to help you do that:
- Always add the slip from your hands and splash pan into the clay reclaim bucket.
- If you have a separate bucket to wash your hands as you work, let the clay particles settle and pour off the clear water on the top. You can then add the clay-rich sediment to the reclaim bucket once you’ve finished working.
- If your reclaim bucket contains a lot of water, let it settle. Once the clay has separated out and settled at the bottom, you can siphon off the clear water from the top. Avoid simply pouring off the slip water from the top if it looks like it’s full of clay particles.
How to Recycle Clay Without Plaster
Because plaster is so absorbent, it can be very useful in a pottery studio. However, the drawback of using plaster is that you need to avoid getting the plaster in your clay.
If flakes of plaster come off and end up in your clay body, they can create problems when you fire your clay at a later point. The plaster can cause bits of your pottery to pop off when it’s being fired. Or it might even cause your pottery to split and break apart in the kiln.
If you are careful about using plaster surfaces that are smooth and crumble-free, you can avoid contaminating your clay with plaster bits.
Nevertheless, some potters prefer to reclaim clay without plaster. Which is fair enough. Here are some other ways to recycle clay that don’t involve using a plaster slab.
Other Absorbent Surfaces for Reclaiming Clay
If you don’t want to use plaster, you can also spread the clay from your reclaim bucket onto the following:
- Plywood
- Hardie board
- Concrete covered with an old bed sheet
- Old towels
- A sheet of canvas
You can speed up the drying process in the following ways:
- Leaving the clay outside (especially if it’s a warm day)
- Using a fan indoors
- Putting the absorbent surface onto a rack so that air circulates underneath it
If you are drying your clay outside, it’s best to cover the clay with a breathable cover like an old bedsheet. This will stop bits like leaves and dust from falling into the clay.
The Pillow Case Method of Recycling Clay
This is how to reclaim clay using a pillowcase. Instead of spreading your clay on a plaster slab, you can scoop the clay in your reclaim bucket into an old pillowcase.
This can then be suspended from somewhere and left so that the water drains away or evaporates from the clay.
I’ve heard of potters suspending the pillowcase from a sturdy tree branch or a solid fence post. This works if you have a backyard, and if you can guarantee that it’s not going to rain!
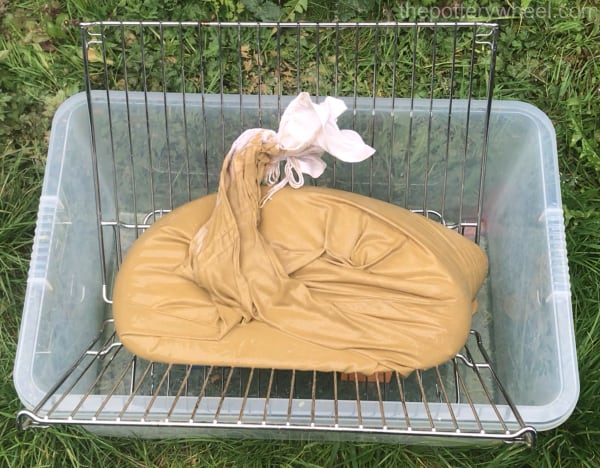
It rains a lot where I live, so I’d never be able to dry clay out by hanging it from a tree. Instead, I put the pillowcase of clay on a couple of metal grids.
These metal grids are just old oven racks, you can buy them on Amazon if you don’t have any old ones to spare. They are quite inexpensive.
I put two metal racks in a V-shape in an old plastic box. Then I put the pillowcase of clay in the v shape. This keeps the clay pillowcase off the floor and allows the water to drain away.
Depending on the climate where you live, it can take quite a while for the clay to firm up. It’s much slower than using a plaster slab. I’ve found that it can take over a week for the clay to be anything close to wedgeable.
You can press your finger into the side of the pillowcase and feel how firm it is. Once the clay is firm enough, you can peel it out of the pillowcase and wedge it up.
An Alternative Pillow Case Method of Recycling Clay
If you have some bone-dry clay that you want to recycle, you can also use a pillowcase to help you out.
Put the bone-dry clay into the pillowcase and tie it up so that the case is sealed.
Dunk the pillowcase into a bucket of water and leave it there for a few hours. The dry clay will absorb the water quickly and become rehydrated.
Lift the pillowcase out of the water and suspend it in whatever way works for you. This could be from a tree or post, or using my makeshift method outlined above.
As with the above method, you need to leave the clay in the pillow case until it’s firm enough to be handled.
How to Recycle Clay Using the 3 Bucket System
This method of reclaiming clay involves having three buckets of water ready as you work.
- Have the buckets in a row, and l handy when you are making pottery.
- When you want to wash your hands or tools, use the first bucket to wash off most of the clay slip and gloop.
- Use the second bucket to rinse your hands and tools
- Then finally dunk your hands in the third bucket to ensure that they are completely clean. The water in the third bucket should be more or less clear.
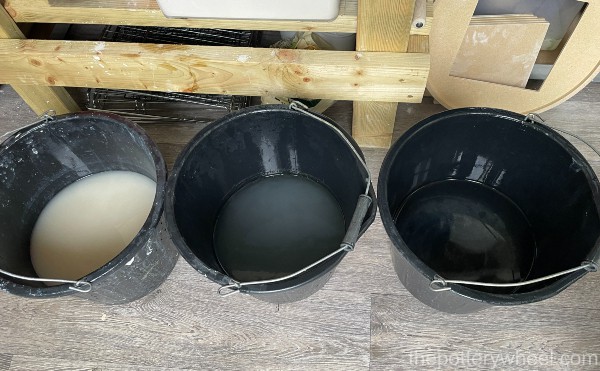
Gradually the first bucket will begin to fill up with clay particles. When it looks like it is getting full, allow the clay in the bucket to settle. When the clay has settled, you will get a layer of water on the top that is more or less clear.
You can remove this water by scooping it up with a small jug, using an old turkey baster, or absorbing it carefully with a sponge.
What you will have left is a bucket of clay slurry which can now be recycled using the method of your choice described above.
This way of reclaiming clay is good for a couple of reasons.
- Firstly, you are rinsing your hands and tools in a bucket. This helps to avoid the clay going down your sink and causing a blockage.
- Secondly, you are catching all those smaller particles of clay and including them in your recycling process.
How to Recycle Bone Dry Clay
You might wonder, “Can bone-dry clay be recycled?” The answer is, yes, you can recycle bone-dry clay.
If you have made a pot and it hasn’t worked out as you had hoped, you don’t have to waste the clay. It can be recycled easily. In fact, there are some benefits to recycling clay once it’s bone dry.
The first benefit is that bone-dry clay absorbs water easily and evenly. If you put bone-dry clay in water it will rehydrate and break down quickly. This is called ‘slaking down’.
If you have big chunks of bone-dry clay, the first thing to do is to break them up into smaller pieces. This will help the clay slake down easily.
Whenever you are breaking up dry clay, it’s important to wear a dust mask that is designed to filter out smaller airborne particles. Clay contains silica which can linger in the air, and is linked to health concerns.
One way to break down bone-dry clay without creating a lot of dust is to put it in a thick plastic bag and crush it with a mallet or a rolling pin.
Two Ways to Recycle Bone Dry Clay
Here are a couple of ways to recycle dry clay.
Option 1 for Recycling Bone Dry Clay
- Once the bone-dry clay has been broken into smaller pieces, transfer them into a bucket.
- Add enough water to the bucket to cover the clay.
- Allow the clay to slake down and absorb the water.
- Stir the mixture to make sure that each piece of clay has been rehydrated.
- Remove the excess water and firm the clay up with your preferred method of using either a plaster slab or a pillowcase.
Option 2 for Recycling Bone Dry Clay
- Transfer the bone-dry clay to a strong plastic bag that is free from holes.
- Add some water to the plastic bag and seal the bag.
- Put the bag in a bucket just in case the bag leaks.
- Allow the clay to absorb the water. You need to give the water enough time to permeate the water equally. Give it about a week to work its way through. If you don’t give it long enough, you will have lumps in the clay.
- If you add just the right amount of water, the clay should be reconstituted to the right consistency, and you won’t need to put it on a plaster slab afterward.
- Take the clay from the bag and wedge it to make it useable.
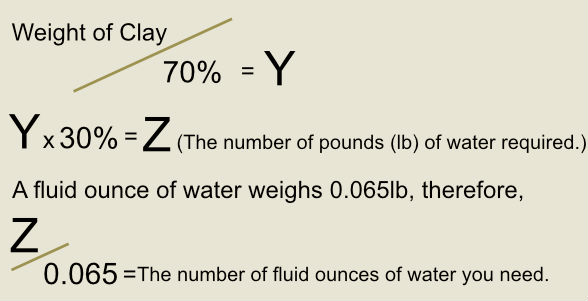
Working Out How Much Water to Add
As a rule of thumb, clay is workable when it contains 30% water. You can work out how much water is equal to 30% of the weight of the clay as follows.
- Weigh the dry clay. Let’s say the dry clay is 14lb.
- Divide the weight of the clay by 70. 14lb/70 = 0.2lb
- Multiply this figure by 30. 0.2lb x 30= 6lb
- So, you need 6lb of water.
- A fluid ounce of water weighs 0.065lb. Therefore…
- 6lb divided by 0.065= 92.30 fluid ounces.
- 92.30 fluid ounces is equal to 4.8 pints of water.
- To reconstitute 14lb of dry clay you will need 4.80 pints of water.
Working out the right amount of water to use might seem like a drag. But it does mean that you will have a bag of clay that is much closer to being usable.
If you like to measure things precisely and don’t like a mess, you might prefer this method.
Final Thoughts
Recycling clay is not the most glamorous or fun part of making pottery. However, it’s better for the environment to reclaim clay and in addition to this, it will save you a lot of money. If you don’t recycle your clay, you are throwing away your precious pottery supplies. So, I’d suggest experimenting with the above clay reclaim techniques. Find out which one you like best, and get recycling.