Your cart is currently empty!
How to Make Marbled Pottery – 4 Easy Ways to Marble Clay
Published:
Last Updated:

Affiliate Disclaimer
As an affiliate, we may earn a commission from qualifying purchases. We get commissions for purchases made through links on this website from Amazon and other third parties.
The first time I saw marbled clay I was intrigued and I wanted to know how it was done. It’s a beautiful way of blending colors on your pottery. So, I wanted to write about the different ways you can make marbled pottery. It’s really pretty simple.
You can marble pottery by coloring the clay and making the marbled pattern with your clay. This can be done by throwing on a pottery wheel or hand-building a slab pot. Or you can make a marbled decorative effect on the surface of the pottery, using underglaze or slip.
I’m going to cover various ways to make marbled pottery, so you can experiment and decide which you prefer. Different techniques suit different people, so see which one feels most enjoyable to you. And get an idea of which effect you like best.
If you are interested in one particular way of marbling clay, click on one of these links below. You can jump straight to that section.
- How to Make Marbled Pottery on the Wheel
- Hand Building Marbled Pottery Without a Wheel
- Marbling Pottery with Underglaze
- How to Make Marbled Pottery with Slip
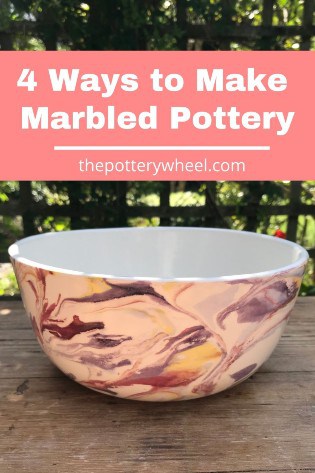
Table of Contents
show
How to Make Marbled Pottery on the Wheel
To marble pottery on the wheel, you need to use clay that is at least two different colors. You can get your hands on different colored clays in a couple of ways. Either you can buy different colored clays, or you can make them.
If you are going to buy different colored clay, you need to make sure that they are compatible to mix. Some, but not all different types of clay can be mixed successfully. If you want to know more about mixing different types of clay, check out this article here.
Put simply, if you are using different types of clay in one piece, you need to make sure of the following. Do they fire at the same temperature? Do they shrink at the same rate? Have they got the same moisture content? The answer to all these questions needs to be ‘yes’.
If in doubt, your local ceramics store will be able to advise you which clays can be mixed together safely.
Using different types of clay is great if you want your pottery to look something like this:
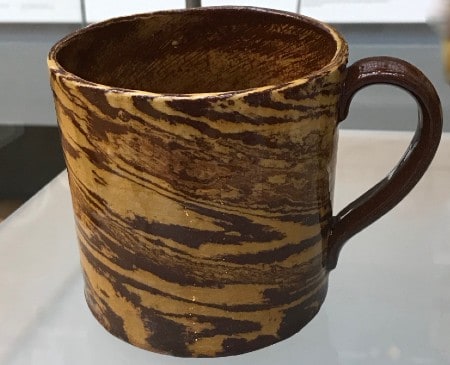
In this piece, the colors are the natural colors of the different types of clay that have been used. It has a nice natural organic feel.
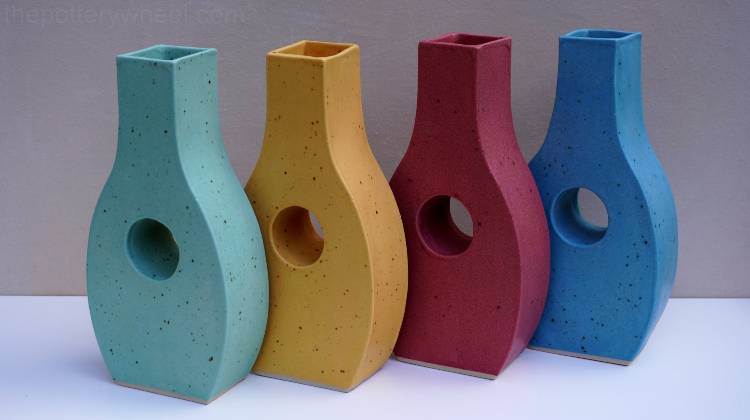
However, if you want something more colorful, then your best bet is to color some clay using ceramic stains.
Making Colored Clay
To make colored clay, you need to mix some ceramic oxides or stains into the clay you are using. This is actually a very simple process, and you can make colored clay in a few different ways.
Basically, when you make colored clay, you wedge the stain into the clay body. Here is an overview of how to make colored clay:
Choose a light-colored clay so that the color of the stain will show up. Either white or tan/buff clay is fine.
Select a stain color. You can either use oxides, which are powdered raw materials like iron oxide. Or you can use a ceramic stain. Ceramic stains are oxides that have been processed and have additional ingredients that make their colors more stable. One of the most popular types of stains is Mason Stains. They make a great range of colors.
Decide how much clay you want to color. For example, if you want to make 2 lbs of colored clay, weigh out this quantity and keep it to one side.
Then weigh out your powdered stain. Usually, this is worked out as a percentage of the weight of the clay. The amount of stain you use will determine how deep the color is. Adding a quantity of stain that is equal to 8% of the weight of the clay is a good start. Though paler-colored stains may need more.
After you have weighed out your quantities, you need to wedge the stain into the clay. There are a few different ways to do this. If you want an overview of the different ways to mix stains into clay, check out this article.
Preparing your Colored Clay for Throwing
Here is a step-by-step guide to how I made this marbled cup…
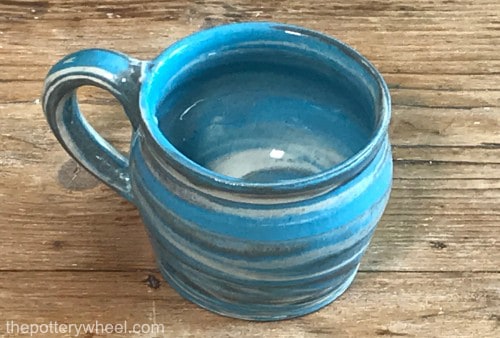
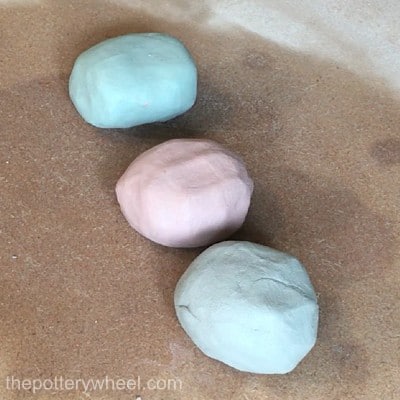
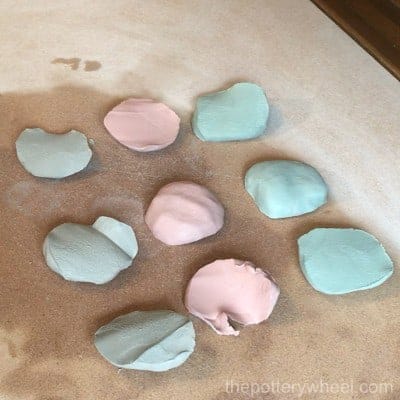
Once you have your colored clay, you need to assemble it so you can make marbled pottery on the wheel. I find the easiest way to do this is to slice off a few chunks of your colored clay. Then roll these chunks into balls and flatten them slightly so they are shaped like a tangerine. You can use as many different colored clays as you like, as long as you have at least two colors.
Then slice each ball shape into a few sections, shaped a bit like cookies. The easiest way to do this is with a clay wire cutter.
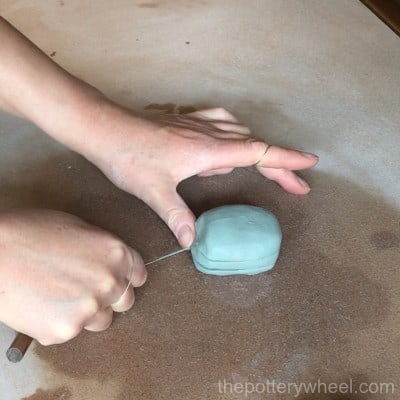
After you have sliced them, stack the cookies on top of each other, alternating the colors.
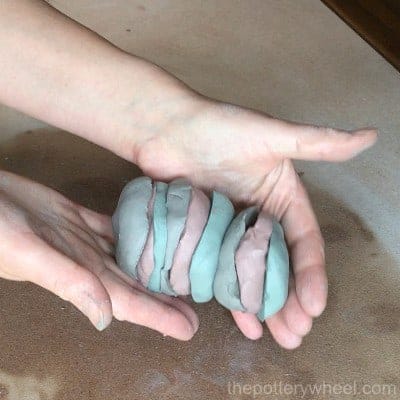
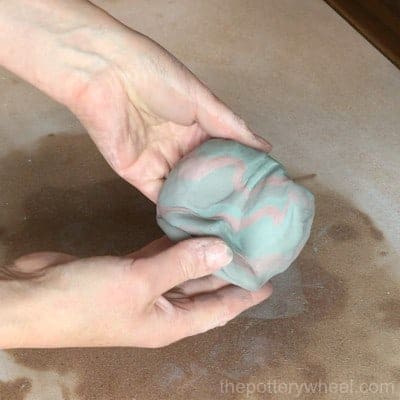
Once they are stacked, you can pat the stack into a ball shape. Pat or slap it firmly so that the clay slices stick together. When you have made a ball shape, I’d suggest wedging this ball just a few times.
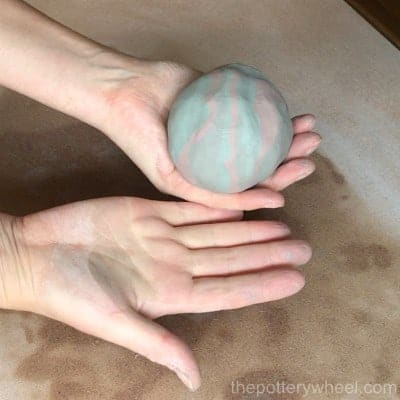
Wedging just a little will help the clay slices to adhere to one another. However, just wedge about 3 times because the more you wedge, the more the colors will mix together. You don’t want to wedge so much that you lose the distinct color strata.
You are then ready to make marbled pottery on the wheel.
Throwing a Marbled Pot
Throwing a marbled pot on the wheel is like throwing any kind of pot, with a few simple adaptations.
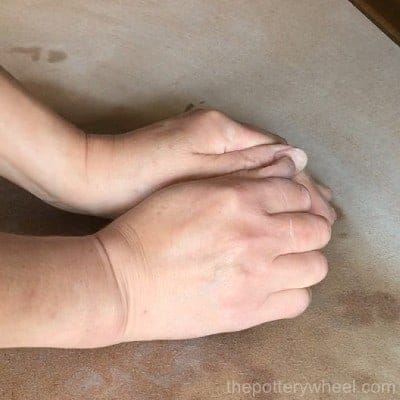
Firstly, you need to center your clay relatively quickly. The more time you spend centering your clay, the more the colored layers will blend in. If you center by coning the clay up and down, I’d suggest going up and down no more than twice. Once the clay is centered, simply throw your pot as you normally would.
Secondly, once the pot is thrown, the color might look a bit muddy and unexciting. However, when you clean the slip off the outside, it will reveal the marbled clay.
To clean the slip off the outside, simply draw a rib tool over the outside of the pot. I find that using a metal rib is the best way to reveal the marbled pattern.
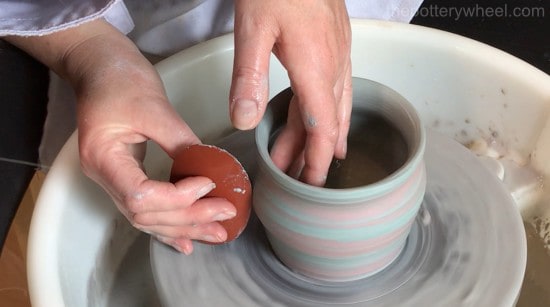
If you’re making a bowl, you will be able to scrape the slip off the inside of the bowl easily. Simply use a curved metal rib to remove the slip and reveal the marbled clay.
However, it’s harder to remove the slip from the inside of a cup. This is because it’s awkward to get a tool to run across the inside surface, without gouging the clay.
I just remove as much of the slip from the inside as I can with a sponge. Then try to tidy the inside up a little more when I trim the mug.
Finishing your Marbled Pottery
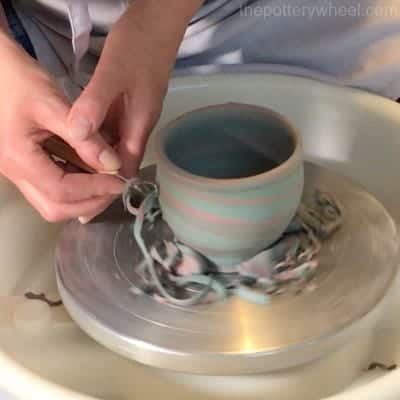
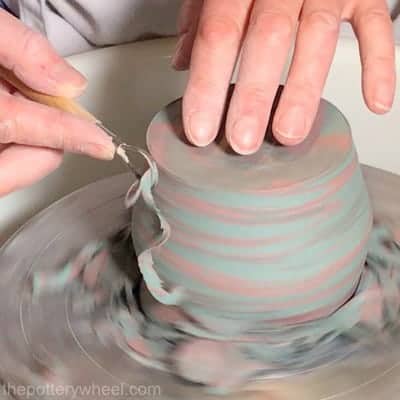
Once the pot or mug has been left to go leather hard, you can trim it. When you trim, more of the slip is removed, to reveal the marbled pattern.
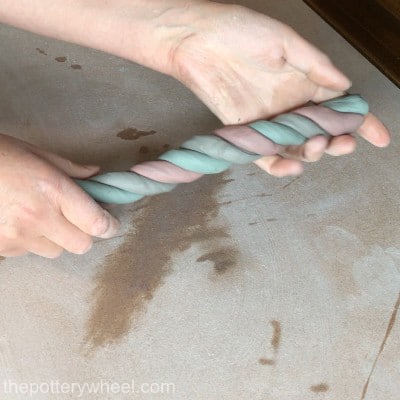
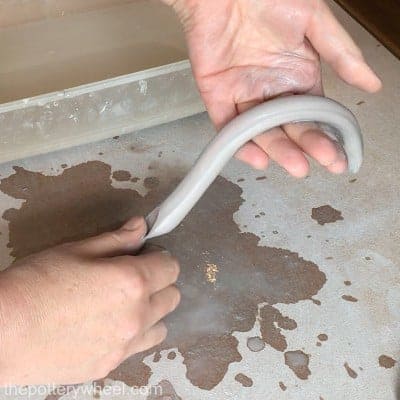
If you are making a mug, it’s a nice idea to make the handle out of matching marbled clay too. I do this by rolling out some coils of the colored clay and then twisting these together in a spiral. I then press the twist of coils together to make one larger fatter coil.
You can then bend the larger coil over and squeeze that into a cone shape. This cone can be used to pull a handle as you would any mug handle.
Once you have attached the handle to the mug, you will need to tidy the slip of that too. This can feel a bit fiddly. I use a variety of trimming tools to scrape the slip off the handle.

Once the handle is attached and your pottery is bone dry, it is ready to be bisque fired. It’s best to finish marbled pottery with a clear glaze.
How to Make Marbled Pottery by Hand Building
If you prefer to hand build your pottery, it’s easy to make a slab of marbled clay. You can then use this to build your pottery in whatever way you choose.
I will describe here how to use your marbled slab of clay with a hump or drape mold. But it can also be used well with a slump mold.
As with the above method, you need to decide if you are going to use different colored clay bodies. Or if you want to use clay you have colored with mason stains. Once you have your clay to hand, you can get to work making your marbled clay slab.
Method 1: Making a Marbled Clay Slab
There are a few different ways of making a marbled clay slab. Each will produce a slightly different marbling pattern in the clay.
Stack and Slam Marbling
I call this stack and slam marbling because the technique is based on the stack and slam wedging method.
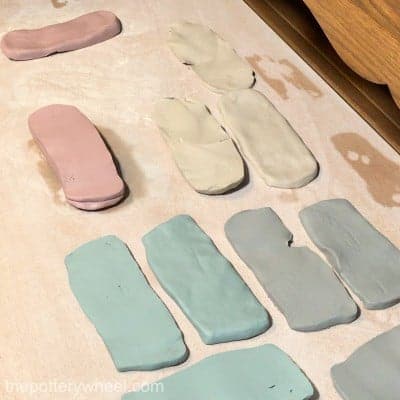
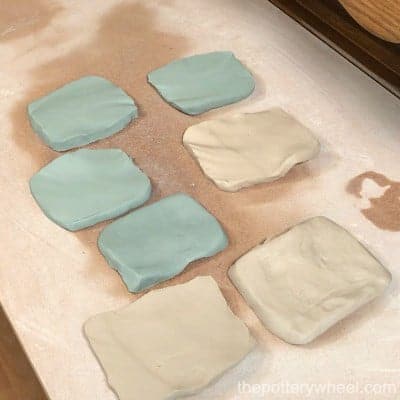
Start by selecting two or more clay colors of roughly equal size. Or, if you use more of one color that can act as a base color. And the other colored clays can be accent colors.
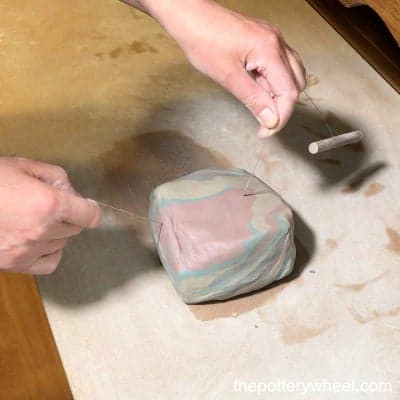
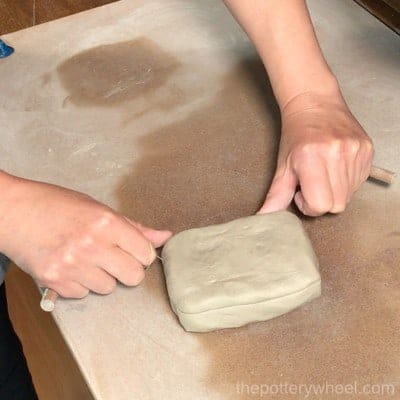
Press, drop, or roll the clay into oblong loaf-shaped pieces. Then slice each of them into sections along the long length.
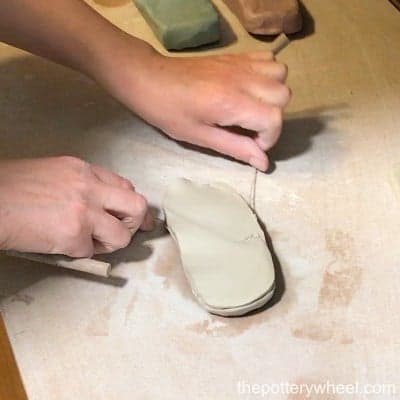
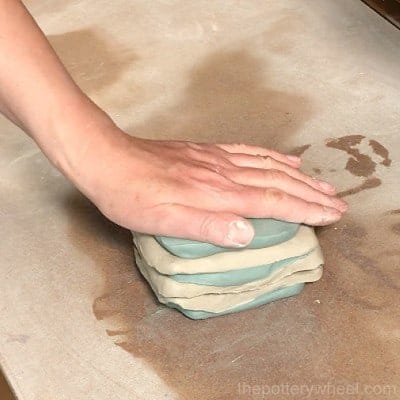
Stack these sections on top of each other alternating the colors. Then press the clay slabs together.
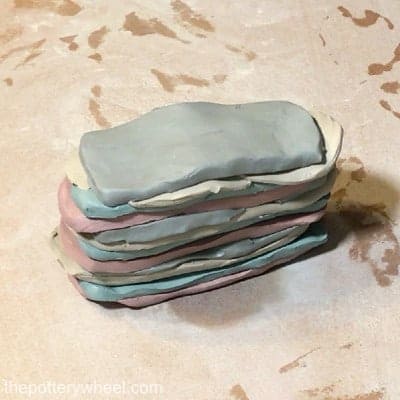
Once they have been pressed together, drop the clay onto the wedging surface. It helps if you slam it by using a bit of force when you drop the clay. I tend to slam it on one side, then turn it over and slam it on the other a few times.
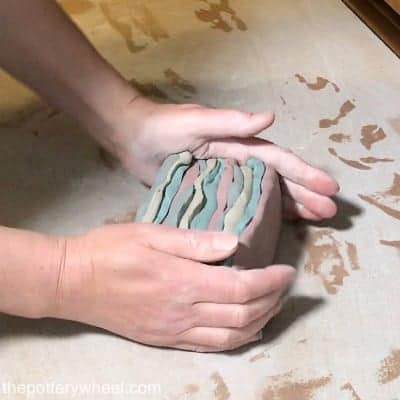
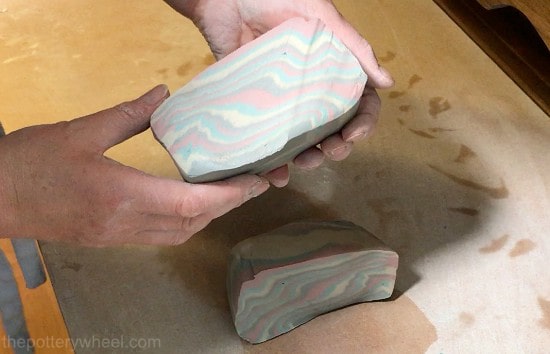
Using a wire cutter, slice the clay in two and stack the two sections on top of one another. Then slam the clay down on the table again a few times. This will stick the sections together and refine the colored layers of clay.
Avoid repeating this process too many times, as the layers will become too thin and the different colors won’t show. Just keep an eye on the thickness of the layers when you slice through. And stop when you feel they are fine enough.
Using the Marbled Clay Slab to Make a Bowl
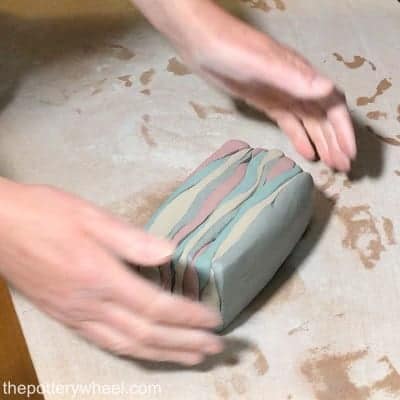
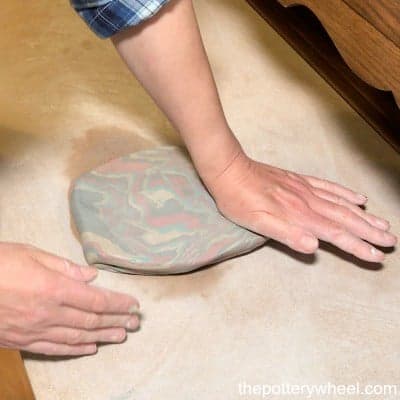
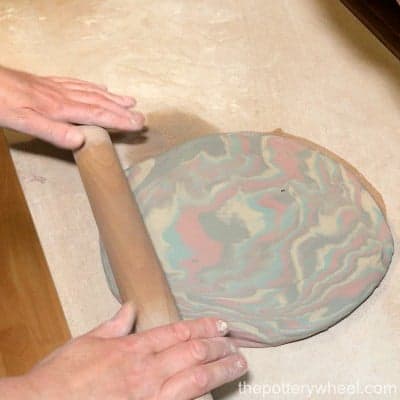
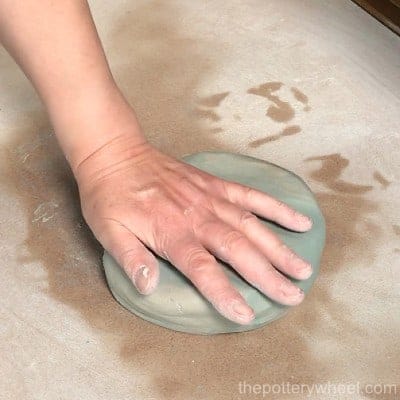
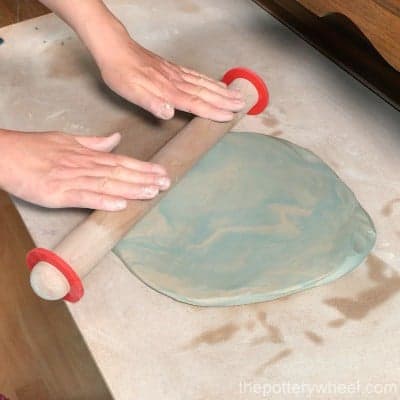
At this point, you need to roll the clay out into a slab. First of all, press the block down a bit with your hand to start of the flattening process. Then make your slab. I find the easiest way to do this is to use a rolling pin. Simply roll the clay out to the size and thickness that you want.
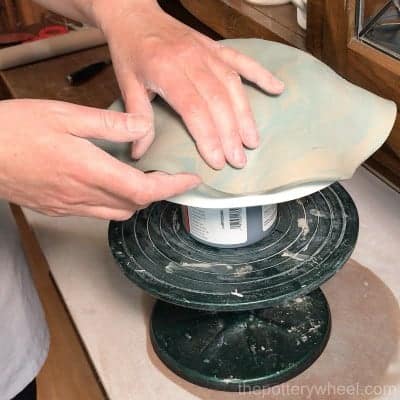
Then carefully lift the slab and drape it over a hump mold. Your mold does not need to be anything fancy. You can simply use an inverted bowl. Or you can use a hump mold that you have made out of plaster or bisque fired clay.
Here, I’m using a plaster hump mold that I made. They are easy to make. If you want to know about making a plaster hump mold, check out this article.
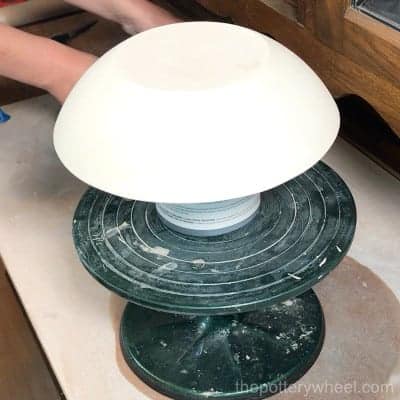
If you are using an inverted bowl, I find it best to use one with a completely smooth base. Any patterns or a foot ring will leave an indentation in your marbled clay.
You can either shape the clay so that it is flush around the mold. I then slice the excess clay off around the edge of the bowl mold. The edges don’t need to be especially tidy now, as you can trim them later.
Or you can drape the slab over more loosely and create a fluted edge with the marbled clay.
Once the clay is leather hard, you can remove it from the mold. You can also trim the edges and tidy up the surface of the clay before.
Method 2: Marbled Slab Technique Number Two
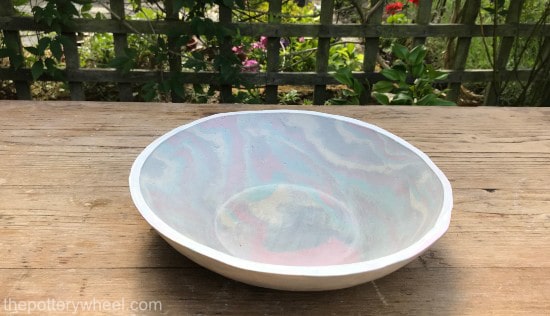
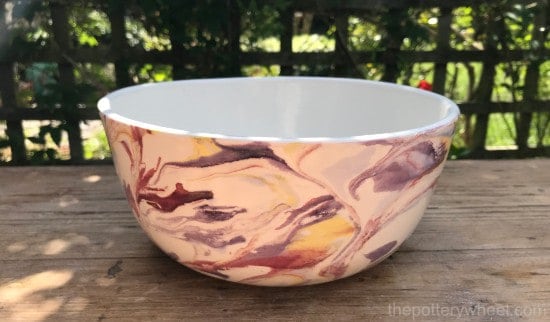
If you would rather not use the stack and slam method, here’s another simple way to make a marbled slab. This is how I made the following marbled bowl.
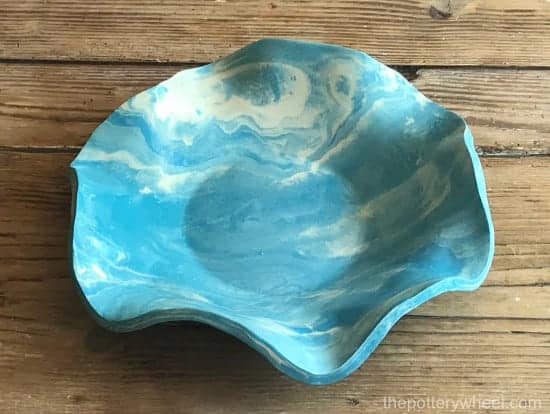
With this bowl, I used two colors of clay. First, shape your different colors of clay into blocks, and wire cut them into sliced sections.
As above, stack the slabs on top of one another alternating your colors. Once they are stacked, pat them together firmly. Or slam on the table just a few times until they feel stuck together.

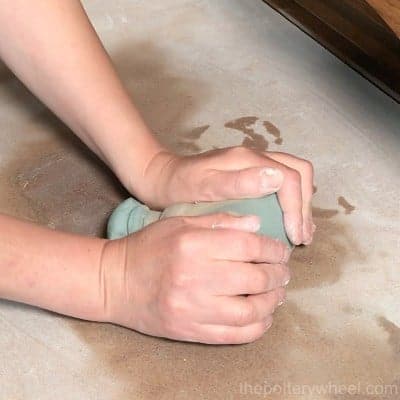
You are then ready to wedge your clay a few times in one direction. Once you have wedged around 5 or 6 times you will start to see the marbled pattern begin to emerge.
Then turn your clay around and wedge at a different angle. This will cause the marble pattern to change direction. And it will mix the pattern up in quite a random way. Again, wedge in this direction 5 or 6 times.
You can repeat this process at another angle if you want. But you need to be careful not to wedge for too long. The longer you wedge, the more the colors blend in.
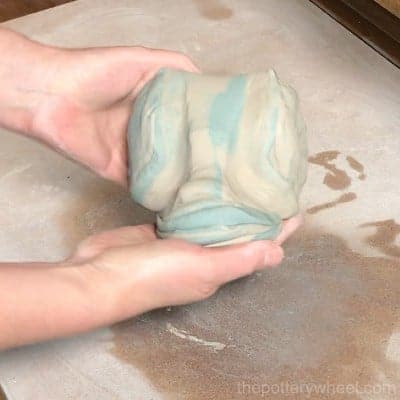
There is a sweet spot where the marbled clay pattern will look its most appealing. After that, it can start to lose some of its definition. You will need to experiment and decide at what point it feels right for you to stop wedging.
Using the Marbled Clay Slab to Make a Bowl
You are now ready to make your marbled slab. Using your roller, make your slab as described above.
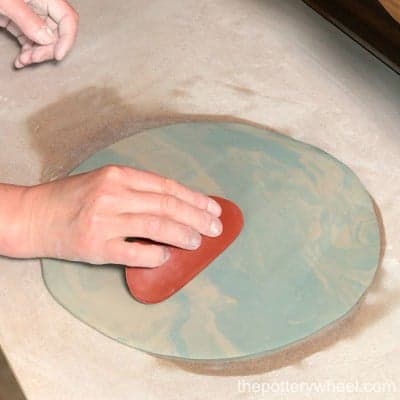
Once I have rolled out a slab, I tidy it up and compress the clay with a rubber rib tool. It’s important to do this gently, so you don’t drag the colors of the clay too much.
Then I cut the clay into a tidier more evenly shaped circle. You are then ready to drape your marbled clay slab over your mold in the way mentioned earlier.
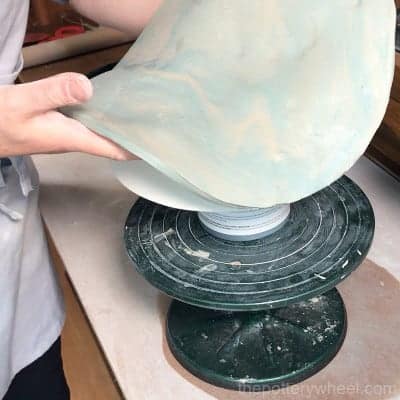
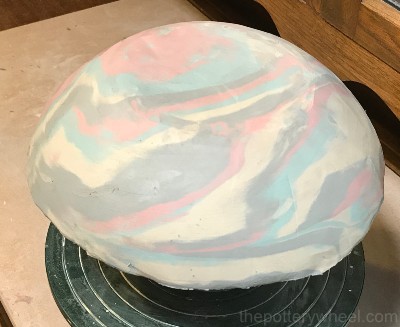
In this example, I draped the slab over a plaster mold and I left the edges fluted.
Once the slab is draped over the mold, I tidy up the surface of the slab with a rubber rib. I do this to smooth and compress the clay, especially if there are small surface cracks in the slab.
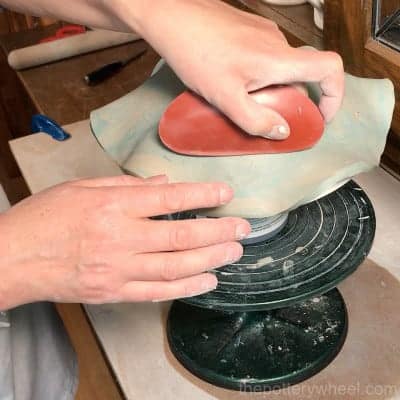
When the clay is leather hard it will lift off the mold easily. You can then trim the edge and smooth out the inner surface with a rubber rib.
Once the clay is leather hard, it can be bisque fired and then glaze fired with a clear glaze. Here is a video of the step-by-step guide, with some footage of the finished bowl.
How to Make Marbled Pottery with Underglaze
Another way of marbling clay is to use a decorative marbling technique. One way of achieving a marbled decorative effect is to use underglaze. This is a simple technique, but the results can be stunning. This is how marbled this bowl.
All you need is:
- Some bisque fired pottery.
- Shaving foam
- Underglaze
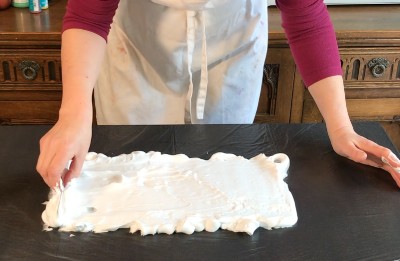
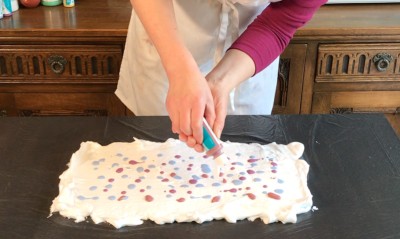
First, cover your work surface with a plastic sheet. Then spray the shaving foam directly onto the plastic. Spread the shaving foam out into a smooth even layer. You can spread it out with any kind of implement, like a ruler, spatula, or rib tool.
Select your underglaze colors and then drip the underglaze onto the shaving foam. You can use just one color, but I find the effect more striking with a selection of colors.
Drip your different colors of underglaze evenly on the foam. Then drag the tip of a modeling tool through the underglaze in whatever pattern you prefer.
Tip!
Although the tool you use to drag the underglaze needs to be narrow, don’t use something too thin. I have found that if I use a needle tool or toothpick, the underglaze swirls don’t show up well. If you are working on a very small piece, then a needle tool might be fine. But for a cup, bowl, or vase, I find the pointed end of a wooden tool works best.
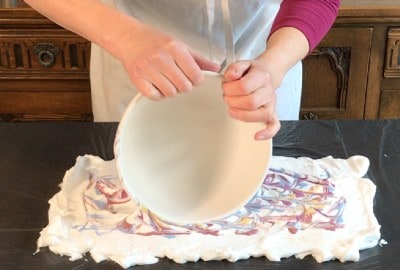
Once you are happy with the underglaze pattern, carefully roll your bisqueware over the surface of the foam. You don’t need to press it deeply into the foam, simply skim it over the top. That way the bisque will pick up a mixture of the foam and glaze.
When you have covered the surface area that you want to be marbled, simply run it under a tap. This will remove the shaving foam and leave the underglaze behind on your bisque ware creating a marbled pattern.
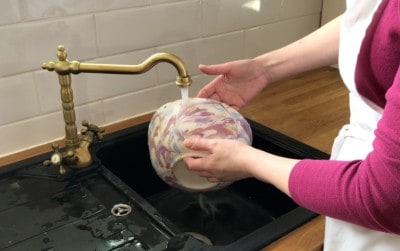
Once a clear glaze has been applied the color of the underglaze will pop really beautifully.
You can watch my full step by step video on marbling with underglaze on YouTube.
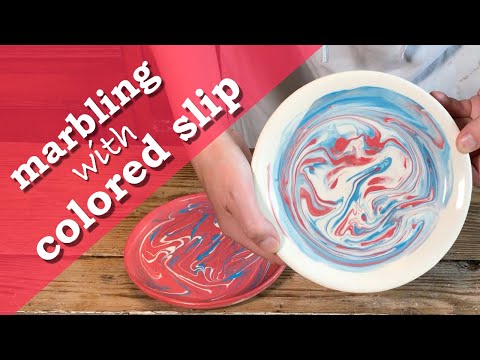
How to Make Marbled Pottery with Slip
Working with colored slip is one of my favorite ways of decorating pottery. This is such a simple way to create a lovely rich looking marbled clay pattern.
Firstly, you need to make a piece of pottery. You can do this in whatever way you prefer. However, the base of the piece needs to be relatively flat.
In this example, I am using a couple of wheel thrown plates. When my plate was leather hard, I painted the upper surface with decorating slip. You don’t have to do this, but you can if you want.
I chose to do this so that the main color of the marble matches the color on the side of the plate. Wait until the base coat of slip is also leather hard.
Marbling Your Pottery with Slip
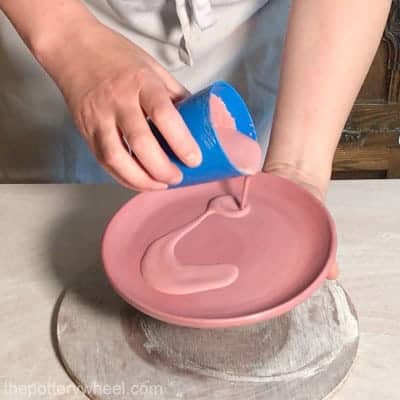
Pour a small quantity of colored decorating slip onto the flat base of the pot. The slip needs to be the consistency of single pouring cream.
If your pottery is very leather hard, there is a risk, it will draw a lot of water out of the slip. If this happens, the slip can simply go solid on your plate. To avoid this, I paint a coat of the decorating slip onto the surface of the plate before marbling. This adds moisture.
Also, make sure the slip is not too thick. If it is too thick, it will start to go hard before you have created the marbled pattern.
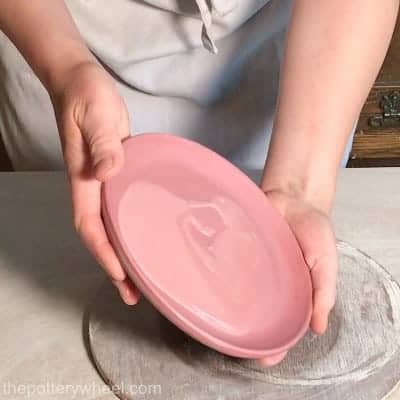
How much you use, depends on how large your piece is. But you need to use enough so that the slip will move about gently if you tilt the pottery. I aim for a layer that is about 2mm thick. I gently rotate the piece of pottery so that the slip is covering the bottom evenly.
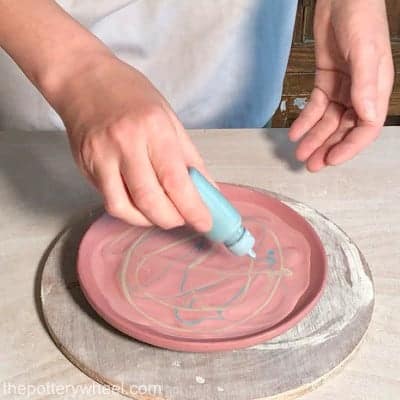
Once the bottom of your piece has a thin layer of liquid slip, you can add a different colored slip. You can either use a spoon or a slip trailer. Add a few dots and lines of the different colored slips.
You can use more than one color with the marbled slip.
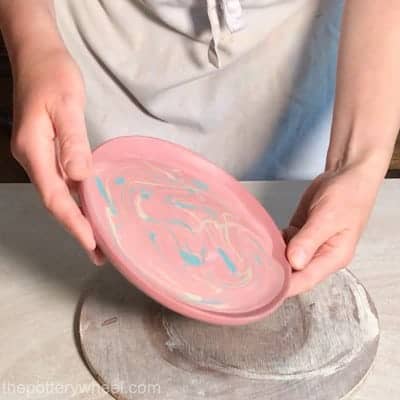
Then lift your piece up and tilt the piece around so that the liquid slip moves around slowly. You can also give the piece a gentle wiggle and shake to make the slip pattern more random.
Tip!
If you have a lot of slip in the base of your piece, you can carefully pour the excess out. Simply turn the piece at an angle and let the slip drain out.
You can either leave the slip marking on the side as a feature of the piece. Or if you want to tidy it up, you can wipe the slip off the side of your piece. Then re-touch the area with some of the base slip you applied before marbling.
Once you are happy with the marbled pattern, you can let the pottery dry out and fire it. Again, applying clear glaze to the piece will intensify the colors nicely.
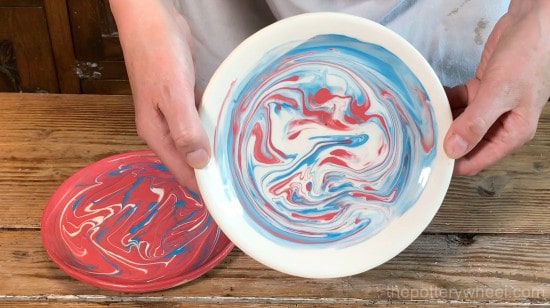
Marbling Pottery with Colored Slip
Final Thoughts
These are just a few of the ways I like to make marbled pottery. There are many other variations of these techniques. The best thing to do is to experiment with these methods and see which one you enjoy most. One of the nice things about marbling clay is that you can create different effects by changing the colors used. I hope you have fun experimenting!
If you enjoyed this post, please share it!
[DISPLAY_ULTIMATE_SOCIAL_ICONS]