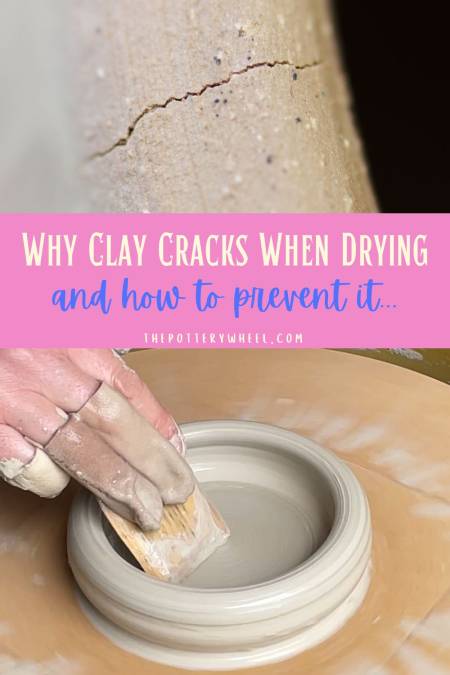
It’s disappointing when you pour your heart and soul into making pottery only to find that the clay has cracked while the pot is drying. But what can you do about it? Here are some of the main reasons why pottery clay cracks while it is drying, and how you can prevent it…
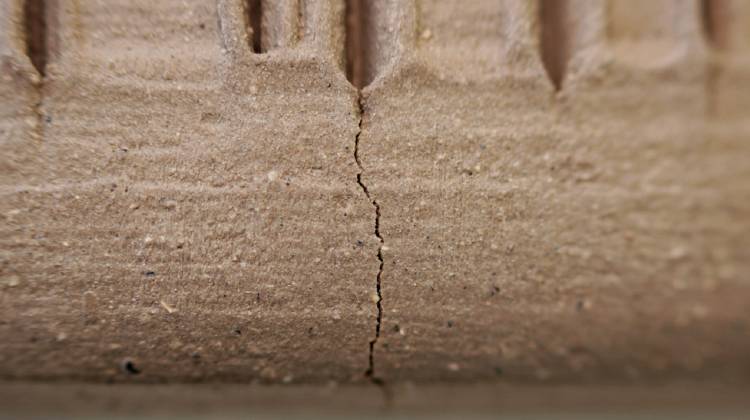
Pottery clay cracks when drying if some parts of the piece dry out more quickly than others. When clay dries, it shrinks. If one part of the clay is shrinking faster than the other, this puts an internal strain on the pottery. The clay cracks to cope with the strain.
Although the main reason why pottery clay cracks is uneven drying, there are several factors involved in this. Read on to find out what else is involved and how to prevent clay from cracking in the future.
Why Pottery Clay Cracks When Drying
It’s sometimes said that pottery clay cracks when it is dried too quickly. This is only partially true. It’s not so much the speed of drying that causes cracks, but rather how evenly the process is managed.
If you dry your pots quickly, it can be harder to dry them evenly. Whereas if you slow the process down, you can control it more and make sure all parts of the pot are drying at the same rate.
There is a lot of water in clay. Around 20% of its body weight is water. As the clay dries out and loses water, it shrinks. When one part of a piece of pottery shrinks more quickly than another, it puts the pottery under strain.
When clay is wet, it is flexible. It stays a little bit flexible, even as it is drying out. When the clay is flexible it can cope with the strain of one part drying out more quickly than another.
However, as the clay dries out more, it starts to harden and become more brittle. At this point, the clay is less able to manage the different rates at which it is shrinking.
This is why you are more likely to see pottery clay crack at a later point in the drying process.

Reasons Why Your Pottery Clay Cracks – And How to Prevent It
So, what are the factors that cause uneven drying? Here are 8 main causes, and how to prevent clay from cracking while drying.
Factor 1) Uneven Clay Thickness
If your pot has parts that are much thicker than others, this can cause cracks when the clay is drying. This is because thinner parts of your clay will dry out more quickly than others.
As clay dries, water migrates from the deeper layers to the surface and evaporates. The further the water has to travel to the surface the longer it takes to dry. As such, thicker sections of your pottery will dry more slowly and the drying clay can be put under stress.
Solution – Making Thinner, More Even Walled Pots
Try to keep the different parts of your pottery of a relatively even thickness. When you are starting out using a pottery wheel, it’s easy for the base of your pots to be much thicker than the rim.
You can test how thick the base is by using a needle tool. Press the needle tool into the base of the pot until it touches the wheel head. Slide your finger down the needle until it touches the clay surface.
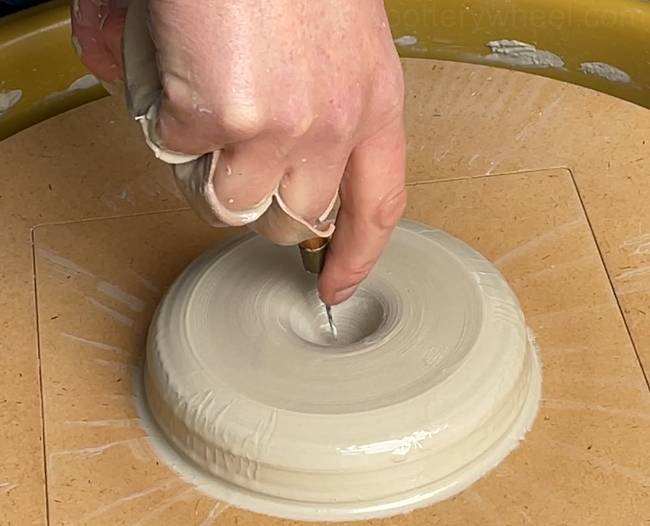
Remove the needle tool and see how far your finger is from the tip of the needle. This will show you how thick the base of your pot is.
I usually aim for the base of a small pot like a mug to be about a quarter of an inch thick. This gives me enough clay to trim off and make a foot ring, but it’s not too thick.
Tip:
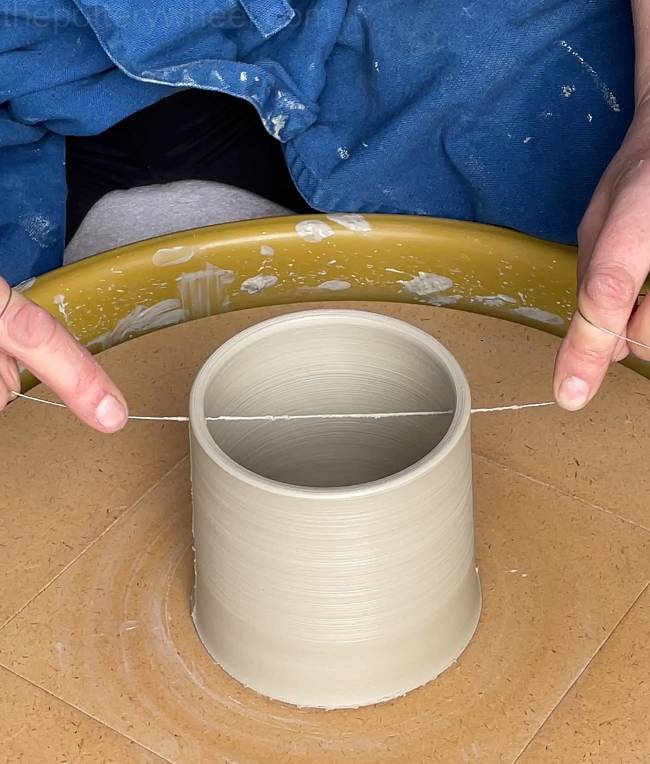
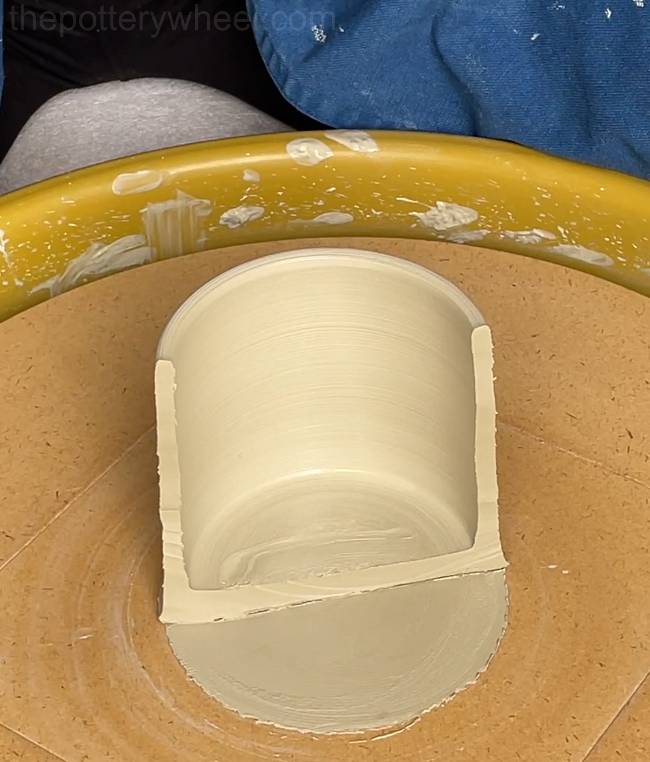
When you are learning to throw thinner more even pottery, it helps a lot to slice some of your pots in half when you have thrown them. Although you may feel reluctant to sacrifice your pots in this way, it’s worth doing regularly. It will show you a cross-section of your pottery and give you an idea of where your pots are thicker or thinner.
Factor 2) Fine Details and Exposed Rims
If your pottery has finely detailed designs these will tend to dry out more quickly than the main body of your piece. This is partly because the clay is thinner, but also because details and angles usually have more airflow circulating around them. This will dry them out quickly.
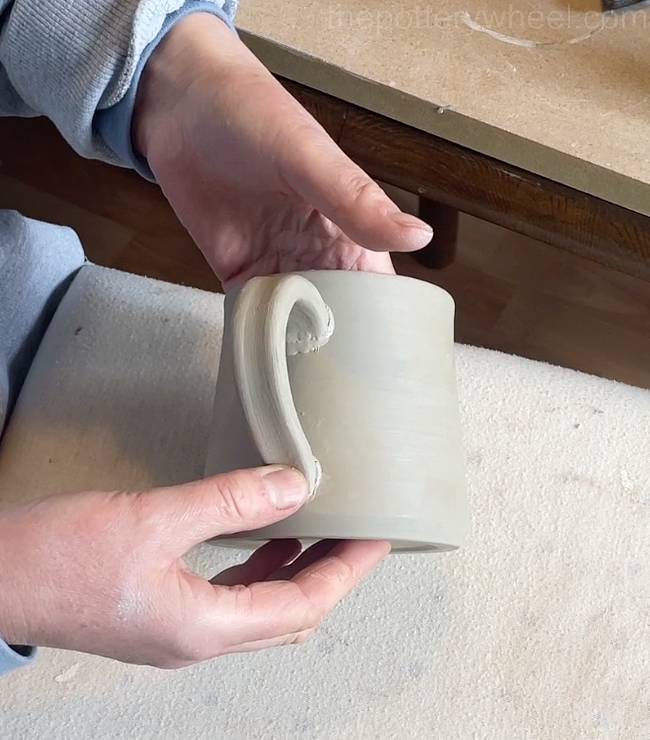
Other features that dry out quickly are sharp angles rather than smooth curves, rims of pots, and handles on pieces.
Solution – Covering Your Pottery
You can control how quickly your pottery dries out by covering it with a plastic bag. The water in the clay evaporates and increases the humidity in the bag, making its own small humid atmosphere.
It’s best to avoid the bag sagging against the surface of your pottery, as the plastic can leave marks against the clay. Instead, put the bag over the clay like a tent, and tuck the ends of the plastic bag under the bat that your pot is sitting on.
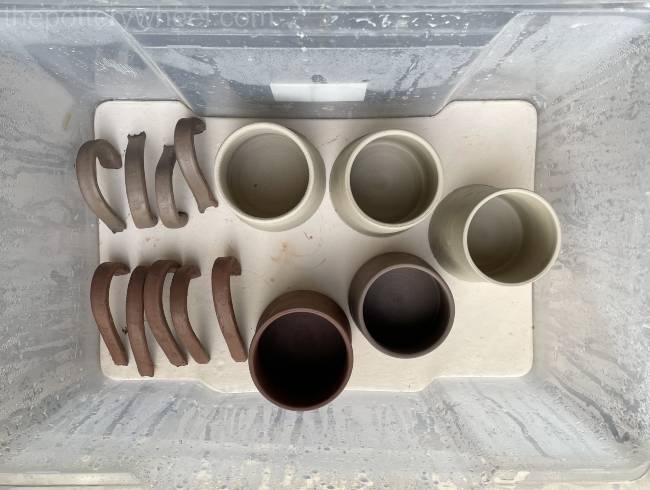
When the pot is firm enough, it’s a good idea to turn it upside down so that it’s resting on the rim. By resting the pot upside down, you reduce the airflow around the rim and slow down the drying process.

Usually, when I’m drying pots, I leave it on the bat until it’s firm enough to pick it up without losing its shape. I lift it off the bat, then I put a piece of plastic bag onto the bat.
This creates a barrier between the wooden bat and the pottery. I then turn the pottery over and put it back onto the bat so that its rim is resting on the plastic bag.
Tip:
Cover details and handles so that they dry more slowly. When I’ve attached handles to my mugs, I wrap them in saran wrap, also called cellophane. This slows down how quickly the handles dry. You can also paint wax resist onto leather hard handles to stop them from drying out too quickly. The wax resist burns off in the kiln during the bisque fire.
In addition to wrapping handles in plastic, it can help to turn mugs so that the handles are all pointing toward one another. This helps the handles to stay damper for longer.
Factor 3) The Size of Your Pottery
Sometimes the size of a piece of pottery can be a factor in cracks forming as it dries. Larger pieces of pottery tend to be thicker, and the surface of the ware dries out more quickly than the deeper layers. Plus, the details and edges will dry out more quickly than the middle sections of the piece.
Solution – Dry Larger Pieces Slowly
I find the best way to avoid cracks with larger pieces is to slow the drying process down and try to even out the airflow around the whole piece.
Put large flat pieces like platters and plates on a metal rack so that air can circulate all the way around and doesn’t just have access to the rim.

Cover the edges of large pieces with plastic or apply a coat of wax resist to the details.
Tip:
Having patience is the key to drying larger pots without cracks. If I’m drying a large piece, I cover all the details on the pot as best I can, then I wrap the whole thing in plastic and leave it for a week. Gradually I loosen the plastic to allow more air flow over a few days. It can sometimes take a good few weeks to dry out a larger piece.
Factor 4) Not Wedging Your Clay
One of the reasons that wedging clay is important, is that it gives the clay an even consistency throughout. Wedging clay makes it homogenous.
If the clay is not wedged enough, some parts of the clay body will be dense and drier. Other parts will be softer and have a higher water content.
If you make your pottery out of unwedged clay, your pot will have an uneven water content. This will increase the chance of your pottery clay cracking as it dries.
Solution – Wedge Your Clay Well
The obvious solution to this is to wedge your clay before you start making. Wedging isn’t everyone’s idea of fun, but it’s important.
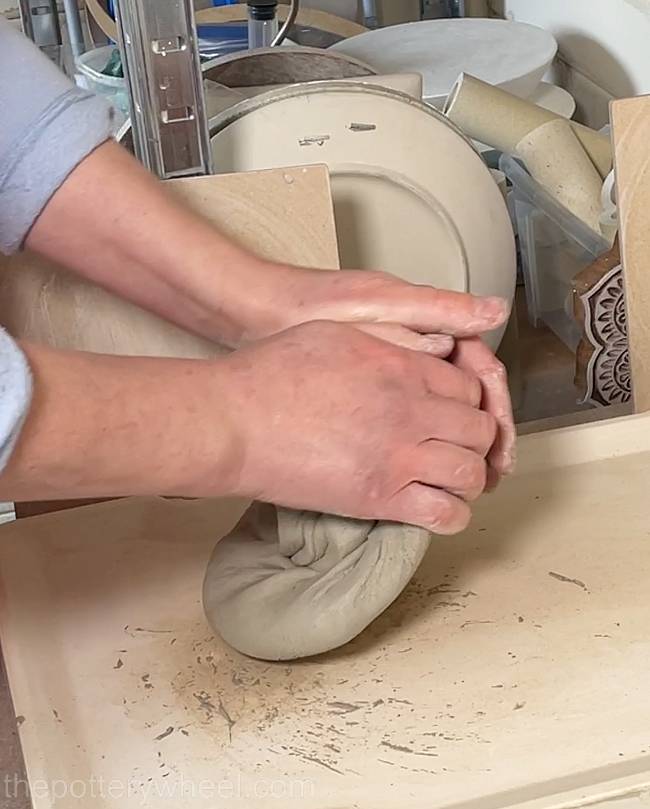
There are lots of different ways to wedge clay, so find which way of wedging you prefer and use that. You can find out more about wedging clay here.
Factor 5) Clay Particle Alignment
Clay is made up of tiny particles, that have a long flat shape. In clay that has not been worked, these particles are randomly arranged and unorganized.
When you work on a piece of clay, the particles become more aligned. This is especially the case when you are throwing on the wheel. As the clay turns under your fingers and hands, the particles move into alignment.
When clay dries out, the particles shrink more across the short width than along their length. If the clay particles are aligned it will shrink more in one direction.
The problem is that the sides of your potter have more contact with your hands than the base. So, sometimes the clay particles on the side are aligned, but the particles in the base stay randomly organized.
This can cause the base and the sides to shrink and dry at different rates, putting the pot under stress at the point at which the sides meet the base.
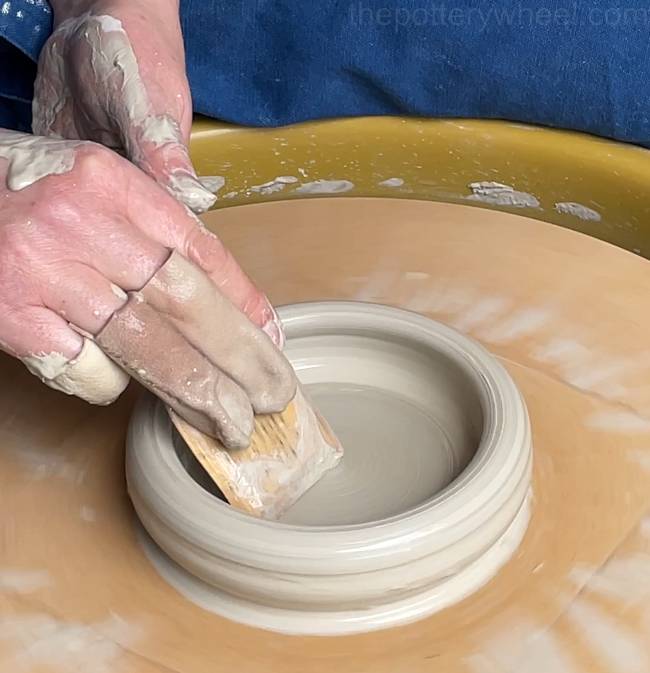
Solution – Compress Your Base
Compress the base of your pot. When you are throwing, run your finger, a sponge, or the flat side of a wooden rib over the base of the pot as the wheel turns. This helps to smooth the base out and make it an even thickness, but it also helps to align the clay particles.
Factor 6) Humidity and Temperature
Clay dries out faster in warmer temperatures. However, the warmth is not the only factor that affects drying. Humidity levels also affect the speed at which clay dries.
Humidity is often lower in cold climates and seasons. So, whilst clay may dry more slowly when the temperature is lower, low humidity will speed the process up.
Solution – Control the Atmosphere
Be aware of the temperature and humidity in your drying space. Cover your pots when the temperatures are warmer and or if the air is drier.
In the winter the atmosphere where I live is cold and damp. I can leave pots uncovered for a few days and they barely dry out at all.
Tip:
Protect your pots from drafts. If your pottery is sitting in a draft, one side of the pot will dry out quicker than the other. Sometimes you can speed up the drying process by using a fan or a heat gun. But if you do this, it’s best to have your pottery on a rotating surface. Turn the pot at an even speed when it’s in front of the fan to make sure it dries out evenly.
Factor 7) The Type of Clay You are Using
Some clay is more plastic than others. This means that it can be bent and shaped more easily and it doesn’t want to return to its original shape.
Clay that is more plastic tends to crack more when it’s drying. There are a couple of reasons for that.
- Plastic clay has smaller clay particles and there is more surface area in the clay for water to stick to.
- There is more area between the clay particles for the water to sit.
An exception to this is porcelain clay. Porcelain is not a plastic clay body but has a high water content (source). As such it’s prone to shrink quickly as it dries and has a reputation for cracking as it dries.
Solution – Choosing Your Clay
Grog in clay reduces cracking during drying. Grog is clay that has been fired and then ground up into granules.
Clay with grog in it shrinks less because the fired clay that makes up the grog doesn’t contain water. As a result, clay with grog contains less water and shrinks less.
Also, the grog in the clay makes the clay particles less densely packed together. This means that the water in the clay finds it easier to get to the surface of the piece and evaporate.
Because grogged clay shrinks less, the pottery undergoes less stress during the drying process and is less likely to crack. Usually, the pottery supplier will state if a clay body contains grog in the description of the clay.
Tip:
The grog granules that have been added to clay come in a range of sizes. Courser grog is tough on the hands if you are wheel throwing. But fine grog can be added to clay and this is suitable for wheel-thrown clay.
Factor 8) Tiny Cracks in Newly Formed Pots
Small cracks in newly formed pottery will open up to become bigger cracks as the clay dries. This is more of an issue if you are hand-building. When you hand-build pottery, the clay can dry out as you roll, pinch, or coil it.
If the clay is dry, you might find that you have small cracks in your piece, particularly at the edges of your pottery.
Solution – Smooth Out Your Surfaces
If you notice small cracks in the surface of your clay, be sure to smooth them out with your thumb or a modeling tool when the clay is still fresh.
Further Tips on How to Stop Clay from Cracking
Here are some additional measures you can take to prevent clay from cracking while drying.
Bonus Tip #1: Join Your Pieces of Clay Well
When you are joining two pieces of clay, like attaching a handle to a mug, the mug and handle need to have the same moisture level.
Also, attach the clay by using slip and score. This technique involves scoring into the clay surfaces that you are going to join. Then apply some slip to the scored surfaces and press them together firmly. Blend the edges of the joined pieces of clay together.
You can also use special types of clay slip that make the bond between the pieces stronger. I like to use paper clay slip. You can read more about making paper clay slip here.
Bonus Tip #2: Make a Damp Box
Another way to cover your pottery is to use a damp box. You can make a damp box easily by setting a 1-2 inch layer of plaster in a plastic box. Once hard, the plaster can be made moist by adding water.
Place your newly formed pottery in the damp box and put a lid on it. This creates a moist draft-free environment for the clay to dry out slowly. You can control the drying rate by adjusting the moisture in the plaster, and by leaving the lid of the damp box open a little.
Final Thoughts
Many factors affect how clay behaves. A few things might be creating pottery clay cracks in your ware. You may need to experiment a little. However, if you use the guidelines above it will help you isolate why your clay is cracking.


