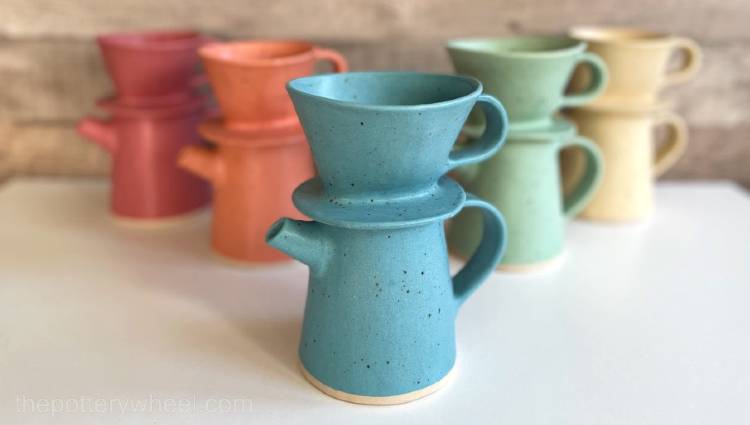
If you have bisque fired to cone 6 by accident, you’re not the first, and you won’t be the last. It’s an easy mistake to make. But if you have a kiln load of overfired pottery, you may be wondering what you can do. Here are some suggestions about what you can do to salvage the situation…
Pottery bisque fired to cone 6 by accident is harder but not impossible to glaze. You can try heating the bisque before applying the glaze. Also, you can thicken the glaze, by reducing its water content or adding a thickener. Or you can add gum to the glaze to help it adhere.
These are some of the most common techniques to help glaze pottery that has been bisque fired too high. However, they are not the only steps you can take, so let’s take a closer look at them and others.
Bisque Fired to Cone 6 by Accident? How Does it Happen?
It is a horrible feeling to realize you have messed up with your kiln. There are a few reasons you can bisque fire your clay at too high a temperature.
If you have an electric kiln, more than likely you have programmed it incorrectly. It’s easy to select cone 6 instead of cone 06 on your control panel.
Perhaps your kiln has malfunctioned and over-fired. Sometimes relays stop working or thermocouples don’t work.
Or if you are using a kiln without a digital controller, it is easy to pick up the wrong cone.
Why is it a Problem if You Bisque Fire to Cone 6?
Well, it’s not always a problem. Some potters actually want to bisque fire their pottery at a higher temperature. In fact, this is one of the ways that mass-produced porcelain dinnerware is made1. In industrial settings, the ceramics are fired to cone 6 or higher and then pebble-washed to smooth the surface. It is then heated and sprayed with glaze before glaze firing.
Nevertheless, if you have bisque fired to cone 6 by accident, it can make life more difficult. And here is why. The higher the temperature at which you bisque fire, the harder it is to glaze.
The reason for this is that ceramics become less porous as you fire at higher temperatures. Glaze adheres to bisque ware when you apply it because the porous bisque absorbs the water from the glaze. This leaves the particles, that were suspended in the glaze water, coating the bisque. Because the bisque is porous, the glaze dries quickly and you can normally apply about 3 coats of glaze quickly.
But if your bisque is less porous, then the glaze does not dry. As a result, it’s hard to get the kind of glaze coverage or evenness that you would want.
However, difficulty glazing is not the only problem that can arise from over-firing.
If you fire a low fire clay to cone 6, the pottery can either become very dense and brittle. This pottery might look okay when you take it out of the kiln. But it is often not usable, because the slightest tap or bump will shatter it.
Alternatively, if you over fire clay, it can bloat, warp, and even melt in the kiln. At high enough temperatures clay can actually end up in a puddle on your kiln shelf.
What to do if You Accidentally Bisque Fire to Cone 6
Assuming your clay is mid or high fire and has not lost its shape from the bisque fire. What can you do to glaze it successfully?
There are techniques you can use to glaze over fired clay. How successful these are will depend on the clay you used.
For example, a cone 10 clay bisque fired to cone 6 by accident, will not have fully vitrified. It will still be a little porous. So, with some coaxing, it will be possible to get the glaze to adhere. If, however, you have bisque all the way up to cone 10, it will be very hard to glaze.
Tips to Get Your Glaze to Stick
The reason glaze does not stick to non-porous bisque is that the water in the glaze has nowhere to go. So, it sits on the surface of the pottery in its liquid state and/or runs off it.
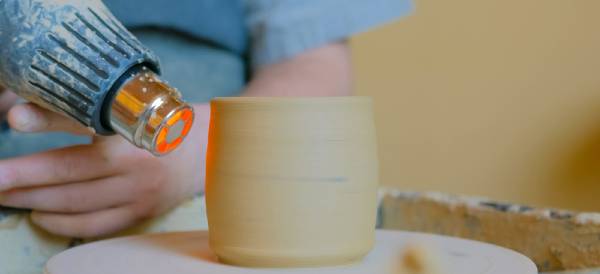
Heating Your Bisque Ware
You can help the glaze adhere to the bisque by heating the pottery up. This will cause the water in the glaze to evaporate so that a layer of glaze materials coats your ware.
Potters use a number of ways to heat their bisque up to achieve this evaporation. The key is that you do have to heat the pottery to quite a high temperature. You need to get the bisque to a temperature where it is almost, but not quite too hot to touch. Being careful, of course, not to burn yourself.
Some ways that the bisque can be heated are:
- In the kiln
- In an oven
- Using a heat gun
- With propane burner

You might be able to think of other ways to heat your bisque. But a hairdryer at this point will not throw out enough heat. The bisque does need to be hot enough to cause the water to evaporate.
Applying the Glaze
As usual, you can apply the glaze by brushing, dipping, pouring or spraying.
Some tips on application are:
- If you are brushing the glaze on, then pat the glaze on with the brush rather than spreading it. Stroking the glaze on is likely to drag it over the surface and leave streaks.
- When dipping the glaze, leave the pottery in the glaze a bit longer than you normally would.
- Ideally, spray the glaze on. Sprayed glaze is atomized and is ordinarily a bit drier than brushed or dipped glaze. So, if you can spray the glaze you are giving yourself the edge in terms of helping it dry.
- To get a good glaze coverage and thickness, it’s best if you can apply a few layers. Make sure that each layer is dry before you apply the next. You can either leave each layer to dry naturally for a day or so.
Or you can speed the drying up using a heat gun, blow torch, or hairdryer. It goes without saying that if you are using a blow torch, you need to be careful. - Once the glaze is on, you need to handle it very carefully. Unfired glaze is always fragile and needs to be treated with care. But when the bisque is not porous, the glaze will flake and crumble very easily.
- One trick that potters sometimes use is to spray the glaze with hair spray or starch. This will simply burn off in the kiln and will help keep the glaze in place.
Thicken the Glaze
Another tip to help the glaze adhere is to thicken your glaze. This can be done by allowing the glaze to settle. As it settles the water in the glaze will separate out and sit on top of the mixture. You can then either pour or siphon some of the water off.
Remember to keep the water on one side, as it will contain some glaze particles. And you will be adding it back to the glaze mixture once you have finished glazing your pieces.
You can also add some thickener or gum to your glaze. Some suggested products that will help your glaze to adhere are Gum Arabic, APT-11, CMC gum, bentonite, and Vee Gum. I’ve also heard of potters adding wallpaper paste to glaze to thicken it up. Though I’ve never tried this myself, and can’t vouch for its effectiveness!
Glazing your Bisque
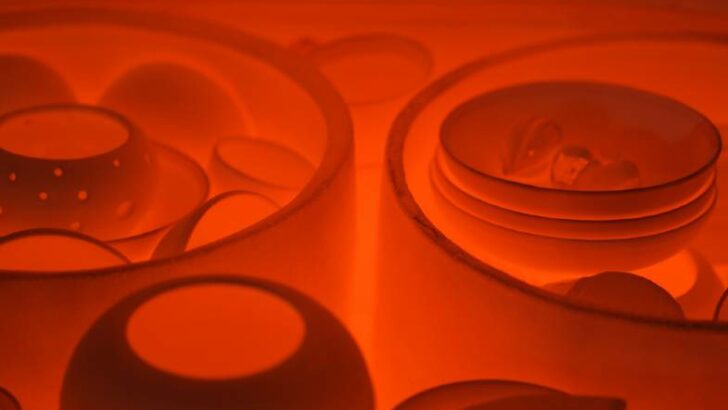
Once you are happy with the glaze thickness and coverage, you are ready to glaze fire. It’s usually recommended that you bring the glaze fire slower than you would normally do. Bringing the kiln up to temperature at a slower pace, to help the glaze mature at a steady rate.
Will the Glaze Melt onto the Kiln Shelf?
A related question is whether the glaze will run off less porous bisque when it’s being glaze fired.
Well, the answer to that question is, probably not. But there is no guarantee. As such, it’s best to be on the safe side. So, how can you protect your kiln shelves during the glaze fire?
- Keep the glaze well clear of the base of the pottery or foot ring. When you are wiping back the glaze around the base, make sure there is lots of clearance. If there is a wider clean area around the base, any running glaze is less likely to reach your shelves.
- Put your pottery on clay coasters (cookies or biscuits) when you glaze fire. You can either buy bisque coasters, or you can easily make them. Simply make a slab of clay and bisque fire it. Make sure that the cookie is wider than the piece of ware you intend to fire.
The pot then sits on the cookie coaster and drips or glaze splatters go onto the cookie, not your shelves. It’s not great if the pot sticks to the cookie. However, it’s better than the glaze sticking to your kiln shelf. - You can also use kiln stilts. These are little metal prongs or stilts that are held in place by a ceramic brace. The pottery sits on the metal pins rather than directly on the kiln shelf.
Kiln stilts are usually used with low fire clays and glazes up to cone 06. They are generally not used with mid or high fire clay.
- Also, make sure that you have used kiln wash on your shelves and your cookies. This helps prevent the glaze from sticking should it run.
- One suggestion is to use a glaze that is less likely to run. Some glazes, like flowing glazes, move more when they are fired. Use a glaze that tends to stay in one place when it’s hot.
To Glaze or Not to Glaze
Of course, glazing is not the only option when it comes to finishing your pottery. If you don’t need the ware to be watertight or food safe, then you can use different finishes.
You could perhaps use your overfired bisque as a way of experimenting with other techniques.
Some other suggestions for finishing your work if you don’t want to glaze them are:
- Using oxides or stains. This is a particularly nice way of finishing bisque if your pottery has interesting textures.
- Wood stains
- Acrylic paint
- Creating a bronze effect: You can do this by painting your bisque with Indian ink. Once the ink has dried, apply a thin layer of polish. Simple clear boot polish is fine. Then dust lightly with bronze powder. If you add a hint of green metallic powder, it creates the look of oxidized bronze.
Really, if you don’t want to glaze you can get very creative when experimenting with finishes.
Is it Worth the Effort?
Another good question is whether it is worth all the work involved? Salvaging pottery that you have bisque fired to cone 6 by accident takes patience and ingenuity.
Some potters will recommend that you trash it or smash it and move on with making more pottery. Other potters will advise that you can successfully glaze over fired bisque if you take your time and are patient.
Another way of thinking about it is to use these pieces as a chance to learn and experiment. If your attempts to salvage the pots don’t work, the worst that has happened is that you have lost time. You may have learned some interesting tips on the way. So, really, it boils down to how you feel your precious pottery time is best spent.
How to Avoid Bisque Firing to Cone 6 by Accident in the Future
Often over firing clay by accident happens when you are new to using a kiln. When you first start, there is a lot to keep in mind. Sometimes the mistake is simply the result of information overload and being distracted.
Here are some tips to avoid over firing your bisque in the future:
- Put a sign near your kiln. It might prompt you to double-check the cone you are firing to.
- Keep your studio tidy and label your cone boxes clearly. This can be hard if you are someone (like me) who prefers creative chaos. But it may help you avoid headaches in the long run.
- Another helpful tip is to keep your 06 and 6 cones in different places in your studio. If you have them sitting close to one another you may be at more risk of mixing them up.
Perhaps keep your cone 6 boxes on a high shelf. When you are reaching for them it will give you a moment to think about what you are doing.
Final Thoughts
If you have bisque fired to cone 6 by accident, it’s disappointing, but it’s not the end of the world. There are plenty of things you can try to salvage your work. But if you choose not to, you can use your time creatively to make more pottery. Let’s face it, it’s a mistake you are not likely to make twice.