If you are starting to glaze your pottery, you may have heard about kiln cookies. What are kiln cookies and why are they important?
Kiln cookies, sometimes called patties, are thin slabs of clay just a bit wider than the base of your pottery. You put them under your pots when you are glaze firing to catch any glaze drips and protect your kiln shelf.
Why Do We Use Kiln Cookies?
Kiln cookies are used for two main reasons:
Reason 1) Catching Drips
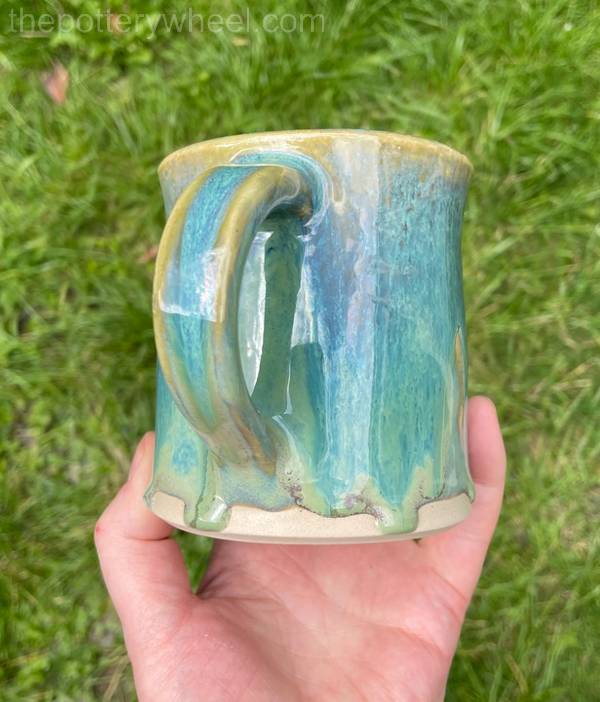
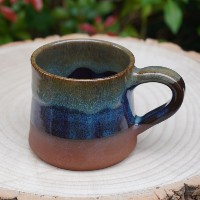
When we glaze fire pottery, the glaze melts. Some glazes are static, which means that they stay where they are when they are fired. Other glazes are ‘flowing’, which means that they become more fluid and move about when they are fired.
Flowing glazes can drip during a glaze fire. Drippy glazes can look lovely, but you need to avoid the drips from flowing right down to the base of the pot and spilling onto the kiln shelf.
When molten glaze cools in the kiln it hardens. If your glaze has dripped from the pot onto the shelf, it will harden into a glass drip that welds your pot to the shelf.
If you have used kiln wash on the shelf it is easier to remove a pot with glaze that has run. Most of the time you will be able to snap the pot off the kiln shelf by giving it a tap or a wiggle.
But even if the pot snaps off the shelf easily, you will be left with blobs of glaze on the kiln shelf that need to be chipped, sanded, or ground off the shelf. This takes time and elbow grease and is best avoided.
Kiln cookies catch the running glaze and stop it from reaching the kiln shelf. If the glaze drips onto the cookie, then the cookie will be stuck to your pot. You then have the issue of removing the cookie from the base of your pottery. But this is much easier to deal with than removing glaze from a kiln shelf.
Reason 2) Protecting Large Flat Pottery
Kiln cookies can also be used under large flat pieces of pottery as they are fired. Big flat items like platters, plates, and tiles tend to bend or warp when they are fired. This is because there is a lot of internal tension in large flat surface areas as they fire. Sometimes pieces will break under the tension.
Placing a cookie under a plate or platter will help with heat distribution during firing. The cookie acts as a buffer between the plate and the kiln shelf. If anything breaks or warps, it is likely to be the kiln cookie rather than your pottery.
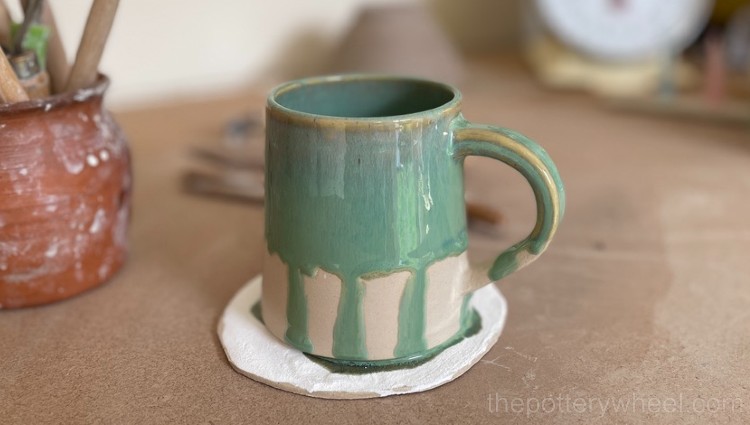
Here are some kiln cookies in action…
How to Make Kiln Cookies?
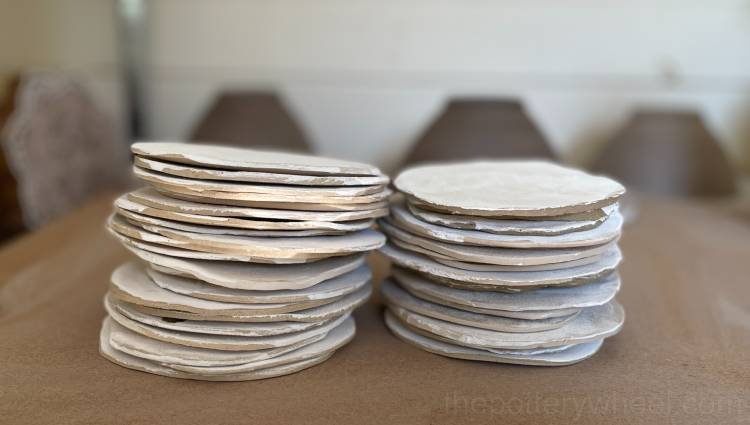
There are several ways to make kiln cookies. This is how I make them:
- Roll out a large slab of clay, until the slab is about 2mm thick
- Cut circles in the slab that are the size that I want the cookies to be
- Put the cookies to one side and allow them to dry
There are other ways that you can make kiln cookies. Here are some alternative methods:
- Pressing them out with the palm of your hand
- Throwing the clay at your wedging table at an angle. This spreads the clay out across the surface of the table into a thin patty.
- Throwing them on the wheel
Whichever way you make them, the ceramic cookie needs to be larger than the base of the piece that will sit on it. A rule of thumb is to make them about ¾ inches larger than your pottery. This should be enough to catch any running glaze.
Drying Kiln Cookies
Because kiln cookies are thin and flat, they tend to bend and curl up as they dry. I find the best way to avoid this is to dry the cookies sandwiched between a couple of sheets of plywood.
You can also put them on a drying rack and cover them to let them dry slowly. But I find sandwiching them works best.
It’s important that the kiln cookie isn’t bent because it needs to be stable enough to support your pottery.
You can also paint the pottery cookie with kiln wash. If you use kiln wash and your glaze drips, the pot is easier to remove from the patty.
Do you need to Bisque Fire a Kiln Cookie?
It’s not completely necessary to bisque fire kiln cookies before you use them. Generally, I don’t bisque cookies before I use them. Instead, I make my cookies thin and ensure they are completely bone dry before I use them in a glaze fire.
Because they are thin and dry, greenware cookies are normally fine in a glaze fire. I haven’t had any issues with them cracking or exploding.
One thing you do need to be careful about is that greenware cookies are fragile. As a result, you need to put your pots on them gently or they will break.
Once they have been through a firing and the cookie has become ceramic, then they are tougher. But the first time you fire a greenware cookie you need to handle it carefully.
Alternatively, you can put the cookies in with a bisque load and bisque fire them before you use them.
How Thick or Large Should Pottery Cookies Be?
I normally aim to make kiln cookies about half an inch (13mm) wider all the way around than the base of the pot.
But it depends a bit on the glaze I’m using. If I’m using a glaze that I know tends to drip, or if it’s a glaze that I haven’t used before I might make the cookie about ¾ of an inch (2cm) larger than the base of the pot.
Nevertheless, don’t go so large that they take up too much space in your kiln.
With regards to thickness, potters will often make their kiln cookies between 1/8 -1/4 inch thick. I aim to make mine about 1/8 of an inch (3mm). However, the thickness does depend on whether you are bisque firing them first.
If you are bisque firing them, you can get away with them being a bit thicker. About the thickness of a pancake is okay. But if you are putting them in bone dry, make them as thin as you can without making them too fragile.
How Many Times Can You Use Kiln Cookies?
The good thing about kiln cookies is that you can use them several times.
I find that after I’ve used them about 4 or 5 times, they will often get so brittle that they snap. Alternatively, depending on what clay you are using, the cookies might bloat if you fire them repeatedly. You can read more about the causes of bloating here.
However, it’s fine to continue to use them until they start showing signs of getting too old and tired.
How many times you can use them depends a little on the type of clay you use. That leads me neatly to the next question…
What Type of Clay to Use to Make Ceramic Cookies?
Like many potters, I make my kiln cookies out of scraps of recycled clay or clay from my reclaim bucket.
However, the patty does need to be the same cone or higher than the clay you are glazing. If you use a lower cone, there is a risk it will melt, warp, or bloat during the glaze fire.
Some potters recommend making kiln cookies out of cone 10 clay to make sure they are as robust as possible.
Other potters get a bit more technical and have a kiln cookie recipe.
One such recipe is to mix EPK Kaolin with Alumina Hydrate. Alumina Hydrate is refractory, which means that it is heat resistant. As such, it doesn’t melt and stick to your pottery. EPK helps to bond the alumina hydrate together and makes it into a workable mix that you can shape.
Another recipe is to mix grog, fire clay, or alumina with a high-temperature clay. This recipe is also designed to make kiln cookies that are refractory and can survive multiple firings.
Different Varieties of Kiln Cookie
Usually, when we talk about clay cookies for glaze firing, we mean the large, thin, flat patties described above. However, there are different types of kiln cookies. Here are some variations on the theme:
Small Kiln Cookies
Some potters use cookies that are smaller than the foot ring on the pottery. They are small discs of bisque-fired clay that fit just inside the foot ring.
These disks have 3 or 4 little raised bumps on the surface. The pot sits on the raised bumps. And the pottery can be kept steady on the small cookie by using a small amount of Elmer’s glue. Alternatively, you can use tacky wax to keep the cookie attached to the pot. The glue or wax will burn off as it fires.
Be aware that as your pot fires it will shrink a little. If the cookie shrinks less than the pot, it can get wedged in the foot ring. This is because the foot ring shrinks around the cookie and traps it.
Wadding
An alternative to using a kiln cookie is to use wadding. Wadding is normally made from a mixture of alumina hydrate and EPK. It is then rolled into small balls, beads or blobs about the size of a pea. 3 or 4 balls of wadding are stuck to the foot ring of your pot using a dab of glue. Once the pottery has been glaze fired, these dots of wadding tap off the foot ring easily.
The balls of wadding can be stuck to the foot ring when they are workable. These are then left until they are air dry. They are small enough that they are very unlikely to crack or explode during the glaze fire.
Alternatively, some potters will make a slab of wadding and cut it into little cubes. These are then bisque fired and placed under the pots during a glaze fire. They work a bit like kiln stilts.
Wadding is often used in atmospheric firings like soda firing or wood firing. The wadding raises the base of the pottery off the kiln shelf. This allows flashing, characteristic of atmospheric firing methods, to occur right around the piece, including the base.
Visit The Pottery Wheel Store
Fancy treating yourself to some homemade pottery? Looking for a unique gift? Check out my handmade pottery store…
How to Remove Kiln Cookies that Are Stuck to a Glazed Pot
If your glaze does run, you will need to find a way of removing the pot from the kiln cookie.
There are a few ways of doing this:
- TAP IT: If the glaze has only run a little, you may be able to simply tap the cookie off the pot.
- SAND IT: If the glaze has run more, you might have to chisel the cookie off. If that is the case, you will need to do a bit of sanding once the cookie is removed. You can either use sanding paper or a palm sander. If you are sanding or grinding, remember to wear a mask.
- GRIND IT: Another option is to grind the kiln cookie off the pot. A Dremel tool can work well, but they are small and take time. Grinding pads are quicker and can give you a more evenly ground finish. Diamond Core Tools grinders are gritty disks that you can stick to a batt on your wheel head. As they turn, you hold the pot over the grinder, and it will grind the cookie off evenly.
Final Thoughts
Kiln cookies are a simple but useful part of your pottery tool kit. Experiment with what works for you, and you will avoid hours of grinding glaze off your kiln shelves.


