Your cart is currently empty!
How to Make Colored Slip – 3 Easy Ways to Color Clay Slip
Published:
Last Updated:
Affiliate Disclaimer
As an affiliate, we may earn a commission from qualifying purchases. We get commissions for purchases made through links on this website from Amazon and other third parties.
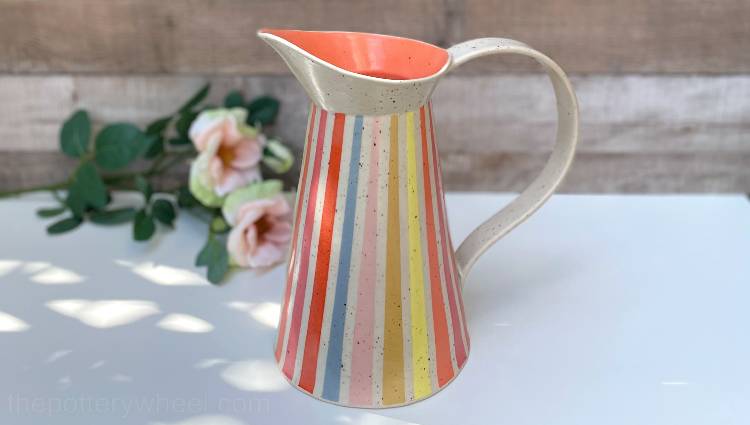
Colored slip is a great way to decorate your ceramics. But it can be expensive to buy, and you may not find exactly the color that you want. So perhaps you are wondering how to make colored slip.
To make colored slip, you mix a powdered oxide or stain with clay slip. The amount of stain added is normally between 5 and 10% of the weight of the clay in the slip. The best percentage depends on the color of the stain. And how deep you want the color of the slip to be.
In this article, I will look at how to make colored slip in 3 very easy ways. But before going onto the first method, here are a couple of general points:
- When handling powdered ceramic products like stains, or glazes, always wear a respirator to protect your lungs.
- You can make colored slip from stains or oxides. Although this article refers to stains, the techniques can be used for coloring slip with oxides. If you want to know more about the difference between stains and oxides, check out this article.
- Each of these ways to make colored slip is quite easy. But the one that suits you best, will depend on how much slip you need to make. And what you are going to use it for.
- You can also make colored clay using stains. Here is a step-by-step guide on simple ways to make colored clay.
With that said, let’s get onto looking at the 3 techniques.
Table of Contents
show
Method 1: How to Make Colored Slip
Here is a quick overview of the steps I will over in this section…..
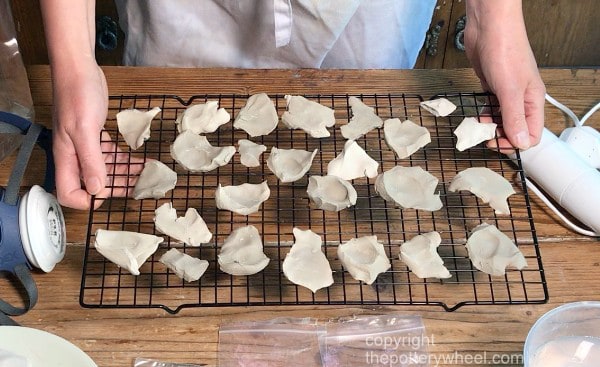
First, you need to collect some scraps of bone dry clay. This can either be scraps left over from the pottery you have been making. Or, you can easily make it by cutting off some thin slabs from your clay block.
I find it dries quickly if I pinch off little chunks and make them into rough cookie shapes. You can put the clay onto a cake cooling rack to speed up the drying process.
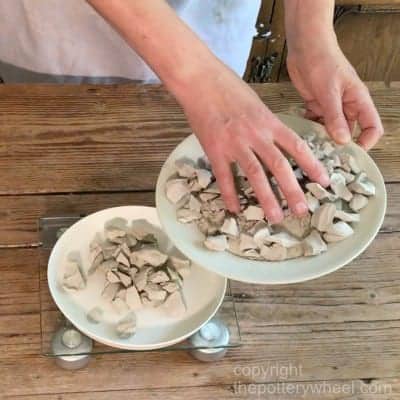
Once it is bone dry, weigh out the quantity of clay that you need. This depends on how much slip you want to make. To simplify things, I have measured out a pound of bone dry clay.
A pound of clay will make a small quantity of slip, but this is enough for one project. Plus, powdered stains are quite expensive. 4 ounces of stain will cost around $9. So, you don’t want to make more than you need.
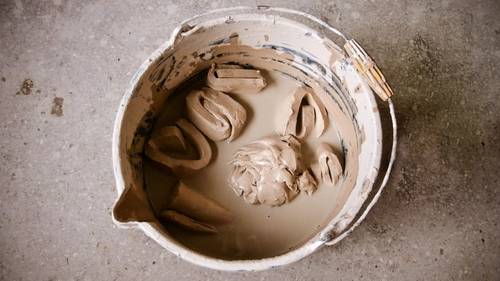
Next, put your dry clay into a container and cover it with a little bit of water. You just need enough water to make sure each bit of the clay is covered. To make sure you aren’t using too much water, break the clay into smaller chunks. This will ensure that no larger chunks are sitting above the water level.
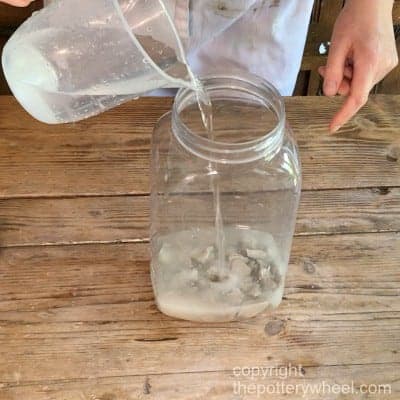
Leave the clay to ‘slake down’(1) for a couple of days. ‘Slaking down’ refers to when the clay crumbles and breaks down in water.
Bone dry clay breaks down in water evenly and absorbs water well. This is why it’s a good idea to dry your clay out to make slip. If you immerse lumps of wet clay in water, the slip tends to stay lumpy. But bone dry clay will break down to create a smoother slip.
Mixing the Slip
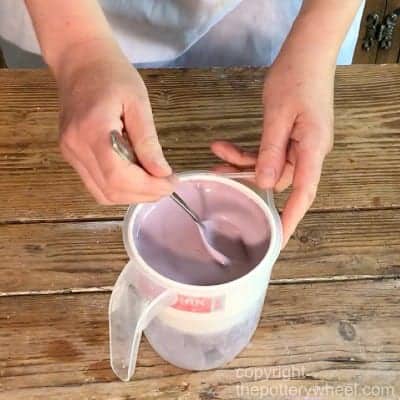
Once the bone dry clay has dissolved, you need to mix it up thoroughly. You can do this by hand with a fork or another implement. But if you have a spare hand blender or food blender then this makes mixing much easier.
If you’re mixing larger quantities, you might want to use a drill with a mixing attachment on the end.
Once you use your kitchen equipment for your ceramics, you shouldn’t then use them to make food. A hand blender is useful to have for your pottery, so buy an inexpensive one for your pottery.
When you have mixed the slip up thoroughly, you need to sieve it. You can use a regular kitchen sieve provided it has a fine mesh. The same rule applies to using a kitchen sieve. Once you have used it for clay, don’t use it to sieve food again.
However, you are better off getting a ceramic sieve. These come in a range of different mesh sizes. The mesh size refers to how small the holes in the mesh are.
You should use the correct mesh size for the clay you’re using. Mesh size 60 is best for stoneware and earthenware clay. Whereas, a mesh size of 80 or over is better for porcelain.(2)
Sieving the slip through a mesh, will get rid of any small lumps and filter out small bits of debris.

Adding Your Color
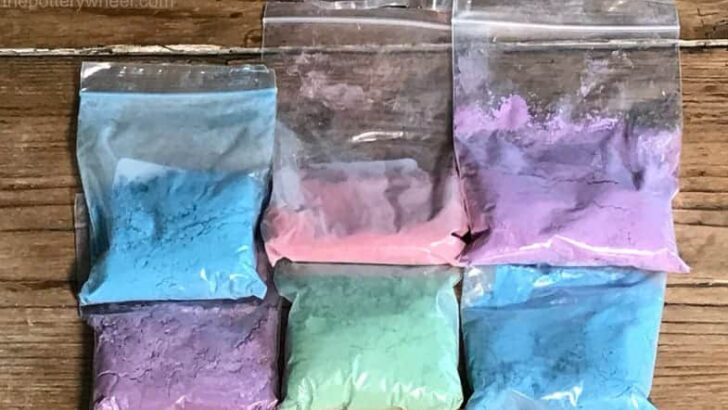
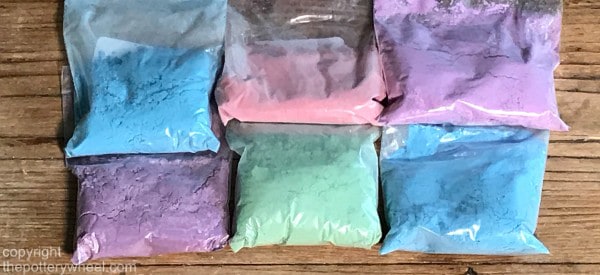
Once you have your nice smooth slip, you are ready to mix in your stain. There are different makers of ceramic stains, but the most well-known are Mason Stains.
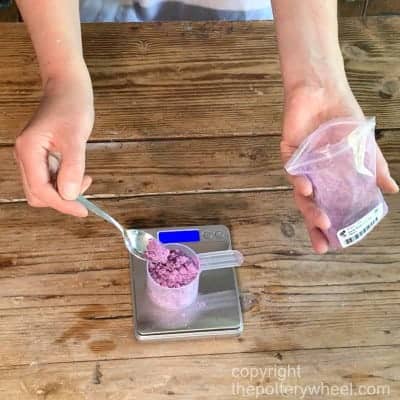
The first thing you need to do is weigh out your stains. Have a look at the section below about what quantity you might need.
You can add your powered mason stains in a few different ways. What I would say is that powdered stains will puff up into the air easily. Think about what happens when you put icing sugar into a cake mixer and then turn it on. You get a layer of fine sugar everywhere, including your lungs.
You can avoid this in two ways. Either use a food processor that has a lid on it. So, you transfer your slip to the old food processor. Then carefully add the stain to the processor with your mask on. Put the lid on the processor and then blend it together with the lid on.
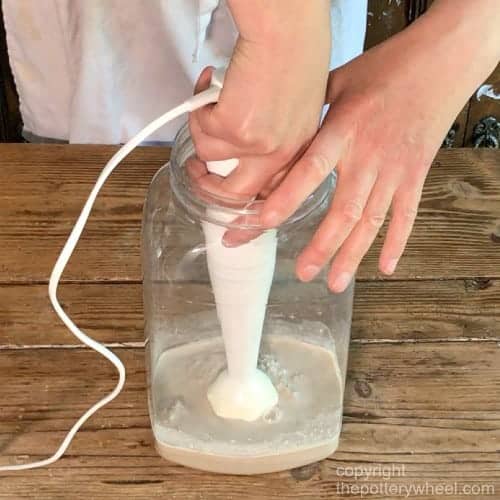
If you’re using a stick blender, you can make your stain into a paste before adding it to the slip.
Do this by putting your stain into a plastic food bag, like a transparent freezer bag. Then add just enough water to make the stain into a paste. Don’t add too much water, as this is adding more liquid to your slip. Just enough to make a paste.
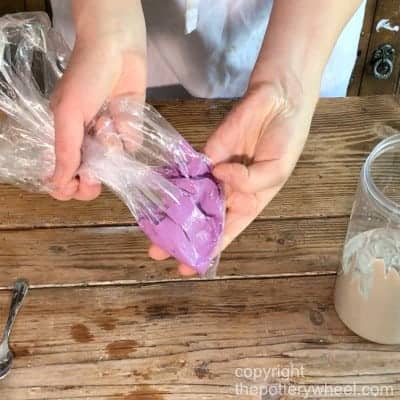
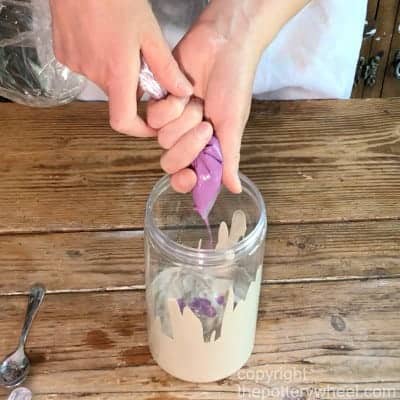
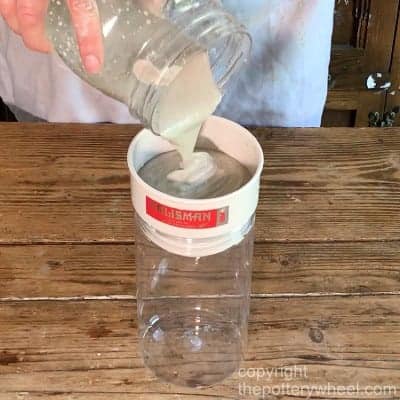
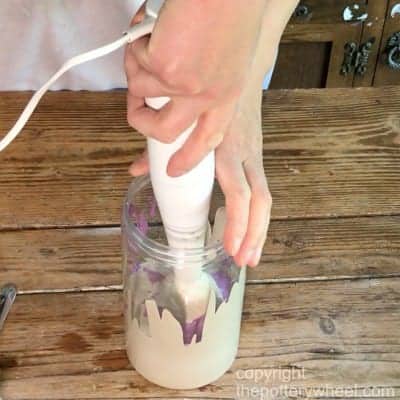
Then snip the tip off the bottom of the bag and squeeze the mix into your container of slip. Once the paste is in the container, you can use your stick blender to mix it up.
When you have mixed the stain in, it’s a good idea to sieve the slip once more. This will get rid of any small chunks of unblended stain. Even small lumps of stain that have not mixed in, will cause a speckled color on your pottery.
Once you have sieved your colored slip, you can transfer it into lidded jars so that it doesn’t dry out.

To watch the full step-by-step video for this method of making colored slip for clay, check out my YouTube video.
How Much Stain to Add?
There are a couple of ways to decide how much stain you want to add.
One way to do it is to gauge it by eye. Simply add some stain to your slip and see what it looks like. Does the color look intense enough for you? This is often ok if you are making a small amount of slip for a one-off project.
However, if you want to make exactly the same colored slip in the future, you need to measure your quantities.
Most of the time potters will use percentages when deciding how much stain to add. For example, they might use 10% stain in a slip. There are a few factors to consider when deciding what percentage of stain to add.
They are:
1) What Color Clay are You Using?
The whiter your slip, the more the color of your stain will show up. Using stains in clay slip that is white, off-white or buff/tan is fine.
It’s not really a good idea to try to stain slip made from very dark clay. This is because you will be fighting the color of the clay. And you will need to add a lot of stain for the color to show through.
2) What Color Stain are You Using?
Usually darker colored stains can be added in smaller amounts. This is because they are more intense, and less is needed to make a bigger color difference to your slip.
For example, when using black, dark blue, or dark green stains, you will often only need to add between 5 and 8%. Whereas lighter colors like violet or yellow will need at least 8% to make a difference. In fact, lighter-colored stains may need up to 25% to really show.
Let’s look at an example:
2lbs of clay is 32 ounces. 8% of 32 ounces is 2.56. So, if you want to add 8% stain to 2lbs of clay, you need to add 2.56 ounces of stain.
However, it also matters whether you are adding the stain to wet or dry clay. This will also have an impact on how intense the stain is.
3) What is the Weight of your Dried Clay?
2lbs of bone dry clay contains more clay particles than 2lbs of wet clay. The reason for this is that around 30% of wet clay is water. So, if you add stain to wet clay, your ratio of clay to stain will be higher.
Normally in pottery when we talk about weights we are talking about dry weights. Once water is added, it’s harder to get precise results.
So, if you are using the above method, you weigh the bone dry clay. And you add stain as a percentage of the dried weight. Even though the slip will weigh more once the water is added.
However, some potters do add clay as a percentage of the wet slip weight. Once you have experience making slip, you will get a feel for how much stain to add. And provided you are making a small batch or don’t need to replicate an exact color, this is fine.
Method 2: How to Make Colored Slip
Another way is to make slip from clay scraps out of the splash pan of your wheel or scrap bucket. If you use this method, make sure the scraps are from the same clay body. You want to avoid cross-contamination of different types of clay.
To make the slip, you collect the scraps into a container. Then add some water if necessary to make the mixture more liquid.
Mix the clay and water up with a hand blender. If you have a larger bucket of scraps, you can use a drill with a mixing attachment.
Once the mixture is thoroughly blended, you need to sieve it. You can do this by transferring it from one container to another and pass it through a sieve.
When your slip is the consistency you are happy with, you can add your stain. Some potters will add the stain as a dry powder. If you do, remember to wear a respirator. Otherwise, mix it into a paste first as described in the previous method. Read my comments above about how much stain to add.
Mix the stain into the clay slip thoroughly, and then sieve the mixture again.
Once you are happy with the color of the slip you can transfer it into a bottle to store.
If you store the slip for a while, the water will separate out from the colored clay. This is fine, you can just mix it up by shaking the bottle. Or if you want to thicken the slip, you can pour off some of the top layer of water.
Measuring the Specific Gravity of Slip
If you want to add a stain to wet slip and be precise you could measure its specific gravity. You can do this easily by putting some slip into a tall cylinder known as a graduated cylinder.
Then drop a hydrometer into the slip. This will give you a specific gravity reading which depends on the water/clay ratio. If you then want to replicate your slip color, you need to make wet slip with the same specific gravity.
Method 3: How to Make Colored Slip
The other option is to make your slip up from dry materials.
There are a number of different slip recipes available online. The advantage of making slip from clay powders is that you have exact weights. So, you can make the slip how you like it. And by adding particular amounts of stain, you can make exactly the same colored slip again and again.
One of the often referenced slip recipes is by Robin Hopper. Here is his slip recipe(3).
- 75% Ball Clay
- 10% Kaolin
- 10% silica
- 5% Feldspar
Stain can then be added in particular percentages to the above mixture and mixed together with water.
How to Make Colored Slip – Using Stains or Oxides
You can color slip using stains or oxides. Oxides are raw materials such as cobalt carbonate and red iron oxide. They are made from metal elements.
Stains, on the other hand, are made out of a mixture of oxides and colored dyes. These have been heated up, quenched, and ground up again. This process is known as ‘fritting’ and it makes the stains more stable. Put simply, stains are a more processed or refined version of oxides.
Using stains instead of oxides has some advantages. These are:
- Stains produce more predictable, repeatable colors. The color of a stain might darken when it is fired. But basically, a stain will normally be the same color when it has been fired and glaze.
By contrast, oxides can turn a completely different color when they are fired. Also, certain oxides can react with glazes and change the color of the glaze. For example, copper carbonate can turn a clear glaze green. - Stains are less toxic.
- You get a wider range of colors with stains.
Nevertheless, many potters prefer to work with oxides. One of the reasons for this is that oxides have a rustic natural look. If this suits your style and work, then you might prefer to work with oxides.
How to Make Colored Slip – Test, Test, Test!
Testing in pottery is important, and you will often see potters recommending that you ‘test, test, and test again’. This is because you often won’t know what something will look like until you try it.
Also, when you make colored slip, you often won’t know exactly what the colors look like till they are fired. Some colors will look quite pale when they are wet slip. But once they have been bisque fired, they will darken. Glazing also intensifies a lot of colors.
In addition to this, different potters will recommend using different percentages of stain in slip. So, it’s often best to have a go yourself and see what colors you like.
A good idea when you are making colored slip is to make a test tile. This will show you what different percentages of stain look like in your colored slip.
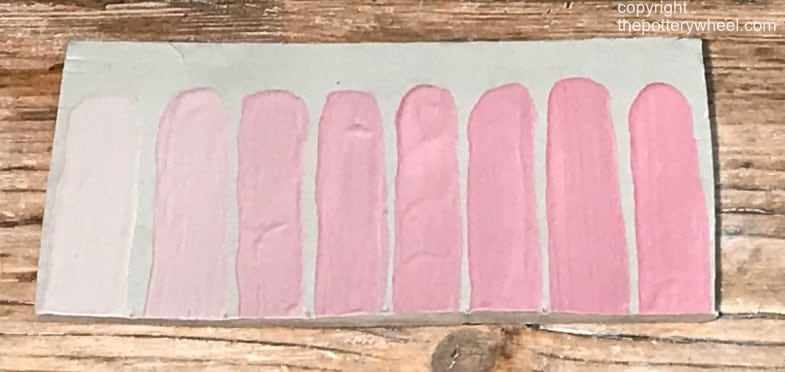
Making a Test Tile for Colored Slip
First, make a tile of clay out of your chosen clay body and let it go leather hard.
Make a batch of slip out of the same clay body, and add a small percentage of stain, say 2%.
Paint a strip of this slip mixture onto the tile and write on the tile that this is a 2% mixture. You can use an underglaze pencil to write the 2% or scratch it into the leather hard clay.
Then add more stain to the slip, so that you have a 5% stain content. Repeat the process, so that you have a row of lines made out of slip with increasing percentages of stain.
Weight Chart for Stains on Test Tile
This chart below assumes you are coloring 1lb of clay (16 oz). The weight of the stain is how much you need to add in order to see what that percentage of stain will look like. Remember that if you are adding to the same batch of slip, you have already added some stain. So you need to subtract the weight of the stain already in the slip, when adding more.
| % of Stain | Weight of that % | How much to add |
|---|---|---|
| 5% 8% 10% 13% 15% 18% 20% | 0.8oz 1.28oz 1.6oz 2.08oz 2.4oz 2.88oz 3.2oz | 0.8oz 0.48oz 0.32oz 0.48oz 0.32oz 0.48oz 0.32oz |
Bisque fire the test tile. Then paint half of the lines of stain with clear glaze and glaze fire it. You will then have a test tile that shows you what the different percentages of stain look like when fired. The tile will indicate what bisque firing and glaze firing does to the color of the slip.
The colored slip will look a bit darker when bisque fired, and darker still when glazed.
If you want to read a step by step guide for making a test tile for slip, check out this article.
Final Thoughts
If you’ve been wondering how to make colored slip, I hope you are reassured it is quite a simple process. I find coloring slip and clay a lot of fun, and you can make some beautiful pieces. It’s another area of pottery where you can let your creativity and personal style blossom. Enjoy!