If you are taking pottery classes, the chances are that the school or studio has some glazes for you to choose from. They may even glaze your pottery for you. But once you start buying your own glaze and glazing your own pots, you need to consider a few factors when choosing a pottery glaze.
Glazing your pottery can make it look amazing. It’s the final step in making your pottery, and the way it looks is important. But choosing a pottery glaze is based on more than the color, texture, and patterns it creates when it’s fired.
Some other factors to consider are:
- The kind of clay you are using and the temperature at which the clay should be fired.
- How you want to apply your glaze.
- What kind of kiln the pottery is being fired in.
- Whether you need your pottery to be watertight and functional or decorative.
8 Tips on Choosing a Pottery Glaze
In this guide to choosing a pottery glaze, we will cover each of these factors in turn. Let’s start with the different ways that pottery glazes look once they are fired.
1) What Do You Want Your Pottery Glaze to Look Like?
Many different styles of pottery glaze can complement your pottery and help you achieve the look you want.
Clear Glaze
As the name suggests, a clear glaze is transparent and doesn’t have any color. It is a clear coating that allows you to see the underlying clay body or the decoration that you have applied to your pots.
There are lots of different ways to decorate pottery. For example, you might have painted your pots with colored clay slip or colored underglaze.
Clear glaze is a good option if you have already decorated your pots using one of these techniques. Glaze seals the surface of the pottery and protects your decoration too.
The beauty of clear glaze is that it can enhance the colors you have used to decorate your pottery. For example, if you apply clear glaze over colored slip or underglaze, the glaze will bring out and intensify the colors of your decoration.
You can select a clear glaze that is shiny, matte, or satin (semi-matte). Choosing a shiny, matte, or satin pottery glaze will have an impact on the overall look of your piece once fired.
As a heads up, I’ve found that matte clear glaze can look a bit milky and not completely clear at times. It helps to avoid applying a matte clear glaze too thick, or you might find you get a hazy, cloudy finish.
Opaque Colored Glazes
Rather than decorating your pots with underglaze or slip, you might want to use the glaze itself to add color to your pottery. There is a massive range of different colored pottery glazes to choose from.
If you are shopping online for glazes, you will often be able to filter the glazes with a particular color choice. For example, if you love blue, you can search for blue glazes and the different choices will be narrowed down for you.
It’s worth bearing in mind that the color of an unfired glaze is often completely different from its color once it is fired.
For example, you may be applying a blue glaze, which looks red-brown when it comes out of the pot. However, the glaze materials change during the firing process and come out of the kiln the right color.
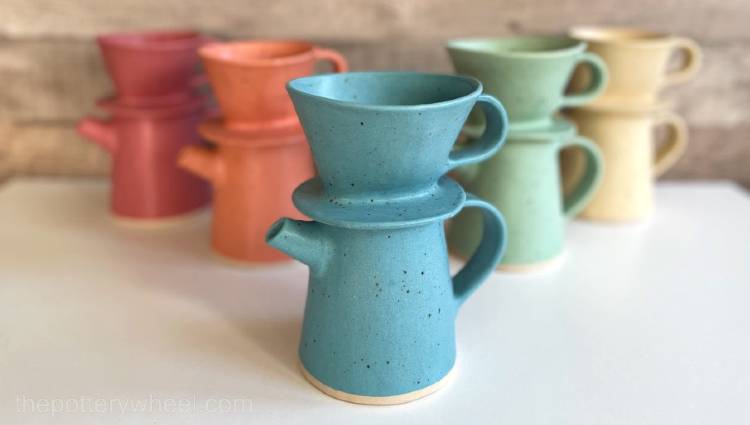
Semi-Transparent Glazes
Another option is to use a semi-transparent glaze. These glazes are colored but see-through.
Because you can see through them they can be applied over decorated pottery and you can see features of the clay body itself. For example, if you use a speckled or flecked clay body, these details will be seen through the glaze.
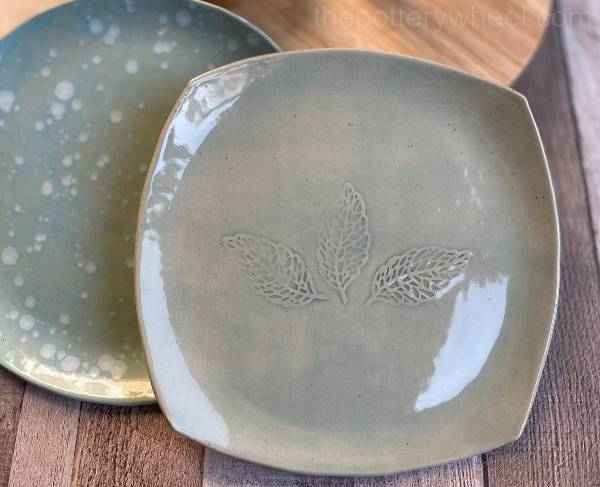
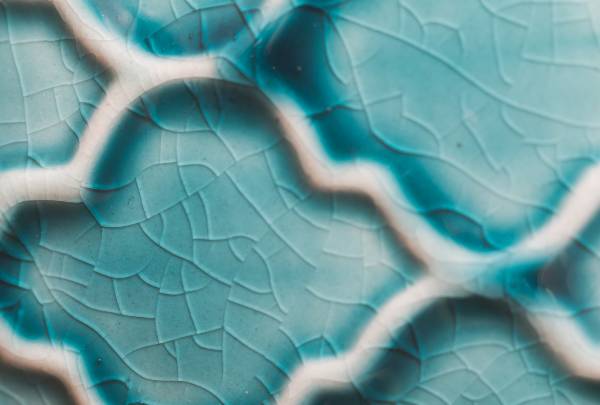
Breaking Glazes
Another lovely feature of semi-transparent glazes is that they are often formulated to become thinner over raised areas on a piece of pottery. The idea is that these glazes highlight different textures on the surface of your pots.
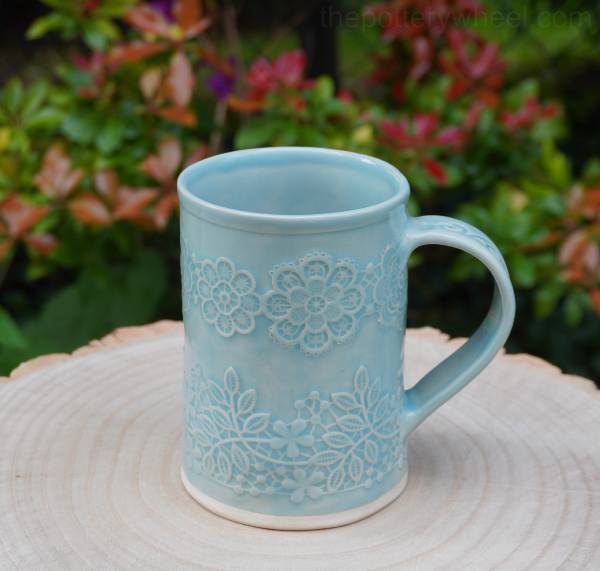
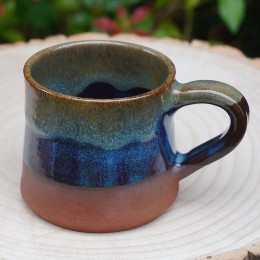
These glazes are often described as ‘celadon’ glazes. They bring out the pattern that has been added to the clay surface because it pools in recessed areas. This mug above was glazed using Amaco Aqua Celadon glaze, which you can look at here.
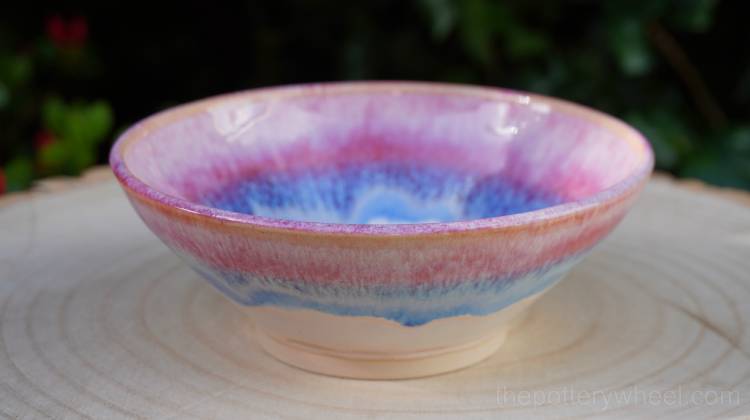
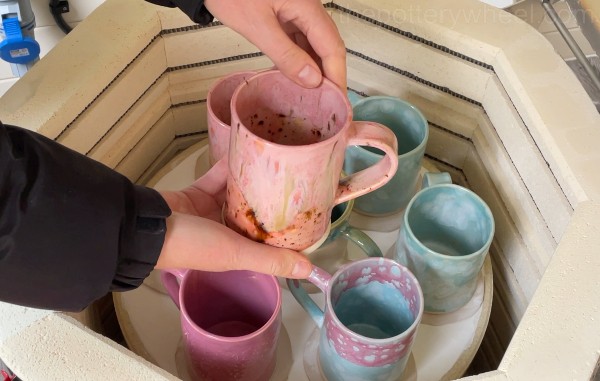
Flowing Glazes
As their name suggests, flowing glazes become fluid and move about when they are fired. This means that they can run or drip if you want to create a drippy-looking effect on your pots.
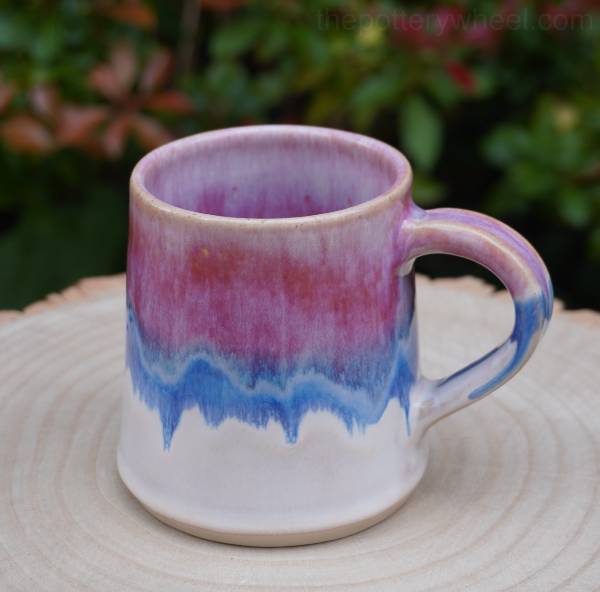
Flowing glazes can be used on their own, or they can sometimes be layered with other glazes. When they are layered, they will often run into each other and create new colors and patterns when they blend together.
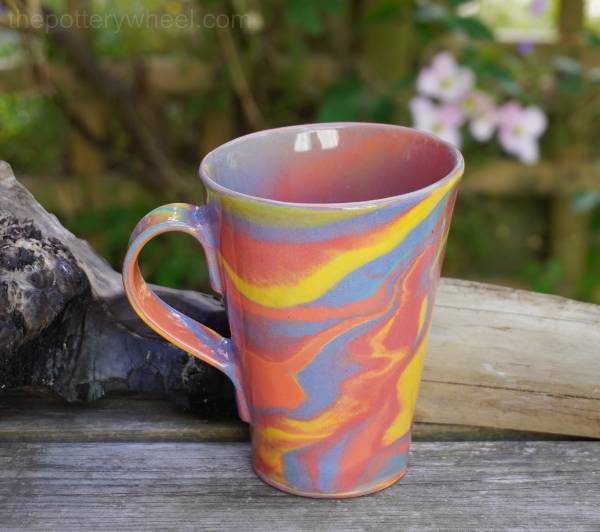
Not all glazes are compatible with each other, but many are. If you buy glazes within the same range, from the same manufacturer, they are more likely to be compatible. For example, you could use the Potter’s Choice range by Amaco.
The mug in the picture above was glazed with a combination of Potter’s Choice glazes. These glazes can be paired up in endless combinations and create lovely glaze effects. You can buy this range of glazes at a lot of pottery supply stores, one of which is Blick.
Often manufacturers will specify if glazes are compatible and can be used together. If you want to try layering a glaze and you aren’t sure if they are compatible, then it’s best to make a test piece or test tile to see what they look like when used together.
Also, it’s important to remember that layering glazes can alter their composition. Glazes that are food-safe on their own, may not stay stable and food-safe if they are combined with other glazes.
If you are layering glazes on pottery that is meant for use with food and drink it’s important to check if the combination is food safe. You can send away a sample of your glaze to a laboratory such as BSC Labs to check whether any toxins are leaching from the fired glaze.
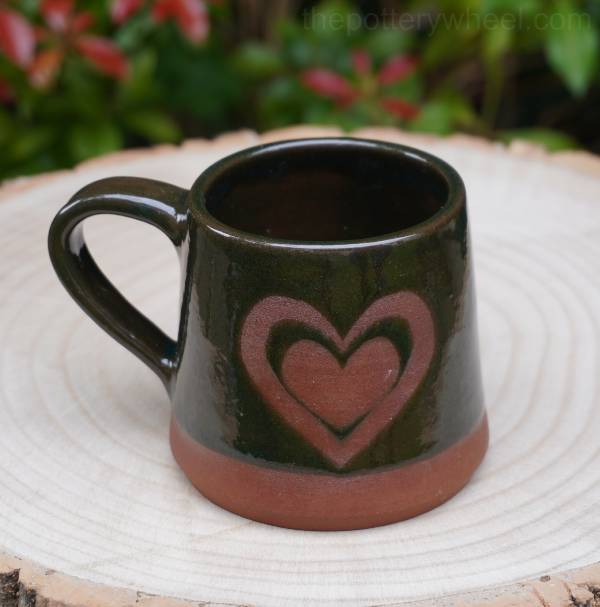
Static Glazes
In contrast to flowing glazes, static glazes don’t move about when they are fired. They are sometimes described as being ‘stiffer’ and they tend to stay put on your pottery.
Unlike flowing glazes, stiff glazes don’t blend into each other when they are fired.
Textured Glazes
Most glazes are gloss, matte, semi-matte, or satin. However, some glazes are made to have a unique textured finish.
One of the most common textured glazes is ‘crackle glaze’. Crackle glazes are designed to give a crazed effect when fired. This crazing can range from delicate fine lines, to bold distinctive crazing.
However, there are other textured glazes, such as lava glazes and crawling glazes that have bold unusual textures.
‘Crawling’ is a feature of pottery glaze that is often thought of as being a problem or ‘glaze defect’. It happens when the glaze crawls away from patches of the pottery when it’s being fired leaving areas of the underlying clay bare.
However, some glazes are specially formulated to create a crawling effect. Here is an example of a crawling glaze used deliberately.
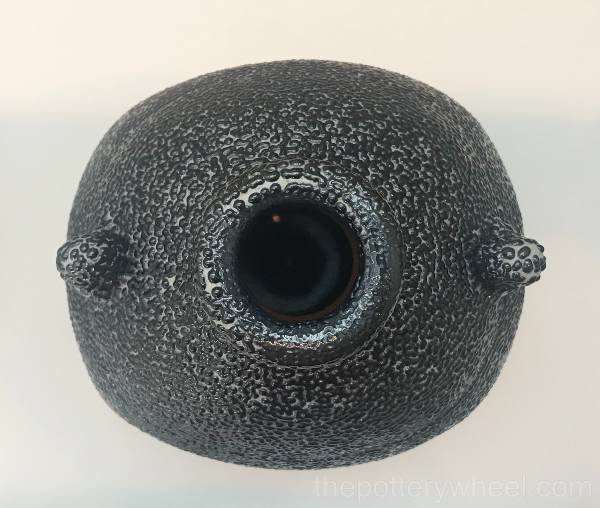
Porcelain clay with volcanic ash glaze. On display at the V&A, UK
Very textured glazes aren’t suitable for use on dinnerware or for drinking vessels. Food particles would get stuck in the texture and would harbor bacteria.
As a result, textured glazes like this are sometimes called ‘sculptural’ glazes, as they are best suited for decorative pottery that won’t be used for food and drink.
Raku Glazes
Another range of glazes that you may come across if you are wandering around a pottery store is “raku glazes”.
Raku is a particular way of firing pottery. In raku, the pottery is heated in a special raku kiln that is fueled by a burnable gas like propane. It is then removed from the kiln when it is red hot, using long metal raku tongs. The hot pottery is then put into a container that has combustible material like paper or sawdust in it.
The container is covered over and the paper or sawdust will burn. This reduces the amount of oxygen in the container and creates lots of carbon in the atmosphere.
A kiln that has an atmosphere with a reduced amount of oxygen, is called “reduction firing”. The combination of the reduction atmosphere and the carbon creates particular effects on the glaze used on the pottery. I’ll say a bit more about reduction firing and its effect on glazing later.
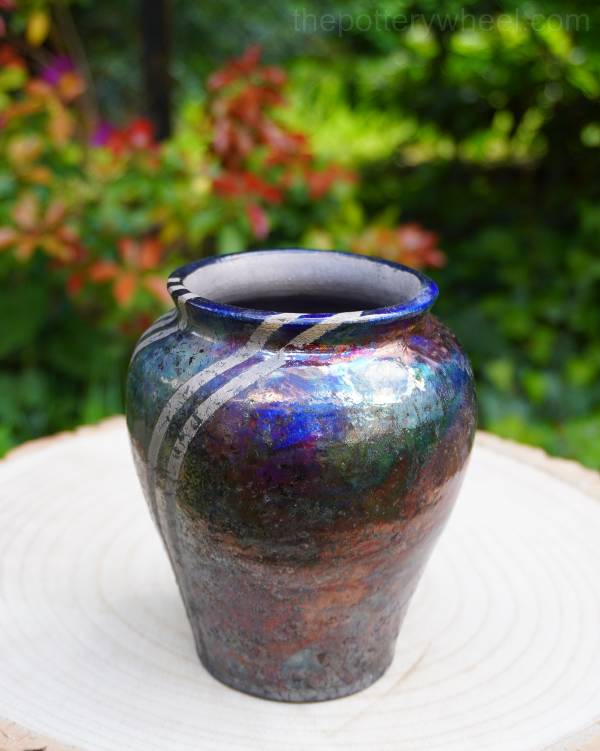
You can raku fire using regular glazes. However, there are specially formulated raku glazes that are specifically developed to enhance the raku effect when fired. They often have metallic lusters and crackle patterns.
It’s possible to use raku glazes in a regular electric kiln, but the results are often a bit underwhelming and dull. Raku glazes definitely work at their best when they are fired using the raku technique.
If this appeals to you, you can read more about making a raku kiln and using raku glazes here.
Over Glazes
Another type of pottery glaze is sometimes called an overglaze or overglaze luster. These glazes create metallic and iridescent effects on ceramics that have already been glaze fired before.
Luster glazes are used to add metallic details to pottery and include, amongst other effects, gold, silver, and mother of pearl.
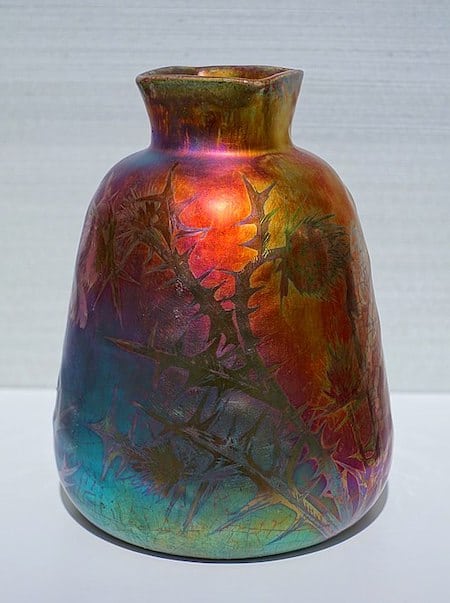
The luster glaze is applied to the glazed surface and then the pottery is fired again at a low temperature of around 1472F (800C).
They are fired at this lower temperature because the metals in the overglaze don’t need higher temperatures to melt. But also, because you don’t want the existing glaze on the ceramic surface to soften again. If the underlying glaze starts to melt, the look of the luster glaze will be spoiled.
Check out my pottery store!
If you like the pottery that is featured in this article, you can check it out in my Etsy store, where I sell a selection of handmade, stoneware pottery.
2) The Type of Clay You Are Using
So far, we’ve covered the look of different types of glaze. However, the look of a glaze is not the only factor to consider when choosing a pottery glaze. There are other practical considerations too.
One of the most important things to think about is whether the glaze is compatible with the clay you are using.
There are lots of different types of pottery clay, but these types and brands usually fall into one of the following categories:
- Earthenware
- Stoneware
- Porcelain
There are quite a few differences between earthenware, stoneware, and porcelain clay. But one of the main differences is the temperature at which they should be fired.
Earthenware clay is normally fired at low fire temperatures, which are around 1100-1150C (2012-2102F). By contrast, stoneware temperatures are considered mid-high fire and usually range between 1180-1300C (2156-2372F). Finally, porcelain is usually a high fire clay and the temperature firing ranges are often 1220-1300C (2228-2372F).
When you are starting out, these different temperature ranges can look a bit daunting. The best thing to do when you are choosing a pottery glaze is to find out what clay you are using. Then choose your glaze accordingly.
For example, if you know you are using an earthenware clay body, then choose from the “earthenware glazes” range. Likewise, if your clay is stoneware, then choose a glaze from the “stoneware glazes” section.
Most pottery suppliers’ websites make it easy to find the kind of glaze you need. Generally, they will have different sections on their sites for earthenware and stoneware glazes.
Just make sure that if you are using earthenware clay you choose an earthenware glaze, and likewise use stoneware glaze on stoneware clay.
What Happens if The Glaze is Not Compatible with the Clay?
The reason choosing the right pottery glaze for your clay is important is that the clay and glaze need to ‘fit’ each other.
Clay and glaze both become more dense and shrink when they are fired. Some shrink and mature more than others. If the glaze you are using shrinks more than the clay, it puts the glaze under a lot of tension.
This can cause the glaze to crack and craze when it comes out of the kiln. This is called “crazing”. You can learn more about what causes crazing and how to prevent it here.
Alternatively, if the clay has shrunk more than the glaze, the glaze is too big for the clay body. If the glaze is too big for the pottery, pieces, and shards of the glaze can pop off the pot when it’s been fired. This is called “shivering”.
Also, if you fire a stoneware glaze at lower earthenware temperatures, the glaze doesn’t mature fully. As a result, it can look dull and lifeless.
Similarly, if you fire a low fire earthenware glaze at higher stoneware temperatures, the glaze can be overfired. Overfired glaze can lose its color, become matte, or develop small blisters on the surface.
3) How Do You Want to Apply Your Glaze?
Another factor to consider when choosing a pottery glaze is how you want to apply it.
There are several ways to apply glaze to your pots. The two most common ways are either to brush the glaze onto your bisque pots or to dip your bisqueware into the glaze.
Brushing and dipping pottery glaze are different, so you need to know which technique you want to use before choosing which to buy.
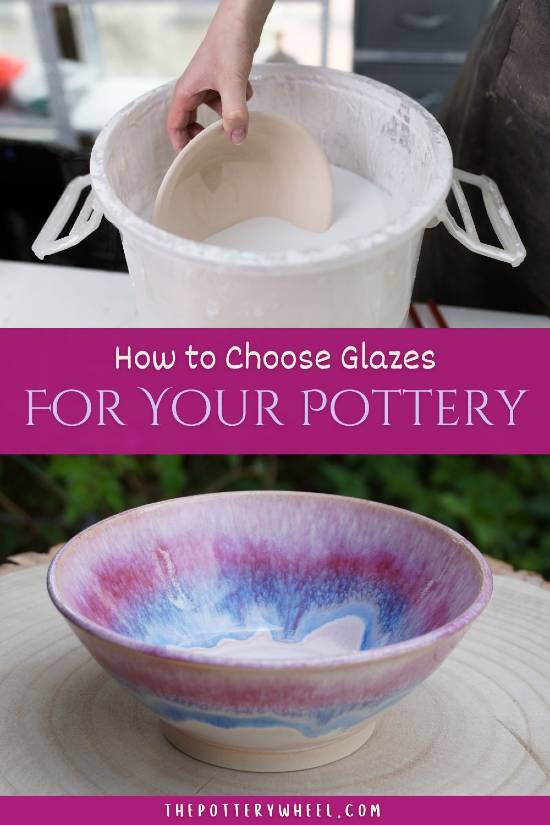
Dipping Glazes
You can buy dipping glazes ready-made in liquid form. They are usually sold by the gallon, so dipping glazes come in larger amounts.
Alternatively, you can buy powdered glaze which you can mix with water. I’ll say more about powdered and ready-mixed glazes a little later.
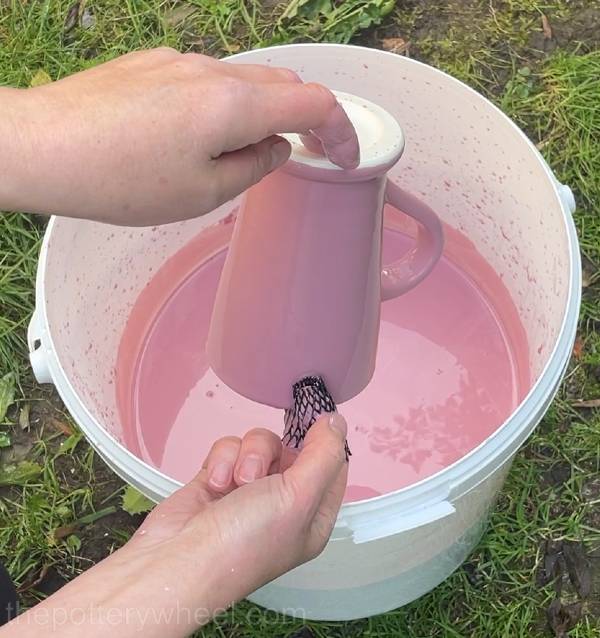
When dipping pottery, the bisque ware is submerged into a container of glaze for around 3 seconds. It’s then lifted out and the glaze dries quickly, usually in around 30 seconds or so.
You can hold the bisqueware with your fingers or a pair of dipping tongs when you dip the pot.
Tongs are good because they leave only small marks on the glaze where they have been holding the pottery. You can rub these little marks out easily with your finger when the glaze has dried.
Pros of Dipping Glaze
It’s easier to get an even coat of glaze by using the dipping method. If you dip smoothly you usually don’t get streaks or uneven patches on the glaze.
If you get any drips or uneven sections in the glaze, you can rub these back with your finger, or a craft knife once the glaze has dried on the pot.
It’s quick and easy to apply. Also, although a gallon of dipping glaze costs more in the first instance, you will be able to glaze more pots with a gallon. So, it’s a more economical way to glaze your pottery in the long run.
Cons of Dipping Glaze
It’s easier to dip pots into containers of glaze that are a bit larger and deeper. You can dip into smaller containers but it can be a bit fiddly. Having large containers of glaze takes up space, and may not be ideal if you are not making that many pots.
There are a wider range of colors and effects available in brushing glazes. I think this is because brushing glazes are popular with potters making pottery at home and manufacturers create wider ranges.
So, let’s take a look at brushing glazes now.
Brushing Glazes
As the name suggests, brushing glazes are applied by brush. They are thicker than dipping glazes so that they don’t run off the pot when they have been applied.
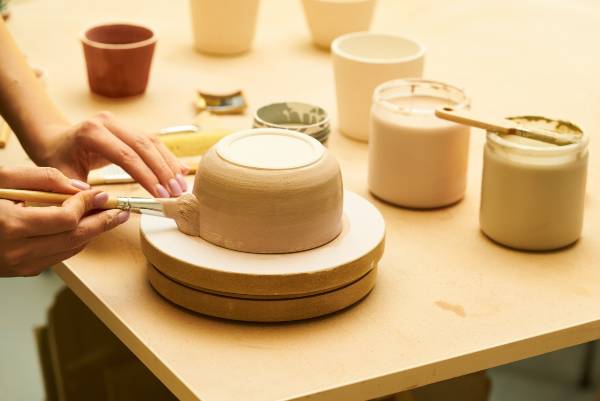
It’s normal to apply 3 coats of brushing glaze, allowing each coat to dry between applications. Applying brushing glaze evenly can be tricky. This is because it dries quickly when it is applied to bisqueware, and brushstrokes can be visible in the dried glaze.
One tip to help get an even coat is to cross-hatch your layers. This means that you use brush strokes in one direction on the first application. Then change the direction of the brush stroke on the second and third. You’re less likely to get streaks using this method.
You can buy special brushes that are designed for the application of pottery glaze. These are wide and flat, with soft bristles called hake brushes. It’s easier to float glaze onto pottery with these wide, flat, soft brushes.

I find that you are less likely to get streaks with flowing glazes that move about when they are fired too.
Usually, brushing glaze is sold in pints, so it comes in smaller quantities than dipping glaze.
Pros of Brushing Glazes
They come in a wide range of colors and finishes. Plus, you can buy them in smaller quantities, which means you can test out the different glazes without committing yourself to buying a large amount.
It can be easier to experiment with layering and combining glazes using brushing glazes.
The smaller pint quantities of glaze are cheaper in the short run.
Smaller bottles of brushing glaze take up less space and are easier to store than big containers of dipping glaze.
Cons of Brushing Glaze
If you are buying a lot of brushing glaze, it does work out more expensive in the long run. You can glaze more pots with a large container of dipping glaze than you can with a pint pot. And pints of brushing glaze are less economical in the long run.
Make sure that you clean the rim of the brushing glaze and close the pot well. Otherwise, the glaze can dry out and thicken or harden quickly between uses.
4) Powdered Dry Glaze or Ready Mixed Liquid Glaze?
Glaze can be bought in a ready-made liquid form, or in a dry powder that needs to be mixed with water before use. Buying powdered glazes can work out cheaper in the long run. However, the convenience of buying a ready-made glaze may be an important factor for you.
If you are new to glazing, the idea of mixing your own glaze can feel a bit daunting. But it’s surprisingly easy to do. Manufacturers usually supply their own mixing instructions and how much water to add to the powder.
At its simplest, mixing dry glaze involves mixing the powder with water and passing it through a sieve. The sieve (mesh) smooths out any lumps in the mixture.
If you buy a glaze that is designed to have a speckled effect, the speckles are normally produced by larger chunks in the glaze. These will be removed when you sieve the glaze. So, you will need to add the gritty residue back into the glaze once it’s been sieved.
It’s worth remembering that you can also experiment with making your own glazes from glaze recipes. This is more complicated than adding water to a dry glaze powder. But once you start making your own glazes, you have more control over the way your pottery looks.
5) Low, Mid and High Fire Glazes
I mentioned earlier that it’s important that the glaze you are using is suitable for your clay body. This is known as the ‘clay glaze fit’.
As mentioned, whether a pottery glaze fits a particular clay body depends on the temperature at which the clay and glaze both need to be fired. Both clay and glaze can be categorized as being low fire, mid fire, or high fire.
Low, mid, and high fire glazes have different qualities. Knowing a little about these properties can help you in choosing the right pottery glaze for you.
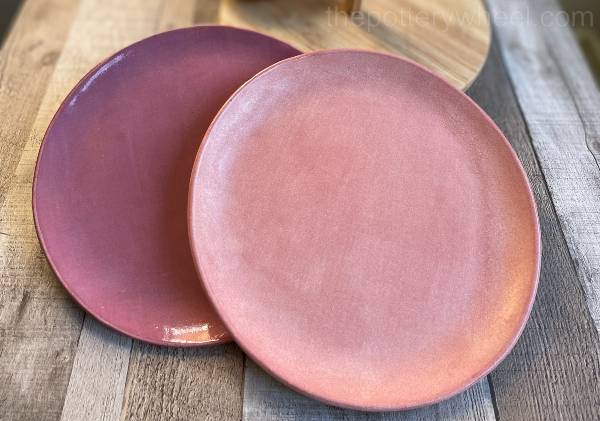
Broadly speaking low fire earthenware glazes have strong, bright primary colors. By contrast, mid and high fire glazes have earthier more organic colors.
Here is an overview of some of the features of low, mid, and high fire glazes:
Low Fire Glazes
- Low fire temperatures range between 1830-1940F (999-1060C).
- This is generally cone 06-04
- Low fire glazes can produce strong colors without needing as much power to fire. This makes them an economical option.
- There are many low fire commercially produced glazes available.
Mid Fire Glazes
- Mid fire temperatures range between 2157-2232F (1186-1222C).
- This is generally cone 4-6.
- In the past, mid fire and high fire glazes were used to create pottery with earthy more subdued colors. However, as glazes have advanced, it is possible to achieve vivid colors in this range. Also, an advantage of these glazes is that they tend to be strong. This makes them good for functional purposes.
- There are also many mid fire commercial glazes available.
High Fire Glazes
- High fire temperatures range between 2305-2381F (1263-1305C).
- This is generally cone 8-10.
- Electric kilns are not often used at the high firing range. Partly because it draws so much electricity to do so. High firing is normally done in gas kilns. And as there are fewer gas kilns used, there are also fewer commercially produced high firing glazes on the market.
- However, potters are often as generous as they are inventive. And it is not uncommon for ceramicists to share high fire glaze recipes on forums.
6) Do You Need Your Pottery to Be Watertight and Functional?
Pottery glaze creates a decorative effect on your ceramics. But glaze is not just about making pottery look nice. It also has a function too, which is that it can seal pottery too.
The kind of glaze and clay you use will determine how watertight and functional your pottery is.
Earthenware Glazes
Earthenware pottery is fired at lower temperatures. Whilst earthenware pots are turned ceramic in the kiln, the clay is still porous. This means that although the pottery won’t break down in water after it’s been fired, it will still absorb liquid.
As a result, earthenware pottery needs to be glazed. If you didn’t glaze your earthenware ceramics, the pottery would absorb liquid from food and drink. And vessels like vases would seep water over time.
Earthenware glazes create a seal over the porous surface of the underlying ceramic body.
However, when earthenware pottery is glazed, the glaze sits on top of the ceramic body in a hard separate layer. Although the clay and glaze are stuck to one another, the bond is relatively fragile. This means that earthenware glaze can chip off quite easily with everyday wear and tear.
Stoneware and Porcelain Glazes
Stoneware and porcelain clay or glaze can withstand being fired at mid and high fire temperatures. Temperatures above 2157F (1156C) are normally called ‘stoneware temperatures’.
When pottery is fired at mid and high fire temperatures the clay and glaze melt into one another. The glaze doesn’t sit on top of the underlying pottery. Instead, an intermediate layer between the clay and glaze is formed where the two mingle and become one.
This mingled layer means that mid and high fire glazes are stronger than earthenware glazes. They are less likely to chip and flake off.
Another factor to bear in mind is that the higher the temperature that pottery is fired, the less porous it is. So, clay that is fired at stoneware temperatures doesn’t need to be glazed to be watertight. Whereas, fired earthenware clay does need to be glazed or it will absorb water and other liquids.
7) What Kiln Are You Using?
When you are starting out making pottery, you probably won’t own your own kiln. It’s more likely that someone else will be firing your pots for you. Perhaps you are making your pottery at a local school or studio. Or maybe you are making pottery at home and using a local pottery firing service.
Either way, it’s important to find out what temperature your pottery will be fired at. For example, perhaps you are renting space in a kiln that belongs to a local potter. They may have a kiln that fires at either earthenware or stoneware temperatures. Or they may only fire at earthenware temperatures.
This will affect your decision when choosing a pottery glaze. You can learn more about finding a local pottery firing service here.
Gas and Electric Kilns
There are lots of different ways of firing pottery. The two most common types of pottery kilns are gas and electric kilns. Of the two, electric kilns are more common among studio and hobby potters.
Although electric kilns are more common, you might end up firing your ware in a gas kiln. Perhaps you have a friend who has a gas kiln, and they have offered to fire your pots for you. Or maybe a local potter or school has agreed to help you out. Lots of schools, including my old high school, have gas kilns.
The reason this is relevant is that glazes can look different according to how they are fired. A glaze fired in an electric kiln can look quite different from the same glaze fired in a gas kiln.
Oxidation and Reduction
Electric and gas-fired pottery glazes can look quite different because of the chemical processes that happen during firing. These processes are called oxidation and reduction, which I mentioned earlier on when talking about “raku glazes”.
Oxidation and reduction refer to the type of atmosphere that is created in the kiln when it’s being fired. It depends on how much oxygen is present in the kiln during firing.
Usually a “reduction atmosphere” can be created in a gas kiln, not in an electric kiln. Electric kilns tend to work in an oxidation atmosphere. Glazes fired in the oxidation of an electric kiln tend to be cleaner and brighter colors.
The same glaze fired in a gas kiln where there is less oxygen may look earthier, darker, and more rustic. A reduced atmosphere tends to create darker more intense glazes.
If you want to know more about oxidation and reduction, you can check out my simple guide to these two processes here. Either way, it’s worth being aware of the differences, as it might affect your decision when choosing a pottery glaze.
8) Safety Considerations When Choosing a Pottery Glaze
In the past, it was commonplace to use lead in glazes. The lead gave the glazes bright, glossy surfaces.
However, growing awareness of the risks of using lead in pottery glaze has led to its legislation. Lead is still sometimes used in glazes, but the manufacturer has to state if it is present. Also, manufacturers have to state if their pottery glaze is food-safe.
Most pottery glazes these days are lead-free and food-safe, but some are not, and important to check before you use a glaze.
Lab Testing Your Glazes?
It’s often assumed that if you use lead-free glaze then your ware will be safe for functional use. However, some suppliers sensibly state that the term ‘food safe’ can’t be applied to glaze as it is supplied.
This is because whether a piece of pottery is food-safe depends on other factors. These include, amongst other things, how the pottery was fired, the texture of the ceramics, and what clay was used.
Generally, it’s thought that ware will be food-safe if a lead-free glaze is fired to maturity. And if a suitable clay body has been used. However, increasingly suppliers recommend that food safety can only be guaranteed if the ware has been tested in a laboratory.
There are certified ceramics testing laboratories that will test a potter’s ware for leaching. This may sound like a tedious procedure. However, sending off a sample to be tested can be relatively straightforward.
As a rule, if you are making functional ware, choose a lead-free glaze. However, if you and your family are choosing to eat from it, it may well be worth getting it tested. This applies if you are selling ceramics you have made too.
Final Thoughts
Learning about glazes and choosing a pottery glaze can feel like a lot of information to start with. I hope that this article has given you some guidelines to help you begin.
If you have any unanswered questions, you can always call your local pottery store and ask them for suggestions about what glazes to use. Better still, if you could pop in and speak to them in person. Pottery suppliers are usually very knowledgeable and happy to help.