Your cart is currently empty!
How to Glaze Raku Pottery – Glazing and Underglazing Raku
Published:
Last Updated:
Affiliate Disclaimer
As an affiliate, we may earn a commission from qualifying purchases. We get commissions for purchases made through links on this website from Amazon and other third parties.
Raku firing is quite different from regular firing in a gas or electric kiln. If you are new to raku, this may have left you wondering if raku glazing techniques are different too. When I started out in raku, I was left with similar questions. I wanted to know exactly how to glaze raku pottery and if I had to adapt my glazing techniques. Here is what I have learned about glazing raku…
Techniques for applying glaze to raku are similar to glazing other kinds of pottery. However, there are differences, like leaving areas of raku unglazed for carbonization in post-reduction. Additionally, there are particular glazing techniques involved in naked raku. Also, measures need to be taken to stop underglaze fading on raku.
How To Glaze Raku Pottery – First Things First
Glazing raku is not essential. There are numerous different techniques for decorating your raku, some of which do not involve applying glaze. However, if you are using glaze, then the first thing to know is what type of glaze to use.
What Type of Glaze to Use on Raku Pottery
The key thing to remember about raku firing is that it is a low-fire process. That means that although the pottery becomes red hot, the temperatures reached are relatively low.
Typically, a raku firing will be between cone 010 and 06. This is between 1,400 and 1,832F (800-1,000C).
In raku firing, the aim is to get the pottery and glaze to a temperature where the glaze has melted. The pottery is then removed from the kiln and various post-firing steps are taken.
The important point here is that the glaze needs to be able to melt at lower raku temperatures. Consequently, it’s a good idea to choose a low fire glaze.
However, because the results of a raku fire are quite unpredictable, it is the ideal chance to experiment a bit. Sometimes the only way to know what a glaze will look like is to try it out. It may not look how you intended it to be the first time around. However, this is an opportunity to tweak your approach and try again.
Some potters state that you can use mid and high fire glazes on raku if you adapt your approach (source). One technique is to apply a low fire glaze on top of the high fire glaze. When the low-fire glaze melts, it encourages the underlying high fire glaze to melt too. This approach means that you are not limited to using lower fire glazes.
Nevertheless, if you are new, you may want to get a handle on using low fire glazes first.
Special Raku Glazes
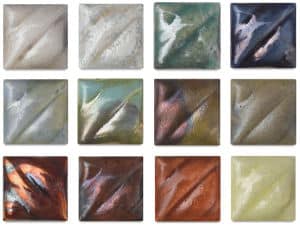
It is possible to buy or make glazes that are specifically designed for the raku approach.
Using a special raku glaze is not absolutely necessary. You can try out any glaze that fires in the right temperature range, whether they are raku glazes or not.
I would suggest simply looking at a range of low-fire glazes and seeing which one you like the look of!
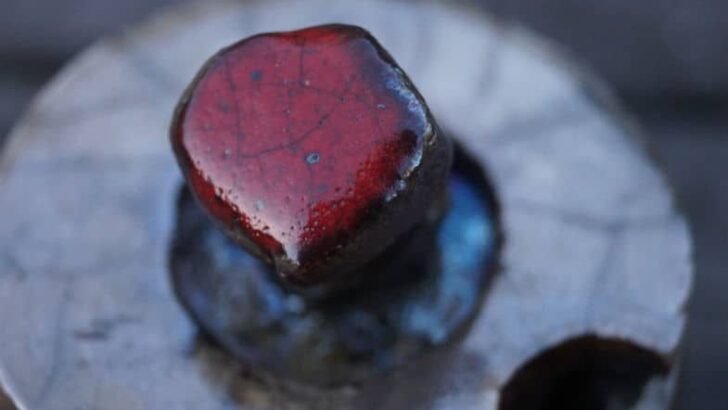
Green glazes tend to have copper in them. Copper in a raku firing can create a vivid range of intensely bright colors.
Your green glaze can be gloss or matte. A low-fire green gloss glaze can create a gloss luster effect in a raku firing. And a copper matte glaze can create very vivid rainbow metallic colors on raku pot.
There are advantages to buying a special raku glaze. One of these advantages is that the manufacturer will provide a sample piece. This will give you a good idea of what the glaze will look like.
An ordinary low fire glaze would normally be fired in the oxidation atmosphere of an electric kiln. This glaze may look very different when it has been through the post-reduction process of raku firing.
Not knowing how your glaze will turn out is part of the charm of raku. However, if you want a more predictable result, a raku glaze may give you that.
How to Glaze Raku Pottery – Applying your Glaze
Glaze can be applied to raku pottery in the same way it can be applied to other bisqueware. Techniques can include dipping, brushing, spraying, and sponging to name a few. There is no need to adopt any particular approach.
Brushing is a popular technique because you don’t have to have a large quantity of glaze in a bucket. You can simply brush it on from its container.
As with glazing other pottery, you should avoid getting glaze on the foot ring of your pottery. Your design may not have a foot ring. In this case, you just need to avoid getting glaze on the part that will sit on the kiln shelf. Otherwise, the glaze will melt onto the shelf.
If you get glaze onto the foot ring, don’t panic. You can easily wipe this off with a damp sponge or cloth.
Tips on How to Glaze Raku Pottery
- The first layer of glaze will try quickly (usually in a matter of minutes). This is because the water from the glaze absorbs into the bisqueware.
- Apply a generous layer of glaze to ensure that the pottery is covered well.
- Apply about 3 or 4 layers of glaze and allow each coat to dry in between.
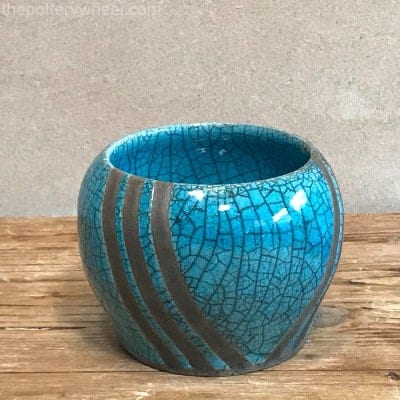
- If you leave areas of the bisque unglazed these will turn back in the raku process. This is due to carbonization. The dense matte black finish can provide a very attractive contrast to colored or metallic luster glaze.
- If you use crackle glaze, the cracked areas of exposed clay will carbonize during reduction and turn black. This is a well-known raku effect.
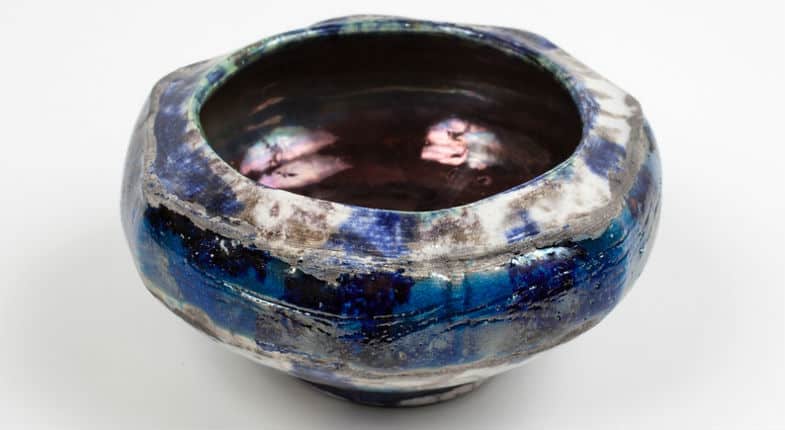
Glazes can be combined on raku to good effect. You can apply different glazes to different parts of the pottery to set up a contrast in colors and tone. And, you can let the different glazes run into one another too.
Layering Glazes on Raku Pottery
If you are dipping your pottery in glaze, one dip is usually enough. If you want to combine two colors, you can dip a second time into a different glaze. However, you may need to thin the glaze down by adding water, so that multiple layers are not too thick.
If you are brushing your glaze, you may need to apply 3 or 4 layers of glaze. It is fine to use different glazes for different layers. Different glazes can interact in surprising ways, and create beautiful results. It can be a lot of fun to experiment with combining different glazes on your piece.
Glazes with different levels of opacity and color can interact with interesting results. Also, the glazes may have different melt fluidity. Very simply, melt fluidity is how liquid or fluid a glaze becomes when it melts. You might choose to layer up two flowing glazes. Or you might mix a flowing glaze with a static one.
With Raku, the world is your oyster, in terms of trying things out. For example, I came across one potter who applies matte copper glaze over clear gloss glaze to amazing effect.
How to Glaze Raku Pottery – Naked Raku
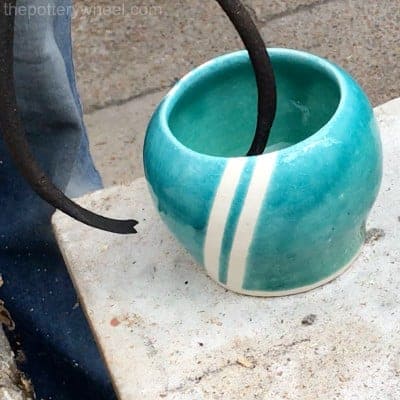
Naked raku is so-called because at the end of the firing process, the pottery is unglazed. However, the process of making naked raku can involve using a ‘resist glaze’.
Once the pottery has been bisque fired, it is dipped in resist slip. Then, once the slip has dried, it is dipped in resist glaze. The resist slip is really a thin substance that stops the resist glaze from sticking permanently to the pottery.
During the raku firing the resist slip and glaze shrink and crack. The underlying ceramic body is exposed through the cracks. When the pottery is then put into a reduction chamber, the exposed areas go through carbonization and will blacken.
After the reduction process, the resist slip and glaze will flake off the pottery. Any that remains on the pottery surface can be wiped or brushed away. The result is a bare ceramic surface with a striking cracked black-and-white pattern.
Neither resist slip nor resist glaze are commercially available. Or at least, not widely so. Most potters rely on making their own through generously shared recipes or trial and error.
How to Glaze Raku Pottery – Applying Clear Glaze on Underglaze
Another way of using glaze on raku pottery is to apply clear glaze over underglaze decoration.
Again, the application of clear glaze onto raku is much like applying it to other bisqueware. In essence, the underglaze needs to be dried and then the clear glaze is applied over the top. If the underglaze is not sufficiently dry this can lead to underglaze smudging and bleeding.
Clear glaze is usually applied by brushing, dipping, or sponging. If you have used clear glaze before these techniques will be familiar. However, there are things about using underglaze on raku pottery that need to be taken into consideration.
Using Underglaze on Raku Pottery
Underglaze can be applied to raku pottery in the same way that it is applied to any other. Often the underglaze is left to dry and then a clear crackle glaze is applied on top before raku firing.
Underglaze Colors Fading on Raku
However, it is a common complaint amongst potters that the color of their underglaze fades in raku firing.
One of the suggestions made to compensate for this is to apply more layers of underglaze. The thinking is that the thicker the underglaze the deeper the pigment.
However, this solution generally has rather limited success, with the underglaze still losing its color even when layered up.
A suggested reason for this color loss is that the colors are losing their brightness in the reduction atmosphere.
This makes sense, as oxidation is associated with bright colors. Whereas reduction tends to produce more organic mute colors. From this perspective, it is the atmosphere, rather than the temperature that is bleaching the colors.
Preventing Underglaze Colors Fading on Raku
Here are some suggested underglaze techniques to prevent your colors from fading during a raku fire.
- Apply your underglaze to the pottery when it is greenware. Bisque fire the pottery and then apply the clear crackle glaze to the bisque.
- Add a ceramic stain to your underglaze. Ceramic stains tend not to change color when they are being fired and may make your underglaze color more resilient.
Final Thoughts
Raku firing can feel a bit like the wild west of the pottery world. Because the results of raku are unpredictable, trying to create a very specific effect through glaze can be a challenge. This is particularly true when you are just learning raku and finding your feet.
If you want to know how to glaze raku pottery, your best bet is to experiment a bit. Accept that not everything you make will be great, but that some pots will be amazing.

