Your cart is currently empty!
What is the Right Temperature to Bisque Fire Pottery?
Published:
Last Updated:
Affiliate Disclaimer
As an affiliate, we may earn a commission from qualifying purchases. We get commissions for purchases made through links on this website from Amazon and other third parties.
Before owning a kiln, I took my greenware along to a local pottery shop and would get it fired there. I told them what clay I had used, they fired it and I collected it when it was done. But firing ceramics yourself in your own kiln raises all sorts of questions. The first question I encountered was what is the right temperature to bisque fire pottery? What I have found is that….
The most common temperature to bisque fire pottery is cone 06 – 04. This equates to around 1830 – 1940F, (999-1060C). However, potters do bisque fire at other temperatures. The right temperature to bisque fire depends partially on the clay you are using. And on the glaze or decorative finish you want.
With so much to bear in mind, it can be nerve-wracking bisque firing for the first time. You don’t want to mess up. However, there are a few simple guidelines that you can follow. Once you are confident in what you are doing, you can experiment a bit to find what fits your style. So, read on…
Generally speaking, most potters will bisque fire their pottery somewhere between cone 08 and cone 04. If you’d like to know more about cones before you read on, check out this article here.
The right temperature to bisque fire pottery will depend on the clay body you are using. However, it also depends on the kind of result you are looking for. The higher the bisque firing temperature the denser and less porous the ceramics becomes.
Before exploring these variables, it’s important to know what is happening at different temperatures in a bisque fire. So, here is an overview of the different stages of a bisque fire:
The Temperature to Bisque Fire Pottery – Different Stages of Bisque
Greenware undergoes a number of physical and chemical changes at different temperatures during a bisque fire. This is an overview of what happens at different temperatures.
Below 212F (100C)
It’s a good idea to hold your kiln for a few hours below the boiling point of water. This is known as candling. Even though your pottery may feel bone dry, it will still contain some moisture when it goes in the kiln.
This is known as mechanical water or free water. It is simply moisture that has not been able to evaporate thoroughly from the greenware. Your greenware will only dry out as far as the surrounding atmosphere allows. So, your greenware will dry out to match the moisture level in your pottery room.
If your kiln goes above the temperature of boiling water, this free water will turn to steam. As it turns to steam it expands rapidly and can cause your pottery to crack or explode in the kiln.
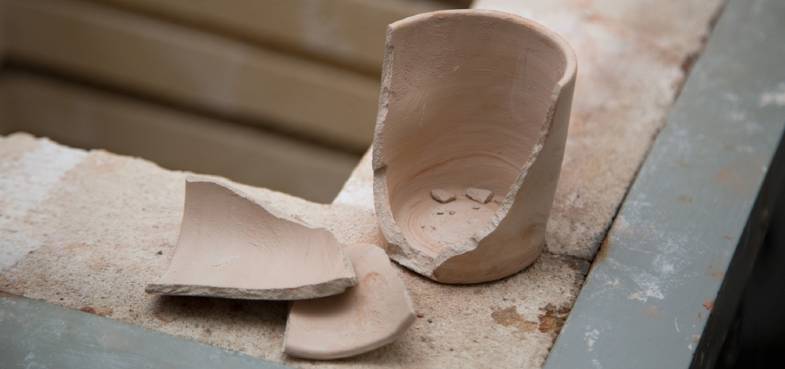
The way to avoid this is to candle your kiln by holding the temperature below boiling point. This allows the mechanical water to evaporate out of the clay so the clay is absolutely dry.
How long to candle your ware is another question. Some potters will candle overnight. This raises the issue of whether you are happy to leave your kiln unattended when it is on. For more on this subject, see my article here.
If you have an electric kiln, you can check moisture levels by holding a mirror to the top peephole. The mirror will fog up if moisture is still escaping from the pottery and leaving the kiln1.
450F (232C)
At around 450F, organic matter or carbon-based compounds in the clay body will start to burn away.
622F (350C)
Magnesium carbonate oxidizes to form magnesium oxide.
842-1022F (450-550C)
Clay also contains water that is chemically bonded to the clay particles. In order for the clay to become ceramic, this needs to be driven out of the greenware. This process occurs around 842 -1022F.
1112F (600C)
Once the temperature in the kiln goes above 1112F, Sulfur compounds will burn out of the clay. It is the burning off of sulfur in a bisque fire that creates that eggy smell you will notice.
1544F (840C)
Calcium carbonate decomposes.
1600F (870C)
Sintering is the process whereby greenware clay becomes ceramic. Gradually the clay particles move closer together and become denser. The clay shrinks and becomes hard ceramic that is no longer soluble in water. Sintering occurs as the sulfur compounds and carbonates are burned out and decompose.
Why are These Temperatures Important in Bisque Firing?
Some of the reasons for bisque firing clay are:
- Get rid of mechanical and chemical water in the clay
- Burnout carbonaceous materials
- Densify the clay through sintering
Each of these processes makes the clay more suitable for glazing. As such, it’s important that they are achieved in the bisque firing process.
Bisque firing successfully requires that the temperature increases slowly enough for the processes to occur. And also, that the right temperature is achieved so that the greenware has been sufficiently processed.
So, successful bisque firing isn’t just about the temperature reached, it is also about how fast you fire. In general, it is accepted that it is best to bisque fire slowly. This is particularly the case for the early part of the fire when the mechanical water is being driven out. Whatever temperature you are bisque firing to, it’s recommended that you go slow.
With all that said, let’s have a look at the best temperature to bisque fire pottery…
What Temperature to Bisque Fire Pottery?
Occasionally pottery is fired just once. This is called single firing, and the pottery is effectively bisque fired and glaze fired at once.
However, most of the time, firing takes place in two or more firings. The first being the bisque fire and the second being the glaze fire.
Clay becomes ceramic during the bisque fire. The process of becoming ceramic occurs when the clay undergoes sintering. However different clay bodies are fully mature at different temperatures.
- Low fire clays will mature between cone 06 and 04
- Mid fire clays will mature between cone 4 and 7
- High fire clays mature between cone 8 and 10
Bisque Firing and Low Fire Clay
Often potters will bisque fire low fire clay at a higher temperature than the glaze fire. A handy rule of thumb is to bisque fire 2 cones higher than you glaze fire2. For example, bisque firing at cone 04 and glaze firing at 06.
This may seem to go against common sense. Aren’t glaze fires supposed to be hotter? Well, not always.
One problem that can occur if your glaze fire temperature is higher than your bisque fire is pinholing.
This occurs when organic and carbonaceous material continues to burn out of the clay during a glaze fire. The gases that are created by the burn out create bubbles or pinholes in the glaze that don’t heal.

If you glaze at a higher temperature than your bisque fire, carbon burnout may continue and ruin your glaze. So, a solution is to glaze fire at a lower temperature.
Some Considerations:
Not all potters use this approach. Some find that they can quite happily bisque and glaze at cone 06 without difficulty.
Other potters argue that if you glaze at a lower temperature, it sits on the clay in a separate layer. During a glaze fire, the glaze and the clay surface melt and mix together to form a strong mixed bond.
If the clay does not heat up enough it does not mingle with the glaze. As such the glaze stays on the surface and the bond is less durable.
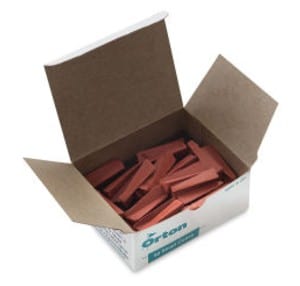
Orton Cones – View on Blick Arts
Some potters feel that the overall effect of a glaze that adheres in this way has less depth. Nevertheless, bisque firing low fire clay at a higher temperature than the glaze fire has its benefits.
The main one is that you are more likely to have a successful glaze outcome without firing imperfections like pinholing.
Bisque Firing and Mid or High Fire Clays
Mid fire clays generally mature at cone 4-7 and high fire clays can be heated to between cone 8-10. As such the above rule of thumb of bisque firing 2 cones higher than you glaze fire doesn’t apply.
Usually, with mid and high fire cones, the glaze fire is hotter than the bisque fire. Usually, organizations like schools will bisque at cone 04 and fire at cone 6. However, there are different considerations when deciding what temperature to bisque fire at when using mid and high fire clays. Here are some things to think about….
Some potters argue that it is always best to bisque fire at cone 043. They recommend a cone 04 bisque fire regardless of what clay and glaze you are using. From this position, as long as you are bisque firing slowly, cone 04 is an optimal temperature to bisque fire.
However, as stated above, other potters choose to bisque fire at other temperatures. Sometimes they do their first fire as low as 010.
It is important to bear in mind that whatever cone you choose will affect the type of bisque you produce. The higher the bisque temperature, the harder your ceramics will be. Let’s look at the effects bisque temperature more closely…
Soft or Hard Bisque
As explained above one of the key stages in bisque firing is sintering. This is when the clay densifies.
During densification, the clay particles lose water and carbonaceous and organic material. The surface of the clay particles is also bonding together and the space between the particles is reducing.
The hotter the bisque fire, the denser the clay becomes. As the clay becomes denser, it also becomes less porous when it has cooled. Therefore, ceramics that have been bisque fired to cone 04 will be less porous than clay fired to 06.
Advantages of Bisque Firing to Cone 04:
- Your ceramics will be harder and less likely to break.
- More carbons and organic material will have been burned out. Therefore, you are less likely to encounter glazing problems related to burnout.
However…
Disadvantages of Bisque Firing to Cone 04:
- If your bisque is less porous it might be harder to apply your glaze. Porous bisque draws the water out of glaze so the glaze adheres easily to the ceramic surface. If the bisque is less porous, the glaze may not adhere as well.
- This is particularly the case if you are painting on layers. The second or third coat of glaze may simply not want to stick. As such, it might be hard to get the glaze coverage that you want.
- An example of this is that in industrial settings commercially produced ceramics need to be tough. As such they are bisque fired to a higher temperature. A gum is then added to the glaze to enable it to adhere.
- Potters in a non-industrial setting may not want to start putting additives in their glaze to help it adhere. So, a simpler solution is to a thicker glaze mix. Alternatively, if the glaze is not adhering, warming the bisque before glazing helps the glaze to dry and stick.
Advantages of Bisque Firing to Cone 06:
- Your ceramics will be more porous and you are less likely to have problems getting your glaze to adhere.
Disadvantages of Bisque Firing to Cone 06:
- Because the bisque is more porous, there is more possibility of applying glaze overly thick. This can lead to the glaze running when it is glaze fired.
- Less of the carbons and organic materials will have been burned out. Therefore, there is more chance of problems during glazing such as pinholing.
Experimenting to Find the Best Temperature to Bisque Fire Pottery
So, there are advantages and disadvantages to bisque firing at both cones 06 and 04.
Many potters will recommend that the best approach to finding what works is to experiment. From this perspective, there is no absolutely right temperature to bisque fire pottery.
You can test out what bisque firing temperature works best for the clay and glaze combination you are using.
Different clays respond differently to the same bisque firing conditions. For example, a cone 10 clay bisque fired at cone 04 will be more porous than a cone 2 clay. The reason for this is that the cone 10 clay is high fire and requires more heat work to mature.
What is more, although bisque firing between 06 and 04 is most common, it is not the law!
Many experienced potters do what they like. Some potters will bisque fire at cone 10 because they like the color of the clay at a higher temperature. And then decorate their ceramics with luster glazes at cone 018.
Other potters will bisque fire multiple times at 010 or lower. They build up decorative layers of underglaze or china paint between each fire.
There are also other exceptions such as raku pottery which is often bisque fired between cone 04 and 1.
Cones and The Temperature to Bisque Fire Pottery
Before finishing, I just wanted to say a few words about cones and cone charts.
A cone is a small pyramid-shaped piece of ceramic that is put in the kiln when it fires. The cone gradually melts as the kiln fires. Cones start off standing upright in the kiln.
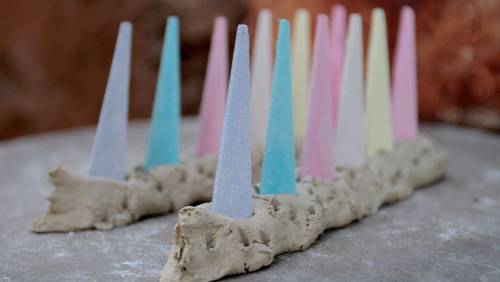
As the kiln heats, the cone melts and bends. Each cone has a rating that determines the temperature at which they will have completely melted. So, when the cone has melted over to a 90-degree angle, you know that the kiln has reached a particular temperature. This is why they are also called witness cones.
However, cones don’t just measure temperature, they also respond to the rate of temperature increase. So, they measure a combination of temperature rise and rate of temperature change.
Therefore, most charts that refer to cone temperatures, will give you more than one target temperature for a given cone. This is because if your kiln is ramping more slowly, the cone will have bent at a slightly lower temperature.
The reason for this is that cones measure heatwork. And, heatwork is the combined effect of time and temperature on clay and glaze.
If a kiln is ramping more quickly, less time is being taken to fire. If less time is being taken to fire, more temperature will be required to achieve a particular amount of heatwork. Likewise, if more time is taken, less temperature is required.
Take cone 08 for example. If the kiln is ramping at 108 F per hour, the temperature that the cone melts will be 1728 F. Whereas if the kiln is ramping at 270 F per hour, more heat is needed. Therefore, a higher temperature of 1753F is required for the cone to melt.
On a cone chart, this will look something like this:
| Cone | Temp at 108F/ph | Temp at 270F/ph |
|---|---|---|
| 08 | 1728 | 1753 |
Lots of articles will specify that you should bisque fire to a particular cone. But then if you research what temperature the cone relates to, you will get different figures. The above is a simple explanation for these differences.
Final Thoughts on the Temperature to Bisque Fire Pottery
If you are just starting out bisque firing, a helpful guideline is to bisque fire at either 06 or 04. However, this is not written in stone. As you become more familiar with the technique, you can experiment with what temperature to bisque fire pottery. With time you will find out what works best with your pottery.


