
Buying a pottery kiln for home use is very exciting. But making the right choice is important and there are some key things to consider. In this guide, I’ll walk through my experience of buying an at-home kiln. I will flag up any essential things to bear in mind when you are choosing, installing, and using your pottery kiln for the first time.
Buying a Pottery Kiln for Home
I used a second-hand pottery kiln for years. It was a great starter kiln, and I felt very sentimental about it. But sadly, it was getting old and not very efficient. Also, I had outgrown it and it wasn’t big enough for my needs anymore.
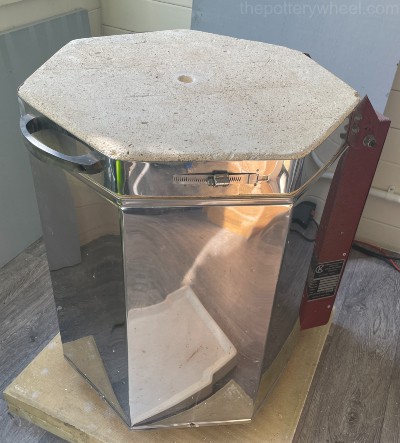
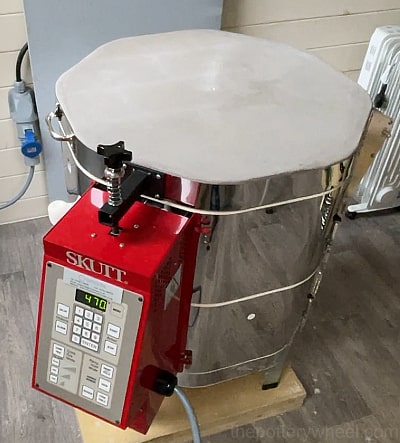
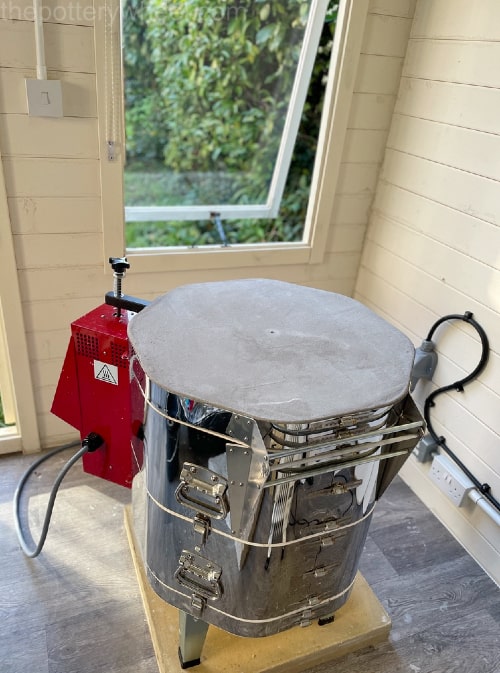
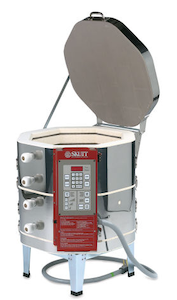
I knew I needed to buy a new one and finally, after much thought, I decided to buy a Skutt KMT 818. Even though I was sad to see my old kiln go, I’m very happy with my new kiln.
The good news is that kilns keep their value, and I was able to sell my old kiln very quickly for $700. This went towards the cost of the new kiln. Happy days!
I thought it would be helpful to share my experience of buying the Skutt 818. In the process, I can highlight any pitfalls and pointers that you need to be aware of when buying a pottery kiln for home use.
Some of the things you need to consider when buying an at-home kiln are:
- Space requirements
- Electrical requirements
- Ventilation
- Kiln size
- Firing temperature
- Post-purchase customer support
So, let’s look at some of the things you need to consider when getting a kiln for your home.
Tip 1) Kiln Delivery
Kilns are heavy. As kilns go, the Skutt 818 is relatively light, but even so, with the packaging it weighed just under 200lb when it arrived in its packaging.
Kilns are normally sent by the supplier on a pallet, which means they are strapped to a flat wooden crate.
Getting the Kiln into Your Home
Courier services vary in what they do with pallet deliveries. Some will be helpful enough to wheel it on a dolly into your home or garage. But many do roadside delivery which means that they deliver it outside your home. It’s your job to get it from the road and into your house.
Ask the supplier whether the courier company will bring it right into your home. If they don’t, you need to know how you are going to move it from the street.
I thought that I had planned the arrival of the kiln quite well. However, I’d underestimated how heavy 200lb was.
Secondly, the box that the kiln arrived in was wider than my front door and I couldn’t get it inside. I had to take the kiln out of the box in my front garden. This would have been okay, but it was threatening to rain, and the whole process was a bit of a rush.
It took two strong handymen to get the kiln to the right location in my home. I did get the kiln in situ, but the process was less smooth and more stressful than I had expected.
Things to Check
- Delivery weight of the kiln
- Will you need a dolly to move it, if not, how many people can lift it safely?
- How wide is the package and will it fit through your door?
- Do you have stairs? How are you going to get the kiln up the stairs?
Note – Sometimes kilns can be taken apart into smaller sections so you can move each part individually.
Tip 2) Space Requirements for An At–Home Kiln
Pottery kilns are bulky items. They come in different shapes and sizes, but even a small kiln is a sizeable piece of kit.
Not only that, you need to make sure that the kiln is positioned with enough clearance around it. Each side of the kiln needs to be at least 18 inches away from any other surface. The surface of a kiln gets hot and it should not come into contact with any flammable surfaces.
Also, when the kiln is firing, it gives off a lot of heat. If it is positioned in a space that is too small, heat will build up around it and this can cause the kiln to overheat.
So, when you’re thinking about a pottery kiln for home use, you need to know that you have space to locate it.
Tip 3) What Surface Will the Kiln Be On?
Some kilns will be sold with a stand which they can be positioned on. Nevertheless, it’s a good idea to check with the supplier what surface they recommend the kiln is placed on.
My kiln is in a wooden pottery shed, so I put a couple of concrete slabs on the floor. The kiln stand sits on the concrete slabs. This prevents the radiated heat from the kiln from drying out the wooden floor too much.
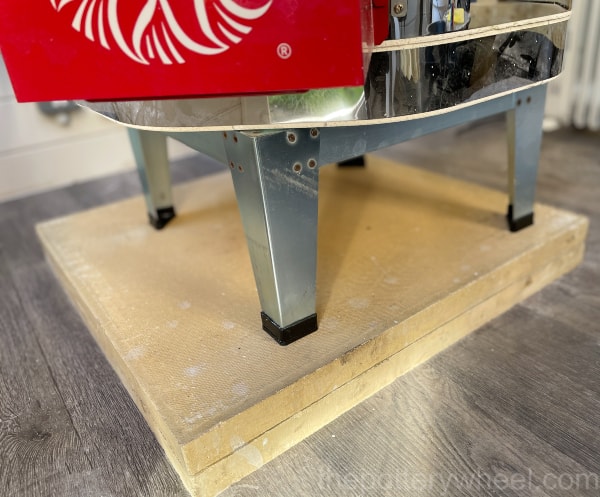
With the kiln on its stand, the concrete blocks underneath get warm but not hot. The floor is wood, covered with lino. If wood gets very dry it becomes a fire hazard, so it’s best to shield the wood from too much heat from the kiln.
Similarly, I have a couple of heat-resistant boards by the wall near the kiln. They don’t look too pretty, but they prevent the wooden walls of the shed from getting hot and drying out too much.
Tip 4) Electrical Requirements For Your Kiln
A small number of kilns can be plugged into a domestic socket and will run from a regular electrical supply. These are often called ‘plug-in kilns’.
Plug-in kilns are smaller kilns, so they are good if you make smaller pottery, or if you make a limited number of pots.
It would help if you thought about what size kiln you want. I’ve written a guide on how to decide what size kiln to buy. You can check that out here.
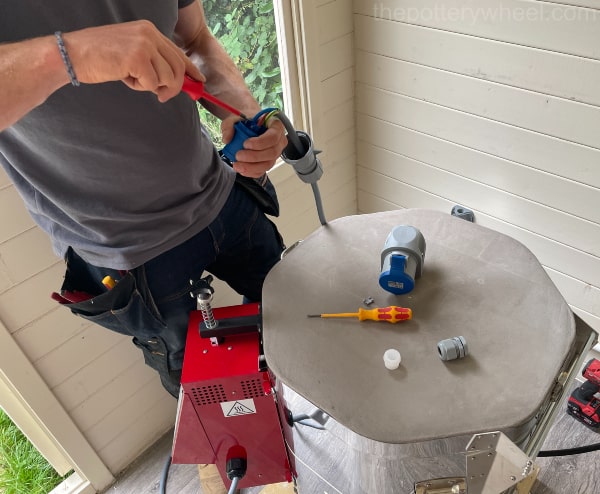
Larger kilns have particular power requirements and will need to be wired into a socket similar to a cooker socket.
When you are deciding what kiln to buy, check the electrical requirements. Then I’d recommend that you ask an electrician to give you a quote for any work that needs to be done to support the kiln.
The electrician may need to run a larger cable to support the kiln and install a particular socket. They may also have to run a separate circuit from the main fuse box too. This will prevent your usual domestic circuit from being overloaded when the kiln is on.
Usually, the kiln will arrive without a plug like this…
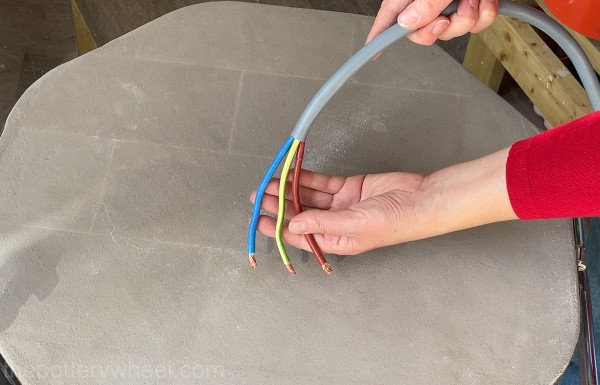
I hired an electrician to install new cables and to wire the kiln in for me. This particular kiln requires 230 volts and 29 Amps.
Single-Phase Vs Three-Phase Electricity
When you are choosing a kiln you should also double check whether it requires single-phase or three-phase electricity. Some schools and commercial buildings have what’s called a three-phase electrical supply. Three-phase electricity can cope with larger electrical loads (source).
Tip 5) Factor in Buying Kiln Furniture
Usually, when you are buying an at-home kiln, it does not come with kiln furniture. The name ‘kiln furniture’ refers to kiln shelves that you put your pottery on. It also refers to the posts that you position the shelves on too.
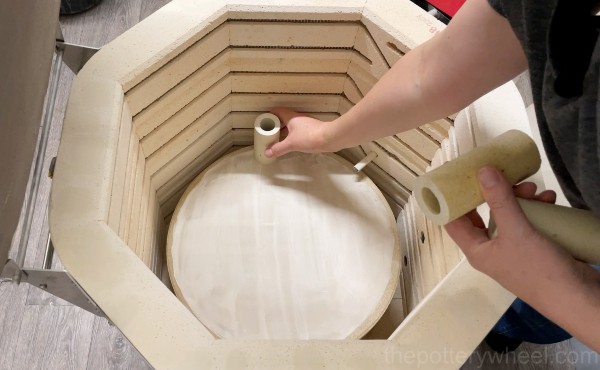
Because kilns come in different shapes and sizes, you need to buy kiln furniture that is the right size for your kiln.
You can buy complete sets of kiln furniture that are designed to suit a particular model of kiln. Or you can buy shelves and posts individually.
As I already had quite a few posts, I just needed to buy some kiln shelves that were the right size. Buying individual kiln shelves was less costly than buying an entire set of furniture.
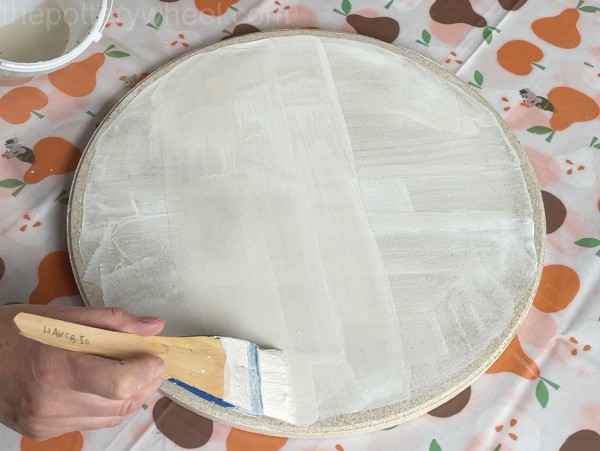
When you buy new kiln furniture, it’s a good idea to paint some kiln wash on it before you use it.
Kiln wash (also called batt wash) creates a protective layer on your kiln shelves. This layer means that if glaze drips off the pot onto the shelf, you can remove the glaze easily. The wash prevents the glaze from welding to the kiln shelf.
My new kiln arrived with a batch of batt wash included in the package. Skutt recommends that you apply the kiln wash before the test fire.
Using kiln wash is easy. It usually comes in a powdered form. You simply mix the kiln wash powder with water to make up a liquid with the consistency of full cream milk. Kiln wash inexpensive and will save you money if your glaze drips.
Then paint a couple of coats onto the kiln shelf with a hake brush. Allow the shelves to dry for 24 hours before you fire the kiln.
Tip 6) Test Firing the At Home Kiln
Once the kiln is in position and has been wired in, you are almost ready to go. Manufacturers will almost always recommend that you test-fire the kiln when it is empty first.
The reason for running a new kiln when it is empty is that it helps form a protective oxide layer on the elements. When you fire a kiln with pottery in it, the pottery gives off fumes and gases. It’s best to fire the kiln without these fumes for the first time.
Also, you can check to see that the kiln is getting to the right temperature too.
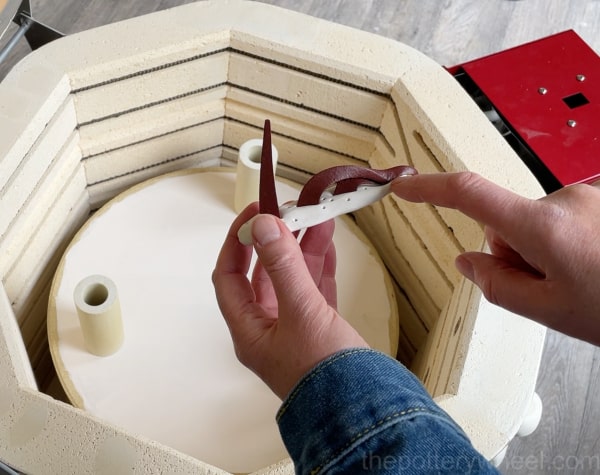
I fired my new kiln with a cone pack on each kiln shelf. This let me check that it was reaching the right temperature at different heights in the kiln. You can read my guide on how to make a cone pack here.
Tip 7) Using the Pottery Kiln at Home
One of the reasons that electric pottery kilns have become so popular is that they are extremely easy to use. Many new kilns have digital touch screens and can be linked up to your WiFi. Skutt does a touchscreen model of the KMT818 which you can check out on Blick Art Supplies here.
Whilst I do like the idea of a touchscreen controller, they are more costly. So, I chose a kiln with the original programmable controller.
Using a new kiln can feel intimidating. My old kiln used a Stafford Controller, and I was used to programming that. I was familiar with its functions and how to use it.
I was a little nervous about using the 818 and was worried that the controller would be baffling. However, I’m happy to say that I needn’t have worried. It’s very easy to use.
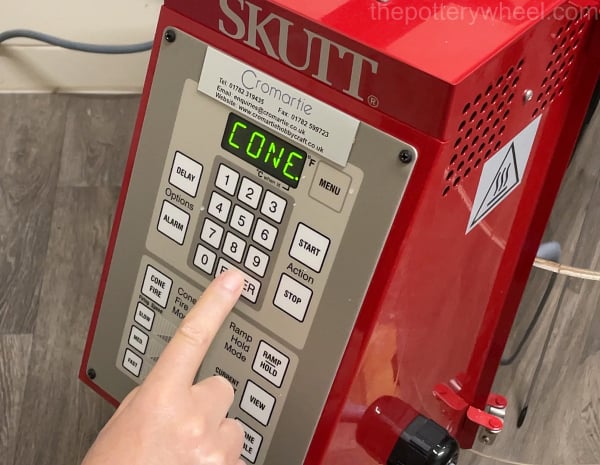
It has some pre-programmed firing schedules. When you turn the kiln on, you can select ‘cone-fire’ mode on the controller.
Cone-Fire Mode
In cone fire mode, you can choose the cone you want to fire to, and whether you want the schedule to be slow, medium, or fast.
You can also choose whether to preheat the kiln before the firing schedule starts. I have written an article on the benefits of preheating your kiln here.
You can also select if you want the firing schedule to hold at the end too. ‘Holding’ is when the kiln stays, or ‘holds’ at a temperature for a short period during the firing schedule.
This can be good when you are glaze firing, as it gives the glaze a final chance to mature, and for any imperfections in the glaze to heal over before the firing schedule ends. You can read more about holding your kiln here.
You can also program the kiln yourself to fire using a bespoke firing schedule. This is helpful if you want to fire particular glazes like crystalline glazes.
Tip 8) Safety When Firing Your Kiln
It’s never a good idea to leave your kiln unattended when it’s firing. My kiln is in a pottery shed in the garden. It’s a small shed and I don’t spend a lot of time in there when it is firing. But I also don’t leave the house whilst the kiln is on.
As I mentioned earlier, kilns get very hot and if anything went wrong with the kiln, I’d want to know about it as soon as possible, so I could intervene.
Whilst I’m not in the room when it’s firing, I do use a baby monitor when it’s on. These days baby monitors are quite sophisticated. Some are designed to transmit a signal over a long distance and they have video screens.
I have the baby monitor ‘watching’ the kiln, and I can watch the video feed in my home. The monitor that I use is like this long-range monitor on Amazon.
Here are a few other safety precautions that I take when firing the kiln:
I have a fire extinguisher available. If you get an extinguisher, be sure to choose one that is suitable for electrical fires such as wiring and fuse boxes. I also have a fire blanket on hand.
There is a safety mechanism on Skutt kilns which means you can lock the kiln lid before you can start firing.
Lastly, I’d recommend keeping an eye on who has access to the kiln when it’s firing. Make sure that animals, children, and unsuspecting adults don’t touch the kiln whilst it is on as the surface will be hot.
Tip 9) Ventilating an At–Home Kiln
If you have a pottery kiln in your home, you need to think about ventilation. When clay and glaze are fired they give off fumes and gases. These smell bad and they are irritants too.
If these fumes build up without adequate ventilation you will find that your lungs, lips, and eyes will feel uncomfortable. Not to mention that some ingredients, particularly in glazes can be toxic before they are properly fired.
All kilns need good ventilation. The type of ventilation that you use depends on the circumstances. I fire my kiln in an outhouse and I’m not in the shed much when the kiln is on.
For me, adequate ventilation consists of ensuring that I open the windows wide. I also turn a fan on whilst the kiln is firing. This circulates the air around the shed and creates a cross draft so the fumes go out of the window.
However, if you intend to have your kiln inside your home, you may want to think about getting a kiln ventilation system.
Different Ventilation Options
There are different types of ventilation systems. Some hang above the kiln, draw the fumes from the kiln, and vent them to the outside of the building. Others fit underneath the kiln and draw the fumes out from the bottom of the kiln before venting them outside.
For a short while, I did have my old kiln in the house. It was in a spare room. I used to open the window and close the door whilst it was firing. I would also put towels around the bottom of the door to create a seal.
Nevertheless, I could still smell the fumes from the kiln in the house while it was in operation.
Even with the doors closed and windows open fumes and smells seeped into my home. It’s one of the reasons why I finally took the plunge and built myself a pottery shed. You can see how I put together my home pottery studio here.
Tip 10) Choosing A Pottery Kiln for Home
There are a few other things you need to think about when you are choosing a pottery kiln for home use. Here are a few things to bear in mind:
What temperature do you want to fire your kiln at?
Kilns are categorized according to the temperature that they can reach. Some kilns are designed to be used at earthenware temperatures. Other kilns are designed to be fired cone 6 or cone 10.
It’s good to have an idea of what temperature you need your kiln to work at and buy a kiln that suits your needs.
Does the kiln have a warranty and good customer support?
Check out what kind of help the supplier can offer you if something goes wrong. Do they have kiln technicians who can help you out if your kiln stops working? Can you get replacement parts such as elements, relays, or thermocouples for the kiln easily?
Although these questions might seem a bit boring, they will make your life easier later down the line.
Tip 11) Firing Your Home Pottery Kiln
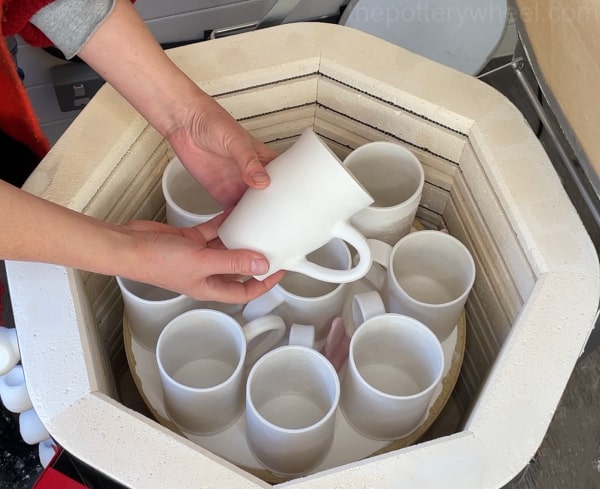
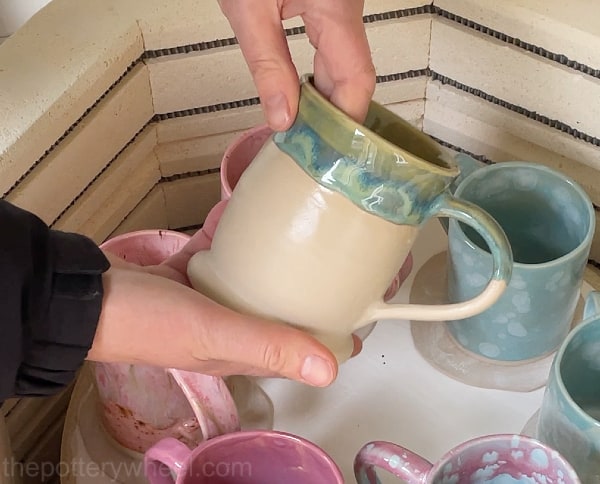
Once everything is set up and you have test-fired your kiln, you are ready to bisque and glaze fire.
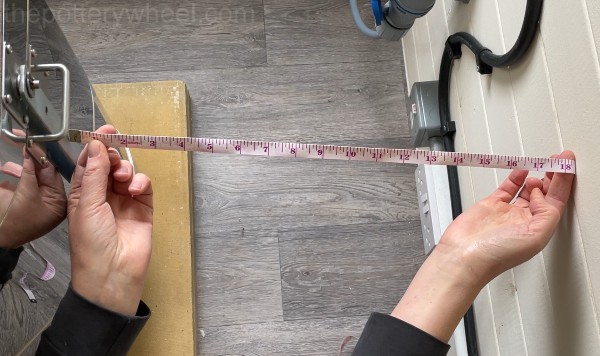
The Skutt 818 has an internal firing chamber that is 2.6 cubic feet, which is equal to 73 liters.
The measurements are 17.5 inches wide and 18 inches deep.
It’s hard to give a definite idea of how much pottery you would be able to fit into this space. It depends on what you are firing and what size your pieces are. For example, I make big mugs rather than polite teacups. My mugs are normally between 4 and 6 inches tall when they are greenware. I like a lot of coffee in my mug!
If I fill the kiln with mugs, I can use 4 kiln shelves and fit 36 mugs in a bisque fire. My kiln shelves are 39.4cm wide. You can check out Skutt 818 kiln shelves here.
When you are glaze firing in a new kiln, it’s a good idea to fire your glazes on test tiles before you glaze fire a whole kiln load of pots.
A test tile is a small sample of clay that you can glaze and fire to see what the glaze looks like. Here are some of my test tiles…
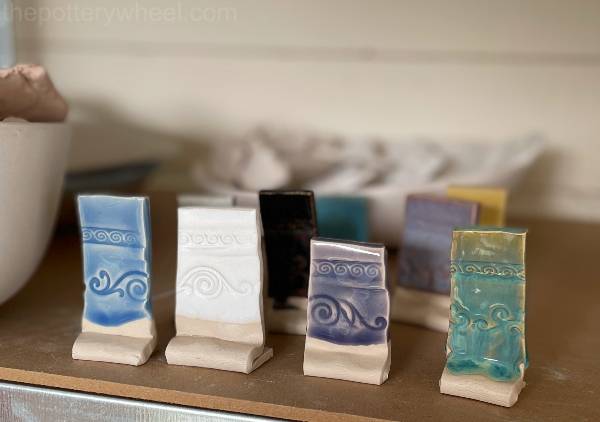
I write the glaze I’ve used on the underside of the test tile with an underglaze pencil. If I didn’t write the glaze on the underside, I would forget what it was and then the test tile is useless.
Here are some things that test tiles can show you:
- If the clay and glaze fit each other. When clay and glaze are not compatible, you can get with the glaze like pin holes and crazing.
- How much the glaze runs.
- What does the glaze look like once it’s been fired? This can be different from what you expect.
- What glazes look like when you combine or layer them.
- Does the glaze break over textured pottery? Breaking is when the glaze flows away from the texture in the clay so that you can see the design on the clay surface.
Is This the Best Pottery Kiln for Home Use?
For me, right now, the Skutt 818 is the best pottery kiln for me to use in my home. It’s the right size for me, it works like a dream, and it fires my pottery beautifully.
I suppose that I may need a bigger kiln with time if my pottery output increases.
But for now, it’s the perfect size. It’s big enough to fire a large kiln load, but not so big that it takes an age for me to fill.

Is this the right kiln for you? Hopefully, you can use some of the pointers outlined above to help you make that decision.
Skutt KM-818
Final Thoughts
There is a lot to consider when buying a pottery kiln for home use. Sometimes the best thing to do is get out a paper and pencil and write down a list of things that you need from an at-home kiln.
Then use this as a checklist when you are reviewing the kilns available. One final tip, if there is a pottery supplier near you and they have a physical shop where they stock kilns, it can help to go along and see the kiln in real life.

