Your cart is currently empty!
How to Make a Ceramic Clock – A Timeless Clay Project
Published:
Last Updated:
Affiliate Disclaimer
As an affiliate, we may earn a commission from qualifying purchases. We get commissions for purchases made through links on this website from Amazon and other third parties.
Making a clock that works accurately and looks nice may seem tricky, but DIY clocks are actually very simple. I love working with clay slabs, so, making ceramic clocks is ideal for me. It appeals to the precision nerd in me, and I get to work with clay slabs. Here is a step-by-step guide on how I make a ceramic clock.
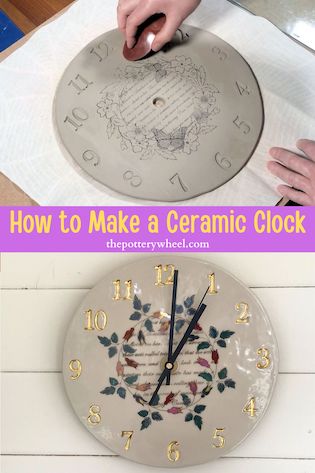
Table of Contents
show
How to Make a Ceramic Clock That Works
To make a ceramic clock out of a clay slab, I use a template. The template helps me cut out the clay slab into an accurate circle. But using a template is important for two other things, namely it helps me…
- Work out exactly where the center of the circle is
- Gauge where I am going to position the numbers on the clock
So, the first thing that I do when I’m planning the ceramic clock is make a template. Here is how I make the clock template:
Making A Template for Your Ceramic Clock
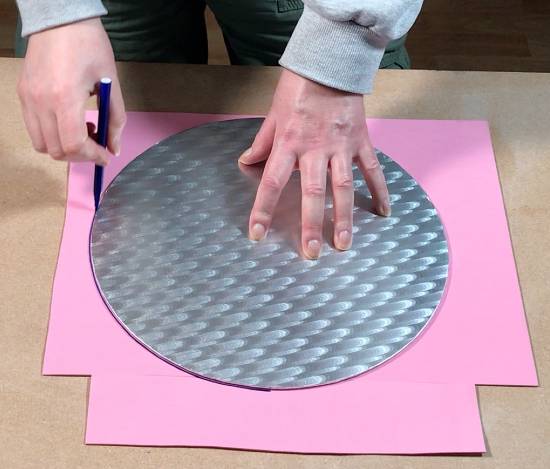
I tend to make templates for slab pottery using craft foam. These are thin sheets of foam that you can pick up in most craft shops or you can buy them here. I’d recommend buying sheets that are A3 or bigger so that you can make larger templates.
I have A3 sheets which aren’t quite large enough for the clock size that I want to make. My plan is to cut out a slab of clay that is 12 inches in diameter. So, I have to improvise and add tape a little extra section of craft foam onto the edge of my A3 sheet.

Step 1 – Drawing Your Clock Face
I start by drawing a circle on the craft foam that is 12 inches wide. The easiest way to do this is to find an object that is the right size and draw around that. A round cake board or something similar will do the trick.
Step 2 – Finding the Center of the Circle
I mark the center of the circle on the template so that I can easily find the center of my clay slab later.
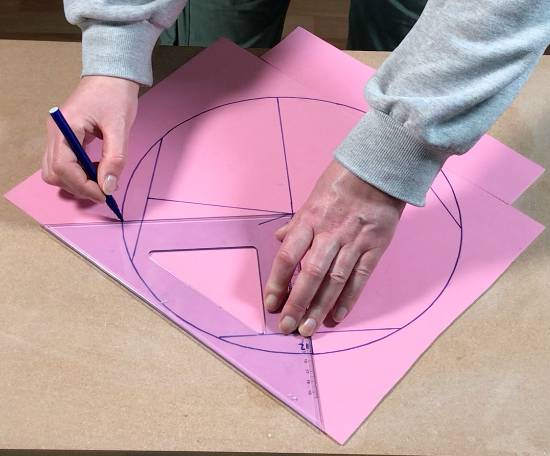
It’s easy to find the center of a circle once you know how. With your ruler, mark a line on the edge of the circle. Make each line the same length, and choose a length that is easily divisible by 2.
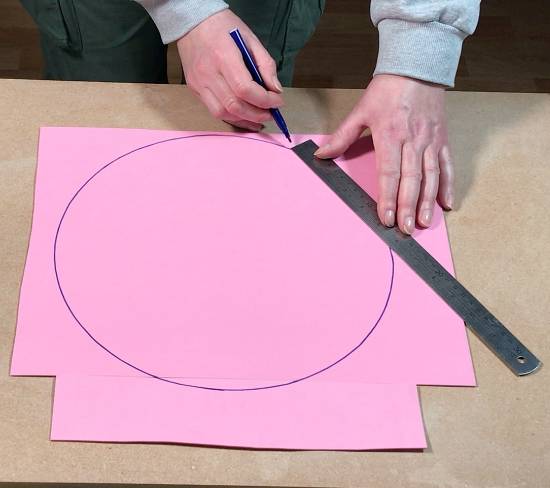
I mark a 6-inch line on the edge of the circle with the ends of the line touching the circle. Then I mark the mid-point of the line, at 3 inches.
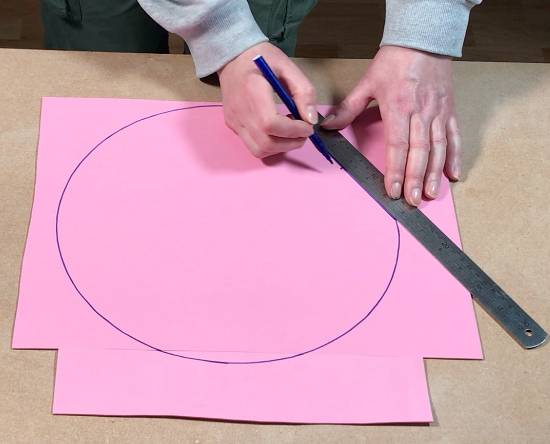
Do this three times at three points around the circle. Then using a right-angle ruler (set square or triangle) draw a line at a 90-degree angle from the midpoint of each line.
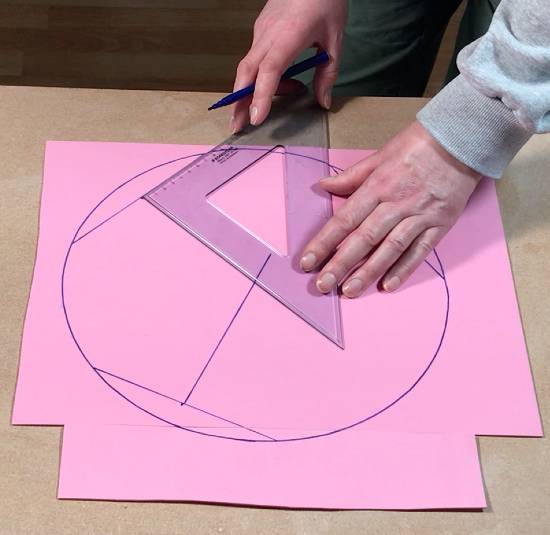
The point at which the three lines intersect is the center of your circular template.
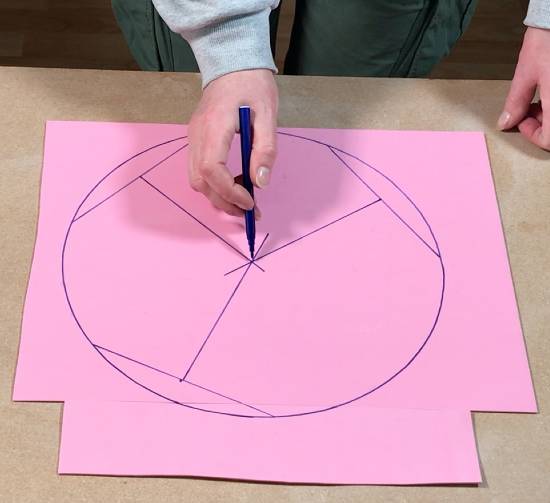
You can actually just use two intersecting lines to work out the middle of the circle. However, I like to use 3 just to be absolutely sure I have the right point.
Step 3 – Marking Where the Clock Numbers Will Go
You don’t have to mark exactly where your clock numbers will go. If you prefer to wing it, you can gauge where to position them by eye once you are working with the clay.
My experience of doing that is that it can be hit-and-miss. It’s easy to place a number in a position that’s just a little bit wonky. This can spoil the overall look of the clock.
I’d rather work it out accurately at an early stage and use the template as a guide.
If you want to use the template to find the position for your numbers, you need to mark 12 evenly spaced points around the clock face.
Dividing the Circle into Quarters
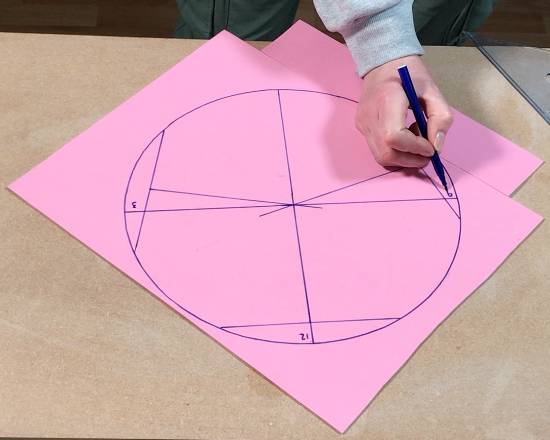
Draw a line through the center of the circle so that it reaches the outer edge of the circle on each side.
Then using your right-angle ruler, draw another line that intersects at the center of the circle at a right angle to the first line.
Then use these lines to mark where your quarter hours will be, that is 12, 3, 6, and 9 o’clock.
Finding The Other Numbers
You now need to find where your other numbers will be positioned. To do this, take a drafting compass (this is a large sturdy compass) and line it up against the radius of your circle. The radius of a circle is the distance from the center of the circle to the edge.
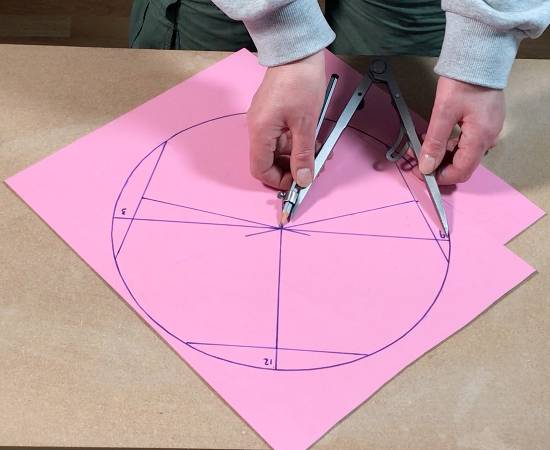
This should be 6 inches because the overall diameter of the circle is 12 inches. I double-check the length of the radius with my ruler to make sure that I’ve got it right.
Then, put the point of the compass at one of your quarter points, either 12, 3, 6, or 9 o’clock.
Make a mark on the edge of the circle, then swing the compass around and make another mark the same distance away on the other side of the circle.
This marks the points at which the other numbers should be positioned. For example, let’s say that the point of your compass is at 6 o’clock. If you make a mark on the circle to your left, you will be marking the point at which 8 o’clock will be.
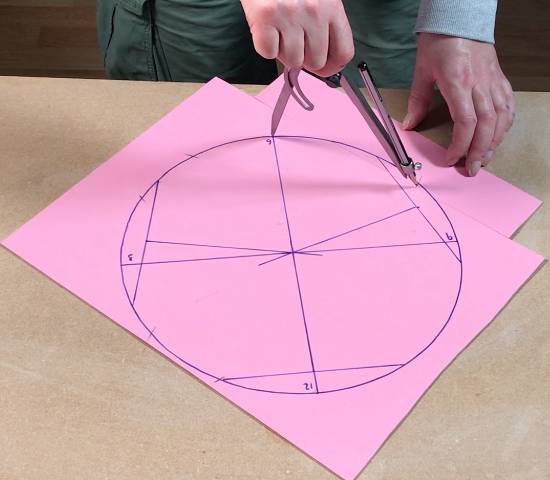
Then if you swing the compass around and mark the other side of the circle, you are marking where 4 o’clock will be
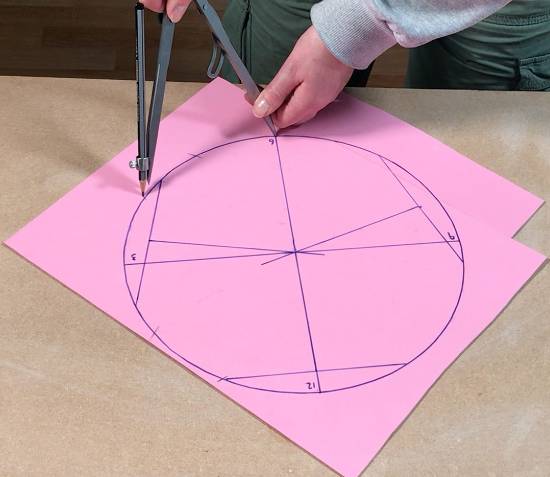
Position the compass point on another quarter hour and repeat the process, until you have marked where each number should go.
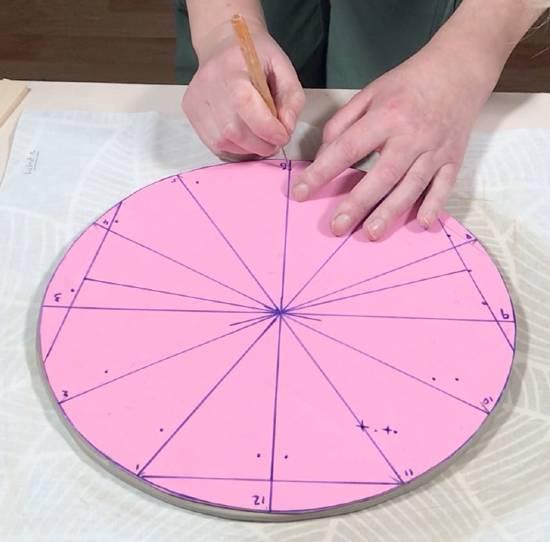
Then draw lines that radiate out of the center mark to the edge of the circle where each number will be positioned.
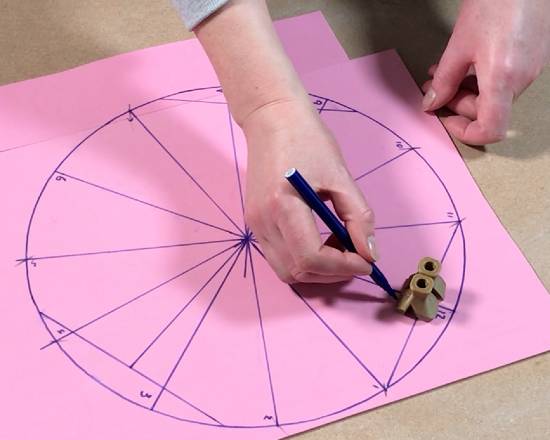
Step 4 – Marking Where the Numbers Will be Placed
Exactly what type of numbers you want to use is up to you. Sometimes it’s nice to use Roman numerals, other times, it works not using numbers at all. With this particular clock design, I am using regular number stamps. These are the number stamps that I use.
Position the number stamps on the template and make a small mark on the template where you want the numbers to go. Repeat this process finding the ideal position for each number around the clock face.
Step 5 – Finishing Touches to The Template
Cut the template circle out. Then using a needle tool, poke a hole through the template at the center of the circle, and on the dots where you marked the number position.
The template is now ready to use.
Step 6 – Rolling the Clay Slab
You can make a ceramic clock using a wheel-thrown circle of clay. Or you can use a clay slab as I’m doing with this particular clock.
Rolling a slab of clay is simple, but there are a few tips about how to roll an even slab that can be helpful to know. You can read more about how to roll a slab of clay here.
Roll out a slab of clay. I’d recommend rolling a slab that is 5mm or thinner. It’s best not to make the ceramic clock too thick because it will be too heavy to hang on your wall.
But also, at a later point, you will need to put a clock mechanism through the hole in the center of the clock. If your slab is very thick, you may struggle to find a clock mechanism that is the right size.
Once you have rolled out a slab of clay, position the circular clock template on the slab.
Cut around the template with a fettling tool and peel away the excess clay from the edge of the slab.
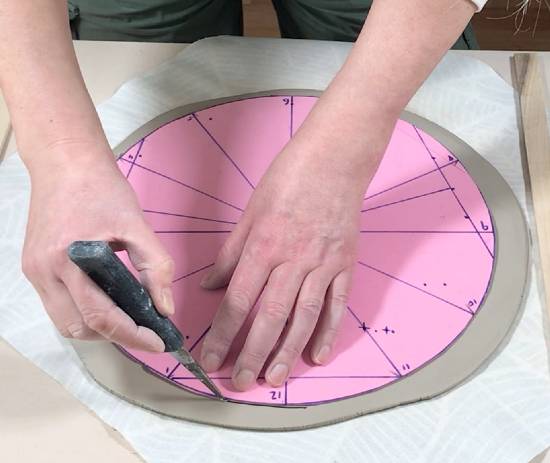
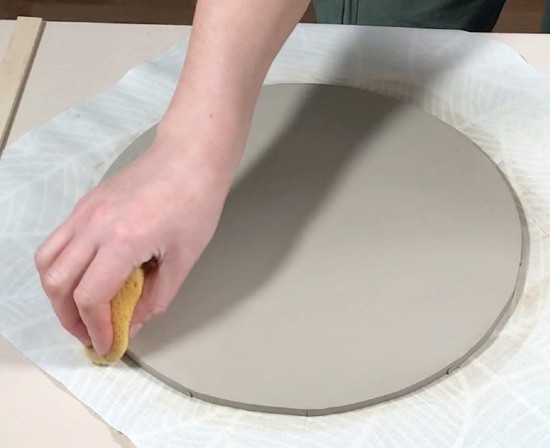
Tidy up the edge of the clay circle with a slightly damp sponge or a piece of chamois leather.
I use a stamp on the back of my pieces. You can get a personalized stamp made for your pottery here.
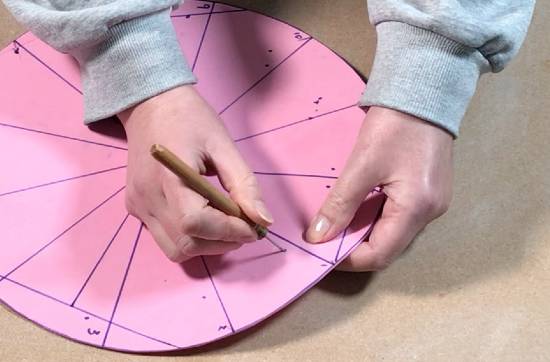
Step 7 – Marking the Slab Where the Numbers Will be Positioned
Once you have tidied up the slab circle, position the clay template on top of the slab again. Then using a needle tool, press through the holes in the template that you made earlier on. This will leave a small mark on the clay underneath where the numbers and center of the clock should be.
Step 8 – Making a Hole in the Center of the Slab
Use a small circular tool to make a hole in the clay in the middle of the clock face. You can improvise with what you use to make this hole. With this particular clock, I’m using the bottom of a nozzle from a slip-trailing bottle.
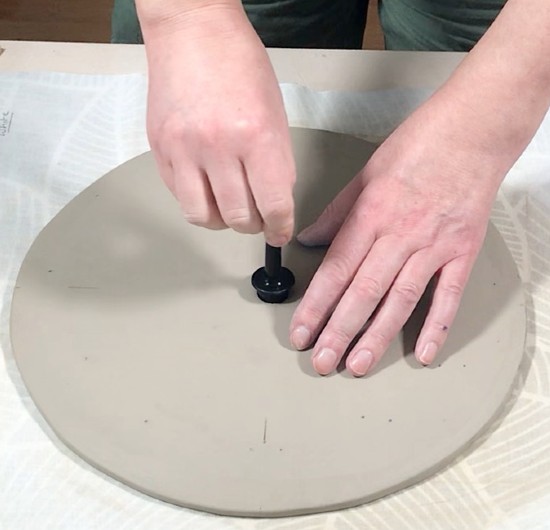
But you can use whatever you have available. A pen lid can work too. I’d recommend using something that is less than 1/3 of an inch in diameter. The hole needs to be big enough for the clock mechanism to go through. But you don’t want it to be so big that you can’t tighten the mechanism later.
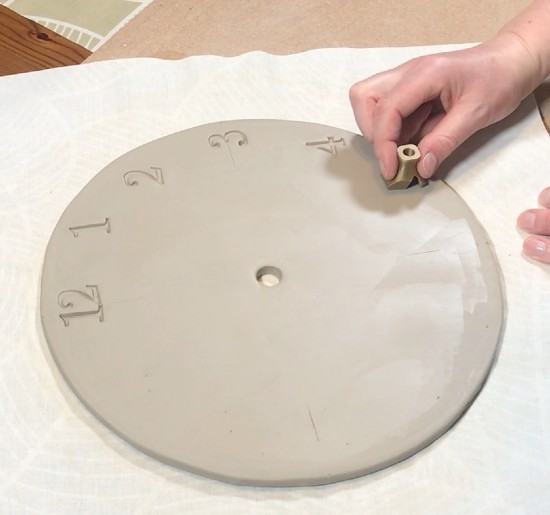
Step 9 – Impressing the Numbers
Now comes the really satisfying part! You have marked all the number positions around the clock face. Line your number stamps up on the clay slab, and impress the numbers into the clay at the right point. You can buy these lovely stamps by Relyef here.
Step 10 – Decorating Your Clock
There are an unlimited number of ways that you can decorate your ceramic clock. Because it’s a nice flat slab of clay, it’s a little like a painter’s canvas. You can decorate it absolutely as you choose.
Also, you aren’t just restricted to decorating with color. You can add texture with incising (carving), slip trailing, sgraffito, or adding relief designs around the edge. Those are just some options.
With this particular ceramic clock, I wanted to make something that had a vintage feel. So, I designed my own vintage-looking transfer to go on the center of the clock.
I use a method of making transfers that involves loading ceramic stains onto something called a Pronto Plate. These are also knowns as polyester litho plates.
I won’t go into detail about how I make these transfers because it would make this article very long. However, if you want to know how I make these transfers you can check out my step-by-step guide here.

Once I have transferred the image onto the center of the clock, it’s now time to let the clay start to dry out.
Step 11 – Allowing the Clay to Dry
Drying slabs of clay requires patience. If you try to dry clay slabs too quickly, they are apt to lose their shape, and curl or warp.
There are a number of things you can do to prevent your clay from warping. You can read more about how to keep your clay flat as it dries here. But suffice to say, that when I’m drying my clocks, I dry them slowly.
So, here are the steps I take to prevent my slabs from losing shape:
a) Drying the Slab Until it is Soft Leather Hard
I leave the slab on board that I have rolled it on until it is soft leather hard. To prevent it from starting to warp as it begins to dry out, I cover the slab with some plastic sheeting. A large garbage bag will do fine.
Condensation will form on the underside of the plastic bag, so it’s important to stop it from sagging on your slab. One way to prevent this is to place a metal rack over the slab. An old oven rack is the right size to cover a 12-inch clock.
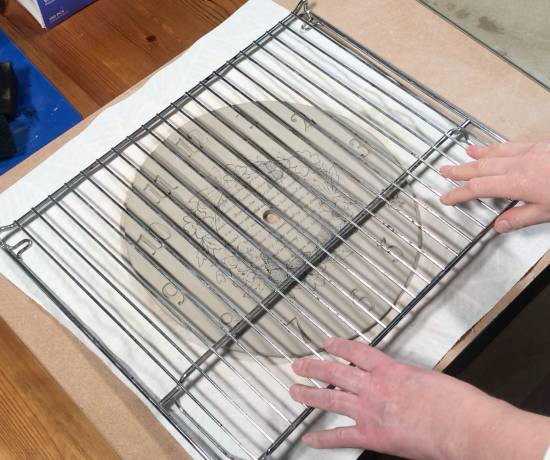
This old oven rack is ideally shaped so that the slab fits just underneath it, without the clock face being touched by the metal.
I then put the large plastic bag over the metal rack. This slows the drying process down and protects the slab from drafts.
b) Drying the Slab Until it is Bone Dry
When clay is soft leather hard, it still has some moisture and is a bit pliable. However, you can pick it up and it won’t flop about and lose its shape.
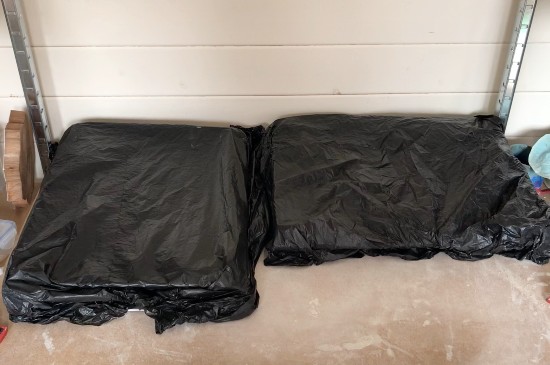
Once the clock is soft leather hard, I transfer it onto another metal rack. Placing it on a metal rack allows air to circulate all around the slab.
Place another metal rack over the slab. You can buy baking racks that stack on top of each other. Or, you can use another oven rack, and separate the two using blocks of wood or something of that kind. I use old Lego blocks to separate the two racks.

Then I cover the whole thing up again with a plastic bag and leave it until the clay is bone dry.
Depending on the climate where you live, this can take quite a while. I live in a climate that is rainy and cold a lot of the time, so it can take over a week before the clay is dry.
Step 12 – Firing and Glazing the Ceramic Clock
Once the clock is bone dry, I bisque-fire it. If you don’t have a kiln, don’t worry about that. It’s likely that there are plenty of places near you that will fire your clock for you. You can check out my article on where to get your pottery fired here.
With this particular vintage style design, I bisque fire it, then I apply clear glaze and fire it a second time.
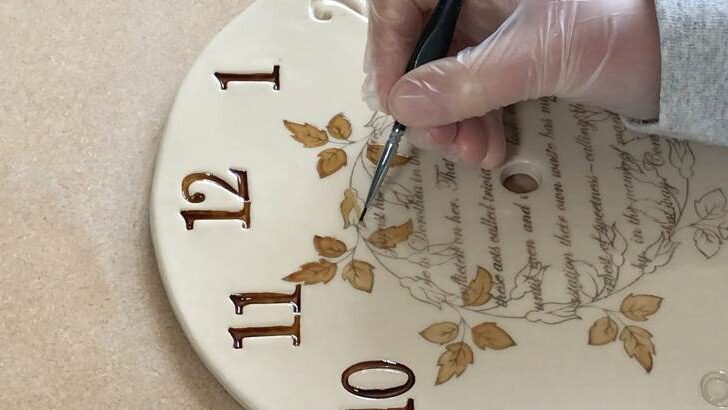
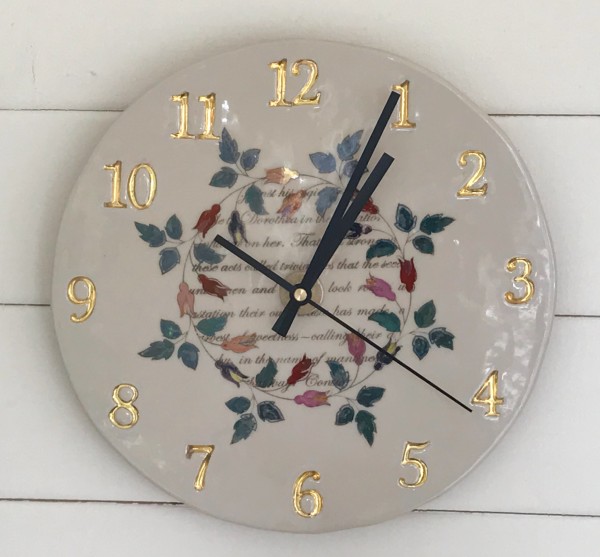
Once the ceramic clock has been glaze fired, I add some color and decoration using over glaze lusters. I carefully paint gold luster into the numbers that have been impressed into the clay. Then I paint some colored over glaze luster onto the leaves and flowers in the transferred design.
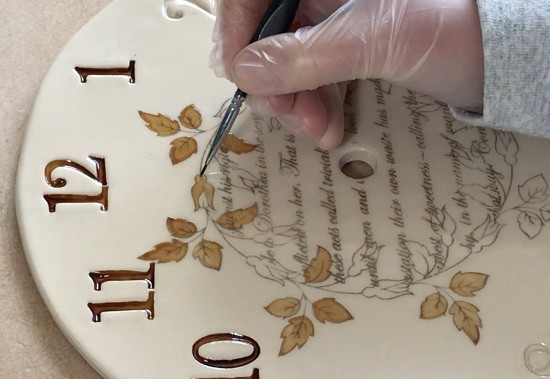
Luster over glaze decorations look brown before they are fired. Once fired, the true color develops.
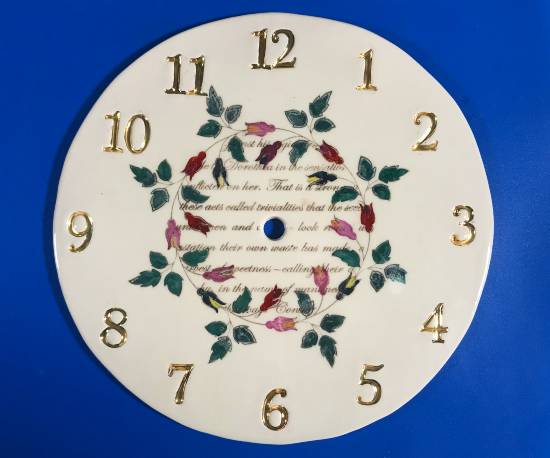
Once the lusters have been applied, I fire it again, at just 1292F (700C). This is a high enough temperature to melt the over glaze.
After firing, you can see the actual colors of the over glaze.
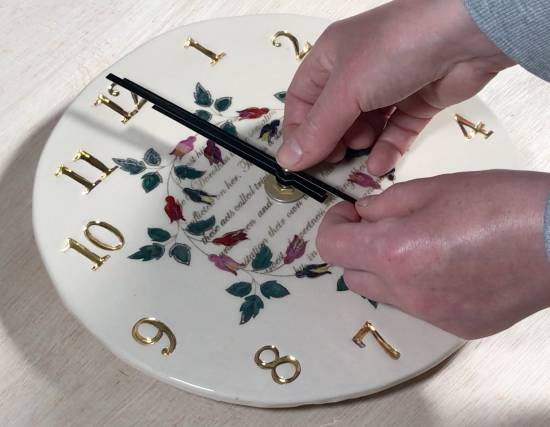
Step 13 – Adding the Clock Mechanism
The easiest part of this process is adding the mechanism to make your slab into a ceramic clock!
You can buy clock mechanisms here. They are relatively inexpensive to buy. Alternatively, if you find an old clock in a thrift store, you can take the mechanism out of that too.
The particular mechanism that you buy will have instructions about how to assemble the mechanism. But it’s very easy. Amazingly, adding the mechanism should only take a few minutes.
You simply put the mounting post through the hole in the center of the clock. Then push the clock hands onto the post. You may need to add a washer to make sure that the hands and mount fit snugly onto the ceramic clock.
Step 14 – Hanging Your Clock
You can attach a metal hanging hook to the back of the clock once it’s been assembled. This is what I did with this clock. I simply attached the metal hook to the back using Liquid Nails.
However, if you prefer, you can add a clay hook to the back of the slab at an earlier stage in the making process. Simply make a small slab of clay and then attach it to the back of the clock in the shape of an upside-down pocket when the clay is still soft leather hard.
You would then need to dry the clock face down so that the clay hook would not get damaged. I didn’t add a clay hook to this clock because the transferred image that I made needed to be dried face up.
You can watch a video that I made of this process here…
How to Make a Ceramic Clock

Final Thoughts
Making a ceramic clock is quite easy. It can be as simple as making a slab of clay or throwing a flat piece of clay on the wheel, then decorating it as you choose. The thing that takes a bit more time and working out is where to position your numbers. You may not want your clock to have visible numbers, that can look great too. Either way, I’ve found that the difference between a nice and a lovely ceramic clock is the attention to detail. If you love clay and you like figuring out how things work, then making a clay clock may be the ideal project for you.