
This is how to make a slab pottery butter dish using a printable pottery template. If you would like to get a copy of the template, you can grab one from my Etsy store here:
Get The Template Here
You can get a copy of the template (and my other slab pottery templates) from my online store here…
Making the Slab Pottery Butter Dish
These are a few tools that you might find helpful in making the slab pottery butter dish.
- Clay
- Rolling Pin
- Roller Guides
- Clay knife
- Rubber pottery rib
- Platter tool
- Clay scoring tool
- Serrated rib
- Wooden modelling tools
- Chamois leather
- Lazy Susan
- Banding wheel
- Wooden drying/wedging board
- Canvas
- Serrated rib tool
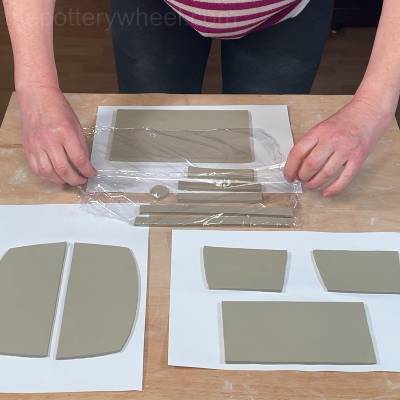
Step 1: Preparing the Clay Slab
This butter dish is made using templates to cut out each individual section of the design.
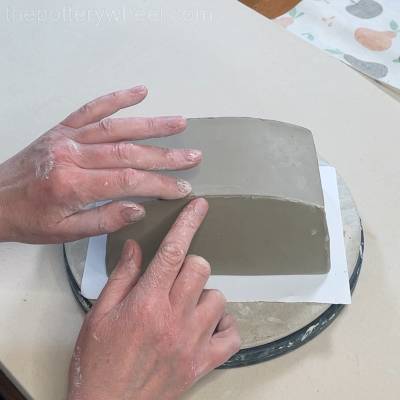
Start by rolling out a slab of clay using 3mm roller guides. The roller guides help create slabs with an even thickness.
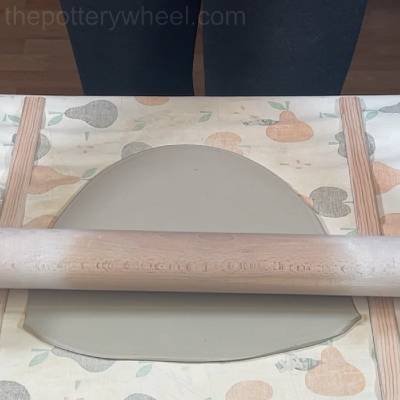
Turn the clay regularly while rolling. I do this by placing a piece of rolling fabric over the clay, flipping the slab over, peeling away the bottom fabric, and continuing to roll.
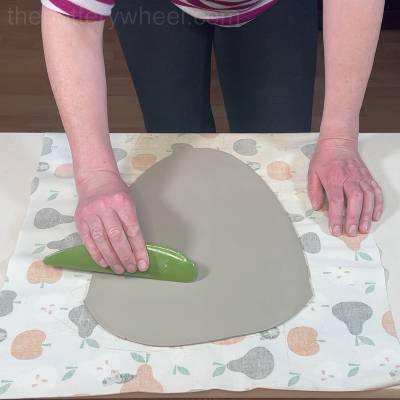
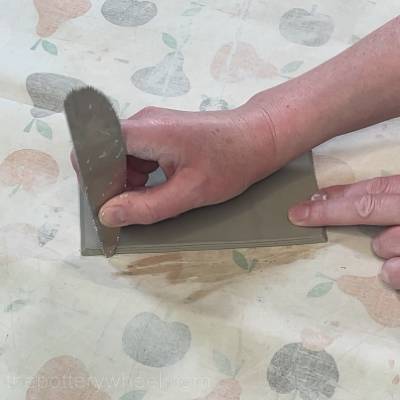
Once the slab is the correct thickness, use a platter tool or rib tool to compress the clay, smooth the surface, and remove any texture left behind from the fabric.
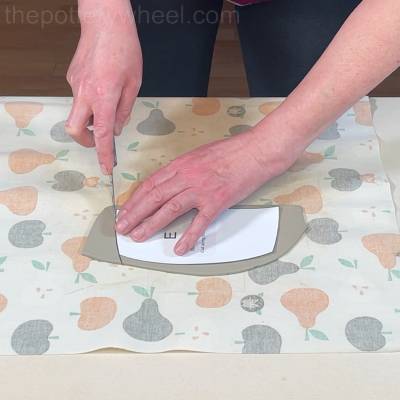
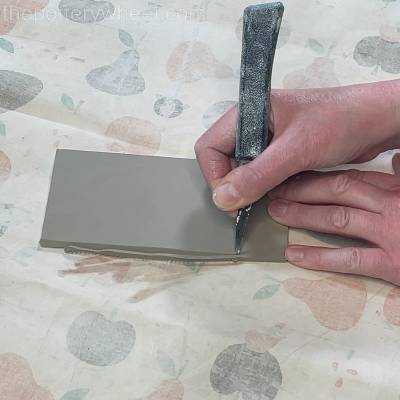
Step 2: Cutting the Side Slabs
The first template is Template E, which creates the side pieces of the butter dish.
Place the template onto the clay and cut around it using a clay knife. Support the knife with your other hand as you cut around the curves to create a smoother edge.
Remove the template and place the piece aside to firm up slightly.
Cut out two slabs using template E.
Tip
Paper templates work well, but they absorb moisture from the clay and only last a few uses.
For a reusable option, trace the template onto craft foam and cut it out. The foam is flexible, waterproof, and much more durable.
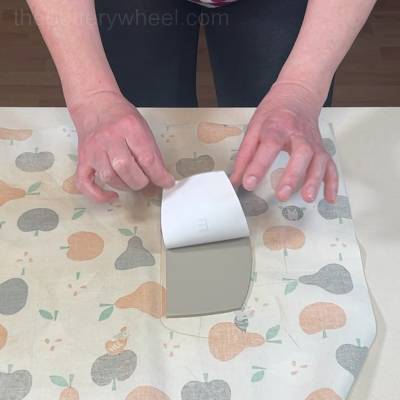
Step 3: Cutting the Remaining Slabs for the Butter Dish
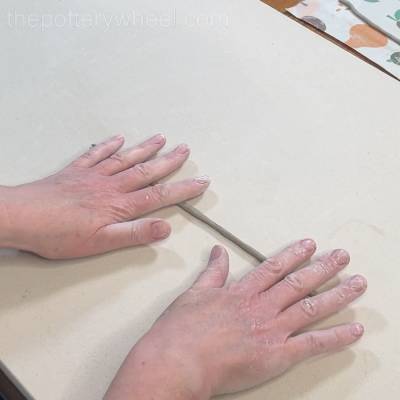
The clay will still be soft at this stage, so handle it carefully to avoid stretching it.
To move the slabs, place paper over the top, flip them over, and lift them from underneath.
Next, cut Template B, which creates the top section of the butter dish. You only need one piece from this template.
Place the template onto the clay and trim carefully around the edges.
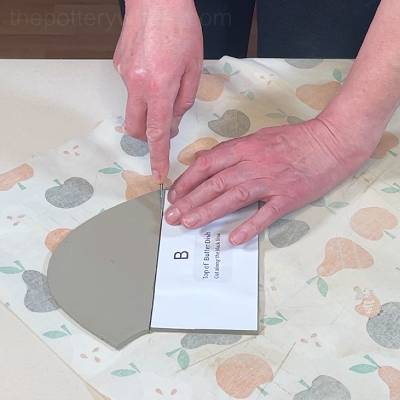
Peel away the template, set it aside with the other pieces to firm up.
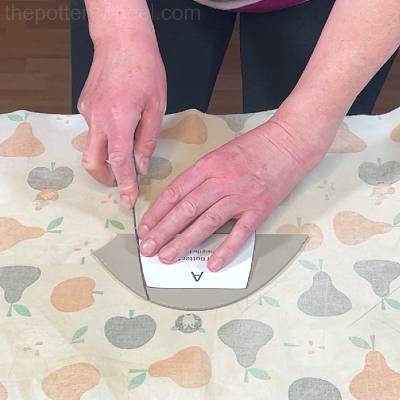
Cutting the Narrow End Slabs
Use Template A to create the narrow ends of the butter dish. You will need two slabs to be cut using template A:
Place the template onto the clay. Carefully cut around the edges. Set aside to firm up.
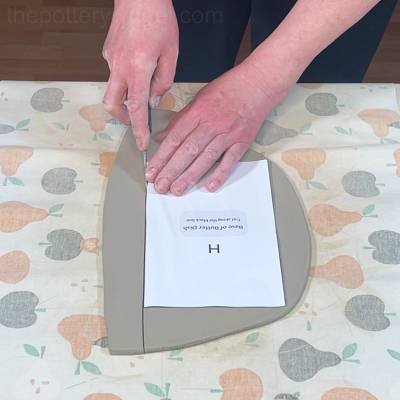
Making the Base
The base is made using Template H and is slightly thicker than the other pieces.
Use 5mm roller guides for the base to make it stronger and more durable.
Roll the slab in the same way. Turn the clay regularly while rolling. Roll until evenly thick. Smooth the surface with a rib tool.
Cut around Template H. You only need one piece from this template.
Cutting the Remaining Base Pieces
The remaining base pieces are also cut from a 5mm slab to give the butter dish extra strength and durability.
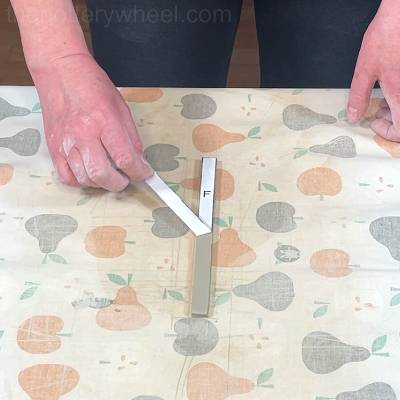
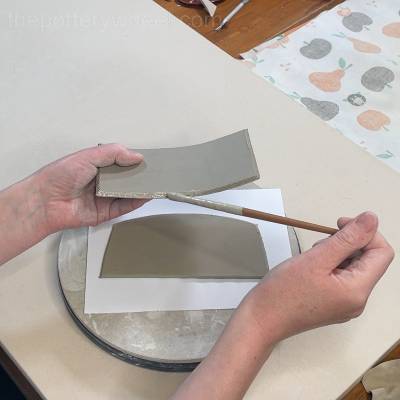
For the long sides of the base, use Template F.
Place the strip template onto the clay and cut around it. Use a straight edge along the longer sides to help create a clean, straight cut.
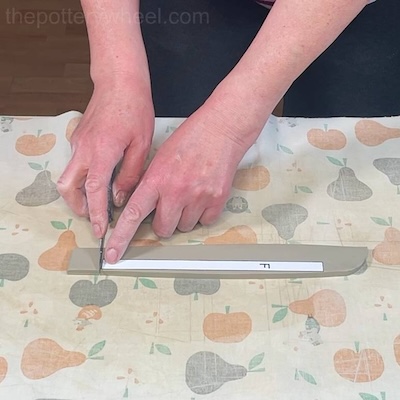
Because these strips are narrow, they can be a little delicate to handle. If the paper template sticks or leaves small pieces behind, simply peel the paper away before continuing.
Repeat the process to create the second long side strip.
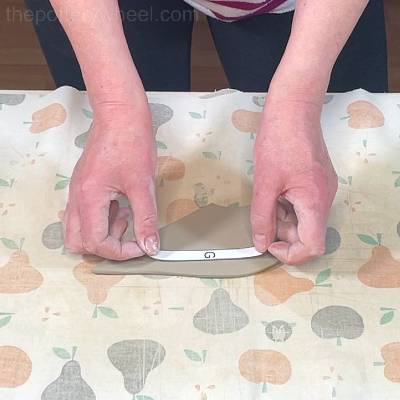
Next, use Template G to create the shorter ends of the base. You will need two pieces. Place the template onto the clay. Cut around the shape and set the pieces aside.
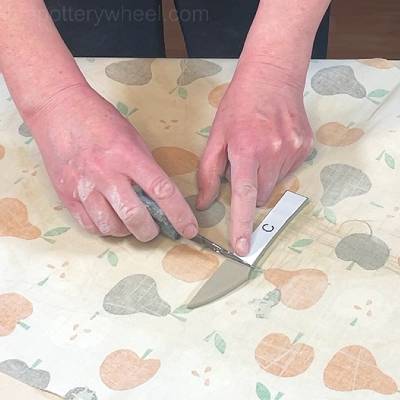
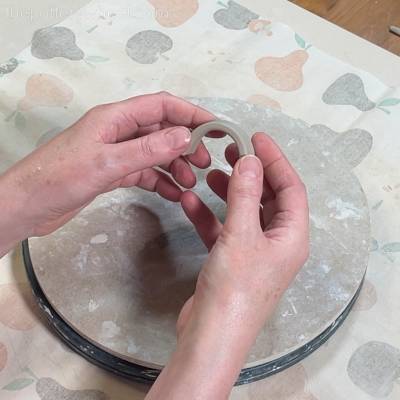
Cutting the Butter Dish Knobs
There are two knob options included in the template set:
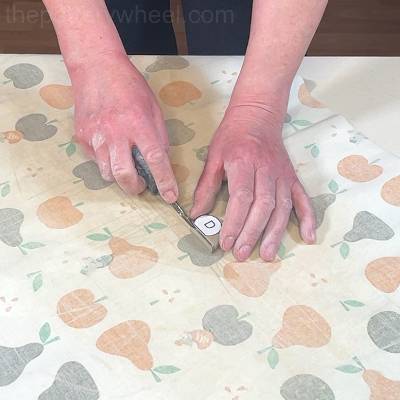
- Template D – a simple round, disc-shaped knob
- Template C – a curved strip handle with slightly concave sides
Cut the chosen knob design from clay in the same way as the other pieces and set aside ready for attaching later.
Step 4 – Allowing The Slabs to Firm Up
Before assembly, the clay pieces need to firm up so they are easier to handle.
Place the larger slabs on a drying board and cover them with another board or sheet of wood to help keep them flat as they dry.
The smaller pieces, such as the base strips and knobs, need to stay more flexible, so place them on plastic and cover them to stop them drying too quickly.
The aim is for the clay to become firm enough to hold its shape, while still having enough flexibility for joining.
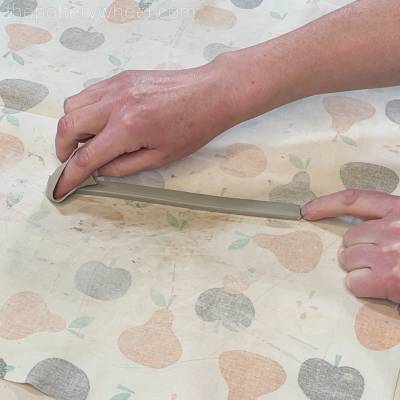
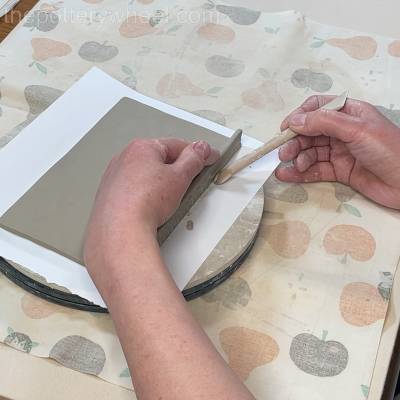
Step 5 – Preparing the Side Slabs
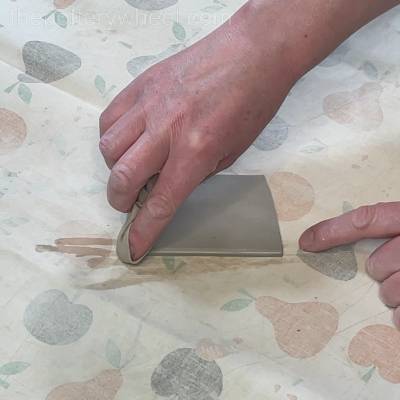
First, smooth the straight edge of the slab with a damp chamois leather. Smooth it on both sides, to create a nice rounded edge.
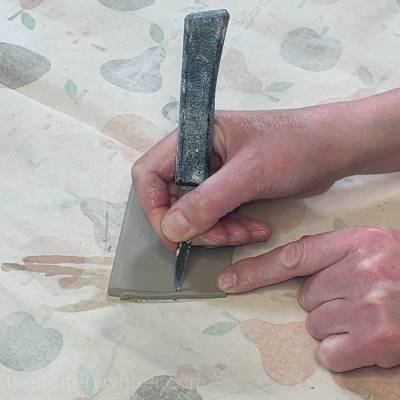
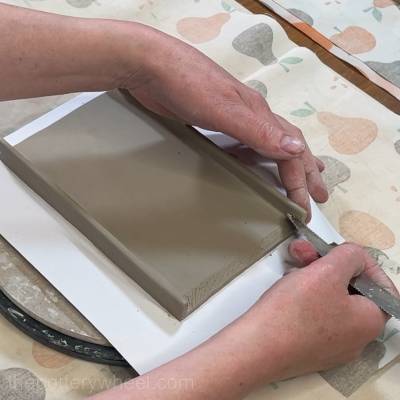
Next, prepare the joining edges by beveling them.
Bevelling means cutting the edge at a slight angle so the pieces fit together neatly and create a stronger join.
Using a clay knife:
- Bevel the short edges of the side pieces.
- Bevel the top curved edge of each side piece.
Keep all bevels on the same side of the clay — there’s no need to turn the piece over. Cut the bevel at around a 45-degree angle.
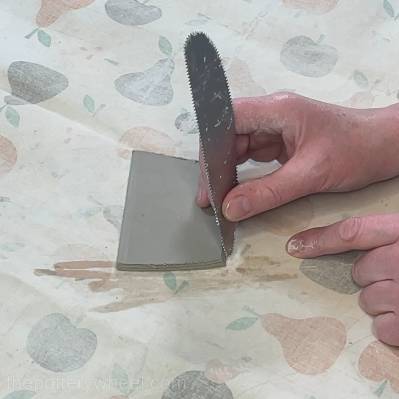
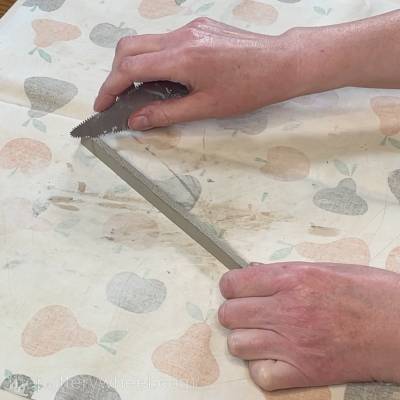
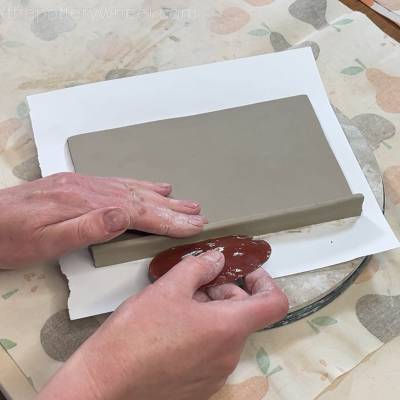
Once the edges are prepared, use a serrated rib tool or a clay scoring tool to score the joining surfaces.
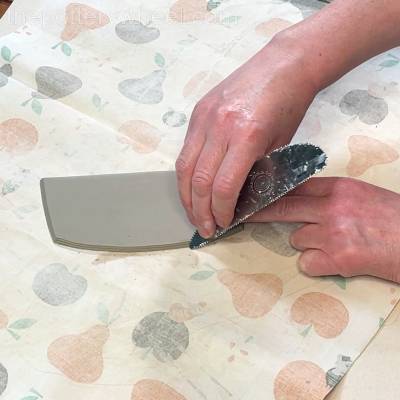
Scoring creates texture for the slip to grip onto, helping the clay pieces bond together securely.
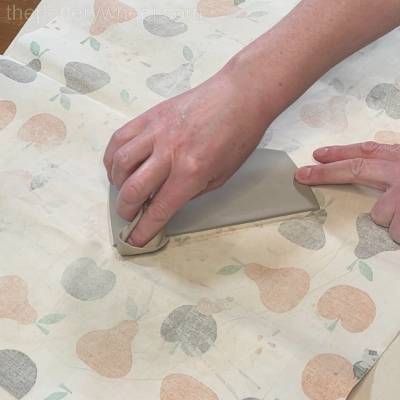
Step 6 – Preparing the Short Ends of the Butter Dish
The short end pieces are prepared in the same way as the longer side pieces.
Start by smoothing the bottom edge with a damp piece of chamois leather. Round and soften the edge while the slab is still flat — it’s much easier to do this before assembly.
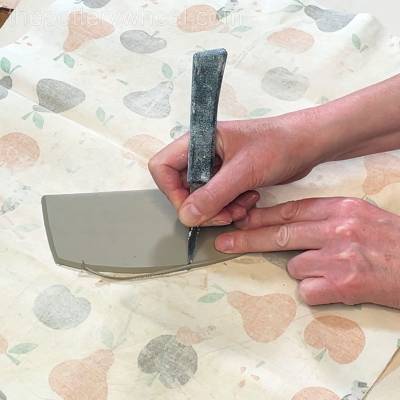
Next, bevel the joining edges:
- Both short side edges
- The top edge
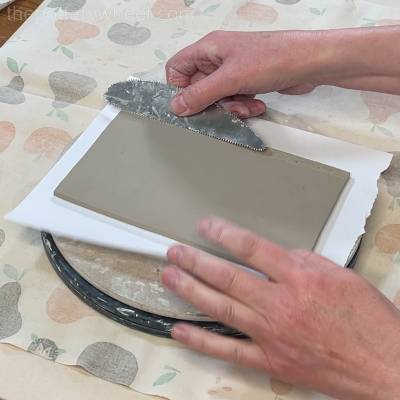
Hold the clay firmly in place as you cut, and support the corner with your finger to help prevent the edge from being damaged.
Once beveled, score all the joining surfaces with a serrated rib tool.
Repeat the process with the second short end piece and set both aside.
Step 7 – Preparing the Lid/Roof of The Butter Dish
The top section of the butter dish forms the curved “roof”.
Prepare this piece in the same way. First, bevel all four edges of the butter dish lid. Keep the bevels on the same side of the clay.
Score the edges ready for assembly.
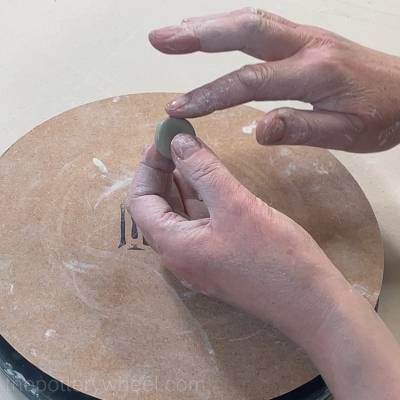
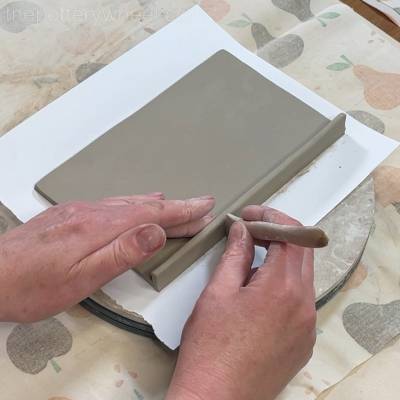
Step 8 – Preparing Clay Coils
Before assembling the butter dish, prepare some thin clay coils for strengthening the joins.
Roll out a few thin coils and keep them covered under plastic so they stay soft and workable.
A useful tip is to lightly run the coils through water before covering them. This keeps them flexible and makes them easier to blend into the joins later.
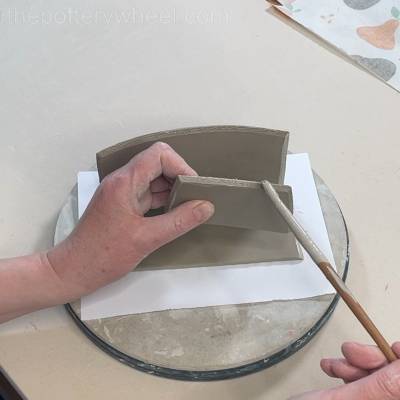
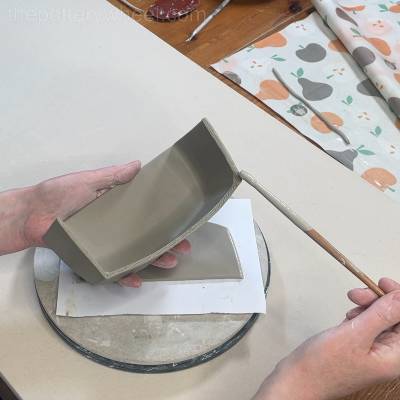
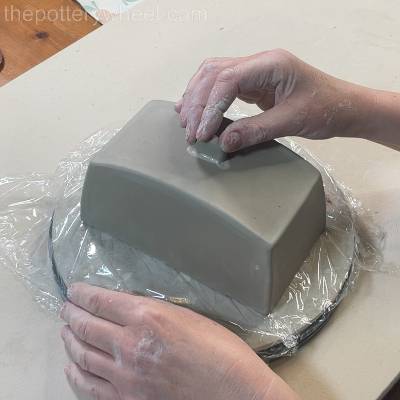
Step 9 – Attaching the First Side
Now the butter dish can start to take shape.
Apply slip to the top scored edge of one of the long side slabs. Put the side slab on a wooden bat, ideally have the wooden bat on a banding wheel.

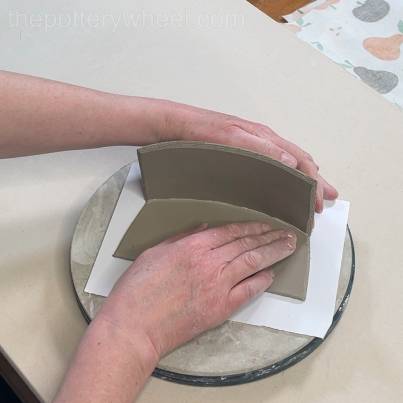
Before attaching, gently curve the roof piece slightly so it follows the shape of the side. This helps the two pieces meet more easily.
Apply slip to one curved edge of the roof/lid
Line up the bevelled edge that have slip on them.
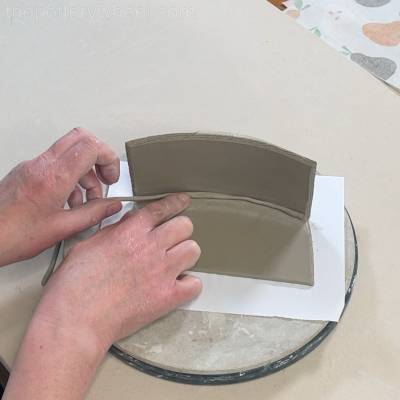
Once aligned, gently press the join together so the two edges meet neatly.
Strengthening the Join with a Clay Coil
Because the clay has firmed up slightly, add a little moisture before blending in the coil.
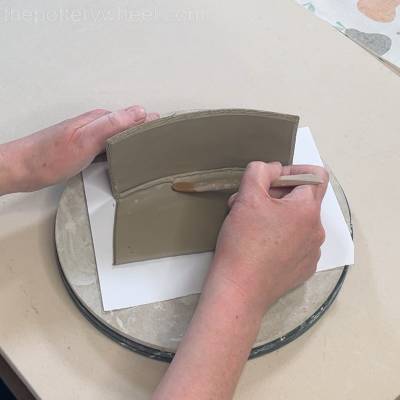
Use a soft paintbrush to apply a small amount of water along the join, then place the clay coil along the inside of the join. Press it gently into position
Blend it into both sides using a wooden modelling tool. Support the outside of the join with your other hand while blending to avoid pushing the pieces apart.
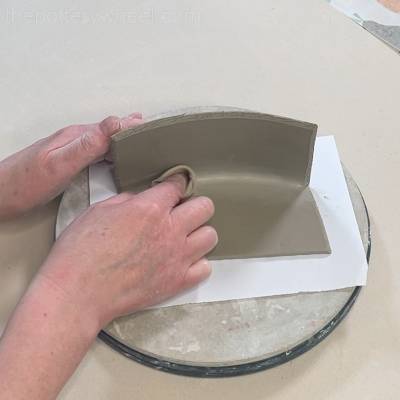
Smoothing the First Join
Next, use a damp piece of chamois leather to smooth over the join and remove any texture left behind by the tool.
Support the outside of the butter dish while smoothing to avoid putting pressure on the join.
If a little clay squeezes out from the coil, simply tidy it away with a clay knife to keep the edges neat.
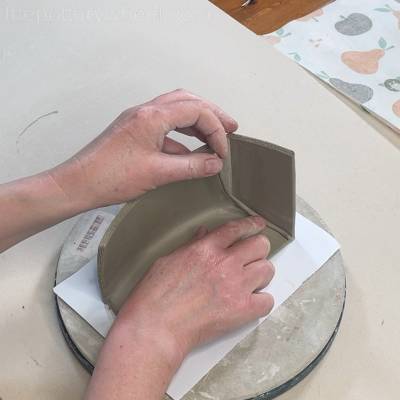
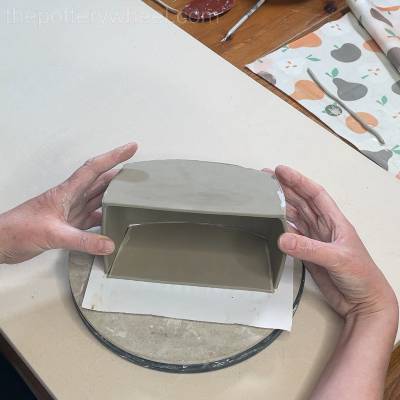
Step 10 – Adding the End Slabs
The narrow ends of the butter dish are slightly curved, so gently shape the slab before attaching it.
Before joining, check the fit:
- Make sure the size is correct.
- Check the curve matches the side piece.
- Adjust if needed.
Once you are sure the fit is right apply slip to both scored surfaces.
Position the end piece carefully. Line up the side and top edges, and press the pieces together firmly.
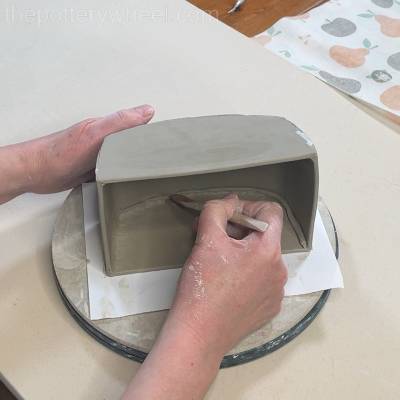
Reinforcing the End Join
Strengthen the join using the same clay coil method:
- Add a small amount of water to soften the surface.
- Place a clay coil along the inside of the join.
- Press it gently into place.
Blend it with a wooden modelling tool. Support the outside of the butter dish while blending.
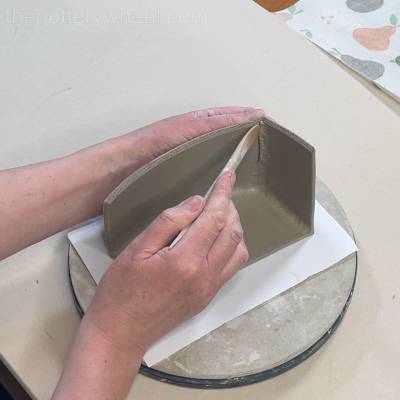
Finish with damp chamois leather to smooth the surface and remove any rough areas. Tidy away any excess clay with a clay knife.
Repeat the same process for the second end slab.
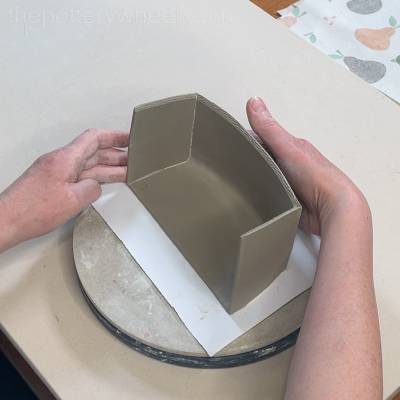
Step 11 – Attaching the Final Long Side
The final long side can now be added.
Apply slip to all joining edges of the final long side of the butter dish. Place the final side piece flat on the bat.
Apply slip to each of the edges of the assembled slabs, then lower them into position on the final long side.
Take time to align the edges before pressing the pieces together. A little gentle adjustment or wiggling is normal at this stage.
Once everything is lined up, press the joins together to secure the structure.
Secure the join on the inside with a thin clay coil in the same way as outlined above.
Strengthening and Smoothing the Butter Dish Structure
Once the final side piece is attached, blend the clay in the four bottom corners of the butter dish.
The corners are more likely to crack during drying and firing, so make sure the clay is well compressed and joined.
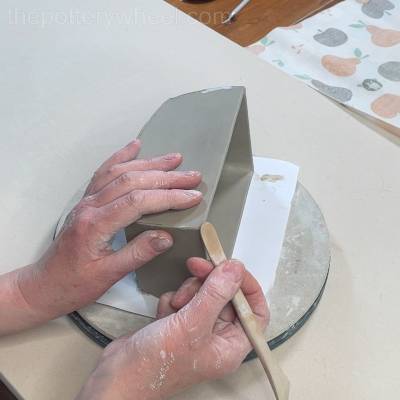
Step 12 – Blending the Outside Seams
Next, work on the outside seams.
Although the inside joins have already been blended, the outside edges may still have small gaps. Gently pinch the seams together, then smooth them with your thumb or fingertip.
If the clay feels dry, add a small amount of water to help blend the surfaces.

Finish by wiping over the joins with damp chamois leather to remove tool marks and create a smooth surface.
Step 13 – Tidying the Bottom Edge of the Butter Dish
Turn the butter dish upside down and rest it on a soft surface like an old cushion or piece of foam. Smooth the bottom edge, removing any sharp corners or rough sections.
Check that the side slabs are straight.
Once finished, place the butter dish onto a wooden bat. Put some plastic on the wooden bat before you transfer the butter dish onto it.
The plastic slows the drying process and keeps the clay workable while you prepare the lid knob.
Step 14 – Adding the Lid Knob
There are two knob options:
- Template C – curved strip-style handle
- Template D – round disc knob
The Disc Knob (Template D)
First, smooth the edges of the knob with damp chamois leather to remove any rough marks from cutting.
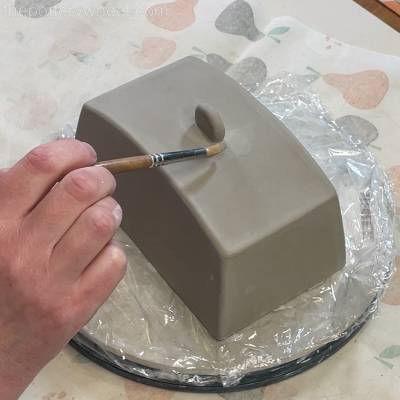
Attaching the Knob
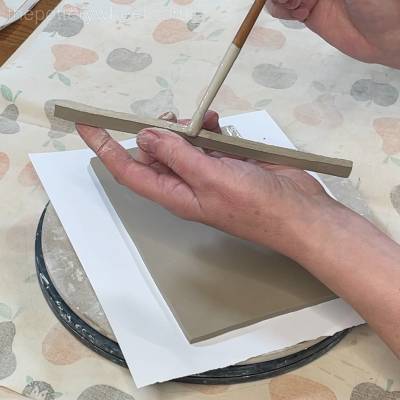
Position the knob in the centre of the lid and mark around the base with a clay knife.
Score the underside of the knob and the top of the lid where the knob will be attached.
Apply slip to both scored surfaces and place the knob into position.
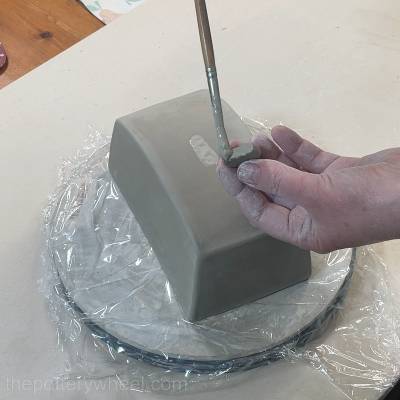
Check the placement before pressing it down firmly, making sure the angle and position are right.
Once you’re happy, gently press the knob into place to create a strong bond.
Finishing the Lid Knob
Once the knob is in position, wipe away any excess slip and allow the join to firm up.
When the clay has reached leather hard, use a damp paintbrush to smooth over the join and remove any remaining texture.
Adding the Strip Knob (Template C)
The second knob option is made using Template C, which creates a curved strip-style handle.
Before attaching it:
- Smooth the edges with damp chamois leather.
- Gently curve the strip into shape.
Once shaped, place the handle on the lid and adjust the position until you’re happy with how it sits. Mark the two areas where the handle will attach.
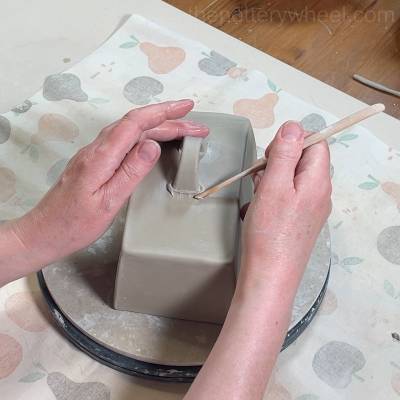
Attaching the Strip Handle
Prepare the joining surfaces:
- Score the two ends of knob.
- Score the two areas on the lid.
- Apply slip to all scored surfaces.
- Position the handle and press gently into place.
Wipe away excess slip, then strengthen the join by adding a small clay coil at each end.
Blend the coil with a wooden modelling tool and smooth the area with damp chamois leather.
Adjust the shape if needed, then set the lid aside to firm up.
Step 15 – Making the Butter Dish Base
The base is made using:
- Template H – main base slab
- Template F – the long side strips
- Template G – the short side strips
Preparing the Long Base Side Strip
Both long side strips are attached in the same way. Attach both of the long sides before you add the short sides.
Smooth the top edge of the long side strip with a damp chamois leather.
Score the bottom edge of the long side strip.
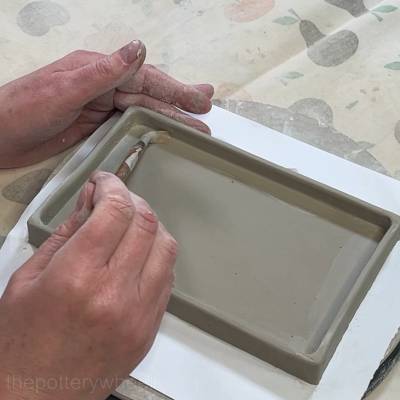
Attaching the Side Strip to the Base
Score the edge of the base slab.
Apply slip to the scored base and the scored edge of the long side strip.
Position the side strip on the edge of the base slab. Inset the strip slightly leaving the extra 1mm of base clay visible from the base.
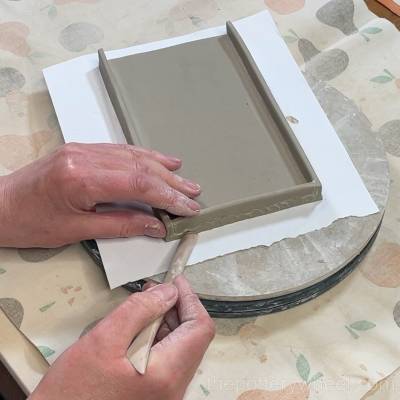
Press the strip into place, then use a wooden modelling tool to blend the excess clay from the base up onto the side.
This creates a strong, smooth join between the base and the side piece.
Blending the Base Join
Use a pottery rib tool to smooth and compress the outside join.
Work over the area several times until the clay feels secure and even.
Then use the flat edge of a wooden modelling tool to tidy the shape and keep the side strip straight.
Step 16 – Adding the Short End Side Strips to the Base
Prepare the short side ends of the butter dish base made from template G. Smooth the top edge of the short side strips. Then score the other long side of the strip. Remember to score the short ends of each side strip.

Score the matching areas on the base of the butter dish.
Position the piece, leaving the small amount of extra base clay visible, and blend the excess clay up onto the side using a wooden modelling tool.
Support the piece while blending so it doesn’t move.
Repeat this process for both of the two short side strips.
Adding Small Corner Coils
For extra strength, add a tiny clay coil into each corner.
Roll a small coil of clay.
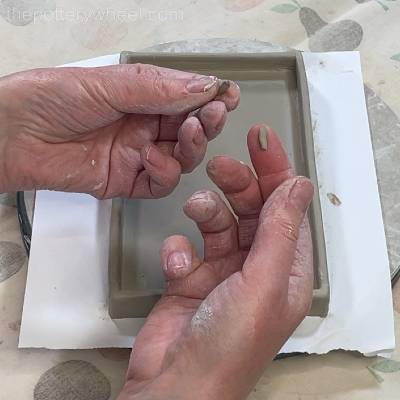
Press the small coil in the corner.
Blend the clay coil into the corner.
Repeat the process of adding a small clay coil to each corner on the base. This creates a strong connection between the base and sides, helping the butter dish dry evenly without the joins separating.
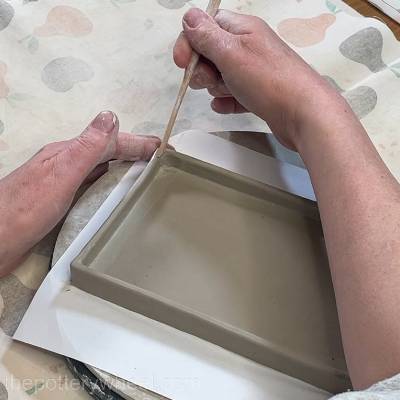
Finishing the Base Joins
Adding a thin coil all around the inside join of the base can make the interior of the base too bulky. This might stop the butter dish lid from fitting neatly.
Instead of using a coil, I blend the join on the inside in the following way. I take a soft brush and wet the brush with clay slip. Then I run the brush back and forth over the join until the surface of the join looks smooth and blended.
In the corner of the base, I gently swirl the brush with slip around, to smooth away any marks left by the modelling tool and blend the surface.
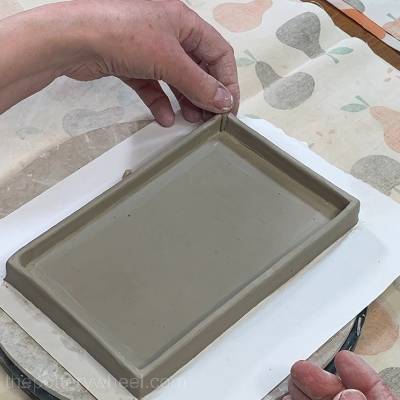
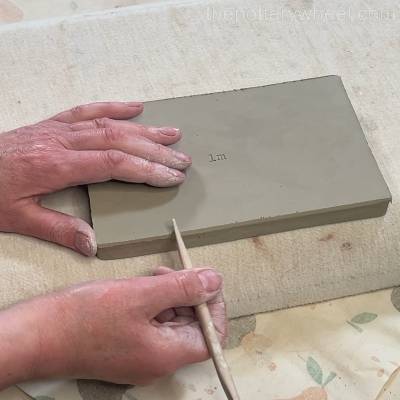
Tidying the Bottom Edge
Once the inside joins are finished, carefully turn the base over. The clay is still slightly flexible, so handle it gently.
Use the flat edge of a wooden modelling tool to tidy the bottom edge. Trim away a small amount of clay to create a slight bevel, which gives the base a cleaner finish once fired.
Use damp chamois leather around the outside edges to:
- Smooth the surface
- Round the corners
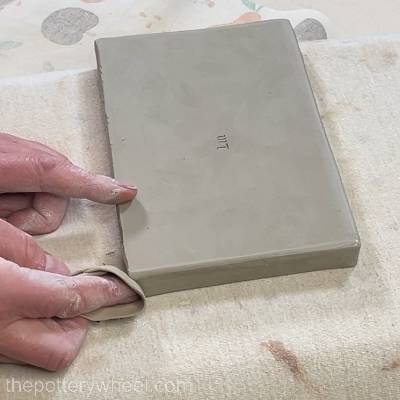
Softening the corners helps reduce the chance of chips or damage during everyday use.
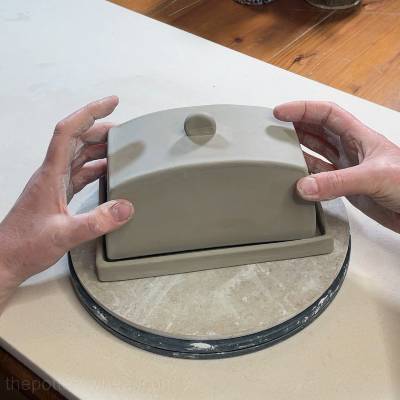
Step 17 – Checking the Fit of the Butter Dish Lid
Once the base is finished, check that the top section fits neatly inside.
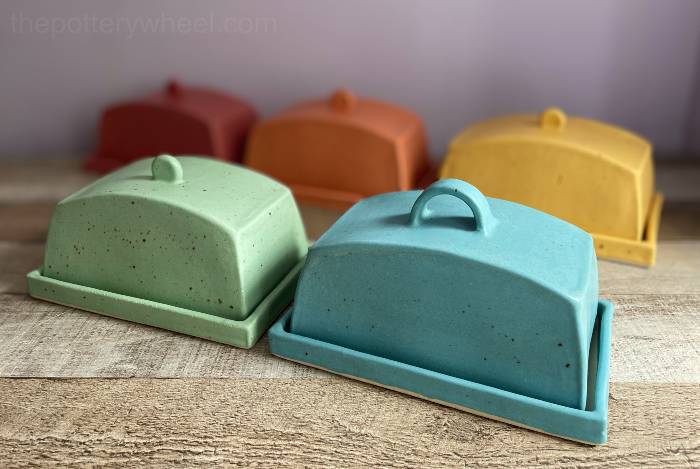
The base is designed to be slightly wider than the lid, leaving a small gap around the edges.
This extra space is useful because it allows you to glaze the whole of the lid if you wish, without the two parts becoming too tight or sticking together.
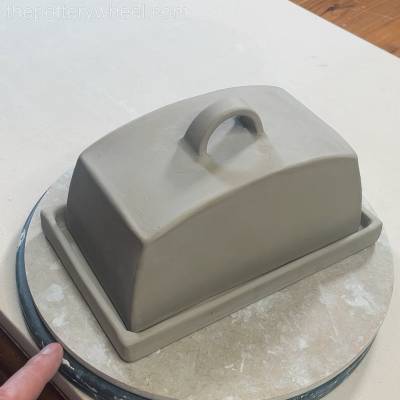
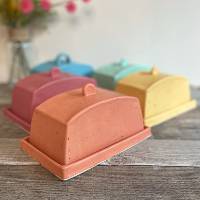
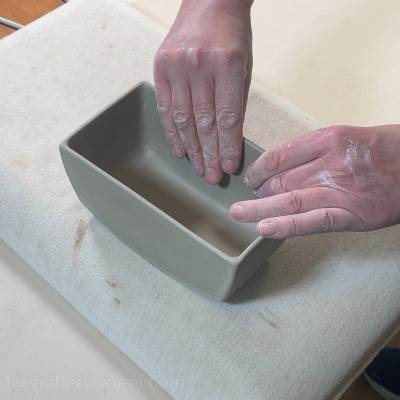
Finished Slab Pottery Butter Dish
The slab-built butter dish is now complete, ready to be dried, fired and glazed.


Leave a Reply