
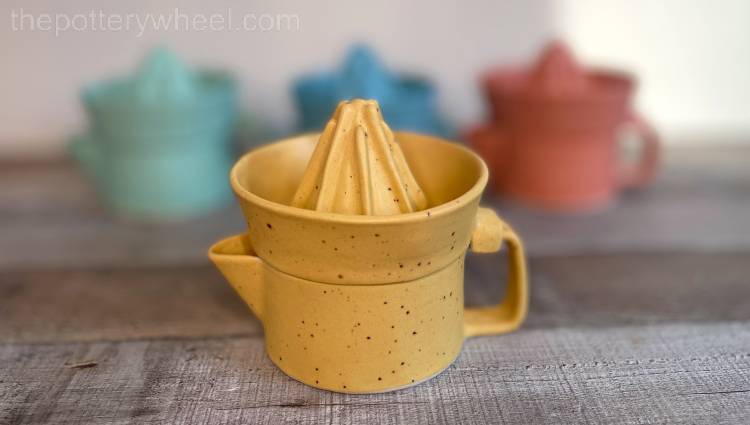
This is how to make a slab pottery lemon squeezer using a printable pottery template. It’s a step-by-step guide, with images.
You Will Need
Here are some of the tools that you might find helpful when you are making the lemon squeezer:
- Clay
- Rolling Pin
- Roller Guides
- Clay knife
- Rubber pottery rib
- Platter tool
- Clay scoring tool
- Serrated rib
- Wooden modelling tools
- Chamois leather
- Lazy Susan
- Banding wheel
- Wooden drying/wedging board
- Canvas
- Serrated rib tool
If you would like to make the lemon squeezer, you can get a copy of the template here:

You can get a copy of the template (and my other slab pottery templates) from my online store here….
Using the Lemon Squeezer Template
Here are the initial steps in preparing to make the lemon squeezer.
Step 1 – Rolling a Slab of Clay
Roll a slab of clay with a slab roller or a rolling pin. If you are using a rolling pin, it’s a good idea to use roller guides which enable you to roll a slab of an even thickness.
I use 3mm roller guides. But if you prefer working with thicker slabs, you can use thicker roller guides.
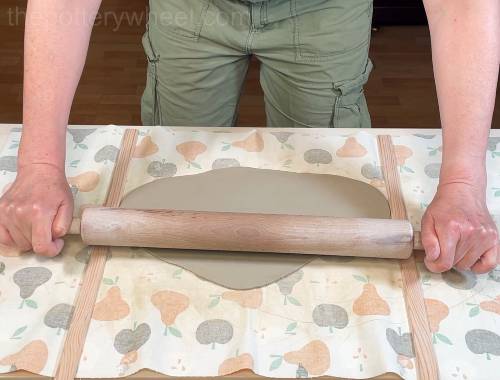
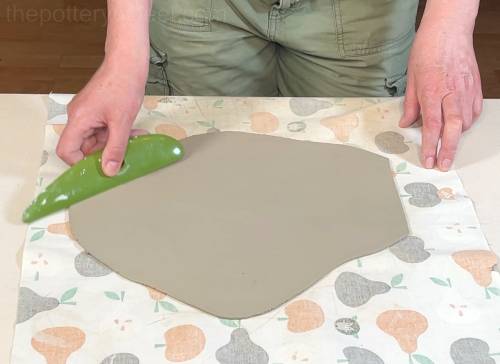
Once the slab is large enough, run a pottery rib over each side of the slab. If you are new to working with slabs, you might find my step by step guide on rolling slabs helpful.
Step 2 – Cutting Out the Slab Pieces
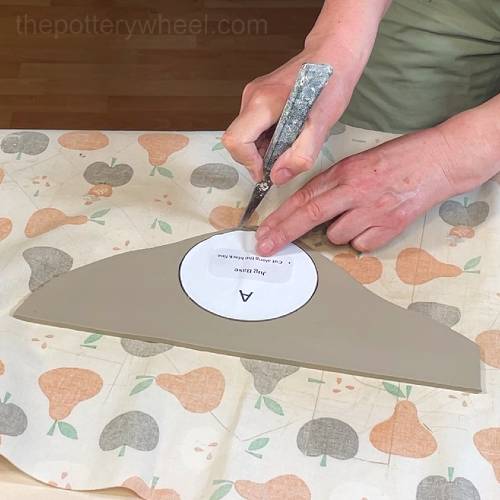
Print the template and cut the pieces out of paper. Once you have prepared the paper template, you can use them to cut out your clay slabs.
When you have cut out the paper template, you can draw around it onto craft foam. Craft foam is a flexible material that doesn’t absorb moisture and will last longer than a paper template.
Here is an alphabetical list of the different parts to the template:
The template consists of parts for the squeezer jug and parts for the squeezer itself. Together they make up the lemon squeezer set.
Pieces of The Lemon Squeezer Jug
Here are the parts of the template that make up the lemon squeezer jug.
Template A
A is the template for the base of the jug.
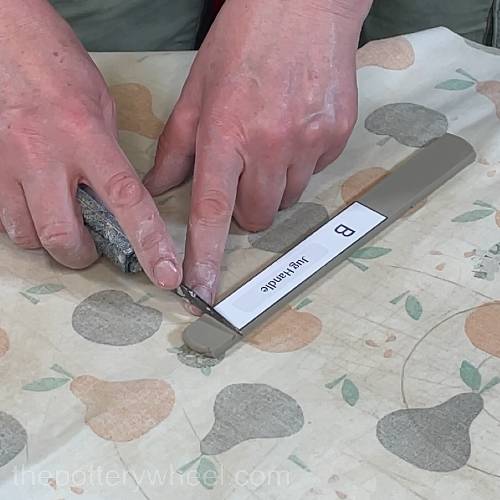
Template B
This is the handle for the jug. For the handle, I roll a small slab with 5mm roller guides, as I like handles to be a bit thicker.
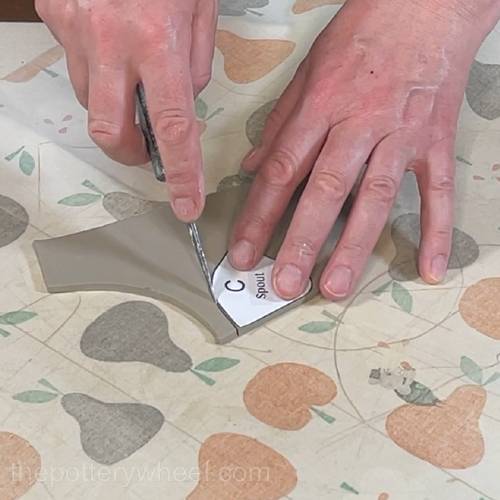
Template C
This is the template for the spout on the lemon squeezer jug.
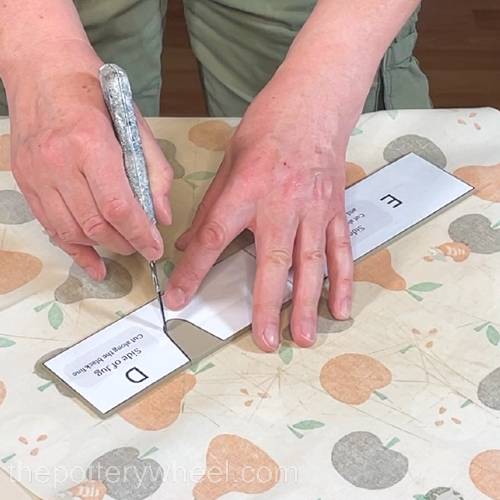
Template E & D Joined
E and D together make the wall of the lemon squeezer jug.
Pieces For The Lemon Squeezer
Here are the parts of the template that make up the lemon squeezer part of the set.
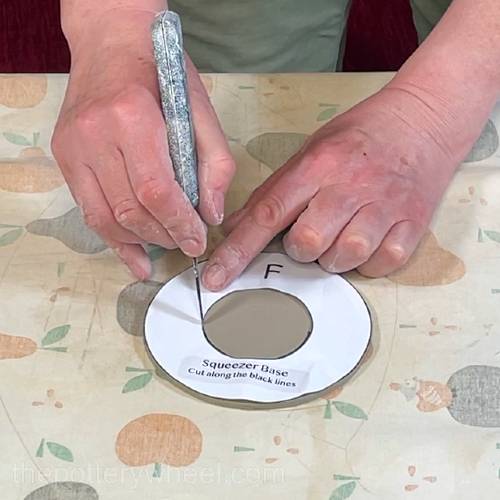
Template F
This is the circular bottom of the lemon squeezer.
Template G
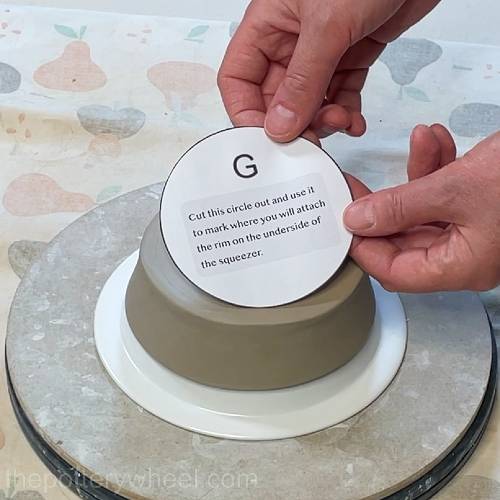
This template is used as a guide for making on the underside of the lemon squeezer where to attach the rim. So, you don’t need to cut out a slab for template G.
Template H
This template is for a small tab of clay that attaches to the lemon squeezer and fits around the jug handle. It stops the lemon squeezer from spinning around when you are squeezing lemons!
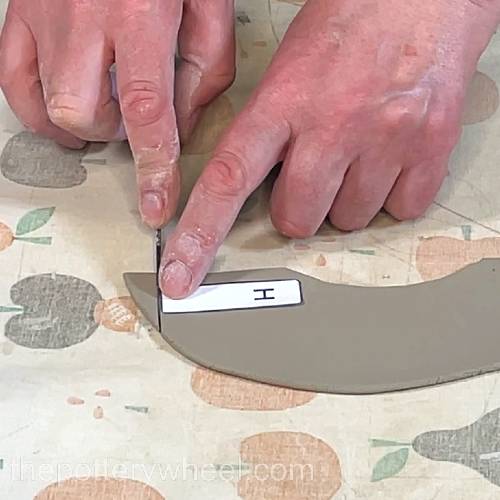
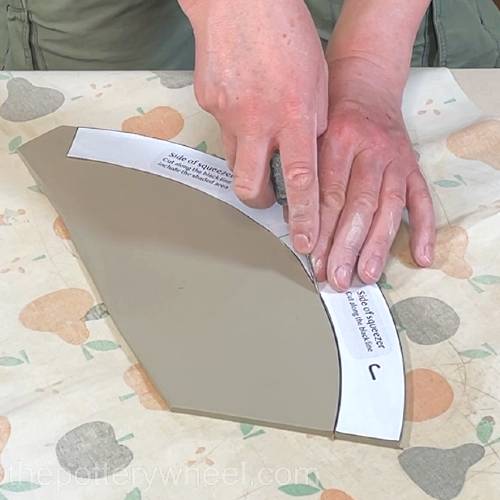
Template I & J Joined
Together, templates I and J make the cone-shaped wall of the lemon squeezer.
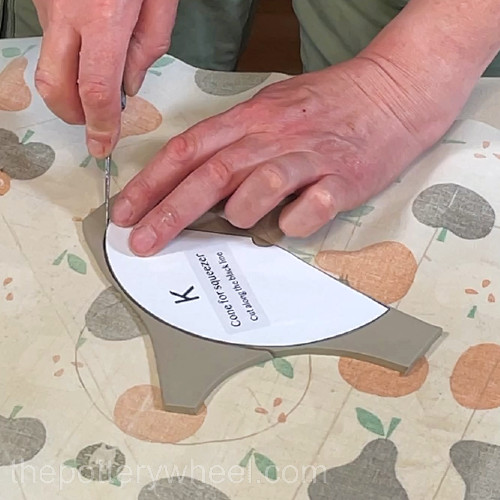
Template K
This template makes the cone shape that sits in the middle of the lemon squeezer.
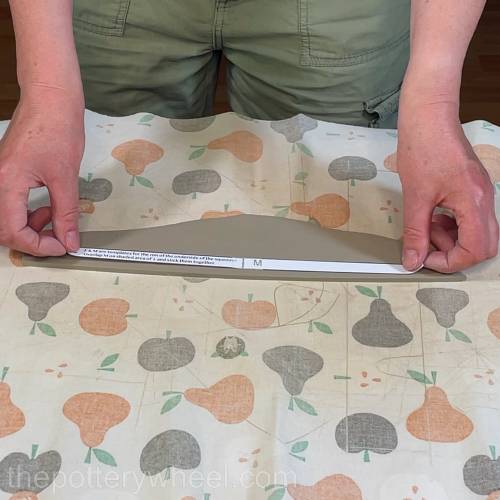
Template L & M Joined
Together template L and M when joined make a long strip of clay that forms the rim on the underside of the lemon squeezer. This keeps the squeezer on the jug.
Tip: After you have cut out the slabs, wrap the small slabs in plastic to stop them from drying out too much and becoming too stiff.
Making the Jug
Here is how to make the jug part of the set.
Step 3 – Making the Wall of The Lemon Squeezer Jug
Wipe both side of the top edge of the slab made from template D & E. This is the top edge of the jug, and it’s easier to smooth it when it’s flat.
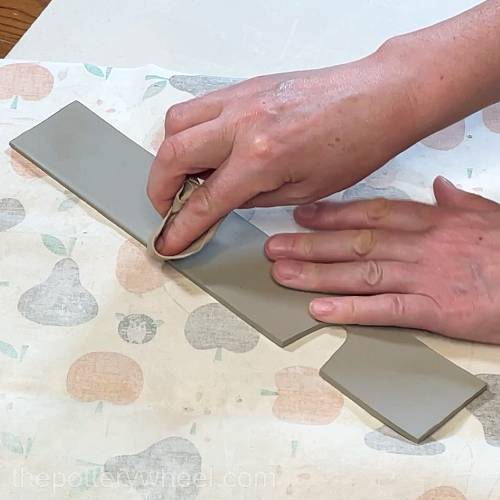
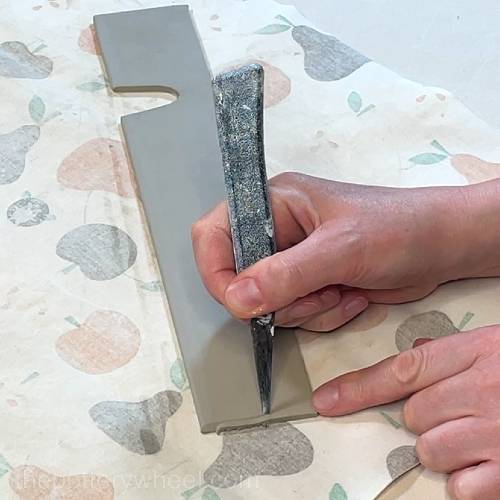
Bevel both short ends of the slab. Bevelling means cutting at an angle. You can bevel by holding your clay knife at an angle and drawing it down the short end.
Important: Remember to turn the slab over before you bevel the second side. This will ensure that the bevelled edges are flush and overlap when you join them.
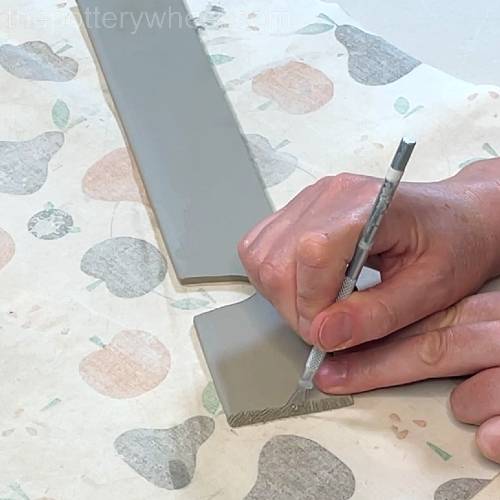
Score into the bevelled edges.
Lift the slab and curve it around into a circle.
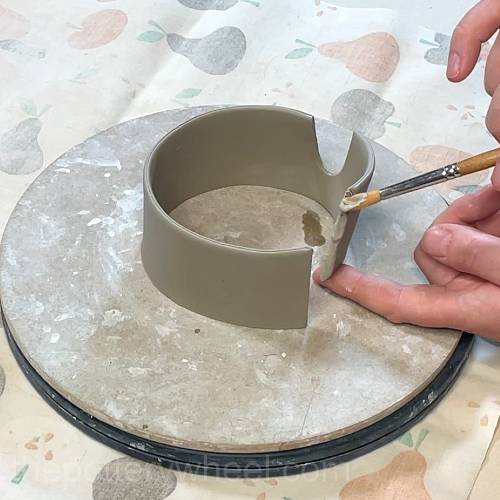
Apply slip to both scored edges. Press the edges together and compress the join.
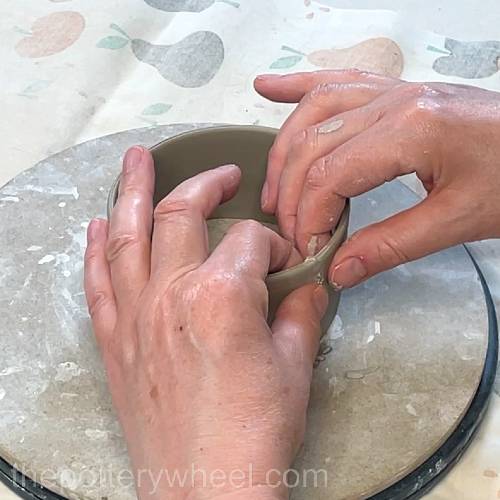
Run a rubber rib over the outside edge to smooth the join.
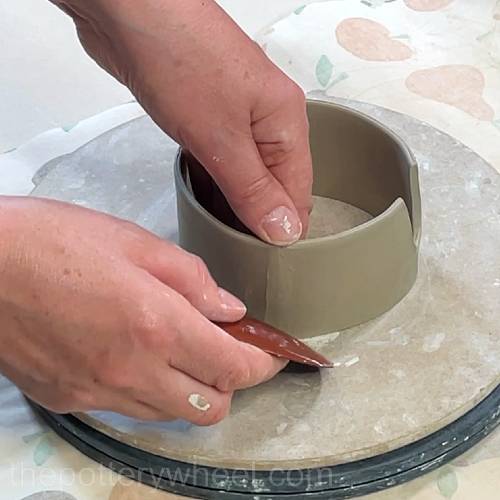
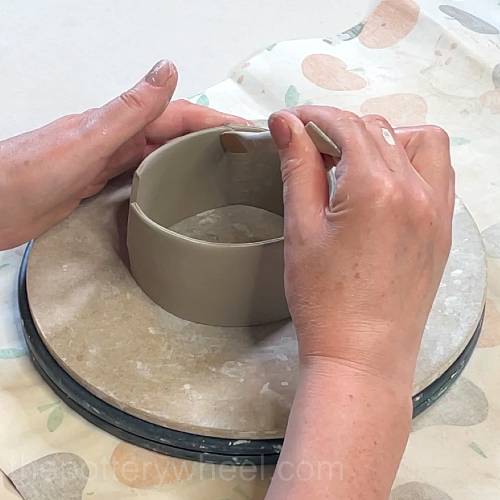
Blend the inside seam using a wooden modelling tool.
You can get a copy of the template (and my other slab pottery templates) from my online store here….
Step 4 – Adding the Base to The Lemon Squeezer Jug
Using a serrated rib tool or a clay scoring tool, score around the edge of the base slab made from template A.
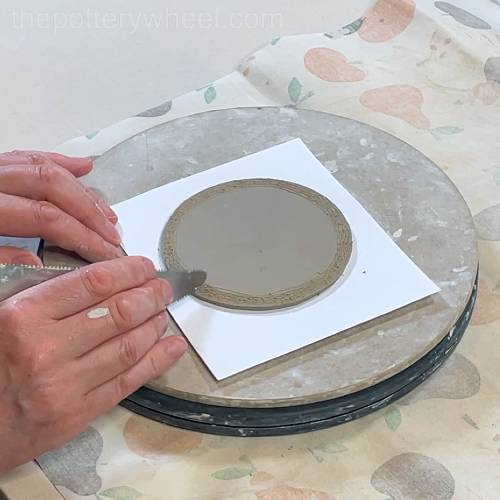
Then score around the bottom edge of the jug wall.
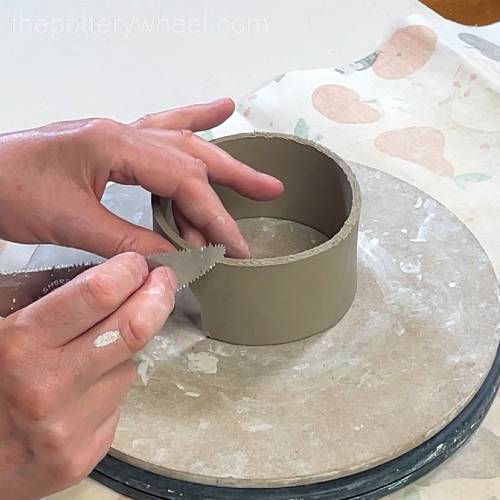
Apply slip to both scored surfaces.
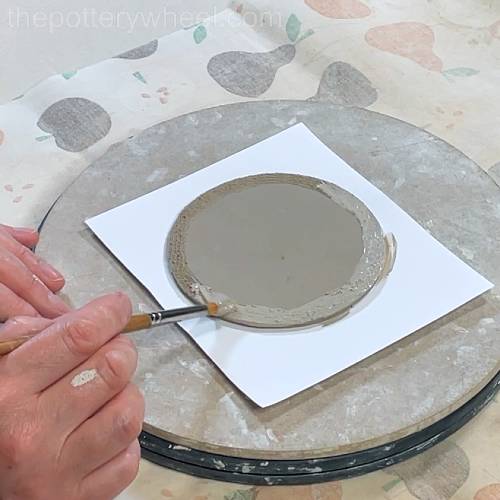
Lower the wall of the jug onto the base.
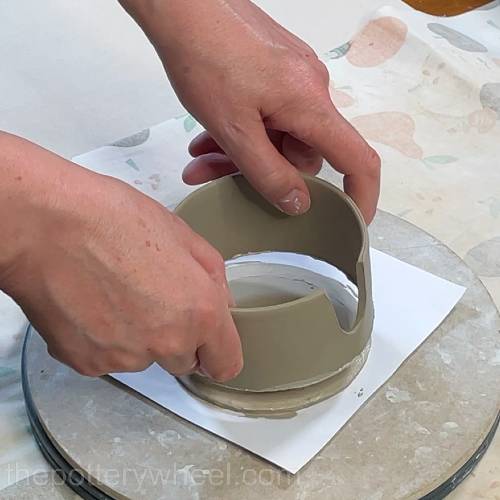
The base is a couple of millimeters wider than the wall. You can use this extra clay to blend the base onto the side of the jug with a modelling tool.
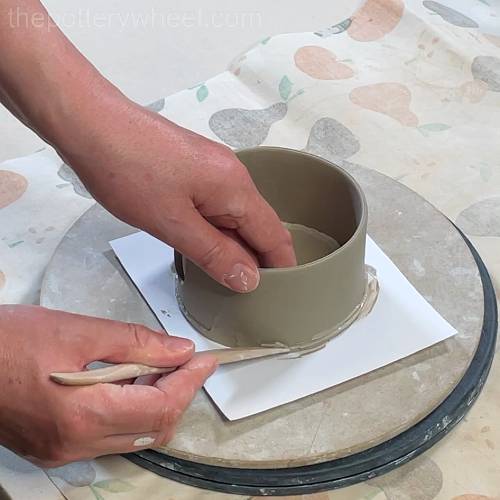
After it’s blended on, smooth the join with a rubber rib tool.
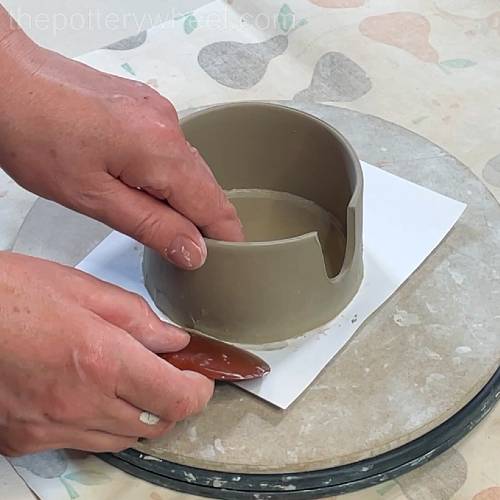
I smooth the inside join by running a soft brush loaded with clay slip over the join until the two pieces are blended together. I do this all the way around the inside base join.
If you prefer you can add a thin coil to the join and blend that in.
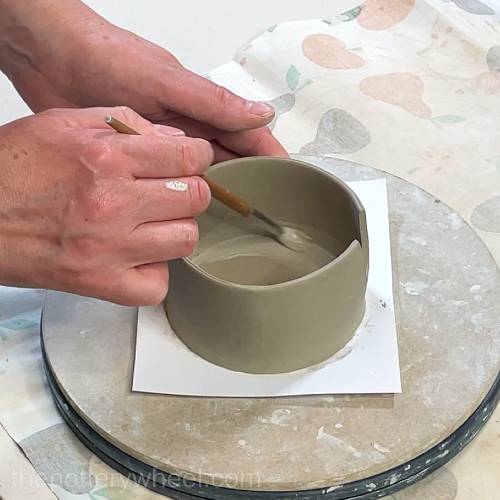
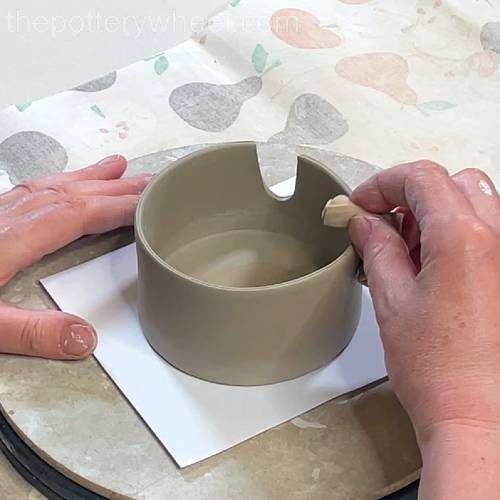
Then I turn the jug over, and I tidy up the outside bottom edge using the flat edge of a modelling tool.
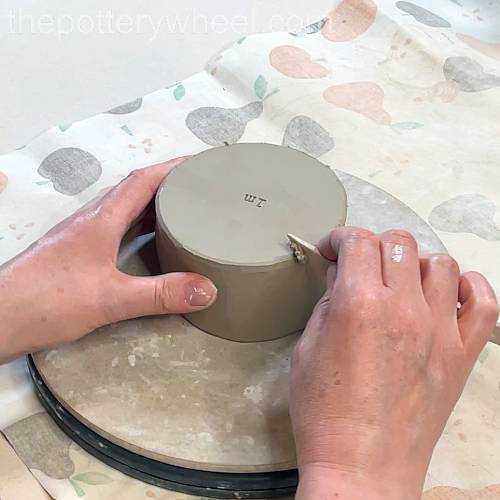
I finish tidying up the outside edge using a damp chamois leather to get rid of marks left by the tool.
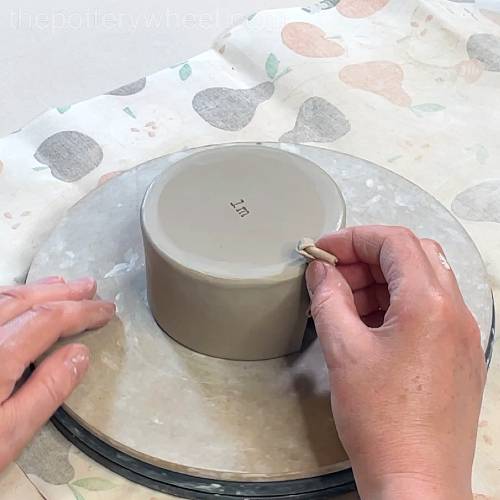
Then I turn the jug over and smooth the rim of the jug with the chamois leather.
Step 5 – Making The Handle
Smooth each of the four edges of the handle with a damp chamois leather.
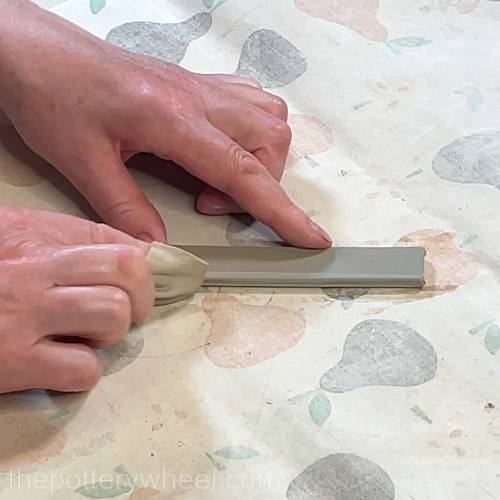
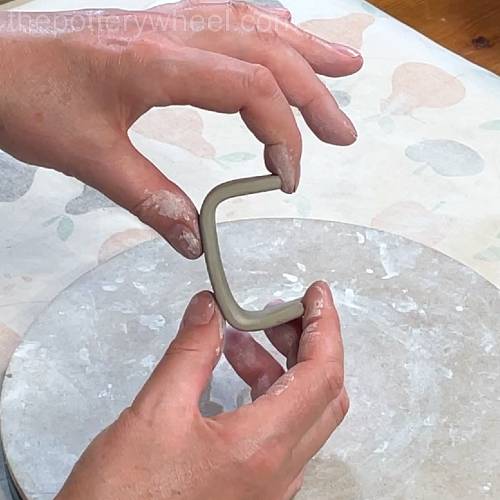
Shape the handle as you like. I like to make the handles for this squeezer jug square, but you can make it round if you prefer.
To make it square, I bend both ends of the clay tab to create right angles. When you bend clay small cracks can appear in the surface. You can blend these in with a wet fingertip.
Step 6 – Adding The Handle to The Lemon Squeezer Jug
With my clay knife, I carve a curve in each end of the handle. This helps the handle sit flat against the curved edge of the jug.
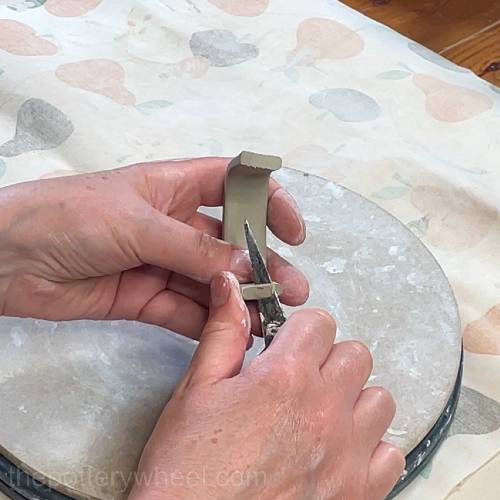
Hold the handle up against the side of the jug (opposite where the spout will be attached). Make some small marks on the side of the jug where you are going to attach both ends of the handle.
Score on the side of the jug where the handle will attach. Also score both ends of the handle.
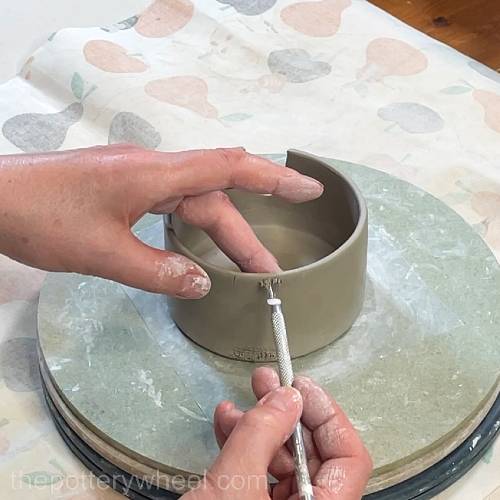
Apply slip to each scored surface.
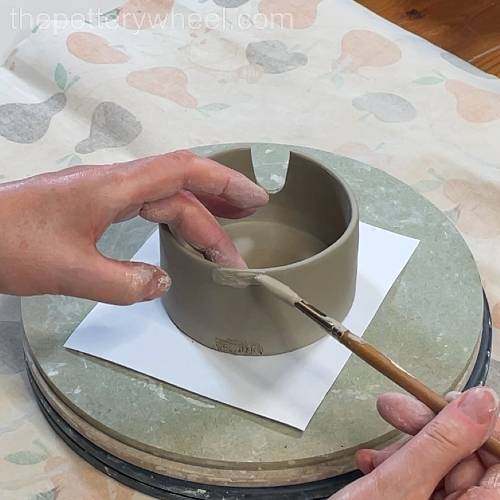
Press the handle into position. Then wrap a thin clay coil around the points where the handle meets the jug. Blend the clay coil onto the handle and the jug.
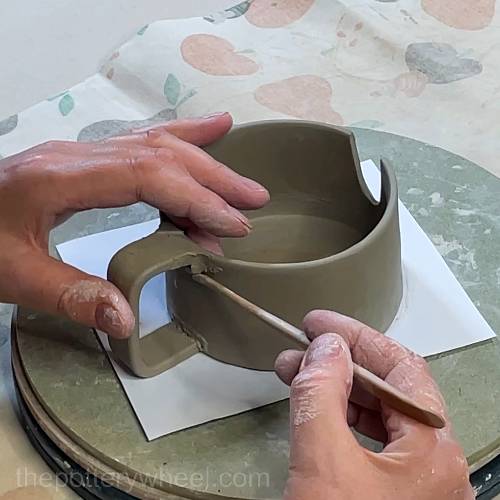
Blend a coil in around both points where the handle is attached. Wipe down the join with a damp chamois leather to get rid of any marks left behind by the wooden modelling tool.
Step 7 – Adding The Spout
The spout is the small slab made from template C. Smooth the top edge of the spout on both sides.
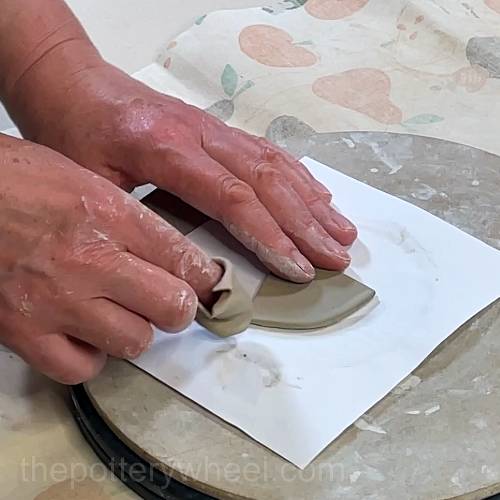
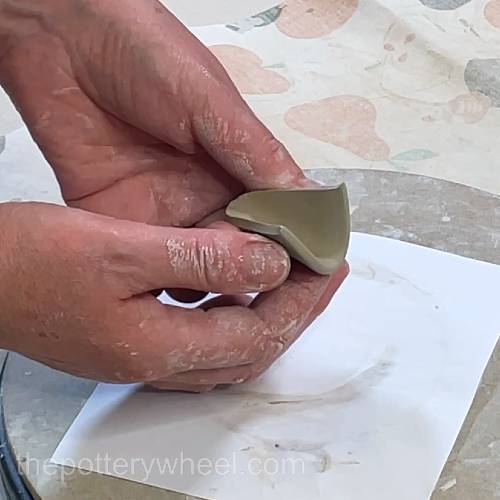
Gently bend the spout so that it folds into a pourable spout shape.
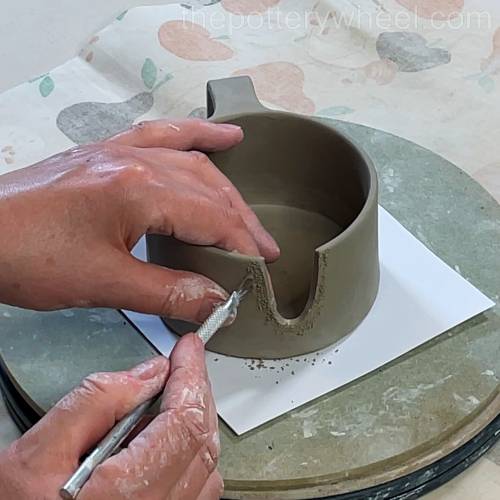
Score the outside edge of the jug where the spout is going to be attached.
Also score into the edge of the spout.
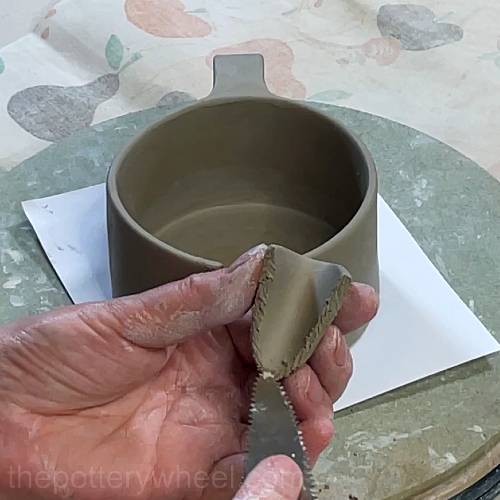
Apply slip to both scored edges.
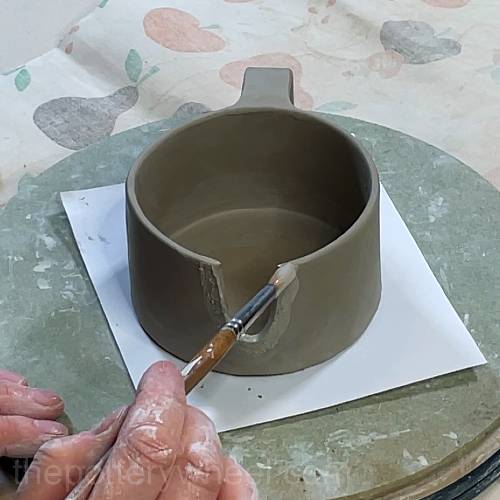
Press the spout into position.
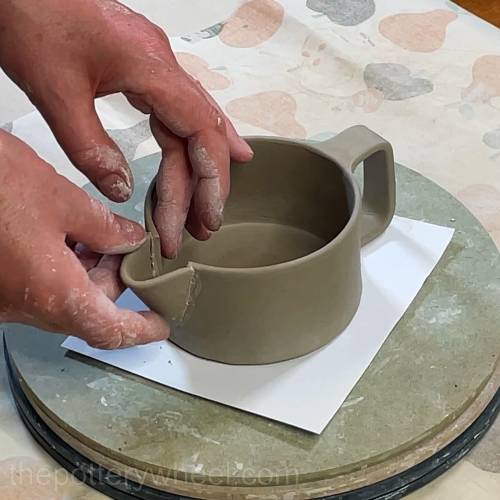
Blend the edge of the spout onto the outside surface of the jug.
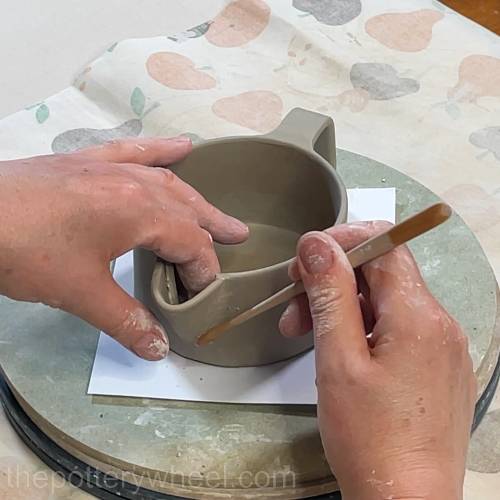
Also blend the inside join where the spout meets the jug.
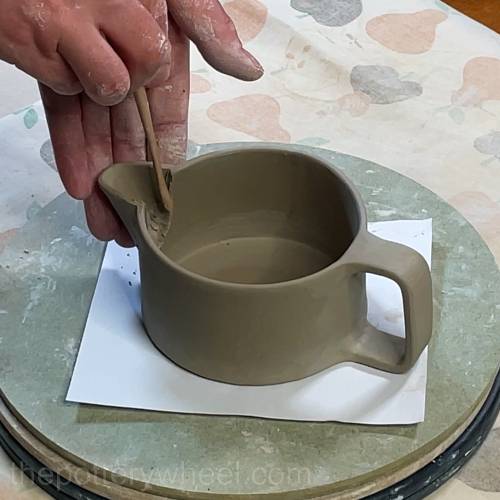
Wipe the inside and outside surfaces with the damp chamois leather to create a smooth finish.
Making the Lemon Squeezer
This is how to make the lemon squeezer part of the set.
Step 8 – Joining The Wall and Base of The Lemon Squeezer
Smooth the long edge on both sides of the arc-shaped slab made by templates I and J.
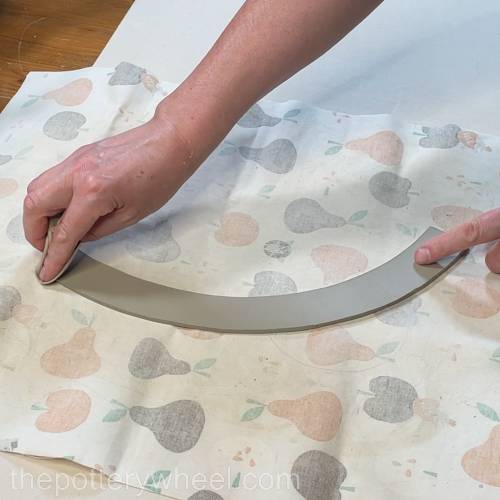
Bevel both short ends of the same slab. After you have bevelled the edges, score into the short ends.
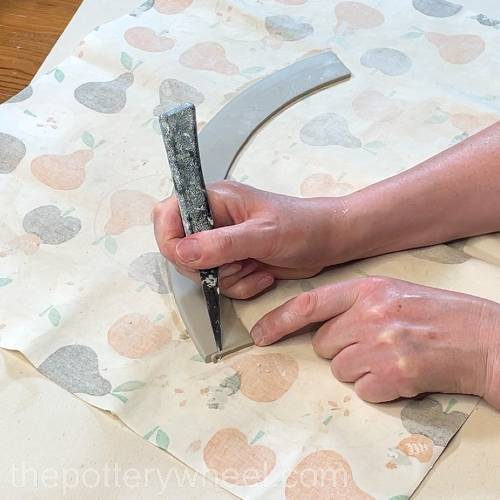
important
Remember to turn the slab over before you bevel the second short end.
Curve the clay around into a circle, so that it’s resting on the narrower end of the clay cone.
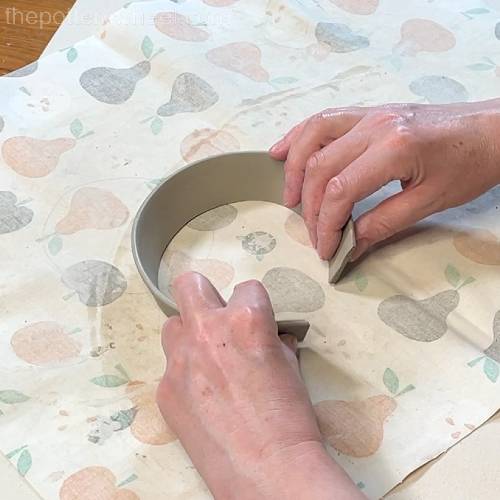
Apply slip to both scored ends, and press the ends together to make a firm bond.
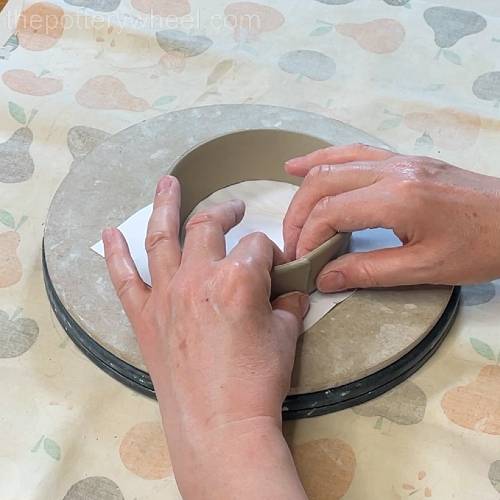
Smooth the join on the outside with a rubber rib.
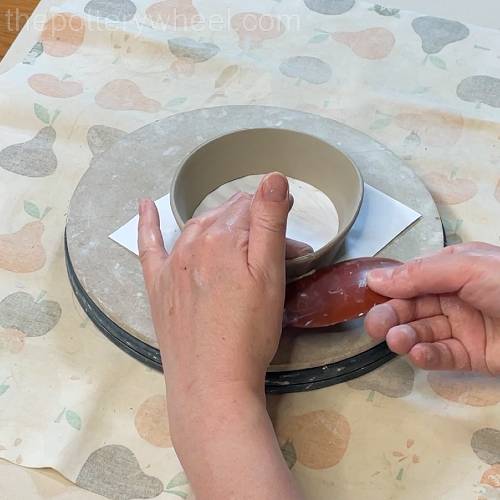
Blend the join on the inside with a rib or a modelling tool. You can smooth away the marks left by the modelling tool with a rib.
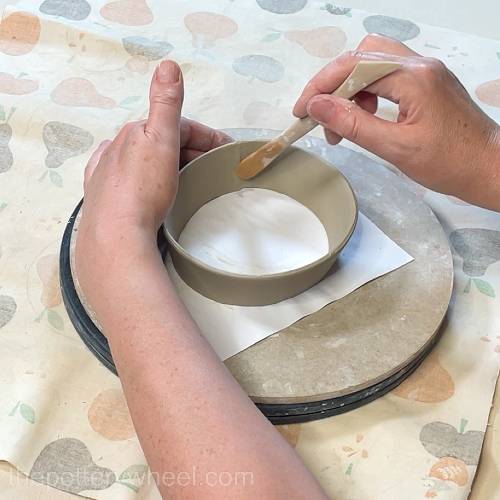
Score all around the edge of the slab made from template F. Score the underside of the clay cone walls.
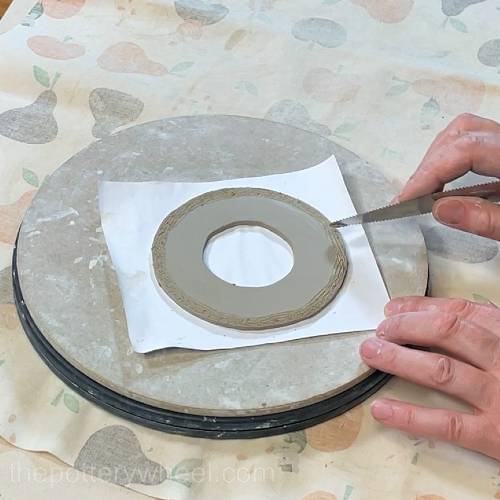
Apply slip to both scored surfaces, and then lower the clay cone down onto the base.
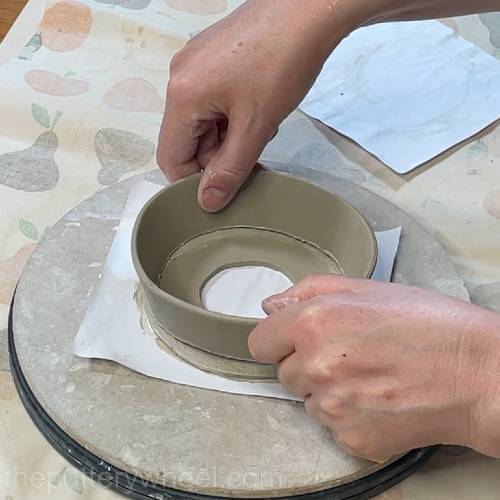
Position the clay cone so that it’s right in the centre of the base.
The base is about 2 mm wider all the way around that the sides. Blend this extra clay from the base onto the side of the clay cone. I blend it on with a modelling tool. Then it tidy it up a bit with a rubber rib.
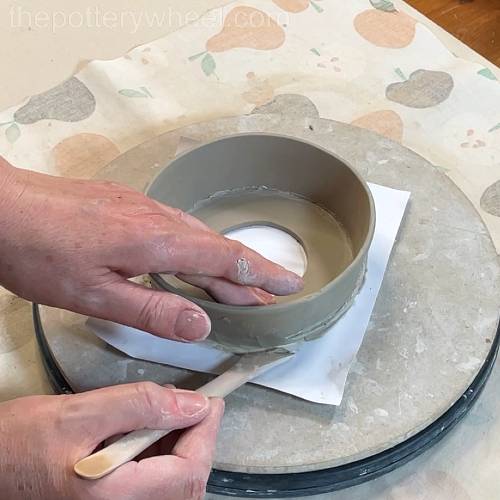
Dip a soft brush in clay slip and brush the inside join with clay slip repeatedly until the join on the inside is smooth and blended together. If you prefer you can put a thin clay coil around the inside join and the coil in.
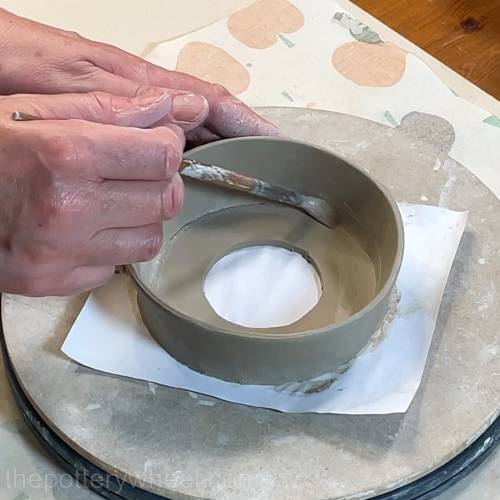
Tidying Up the Base and Wall
Turn the clay cone over. Use the flat edge of a modelling tool to tidy up and shape the join on the outside.
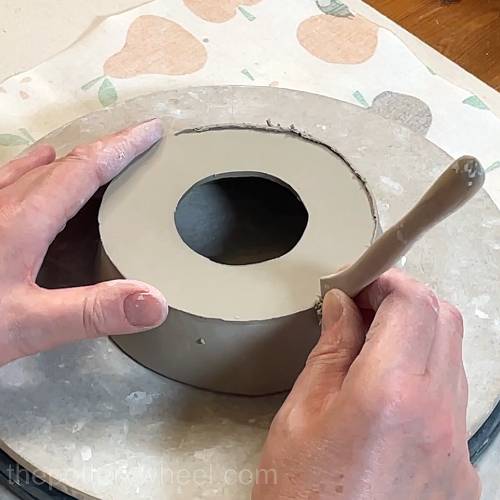
Wipe down the join with a damp chamois leather to make it smooth.
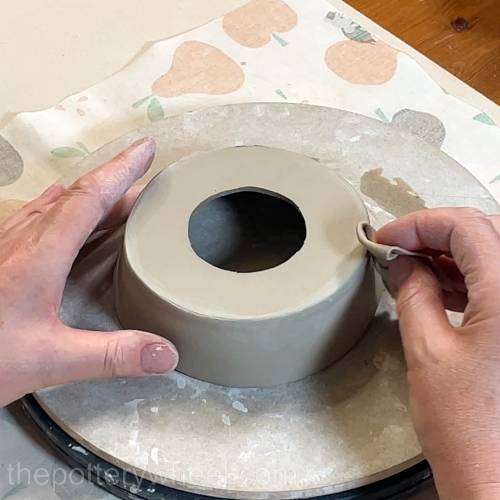
Step 9 – Adding a Rim to The Lemon Squeezer
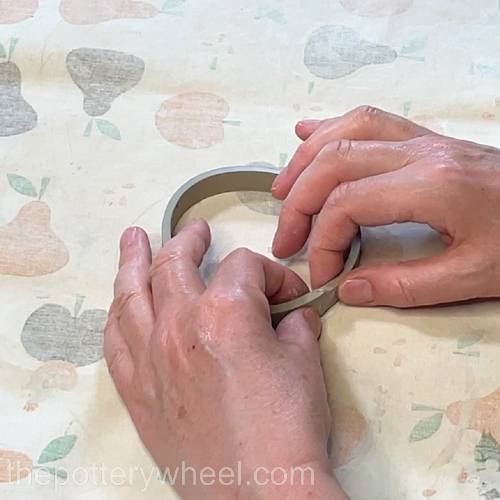
Bevel the two very short ends of the long strip slab made from templates L and M. Remember to turn the slab before you bevel the second end. Score into the bevelled ends.
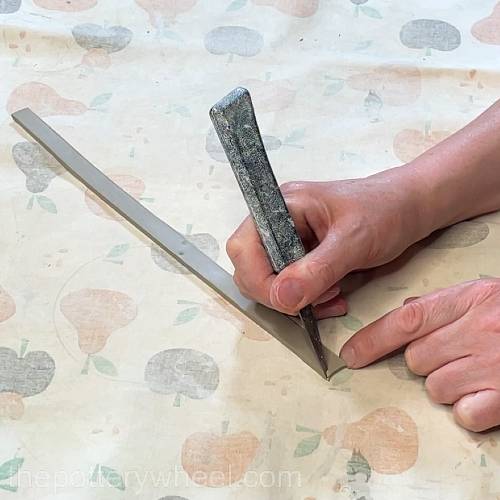
Curve the clay strip into a circle and apply slip to both scored ends. Press the ends together to make a clay ring.
Place template G (this is a guide template) on the underside of the base of the lemon squeezer.
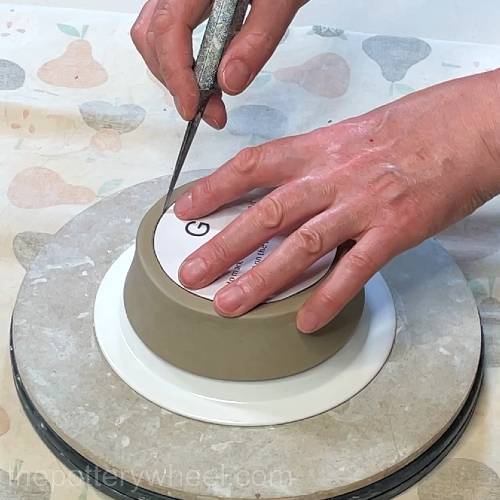
Use a clay knife to draw lightly around template G to make a light circle on the base.
Score around the guide circle on the base with a clay scoring tool. Also score around one side of the clay ring you just made.
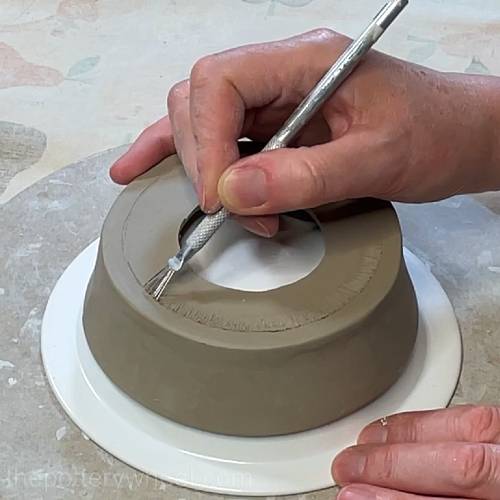
Apply slip to both scored surfaces. Lower the clay ring into position on the underside of the base.
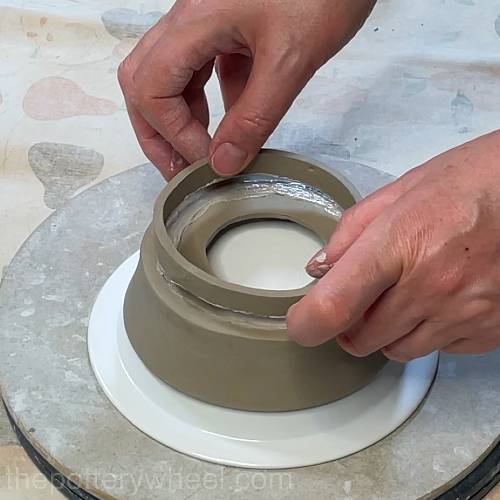
Use a fine modeling tool to blend the rim onto the underside of the base.
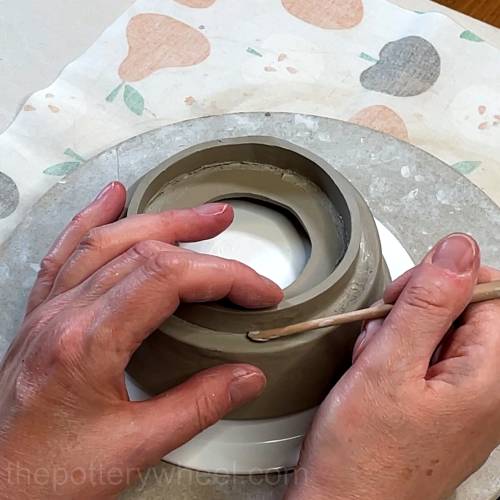
It needs to be blended on the inside and outside join.
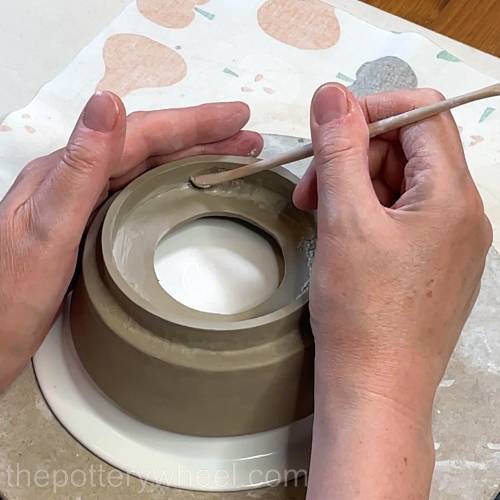
Use a soft brush with slip on it to wipe down both blended surfaces to create a smooth finish.
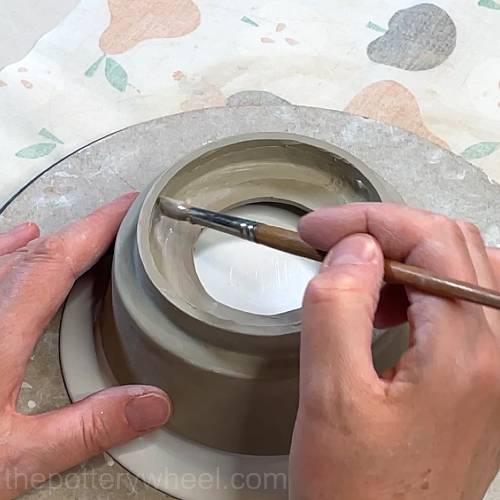
Wipe the edge of the rim with a damp chamois leather to create a round finish on the rim.
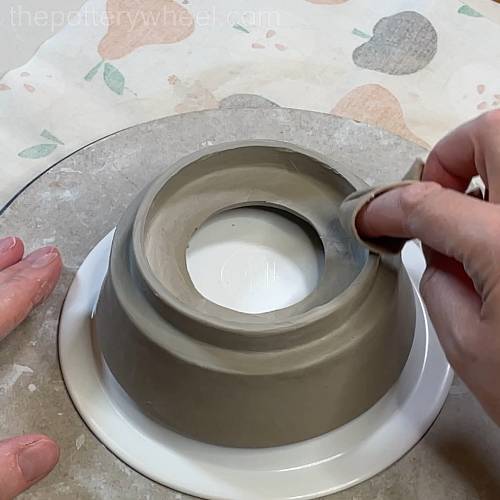
Step 10 – Making The Cone For The Lemon Squeezer
Bevel both straight edges on the clay slab made using template K. Turn the slab over before beveling the second edge.
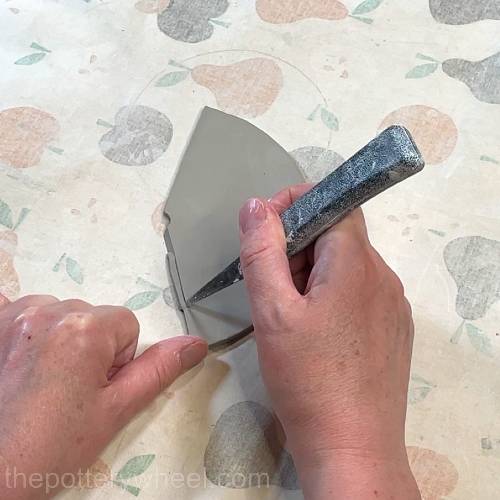
Score into both bevelled edges.
Gently curve the slab round into a cone shape. The clay needs to be soft to curve it round. If tiny cracks appear in the clay, smooth them away with a wet fingertip.
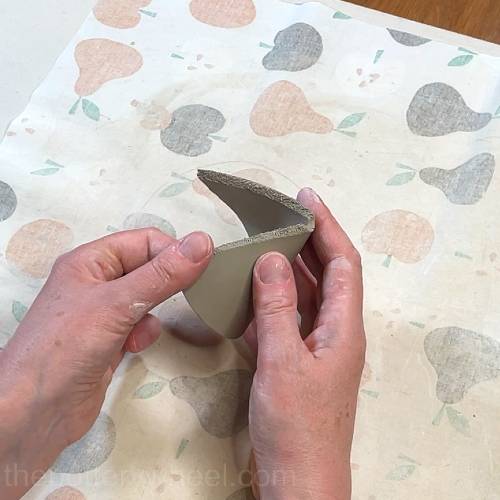
Apply slip to both edges and press the seam together.
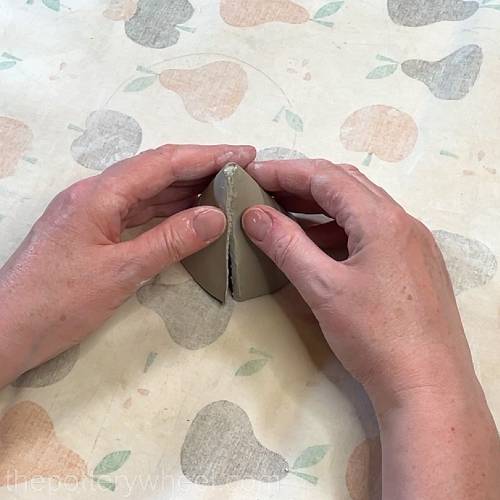
Blend the seam on the outside with a rubber pottery rib.
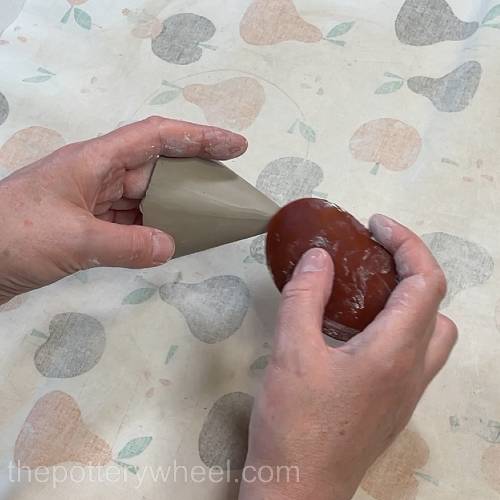
Blend the inside join with a modelling tool.
Step 11 – Adding Ridges to The Lemon Squeezer Cone
Roll a thin coil of clay. You can check out my tips on rolling a coil of clay here.
Cut the clay coil into 4 equal lengths. I cut the first batch of coils into lengths of 5 ½ cm.
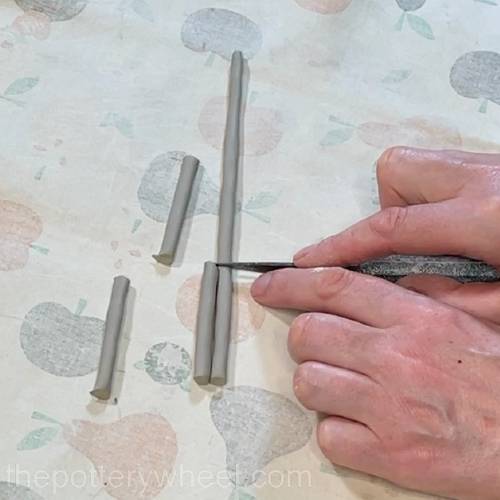
You’re going to attach each coil to the side of the cone, at regular intervals around the cone. Score into the side of the cone, and also along one side of the coil.
Apply slip to both scored surfaces and gently press the coil onto the side of the cone.
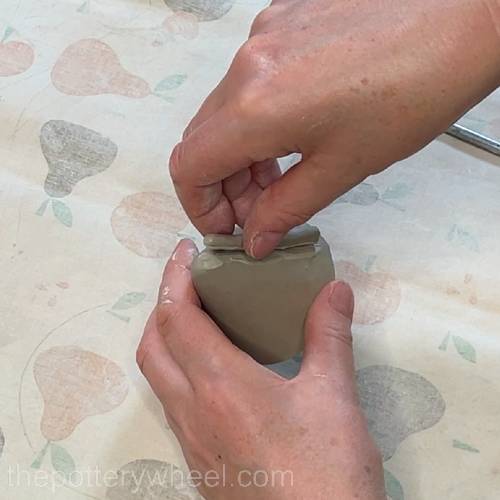
You can add a bit of water to soften the clay a little. Then use a modelling tool to blend each edge of the coil onto the cone.
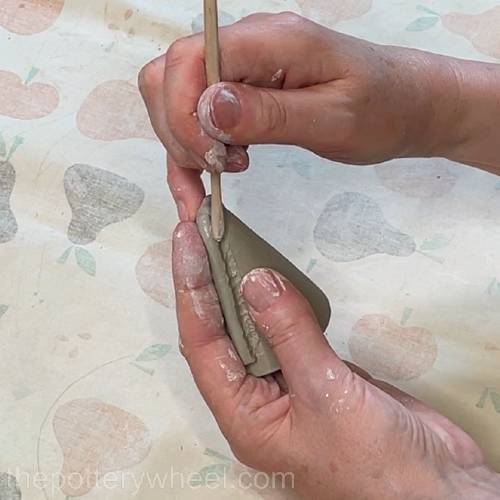
Once it’s blended all around, use a damp chamois leather to smooth the surface and edge of the coil.
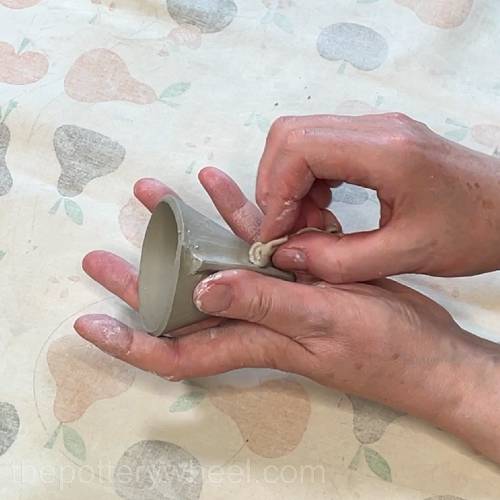
Repeat this process until all 4 coils have been attached around the cone.
Then cut 4 shorter coils. I usually make the shorter coils around 4 cm long.
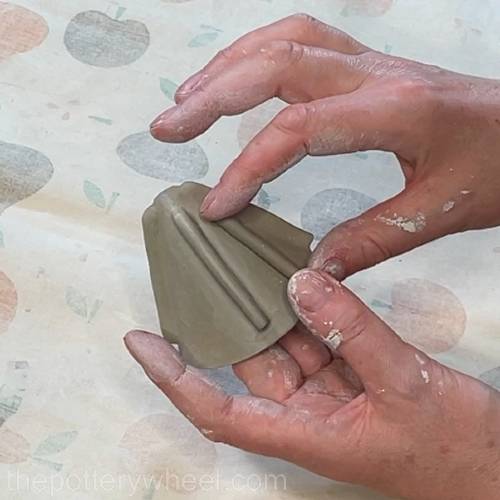
Repeat this process adding the shorter coils between the longer coils.
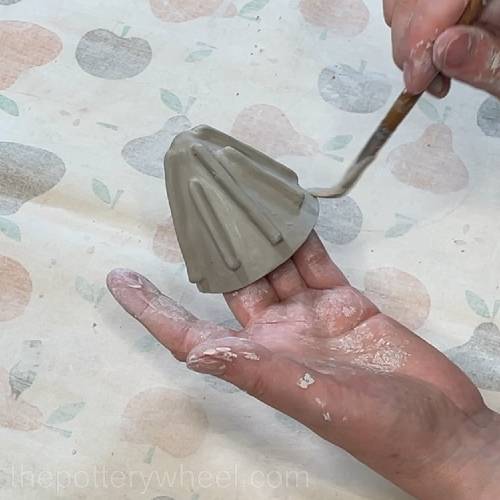
Step 12 – Attaching The Cone to The Lemon Squeezer
Score around the hole in the centre of the lemon squeezer base.
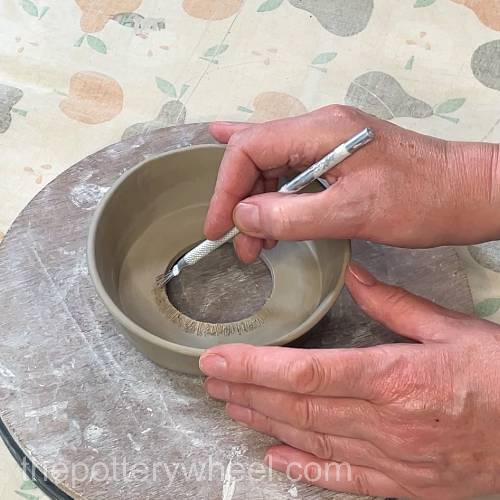
Also score around the bottom edge of the ridged cone.
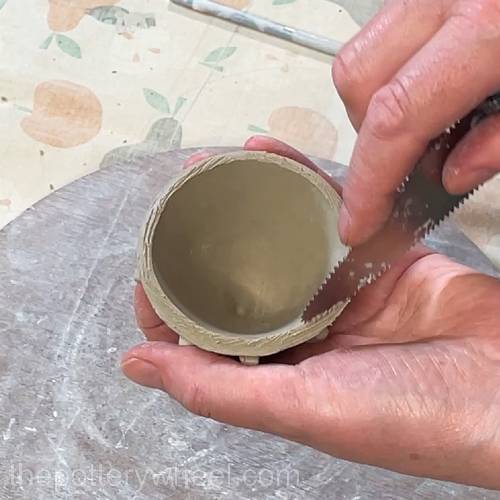
Apply slip to both scored surfaces, and lower the cone onto the base. Make sure the cone is in the centre of the base and then gently press it so the clay bonds together.
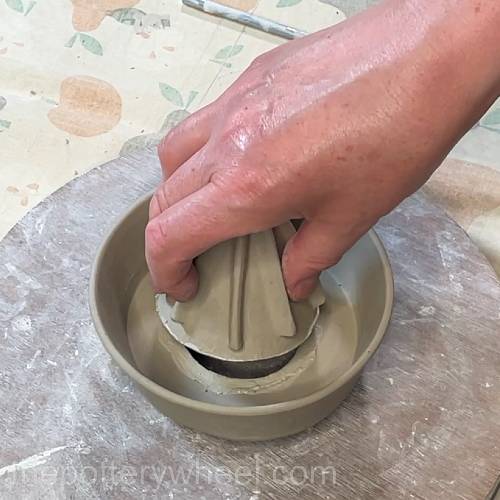
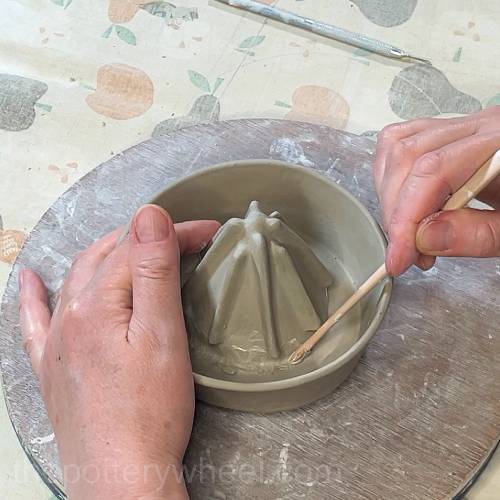
Use a fine modelling tool to blend the bottom edge of the cone onto the base of the lemon squeezer.
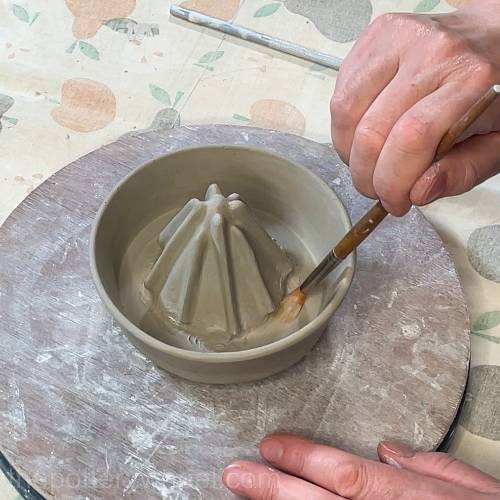
You can tidy up the join by brushing it gently with a soft brush dipped in clay slip.
Step 13 – Blending the Underside of the Lemon Squeezer Cone
Once the upper side of the cone has been blended on, hold the cone in your hand gently and use a wooden tool to blend the join on the inside underneath.
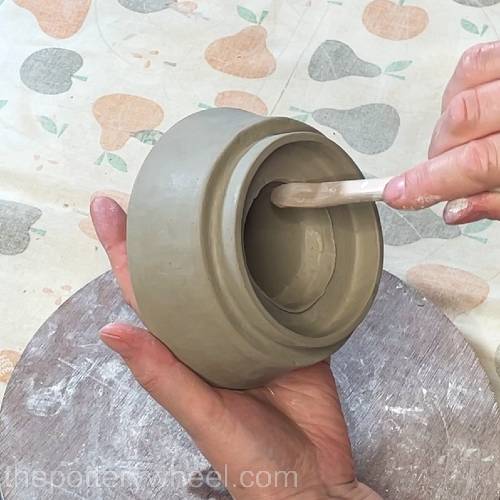
When it’s been blended together, use a chamois leather or a wet fingertip to smooth the surface.
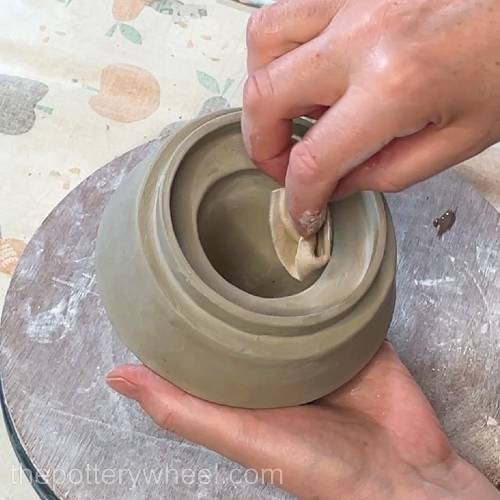
Step 14 – Making Lemon Squeezer Holes
Using a thin clay hole cutter, press out holes of clay all the way around the base of the cone.
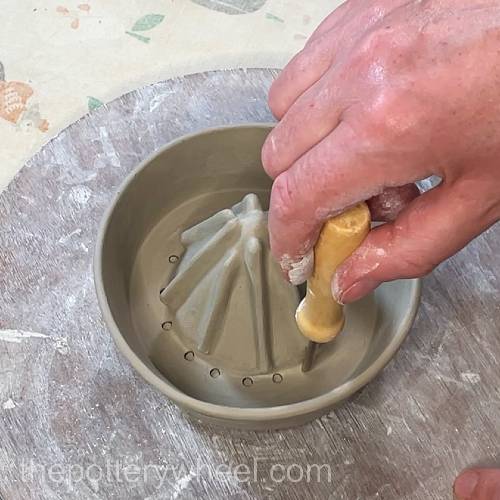
You might have to poke the clay plugs out with a thin paint brush or pencil tip.
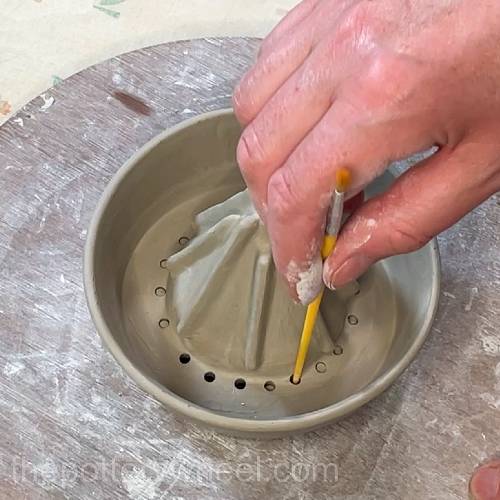
Step 15 – Adding The Clay Tab to The Lemon Squeezer
The tab of clay made by template H curves around the handle, and stops the lemon squeezer spinning around when you are squeezing fruit.
Smooth the edges of the tab of clay and then bend the edges of the tab.
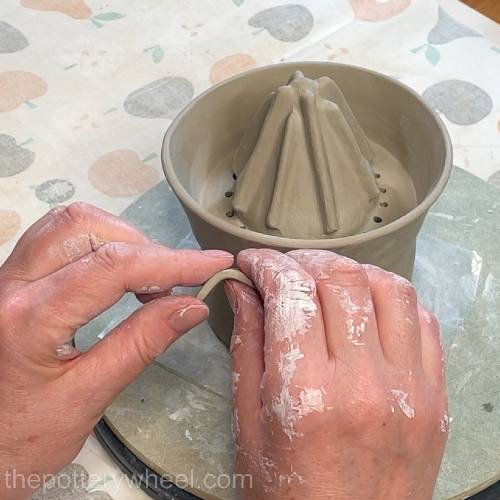
When both sides have been bent, it makes a square-looking C shape.
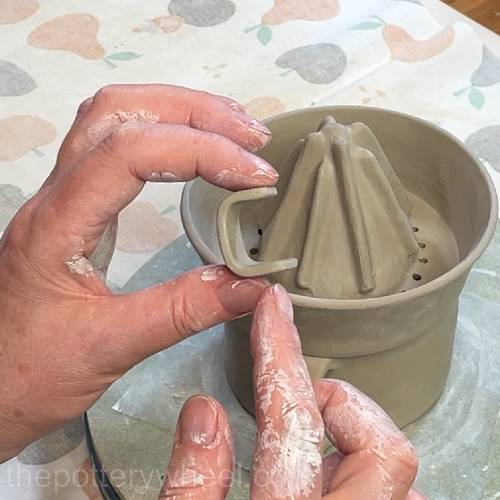
Score into the edge of the lemon squeezer. Also score one edge of the C shaped tab.
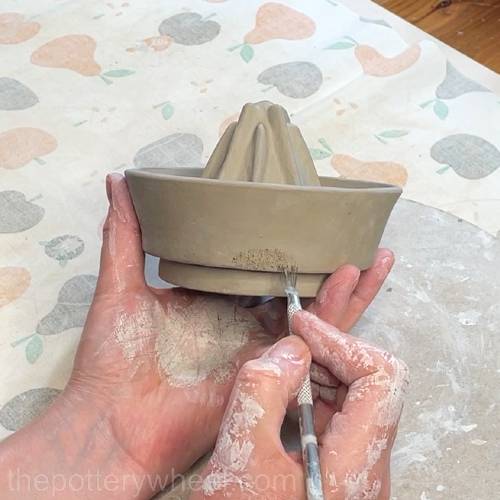
Apply slip to both scored surfaces and the press the curved tab onto the side of the lemon squeezer.
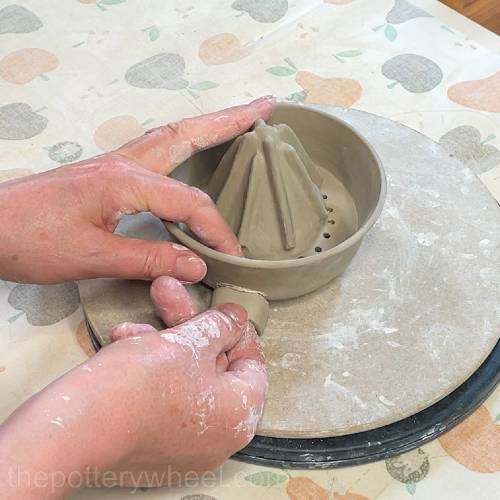
Add a small thin coil to the top of the clay tab, and blend it onto the tab and the lemon squeezer.
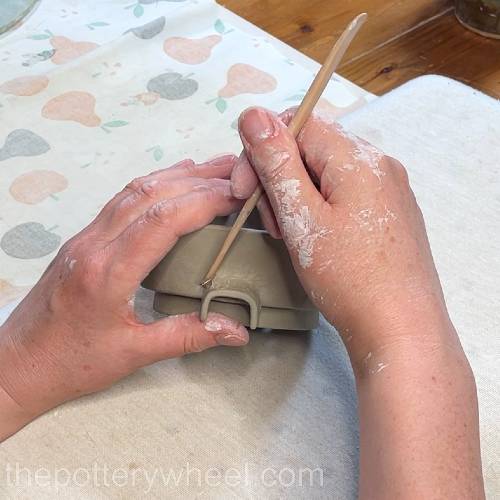
Then add a thin coil to the underside and blend that in too.
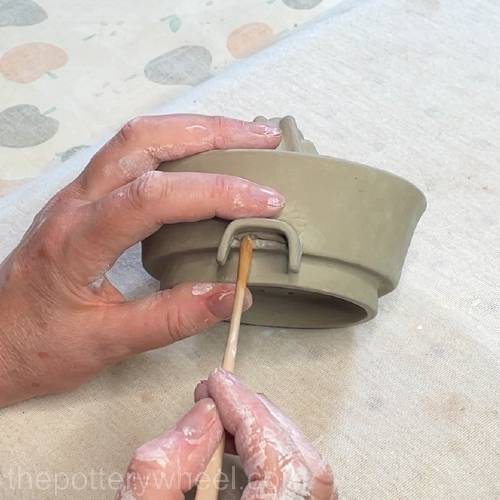
Shape the tab so that it’s a couple of millimeters away from the handle.
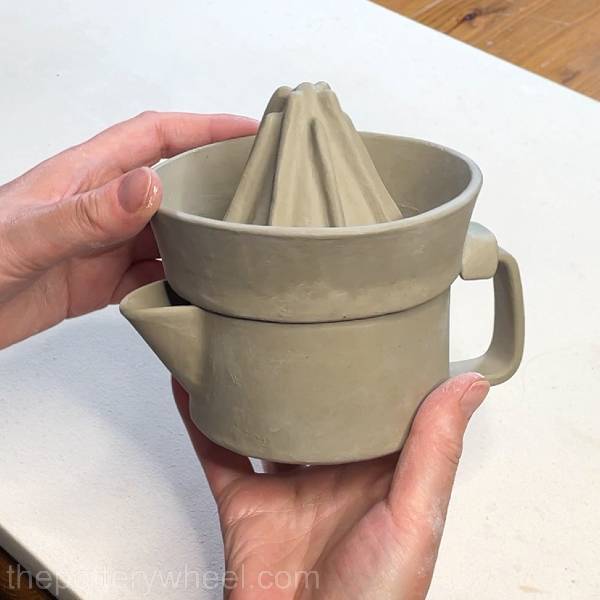
Here is the finished greenware lemon squeezer, all ready to be dried and then fired.
You can get a copy of the template (and my other slab pottery templates) from my online store here….

Leave a Reply